Hello everyone! I’m back with another card featuring the May release from Pretty Pink Posh. Today I created a fantastic background with the new Crafty World layering stencil set and added a shaker element for interactive fun!

This is a three layer stencil set that I inked up with blending brushes and dye inks, with the exception of the white which is a pigment ink and also the layer I started with because of that. These stencils are so wonderfully planned out that I didn’t even mask anything off while inking them up.
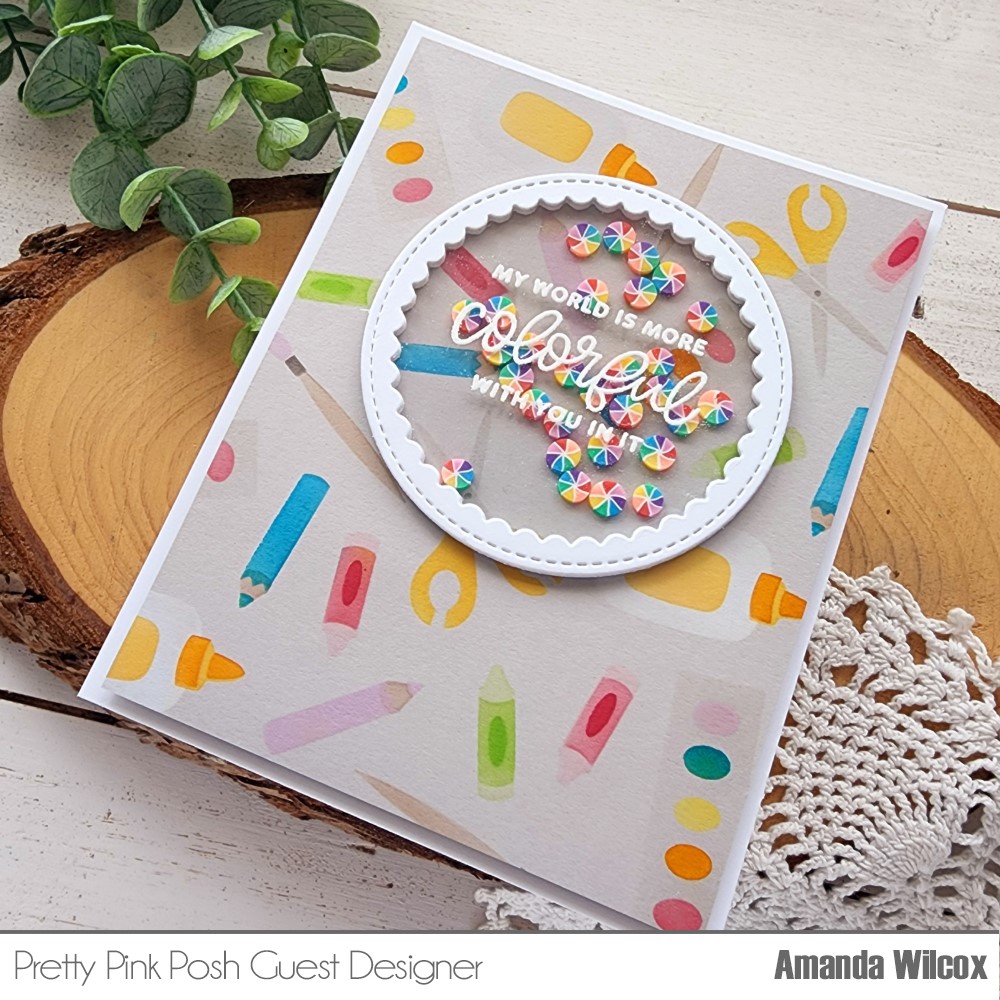
Once the stenciling was done, I trimmed the panel down to 4×5.25 inches and added it to a white card base with foam tape. Then I cut the smaller Scallop Circle die from white cardstock 5 times and a regular circle from acetate once. I stamped an heat embossed the sentiment from Craft Sentiments on the acetate and then used liquid glue to adhere all the layers together.

I thought these color wheels were perfect for the crafty theme and the colorful sentiment that I chose. So, I added some to my card front and glued the circle over the top, sealing them in. I placed an acrylic block on top to assure it all dried flat.
Voila! My card is all finished. I thought this would be just perfect to send to a crafty friend.
Products used today:
Crafty Background stencils
Scallop Circles dies
Crafty Sentiments stamps
Blending brushes
Lawn Fawn dye inks
Hero Arts unicorn white pigment ink
I appreciate you sharing your time with me. Have a fabulous day!