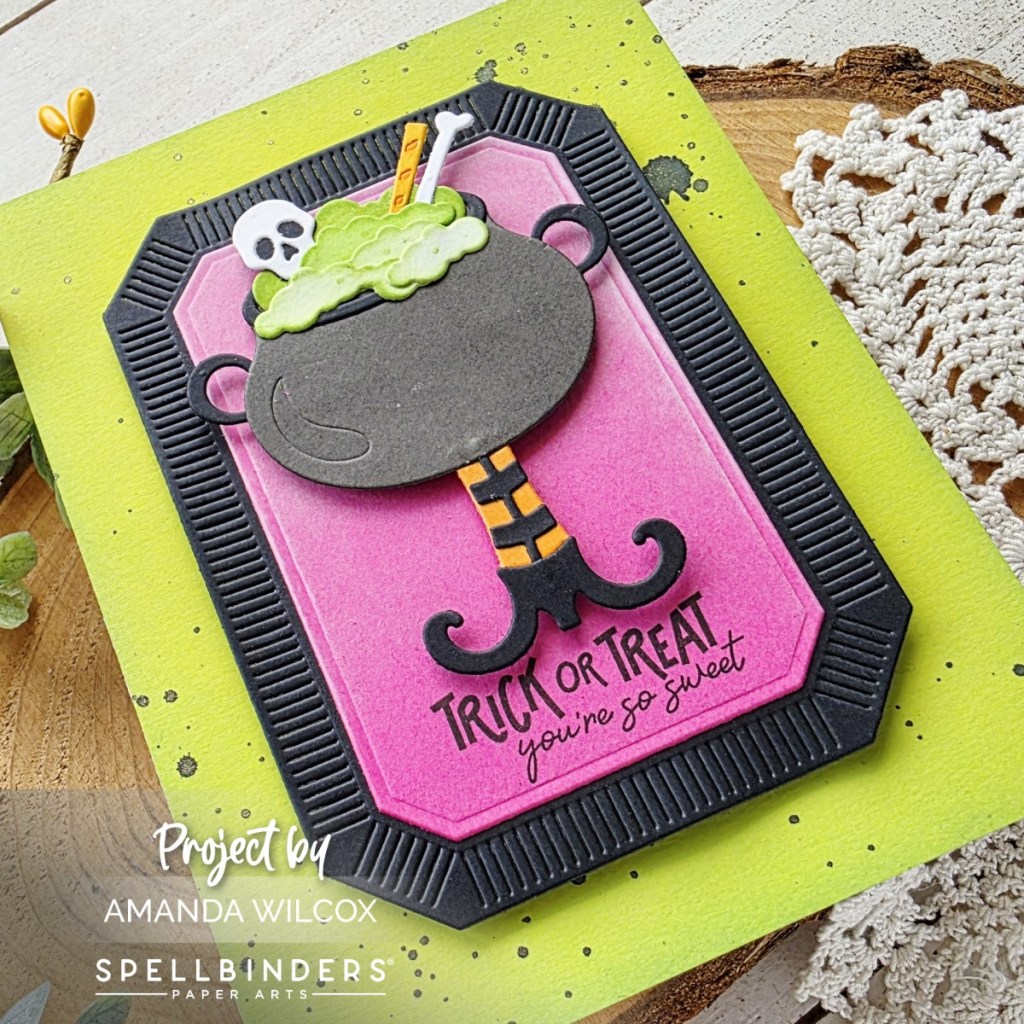
Thanks for stopping by again everyone! For today’s 13 Days of Craftoween reveal we’re going fun and spooky. Are you ready?
After building my awesome cauldron with legs, I pulled out the Notched Rectangles again to bring that focal point together. I cut the inside layer from dark pink cardstock and inked the top with white pigment ink to soften it, then stamped my sentiment on the bottom.
I splattered a green panel with watered down black paint and adhered everything together with liquid glue and foam tape.
Grab your 13 Days of Craftoween HERE and join in the fun!
I appreciate you sharing your time with me. Have a fabulous day!
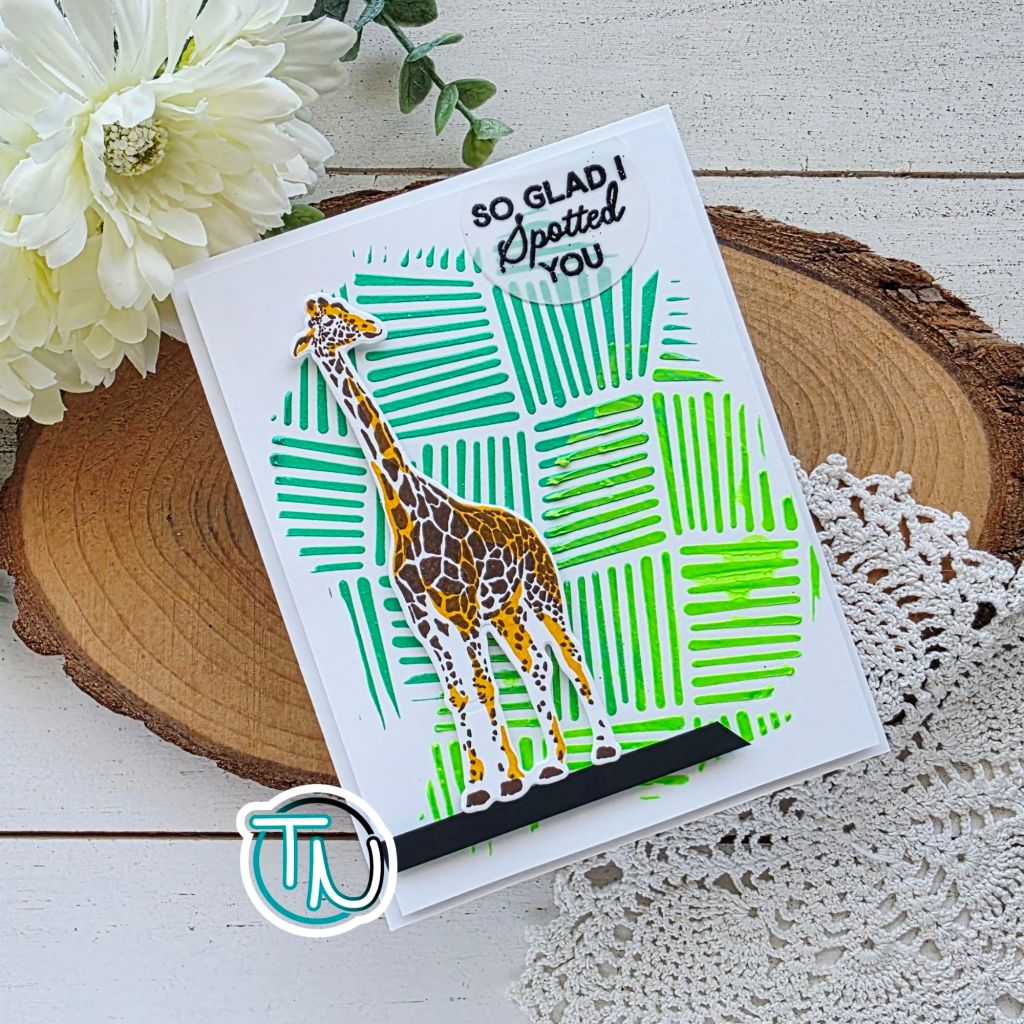
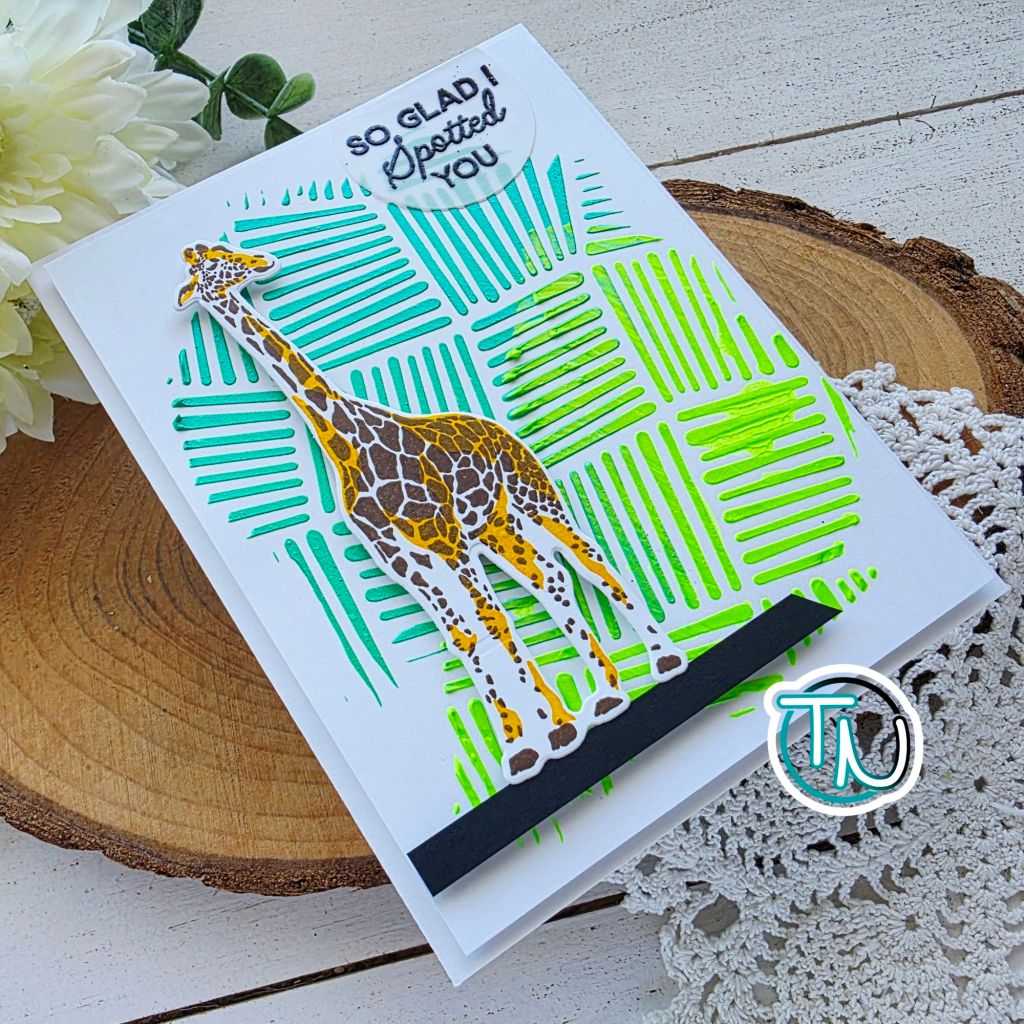
Hi friends! I’m back with more inspiration featuring the Simon Hurley Create release with Ranger Ink. Today I’m using more Lunar Paste but doubling up on colors using the same stencil.
When I do things like this, I spread the first color out and scrape as much excess off as I can, then I come in with the second color mixing them a little where they meet. It’s so cool if they are complimentary or opposing. They don’t mix into a new color but meld and swirl without combining.
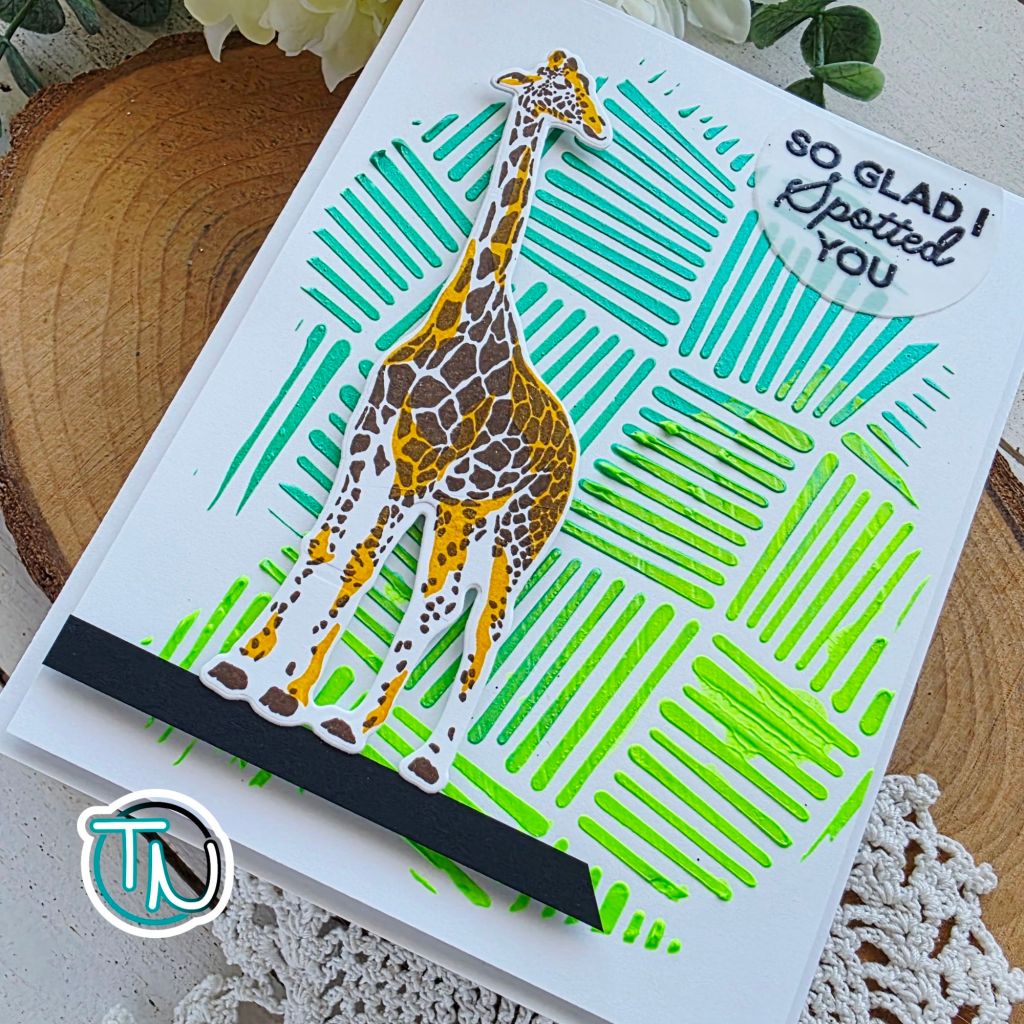
After stenciling, I set the panel aside to dry and stamped a fun giraffe from the Wild About You set. I used brown for my base and layered yellow, orange and brown for my accent colors. It was a complete experiment as I’d never done that before. I just inked the yellow, stamped, then inked the orange and dabbed it away so it was a light layer, stamped and repeated that thought with light brown. I love the color it made!
After die cutting the giraffe, I cut a circle from vellum and heat embossed my sentiment. Then I trimmed the stenciled panel to 4×5.25 and popped it up on a white card base. I added foam to the giraffe but thought he needed grounding so I added a 1/4″ strip of black which balances things nicely.
Last, I trimmed the top off the vellum circle and then hid glue behind the words and glued it in place.
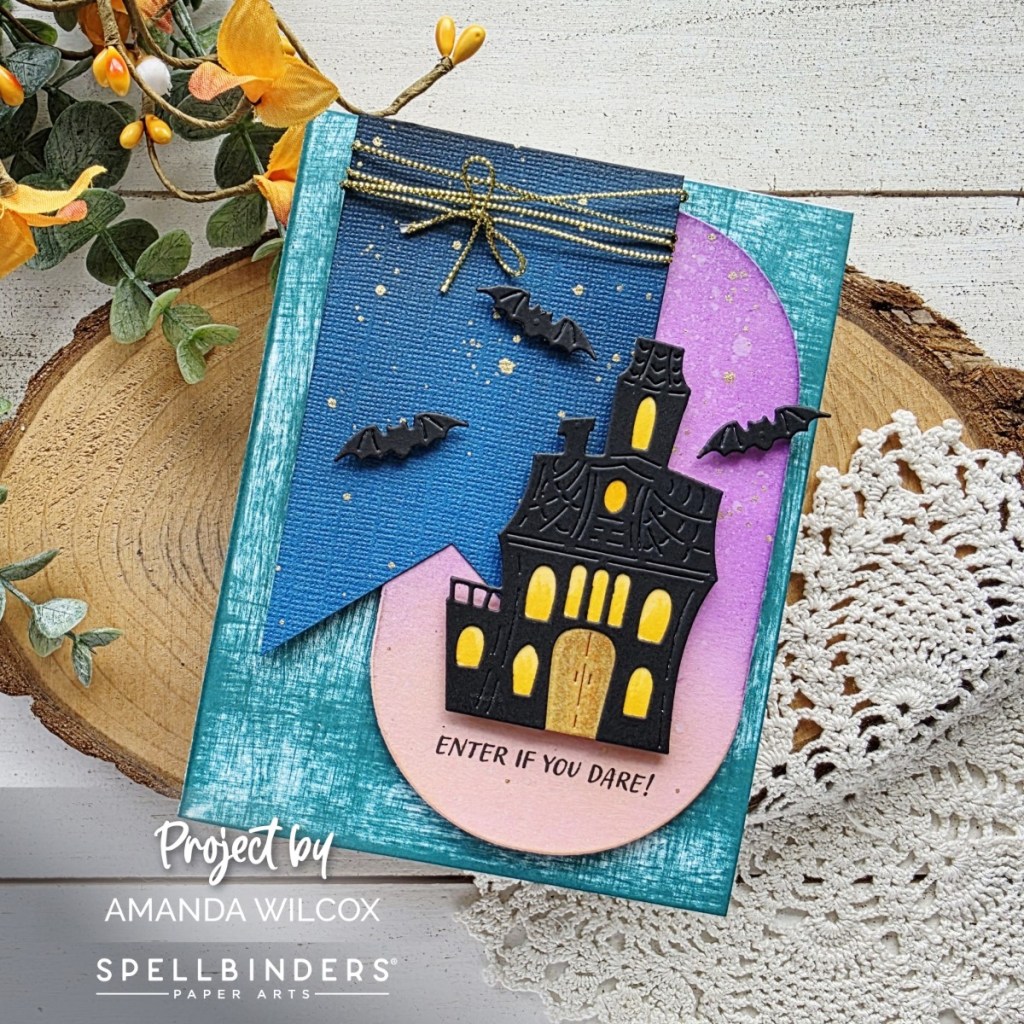
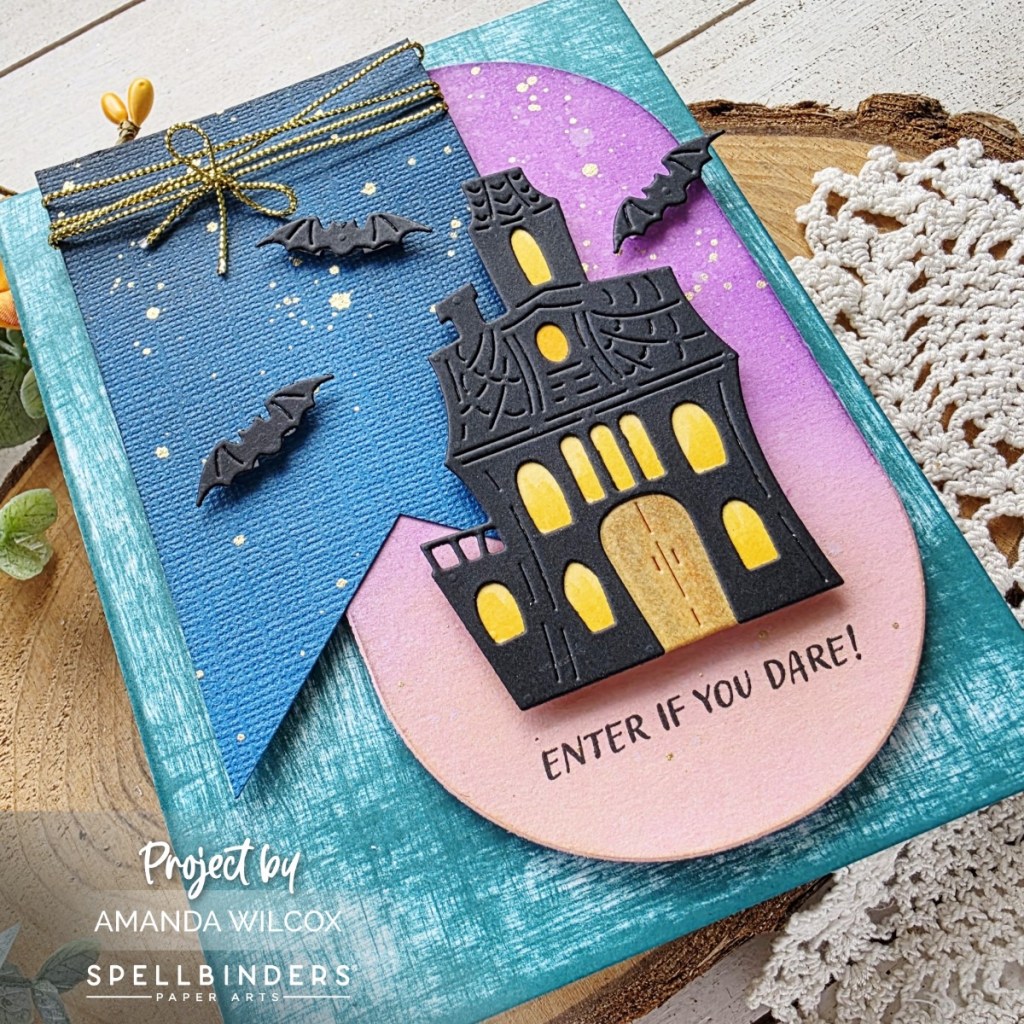
Day 11 is simple but so wonderful and really got me excited when I opened it. I don’t know what it is about this wonderful haunted house and it’s little bats but I love it and I had so much fun getting ink to create today’s card.
I cut the back layer of the house from yellow cardstock and used copics to add some depth to the windows and door. I also have a serious love for bats so one wasn’t going to do at all!
For the background, I took my felt ink pad direct to the card front for that great texture and quick color coverage. Then I did distress oxide blending on an Essential Modern Oval, then splattered gold watercolor and stamped my sentiment.
The banner is punched using a 2 1/2 inch wide piece of cardstock and my Spellbinders Banner Punch. I wrapped it with gold wrapped wire and adhered everything together with foam squares and tape.
Grab your 13 Days of Craftoween HERE and join in the fun!
I appreciate you sharing your time with me. Have a fabulous day!
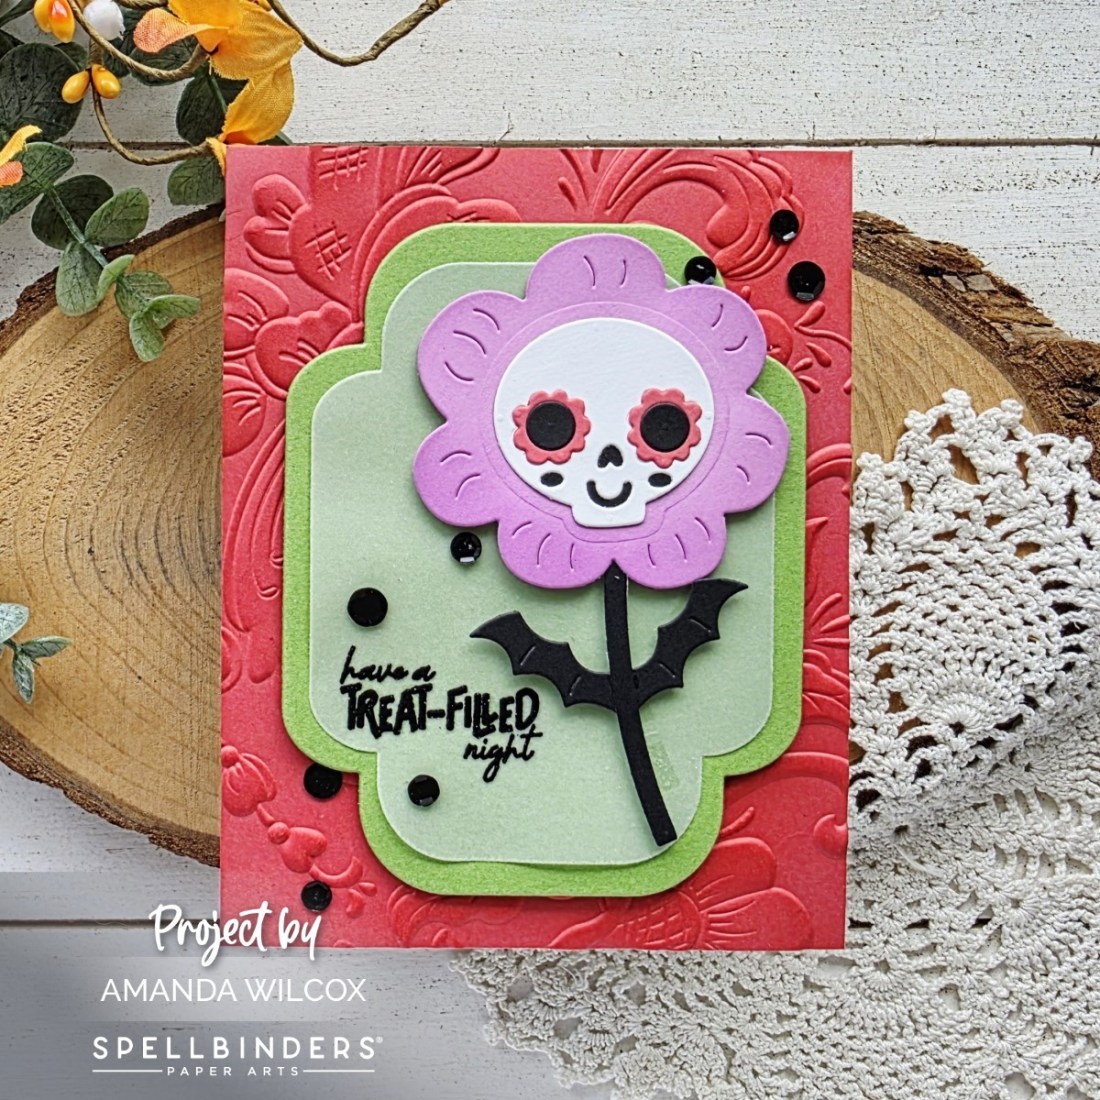
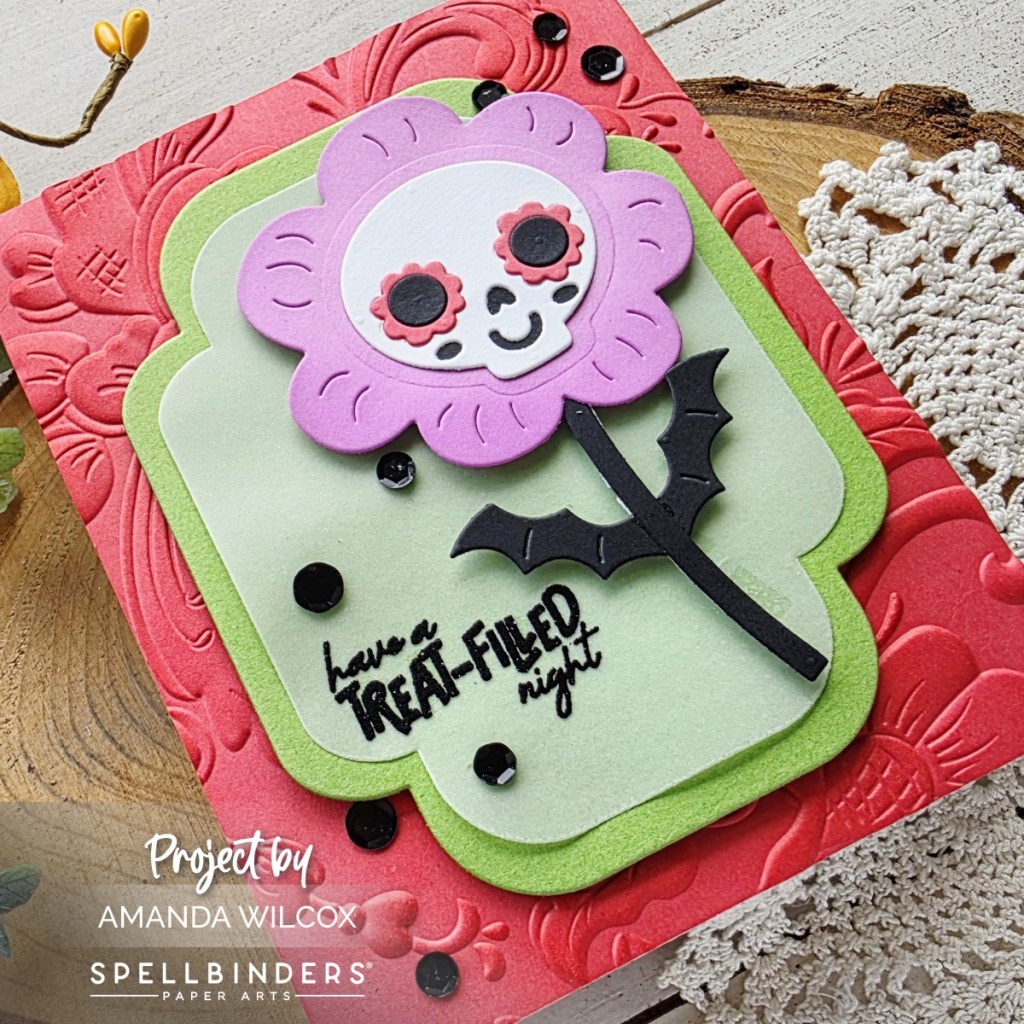
Hi friends! Back today as we’re coming in the home stretch with the Spellbinders 13 Days of Craftoween, already up to day 10! This one gave me Day of the Dead vibes and I’m seriously smitten with it!
After creating my awesome floral, I pulled out the Four Petal dies and cut two layers – green and vellum. I heat embossed the sentiment on the vellum and attached the flower with foam squares. Then I hid the adhesive behind the heat embossing and flower to adhere the vellum to the green panel.
I embossed a melon colored cardstock panel with the Norwegian Rosemaling 3D embossing flower and ink blended the embossing with a darker melon ink to give it depth. I popped the green panel up on that with foam tape and glued the whole thing to a card base.
For finishing touches I pulled more of the sequins from the pack that came in the kit. I love those shiny pops of black!
Grab your 13 Days of Craftoween HERE and join in the fun!
I appreciate you sharing your time with me. Have a fabulous day!
Happy Wednesday everyone! We’re halfway through the week and I wanted to pop in with an extra card today featuring more of the new release from Ranger Ink and Simon Hurley Create!
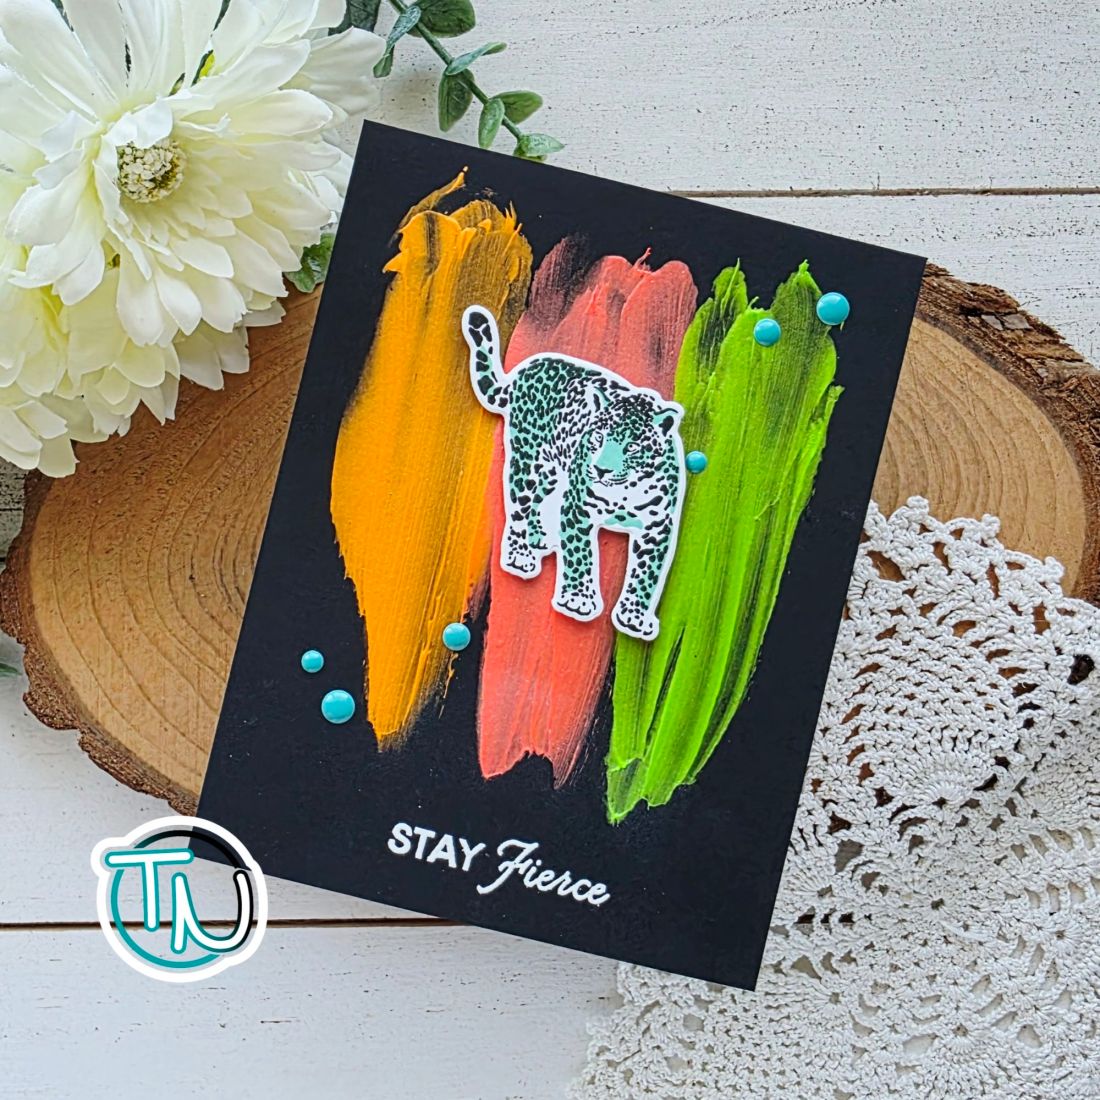
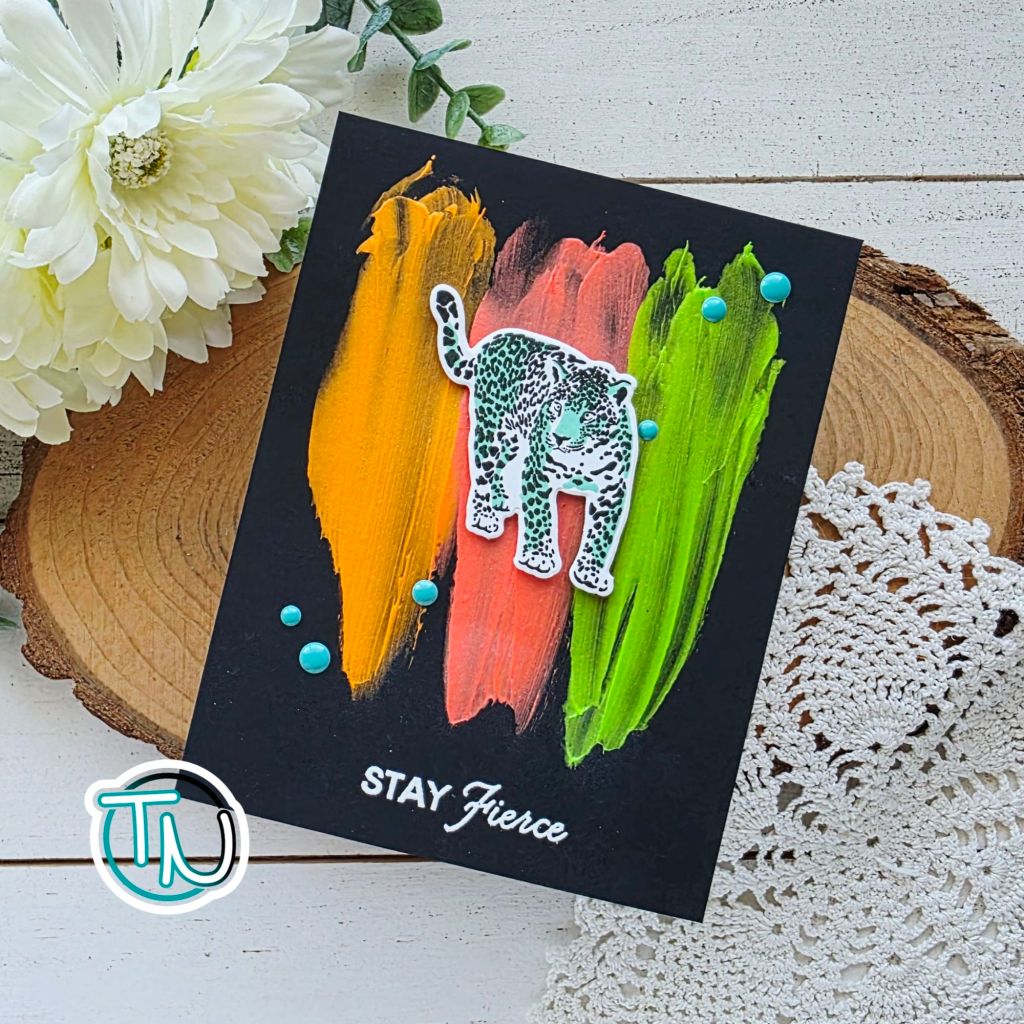
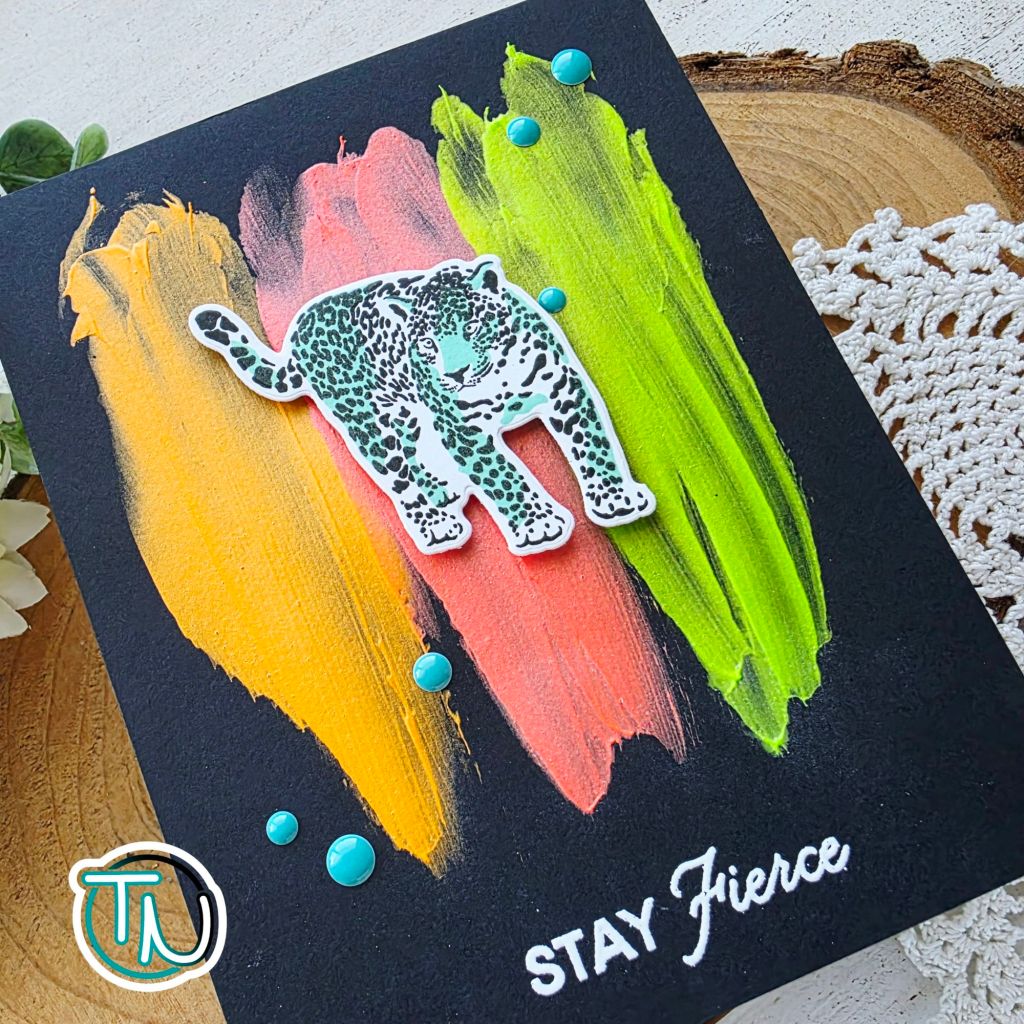
For this background, I literally just finger painted with three of the new Lunar Paste colors for a fun abstract background. Once the panel was dry, I chose my sentiment and heat embossed it along the bottom of the panel.
Next I stamped the awesome leopard in the Wild About You set with Stellar Inks – black widow and high tide. I used the coordinating die to cut him out and popped him up with foam squares.
I glued the panel to a card base and finished things off with a scattering of teal enamel dots from my stash. I love these new Lunar Pastes on black! They pop so well!
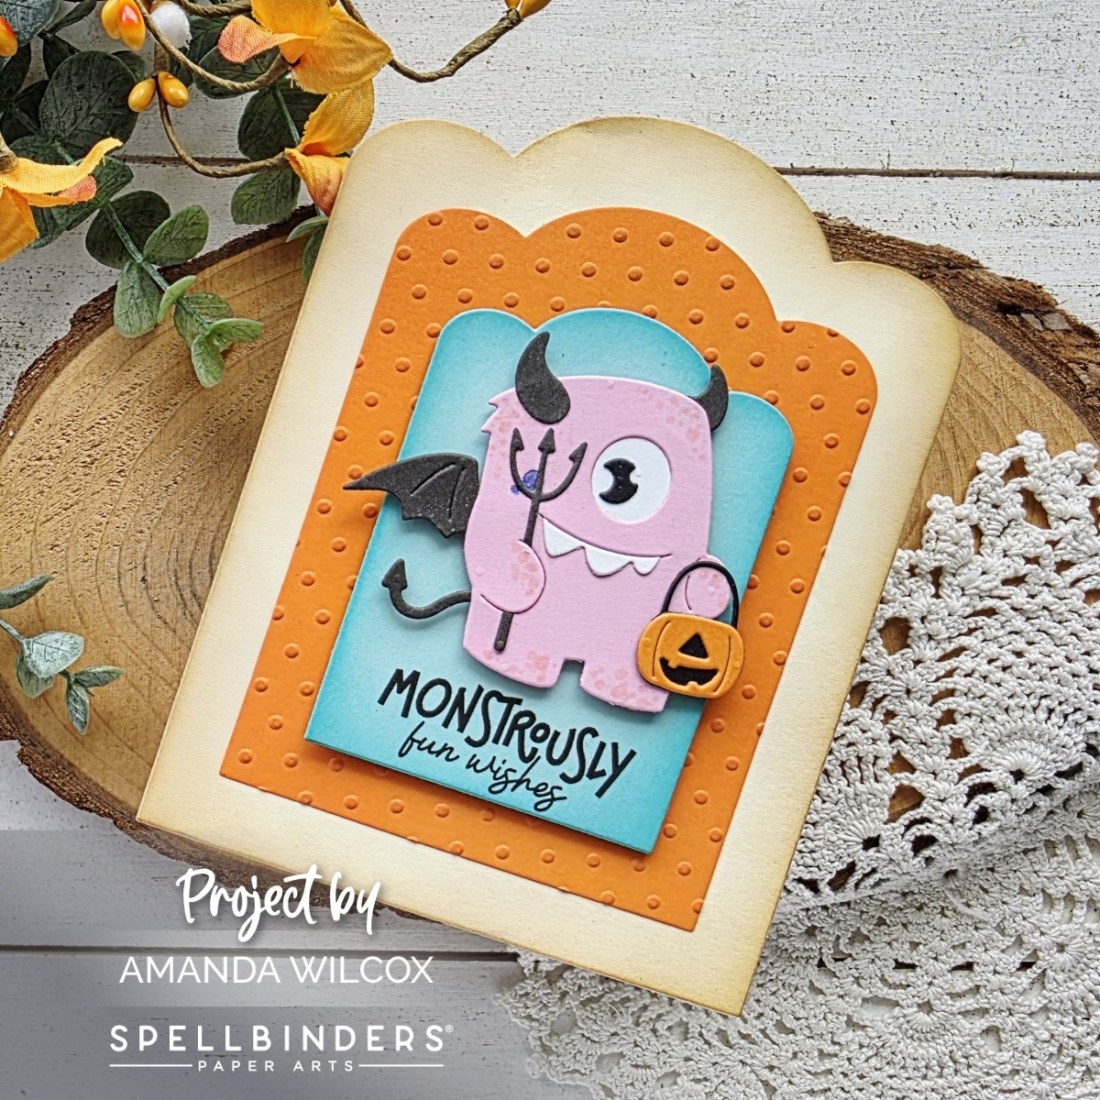
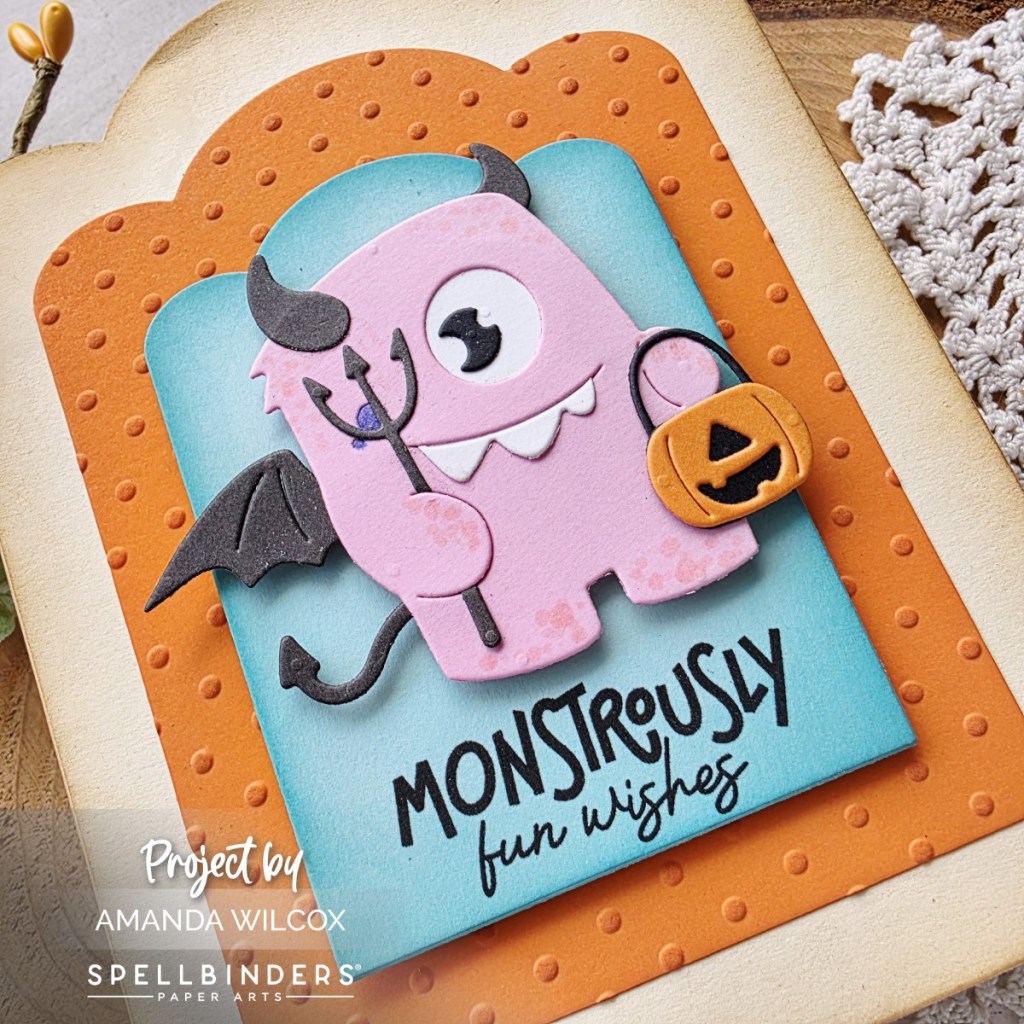
Who doesn’t love a sweet little monster from time to time?!? I sure do! And this cutie is no different. Day 9 was so fun to build and would be amazing in all the color combos too!
I used my copics to give her a little dot detail and colored the cheek embossing in with a purple marker for fun. And did you notice that adorable one-eyed pumpkin bucket?!? So cute!
The layers on this shaped card come from the Scallop Labels and Tag dies. I cut the bottom from cream and ink blended a little brown for depth. The next layer was embossed with the Tiny Dots embossing folder and the last one was from light blue ink blended with teal.
One more tip on this kind of shaped card. Instead of a top fold that’s only holding on by the middle scallop, I scored the left side of this back layer at 1/4″ and glued them together on the side.
Grab your 13 Days of Craftoween HERE and join in the fun!
I appreciate you sharing your time with me. Have a fabulous day!
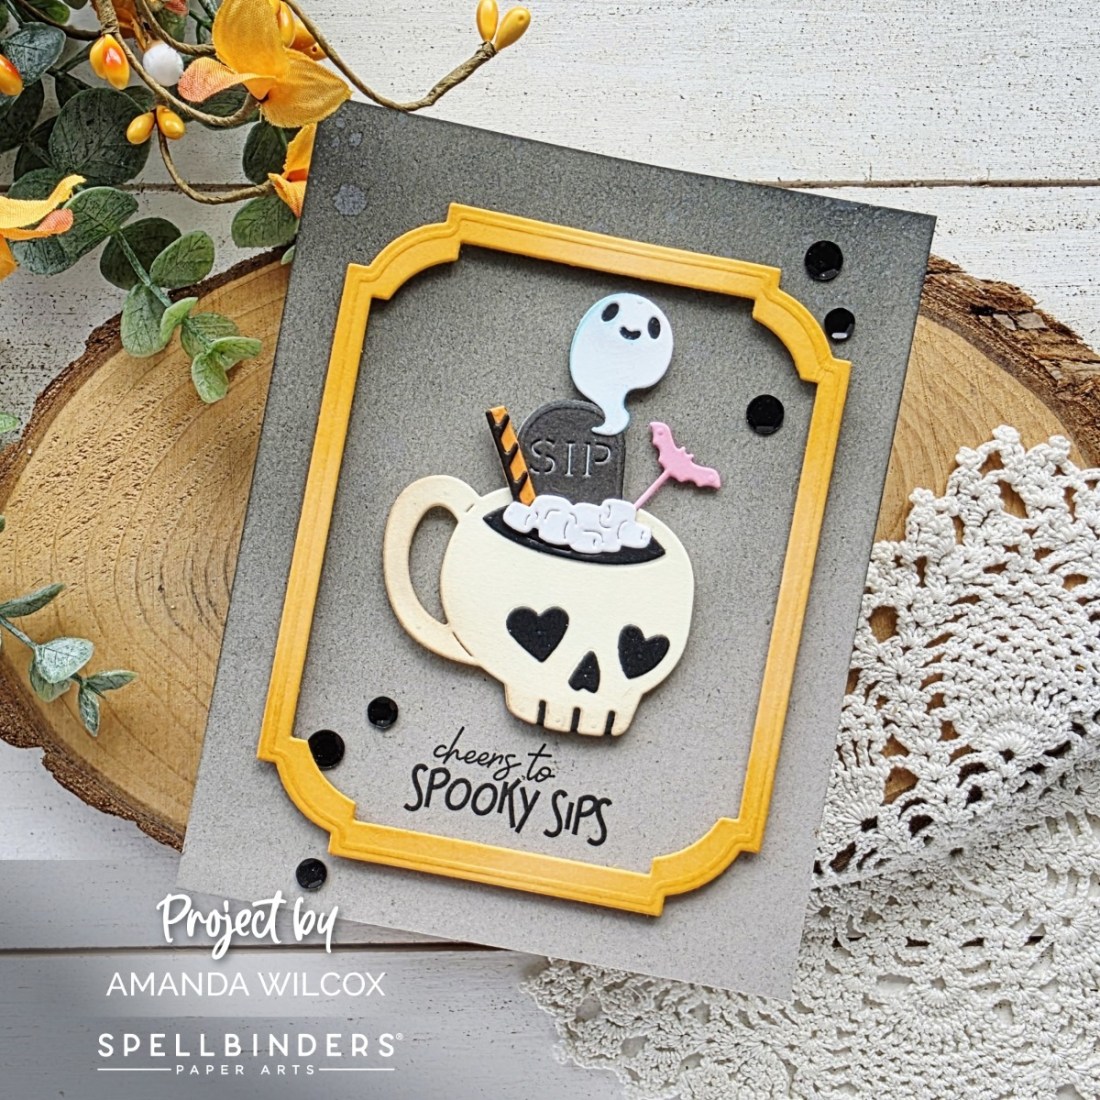
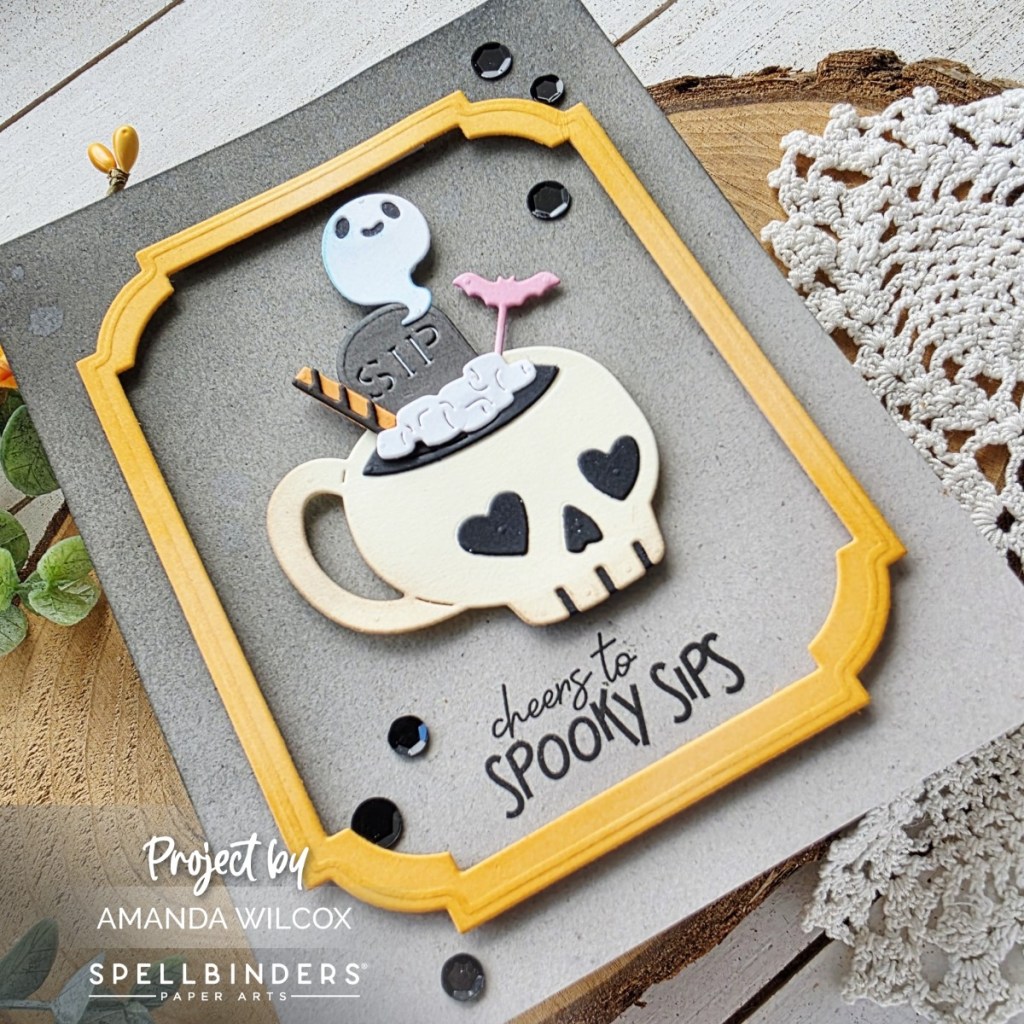
If you’ve followed me for a bit you know I was on the Coffee Loving Cardmakers design team because I love coffee, tea and all things comfort! So to pair that with Halloween had me with heart eyes when I opened today’s surprise!
This little mug of death was so fun to build and decorate! I paired it with a little ombre ink blended on gray cardstock and a fun frame to give it center stage! Remember, if you have nesting dies, just add two of them together and create your own fun shaped frames all day long!
After popping everything up with foam squares, I placed the card in my MISTI to stamp the sentiment so it lined up where I wanted it. Then I finished this card off with more of those great sequins!
Grab your 13 Days of Craftoween HERE and join in the fun!
I appreciate you sharing your time with me. Have a fabulous day!
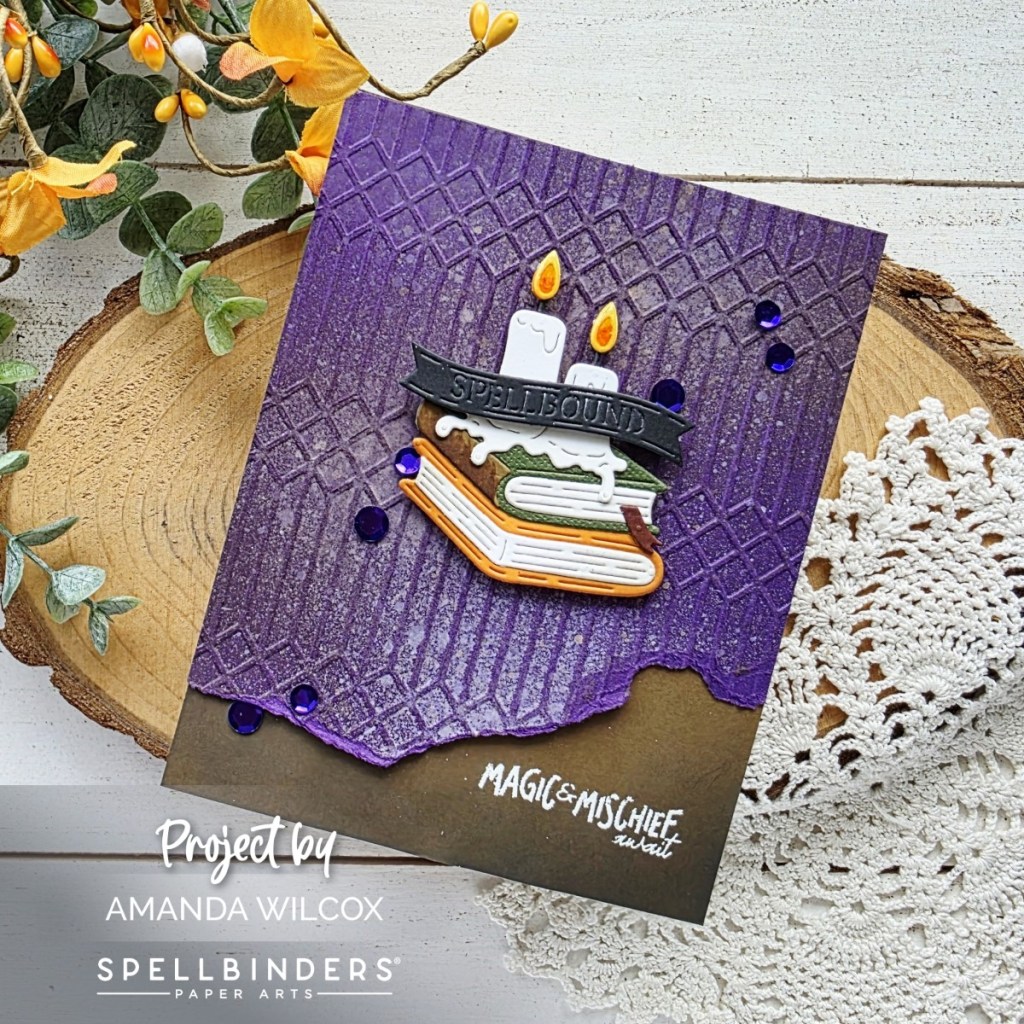
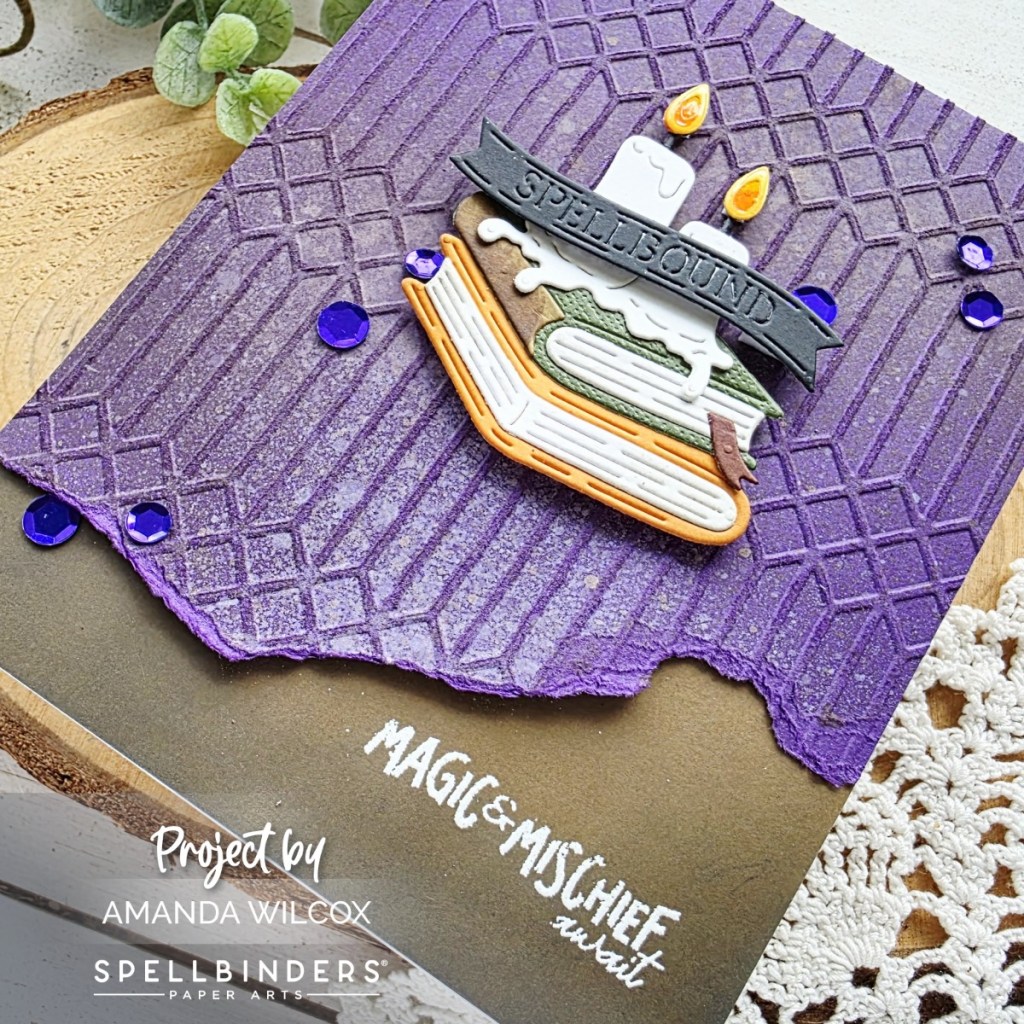
If you know me, you know I squealed when I opened today’s beautiful envelope of surprise! BOOKS!!!! And spooky books at that! They’re so perfect!
After assembling the books, candles and popping on the sentiment banner, I pulled out a regal embossing folder called Columns and embossed a dark purple cardstock. Then I spritzed it with distress oxide spray for distressing texture and tore off the bottom for that worn and weathered look.
Using the torn panel as a guide, I ink blended the bottom of a piece of dark brown cardstock and heat embossed my sentiment. I glued the panels together and to a card base before popping the books up with foam squares. I finished things off with glossy accents on the flames and another scattering of sequins from the pack in the kit.
Grab your 13 Days of Craftoween HERE and join in the fun!
I appreciate you sharing your time with me. Have a fabulous day!
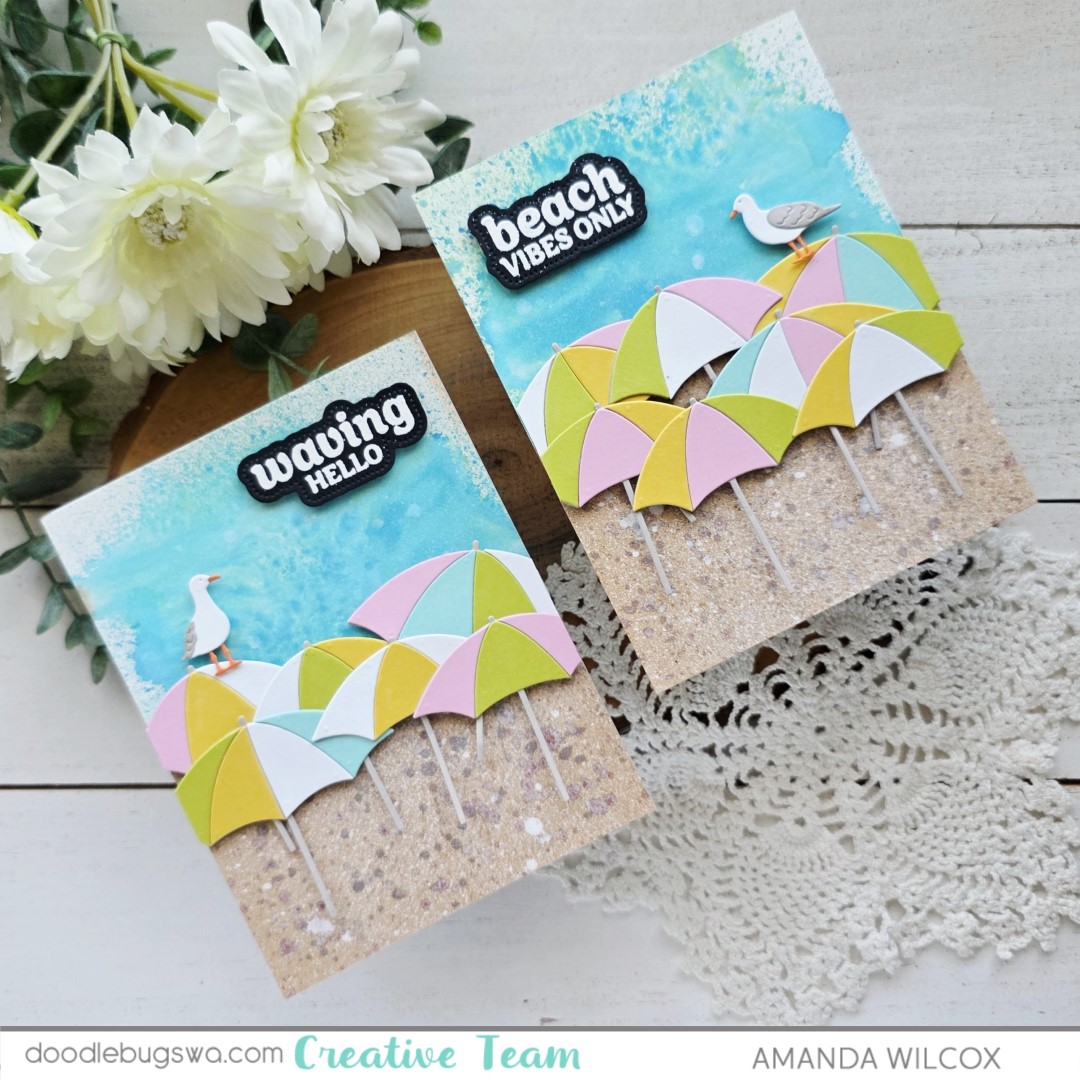
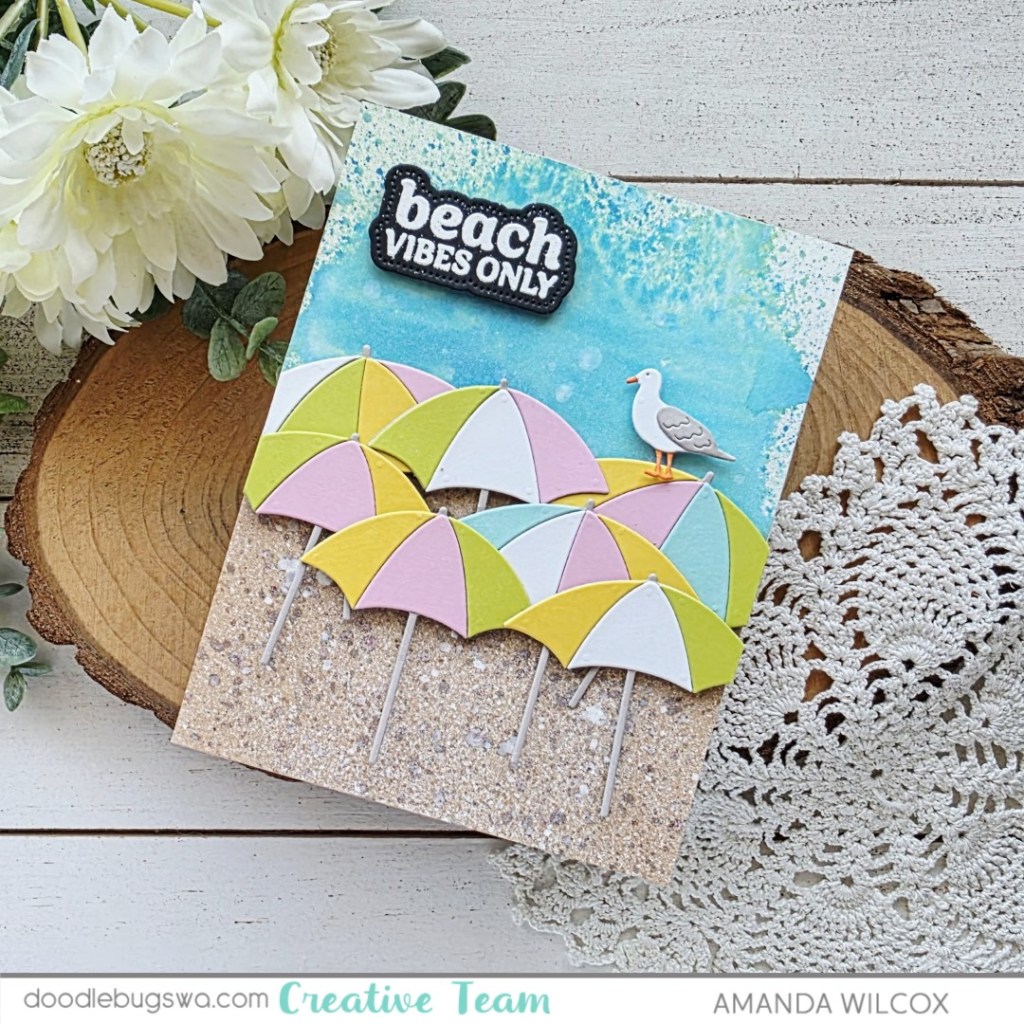
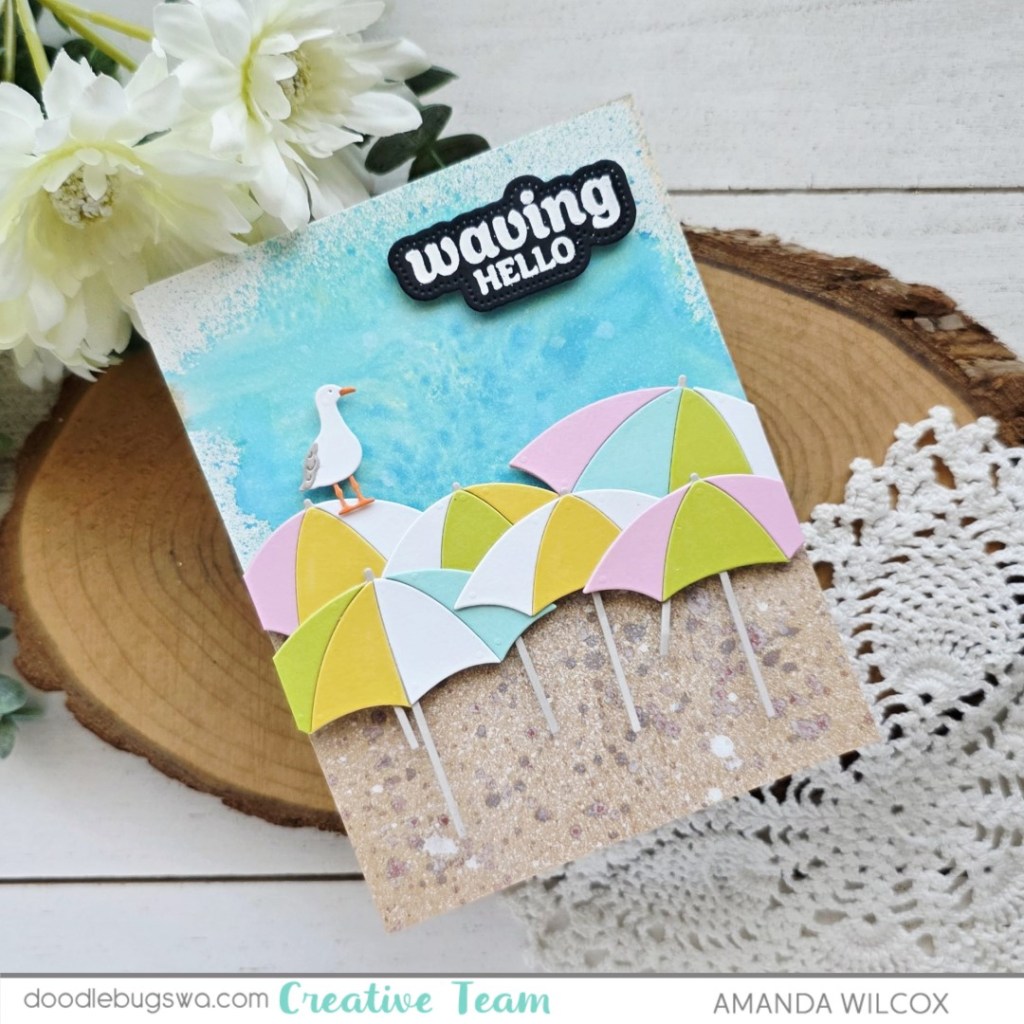
Hi friends! I’m here with my installment of Mix it up Monday for Doodlebugs. I’m still intermittently playing with my summer goodies and having fun before it’s all things holiday! I have two cards to share today and they happened by accident in a really cool way.
I wanted to play with my recently ordered Concord & 9th Beach Days dies so I pulled out some colored cardstock and started cutting umbrella pieces. Once I had a good variety I just started assembling, honestly thinking it would be enough for one card. Nope, easily enough for two.
Once I figured that out, I pulled out watercolor paper and kraft cardstock to start making some sky and sand. I used distress oxide sprays for my sky and a splattering of watered down ink and paint for my sand. Those panels ended up being the perfect size to cut in half and use on both cards too. The umbrellas perfectly span the seam.
Once all of that was assembled, I stamped and heat embossed sentiments from the Waffle Flower Coastal Greetings set and used the coordinating dies to cut them out. But things were still a little empty so I die cut and added a sea gull to each card. Aren’t they funny up there?!? They make me giggle.
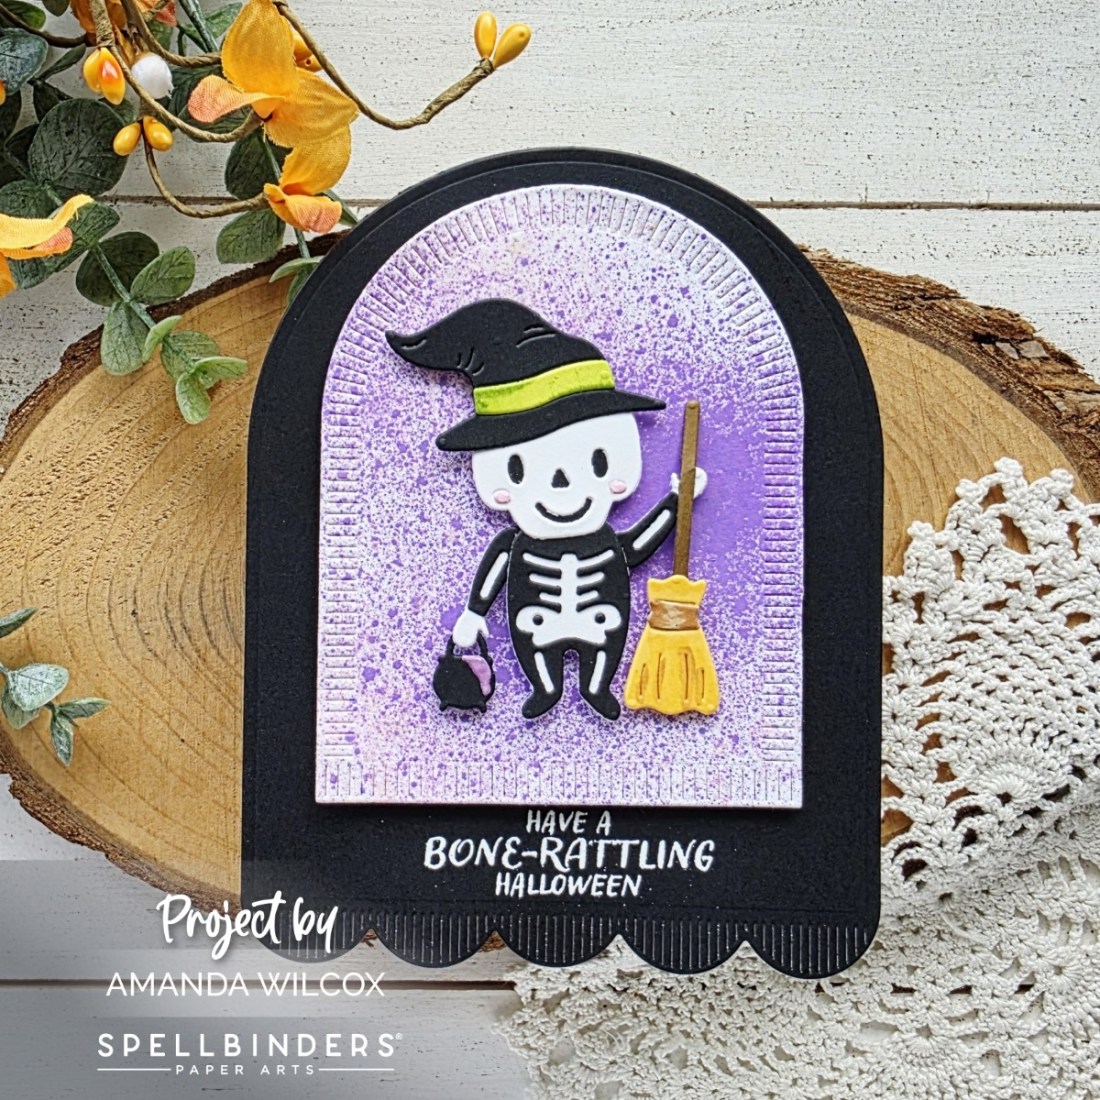
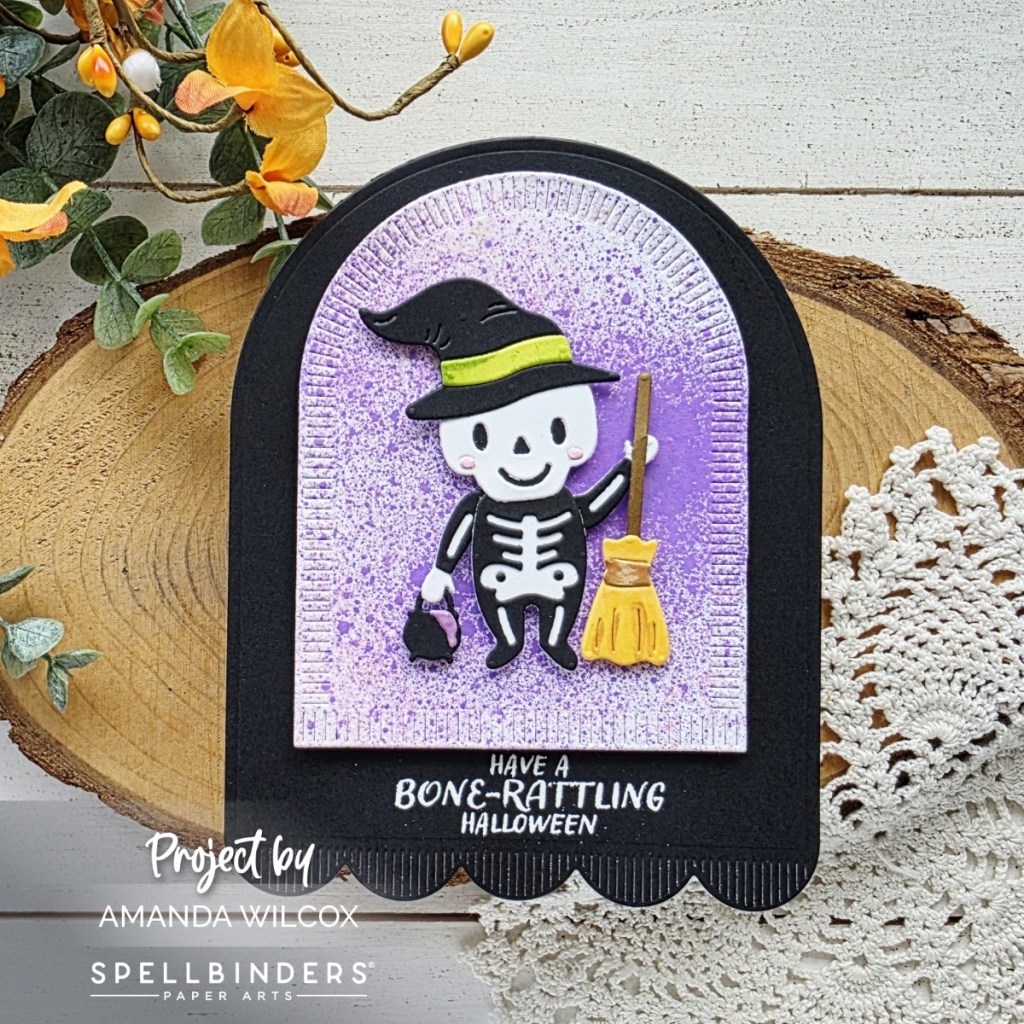
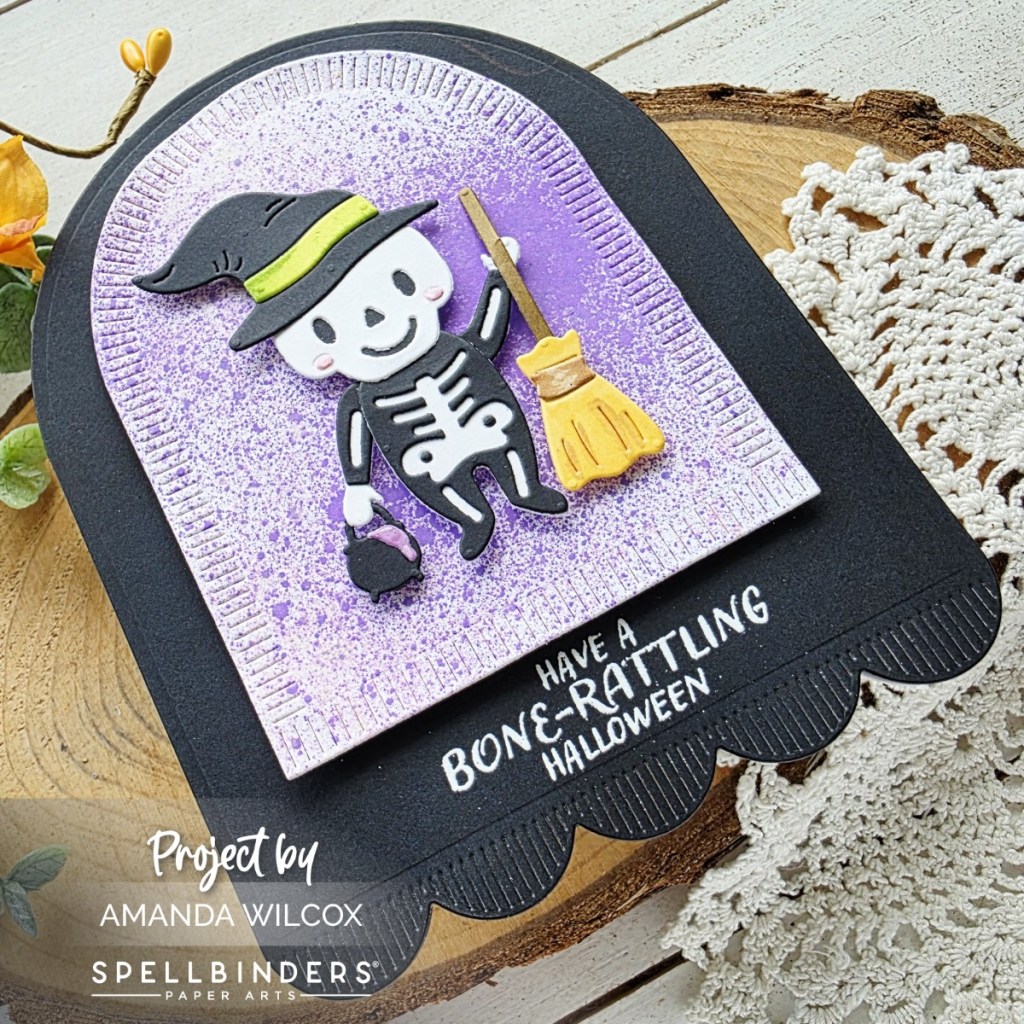
Keeping things spooky but adorable and fun, we’ve got the most perfect addition in today’s envelope! How cute is this skeleton witch and their cauldron and broom! I love it all!
After building my character, I couldn’t resist a little distress oxide spray for a fun and bright background. Then, instead of centering the arch panel, I scooted it up a little so I could heat emboss my sentiment right underneath it.
To make this a shaped card, I took the largest background die and cut it a second time from white cardstock. Then I scored a line about 1/2 inch from the top and glued the back to the front just on that little flap. After the glue dried I folded it open and used a bone folder to solidify the crease.
Grab your 13 Days of Craftoween HERE and join in the fun!
I appreciate you sharing your time with me. Have a fabulous day!