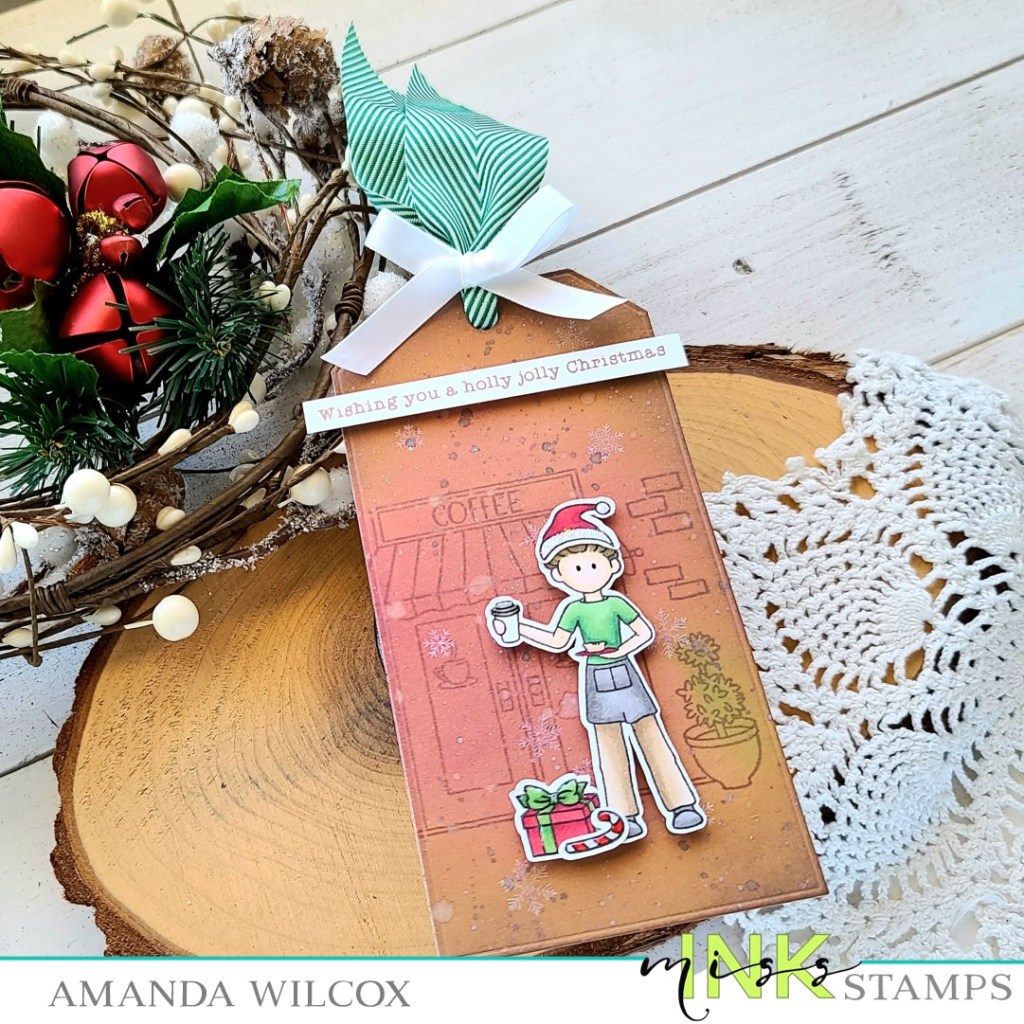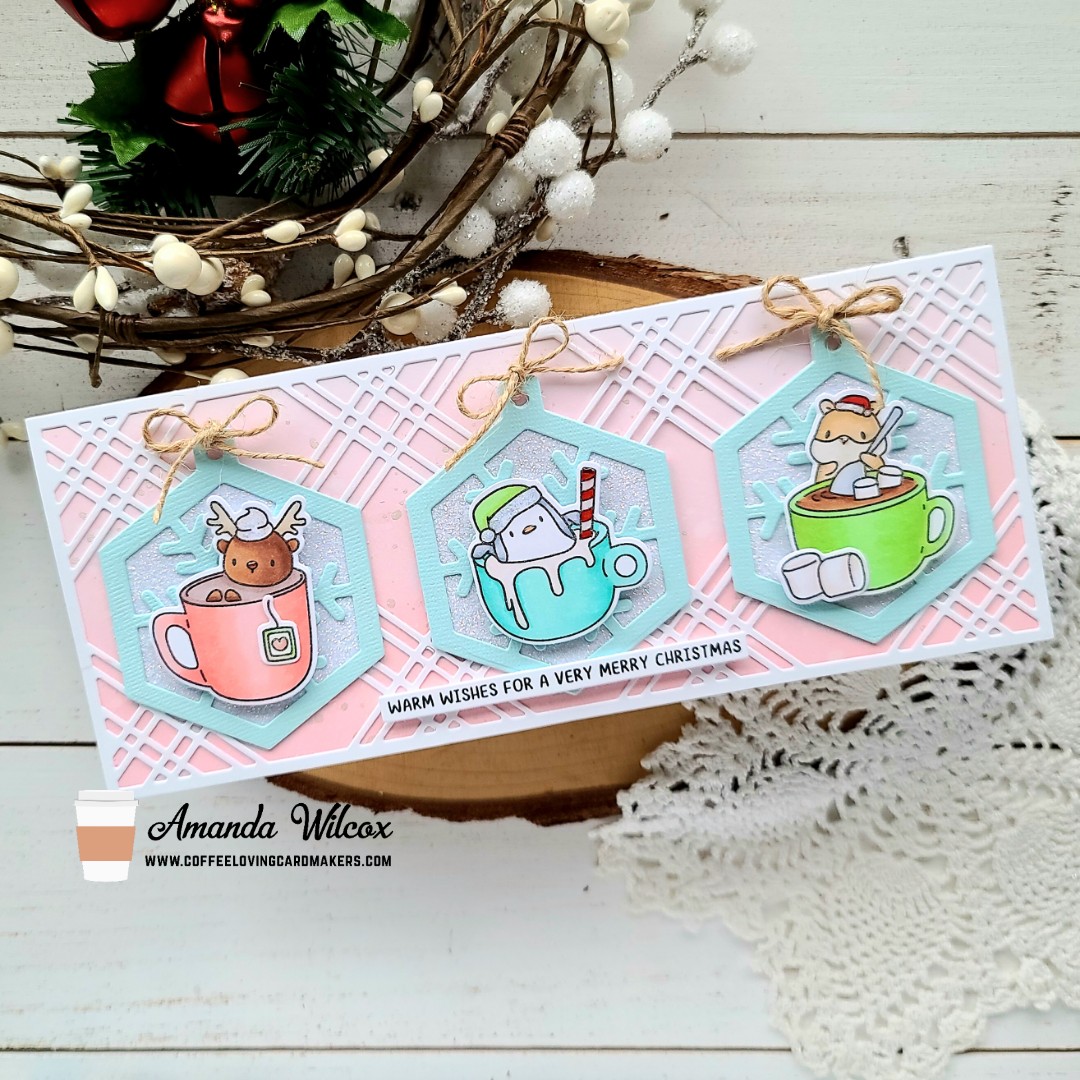
Hey friends! I’m over on the Coffee Loving Cardmakers blog today having a coffee date with my friend Beata June! Here’s a peek at my card but you’ll have to head to the Coffee Lovers blog to see hers!
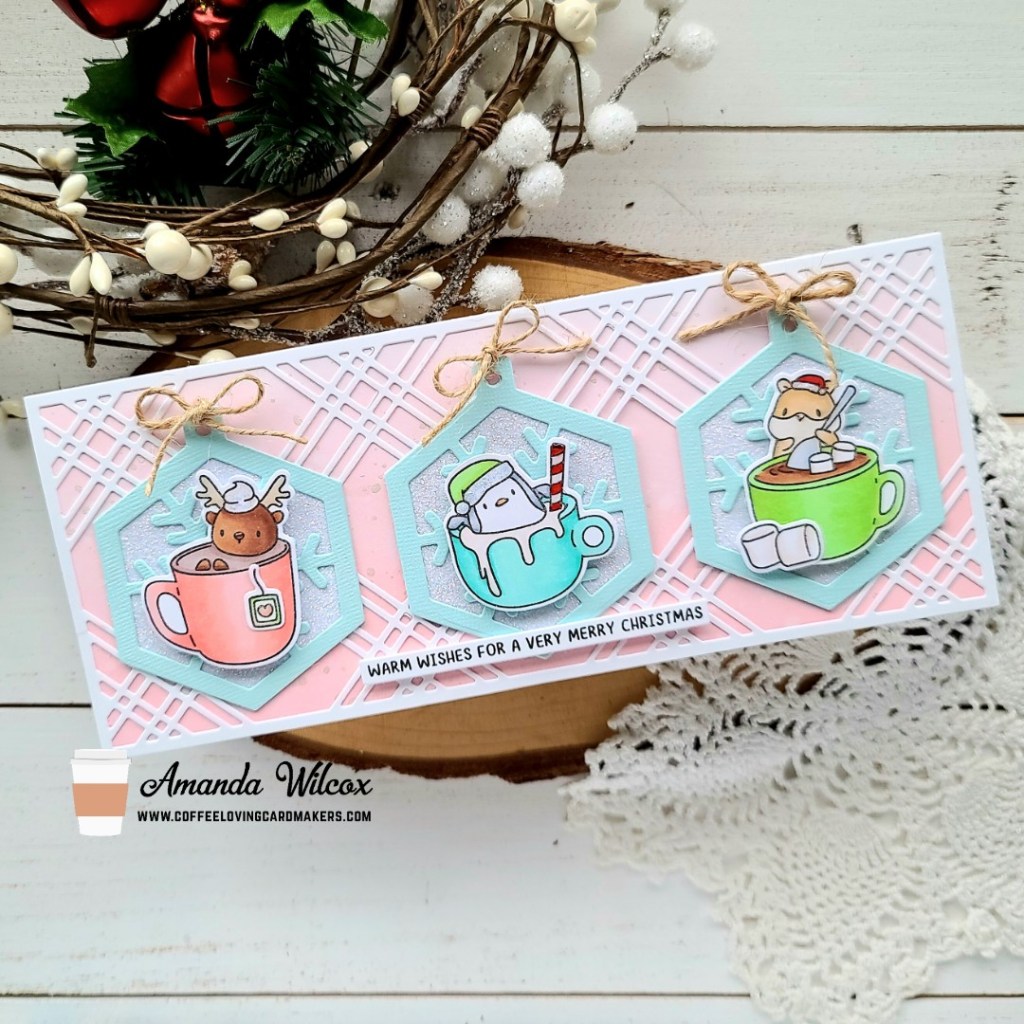
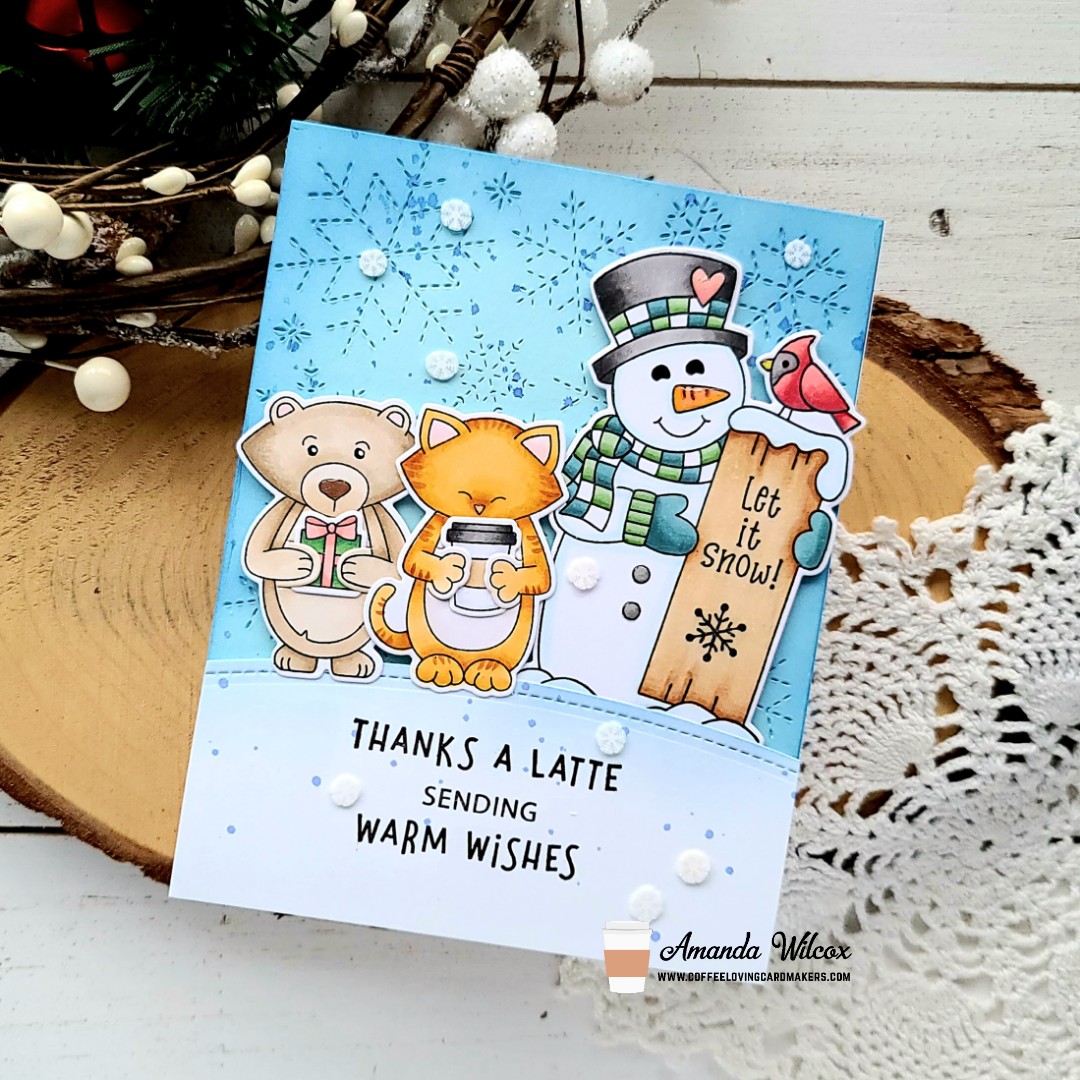
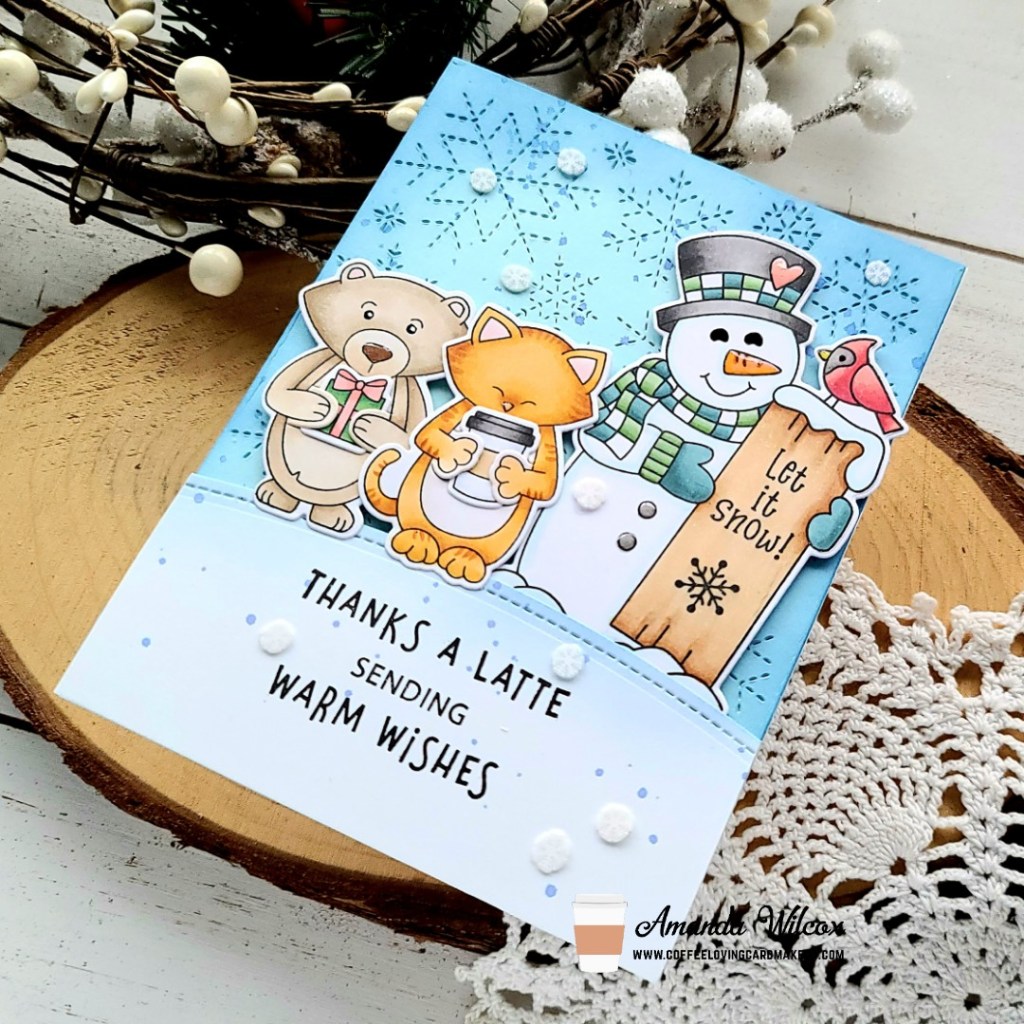
For our coffee date we chose a layout and a stamp set to use but everything else was up in the air! Using the Mama Elephant Hot Cocoa stamp set and a slimline – 3 window design idea, this is what I came up with. I colored the images with my copic markers and cut them out with the coordinating dies. I cut the hexatag from glitter cardstock and layered the snowflake version over the top in light blue. Then I tied twine bows at the top for a little texture.
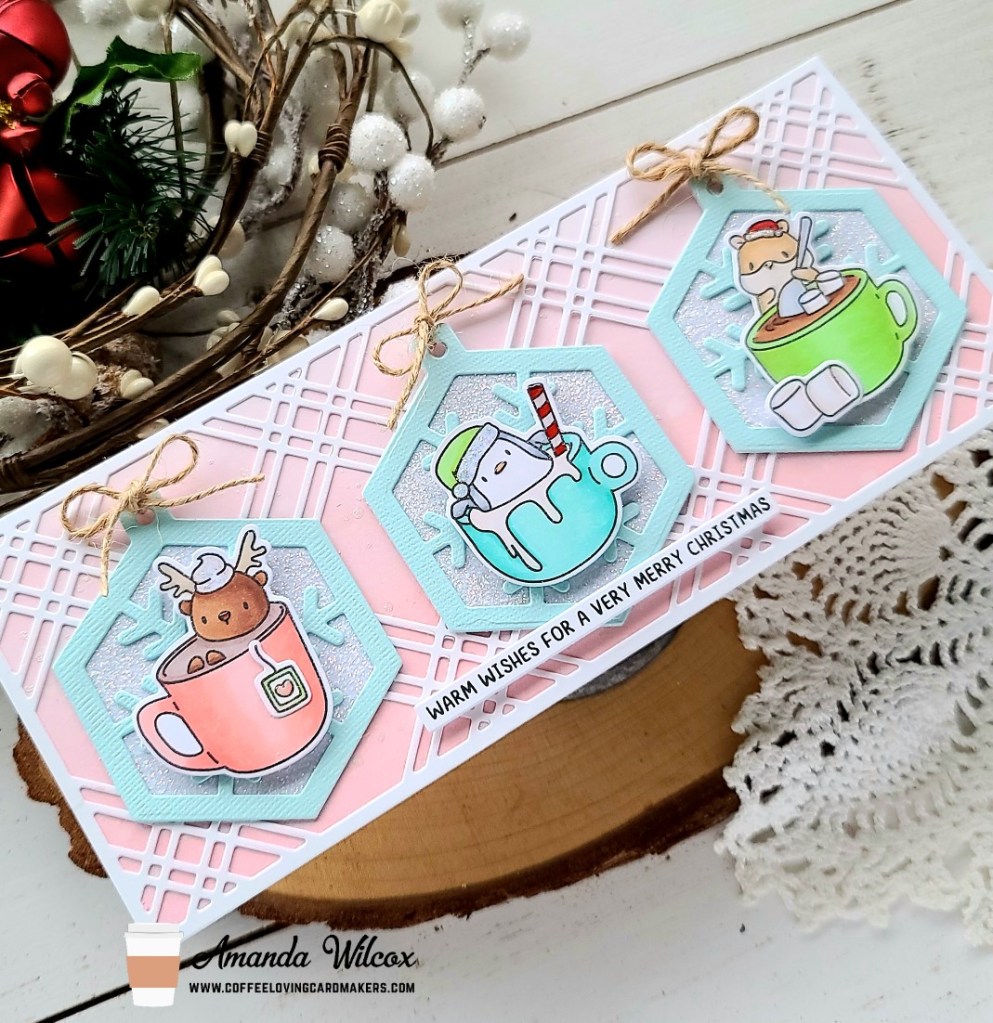
On my background panel I ink blended distress oxide ink in spun sugar and festive berries on a white panel. I spritzed it with water and flicked pearl watercolor all over. Once it was dry, I die cut and adhered a slimline plaid panel from Pink & Main.
To assemble my card, I adhered the tags to the front panel with liquid glue and popped the images up with foam squares. Then I pulled out the Easy Christmas Messages set out, stamped and die cut one, then popped it up with a foam strip.
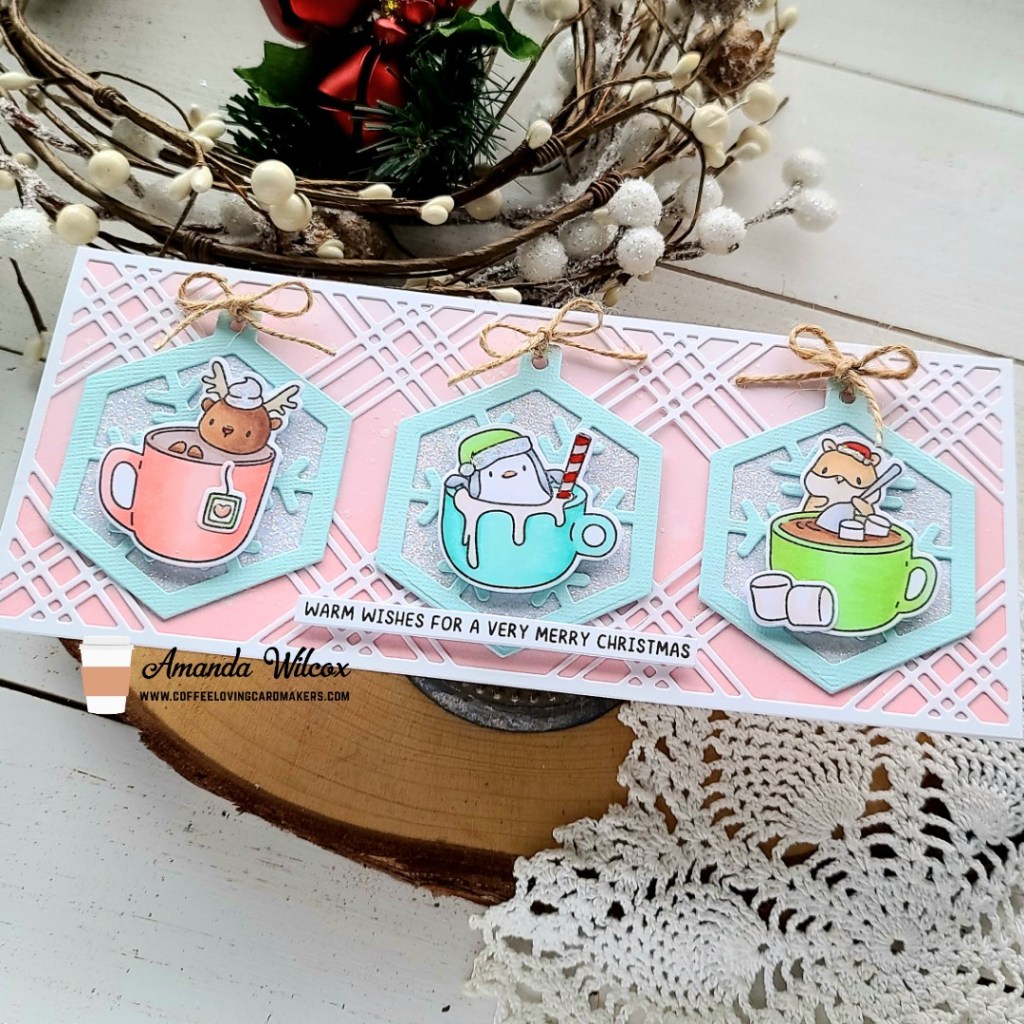
For finishing touches on this card, I added glossy accents to various things like noses and beaks, peppermint sticks and tea tags. Then I came in with unicorn Stickles on hats and whipped cream for some extra sparkle.
Isn’t this just the sweetest!?! I hope you’re all ready for Christmas tomorrow. I totally am and I’m almost more excited than the kids! So silly but I love it all!
Products used today:
Mama Elephant Hot Cocoa stamps and dies
Mama Elephant Hexatag dies
Mama Elephant Easy Xmas Greetings stamps
Pink & Main Plaid Slimline die
Foam squares
Glossy accents
Stickles – unicorn
Distress Oxide ink – spun sugar, festive berries
Copic markers
Merry Christmas!!! I appreciate you sharing your time with me. Have a fabulous holiday everyone!