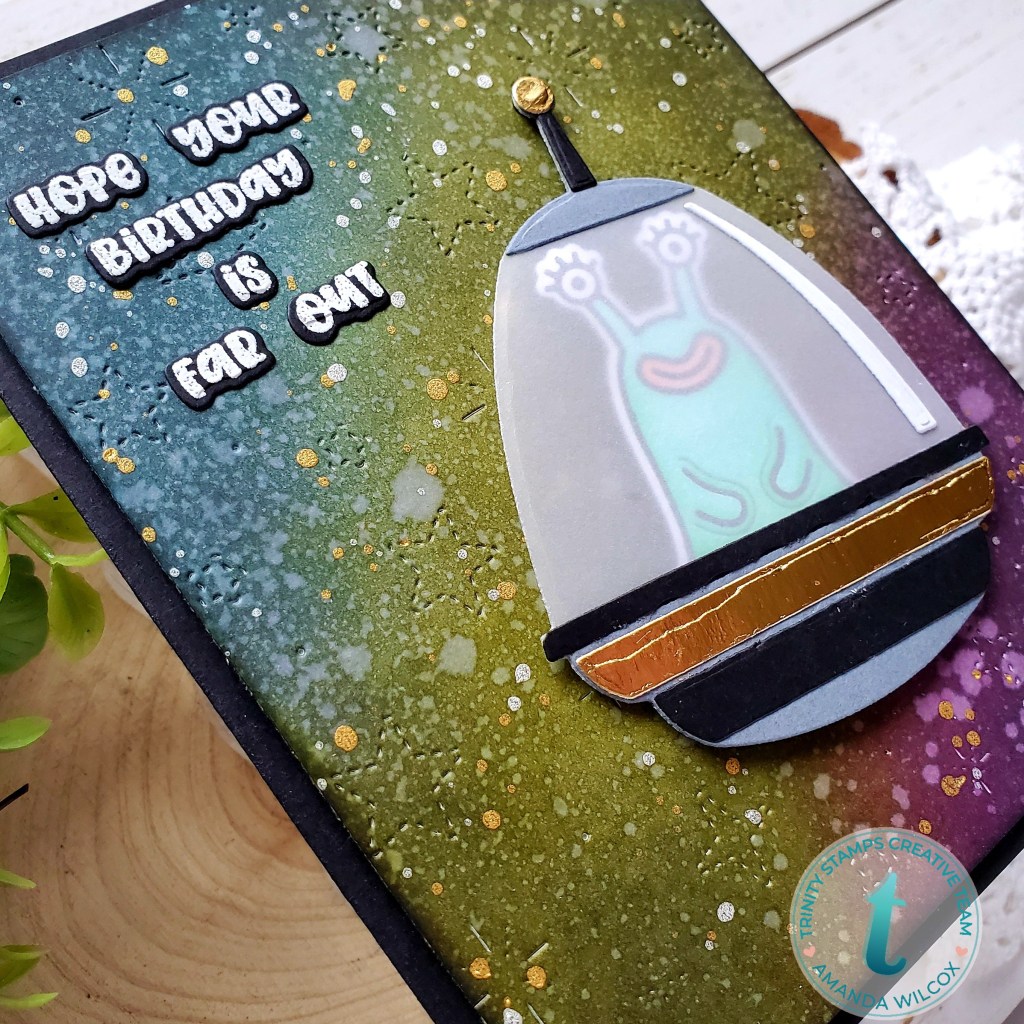
Hello everyone! I hope you enjoyed Newton’s Nook reveal week and have hopped over to buy some new goodies for your stash since everything is on sale today!
I was having so much fun creating, my husband came to check on me one night and had a hilarious idea. I couldn’t resist creating it and wanted to share it with you today.
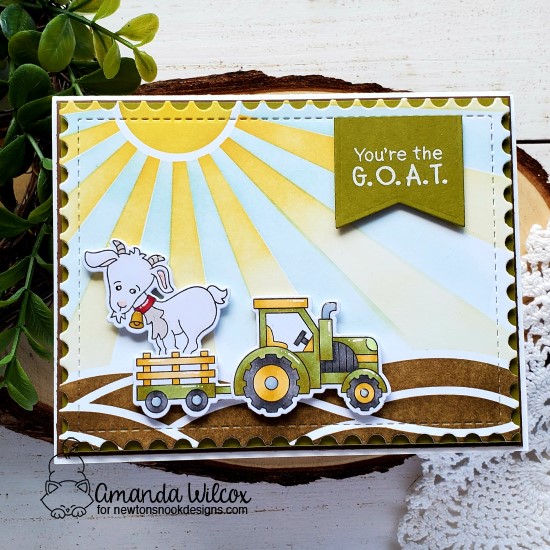
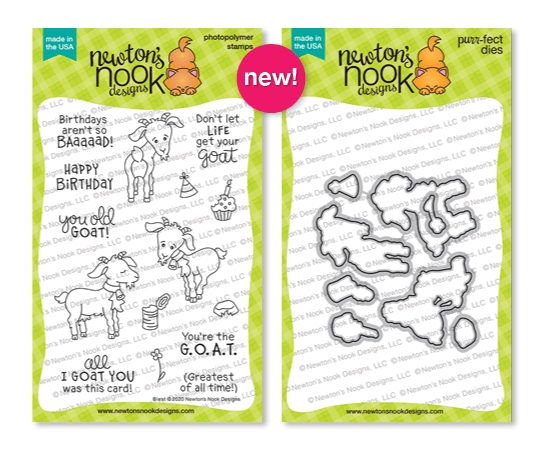
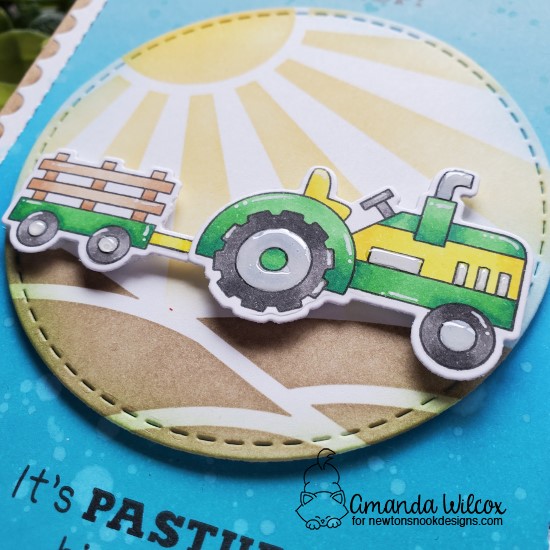
We both loved the G.O.A.T. sentiment and he thought the goat really needed to go in the tractor’s trailer. I told him the proportions were off and when I showed him to prove my point we both cracked up so much that I just had to do it.
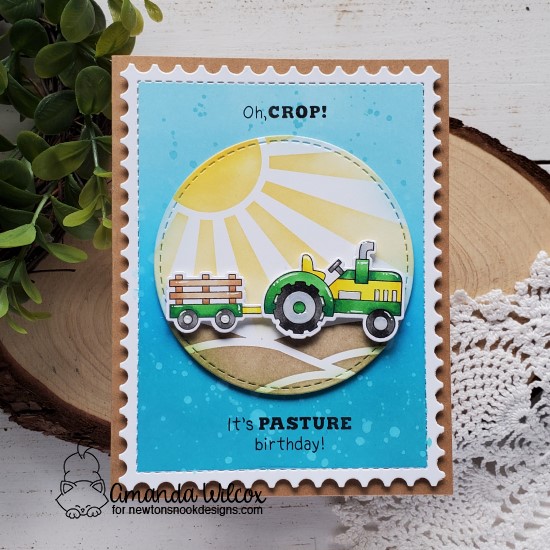
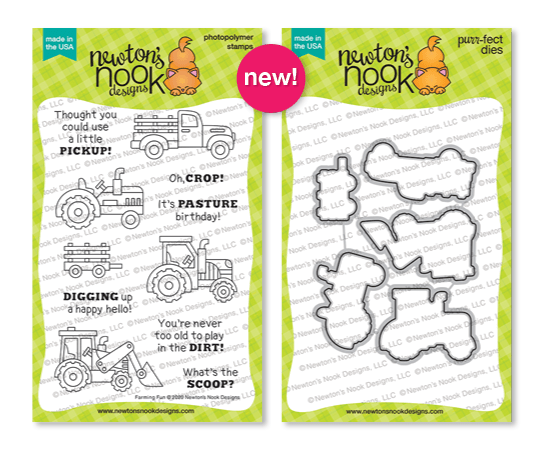
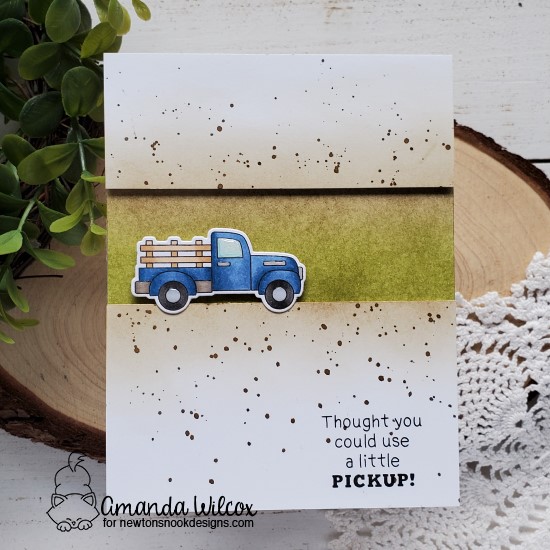
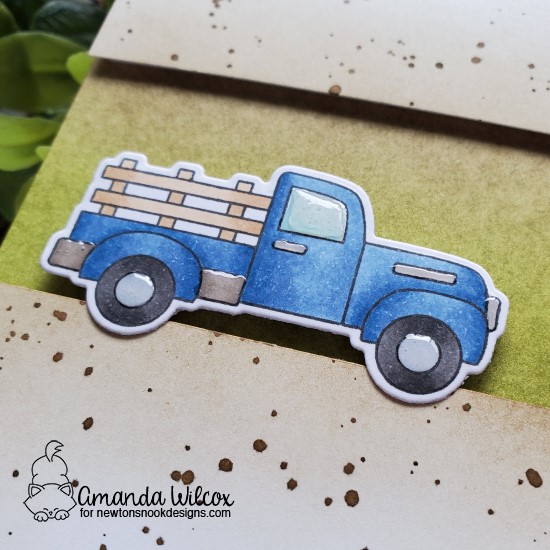
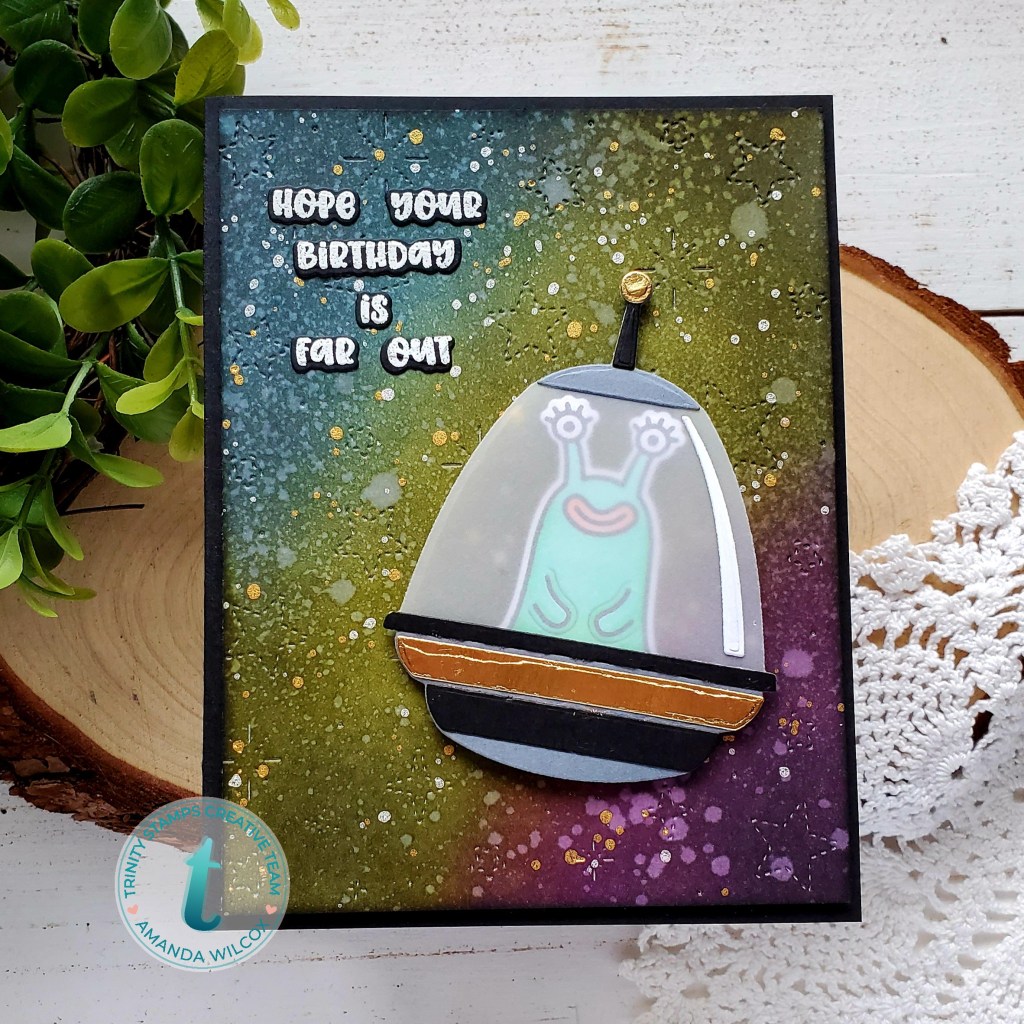
To create my card, I stamped, colored and die cut my images from Bleat and Farming Fun and set them aside. I pulled out the Framework dies and Sunscape stencil again and inked it up. This time after I inked the dirt and yellow part of the sun, I rotated the stencil and used it like a mask to add a little blue sky too.
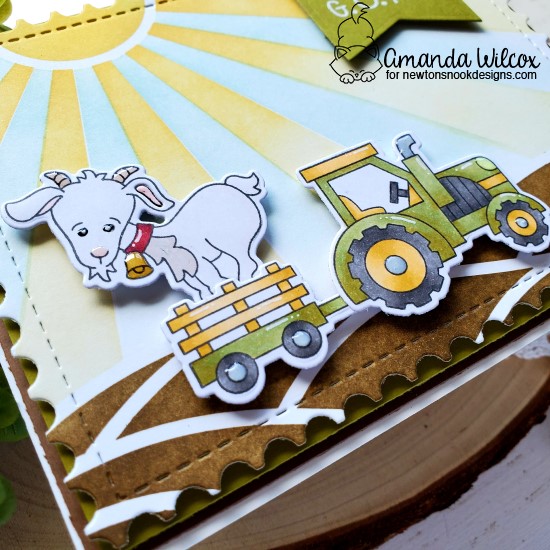
There are a few layers to this card. I started with a white cardbase and glued a brown panel directly to it measuring 4 1/8×5 3/8. Then the green panel is popped up with foam tape and measures 4×5.25 which is the same size as the framework stenciled panel. That is also popped up with foam tape. Finally the images were glued together with liquid glue and popped up with foam squares.

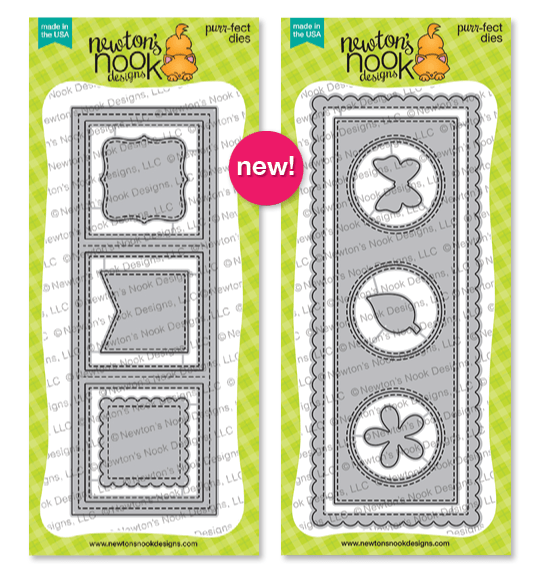
Finally I die cut a flag from Frames and Flags and heat embossed the first half of my sentiment on it in white. This is popped up with foam squares. The second half of the sentiment is stamped inside the card.
Last I moved on to finishing touches which were pretty simple. I added black glaze pen to the eyes and white gel pen accents throughout. Then I finished it off with glossy accents on all the shiny parts of the tractor and trailer, along with the goat’s bell and horns.
Cheers to being silly with your spouse and ending up with a fabulous card as the outcome. I hope you enjoyed the week and are able to pick up some new goodies to play with.
I appreciate you sharing your time with me. Have a fabulous day!