Newton’s Nook – August Release Day 1

Happy Monday everyone! It’s the beginning of reveals for the Newton’s Nook August release. It’s packed full of fun fall themed goodies and I can’t wait to share it all with you! Let’s have a look at today’s goodies, shall we?

Jack-O’-Lantern Stencil Set

Halloween Woofs Paper Pad

Halloween Meows Paper Pad

Franken-Newton Stamps and Dies

Isn’t this a huge array of amazingness to celebrate all things Halloween!?! I am absolutely in love with it all! I have a couple of cards to share with you today. I’ll start with this adorable Franken-Newton stamps set.

For this card, I chose that super cute Elvira-looking kitty and colored her with my copic markers. I used the coordinating die to cut her out and then chose a sentiment to heat emboss on a banner from the Banner Trio die set.

Next, I used Circle Frames dies to cut a silver scalloped and regular black circle to add my image and sentiment to. Then I switched gears to my background. For that, I ink blended distress oxide ink in mowed lawn, twisted citron and seedless preserves at an angle. Then I spritzed the panel with water and used the Bats stencil to spread glitz glitter gel through. I intentionally did this at an angle like the inking and faded imperfectly as I went down.

Once the glitz gel was dry, I die cut the panel with the largest Framework die and added foam tape to the back before adding it to the black polka dot paper in the Halloween Woofs paper pad. Next, I popped up my circle with foam squares.

For finishing touches, I added glossy accents to the white streaks in the kitty’s hair and her nose and bolts. Then I added stardust Stickled to her belt for some sparkle.

For my next card, I used strips of paper from both of the new Halloween pads. I cut strips 3/4″ wide and adhered them to an A2 size piece of orange cardstock. Then I wrapped ribbon around the panel about 1 1/2 inches up and adhered that to a white card base.

I die cut the rounded banner from the Banner Trio dies and heat embossed a sentiment from Spooky Roundabout on it before popping it up with foam squares over the ribbon. Last, I cut stars from the Sky Scene Builder die set from gold glitter cardstock and popped those up across the card front with foam squares too.

Would you like to win the “Franken-Newton” Stamp Set? This stamp set will be given away to ONE lucky winner!

Here’s how to win: Comment on the NND blog and Design Team blogs (see list below)! Thewinner will be chosen at random from the collective reveal posts. Make sure to check out each of their blogs and comment for your chance to win. You will not know which blog has been chosen so the more you comment on the better your chances are of winning! You have until Thursday August 18th at 9pm ET to comment  — winners will be announced on the blog post on Friday August 19th. 

Check out all the awesome Design Team Blogs below to enter:

Newton’s Nook Designs
Donna Idlet
Ellen Haxelmans
Tina Herbeck
Larissa Heskett
Samantha Mann
Zsofia Molnar
Maria Russell
Farhana Sarker
Tatiana Trafimovich
Amanda Wilcox

Pretty Pink Posh – August Release Blog Hop Day 3

Hey friends! I’m so excited to be guest designing for the Pretty Pink Posh August release! This is day 3 of the release blog hop. So after you hop and comment along today’s designers, be sure to go back and do the same for day 1 and 2 to increase your chances of winning!

Now, on to some spooky fun inspiration for you!

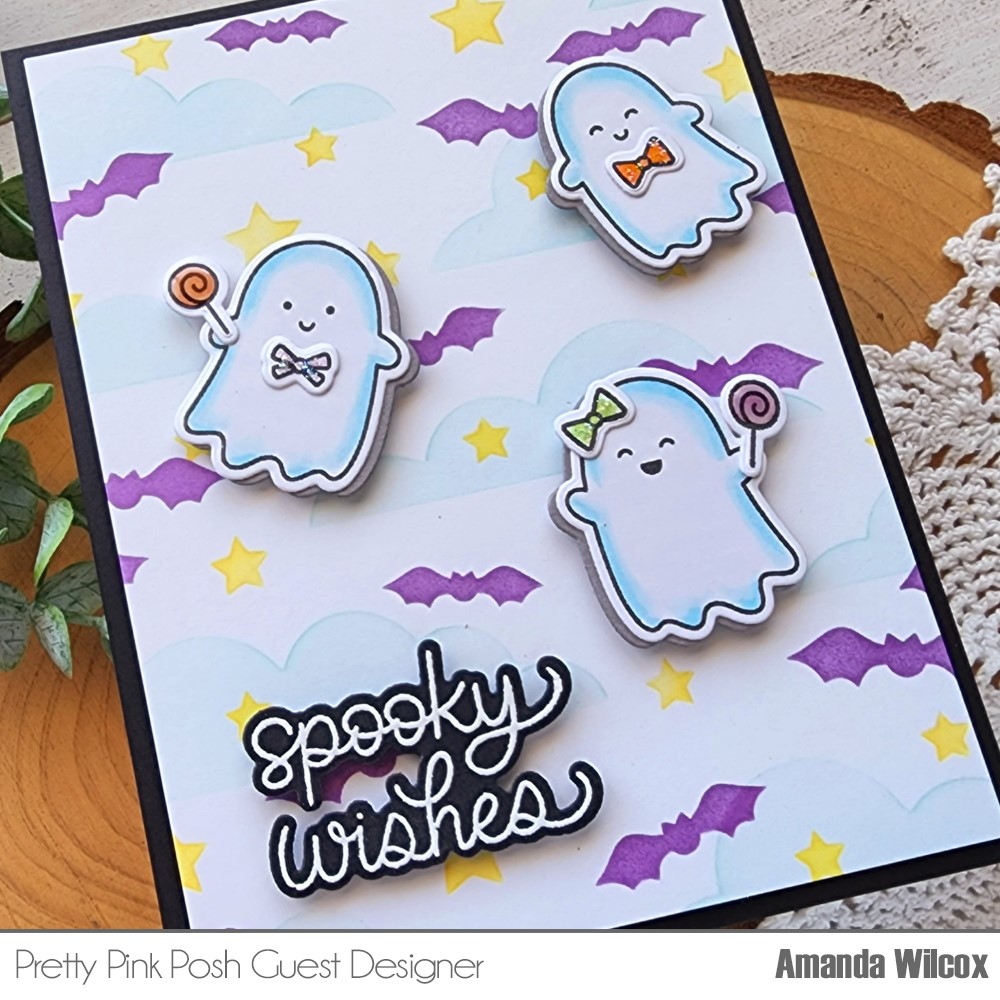
I paired the adorable ghostie images from Ghost Friends with the new Layered Ghosts stencils! They’re all so much fun and definitely too cute to spook! I used white pigment ink with the stencil on black cardstock and then came in with glitz glitter gel for the faces and stars. I love the little bit of sparkle.

Then I stamped and colored the sweet witchy ghost with copic markers, stamped a sentiment in the set and used the coordinating dies to cut all of that out. To create a focal point for my ghost, I ink blended a scrap of white cardstock with distress oxide ink in seedless preserves and dusty concord, then spritzed it with water and blotted it dry. I used the smaller scalloped diamond tag to cut it out and started assembling my card.

First, I trimmed the stenciled panel down to 4×5.25 inches and popped it up on a card base with foam tape. Then I added the diamond with foam squares along with the sentiment. However, to take the fun factor of this card to the next level, I added that sweet ghost with an action wobbler! Sometimes I forget I have these in my stash but I immediately thought a flying ghost needed it!

For finishing touches, I added glossy accents to the witch hat and strip of the broom too.

I hope you enjoyed today’s project. Here is a list of the products I used.

Ghost Friends stamps and dies
Layered Ghosts stencils
Scalloped Diamond Tag dies
Foam tape and squares
Glitz glitter gel – black and gold

Don’t forget to comment for a chance to win 1 of 3 $30 gift certificates to the PPP Shop and then hop along to increase your chances. Winners will be picked randomly along the blog hop. Comments must be left by 11:59 PM PST on 8/17/2022. Winners will be announced on the PPP blog.

Pretty Pink Posh blog
Nichol Spohr
Dana Kirby
Amanda Wilcox
Carly Minner
Yoonsun Hur
Jeanne Jachna

Miss Ink Stamps – One-Layer Halloween Wonder

Hey crafty friends! I’m back today with a super spooky fun Halloween card that is just one layer. This design would be so fun to add to a basket of goodies and easy to mass produce if you had a group you wanted to share them with.

I started with an A2 size panel of kraft cardstock and stamped the Woodgrain Background stamp with brown ink. In this stamp set, there are a variety of stamps to insert into the “tree knot” area. This time, I chose the spooky eyes for added creepy effect. I stamped that part with black ink and used a bright yellow copic marker to color the eyes in.

Next, I used distress oxide ink in tea dye and black soot to ink up the edges of the whole panel. I watered down some black soot ink and flicked it on the panel for extra distressing too. Then, I chose a few sentiments from the Halloween Sentiments stamp set and decided to heat emboss them in black to help them stand out a bit.

Once that was finished, I just adhered the panel to a white card base and my card is all finished. It’s a really simple design but I think it’s spooky fun and it totally makes me happy given my level of “ready for fall” at this moment.

Products used:
Woodgrain Background stamps
Halloween Sentiments stamps
Magic Anti-static Brush
Embossing and Watermark Ink
Embossing powder – licorice
Bearly Arts liquid glue

I appreciate you sharing your time with me. Have a fabulous day!

Newton’s Nook – Aloha Friend

Hi there! I’m so glad you’re here. Today I’m over on the Newton’s Nook blog sharing this beautiful and simple to create square card featuring the Tropical Fringe stamp set. I got inky, as always, and loved the process of this one.

To start, I took distress oxide ink in picked raspberry, carved pumpkin and squeezed lemonade and blended it messily on a panel of watercolor paper. Then I sprayed the panel with water until the ink started to move around on its own. This was way cool to watch. Once that started, I used my heat gun to push the ink where I wanted it until the panel was dry. Then I took my distress sprayer and spritzed it with bigger droplets for actual distressing. When that was dry, I flicked white paint on the panel and let it dry.

Next, I stamped and heat embossed the main image from Tropical Fringe on the panel and used the largest scalloped square die from Frames Squared to cut it out. I had a good size scrap left, so I heat embossed a sentiment and used a die from Circle Frames to cut that out because the size matched better.

I adhered the panel to a 4.25×4.25 white card base with foam tape and popped the sentiment up in the center with foam squares. Then I took my Limeade watercolor from LH Colors and painted in one type of leaf all around the image. The shimmer is so pretty in real life.

To finish off the design I tied some green baker’s twine around the top and tied it in a bow, then glued a white clay heart under the sentiment. Isn’t this so pretty?!? I love it!

Products used:
Tropical Fringe stamps
Frames Squared dies
Circle Frames dies
Foam tape and squares
LH Colors – limeade
Twiddler’s Nook Sweethearts clay embellishments
Bearly Art glue
Magic Anti-static brush
Watermark & Embossing Ink
Embossing Powder – licorice

I appreciate you sharing your time with me. Have a fabulous day!

Pink & Main – You’re Spooktacular

Welcome friends! Today I’m over on the Pink & Main blog with some adorable Halloween inspiration featuring one of my favorite sets from last year. These ghosts are so much fun to color and create with!

I started by stamping the super cute trio of ghosts and colored them with my copic markers. I used the coordinating die to cut the image out and set it aside to create my sparkly background.

I started with an A2 piece of black cardstock and used the 1/4″ EZ Tear Tape to add strips to the center of it. I peeled the backing paper from two strips at a time and then sprinkled super fine glitter on them until all of them were covered. This is one of my favorite ways to use glitter on cards. Then I used the next-to-largest layered rectangle die to trim the panel down. I think the pressure from the die cutter really sets the glitter and I also like the finished look the die gives.

To assemble my card, I used foam tape to pop the glittered panel up on a white card base. Then added my ghosts with foam squares. I stamped and heat embossed a sentiment on black cardstock before die cutting it with a sentiment strip from Sunny Greetings and popping it up with foam strips. For a more finished look, I used the layered rectangle dies to cut a frame and added it with EZ Squeeze liquid glue.

For finishing touches, I added glossy accents to the ghost’s eyes on the ends and black stripes in the letters. Then I added stardust Stickles to their cheeks and the orange stripes. I think it ties in really well with the glittery background and just adds more fun.

Products used today:
Hello Bootiful stamps and dies
Sunny Greetings dies
Layered Rectangle dies
EZ Tear Tape – 1/4″
EZ Squeeze liquid glue
Super Fine Glitter – tangerine, emerald, ice rink and night sky
Foam tape, squares and strips
Glossy accents
Stickles – stardust

I appreciate you sharing your time with me. Have a fabulous day!

Miss Ink Stamps – Stuck Duck

Hello crafty friends! Today I’m over on the Miss Ink Stamps blog with a simple to create but fun scene card to share with you. I used the Stuck Duck stamp set which has an adorable set of images and a super hilarious collection of sentiments to go with them.

I started by stamping the images and coloring them with my copic markers. I used the scan-n-cut to cut them out and started to work on my background scene.

For this, I started with an A2 size piece of white cardstock. I scored it every quarter inch vertically to create a shiplap wall look. Then I took a scrap of kraft cardstock and stamped the Woodgrain Background stamp on it before adhering it to the bottom of the scored panel. For a baseboard, I just cut a quarter inch strip of white cardstock and glued it at the seam of the wall and floor.

Next, I placed all of my images on the panel to decide where to stamp my sentiment. Then I placed my panel in my MISTI and stamped it. Then I adhered the images on the wall with liquid glue and the ones on the floor with foam squares.

Isn’t this little scene too fun!?! I just love it. It totally cracks me up.

Products used:
Stuck Duck stamps
Woodgrain Background stamps
Foam squares
Liquid glue

I appreciate you sharing your time with me. Have a fabulous day!

Miss Ink Stamps – You’re to Die For

Alright friends! I’m back at it again. I couldn’t put the Halloween stamps away. Sorry, not sorry. Hahaha!!! This is another smaller, but totally adorable and fun Halloween set from Miss Ink Stamps and I love it!

I easily shaded these cuties with my copic markers and cut them out. Then I stamped and heat embossed a sentiment from Halloween Sentiments on black cardstock and cut it out with a small banner die.

For the background panel, I blended ripe persimmon and carved pumpkin distress oxides. Then spritzed it with water and flicked black paint on the panel before die cutting it with the Mama Elephant Mod Heart die set. One gives this awesome wonky rectangle and another gives you that cool striped heart I cut from black and white cardstock. Aren’t those stripes so fun?!?

Finally, I created a black card base with a white insert for the inside. Then I popped the orange panel up with foam tape and then the heart next. The ghosts are added with foam squares and finally the sentiment with foam strips.

For finishing touches I used my Wink of Stella glitter brush pen on the shading areas of the ghosts.

I barely got the photos finished of this card before my daughter stole it and put it on the shelf in her room. I guess this one is spoken for. Hahaha!

Products used:
Kindred Spirits stamps
Halloween Sentiments stamps
Mod Heart dies
Distress Oxide – ripe persimmon and carved pumpkin
Foam tape, squares and strips
4-Bar Card dies
Wink of Stella glitter brush pen
Watermark and Embossing Ink
Embossing Powder – frosting
Magic anti-static brush

I appreciate you sharing your time with me. Have a fabulous day!
Pink & Main – Foiling Fun with Toner Paper

Welcome everyone! Thanks for stopping by. Today I have a really cool card to share with you featuring the new Black and White paper pad. This paper is toner printed so you can foil on it! Everything that is black will be foiled if you run it through a laminator.

I specifically chose a print with lots of black so most of my card front would be foiled. Then I chose my foil – gold shattered glass – and heated up my laminator.

A few pro tips for foiling on toner! First, take a clean microfiber cloth and wipe the back of your foil carefully and the front of your paper. This removes the oils from your fingers which inhibit the foiling process. Once you’ve done that, be careful to only handle the edges. Second, make sure your laminator is really good and hot. I let mine heat up twice as long as suggested. Third, look at the back of your foil. There are usually striation lines going one direction in the foil. You want these to go through your machine parallel to the opening. It helps keep wrinkles down.

With my panel foiled, I used the largest A2 rectangle die to cut the panel down and saved the leftover for another project later on. I love distressing for two reasons. First, it’s cool to look at and, second, it hides imperfections wonderfully! So I splattered my panel with some black paint and let it dry.

While that was drying, I used two more layered rectangle dies to create a thin frame. I used liquid glue to adhere it after the paint was dry.

I wanted to focus to be on the awesome foiling so I stamped and heat embossed an image from Floral Wings with licorice embossing powder and used the coordinating die to cut it out. Then I stamped and heat embossed a sentiment with frosting embossing powder and used another layered rectangle to cut that out. Both things were added with foam squares and my card is finished.

I hope you’ll give foiling a try and I also hope that my tips are helpful to you too!

Products used:
Floral Wings stamps and dies
Layered Rectangles dies
EZ Squeeze liquid glue
Watermark & Embossing Ink
Magic anti-static brush
Embossing powder – licorice and frosting
Deco Foil – gold shattered glass
Foam squares

I appreciate you sharing your time with me. Have a fabulous day!
Pink & Main – Best Wishes Stencil Layering

Happy Friday everyone! I’m so glad you stopped by. Today I have more Pink & Main inspiration featuring a new layering stencil to add color to your image. I don’t know about all of you but I’m really having fun with these types of products. Today I stepped it up a bit at the end and really love the outcome.

I started by stamping the Simple Bouquet image in dark gray ink. Then I used the layering stencils to apply my color. Then I placed the image back in my MISTI and stamped the sentiment in the banner.

There are a ton of options in the set that match the curve of the banners perfectly. It’s so perfect and fun to mix and match them different ways!

Next, I die cut the next-to-largest Stitched Arch die from white cardstock and ran it through my die cut machine with the new Many Hearts embossing folder. I popped this up with foam tape on a kraft card base and then popped my image up with foam tape on that.

This is when I had that genius idea to step things up with the stenciling and use glossy gel with super fine glitter. Definitely not the order I recommend but I was VERY careful and thank goodness it all worked out!

So, I replaced the detail stencil layer over my flowers, spread the glossy gel through it and sprinkled on ice rink glitter. I tapped off the excess and left it all to dry before using a dry paint brush to really brush off the excess.

Once that was done, I decided to tie some baker’s twine around the top of my card and tie it in a bow. Such a cute little addition and I really think it finishes things off well.

Products used today:
Simple Bouquet stamps, dies and stencils
Stitched Arches dies
Many Hearts embossing folder
Ergonomic blending brushes
Glossy gel
Super Fine Glitter – ice rink
Foam tape

I appreciate you sharing your time with me. Have a fabulous day!
Miss Ink Stamps – Boo Cats

Hey there! Thanks so much for stopping by. Today I have some out of season inspiration to share with you because, let’s be real, I cannot be the only girl out there just wishing for fall to get here so I can create all things pumpkins, spooky and leaves! I love fall so much and it seems that every year my yearn for it gets a little earlier into summer. Lol! So even if the weather doesn’t cooperate, at least I can craft like it’s October!

To create my card, I started with stamping the main image from Boo Cats and colored it with my copic markers. I used the scan-n-cut to cut it out and set it aside. I had the idea to use the Diagonals Masking Stencil but hadn’t decided on colors or extra layers yet so I went digging. Ultimately I chose to pull the colors from the kitty hats and go with a classic polka dot accent. So fun!

After the stenciling was done, I die cut a vellum rectangle and heat embossed the sentiment on the bottom center. While the rectangle dies were out I trimmed the stenciled panel down with on and cut a darker purple background from the largest one. Then I had a random thought to add a little visual texture by cutting the same size rectangle as the vellum from the center of the panel and popping the frame up with foam squares.

For finishing touches, I added white gel pen highlights to the kitties and their hats, then a little stardust stickles to the stars and moon on the center hat. It’s simple but I love it!

This is one of my favorite Halloween sets! I think it’s so much fun and I enjoy coloring it every time I pull it out!

Products used today:
Boo Cats stamps
Diagonals Masking stencil
Layered Small Alternating Dots stencils (just small layer)
Trinity Stamps Embossed Edge Rectangle dies
Foam tape and squares
Stickles – stardust
Magic Anti-static Brush
Embossing & Watermark Ink
Embossing powder – licorice

I appreciate you sharing your time with me. Have a fabulous day!