Newton’s Nook – Birthday Release Day 4

Oh my goodness friends! I hope you loved the release reveals for this year’s amazing birthday release for Newton’s Nook! Aren’t all of these products amazing!?! I am in love with each one! We’re not done giving things away though. So, today we have bonus inspiration and another chance to win at the bottom of this post too.

For my extra card share today, I have combined a ton of the release to create another super fun and adorable birthday card to share with you!

For this card, I inked up a white panel with distress oxide ink in black soot and hickory smoke. I was going to a bit of a chalkboard vibe today. Then I stamped and heat embossed the Birthday Oval image on that and used the coordinating Oval Frame die to cut it out. Then I used distress oxide ink and watercolored some of the balloons orange.

I stamped and colored one of the Birthday Mice images and used the coordinating dies to cut it out next. I stamped a sentiment from Birthday Roundabout on a rounded banner from the Banner Trio dies. I added the image and sentiment to the oval with foam squares and added foam tape to the back of the oval too.

I was going to add the oval to a solid piece of cardstock but thought it would be fun to kick up the celebration level a bit with patterned paper from the new paper pad. I added the whole thing to an A2 card base with liquid glue.

For finishing touches I came in with glossy accents and white gel pen accents to the image. Then finished the design off with some wrapped twine around the left side of the card.

Would you like to win the “Bokeh Balloons” Stencil Set? This stamp set will be given away to ONE lucky winner!

Here’s how to win: Comment on the NND blog and Design Team blogs (see list below)! The winner will be chosen at random from the collective reveal posts. Make sure to check out each of their blogs and comment for your chance to win. You will not know which blog has been chosen so the more you comment on the better your chances are of winning! You have until Thursday July 14th at 9pm ET to comment  — winners will be announced on the blog post on Friday July 15th. 

Check out all the awesome Design Team Blogs below to enter:

Newton’s Nook Designs
Donna Idlet
Ellen Haxelmans
Larissa Heskett
Samantha Mann
Zsofia Molnar
Farhana Sarker
Tatiana Trafimovich
Amanda Wilcox

Newton’s Nook – Birthday Release Day 3

Thanks so much for sticking with us friends! Today is day 3 of the Newton’s Nook Birthday Release reveals. This is the final reveal for new products today but be sure to come back tomorrow for one more surprise chance to win. Until then, let’s see what we have in store!

Sky High Celebrations stamps and dies

Isn’t this new set just adorable beyond words! I love it so much! And guess what?!?!? It absolutely words seamlessly with the Bookmark dies! I can’t wait to create bookmarks and tags with this fun images too!

Today I chose the balloon image to stamp and color, using the Birthday Party paper pad once again for my color palette inspiration. I used the coordinating dies to cut the image out and set it aside. Next, I die cut a rounded rectangle from Frames & Flags dies to stamp and heat emboss clouds and a sentiment on. I just adore how this looks together!

Next, I took an A2 panel and inked up the new Bokeh Balloons stencil set. These balloons are layered so perfectly that I didn’t even mask anything off between colors. It was so fun to pick and choose colors and end up with a gorgeous balloon filled background. Once it was inked, I used the largest Frames & Flags die to cut it down.

Now, for assembly on this card, I cut a piece of red balloon paper from the Birthday Party paper pad to A2 size and added it to a white card base. Then I added the balloon stencil panel with foam tape. I added foam squares to my image and adhered it to the vellum layer. This gave me a place to hid the adhesive that adheres this to the card front.

For finishing touches I came in with black glaze pen, followed by white gel pen highlight on the puppy’s eyes. Then glossy accents on noses and beaks. Finally I added unicorn Stickles to the highlight on the balloon images.

Would you like to win the “Sky High Celebrations” Stamp Set? This stamp set will be given away to ONE lucky winner!

Here’s how to win: Comment on the NND blog and Design Team blogs (see list below)! The winner will be chosen at random from the collective reveal posts. Make sure to check out each of their blogs and comment for your chance to win. You will not know which blog has been chosen so the more you comment on the better your chances are of winning! You have until Thursday July 14th at 9pm ET to comment  — winners will be announced on the blog post on Friday July 15th. 

Check out all the awesome Design Team Blogs below to enter:

Newton’s Nook Designs
Donna Idlet
Ellen Haxelmans
Larissa Heskett
Samantha Mann
Zsofia Molnar
Farhana Sarker
Tatiana Trafimovich
Amanda Wilcox

Miss Ink Stamps – Blowing Hugs and Kisses Circle Easel Card

Hello everyone! I’m over on the Miss Ink Stamps blog today with a tutorial how I created this fun circle shaped easel card. I love the critters from Bubbles and thought it would be fun to create with them given the summer weather we’re finally getting where I live.

I thought this mini scene was too perfect to add a sentiment to. This is one of my favorite things about easel cards. When they display the card, the sentiment shows because it’s your stopper.

Bonus, there’s plenty of room to write a personal message above that sentiment strip too. For all the details how I created this card, head over to the Miss Ink Stamps blog and check it out!

I appreciate you sharing your time with me. Have a fabulous day!
Newton’s Nook – Birthday Release Day 2

Hey friends! Back for day 2 of release reveals for the Newton’s Nook 9th Birthday Release! Today we’re adding a must-have to the oval card front series. It is so much fun to create with. You’re going to love it!

Birthday Oval stamps (Coordinates with Oval Frames dies)

For today’s card, I just couldn’t resist pulling out one of my very favorite sets – Puppy Playtime – to pair with this fun Birthday Oval set.

Using the paper pad so much this release, because it’s amazing, had me wanting a little variety. So I chose a very different color palette and colored up my images from Birthday Oval and Puppy Playtime and used the coordinating dies to cut everything out. I used liquid glue to adhere the hat to my puppy’s head and set those aside to create my background.

I inked up a piece of white cardstock with distress oxide ink with salvaged patina fading down into nothing toward the bottom. Then I splattered the panel with water, peacock feathers distress oxide ink and white paint for good measure. Sometimes I forget the white paint but I really love the different it makes in the look of the background.

Once the panel was dry, I wrapped some yellow twine around it and tied it in a bow. I added the Birthday Oval with foam tape and then added my puppy with single and double layers of foam squares so it laid nice and flat.

For finishing touches I came in with glossy accents on random places all over the oval and also parts of the puppy too. I added black glaze pen to his eyes and once that was dry I came back in with a white gel pen to add the highlight that got covered up.

Would you like to win the “Birthday Oval” Stamp Set? This stamp set will be given away to ONE lucky winner!

Here’s how to win: Comment on the NND blog and Design Team blogs (see list below)! The winner will be chosen at random from the collective reveal posts. Make sure to check out each of their blogs and comment for your chance to win. You will not know which blog has been chosen so the more you comment on the better your chances are of winning! You have until Thursday July 14th at 9pm ET to comment  — winners will be announced on the blog post on Friday July 15th. 

Check out all the awesome Design Team Blogs below to enter:

Newton’s Nook Designs
Donna Idlet
Ellen Haxelmans
Larissa Heskett
Samantha Mann
Zsofia Molnar
Farhana Sarker
Tatiana Trafimovich
Amanda Wilcox

Newton’s Nook – Birthday Release Day 1

Welcome, welcome everyone! It’s the first day of release reveals for an absolutely incredible birthday release with Newton’s Nook! They are turning 9 years old and this birthday release takes the cake! Let’s get started looking at what we have today.

Birthday Party Paper Pad

Bokeh Balloons stencils

Birthday Mice stamps and dies

I have a really fun card to share with you today featuring the new paper pad and one of the absolutely Birthday Mice images. Don’t worry, I’ll have so much more to share through the week along with the rest of the team.

As soon as I saw this set, I knew I had to create a giant cheese to go with these fun mice! So I immediately started my card today with that. I used dies from Frames & Flags, Frames Squared and Circle Frames to create a two-layer cheese look. I inked the edges of the yellow cardstock for extra dimension and flicked yellow ink and white paint on the panel too. I love the texture it gives!

I chose a piece of paper from the Birthday Party paper pad and used it as a guide to color the images I stamped out from the set. Once they were colored, I used the coordinating dies to cut them out. I trimmed the plaid paper to A2 size and adhered it to a white card base and added my cheese panel with foam tape. Then I added the images with foam squares too. You all know I like my dimension!

Next, I cut two banners from Frames & Flags die set – the red flag is from the Birthday Party paper pad. Then I stamped the sentiment on the white one and glued them together. I added them to the top left with a combination of foam squares and liquid glue.

For finishing touches I added glossy accents to some parts of the images and a little unicorn Stickles to others. I love the combo of shimmer and shine between the two.

Would you like to win the “Birthday Mice Stamp Set? This stamp set will be given away to ONE lucky winner!

Here’s how to win: Comment on the NND blog and Design Team blogs (see list below)! The winner will be chosen at random from the collective reveal posts. Make sure to check out each of their blogs and comment for your chance to win. You will not know which blog has been chosen so the more you comment on the better your chances are of winning! You have until Thursday July 14th at 9pm ET to comment  — winners will be announced on the blog post on Friday July 15th. 

Check out all the awesome Design Team Blogs below to enter:

Newton’s Nook Designs
Donna Idlet
Ellen Haxelmans
Larissa Heskett
Samantha Mann
Zsofia Molnar
Farhana Sarker
Tatiana Trafimovich
Amanda Wilcox

Pink & Main – Die Cut Cards

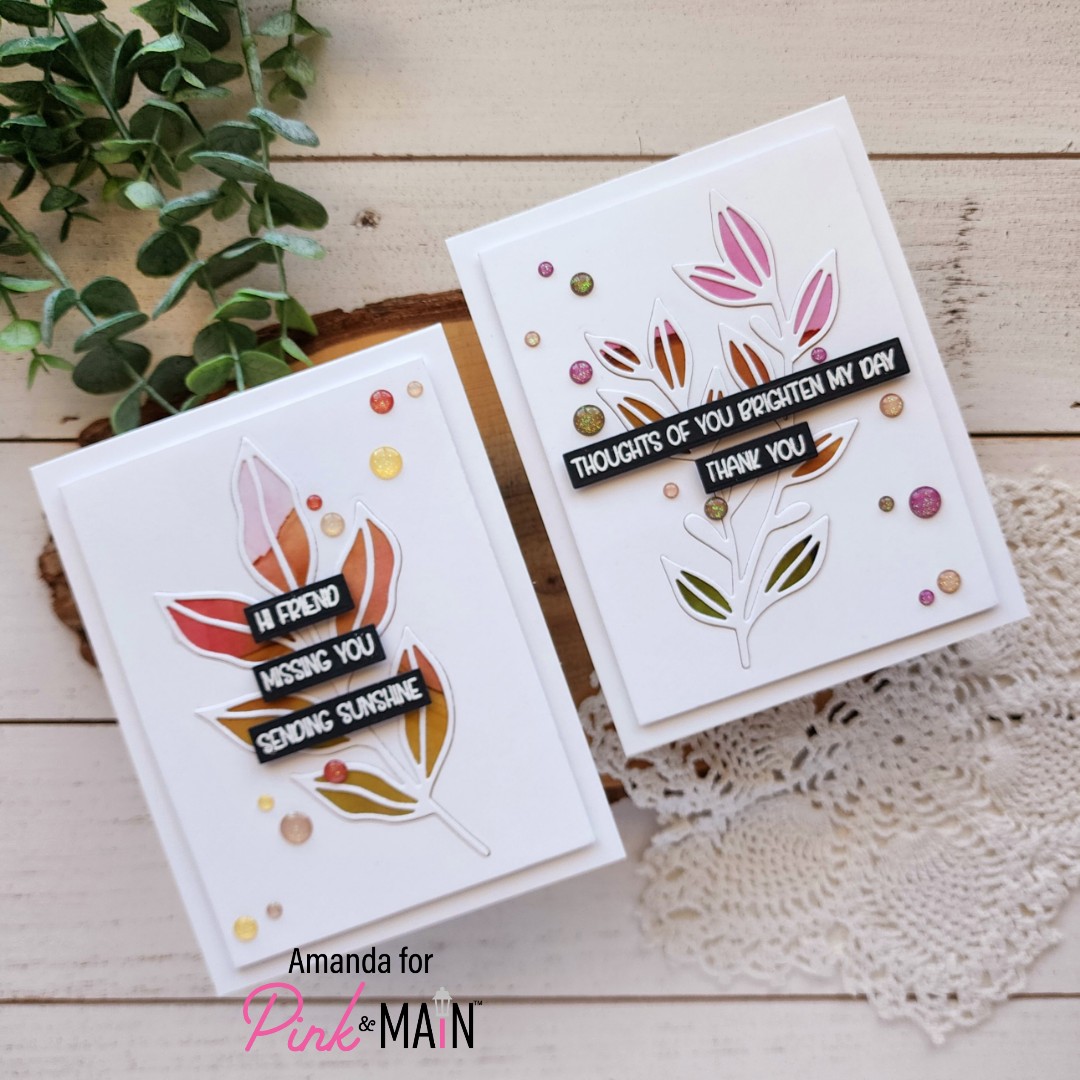
Happy Friday everyone! I’m popping in today with a couple of cards featuring the Pink & Main July release. I was feeling a bit of a creative funk last weekend and didn’t know what to make. I had this feeling of wanting to create but nothing sparked my interest. When this happens I start with one of two things – create backgrounds with inks or embossing OR play with dies. This time I grabbed a couple of new dies and just started cutting things out. After just a minute of cutting and arranging the dies in different ways, I had a couple of ideas pop in my head. Here’s what I ended up with.

The new Seashells Emboss & Cut Folder is so cool, I can’t even explain it! I put a piece of white cardstock inside, ran it through my die cut machine with the embossing folder sandwich and VOILA! I opened it to find five perfectly die cut and embossed seashells! They were so cool, I didn’t want to do anything to them.

So I arranged them in a line close to 5.5 inches wide and glued them together. I adhered them to a strip of paper from the Inked Oasis paper pack and popped that up on a black cardstock panel with foam tape. To cut the harshness of the black paper, I inked the top edge with a teeny bit of white pigment ink. It makes it look chalky and I love it!

Then I stamped and heat embossed a sentiment from Aloha Flowers, used the coordinating dies to cut it out and popped it up with foam squares. Such a simple card but it turned out beautifully!

For the second card, I had cut the “hello” portion of the Hello Sunshine word dies to start and then had the idea to create a die cut background.

After cutting “hello” from the whole A2 size panel, I trimmed it down to 4×5.25 inches and chose another piece of paper from Inked Oasis to layer behind it. I used EZ Squeeze liquid glue to adhere them together and popped them up on a white card base with foam tape.

I knew I wanted to draw attention to the one complete “hello” I strategically placed so I glued three layers of white die cuts together and then cut it from yellow cardstock once. I drug the bottom part of the letters through my Embossing/Watermark Ink pad and sprinkled on Ray of Sunshine embossing powder. I heat set it and glued these letters on top of the white, then added them in their place on the card front.

To finish this card off, I stamped and heat embossed another sentiment from Floral Shells and cut it into a strip. I popped it up with foam strips and then added yellow enamel dots scattered around the design.

Aren’t these cards so fun!?! Just remember that if you’re feeling crafty but don’t know what to create…choose one simple thing to start “playing” with and see if it takes you anywhere. Usually, once you get started things just fall into place.

Products used today:
Seashells Emboss & Cut Folder
Hello Sunshine word dies
Floral Shells stamps
Aloha Flowers stamps and dies
Inked Oasis paper pad
Ergonomic Blending Brush
Enamel Dots
EZ Squeeze liquid glue
Embossing/Watermark Ink
Ray of Sunshine embossing powder
Magic Anti-static Tool

I appreciate you sharing your time with me. Have a fabulous day!

Miss Ink Stamps – Happy Birthday to a-wooooo!

Happy Thursday everyone! I’m here today with a scene card featuring stamps and stencils from Miss Ink Stamps. This card started with me just playing around, layering the Scene Builder: Treeline stencil on a piece of white cardstock. That thing is like magic to use! Then I started digging through my stamps to see what I wanted to pair with it and landed on Wolf Pack for a fun wilderness scene.

For the background stenciling, I used blending brushes and Lawn Fawn dye inks. I started with the top row of trees and then shifted the stencil down to see what a second row would look like. Then I slid the whole stencil up to use the other side as a mask and inked up a beautiful blue sky.

Next, I stamped two images from Wolf Pack and colored them with copic markers. I fussy cut them out and went around the edges with a black pen to clean them up a bit. Next, I took a scrap of white cardstock and cut it into two hills. I blended some brown dye ink on it and came in with similar copic markers to add texture and green for tufts of grass.

To assemble my card, I adhered the background panel to a white card base, then glued the two hills down on that. I adhered the little wolf with liquid glue and popped the big one up with foam squares. Last, I stamped and heat embossed a sentiment on black cardstock and die cut it with a stitched banner. I added it with foam squares to the upper left of the design.

Sometimes it’s difficult to come up with masculine feeling designs but I think this card really achieved that. I held back on the typical bling and extras that I think change that feel and totally love how it turned out!

Products used today:
Wolf Pack stamps
Scene Builder: Treeline stencil
Blending brushes
Lawn Fawn dye ink
Foam squares
Bearly Art liquid glue

I appreciate you sharing your time with me. Have a fabulous day!

Mama Elephant – Little Agenda Mini Scene

Welcome, welcome! I’m so glad you’re here! Today I have a really fun card to share featuring Mama Elephant goodies, new and old. I love how well these products play together over time. It makes it so fun to shop your stash and use things that you may have forgotten about.

I picked up a few sets from the most recent Mama Elephant release and had so much fun creating this little scene card using the Little Agenda House stamps and dies. I shopped through my stash of Little Agenda critters and decided on this sweet kitty purely because the recipient of this card is very much a cat person.

Once I had my images die cut, I created a circle using the Mama Elephant Combo Circle dies. These are so fun and innovative. I pulled from the colors of the house for the scallops and inked a little sunshiny shadow behind my images. The images are adhered with a combo of liquid glue and foam squares. Then I stamped and heat embossed sentiments from the Easy Sentiments set and cut them out using the coordinating die. I chose the one I wanted and added it to the circle with a foam strip.

For added interest in the background I cut the Grid Window background panel and adhered it to a white card base. Then I popped the scallop circle up with foam tape and added a few red clay hearts. Last, I added some glossy accents to the door knob, flowers and heart on the envelope.

I just adore this sweet card and had to much fun creating it.

Products used today:
Little Agenda House stamps and dies
Little Agenda Cats stamps and dies
Combo Circle dies
Grid Window die
Easy Sentiments stamps and dies

Foam strips and squares
Glossy accents
Twiddler’s Nook Sweethearts clay embellishments
Bearly Art liquid glue

I appreciate you sharing your time with me.

I buy all of my Mama Elephant goodies from Doodlebugs and have a coupon code for 15% off your first purchase from there. Click HERE and treat yourself!

Trinity Stamps – Happy Independence Day Cupcake Card

Happy Independence Day to all of my USA friends! Today I’m guest designing on the Trinity Stamps blog and couldn’t resist using the new Cupcake Card die set to create a really fun 4th of July themed card to share! Creating this card just reminded me how fun it is to take things typically meant for something specific and twisting things like color schemes and sentiments to broaden their use.

To start today’s project, I pulled out the dies from the set I intended to use and cut everything from white heavy weight cardstock. I folded the card base on the score line and set it aside to add color to my pieces.

Here’s a quick and easy photo to show you the colors I used for all the pieces. It’s really simple when you break it down. I inked up the cupcake liner with distress oxide in blueprint sketch and salty ocean. Then I added it and the frosting piece to my splatter box and flicked watered down ink in both blues to both pieces. I removed the liner paper and flicked some candied apple on the frosting to bring that classic red into the mix. I set those aside to dry while I colored the remaining pieces with copic markers.

Next, I pulled out the Simply Sentimental – Happy stamps and dies out to work on my sentiment. I cut the shadow from vellum and the word “happy” from white cardstock 4 times and adhered them all together with liquid glue. Then I stamped “Independence Day” from the stamp set in black ink and used the smallest Embossed Edge Rectangle die to create a sentiment strip.

To assemble all my pieces, I used liquid glue starting with the cupcake liner piece first, then the cupcake and finally the frosting and cherry. I added “happy” with liquid glue and popped the sentiment strip up with foam tape.

For finishing touches, I added glossy accents to the cherry and one Jelly Drop Heart embellishment below the sentiment.

I hope you enjoyed today’s project and find some inspiration to create something fun to share with someone.

Products used today:
Cupcake Card dies
Embossed Edge Rectangle dies
Simply Sentimental – Happy stamps and dies
Jelly Drop Hearts – red
Foam tape
Bearly Art liquid glue
Distress Oxide Ink – blueprint sketch, salty ocean, candied apple
Glossy accents

I appreciate you sharing your time with me. Have a fabulous day!

Pink & Main – Sending Sunny Smiles

Happy Friday crafty friends! Today, I’m over on the Pink & Main blog with a super fun and summery feeling slimline card. I wanted some stencil texture for my background but not anything bold so I decided to try Glossy Gel on its own. It’s so cool! Have you tried it yet?
To start my card, I stamped and colored images from the new Summer Snow Globe Scenes stamp set and colored them with copics. I used the coordinating dies to cut them out and set them aside while I got messy.

I started by inking an oversized panel with teal ink from the top left, fading down to nothing. Then I sprayed the Curly Waves stencil with pixie spray and placed it over the panel. I spread Glossy Gel through the stencil fading like the ink. I removed the stencil, cleaned up and set it aside to dry.

Once the panel was dry, I pulled out the Layered Slim Line dies and cut the largest from orange cardstock and then skipped one and used the next size down to cut the stenciled panel. I splattered the orange and stencil panels with orange ink, then also splattered the stencil panel with the same teal ink for extra texture. Next, I added the images with a combination of foam squares and EZ Squeeze liquid glue on the far right end.

Then, I wrapped orange twine around the other end, stamped and die cut the sentiment and added it with foam squares. I added foam tape to the back of the whole panel, avoiding the twine and popped it up on the orange panel. Finally, I added liquid glue to that and added it to a slimline card base.

For finishing touches, I added glossy accents to the stripe on the surf board, parts of the seashell and the bear’s nose. Then I added black glaze pen to the sun’s eyes and unicorn Stickles to the rays o f the sun and starfish too.

Have you tried out the fun glossy gel yet? I’d love to know in the comments if you always add glitter or flock, or if you’ve tried it alone like I did today.

Products used:
Summer Snow Globe Scenes stamps and dies
Curly Waves stencil
Glossy Gel
Palette knives
Layered Slim Line dies
Sunny Greetings dies
EZ Squeeze liquid glue
Foam tape and squares
Pixie Spray
Stickles – unicorn
Glossy accents

I appreciate you sharing your time with me. Have a fabulous day!