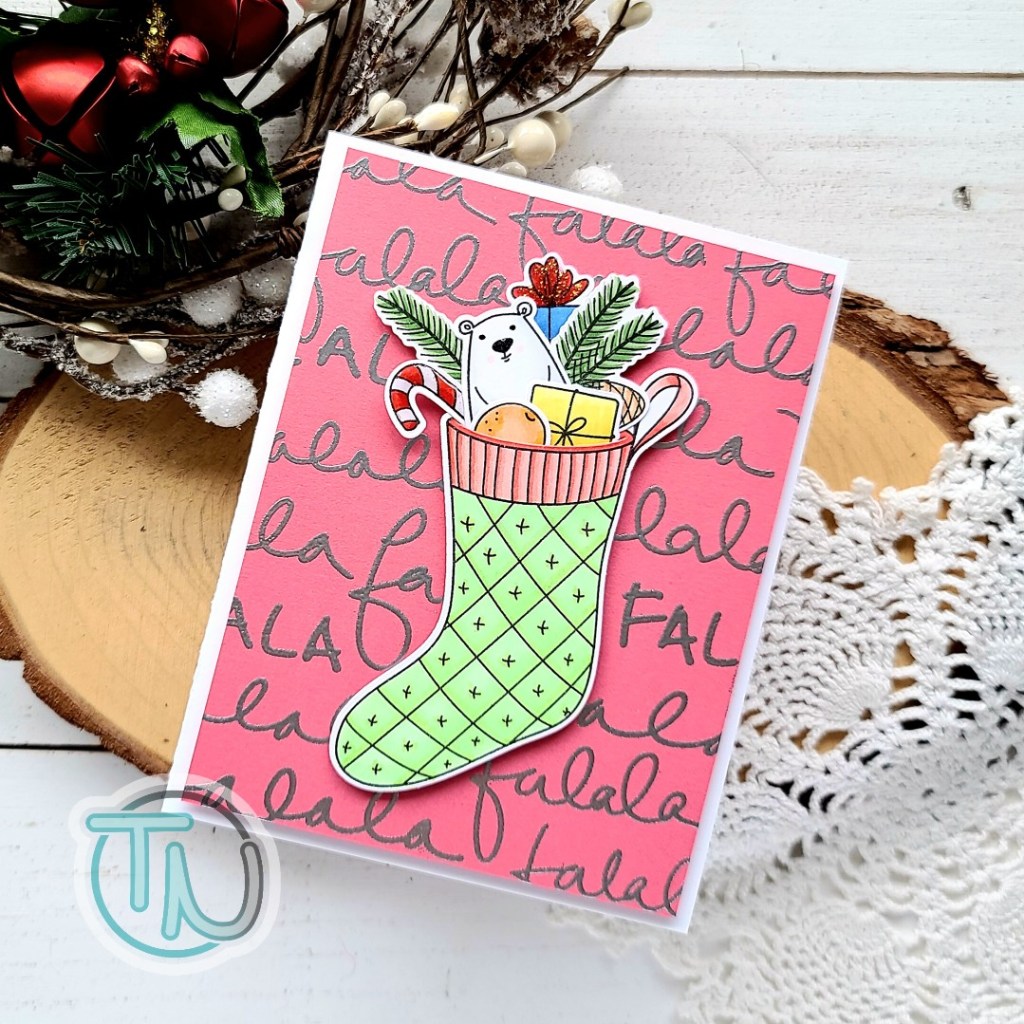
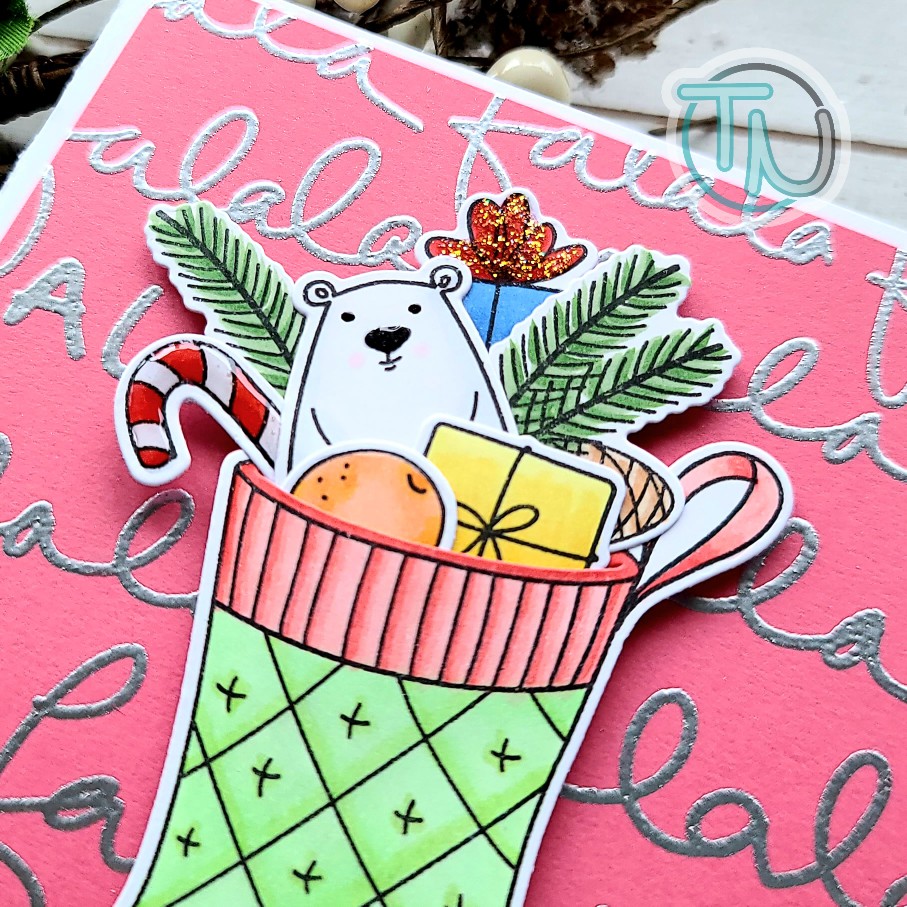
Happy weekend everyone! I’m popping in with a couple of fun Christmas cards featuring some Pretty Pink Posh goodies I had ordered a while ago but had yet to ink up. Shame, shame! Haha! Anyway, they are having a sale on the Christmas section of the store so I’ll have affiliate links below if you’re feeling inspired at all.
Any of the stamp sets out there where a critter is holding a sign and I get to put a sentiment in it…I’m a huge fan of! Totally drawn to them and want them all. Soooo, I had to get this adorable Christmas set – Holiday Signs. Today I stamped a couple of them and colored them with my copic markers. Then I used the coordinating dies to cut them out.
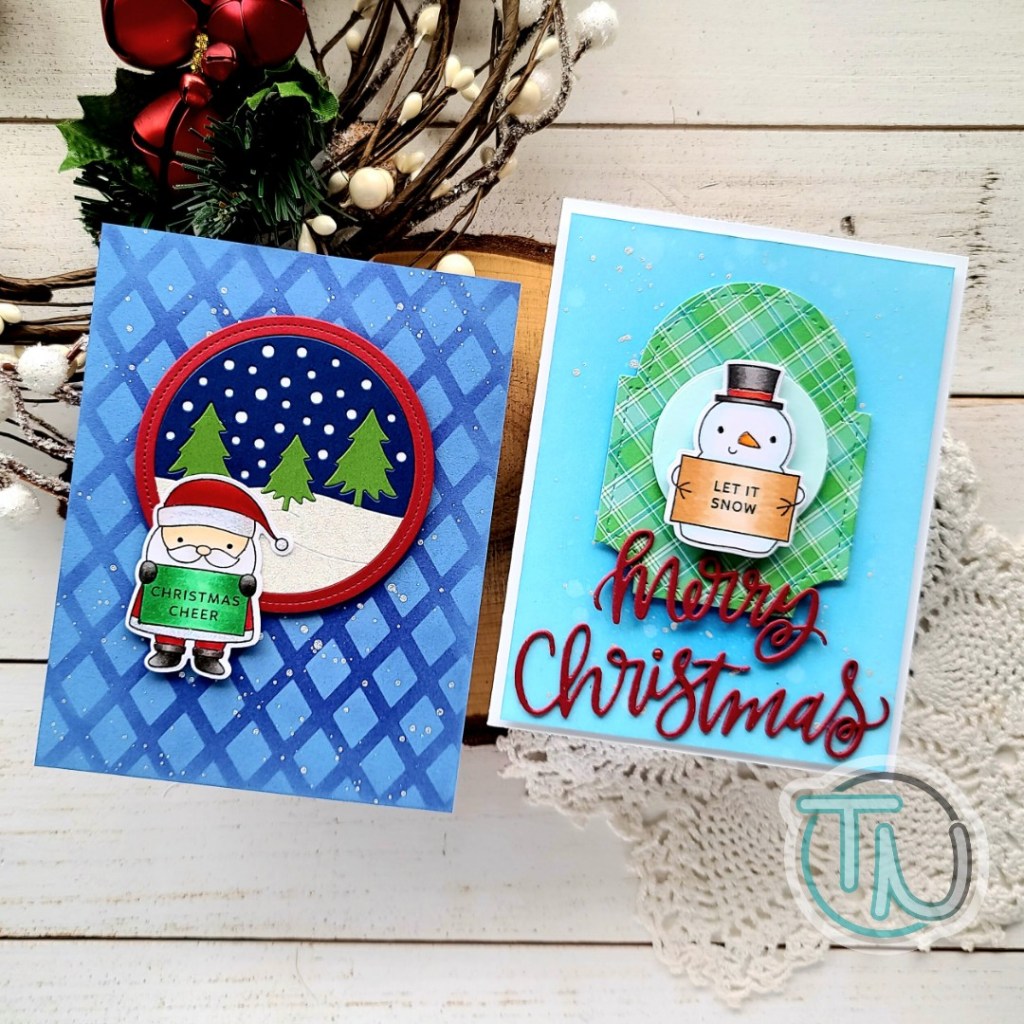
I had a couple of cards sketched out already so I just set to work with more die cutting and ink blending. Let’s look at the Santa one first.

Pretty Pink Posh has a line of dies that cut out scenes like the winter scene on this card, and I just love them! Today I cut the pieces from colored and glitter cardstock and adhered them to a plain white circle for stability.

Next, I took a dark blue panel and cut to A2 size before using the lattice stencil with a blending brush and white pigment ink. I splattered the panel with pearl watercolor and started assembling everything. The stenciled panel went on a card base, then the winter scene was popped up with foam tape and the Santa was adhered with a combo of liquid glue and a foam square to keep him flat.
So sweet, right!?! I just love how this one turned out! Next up, the super fun snowman!
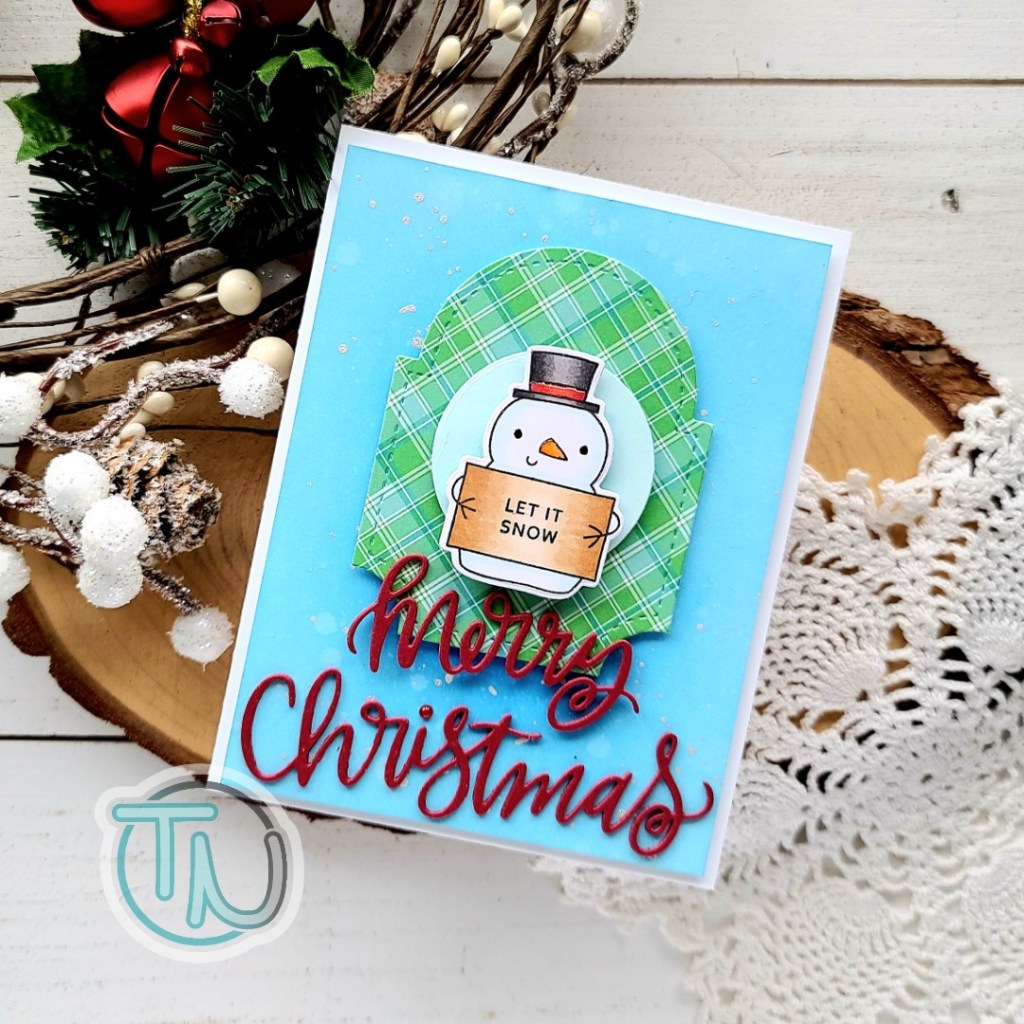
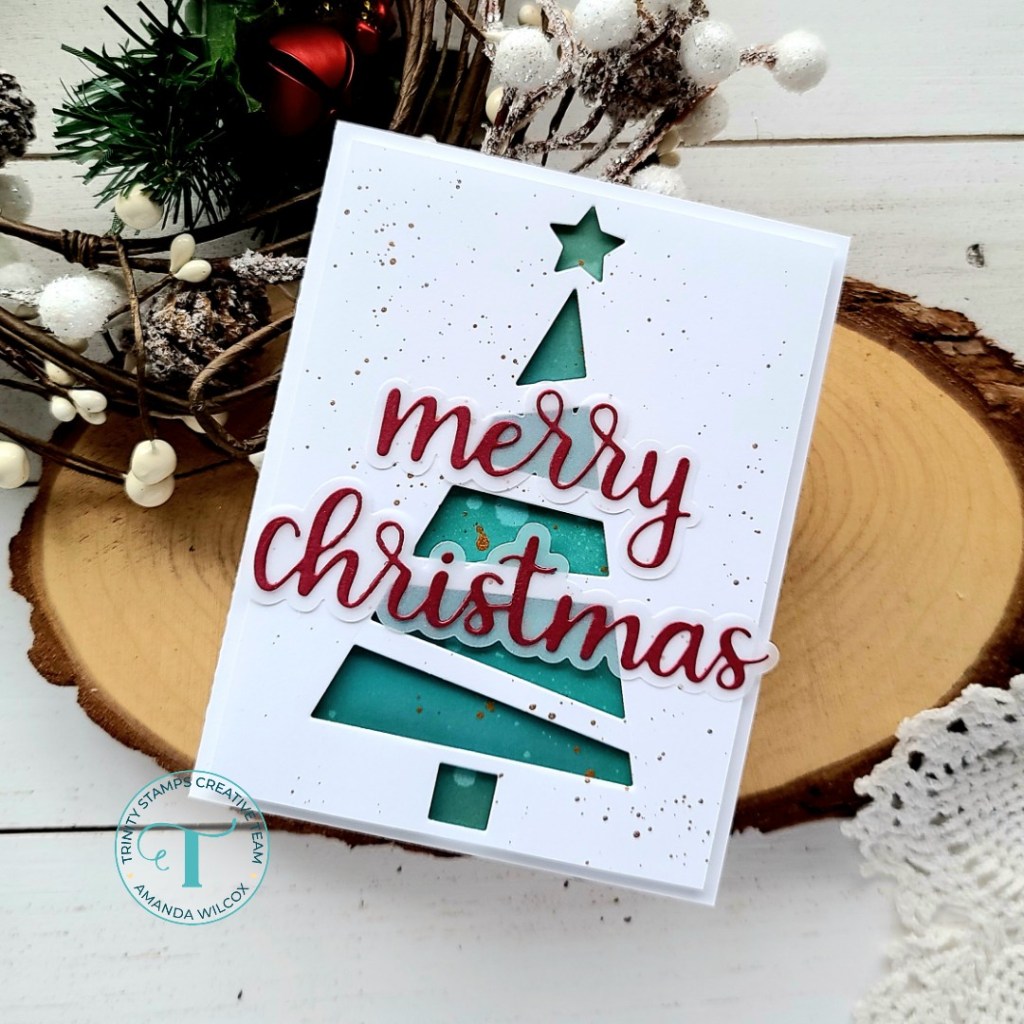
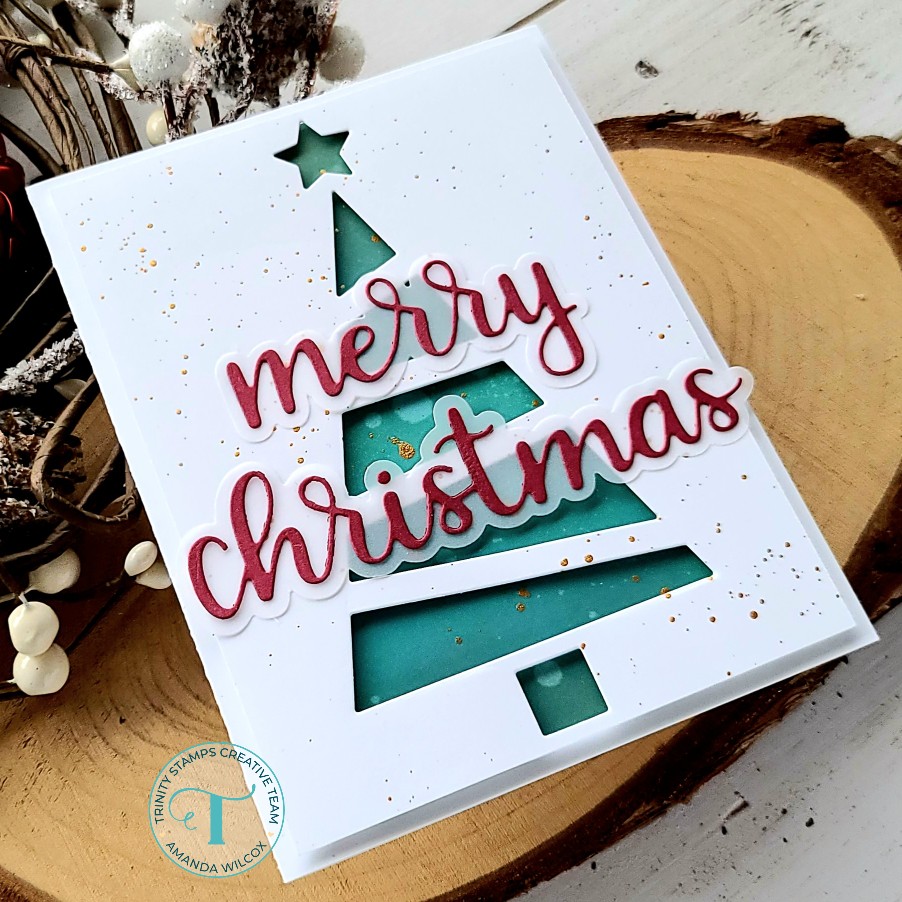
For this card, I die cut the Merry Christmas Script form red cardstock, lost the dot on the “i” and freaked out for a minute. I set it aside and proceeded with my card. Next, I used the coordinating dies for the Spring Circles set (I love this shape!) from plaid cardstock and light blue.

Moving on to the background before assembling every, I inked up a white panel with distress oxide ink in tumbled glass around the outside and salty ocean in the center so it gets a bit darker. I spritzed the panel with water and flicked pearl watercolor on it too.
For assembly, I added foam tape to the back of the blue panel and popped it up on a white card base, then I popped up the other elements with foam squares. I used liquid glue to adhere the Merry Christmas Script die cuts and then contemplated die cutting another dot when I remembered that I have the beautiful Pretty Pink Posh pearl collection! I pulled out the red pearls and glued one on instead!
For finishing touches on both of these cards, I used glossy accents, on parts like Santa’s boots and gloves, the snowman’s nose and hat. Then I added unicorn Stickles to Santa’s hat and finished things off with black glaze pen on both of their eyes.
Products used today:
Holiday Sign stamps and dies
Winter Scene die
Spring Circles dies
Merry Christmas Script dies
Lattice stencil
Cherry Red Pearls
3D foam tape
foam squares
glossy accents
unicorn Stickles
The links above are affiliate links. This helps fund my crafty adventures at no additional cost to you. Remember Pretty Pink Posh is having a sale on all things Christmas, so grab some new goodies and get holiday crafting!
I appreciate you sharing your time with me. Have a fabulous day!