Newton’s Nook – I Just PLANE Like You Easel Card

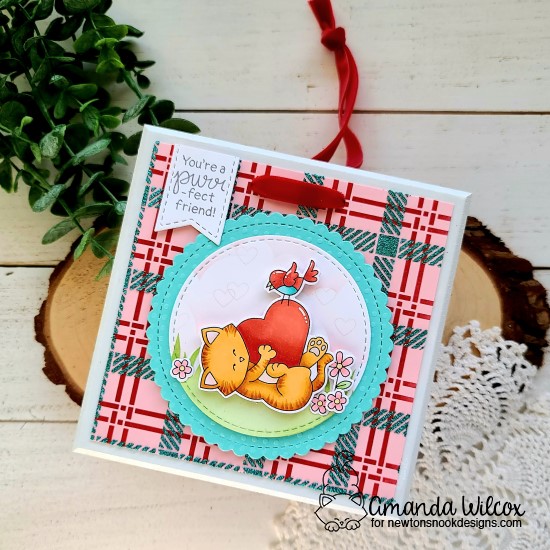
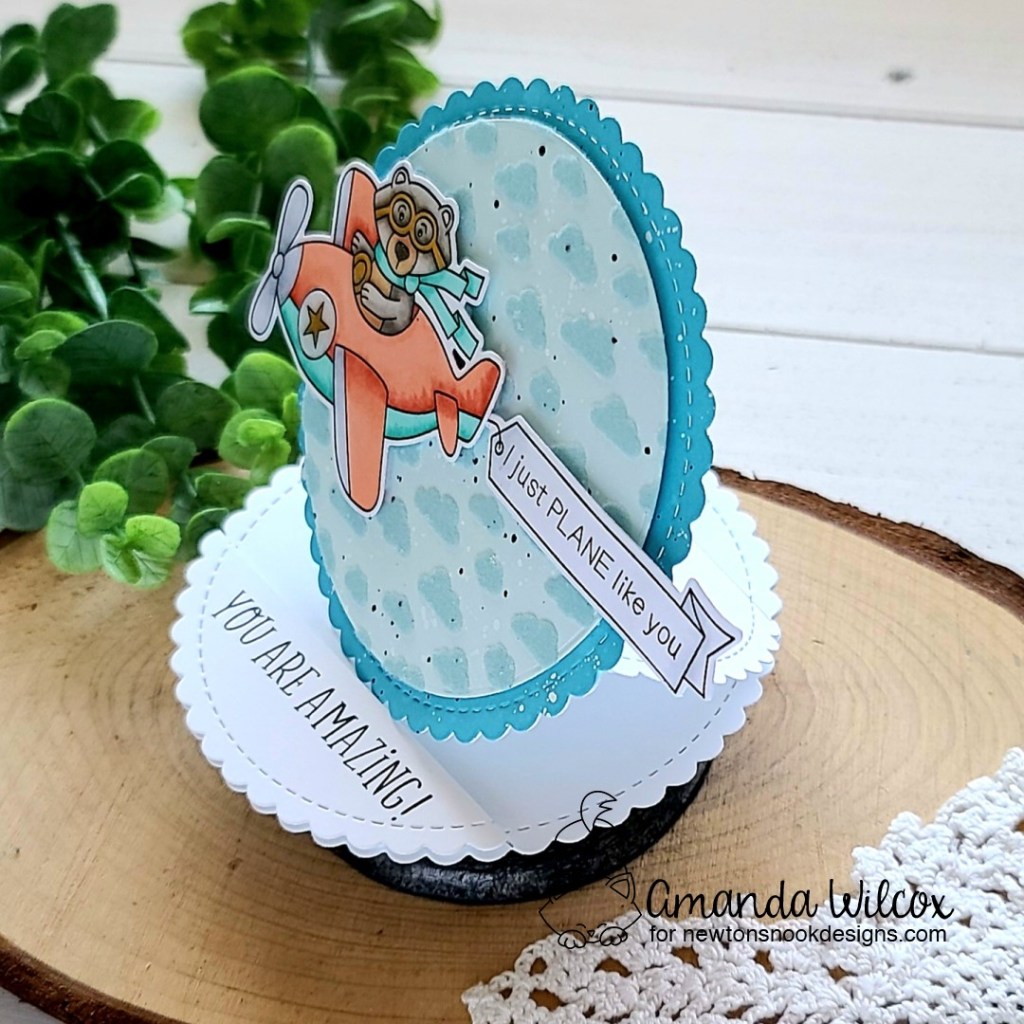
Hey friends! I’m up on the Newton’s Nook blog today sharing this really fun circle shaped easel card! I’ve never made one before and was inspired by my friend Leica who makes adorable ones of these from time to time. They always get me and I had no clue how easy and fun they were to create!

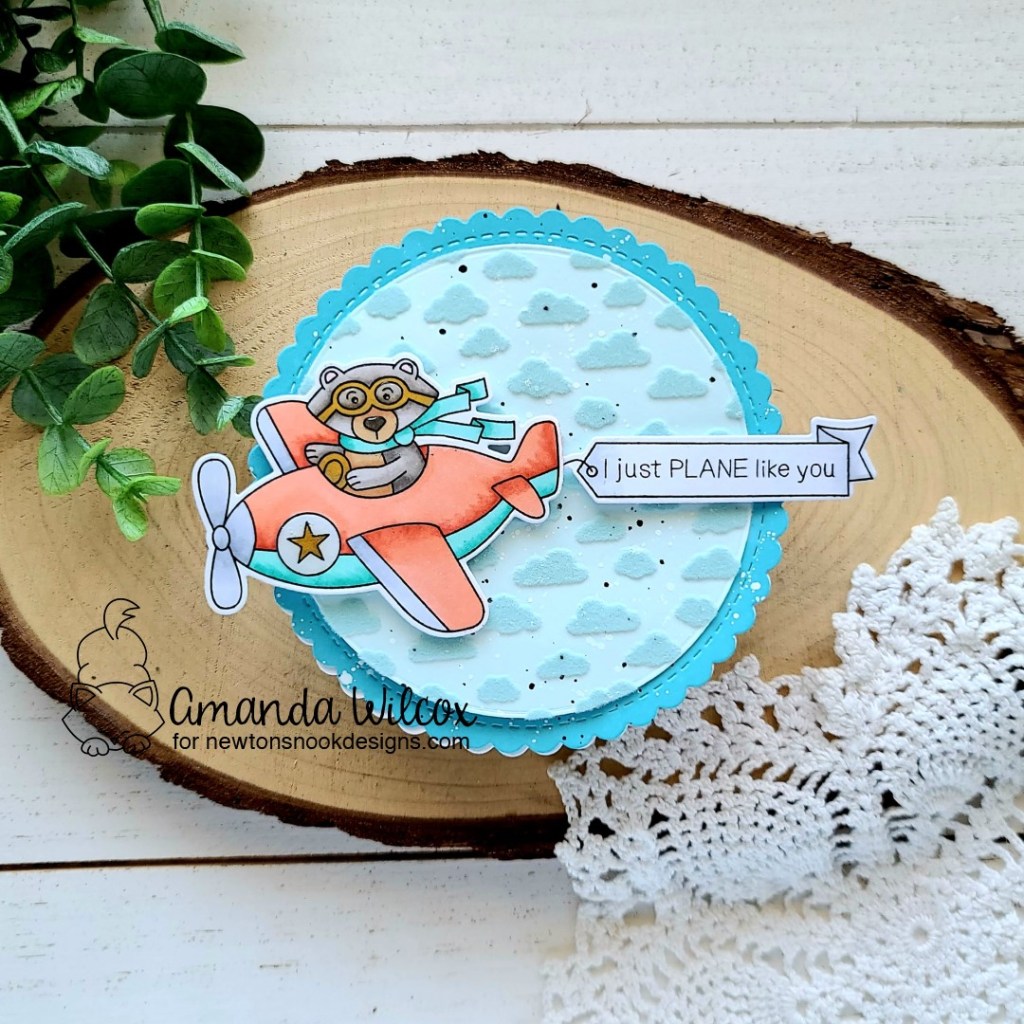
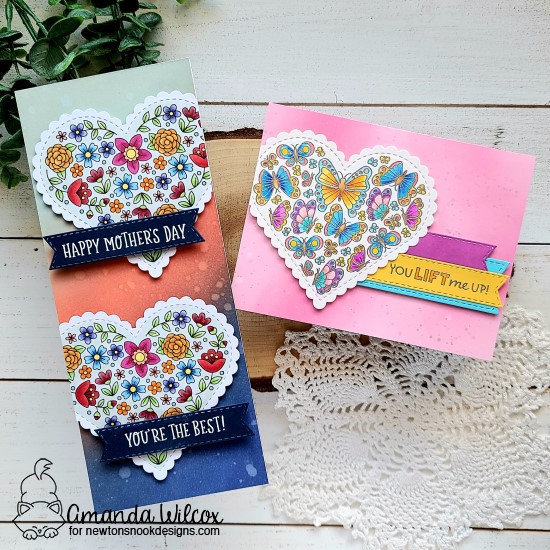
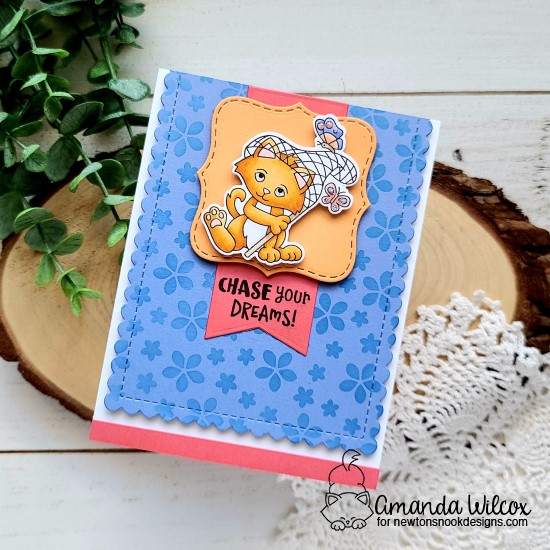
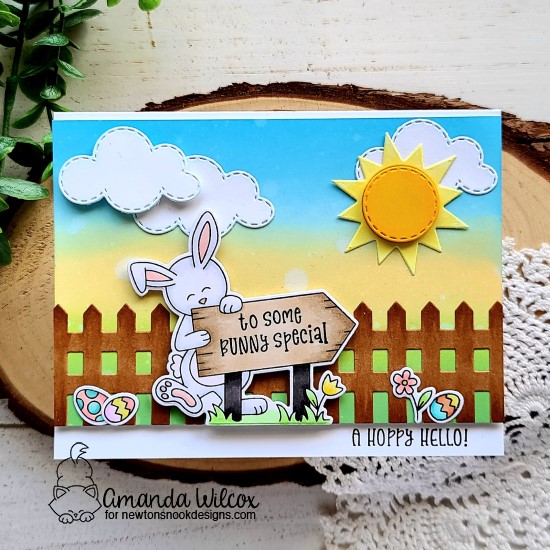
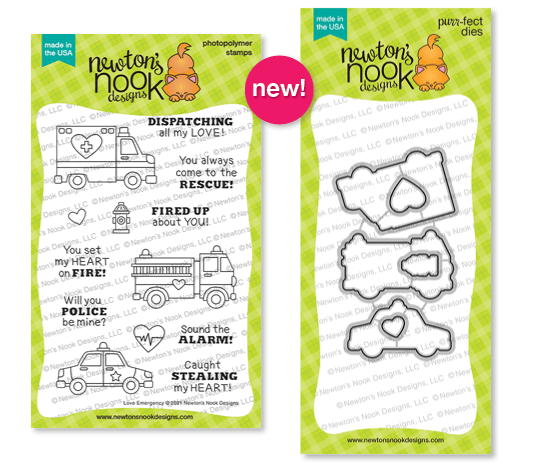
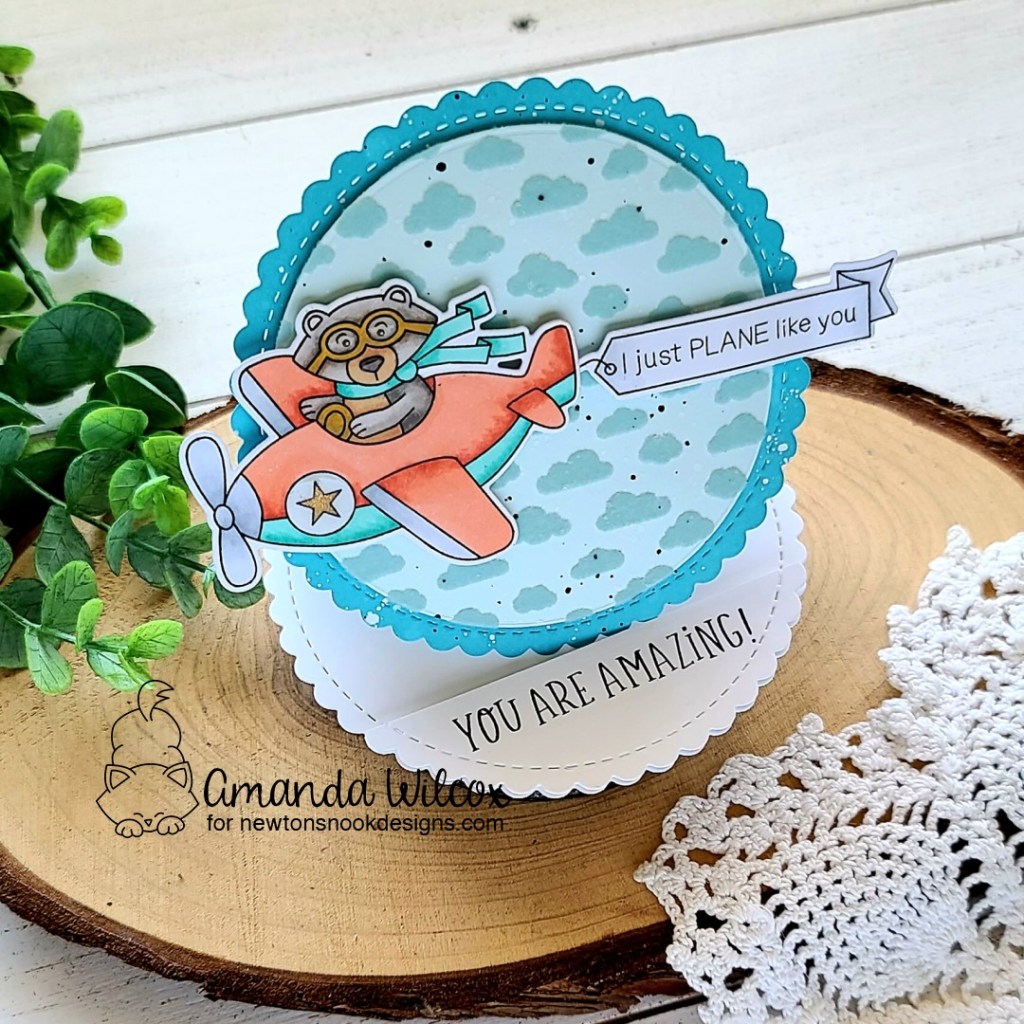
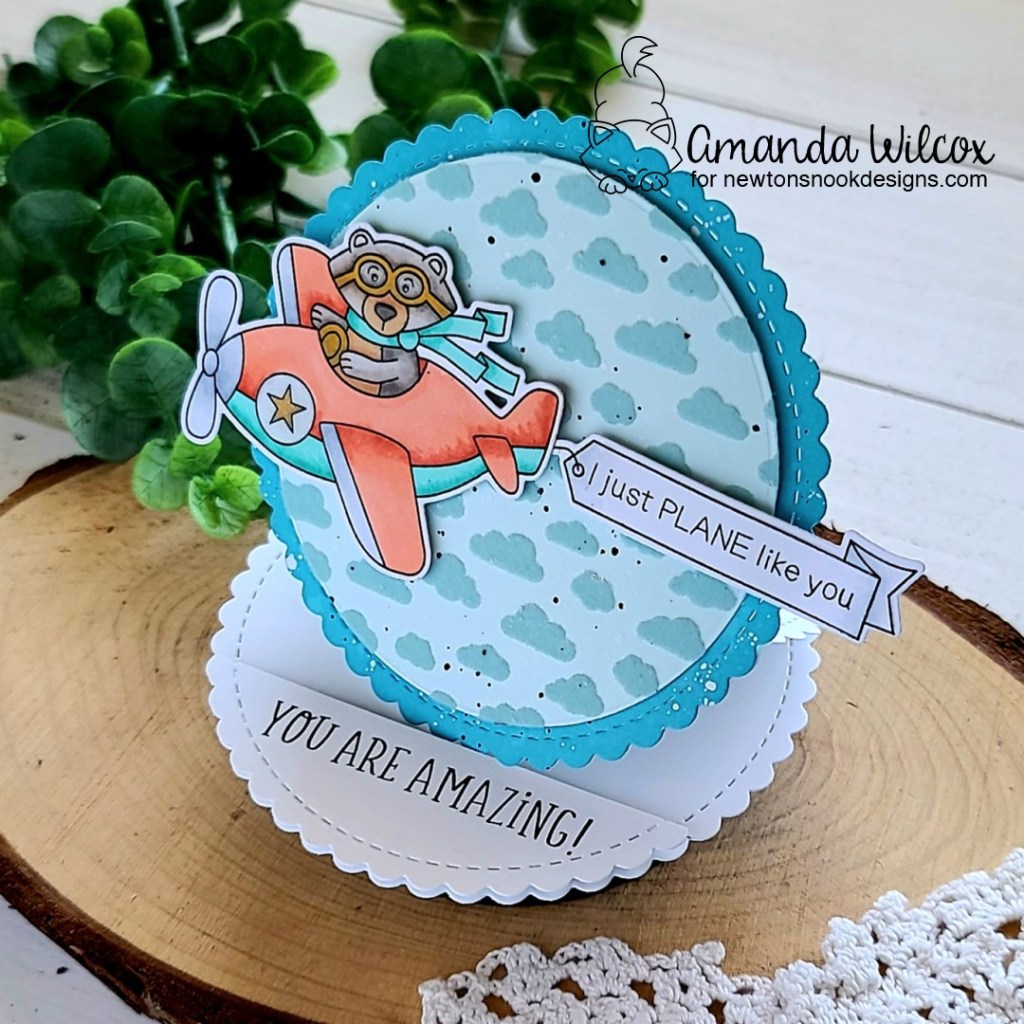
Here’s a look at the card front, flat like it would come out of the envelope. Isn’t it the cutest!?! I used Winston Takes Flight stamps and dies, along with the Circle Frames dies and the new Petite Clouds stencil.

I started by stamping and coloring the images with my copic markers. Then I used the coordinating dies to cut them out and glued the banner to the back of the airplane. I chose 2 lighter blue cardstocks and cut the darker one with the scalloped circle in the circle frames die set. Then I grabbed my Trinity Stamps embossed circle stack dies and cut the lighter one from a size that fit just barely inside the stitching on the scalloped circle. Then I taped it to the petite clouds stencil and spread transfer gel through it. I set it aside to dry while I created my easel pieces. This is also when I turn my laminator on so it’s heated up when I’m ready to use it.

For those, I die cut the scalloped circle 2 more times from white cardstock and then just one edge from a scrap. I took one of the full white circles and scored it at .5 inch from one side and 1.5 inches from the other. Then I folded it into a Z-fold. I glued the .5 inch flap to the other white panel and set it aside to dry. Next, I grabbed the scrap scalloped circle edge I cut and trimmed it straight across with my paper trimmer. Then I placed it in my MISTI and stamped a sentiment from the Floral Roundabout on it. I added foam squares to the back and adhered it to the bottom of the white circle I just glued the Z-fold to. This is the stopper for your easel.

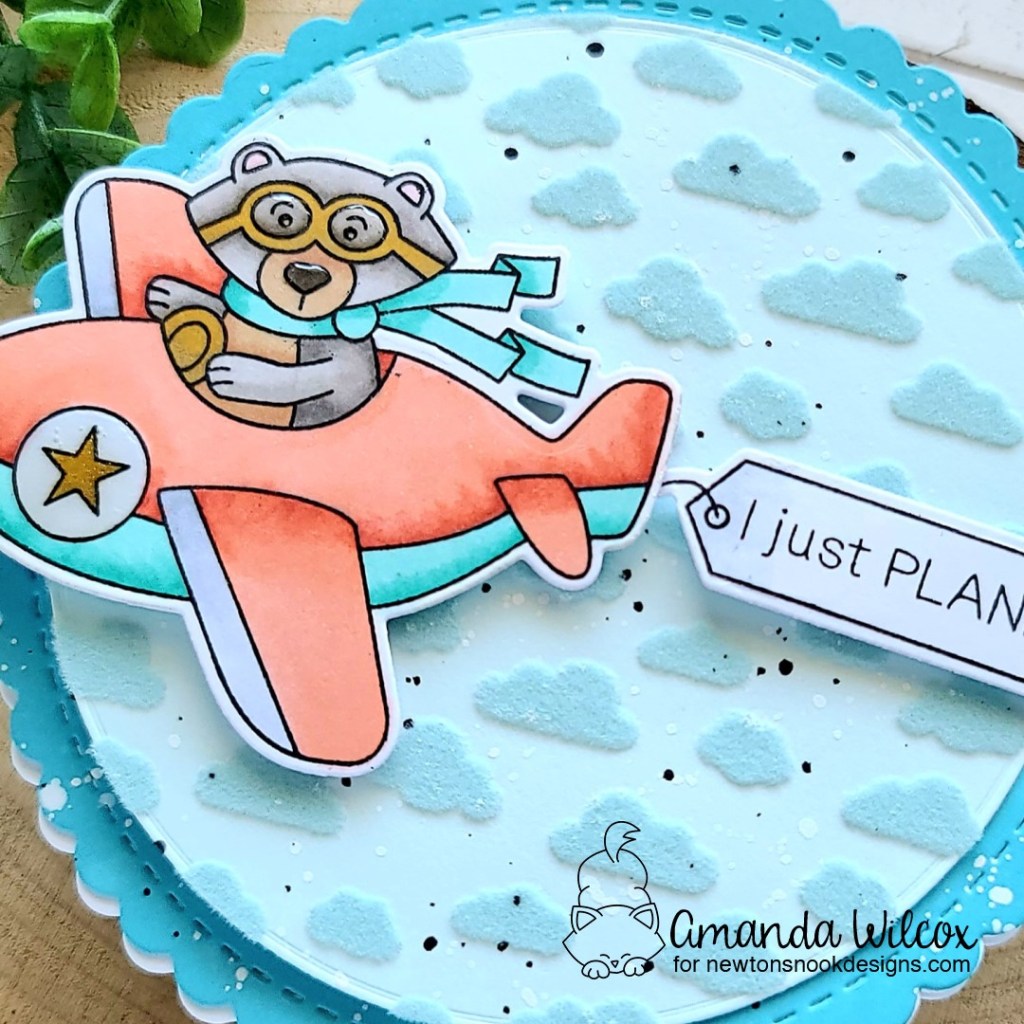
With my transfer gel dry, I ran the cloud panel through my laminator with blue decofoil flock! Soooo much fuzzy fun! I love flocking! Next, I took both blue panels and placed them in my splatter box and splattered watered down white and black acrylic paint on them for a little extra fun texture. Once they were dry, I adhered them together with foam tape. Then I glued this panel to the bottom half of the Z-fold circle attached to my card base.

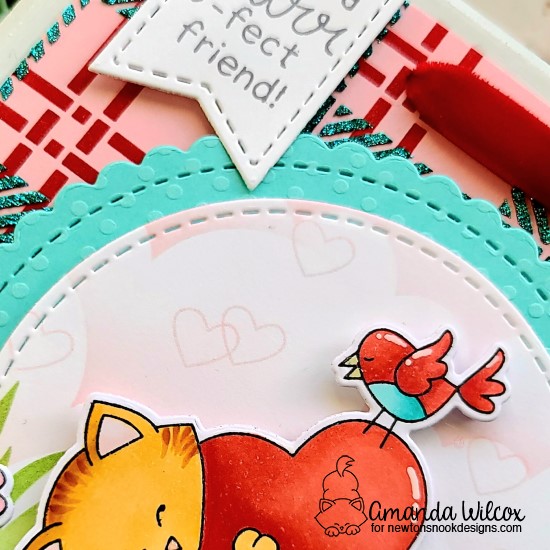
I added foam squares to the back of Winston and added him to the front of the card. Moving on to finishing touches, I added Wink of Stella glitter brush pen to the star on the plane. Then I added glossy accents over the top of the whole circle plus Winston’s goggles and nose. I also added some Wink of Stella to either end of the banner for a little shimmer in the light.

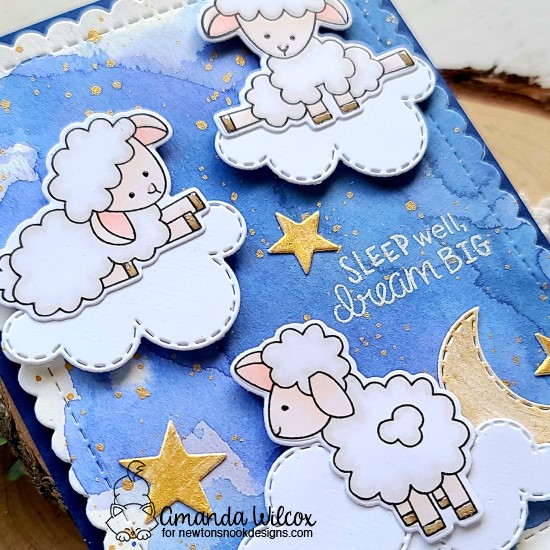
I just can’t get over how cute this is and how much fun it is going to be to give it to someone! I love that it can be displayed in such a fun way after they receive it more than anything!

Have you ever made and easel card? I’m totally hooked and can’t wait to make more of them now!

I appreciate you sharing your time with me. Have a fabulous day!

Newton’s Nook – April Release Day 4

Oh my goodness, we’re on the final day of reveals! I hope you have loved everything so far and are just as excited for today! This time we have new stamps to go with the heart frames collection and a new sentiment set too!

Heartfelt Butterflies

Heartfelt Blossoms

Mom and Dad

I absolutely love how wonderfully everything works together! The sentiments from all of today’s sets fit perfect within any of the Banner Trio dies and the hearts all work with the Heart Frames dies. They’re great staples to have in your craft stash for sure! I have 2 cards to share with you today using all of these goodies! So let’s not waste any more time!

For my first card, I stamped the Heartfelt Blooms twice and colored them with my copic markers. Then I die cut them with the Heart Frames set. I inked up a slimline panel measuring 3.5×8.5 inches with speckled egg, crackling campfire and cracked sapphire distress oxide inks. I spritzed the panel with a distress sprayer and blotted it dry. Then, I used liquid glue to adhere it to a card base and popped my hearts up on it with foam tape. I trimmed the excess off the edge with my scissors and moved on to sentiments.

Because the banner trio dies are solid, I die cut 2 banners from dark blue cardstock and then stamped and heat embossed a sentiment from Heartfelt Blooms and Mom and Dad on each one. I added foam squares to the back and popped them in place.

For my Heartfelt Butterflies card, I stamped and heat embossed the image in silver on watercolor paper. Then I used my Zig Clean Color Real Brush markers to watercolor them all. This was super relaxing and fun to do! Next, I inked up an A2 size panel with spun sugar and picked raspberry distress oxide inks. I spritzed it with water and flicked some watered down ink on the panel. Then I went back and flicked pearl watercolor over the whole thing too. I thought this played really well with the silver heat embossing on the butteflies.

Foy my sentiment, I die cut 2 banners from Banner Trio and one from Frames and Flags from yellow, purple and blue cardstock. I stamped and heat embossed a sentiment on the yellow one and colored the inside of the open letters with a yellow marker to help them pop. I arranged them how I wanted and glued them to the back of the heart. Then I added foam squares to the back of the heart and flags and placed them on the inked panel. Finally, I used liquid glue to adhere the whole panel to a white card base.

Would you like to win the “Heartfelt Butterflies” or the “Heartfelt Blooms” Stamp Set? We will choose ONE lucky winner for each stamp set!

Here’s how to win: Comment on the NND blog and Design Team blogs (see list below)! Thewinner will be chosen at random from the collective reveal posts. Make sure to check out each of their blogs and comment for your chance to win. You will not know which blog has been chosen so the more you comment on the better your chances are of winning! You have until Thursday April 22nd at 9pm ET to comment  — winners will be announced on the blog post on Friday, April 23rd. 

Check out all the awesome Design Team Blogs below to enter:

Newton’s Nook Designs
Ellen Haxelmans
Tina Herbeck
Larissa Heskett
Samantha Mann
Zsofia Molnar
Maria Russell
Farhana Sarker
Tatiana Trafimovich
Samantha VanArnhem
Amanda Wilcox

Newton’s Nook – April Release Day 3

I’m super excited we’re already to day 3 of the Newton’s Nook release reveals! Yesterday we hit all you kitten lovers and today we round things off with puppies!!! Let’s jump in!

Puppy Friends

These guys are just too cute! So cute, that I had to make a slimline card and fit multiple of them on it! And I love all those fabulous sentiments too! They’re punny and perfect!

This time I started my card with a layout in mind so I did the messy stuff that requires drying time first. I took the Slimline Masking Squares stencil and inked it up with cracked pistachio distress oxide ink. I splattered it with water, then I lined up the frame die from Slimline Frames and Windows and cut it out. I saved the frame from another card and took the squares from the windows. I taped the squares to the back of the new Petite Clouds stencil and spread Thermoweb Transfer Gel Blanco on them all. I removed the stencil and set them aside to dry.

I stamped and colored the sweet puppies from Puppy Friends with my copic markers. Then I used the coordinating dies to cut them out. I knew I wanted to pop them up so I also added foam squares and then set them aside. Next, I die cut the scalloped panel from Slimline Frames and Portholes and inked it up with abandoned coral distress oxide and splattered it with water and flicked it with watered down ink too. This gives great texture!

Now that the transfer gel was dry, I ran the squares through my laminator with Thermoweb iridescent decofoil. Aren’t those clouds soooo super awesome?!? I am in love with them! I glued them down on the scalloped panel with liquid glue and popped my puppies in place. For the sentiment, I die cut the smallest shape from the Framework die set and heat embossed a sentiment on it. It ls popped up with foam squares just like the puppies.

Last, I popped the scalloped panel up on a white card base with foam tape and moved on to simple finishing touches. I added glossy accents to puppy noses and eyes, dots on the bandana, tag on the collar and a little something on all their critters too!

Would you like to win the “Puppy Friends” Stamp Set? This stamp set will be given away to ONE lucky winner!

Here’s how to win: Comment on the NND blog and Design Team blogs (see list below)! Thewinner will be chosen at random from the collective reveal posts. Make sure to check out each of their blogs and comment for your chance to win. You will not know which blog has been chosen so the more you comment on the better your chances are of winning! You have until Thursday April 22nd at 9pm ET to comment  — winners will be announced on the blog post on Friday, April 23rd. 

Check out all the awesome Design Team Blogs below to enter:

Newton’s Nook Designs
Ellen Haxelmans
Tina Herbeck
Larissa Heskett
Samantha Mann
Zsofia Molnar
Maria Russell
Farhana Sarker
Tatiana Trafimovich
Samantha VanArnhem
Amanda Wilcox

Newton’s Nook – April Release Day 2

Welcome to day 2 of release reveals for Newton’s Nook’s April release! Today we have a SUPER ADORABLE stamp and die set to share with you!

Captivated Kittens

I can’t get over how adorable these playful kittens are with their different buggy critter friends!

For today’s card, I started by stamping and coloring an image from the set with my copic markers. Then I used the coordinating dies to cut it out. Next, I cut a blue panel with the Frames & Flags scalloped rectangle die and inked up the petite flowers stencil for a tone-on-tone look. I trimmed the top off and added foam tape to the back. Lining it up with the top of my white card base, I adhered it down.

Next, I die cut the label shape from Frames Squared from orange and a flag from Frames & Flags from melon cardstock. I stamped my sentiment at the bottom of the flag, added foam squares to the label shape and adhered them together. Then I adhered it to the top center of my card front with liquid glue. Finally, I popped the kitty up with foam squares in the middle of the label shape.

For finishing touches on this cute card, I added a strip of the same melon cardstock to the very bottom edge, added glossy accents to the kitty’s eyes, nose and toe beans, and finally, some unicorn Stickles to the butterflies’ wings.

Would you like to win the “Captivated Kittens” Stamp Set? This stamp set will be given away to ONE lucky winner!

Here’s how to win: Comment on the NND blog and Design Team blogs (see list below)! Thewinner will be chosen at random from the collective reveal posts. Make sure to check out each of their blogs and comment for your chance to win. You will not know which blog has been chosen so the more you comment on the better your chances are of winning! You have until Thursday April 22nd at 9pm ET to comment  — winners will be announced on the blog post on Friday, April 23rd. 

Check out all the awesome Design Team Blogs below to enter:

Newton’s Nook Designs
Ellen Haxelmans
Tina Herbeck
Larissa Heskett
Samantha Mann
Zsofia Molnar
Maria Russell
Farhana Sarker
Tatiana Trafimovich
Samantha VanArnhem
Amanda Wilcox

Newton’s Nook – February Release Day 4

I can’t believe we’re on the final day of Newton’s Nook February Release reveals. Let’s go out with a bang and share 2 totally wonderful stamp and die sets today! Beautiful and adorable are totally covered!

Newton’s Rainy Day Trio

Daffodils

When I saw these cute kitties I just saw them singing in the rain and couldn’t help myself…

I started by stamping and coloring the image from Newton’s Rainy Day Trio with my copics, then cut it out with the coordinating dies. I also stamped multiple sets of raindrops and cut those out too. I die cut the largest scalloped rectangle from Frames & Flags out of white, then cut the center out with the rounded rectangle in the same set. Taking that rounded rectangle, I used the music stencil and some Glitter Glitz gel for a tone-on-tone musical wonder in the background. I die cut a flag, stamped my sentiment on it and moved on to assembling everything.

I added foam strips to the back of the frame I created earlier and adhered it to a white card base. I used liquid glue and adhered the stenciled panel inside that and when I started arranging images I realized I wanted a ground for my kitties. So I die cut another rounded rectangle from vellum and cut it off with the land borders die. Hiding liquid glue behind where the kitties would be, I adhered the grass down before popping the kitties up with foam tape. Then I used liquid glue to attach the raindrops and finally foam squares to slip that sentiment banner in place. For finishing touches, I added glossy accents to the raindrops, kitty noses, umbrella accents and coat buttons.

Up next, I just had to watercolor those beautiful daffodils so I started my stamping and heat embossing them in white on Bristol smooth cardstock. Then I used Zig Clean Color Real Brush markers and a water pen to color them in. I used the coordinating dies to cut them out.

I die cut the scalloped square from Frames Squared and taped off the edge before inking up the basketweave stencil with blue ink. I adhered my images with foam squares. For my sentiment I die cut a blue label shape from the same die set and heat embossed it in white. I wanted the background to have a little texture so I cut a yellow A2 size panel and just inked the edges with scattered straw distress oxide ink. The label is adhered to the square with liquid glue and the whole thing is popped up with foam tape.

Would you like to win the “Newton’s Rainy Day Trio” or the “Daffodils” Stamp Set? We will choose ONE lucky winner for each stamp set!

Here’s how to win: Comment on the NND blog and Design Team blogs (see list below)! The winner will be chosen at random from the collective reveal posts. Make sure to check out each of their blogs and comment for your chance to win. You will not know which blog has been chosen so the more you comment on the better your chances are of winning! You have until Thursday February 18th at 9pm EST to comment  — winners will be announced on the blog post on Friday, February 19th. 

Check out all the awesome Design Team Blogs below to enter:

Newton’s Nook Designs
Ellen Haxelmans
Tina Herbeck
Larissa Heskett
Samantha Mann
Zsofia Molnar
Maria Russell
Farhana Sarker
Tatiana Trafimovich
Samantha VanArnhem
Amanda Wilcox

Newton’s Nook – February Release Day 3

Moving along quite quickly this week, we’re already on day 3 of the Newton’s Nook February Release reveals! I literally squealed with delight when I saw today’s set. It’s just the cutest. It also caused me to place an order immediatey to fill a couple holes I had. Hehehe!

Baa

This is what I’m talking about…filling in holes. I couldn’t believe I didn’t have all of this cuteness yet. Well, it was quickly rectified and you’ll be enjoying some fun farm themed goodness from me in the near future!

I didn’t go the farm route today though. These little sheep were speaking to me in the dreamy, counting sense instead.

So, I actually started this card by watercoloring with distress oxides on watercolor paper. I used chipped sapphire, blueprint sketch and salty ocean, drying in between each layer. Then I flicked gold watercolor on the whole panel. Once the whole panel was completely dry, I die cut it with the scalloped rectangle in Frames & Flags. Then I stamped and colored my sheep from Baa and used the coordinating dies to cut them out.

I pulled out the sky scene builder dies and cut some clouds, stars and a moon. I used some gold paint from my stash to color the stars and moon and then used liquid glue to attach clouds and sheet together. I laid everything out as a guide and decided where to stamp and heat emboss my sentiment.

After that was finished I added foam tape to the back of the watercolor panel and added it to a dark blue A2 sized panel. Then I used liquid glue to adhere that to a card base. Finally, I added all of my images with a combination of liquid glue and foam squares.

For finishing touches on this card, I added glossy accents to the sheep hooves and noses and left it alone. There is a lot of texture and interest from the layers and different watercolor. I just love it!

Would you like to win the “Baa”  Stamp Set? This stamp set will be given away to ONE lucky winner!

Here’s how to win: Comment on the NND blog and Design Team blogs (see list below)! The winner will be chosen at random from the collective reveal posts. Make sure to check out each of their blogs and comment for your chance to win. You will not know which blog has been chosen so the more you comment on the better your chances are of winning! You have until Thursday February 18th at 9pm EST to comment  — winners will be announced on the blog post on Friday, February 19th. 

Check out all the awesome Design Team Blogs below to enter:

Newton’s Nook Designs
Ellen Haxelmans
Tina Herbeck
Larissa Heskett
Samantha Mann
Zsofia Molnar
Maria Russell
Farhana Sarker
Tatiana Trafimovich
Samantha VanArnhem
Amanda Wilcox

Newton’s Nook – February Release Day 2

Oh, I can hardly stand the absolutely adorable things we have to share with you for day 2 of Newton’s Nook February Release reveals! They are quickly becoming some of my favorites. I want to put bunnies on everything! Let’s get started!

Hoppy Greetings

Hare Mail

I have 2 more adorable cards to share with you today before we get to the giveaway details. I hope you enjoy them!

I had this little scene in my head as soon as I saw this sweet bunny so I started stamping and color straight away with my copic markers. Then I used the coordinating dies to cut everything out. Working on the background, I blended twisted citron, scattered straw and salty ocean distress oxide inks on a panel and spritzed them with water. I trimmed the panel down to 5.5×4 inches and added foam tape to the back.

I pulled out the sky scene builder dies and cut some clouds and a sun. I used copic markers to color them. Then I die cut a fence border out of kraft cardstock and added shading with copic markers as well. I used liquid glue to adhere all of this to my ink blended panel and moved on to attach my images with a combination of foam squares and liquid glue.

I adhered the panel to a white card base and popped it in my MISTI to stamp a sentiment on the bottom. For finishing touches on this sweet card, I added Wink of Stella glitter brush pen to the sky and glossy accents to the bunny’s nose and feet, flower centers and parts of the Easter eggs.

Isn’t this Hare Mail image just the absolute cutest? I’m always obsessed with the mini sets. They’re so fun and I love getting extra creative with ways to use them. Today, I stamped the postmark image all over a gray panel and heat embossed it in silver. Then I die cut the panel from the Framework die and moved on to my cute bunnies! I stamped the image 3 times and colored them with my copic markers, using the coordinating dies to cut them all out. I stamped the sentiment and trimmed it into a strip. Adding foam squares to the back of everything I popped it in place. Then I put foam tape on the back of the panel and added it to the front of a white card base.

For finishing touches on this card, I just added glossy accents to the bunny noses. I love the shine the embossing powder gives the background.

Would you like to win the “Hoppy Greetings” Stamp Set? This stamp set will be given away to ONE lucky winner!

Here’s how to win: Comment on the NND blog and Design Team blogs (see list below)! The winner will be chosen at random from the collective reveal posts. Make sure to check out each of their blogs and comment for your chance to win. You will not know which blog has been chosen so the more you comment on the better your chances are of winning! You have until Thursday February 18th at 9pm EST to comment  — winners will be announced on the blog post on Friday, February 19th. 

Check out all the awesome Design Team Blogs below to enter:

Newton’s Nook Designs
Ellen Haxelmans
Tina Herbeck
Larissa Heskett
Samantha Mann
Zsofia Molnar
Maria Russell
Farhana Sarker
Tatiana Trafimovich
Samantha VanArnhem
Amanda Wilcox

Newton’s Nook – Designer’s Nook Sneak Peek

Hey friends! Tomorrow is another Newton’s Nook Designer’s Nook newsletter and it’s my turn again! I’ve got some really awesome fun included in this one and it has nothing to do with a card!

I hope you’ll head over and subscribe if you’re not already so you don’t miss out! It’s super adorable! You won’t regret it!

Click HERE to subscribe to the Newton’s Nook emails. Be sure to click Designer’s Nook so you don’t miss that extra weekly inspiration to your email inbox!

I appreciate you sharing your time with me. Have a fabulous day!

Newton’s Nook – January Release Day 4

It’s the final day of reveals for the Newton’s Nook January Release and it’s packed with one more adorable dose of amazing! I hope you love it and have your list ready for release day tomorrow!

Newton’s Mug

Love Cafe

I definitely had a rainbow theme going on this release because here it is again today. I have two fun cards to share with you, using each stamp set we’ve revealed today.

I had a rainbow idea for Love Cafe as soon as I stamped the first image, so I just went back immediately and stamped it two more times. I colored the images with my copics and used the coordinating dies to cut them out.

Then I used the framework die to create a gray panel and inked it up with the mugs stencil in gray ink. I cut another framework panel from white and trimmed it off. Using my images as a guide I stamped one of the sentiments from the set and adhered the framework panels together. I stamped some stripes on a teal panel and added foam tape to everything. I love dimension and shine! Needless to say, I finished things off with some glossy accents to the mug hearts and unicorn Stickles to the steam and heart on the sentiment.

With Newton’s Mug, I decided to add the sentiment to the mug after I colored it with my copics. I used the coordinating dies to cut it out and set it aside to decide on my background. I love making a mess in the craft room so I did a little ink smooshing with Tombow brush pens and die cut the panel from the Frame and Flags scalloped rectangle. I popped the panel up with foam tape and also popped Newton up with foam squares. For finishing touches, I added glossy accents to his now and scattered some rainbow pearls in the background.

Would you like to win the “Newton’s Mug” or the “Love Café” Stamp Set? We will choose ONE lucky winner for each stamp set!

Here’s how to win: Comment on the NND blog and Design Team blogs (see list below)! Thewinner will be chosen at random from the collective reveal posts. Make sure to check out each of their blogs and comment for your chance to win. You will not know which blog has been chosen so the more you comment on the better your chances are of winning! You have until Thursday January 21st at 9pm EST to comment  — winners will be announced on the blog post on Friday, January 22nd. 

Check out all the awesome Design Team Blogs below to enter:

Newton’s Nook Designs
Ellen Haxelmans
Tina Herbeck
Larissa Heskett
Samantha Mann
Zsofia Molnar
Maria Russell
Farhana Sarker
Tatiana Trafimovich
Samantha VanArnhem
Amanda Wilcox

Newton’s Nook – January Release Day 3

This week is just chugging along! We’re already to day 3 of the Newton’s Nook January Release and today we are sharing another fabulous stamp and die set with you!

Love Emergency

As usual, I couldn’t decide which images to use because I just love them all so I didn’t. I made a card and a coordinating tag to share with you instead!

For today’s projects, I pulled out the square masking stencil and used it a little differently. I lined up the etched lines with my white panel and inked up two squares. Then I shifted the stencil to the opposite corner and inked them up with the opposite colors giving a cool overlap in the center.

For my card, I trimmed the stenciled panel down to 4×5.25 and added foam tape to the back. I die cut a couple of speech bubbles and stamped sentiments on them that coordinated with the image I was using. I added foam squares to the back of everything and popped them in place. Last, I added glossy accents to the card wheels, lights and accent images too. Then I finished things off with a couple of white clay hearts.

I created the tag the same way as the card, just adding a black hole reinforcer to the top, some silver ribbon, and tied it with black and white baker’s twine.

Would you like to win the “Love Emergency” Stamp Set? This stamp set will be given away to ONE lucky winner!

Here’s how to win: Comment on the NND blog and Design Team blogs (see list below)! Thewinner will be chosen at random from the collective reveal posts. Make sure to check out each of their blogs and comment for your chance to win. You will not know which blog has been chosen so the more you comment on the better your chances are of winning! You have until Thursday January 21st at 9pm EST to comment  — winners will be announced on the blog post on Friday, January 22nd. 

Check out all the awesome Design Team Blogs below to enter:

Newton’s Nook Designs
Ellen Haxelmans
Tina Herbeck
Larissa Heskett
Samantha Mann
Zsofia Molnar
Maria Russell
Farhana Sarker
Tatiana Trafimovich
Samantha VanArnhem
Amanda Wilcox