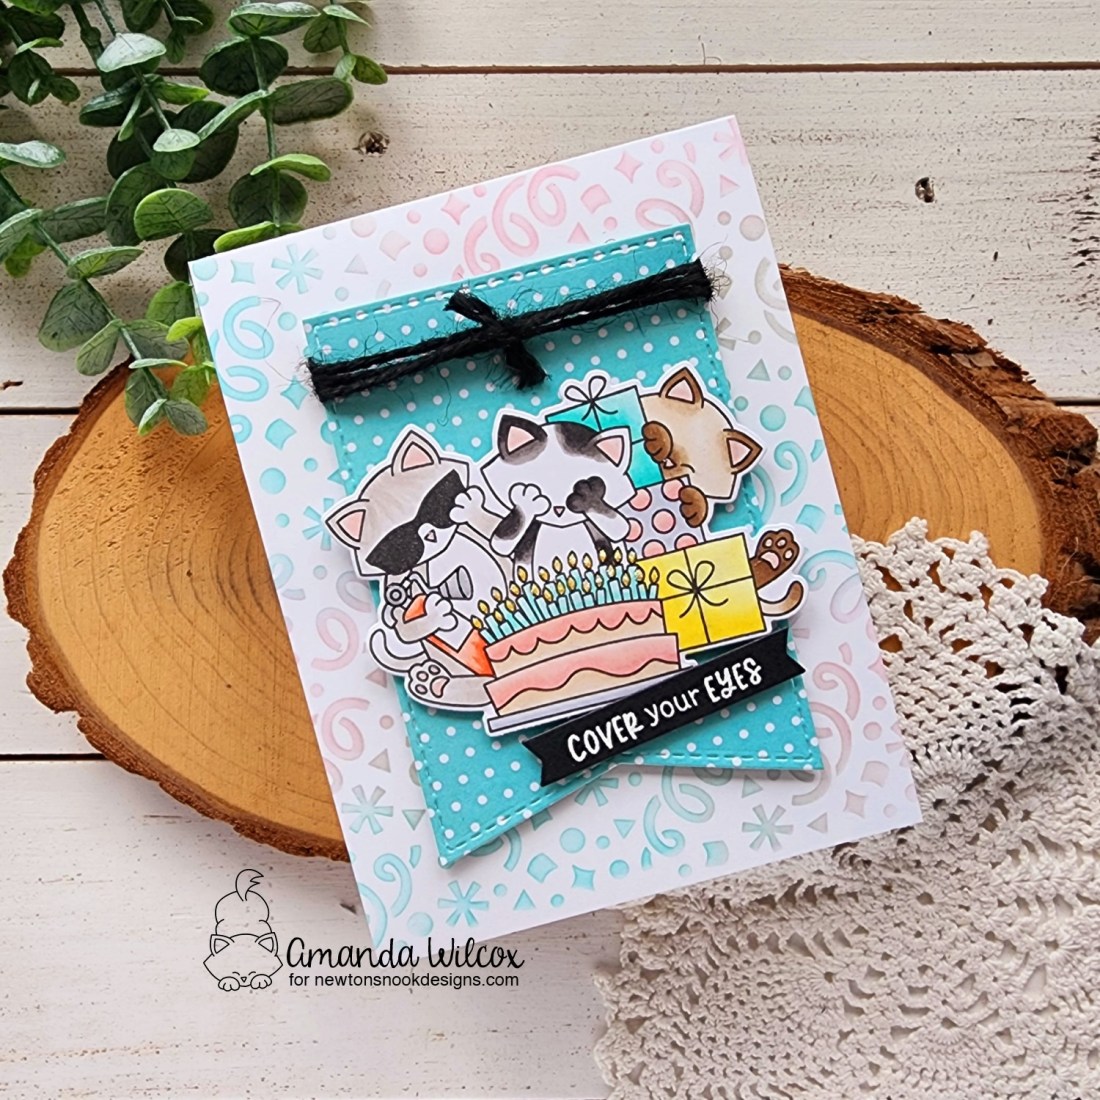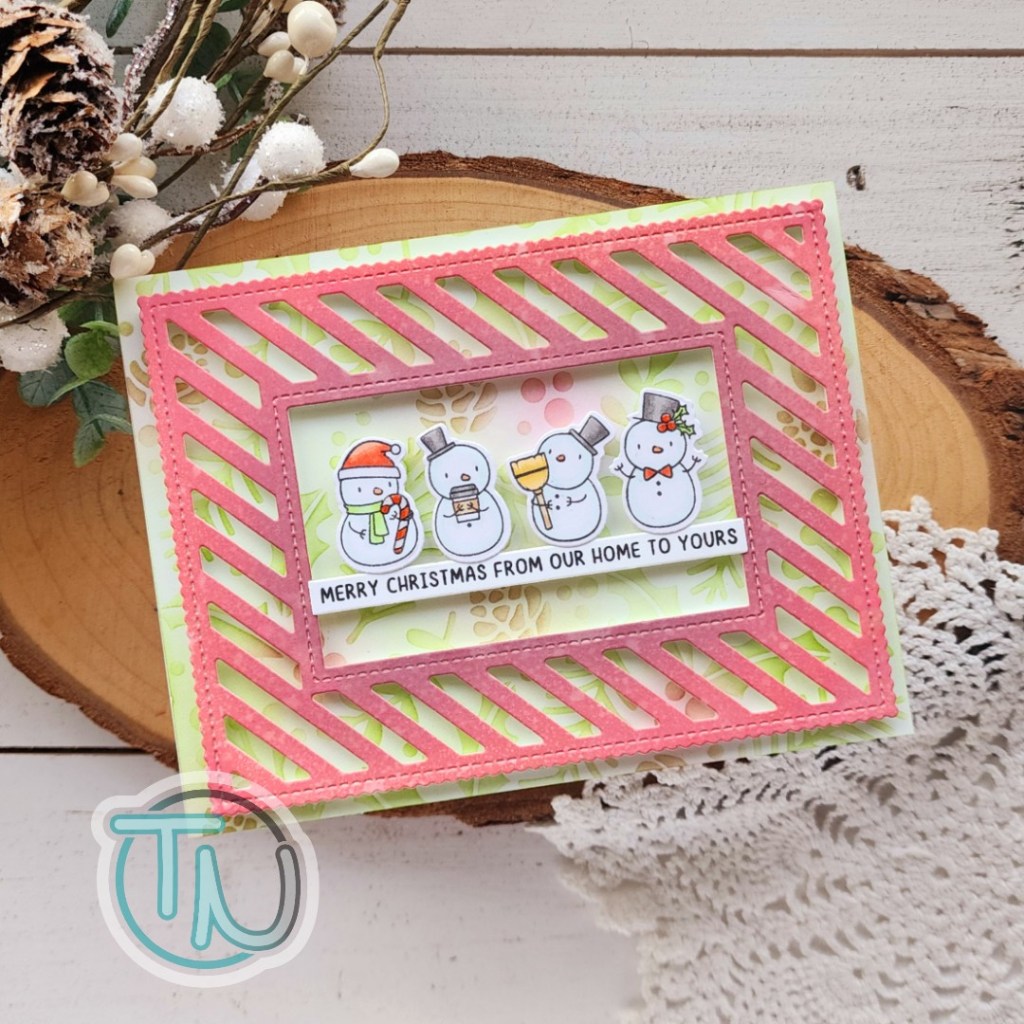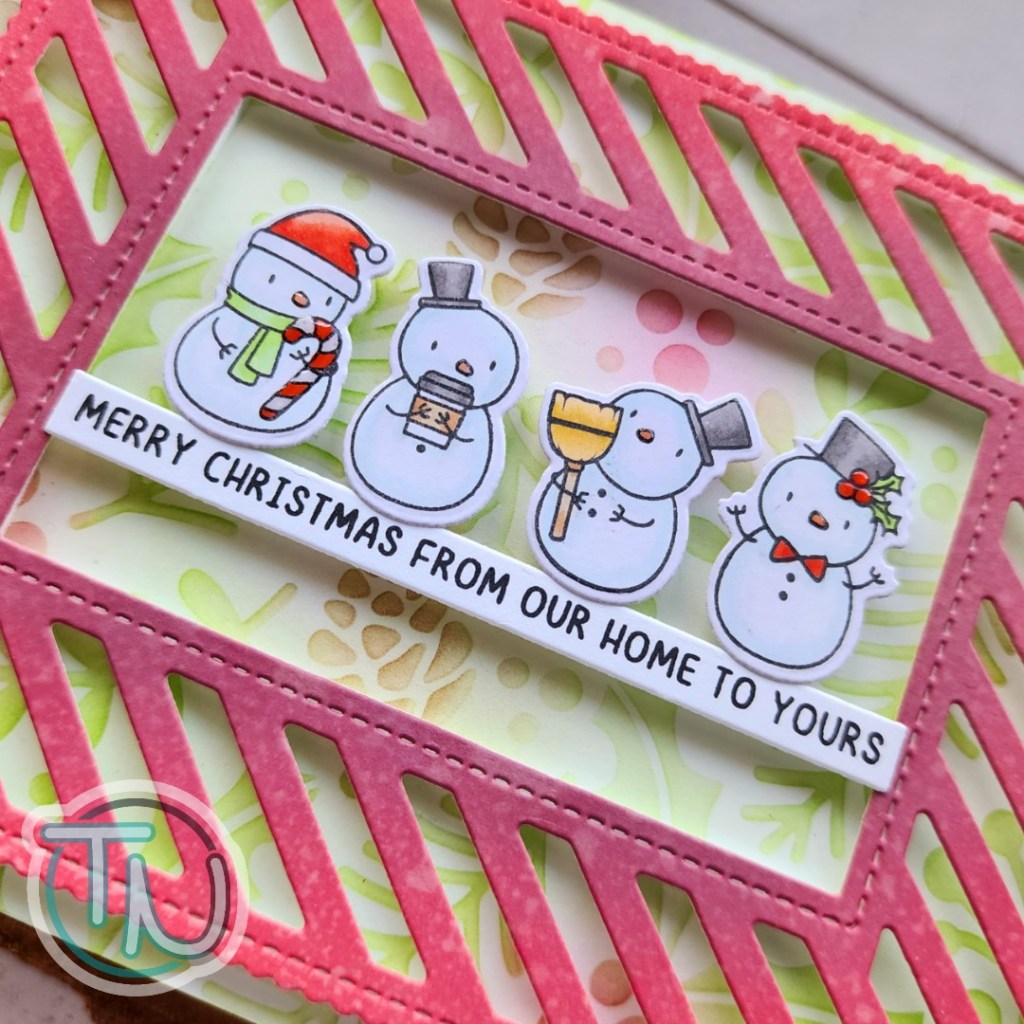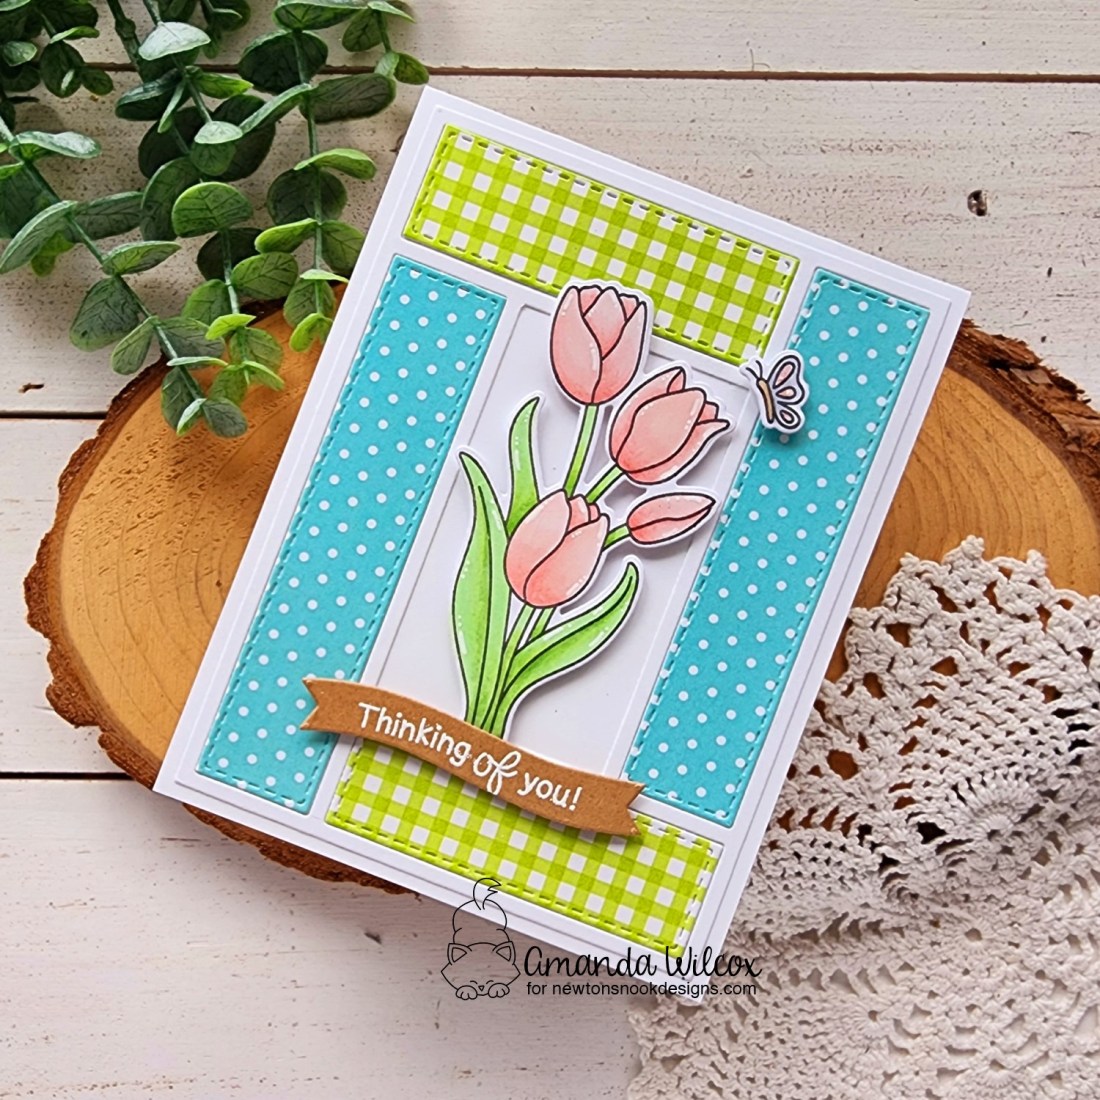
Moving along with the new products from the Newton’s Nook March release, I have a card to share using the new A2 Card Layout die. This is going to be a super fun staple in your crafting back pocket for sure!

Today I cut the A2 Card Layout three times – white cardstock and two patterns from the Pastel Basics paper pad. I kept the pieces from each that I didn’t use so I have them for later on. I love that about dies like these. Those pieces always come in handy.

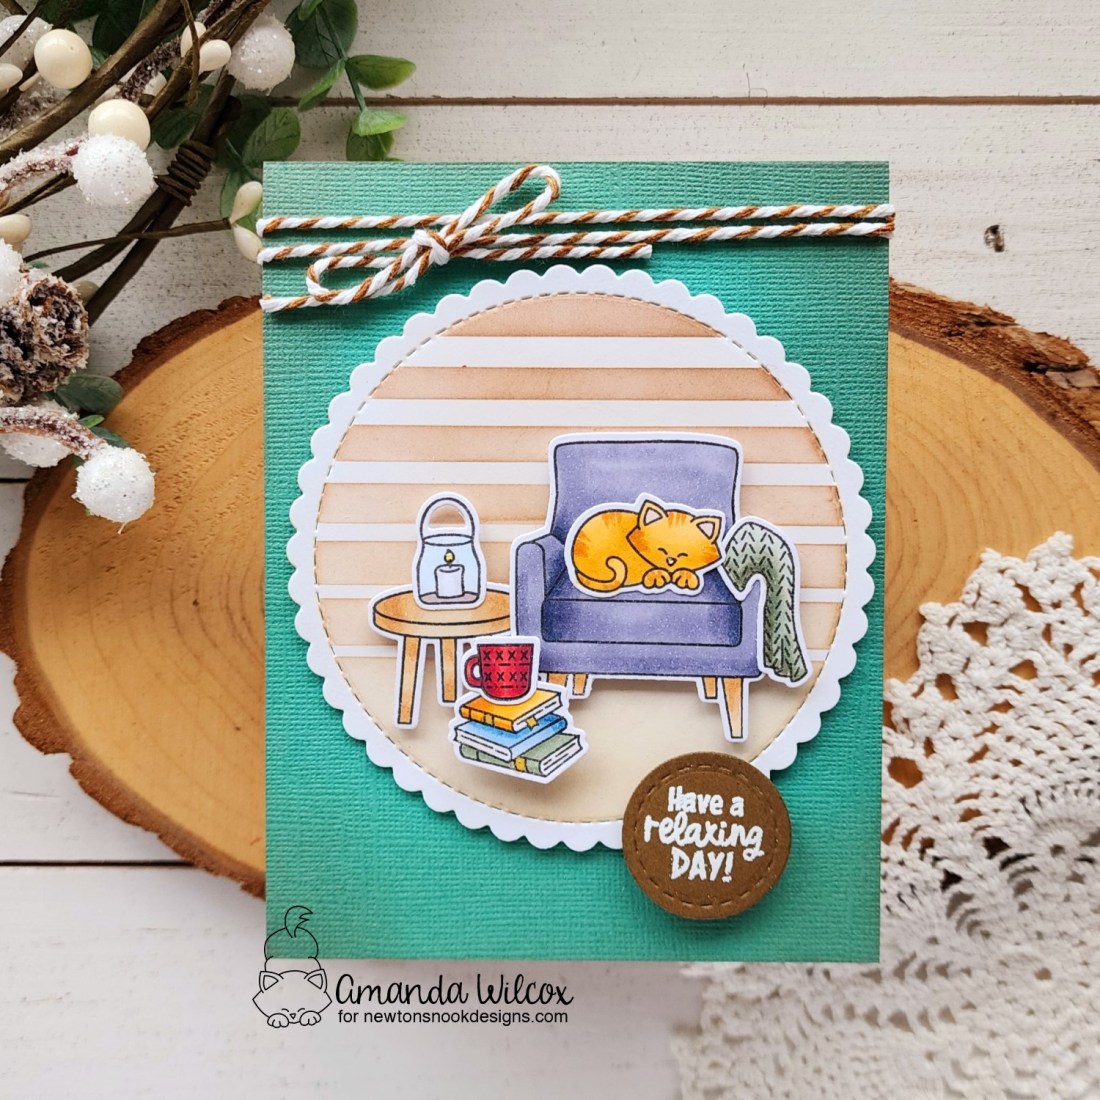
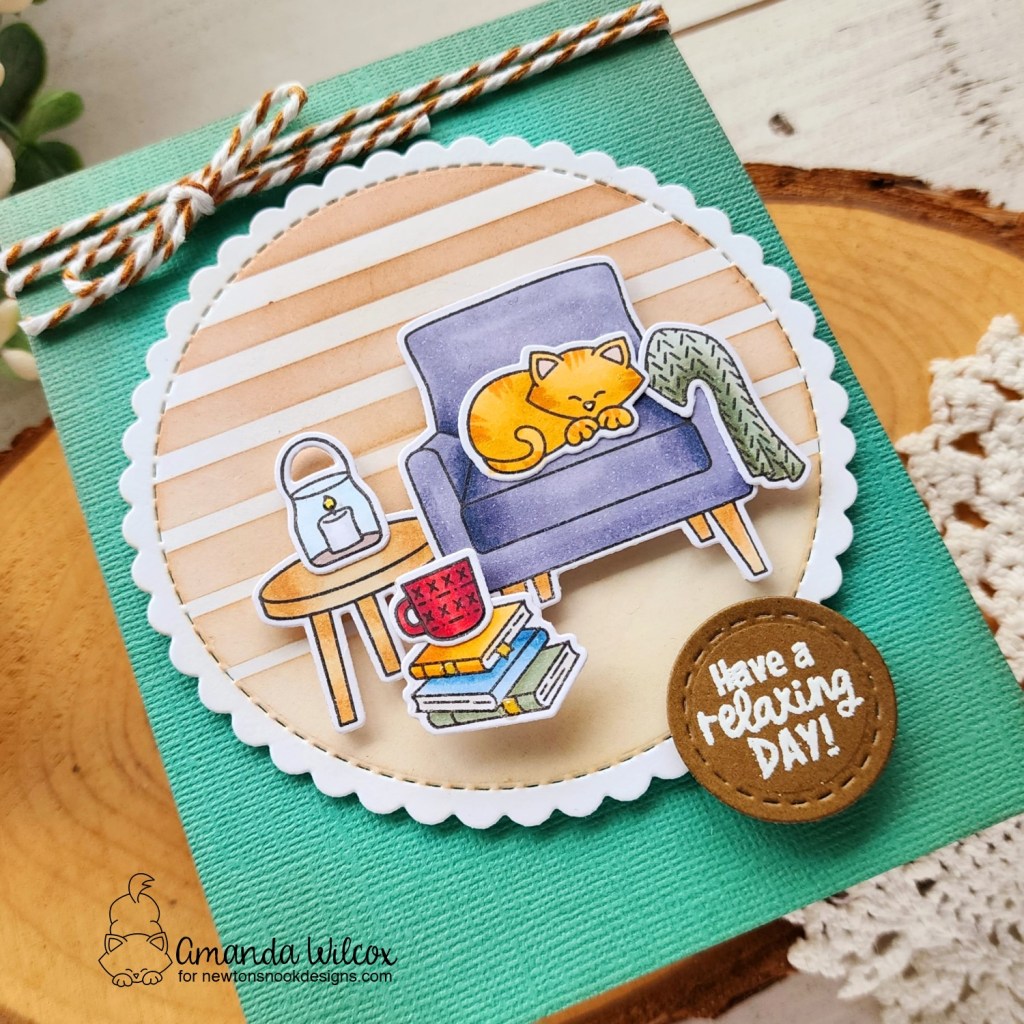
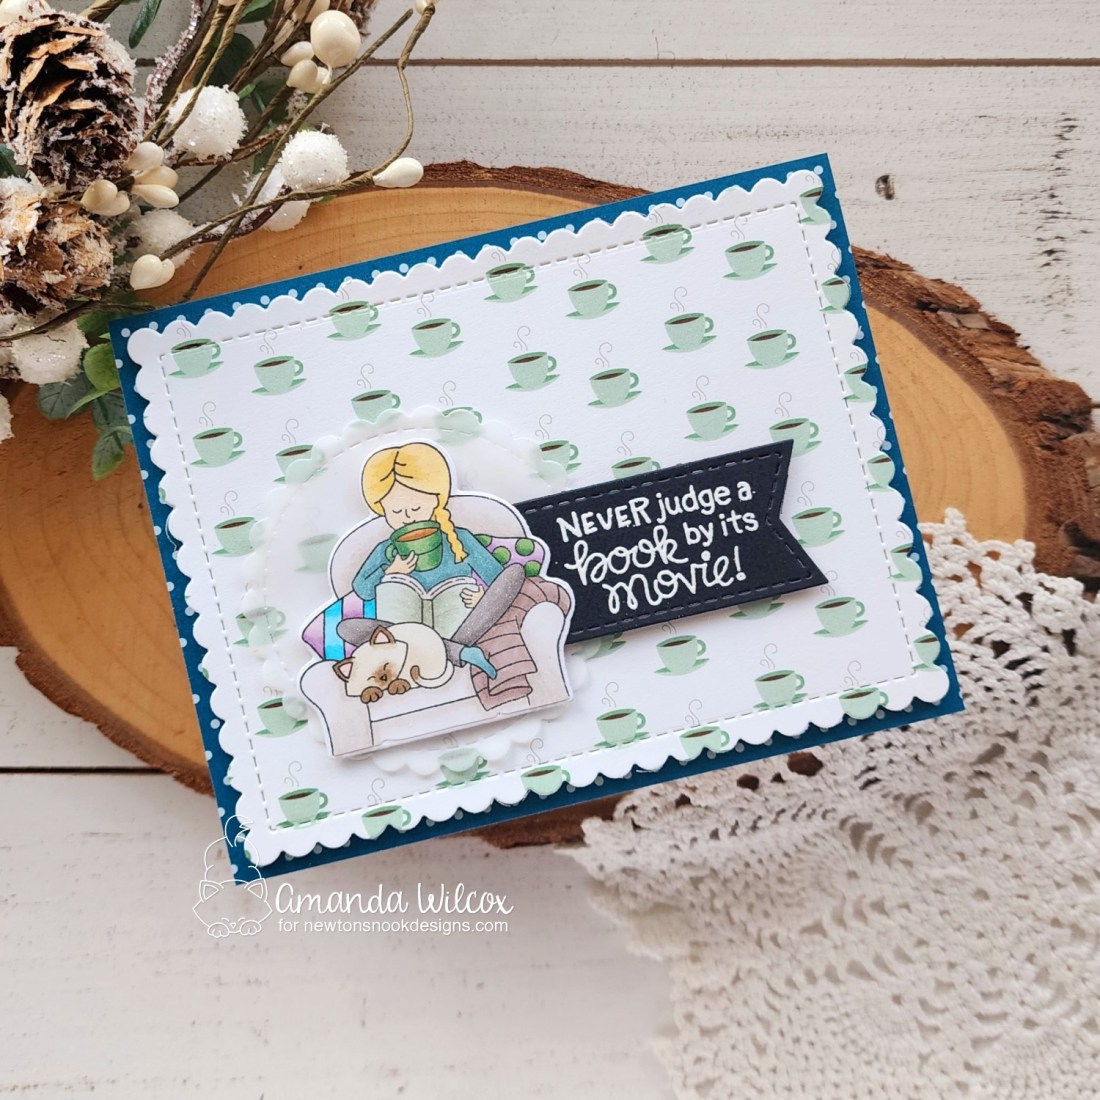
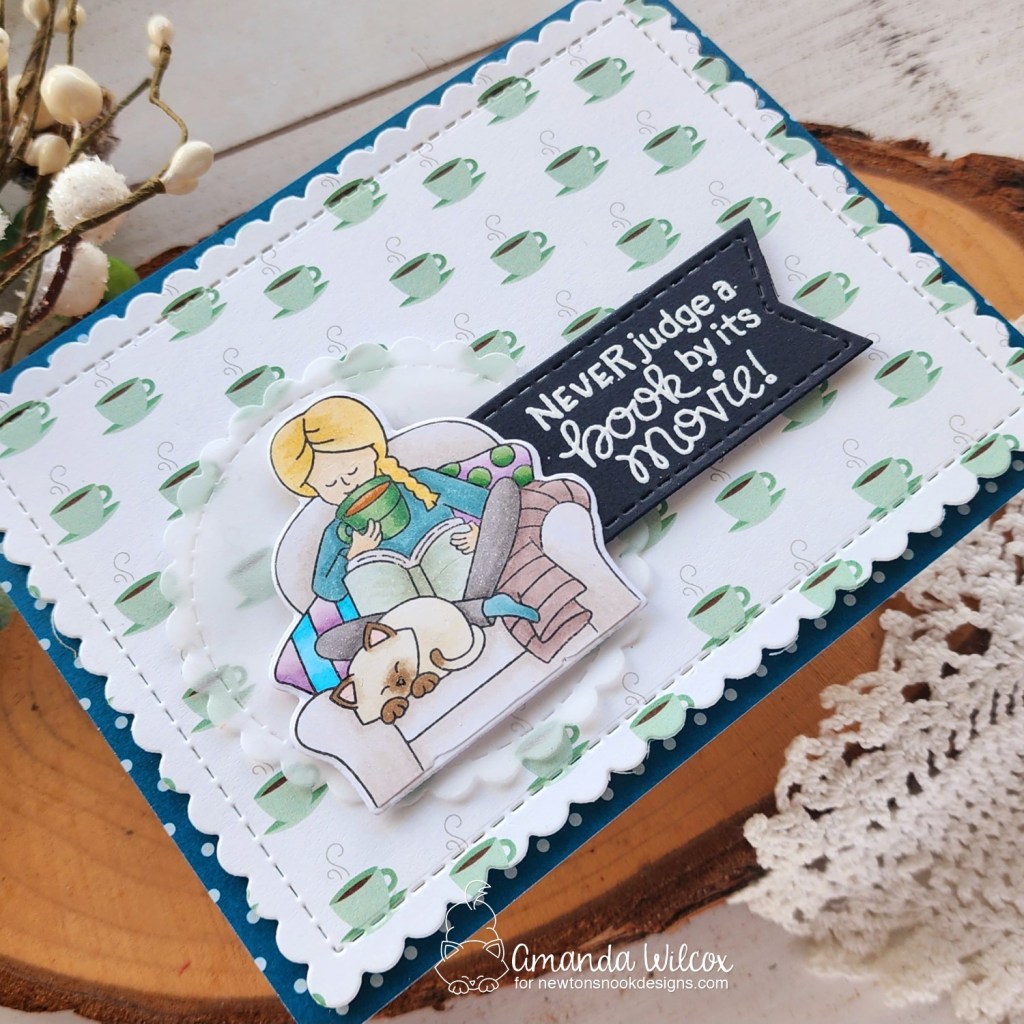
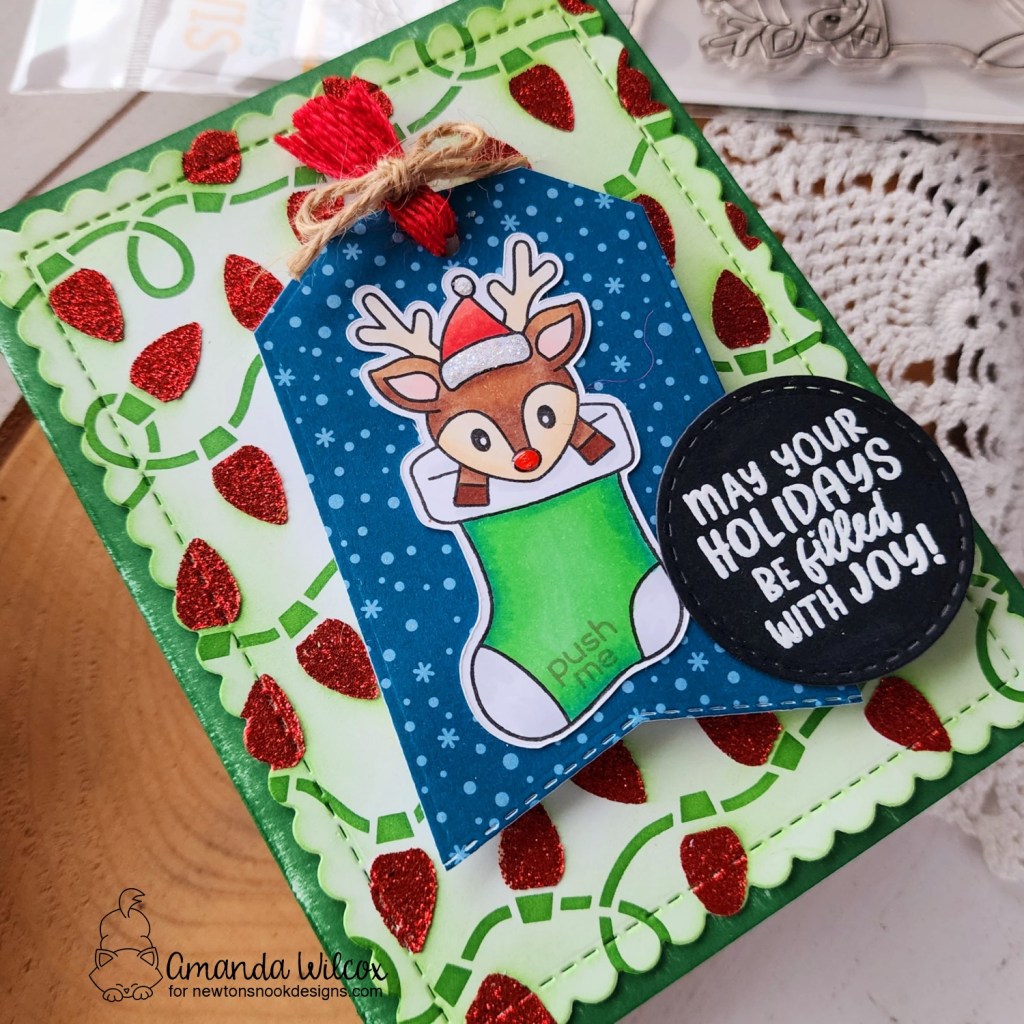
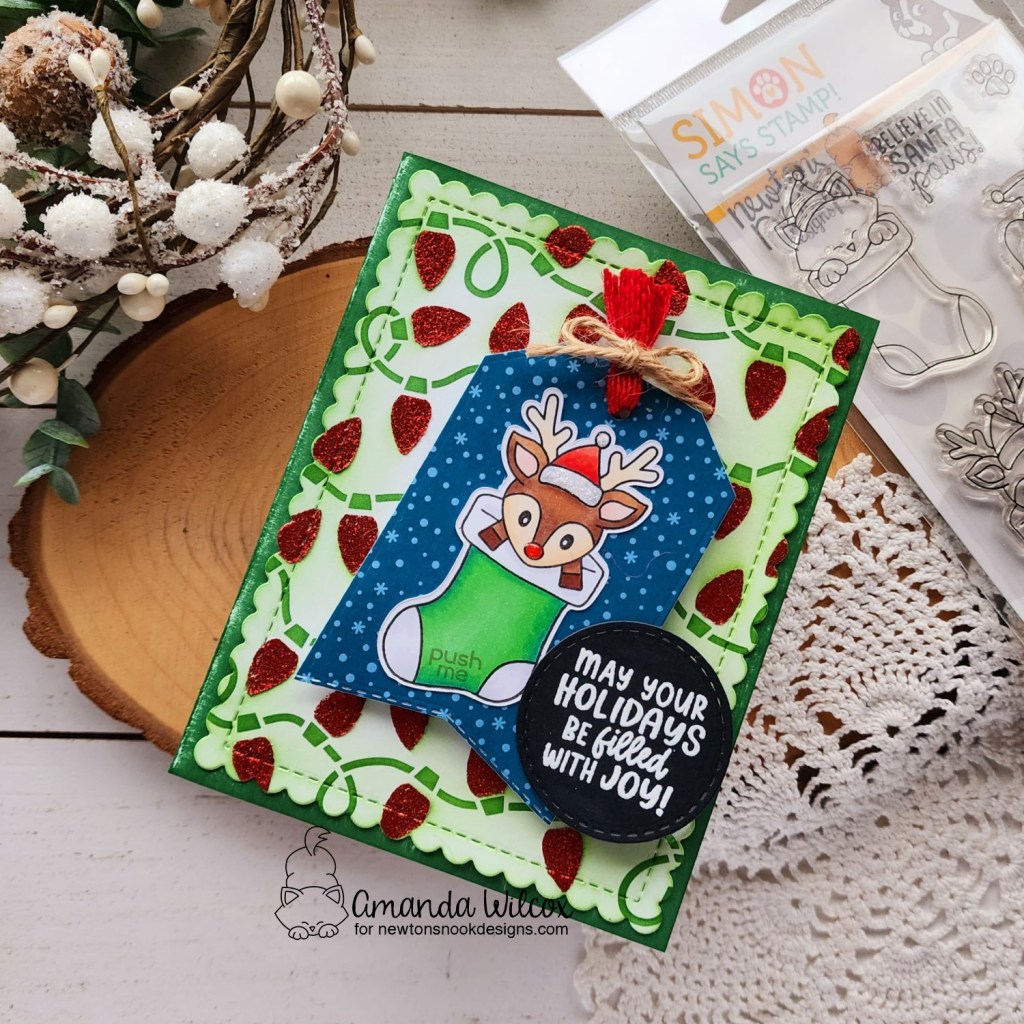
I stamped and colored the tulips and butterfly with copic markers before using the coordinating dies to cut them out. Then I cut a banner from the A7 Frames die set to stamp and heat emboss my sentiment on.
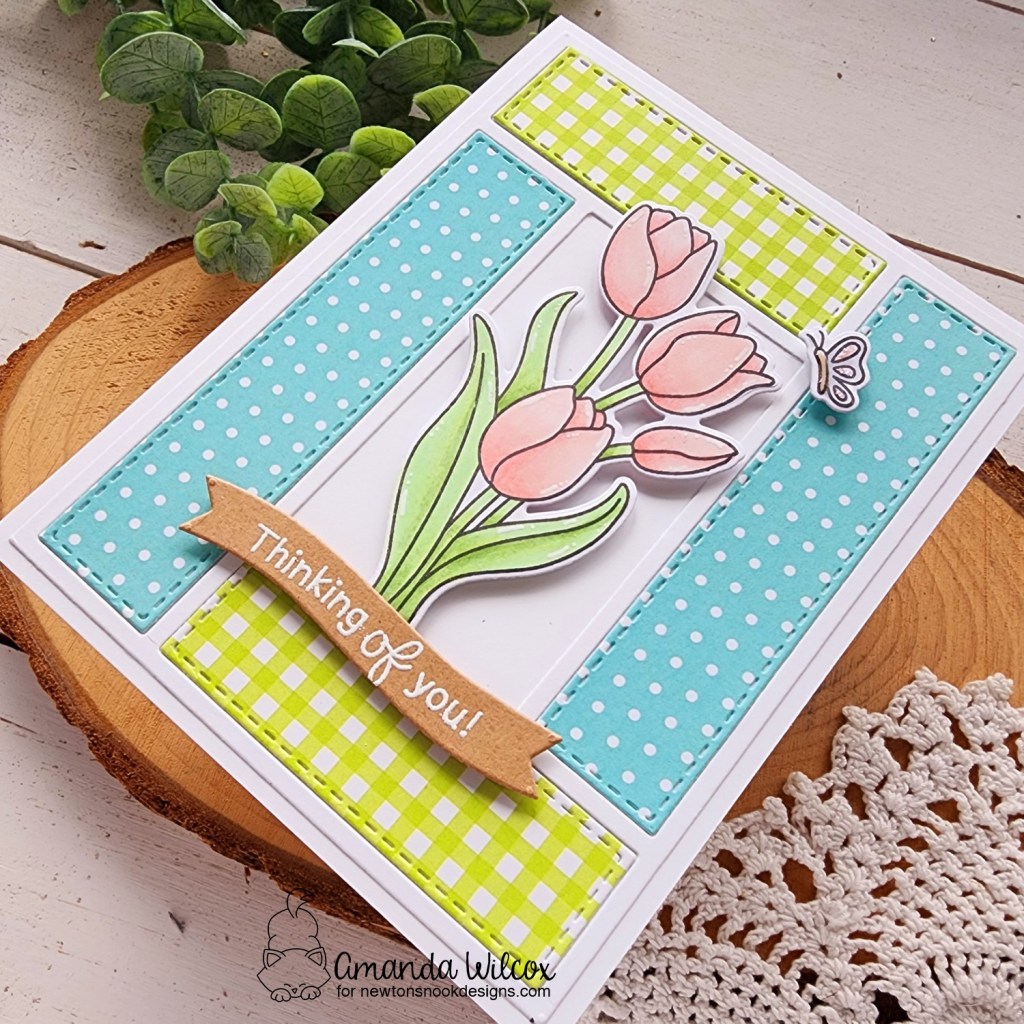
I used liquid glue to adhere the frame and four inserts to my white card base. Then I popped everything up with foam squares on that. For finishing touches I added stardust Stickles to the butterfly wings and white gel pen accents to the florals.
Enter to Win a $25 Prize!
We will be choosing one lucky winner to win a $25 store credit for Newton’s Nook Designs online shop! The winner will be chosen at random from the collective blog posts featuring our new products this week. For a chance to win, leave comments on the Design Team Member Blog Posts (see list below) from Tuesday March 19 through Thursday March 21. You will not know which blog has been chosen so the more you comment on the better your chances are of winning! You have until Thursday, March 21st at 9 pm ET to comment — winners will be announced on the NND blog on Friday, March 22nd.
Check out all the awesome Design Team Blogs below to enter:
Newton’s Nook Designs
Donna Idlet
Ellen Haxelmans
Larissa Heskett
Samantha Mann
Zsofia Molnar
Diane Morales
Tatiana Trafimovich
Amanda Wilcox