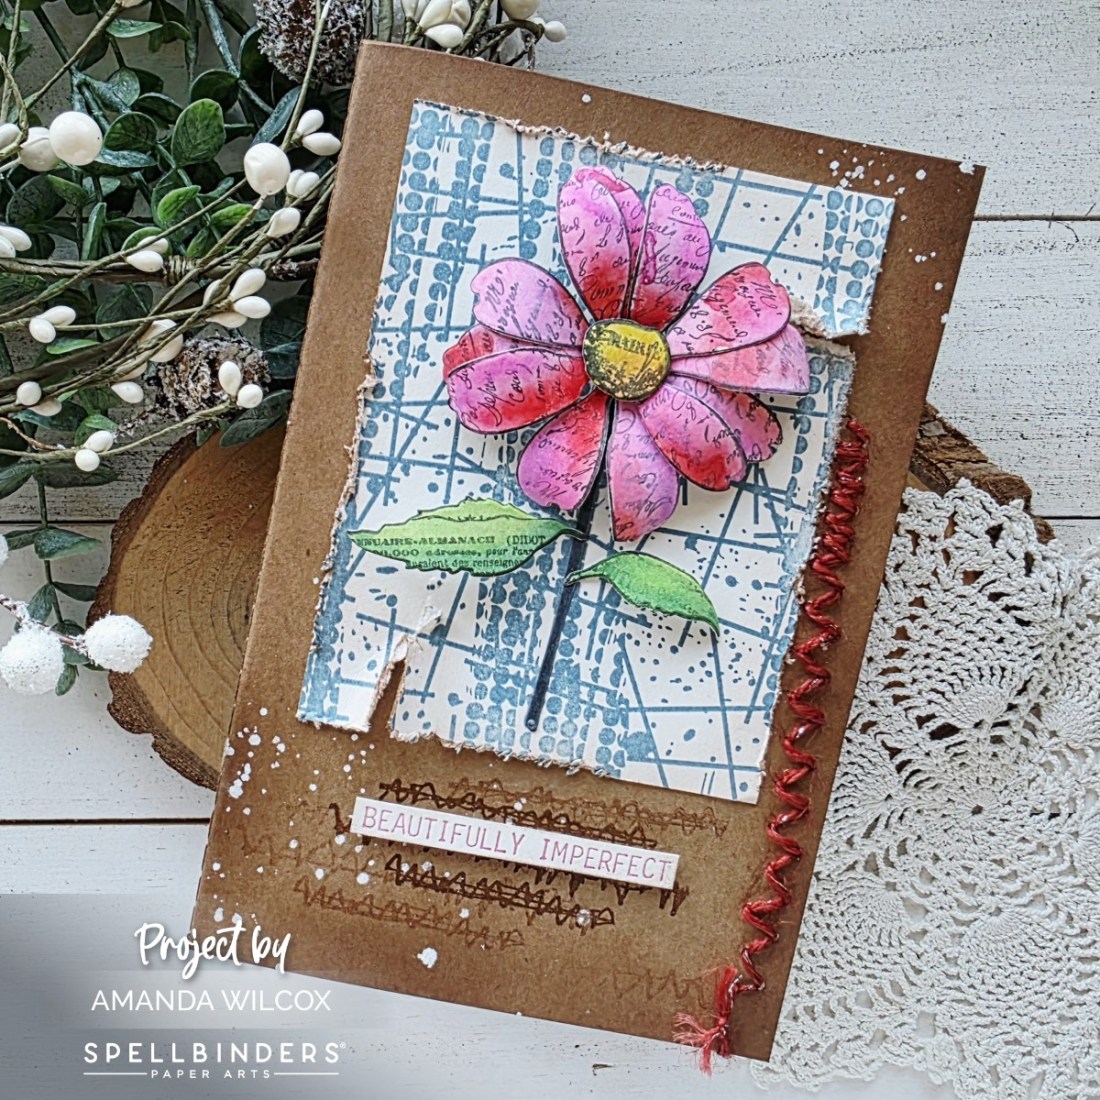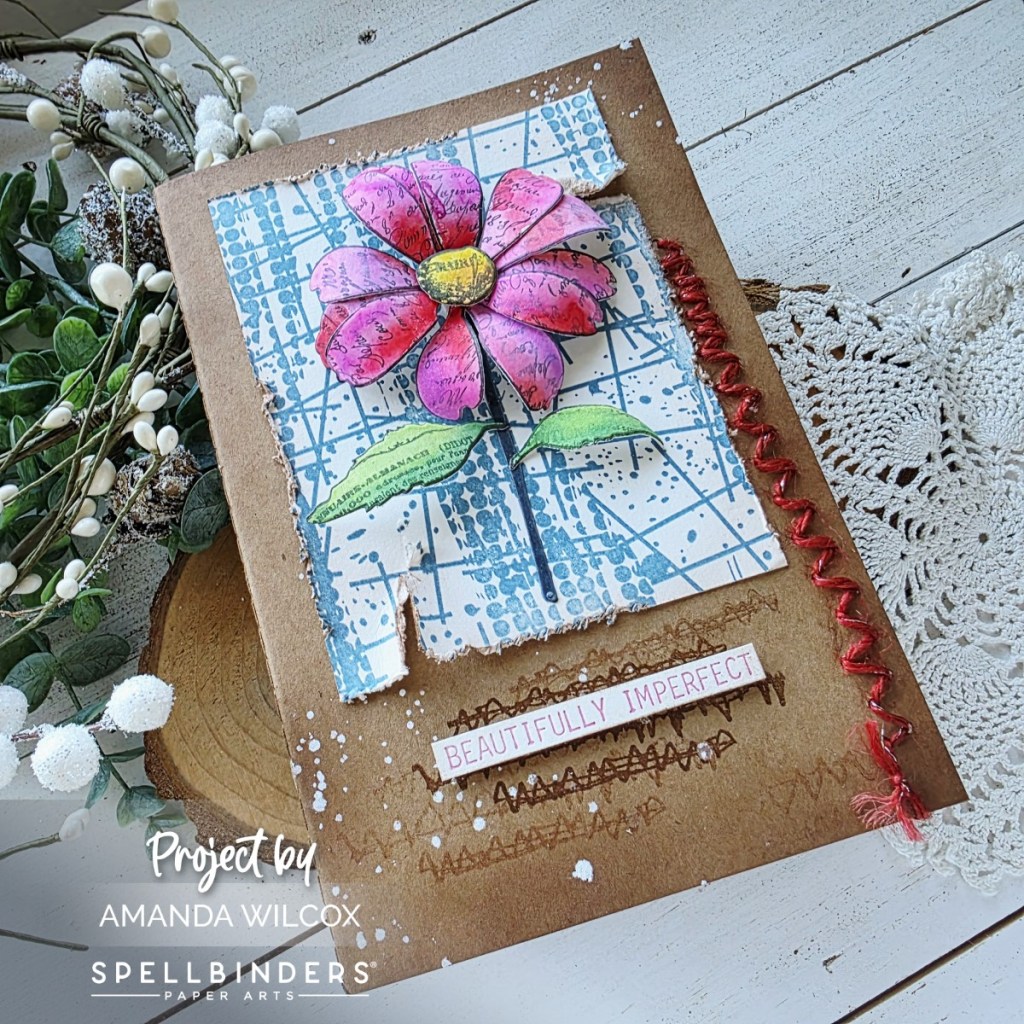
Happy Wednesday everyone! I’m here with a card featuring products from the Spellbinders Beautifully Imperfect collection. There are such an array of products in this collection that are great together but are also going to be amazing on their own over time too.
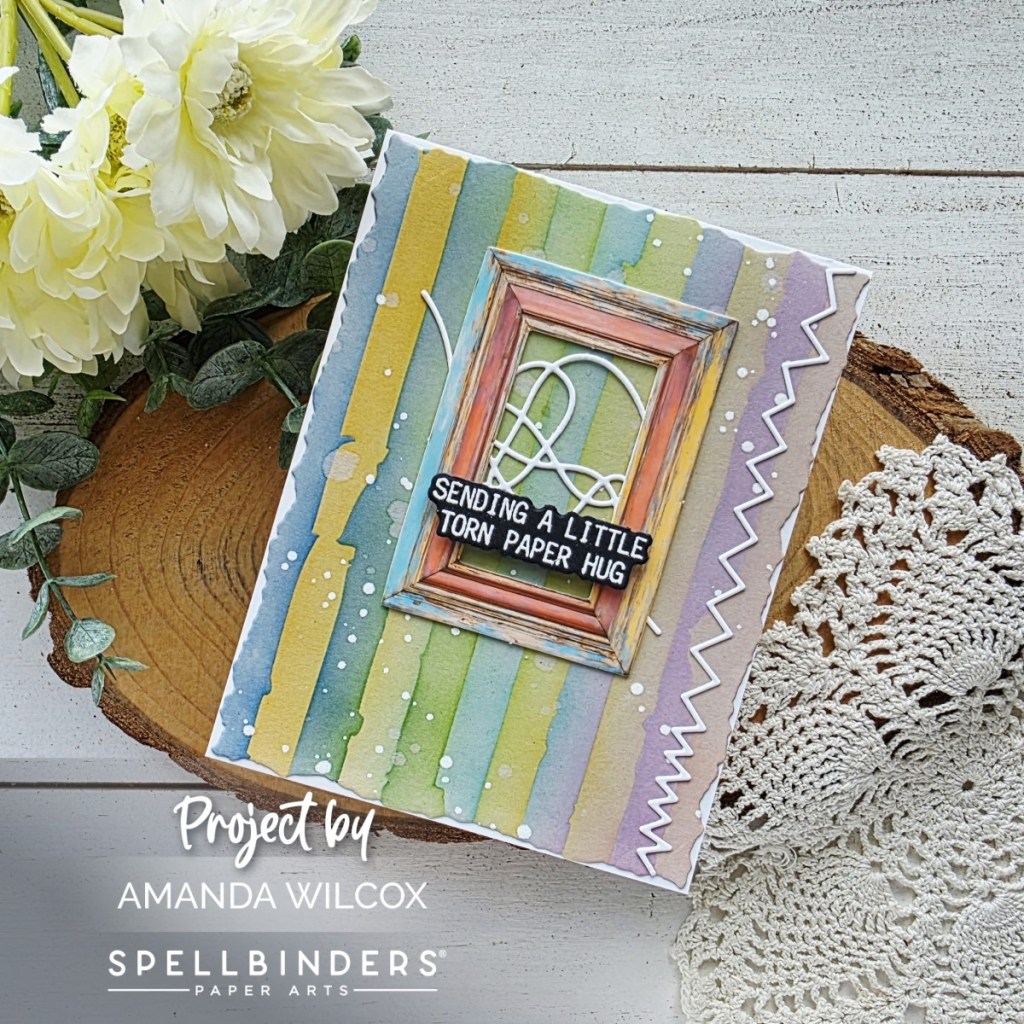
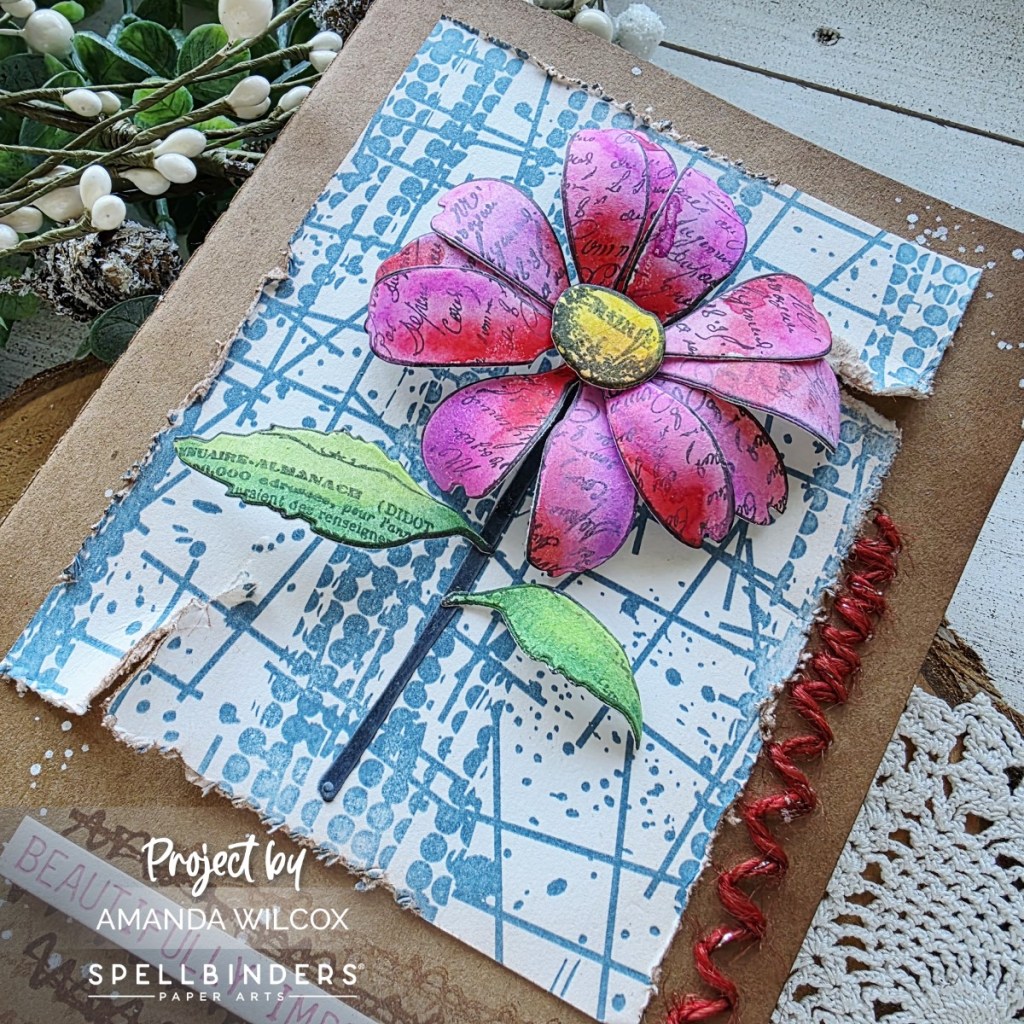
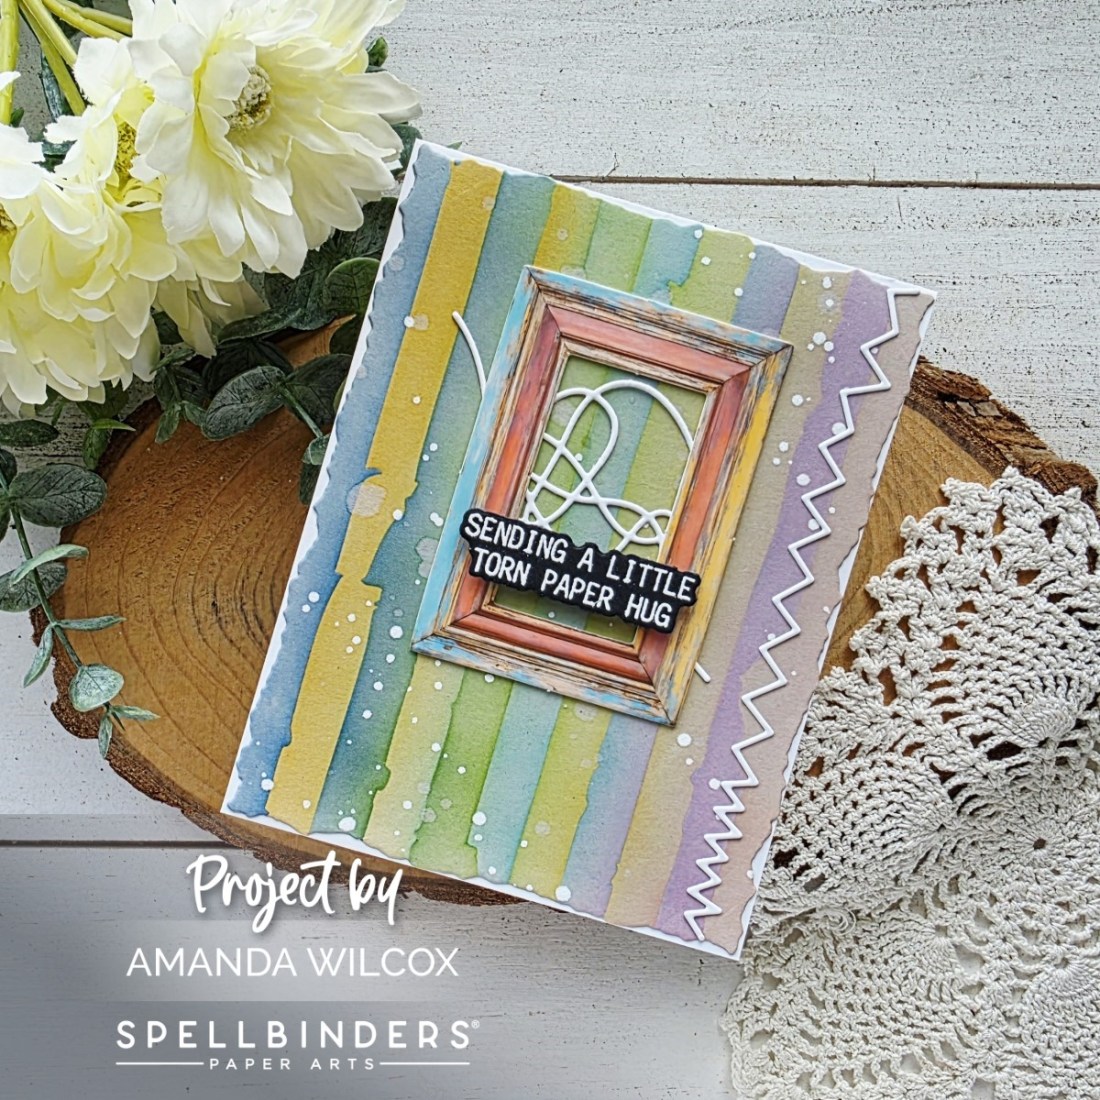
For this card, I cut an A2 piece of light gray cardstock and inked up the Tattered Stripes stencil set. I love that this stencil set has layers for both sets of stripes so you have the choice to color the whole panel or not. Then I die cut the panel with the torn edge die in the Deckled Edge Script die set. I splattered it with white paint and left it to dry.
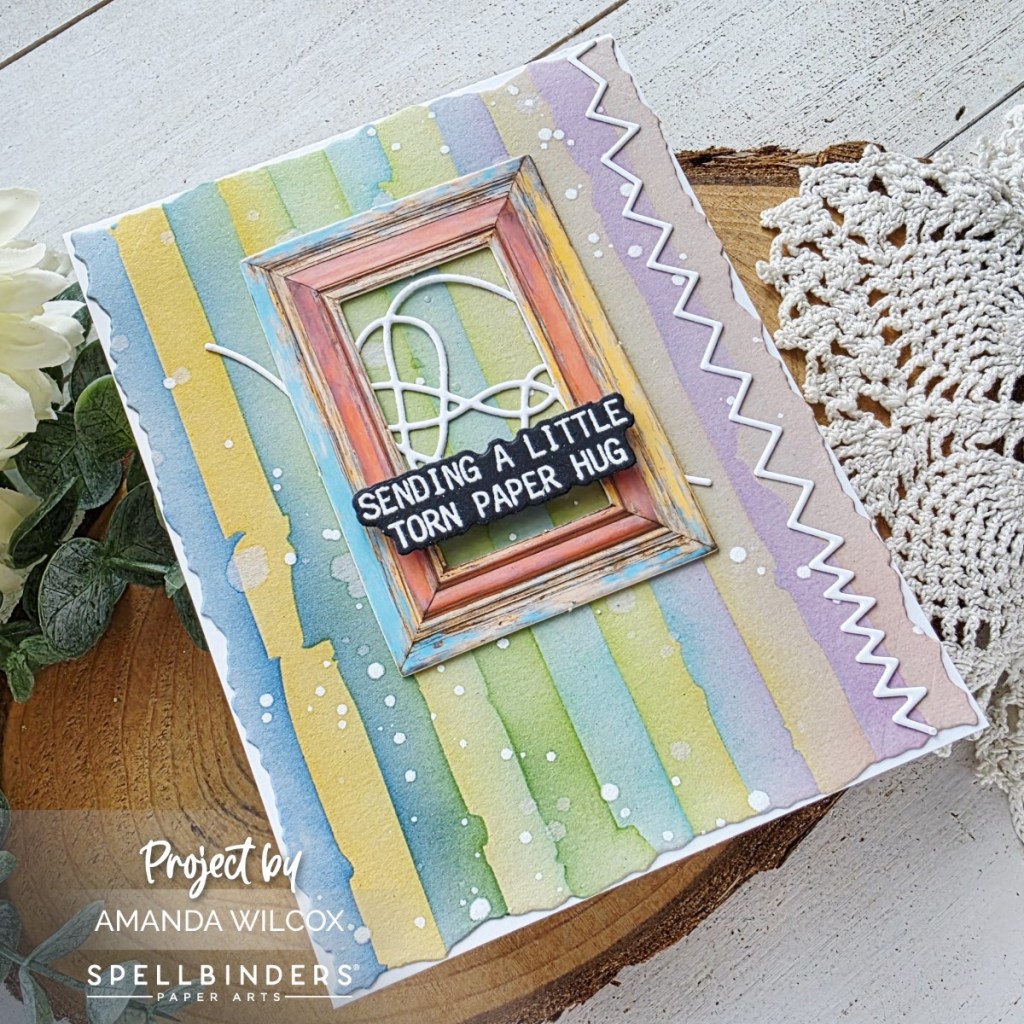
Next I cut accent pieces using dies in the Tangled Threads die set and glued them in place with liquid glue. I added one of the chipboard frames over the center of the design with a thread swirl behind it.
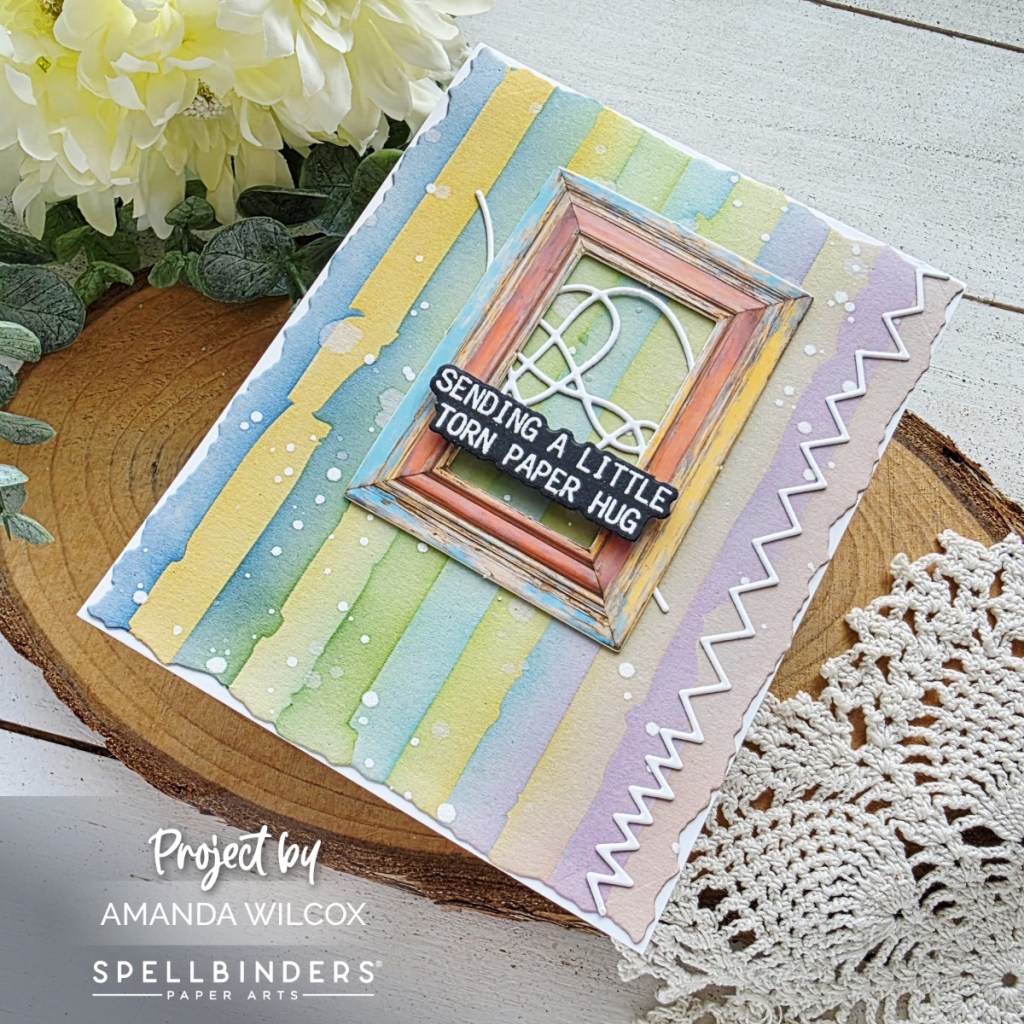
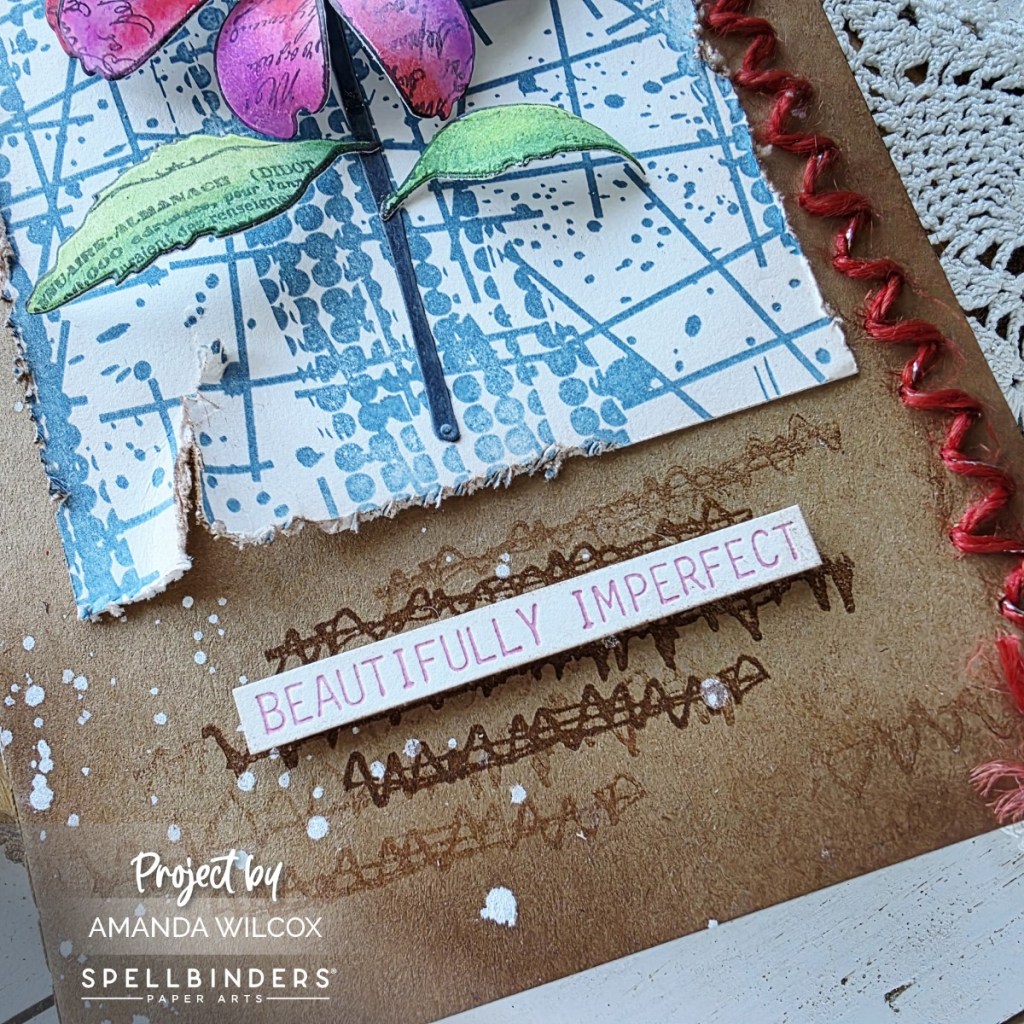
Last, I stamped and heat embossed a sentiment from the Sculpted Scripted Floral stamp and die combo before popping it up with foam squares over the frame. I used liquid glue to add the whole panel to a white card base and my card is all finished.
Products used:
Sculpted Scripted Floral stamp and die combo
Tangled Threads dies
Tattered Stripes stencils
Blending brushes
White paint
Foam squares
Liquid glue
Lawn Fawn dye ink
I appreciate you sharing your time with me. Have a fabulous day!