Trinity Stamps – Happy Everything Balloon Shaped Cards

Hello everyone! We’re already to Wednesday of this awesome week! Today I have another set of cards to share with you. These balloon shaped cards were so fun to create! It all started with the Trinity Stamps Rainbow Funshine dies. Whenever I die cut colored cardstock for rainbows, I love to cut the whole rainbow from each color and then mix and match them for different rainbows. It also, always leads to multiple cards which is fabulous for stocking your stash or sending happy mail to a group of friends.

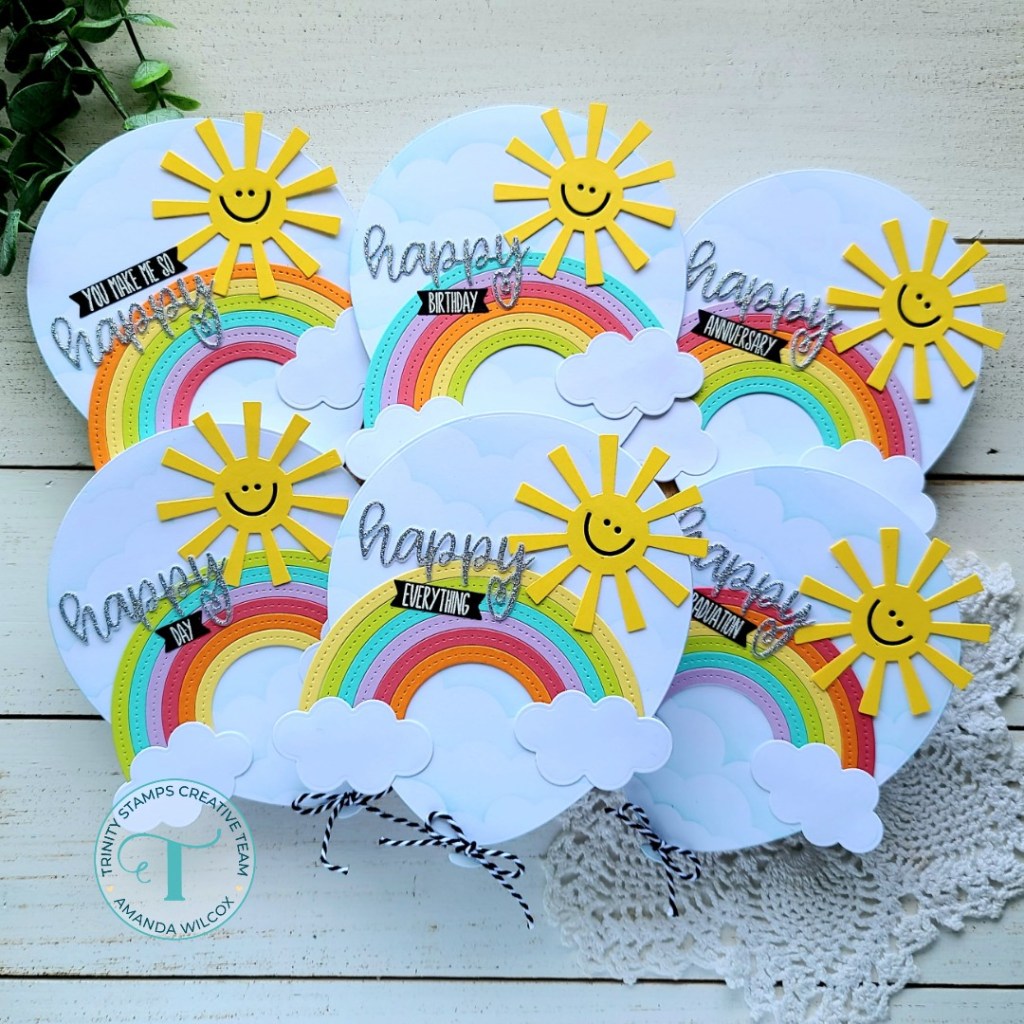
I began this project by die cutting and assembling all of my rainbows and sunshines. Then I die cut the largest balloon from the Bunch of Balloons die set and inked up the new puffy cloud borders stencil on each one. Then I just glued the rainbows, clouds and sunshines to each balloon.

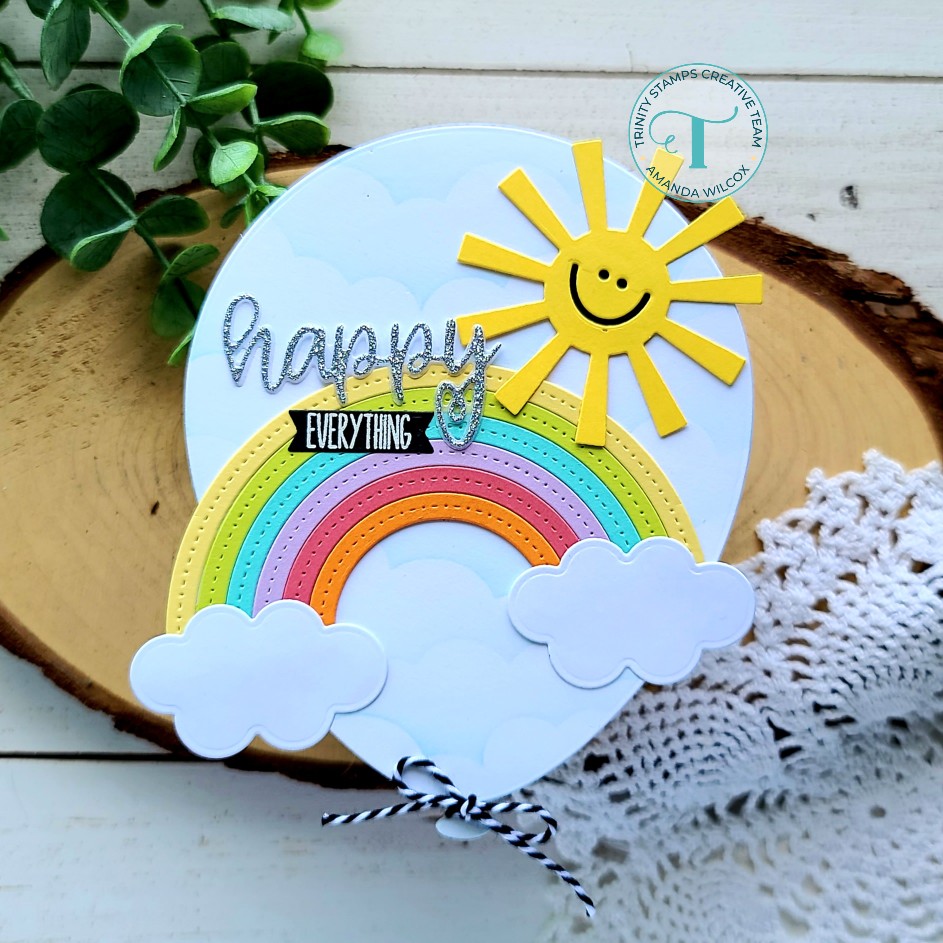
I couldn’t decide on one sentiment so I pulled out the Happy Senti-mini stamps and dies and cut the happy from silver cardstock and vellum and glued them together. Then I chose a random assortment of supporting sentiments from the same set, stamped and heat embossed them. Then I used the banner die cut from the Merry Christmas Senti-mini die set and cut them all out. Then all of the sentiment pieces were adhered with liquid glue.

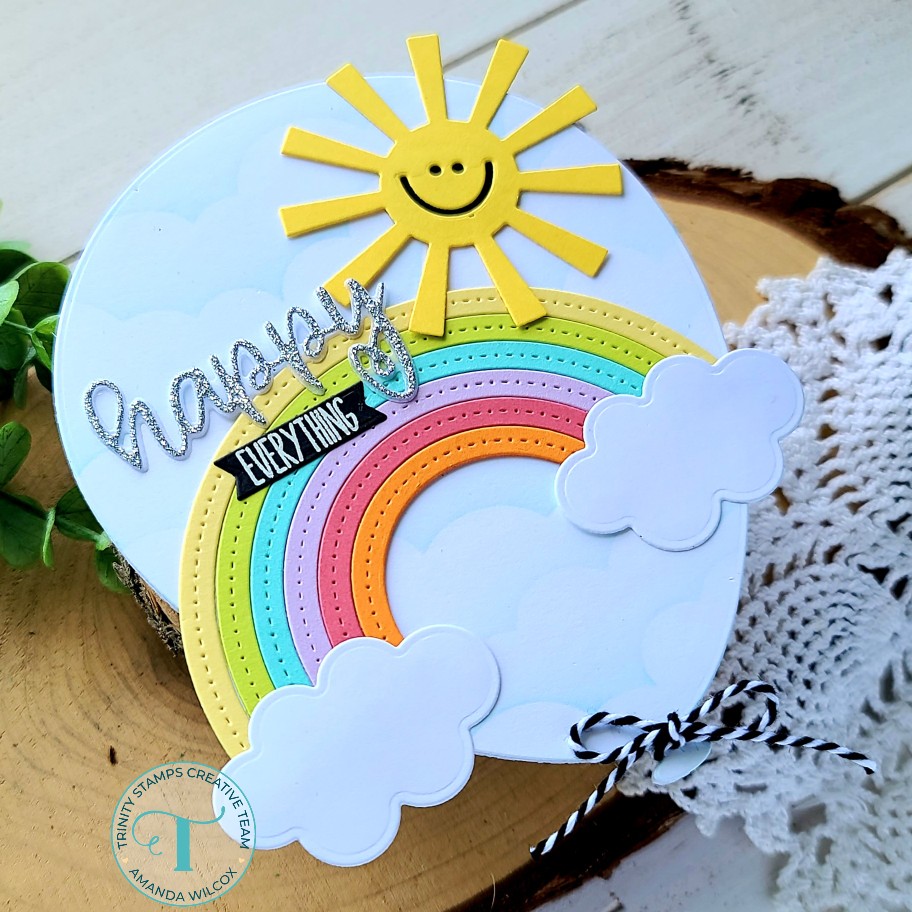
Last, I created 6 white card bases, positioned the same balloon die so that the top of the die hung over the edge (meaning it won’t cut the top portion) and created shaped card bases. Once those were done, I adhered the balloons and tied some black and white baker’s twine to the bottom of each one.

Aren’t these just so much fun!?! I love how they turned out!

Products used on today’s project:
Bunch of Balloons dies
Rainbow Funshine dies
Puffy Cloud Layers stencil
Happy Senti-mini stamps and dies
Merry Christmas Senti-mini dies
Pink & Main silver glitter paper

Also, this month is Trinity Stamps’ birthday month so we’ll be sharing tons of fun birthday inspiration and there will be fun challenges and giveaways going on. Be sure to stay in touch via Instagram and the Facebook group to make sure you don’t miss any of the fun!

I appreciate you sharing your time with me. Have a fabulous day!

Pretty Pink Posh – Happy Summer

Hello there! Thanks for stopping by today! I have a bright and happy summer card to share featuring some Pretty Pink Posh images paired with Trinity Stamps and Lawn Fawn dies to help create my scene. I hope you like it!

To create my card, I chose the images I wanted to use on the Summer Surfboards, Summer Friends and Playful Puppies sets from Pretty Pink Posh. I stamped and colored them with my copic markers and used the coordinating dies to cut them all out. Then for my scene building, I die cut the elements from white cardstock using the Trinity Stamps Slimline scalloped panels, stitched panels, scenic borders and great outdoors borders.

I inked up my layers with distress oxide inks. For the sky I used the puffy cloud stencil with spun sugar and picked raspberry. For the water I used mermaid lagoon and peacock feathers. Then for the sand I came in with tea dye and gathered twigs. After each panel was inked up I spritzed them with water and then flicked the darker color of ink on them. Once the sand was complete and dry, I came back in with the Lawn Fawn sandy beach accents dies to create the mounds to slip my surfboard into.

Moving on to assembly, I used liquid glue to adhere all of the layers together including the surfboards. Then I popped that panel in my MISTI and stamped a sentiment from Summer Surfboards in the sky. I added foam tape to the back of my panel and popped it on the white slimline scalloped panel. Then I added foam squares to the boy and his pup and popped them in place last. Finally, I used liquid glue to adhere the whole thing to a card base.

For finishing touches, I added white gel pen accents to the images and glossy accents to the puppy’s nose, tongue and tag.

This card is so happy and was a blast to create! I am very ready for summer break and all the adventures the come with it!

Supplies used on today’s card:
Pretty Pink Posh Summer Friends stamps and dies
Pretty Pink Posh Summer Surfboards stamps and dies
Pretty Pink Push Playful Puppies stamps and dies
Trinity Stamps Slimline Scalloped Panels dies
Trinity Stamps Slimline Stitched Panels and Windows dies
Trinity Stamps Slimline Great Outdoors Borders dies
Trinity Stamps Slimline Scenic Borders dies
Trinity Stamps Puffy Cloud Layers stencil
Lawn Fawn Sandy Beach Accents dies
Glossy accents

I appreciate you sharing your time with me. Have a fabulous day!

(This blog uses affiliate links whenever possible, at no additional cost to you.)

Miss Ink Stamps – Smokin’ Caterpillars Watercolor

Hey friends! Today I’m sharing a beautiful watercolor scene card featuring Miss Ink Stamps Smokin’ Caterpillar stamps to create a mini slimline scene.

To create my card, I stamped and heat embossed the two main images in Smokin’ Caterpillars with gold embossing powder on watercolor paper. Then I watercolored the whole scene with my Zig Clean Color Real Brush markers. After the panel was dry, I die cut it with the new Trinity Stamps Clean and Simple Mini Slimline Panels. I created a 3×6 inch card base and adhered my scene to it. Then I stamped and heat embossed a sentiment from Wonderland Wisdom on a green cardstock strip that went with the tones of the watercolor. Then I used the banner die cut in the Trinity Stamps Mini Slimline Card and Envelope die set. I popped it up on the scene with foam strips.

Next, I used the envelope dies in the same set to create a custom envelope for my card. I die cut the pieces from kraft cardstock and stamped the caterpillar on the front. I adhered it all together with scrappy tape and my project is complete.

Here are the products used on today’s project:
Smokin’ Caterpillars
Wonderland Wisdom
Clean and Simple Mini Slimline Panels
Mini Slimline Card and Envelope
Foam strips
Scrappy tape

I appreciate you sharing your time with me. Have a fabulous day!

(This blog uses affiliate links whenever possible at no additional cost to you.)

Trinity Stamps – Ocean Themed Magnetic Picture Frames

Hey friends! I’m over on the Trinity Stamps blog today with NOT a card project! Haha! Instead, today I’m making magnetic picture frames with an ocean theme to go with the photos that I want to put in them.

I made some like this around Christmas time years ago and they were so fun! Everyone seemed to enjoy them so I thought it would be great to bring them back and share how I made them.

These are kind of a two-for-one project because you get the frame portion but I always decorate the part that comes out of the middle too. Let’s get started!

I gathered some basic supplies, starting with the photos that I wanted to frame so I could choose images/colors accordingly. I chose the Trinity Stamps winter hues slimline paper pad for my paper and you can find the magnet sheets for less than $2 at Walmart. You may even be able to get something that would work at the dollar store. This isn’t a costly project at all. Moving on…

You need the stitched rectangle and smaller square dies from the Trinity Stamps Slimline Frame and Fold die set and whatever images you want to use to decorate. I chose Turtley Awesome and Ocean Reef Builder stamp sets.

I inked them up and colored them with my copic markers. Then I used the coordinating dies for each set to cut them out and set them aside. Now for the magnet portion of the project.

I trimmed the magnetic sheet down to 4 inches wide, removed the backing paper and smoothed down a piece of striped paper from the winter hues paper pad. Then I die cut 2 of the stitched rectangles from it, positioned the square die and ran them through again. I prefer to do this in two steps because you can get funny warping on the thinner sides if you do them at the same time.

Now it’s time to decorate all of our pieces! I just used liquid glue to adhere the images wherever they touched the frames. Nothing special needed.

When I was finished, I trimmed down my photos and adhered them to the back of the magnet with a little washi tape. It’s not totally necessary but ensures they stay where I want them. Then I went over the images with some unicorn Stickles and glossy accents in various places.

And here are the rectangles that were cut out when I created the frames. I used the Slimline Great Outdoor Border dies to cut a little kraft cardstock and create a sandy ocean bottom for my mini scenes. I use these to hold photos that are too big to fit in the frames. They also have glossy accents and unicorn Stickles for added shine and sparkle.

Products used on today’s project:
Slimline Frame and Fold dies
Turtley Awesome stamps and dies
Ocean Reef Builder stamps and dies
Slimline Great Outdoor Borders
Slimline Paper Pad – winter hues
Stickles – unicorn
Glossy accents
Copic markers
Magnetic sheets

I appreciate you sharing your time with me. Have a fabulous day!

(This blog uses affiliate links whenever possible, at no additional cost to you.)

Coffee Loving Cardmakers – Kind Heart

Hey friends! It’s Tuesday Tea with Twiddler’s Nook on the Coffee Loving Cardmakers blog today. I have a fun coffee mug shaped card to share with you featuring a new distress oxide ink blend combo that I LOVE paired with some Reverse Confetti cuties!

Most of the time I ink blend and then die cut but today I cut out my coffee mug first and blended distress oxide inks in abandoned coral, kitsch flamingo and tattered rose. Isn’t this mix just amazing?!? I love it! Then I splattered some black acrylic paint on the whole panel and set it aside to dry.

I stamped and colored images from the Reverse Confetti Coffee and You stamp set. I used the coordinating dies to cut them out and set them aside. Now that my panel was dry, I stamped and heat embossed a sentiment from My Tribe in black. I added foam squares to the elephant and mouse on the stool and added them to the front.

And then, for grins, I added the other mouse directly to the back of the card. It makes me giggle.

For finishing touches, I added white gel pen accents to the images, black glaze pen to their eyes and glossy accents to things like the mouse’s nose, elephants feet and the star on the coffee cup.

Products used on today’s project:
Trinity Stamps Coffee Mug die
Reverse Confetti Coffee and You stamps and dies
Reverse Confetti My Tribe stamps
Distress oxide inks – abandoned coral, kitsch flamingo, tattered rose
Foam squares

I appreciate you sharing your time with me. Have a fabulous day!

(This blog uses affiliate links whenever possible, at no additional cost to you.)

MFT Stamps – Friend-A-Saurus

Hi again! I’m back with my second entry into the MFT Stamps Wednesday Sketch Challenge and it’s SO CUTE! I just had to pull out these sweet dinos that I got for Christmas! I’ve only used them one other time and was so happy to ink them up again!

To create my card, I started by choosing the image I wanted to use out of the set, stamped and colored them with my copics. Then I used the coordinating dies to cut them out and set them all aside. Next, I stamped and heat embossed a sentiment on black cardstock, then cut it out with a Pink & Main large sentiment strip.

For my background, I die cut the largest Trinity Stamps embossed edge rectangle from kraft cardstock. I pulled out a retired MFT Stamps arch stax die set and cut 3 of those from the left side. Next, I stamped the MFT STamps diagonal stripes background stamp on the panel in brown ink. Then I used a blending brush to ink up the edges for a little dimension. While I had the blending brushes out, I added some of the brown ink to the bottom of the arch cutouts and then went back with an olive green ink on the tops.

I added foam tape to the back of the striped panel and adhered it to a white card base. Then I used liquid glue to add the arches back in to their windows. Next, I added foam squares to the back of the dinos and popped them in place. I added foam strips to the back of the sentiment and bird and added them last.

For finishing touches, I just added some fun white gel pen highlights to all the images. I just love the earthy tones of this card! It’s super fun and would be great for a girl or a guy!

Products used on today’s card:
MFT Stamps A-Roar-able Friends stamps and dies
MFT Stamps Arch Stax
MFT Stamps striped background
Trinity Stamps embossed edge rectangle dies
Trinity Stamps blending brushes
Lawn Fawn dye inks
Copic markers
Foam squares and strips

I appreciate you sharing your time with me. Have a fabulous day!

(This blog uses affiliate links whenever possible, at no additional cost to you.)

My Favorite Things – Sketch Challenege

Hey friends! I’m stopping by this weekend with a couple of really fun cards I created using the MFT Stamps Wednesday Sketch Challenge sketch. Here’s a look at the sketch.

For some reason this one really inspired me and I immediately pulled my stamps out and started coloring. Today we have another Super Friend card because I’m so in love with those critters!

I started my card by stamping and coloring the images from Super Friend. Then I used the coordinating dies to cut them out. Using the colors of their outfits, I found a few distress oxide colors to blend for my background. Today I tried cracked pistachio, dusty concord and chipped sapphire. Then I spritzed the panel with water and also flicked some pearl and gold watercolor on it.

I used my Trinity Stamps embossed edge circle stack to die cut 3 white circles and glued the foliage images on the back side of them. Then I glued those to my inked panel. I added foam squares to my critters and popped them in place next.

I stamped and heat embossed a sentiment from the set on black cardstock and used a Pink & Main Sunny Greetings sentiment strip die to cut it out. I added it with foam strips and moved on to finishing touches.

For those I started with glossy accents on the critter noses, chest emblem and glasses. Then I used my Wink of Stella glitter brush pen on the stars and decided this card was finished.

It’s SUPER adorable and will be fabulous to send to a great friend for a pick me up!

Products used on today’s card:
MFT Stamps Super Friends stamps and dies
Distress Oxide inks – cracked pistachio, dusty concord, chipped sapphire
Glossy accents
Wink of Stella glitter brush pen
Trinity Stamps embossed edge circle stack dies
Foam squares and strips
Copic markers

I appreciate you sharing your time with me. Have a fabulous day!

(This blog uses affiliate links whenever possible, at no additional cost to you.)

Trinity Stamps – Over the TOP

Hey friends! It’s Wednesday and I’m super excited to share this adorable Trinity Stamps circus themed birthday card with you as we sail toward the weekend! This week Trinity Stamps designers are highlighting one of our illustrators all week long – blog, Instagram and YouTube – Davina over at Popsicle Sticks! The Le Cirque stamp set I’m using today was illustrated by her!

To start my card, I knew that I wanted to try out the new build a big top die set so I cut everything from white cardstock and colored various pieces with my copic markers. Then I used liquid to to adhere it all together. It was really simple and fun to do! I’ll link to a great blog post HERE if you have questions about assembly…and a video HERE if that’s more your learning style.

Next, I chose images from Le Cirque, stamped and colored them with my copics as well. I used the coordinating dies to cut them out and set them aside. Next, I took an oversized panel and inked up the Good Morning Sunshine stencil in two-tone yellow inks. Then I used the largest embossed edge rectangle die to cut it out. I used liquid glue to adhered it to a white card base. Next, I decided that I wanted grass for my scene instead of just the great rays from the stencil, so I cut another small panel with the embossed edge rectangle and then trimmed the top with a grass die from the great outdoors slimline die set. I inked it up with a couple of greens for some dimension and glued it in place.

Next, I adhered the fabulous circus tent, added foam squares to the back of my images and popped them in place. I put the whole card in my MISTI and stamped a sentiment from Balancing Acts in the top left corner and moved on to finishing touches.

For those, I added a combo of glossy accents and star dust Stickles to various elements. Then I went in with black glaze pen on all the eyes that are open.

I’ve been having a blast playing with all of the awesome circus themed prodcuts Trinity released and I hope you’re enjoying them too1

The products I used on today’s project are:
Le Cirque stamps and dies
Balancing Acts stamps
Build a Big Top dies
Embossed Edge Rectangle dies
Good Morning Sunshine stencil
glossy accents
star dust Stickles
Lawn Fawn inks
copic markers

I appreciate you sharing your time with me. Have a fabulous day!

(This blog uses affiliate links at no additional cost to you. Thank you for your support!)

Newton’s Nook – I Just PLANE Like You Easel Card

Hey friends! I’m up on the Newton’s Nook blog today sharing this really fun circle shaped easel card! I’ve never made one before and was inspired by my friend Leica who makes adorable ones of these from time to time. They always get me and I had no clue how easy and fun they were to create!

Here’s a look at the card front, flat like it would come out of the envelope. Isn’t it the cutest!?! I used Winston Takes Flight stamps and dies, along with the Circle Frames dies and the new Petite Clouds stencil.

I started by stamping and coloring the images with my copic markers. Then I used the coordinating dies to cut them out and glued the banner to the back of the airplane. I chose 2 lighter blue cardstocks and cut the darker one with the scalloped circle in the circle frames die set. Then I grabbed my Trinity Stamps embossed circle stack dies and cut the lighter one from a size that fit just barely inside the stitching on the scalloped circle. Then I taped it to the petite clouds stencil and spread transfer gel through it. I set it aside to dry while I created my easel pieces. This is also when I turn my laminator on so it’s heated up when I’m ready to use it.

For those, I die cut the scalloped circle 2 more times from white cardstock and then just one edge from a scrap. I took one of the full white circles and scored it at .5 inch from one side and 1.5 inches from the other. Then I folded it into a Z-fold. I glued the .5 inch flap to the other white panel and set it aside to dry. Next, I grabbed the scrap scalloped circle edge I cut and trimmed it straight across with my paper trimmer. Then I placed it in my MISTI and stamped a sentiment from the Floral Roundabout on it. I added foam squares to the back and adhered it to the bottom of the white circle I just glued the Z-fold to. This is the stopper for your easel.

With my transfer gel dry, I ran the cloud panel through my laminator with blue decofoil flock! Soooo much fuzzy fun! I love flocking! Next, I took both blue panels and placed them in my splatter box and splattered watered down white and black acrylic paint on them for a little extra fun texture. Once they were dry, I adhered them together with foam tape. Then I glued this panel to the bottom half of the Z-fold circle attached to my card base.

I added foam squares to the back of Winston and added him to the front of the card. Moving on to finishing touches, I added Wink of Stella glitter brush pen to the star on the plane. Then I added glossy accents over the top of the whole circle plus Winston’s goggles and nose. I also added some Wink of Stella to either end of the banner for a little shimmer in the light.

I just can’t get over how cute this is and how much fun it is going to be to give it to someone! I love that it can be displayed in such a fun way after they receive it more than anything!

Have you ever made and easel card? I’m totally hooked and can’t wait to make more of them now!

I appreciate you sharing your time with me. Have a fabulous day!

Miss Ink Stamps – Everything’s Going to be OWL-right

Hi there friends! Today I have an adorable Miss Ink Stamps card to share with you. It features the Say Cheese! stamp set which I absolutely adore! It’s got super cute images and wonderful sentiments! I paired it with the Scene Builder: Meadow stamps and Basket Case stencil to create my card today.

I started by stamping one of the images from the meadow scene builder on a white panel and colored it with my copic markers. Then I took another panel and trimmed it down to 4×5.25 inches and cut a circle window from the center. I taped the basket case stencil in pace and inked it up with a light gray ink.

Finally, I stamped images from Say Cheese and colored them with my copics. I used the scan-n-cut to cut them out and moved on to assembling my card.

To make sure the scene showed through my window correctly, I used post-it tape to tape the scene and the window panels together, added glue to the back and adhered the scene panel to a card base. I removed the tape and added foam tape to the back of the window panel, then placed it down. Next, I added foam squares to the back of my images and added them to the scene.

I chose my sentiment, placed my card in my MISTI and stamped it at the bottom. For finishing touches, I added star dust Stickles to the pom poms on the mouse’s hat and flowers in the meadow. Then I added glossy accents to the owl beaks and feet, and the mouse’s nose too.

This was a really fun card to create! I hope you liked it and found some inspiration to create something wonderful.

I appreciate you sharing your time with me. Have a fabulous day!