Blog

Pink & Main – Wishing You Everything Nice…

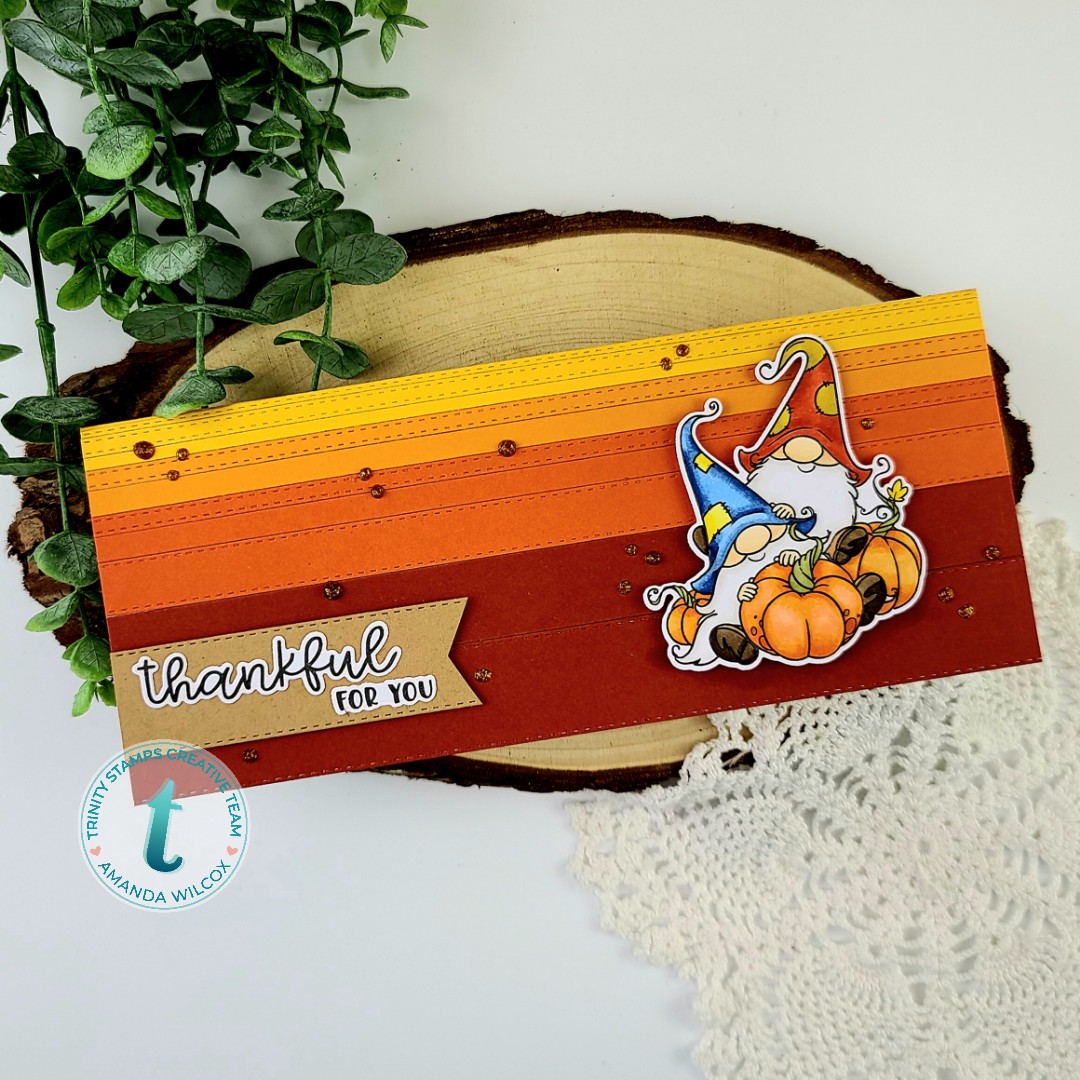
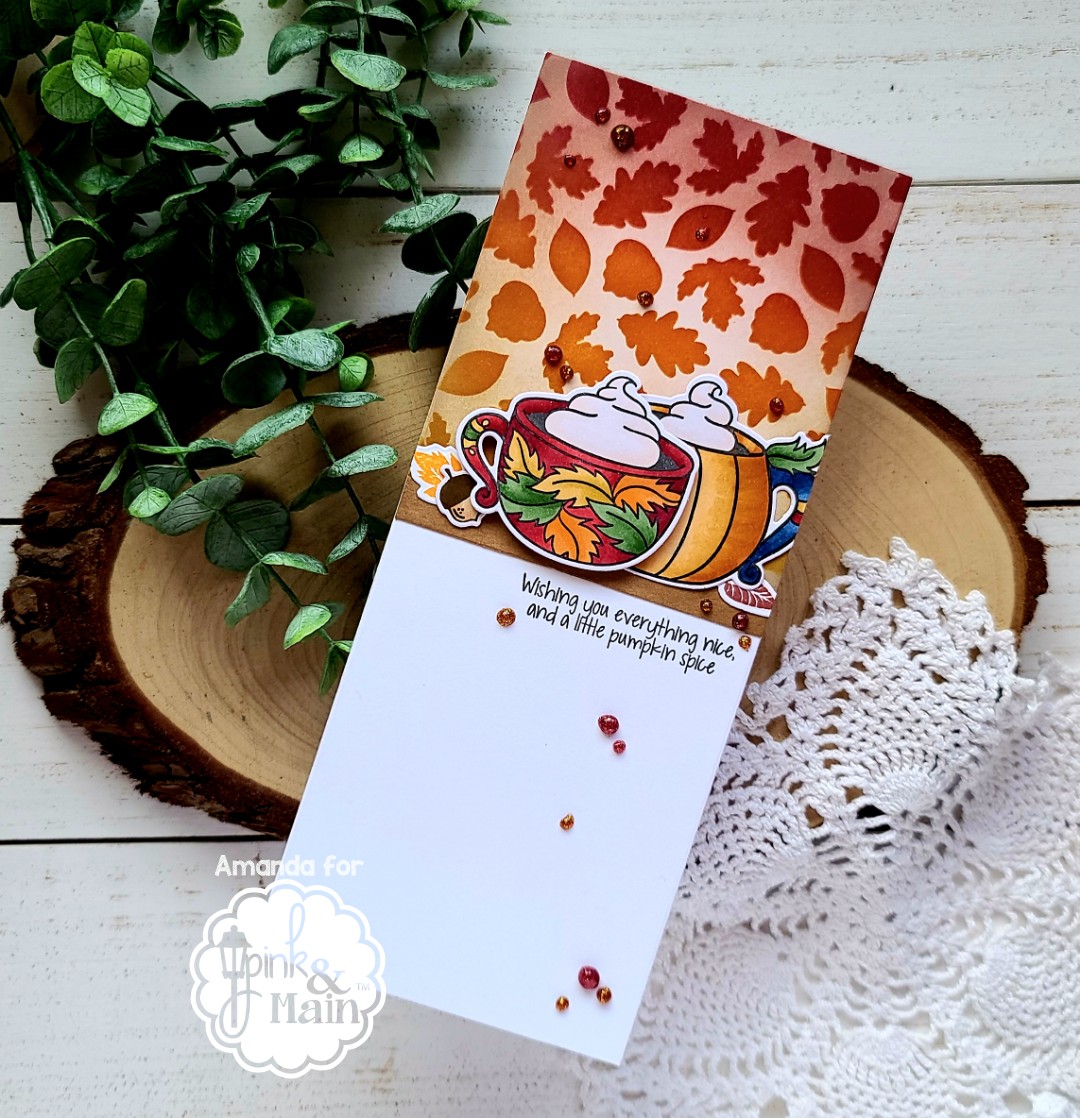
Hey friends! I’m over on the Pink & Main blog today with a fun slimline card featuring the recently released Need to Venti stamps and dies and the leafy stencil that I’m in love with!

I had an idea of the layout so I started by die cutting a white panel from the largest layered slim line dies. I masked off the top half and used my leafy stencil with my mini ergonomic blending brush and some fall colored inks. Once I removed the stencil I went around the edges again lightly coming in toward the center to take away the stark white between the leaves. Then I cut a strip of kraft cardstock about 1/4 inch wide and inked it with some light brown for dimension…although it’s mostly covered so you could totally skip that step. 😉

Then I stamped my Need to Venti images and colored them with my copic markers. I used the coordinating dies to cut them out and went back to stamp some of the small leaf and acorn images to fill in my little scene. Next, I adhered my first mug with liquid glue and then popped the other mug up with foam squares. I tucked the leaves and acorn around them, adhering them with liquid glue as well.

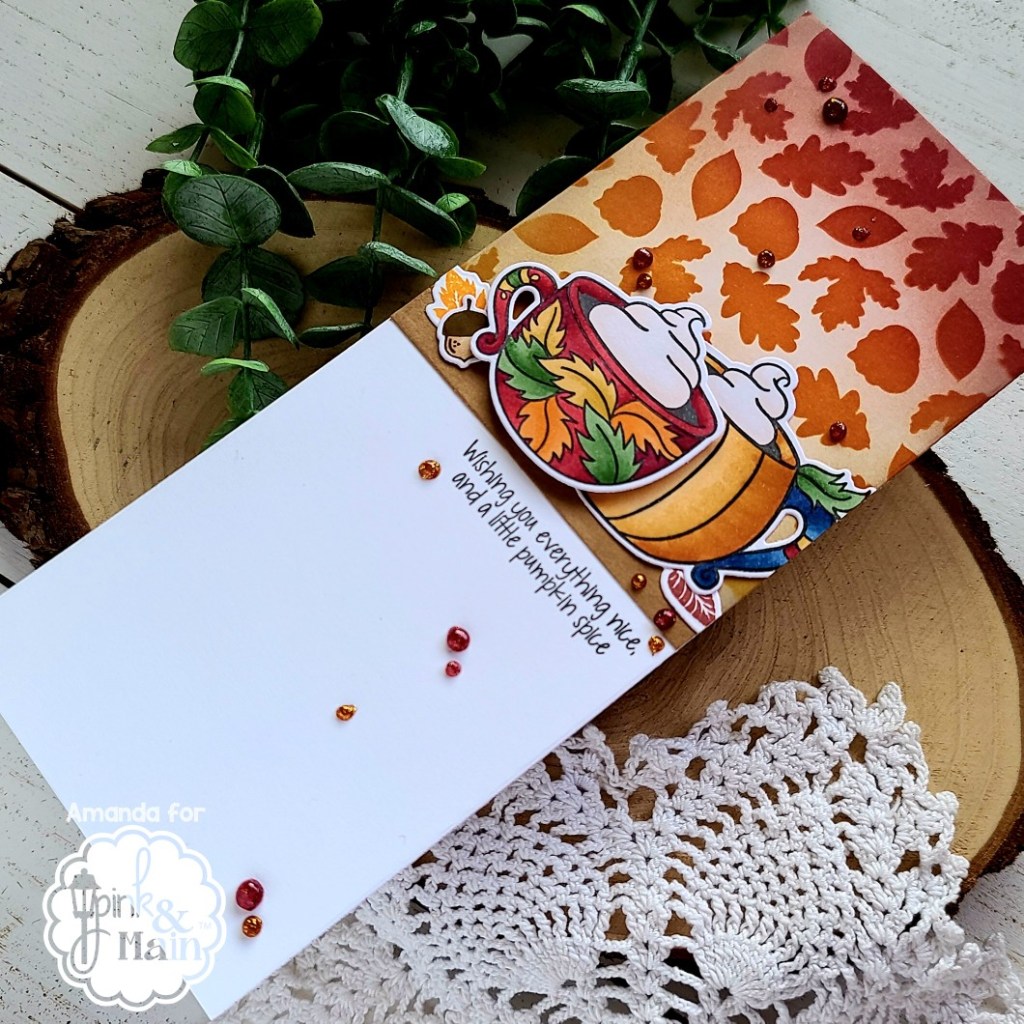
Using my MISTI, I stamped my sentiment just below the scene and moved on to finishing touches. For those, I kept it simple by scattering some Nuvo Glitter Drops in golden sunset and ruby slippers across the design adding a little Wink of Stella glitter brush pen to the whipped cream. Once that was dry I added the panel to a card base and, voila, all finished.

I appreciate you sharing your time with me. Have a fabulous day!

Newton’s Nook – The Book Was Better

Hello everyone! If you’re a reader at all, I’m sure you’re going to #1 love today’s card and #2 totally agree with the sentiment. As a very avid reader, making a point to read most books before watching the movie, I completely agree. 😉

I had so much fun creating today’s card, even though it ended up COMPLETELY different than what I set out to create. It’s kind of fun when projects take on a mind of their own. I started by stamping and coloring my Sips & Stories images with my copic markers. Then I used the coordinating dies to cut them out. I had planned to make 3 cards, one for each image but I couldn’t decide on a layout that I liked and then it hit me to pull out my Slimline Frames & Windows dies to see how everything would fit. I love it so I kept going.

I die cut the Slimline Frames & Portholes scalloped rectangle and used the Mugs stencil on it for my background. Then I popped up my Slimline Frames & Windows panel with foam tape and made final decisions on image placement. Then I used a combination of liquid glue and foam squares to adhere all of my images to their windows.

I stamped and heat embossed my sentiment on a flag from Frames & Flags and popped it up with foam squares as well in the middle window.

For finishing touches on my card, I added glossy accents to random parts of the images like the book spines, coffee mugs and the kitty’s nose. Then I added a scattering of brown clay hearts throughout the design.

Such a super fun card that I can’t wait to share with a fellow book nerd. Do you like to read? What’s your favorite genre or book? I love reading cozy mysteries mostly with a dash of fantasy (Disney mostly) and dystopian themes like The Hunger Games.

I appreciate you sharing your time with me. Have a fabulous day!

Coffee Loving Cardmakers – Coffee and You

Good morning everyone! It’s Tuesday Tea on the Coffee Loving Cardmakers blog today, so grab your cuppa and settle in for some ultra cuteness to be shared!

I had an idea for a fun layout so my card came together a little backwards for my typical style. I started by arranging the dies from my MFT Stamps Stitched Arch STAX dies on my card to see how I could get them to fit. Once I liked it, I arranged my stamps to see if I could fill the windows how I wanted and it worked perfect! I sent the arch dies through my die cutter and then moved over to stamping and coloring like I usually do.

I wanted to play with the Coffee and You set from Reverse Confetti because I just got it a few weeks ago and hadn’t been able to play yet. So I stamped and colored my images with copics, then used the coordinating dies to cut them all out.

Next, playing off the colors of my images, I inked up the arches that were die cut from my panel. I left the front panel white and stamped my sentiment on it.

For assembly, I added foam tape to the back of the white panel and then used it as a guide to adhere the inked arches to the card front. Once those were in place I removed the release paper and put the white panel in place. I added my images with a combination of foam squares a liquid glue to fill in my windows.

For finishing touches, I added a scattering of coffee bean clay hearts from Trinity Stamps and some glossy accents to the elephant’s feet and mouse noses.

This is such a clean and simple card for me but I really love how sweet it turned out.

I appreciate you sharing your time with me. Have a fabulous day!

Newton’s Nook – STAMPtember with Simon Says Stamp

Oh my goodness!!! I’m over the moon excited to be sharing today’s card with you. Newton’s Nook is graciously sponsoring a stamp set for Simon Says Stamp’s STAMPtember event and it’s the cutest thing ever!

The images on this set are all adorable and I have to admit that I colored each one multiple times already but decided to just use one on today’s card. Isn’t he the cutest thing ever? We have 2 cats and a dog so I fully plan on creating a card featuring all of them very soon.

For my card today, I used a rainbow of distress inks and die cut the panel with a die from Frames & Flags. Then I used the raindrops stencil with some texture paste. I cut out a couple of flags from the same Frames & Flags set from white cardstock and arranged my sentiments on them. The “sending you a” portion was too long so I thought it would be fun to add it to the flag as a bold, heat embossed sentiment on a black strip. I love this little touch.

I colored the letters of pocket with copics and wrapped some baker’s twine around the top before adhering it to my panel with foam squares. Then I moved down to the bottom banner, popping it up with foam squares and adhering my puppy to it as well.

For finishing touches, I added glossy accents to the word “pocket” and the puppy’s nose. Then I dug in my stash and found these cute little clay paw prints that I just had to add to the banner by the sentiment. It’s just too perfect!

Be sure to head to Simon Says Stamp to pick yours up right away! These sets have been selling out super fast so don’t hesitate or you’ll miss out.

I appreciate you sharing your time with me. Have a fabulous day!

Miss Ink Stamps – Trick or Treat

Happy Sunday! I hope your weekend is going well and you’re having a moment to relax and recharge before the new week starts. Today I’m popping in to share a fun Halloween card featuring some fun goodies from Miss Ink Stamps.

I stamped this cute little raccoon from the Boo Crew stamp set, colored him quickly with my copics and cut him out with my scan-n-cut. Then I moved on to the show stopper of the card – the stenciled panel.

For that, I took a piece of orange cardstock and one of the diamond fade stencils. First, I used a medium orange ink and faded it down with the diamonds. Then I shifted the stencil just a bit and used some black glitz gel from Gina K. While that was drying, I cut another orange panel to be 4×5.25 and inked it up with the same orange ink so it would be just a little darker where the stenciled panel met up. Like a shadow from the overlap. Once the stenciled panel was dry, I trimmed it down and glued them together. Then I cut a quarter inch strip of the same cardstock – with no inking so it looks lighter – and glued it on top.

I stamped my sentiment and popped my raccoon in place with foam squares. Then I decided to add a scattering of Nuvo Crystal Drops in gloss black and ripened pumpkin across the top of the design. Last, I added glossy accents to the raccoon’s mask and Stickles to his treat bag.

Backward to my typical order, after this was all dry, I was able to pop the panel up on a card base with foam tape and it’s done. Eeeekkk!!! He’s so cute! I just love him.

I appreciate you sharing your time with me. Have a fabulous day!

Trinity Stamps – Stencil Fun

Hi everyone! I wanted to pop in today to remind you that the new Trinity Stamps release is live and full to the brim with amazing goodies! I played with one of the new stencils yesterday – pumpkinhead layering – and had so much fun, I wanted to share my cards with you.

I had some extra squares from cutting stitched slimline windows on previous cards and thought it would be fun to stencil the new pumpkins on them. You can mix and match between the 2 different pumpkin sizes and a bundle of faces! I had a blast. I also used the slimline stripes stencil on the background panel for a little texture there too. Isn’t it so fun?

I happened to have 6 of those squares so I couldn’t just stop at 3, I used them all and created a second card as well! This time I used the slimline lots of dots stencil on the background and also tested out the new slimline quilted background die and stencil combo. It was SO COOL!!!

I hope you have an amazing weekend! Head to the Trinity shop and treat yourself!

I appreciate you sharing your time with me. Have a fabulous day!

Birch Press Design – Thank You Box

Hey friends!! I’m over on the Birch Press Design blog today with a beautiful die cut box using a variety of products. I kept the colors bold for an autumn feel and I just love it. I can’t wait to fill it with goodies and share it with someone.

Here’s a top view of it so you can see the beautiful layered sides and the nice sentiment on the lid too. The ribbon is glued to the lid, under the sentiment so it stays with it but it’s not attached to the box so it’s easy to open.

I wanted to share a side view so you really get a look at those layers too. I just love these colors for fall. They’re too perfect. Warm and cozy!

If you’d like to see the step-by-step process how to create one of these, head over to the Birch Press Design blog and I’ll walk you through it.

I appreciate you sharing your time with me. Have a fabulous day!

Trinity Stamps – Thankful For You and Instagram Hop

Happy Thursday everyone! We’ve got some major fun happening over on the Trinity Stamps Instagram page today and tomorrow. We’re having a 2-day Instagram hop with chances to win each day.

Today I’m sharing another sneak of some fun products coming your way, available for purchase tomorrow!

What’s this I see??? Slimline stitched and solid strips! And another batch of those too cute gnomes! Sooo much fun to be had!

I just love this whole line of gnomes and was so happy to see more added to he mix. So fun and festive, these guys will be great all the way through November!

And those slimline strips are perfect for making sentiment banners too! Tons of versatility and fun to play with.

I appreciate you sharing your time with me. Head over to Instagram and hop along for some more inspiration and comment for chances to win.

Trinity Stamps – New Release Sneak Peak 2

Hey friends! I’m back today with another sneak peek of the Trinity Stamps release that goes live on Friday! It’s absolutely incredible and I’m over the moon in love with so much of it. I can’t wait for you all to see it and see what you create with it too!

I’m just batty for this card! It couldn’t have turned out more perfect and those that know me, know how much I love bats! I can’t wait for you to see the whole set. It’s amazing and so much fun!

For this card, I used the circles foundation stencils to keep my focal point on that sweet bat and then used the shine brighter stencil for some extra emphasis. I finished things off with a scattering of black eyed baubles embellishments and some glossy accents on the bat’s nose and eyes.

Don’t forget we’ll be having an Instagram hop tomorrow and Friday to celebrate the new release with chances to win each day.

I appreciate you sharing your time with me. Have a fabulous day!

Pink & Main – Frightful & Delightful

Hi there! I’m over on the Pink & Main blog today with this fantastic and fun Day of the Dead Halloween card. As soon as I saw this stamp set, I wanted to try it out with the awesome Spider Web cover die. I just think they’re fun together.

For this card, I started with the background first. I die cut the spider web from vellum and cut a white A2-sized panel to blend some distress oxide inks. I used black soot, hickory smoke and pumice stone in an ombre effect. Then I splattered it with water and some watered down black acrylic paint. I set it aside to dry and stamped out my Day of the Dead images. I colored them with my copics and used the coordinating dies to cut them all out.

Moving on to assembly, I added foam squares to the back of my images and adhered them to the vellum spider web. Then I hid liquid glue behind those to adhere my spider web to the inked panel. Carefully, I spread a super thin layer of liquid glue on the corners of the spider web and adhered them to the inked panel as well. If your glue is thin enough, it holds but you can’t see it through the vellum. Then I glued the panel to a card base.

I decided to change things up and use a sentiment from Fall Sentiments this time. I stamped it with VersaMark and heat embossed it in white on black cardstock. I trimmed it into a strip and popped it up with foam squares.

Then I moved on to finishing touches which were some glossy accents on the candle flames and parts of the girl. Last, I decided to add a little shine with some baubles from my stash.

I just love when a card comes out even better than I imaged in my head. I just love this design and how the bright colors on the girl pop against the gray tones.

I appreciate you sharing your time with me. Have a fabulous day!