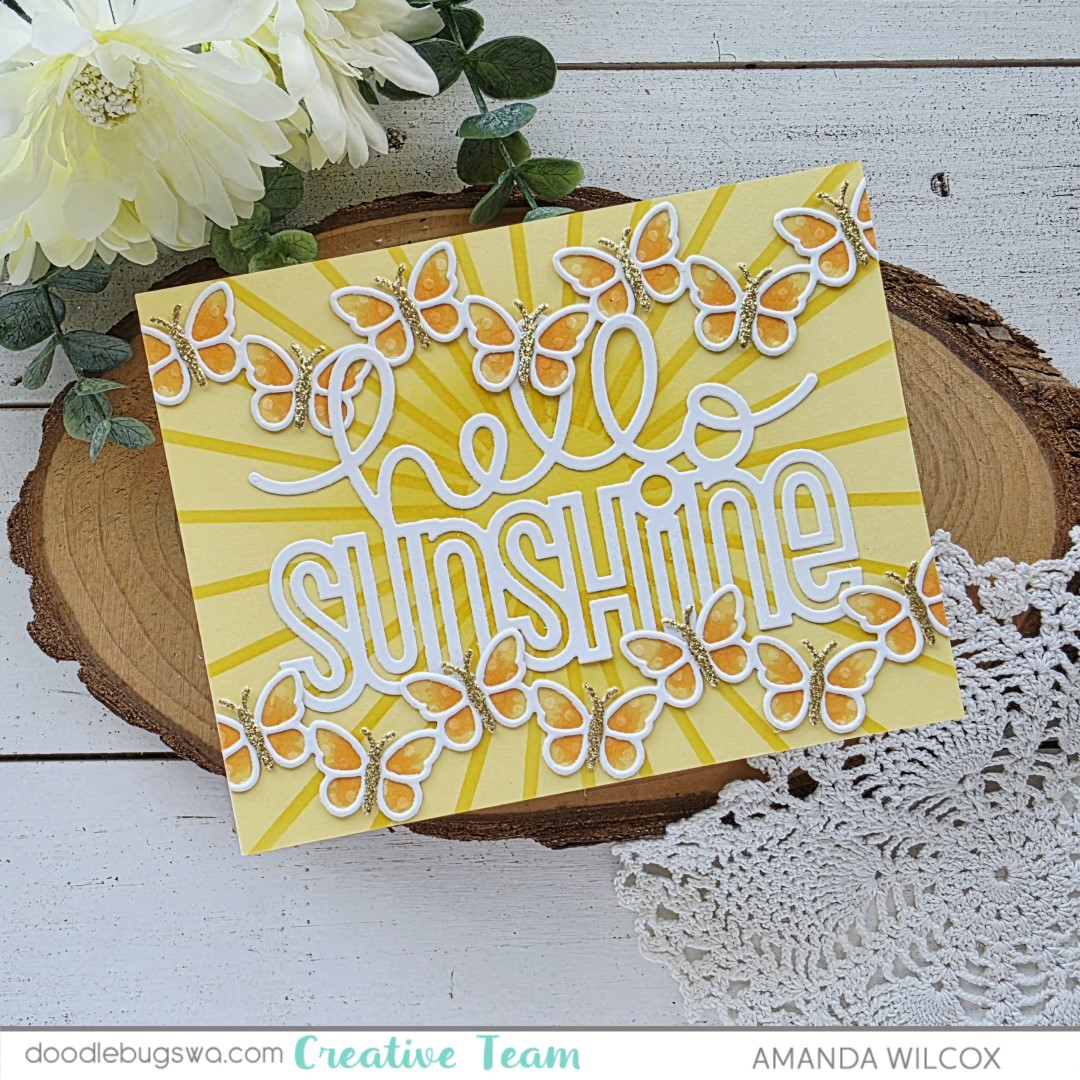
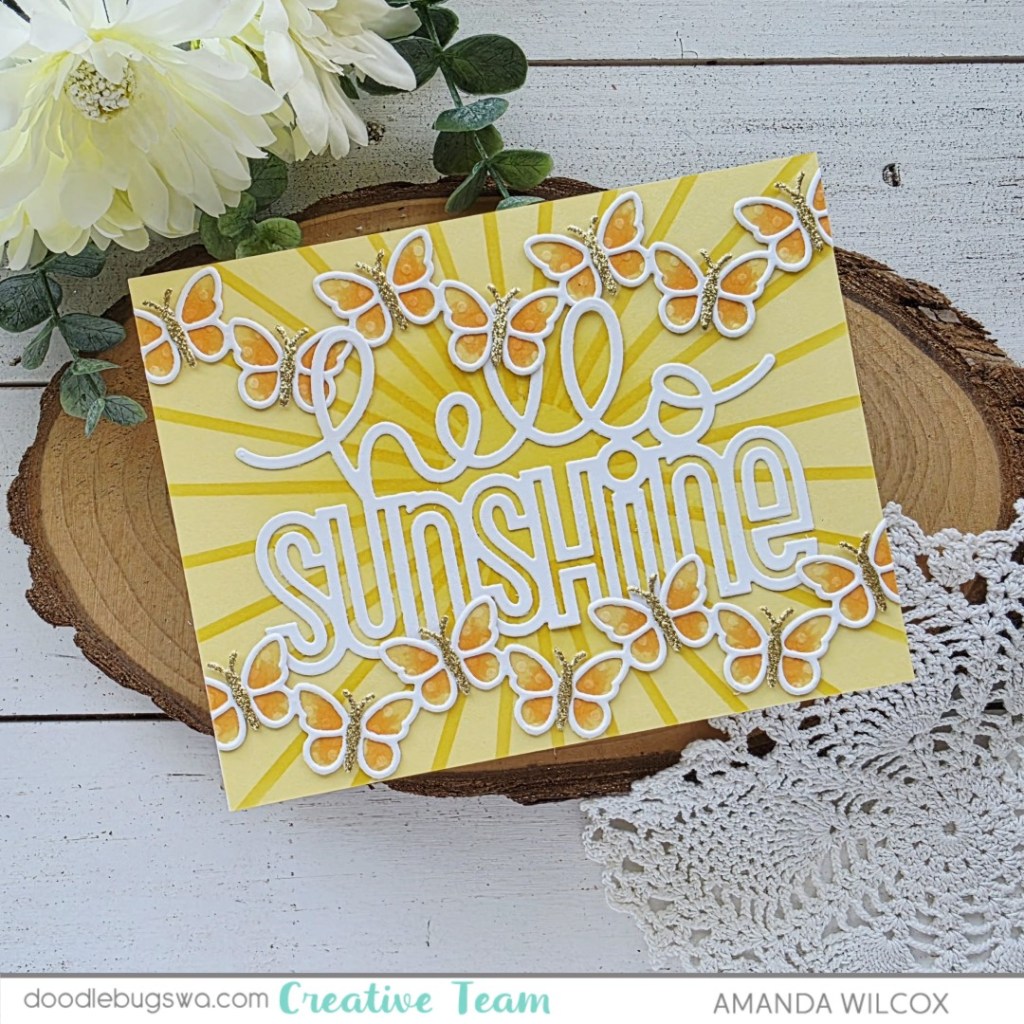
Hi friends! For Mix it up Monday on the Doodlebugs blog, I’m willing the weather to follow my vibes with more sunshine and less rain as we head into that wishy-washy spring weather. In doing so I got to play with the new Lawn Fawn butterflies and couldn’t recommend them more!
I started by die cutting the Lawn Fawn Butterfly Border pieces from white, yellow and gold glitter cardstocks. I added some copic accents to the yellow layer of the butterflies before using liquid glue to adhere the layers together.
Next, I cut the Lawn Fawn Giant Hello Sunshine from white cardstock and set it aside. I trimmed a piece of yellow cardstock to A2 size and inked it up with the Pretty Pink Posh Starburst stencil using Lawn Fawn sunflower ink and a blending brush. After removing the stencil I went over the center of the panel with the same color, fading out as I moved toward the edge.
I glued the stenciled panel to a white card base and then glued the sentiment to the center of that. I knew I wanted to layer the top row of butterflies so I left the top of the hello letters without glue for now. Next, I glued the butterflies in place, going back to add a little glue on the sentiment as needed. After everything dried, I trimmed the butterflies off the edge and my card is all finished.
Are you ready for some steady sunshine or do you have it already where you live? We’re soaking it up each day that we get where I am.
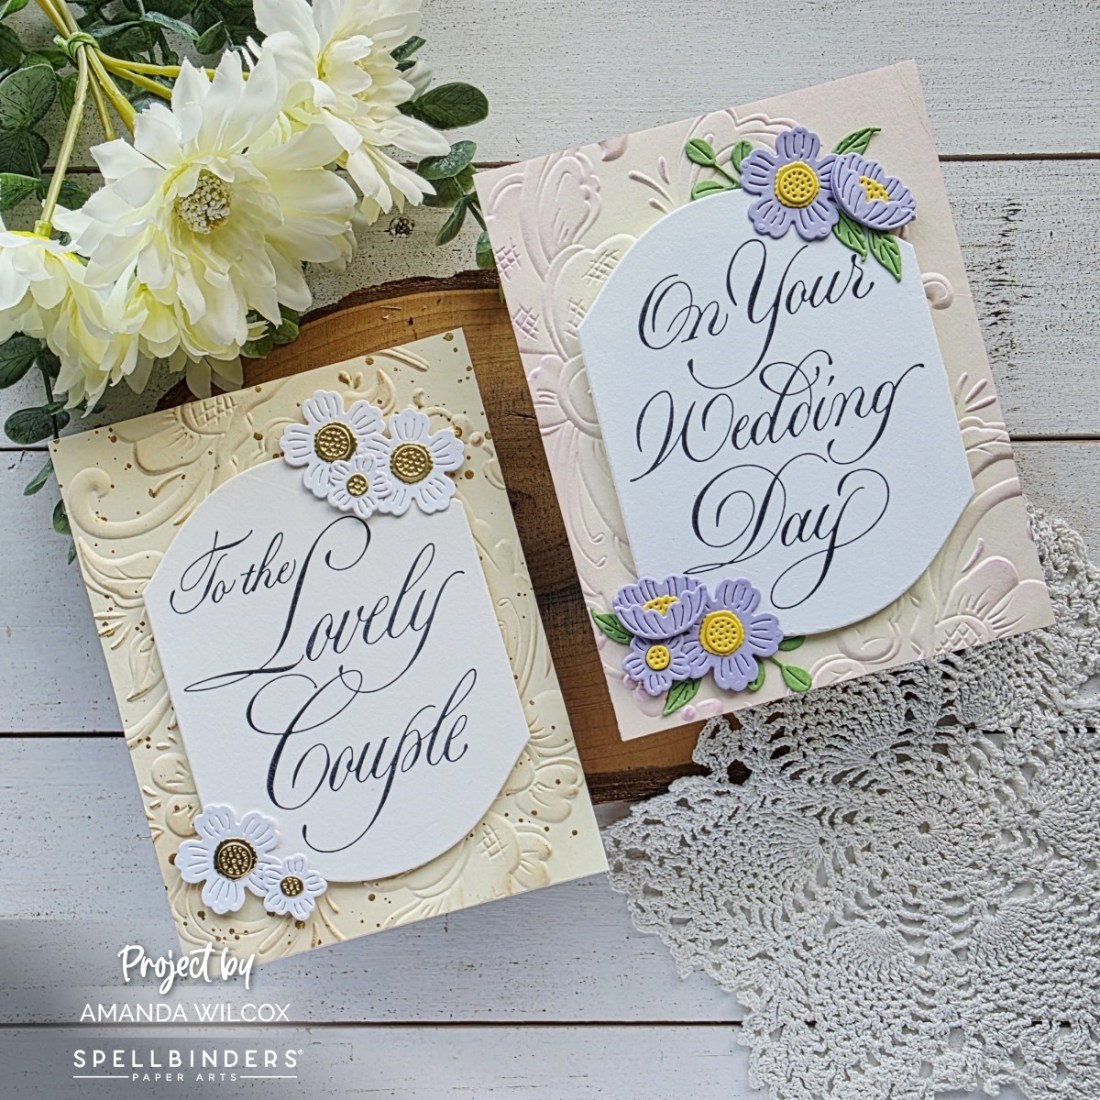
Welcome everyone! I’m stopping by really quick today with a pair of cards I creating using the new On Your Special Day Better Press plates. The Better Press system is almost flawless when getting perfect results time and time again. I just love it each time I use it!
Remember the Better Press plates work with your Spellbinders Glimmer machine if you choose as well. Today I stuck with Better Press inking to create a couple of pretty wedding cards to have in my stash.
I paired them both with the Norwegian Rosemaling 3D embossing folder for an elegant background. This one was lightly inked with brown and splattered with gold watercolor. Then I played off the gold and used gold foil cardstock for my flower centers too. I like the mix of cream, white and gold together. It feels fancy.
For this card, I added purple flowers and inked the embossed panel lightly with purple ink as well. The florals I used on both cards are from the Little Blooms die set. It’s a great smaller set with a few different florals and greenery to use in any combination you choose.
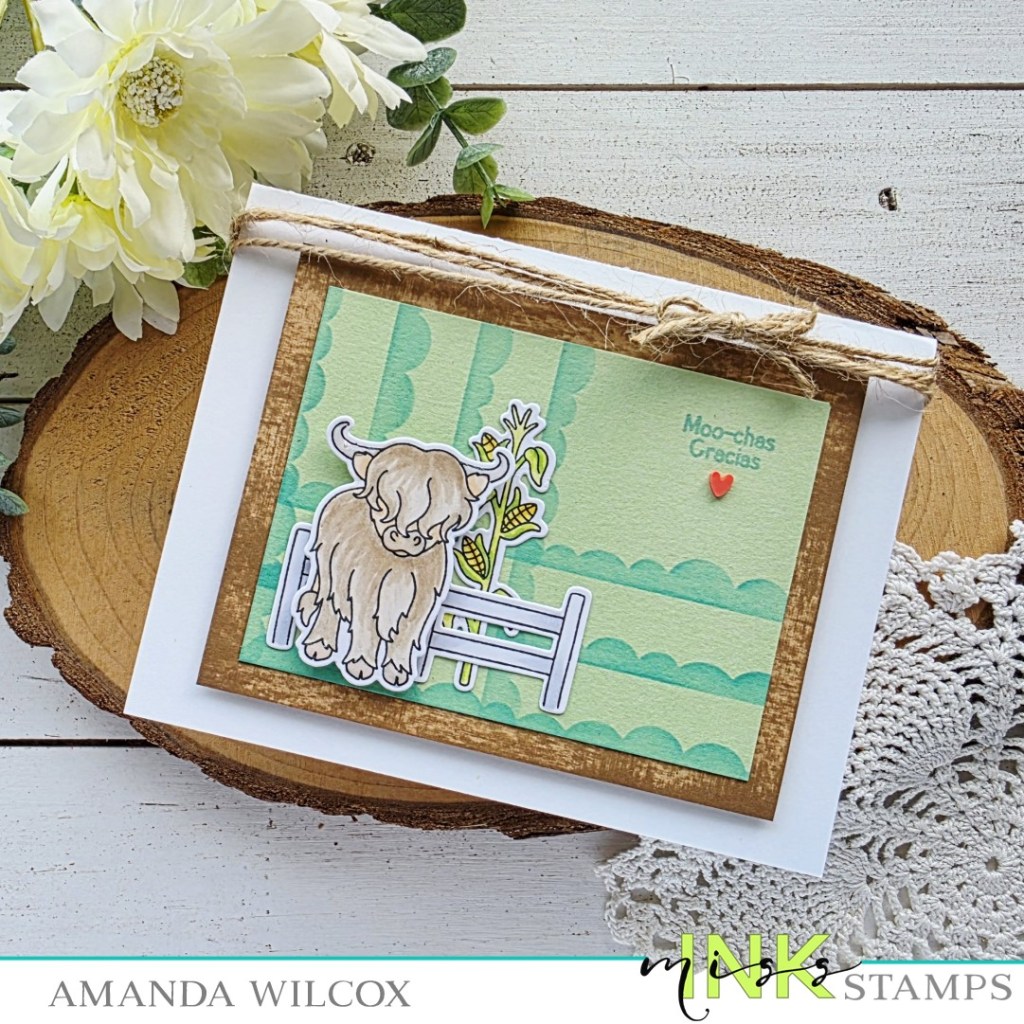
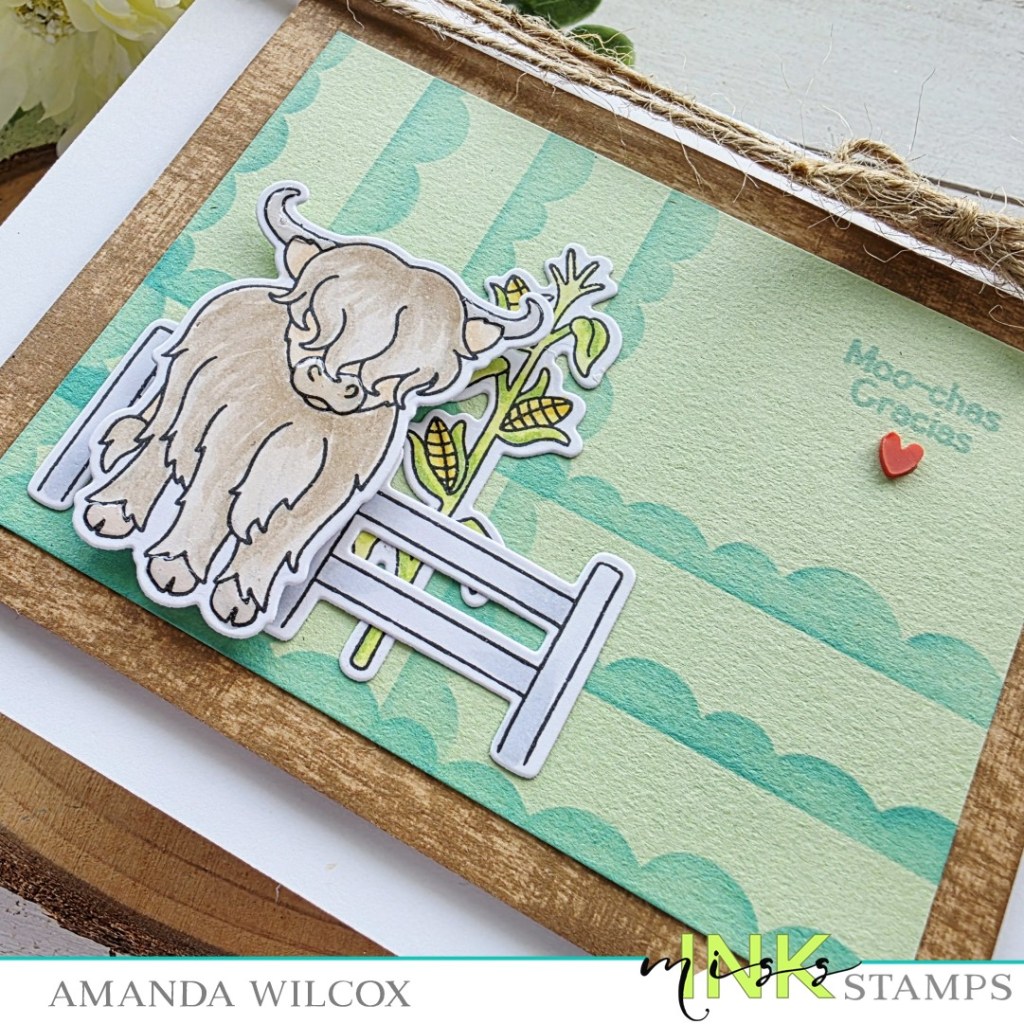
Happy Thursday everyone! I’m here with a little fun inspiration featuring Miss Ink Stamps products. I love these highland cows but they got buried so when I came across them I just had to give them some love.
First, I stamped and colored my images from Highland Cows and then used the coordinating dies to cut them all out. Next, I cut a piece of cardstock measuring 3×4 inches and used the Wonky Scallop stencil on it. Using a blending brush I inked up a few rows one way, rotated the stencil and inked up a few more rows going the other way. Just a fun way to add texture to the background.
Next I cut a piece of kraft cardstock 3.5×4.5 and drug my brown ink pad across the edges for textured color on that panel too. I used liquid glue to adhere them together and then also added the images to the bottom left corner. After that I place the panel in my Misti and stamped a sentiment in the upper right corner.
I popped that panel up with foam tape on a white card base and tied some jute twine around the top. Then I finished things off with glossy accents on my sweet cow and a little clay heart under the sentiment.
Happy Mix it up Monday everyone! I’m on the Doodlebugs blog with some seriously monstrous birthday wishes! These new Mama Elephant monsters are adorable and are going to be so fun to color in all the different colorways over time. I’m absolutely smitten!
After stamping and coloring these cuties, I used the coordinating dies to cut them out. Then I switched to my background because it was going to need time to dry.
For that I used the Pretty Pink Posh Layered Candles stencil set. I inked them up at a gradient angle for the base candle shape, then added the flames, then for the detail layer, I inked up the same colors again but after that I wiped the stencil off and added a layer of glossy gel over the top for some dimension that kept the color underneath. Once the glossy gel was dry, I added a little copic marker to the flames for some extra dimension there too.
For my sentiment, I cut the Pretty Pink Posh Wish Big dies from white cardstock 3 times and used liquid glue to adhere the layers together. Then I stamped and heat embossed a sentiment from the Mama Elephant Monster Hugs set my images came from and cut it out with a Pretty Pink Posh Sentiment Strip die.
Next I just adhered all my layers together. The stenciled panel went on a card base with liquid glue, then my wish big sentiment the same way. Then I added the images and embossed sentiment strip with foam squares and strips.
For finishing touches I just added black glaze pen to the monster eyes and a little white gel pen highlight to the balloon.
Products used: Mama Elephant Monster Hugs stamps and dies Pretty Pink Posh Layered Candles stencils Pretty Pink Posh Sentiment Strips dies Pretty Pink Posh Wish Big dies Blending brushes Lawn Fawn inks – sunflower, mermaid, fish tank, juice box Liquid glue Foam squares Anti-static bag Embossing ink Embossing powder – white
I appreciate you sharing your time with me. Have a fabulous day!
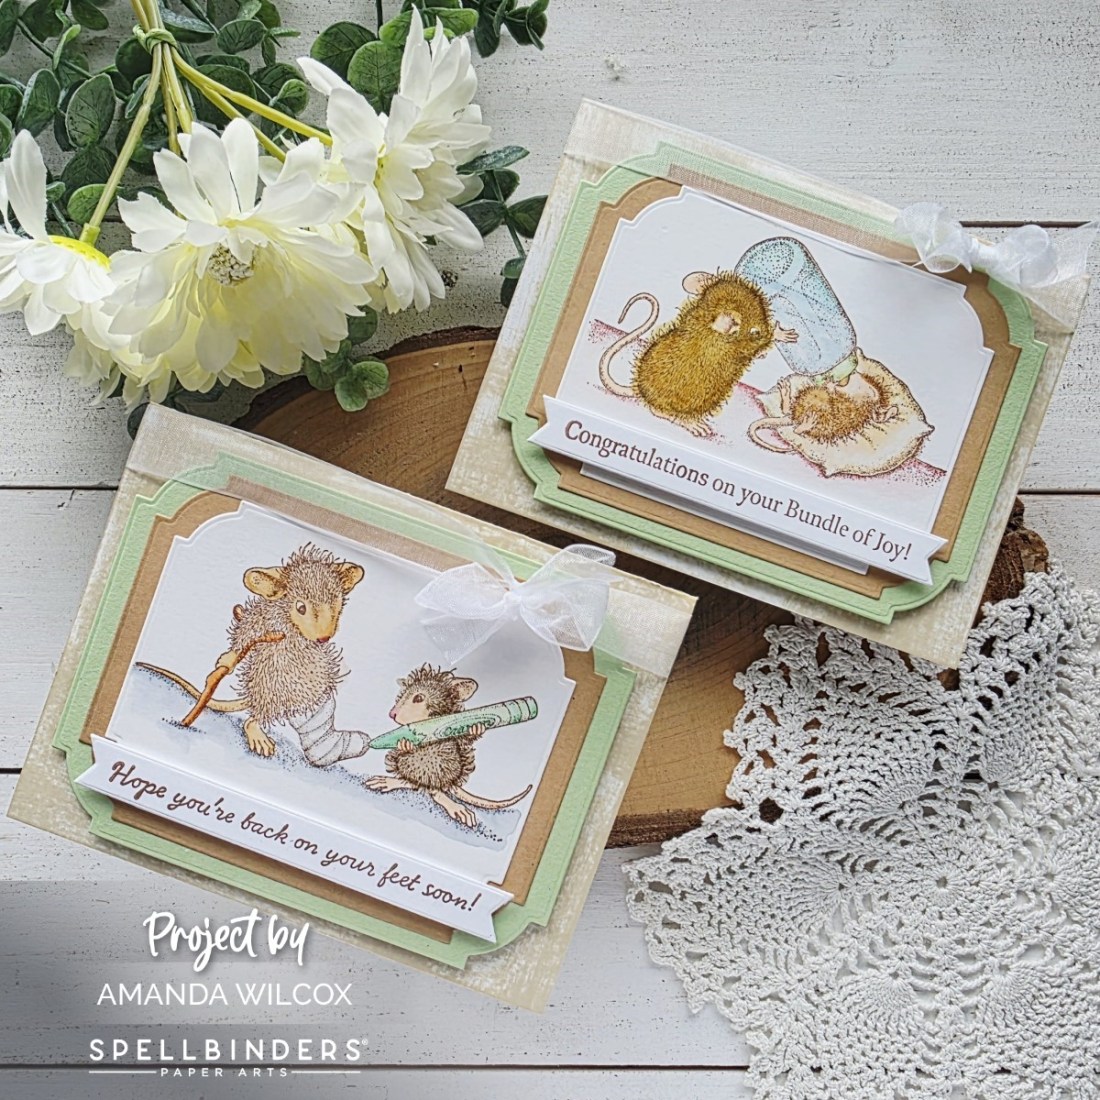
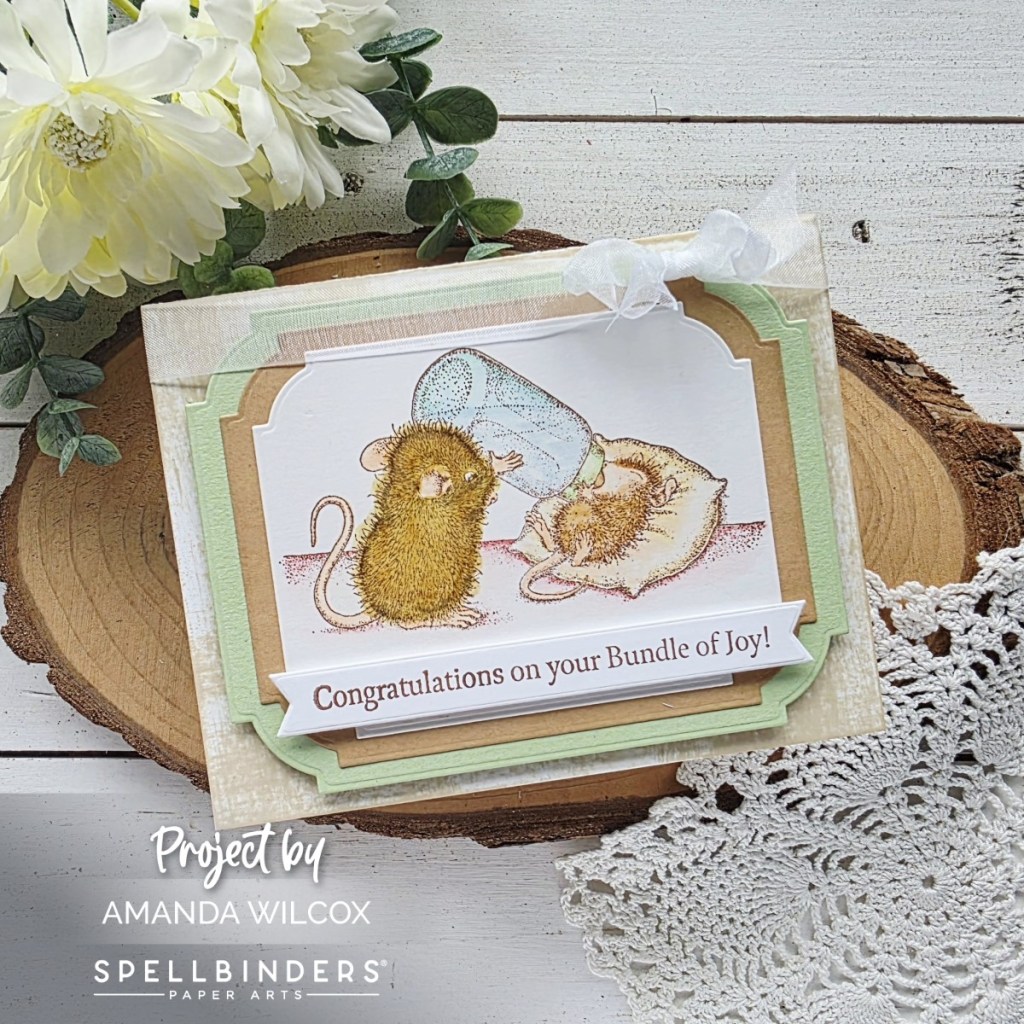
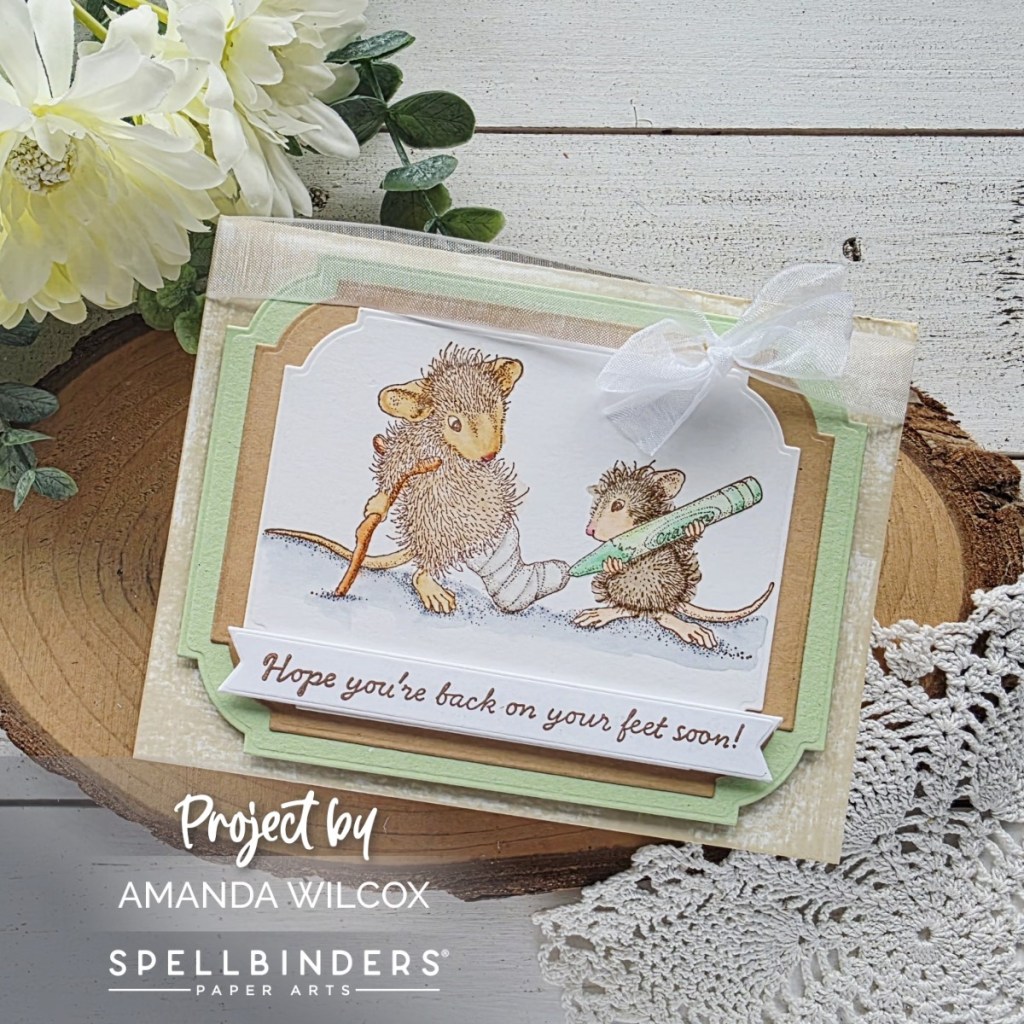
Hey friends! Happy to pop in with a couple of cards featuring new, adorable images from House-Mouse at Spellbinders. I always adore these images and love a reason to relax and watercolor – it’s a perfect combo.
Today I stamped the images and sentiments with brown ink for a softer look and used my Zig Clean Color Real Brush markers to watercolor the images with.
After the panels were dry I cut the images out with the Notched Rectangle dies plus a couple of layers larger. I inked the edges of the kraft panels for a darker brown that I liked better and glued them all together with liquid glue.
First, I took my light brown ink pad direct to the card front to ink up the edges with some texture. Then, I added foam tape to the sentiment banners and stack of notched rectangles. and popped them in place. To finish things off I tied some organza ribbon around the top of both cards in a little bow.
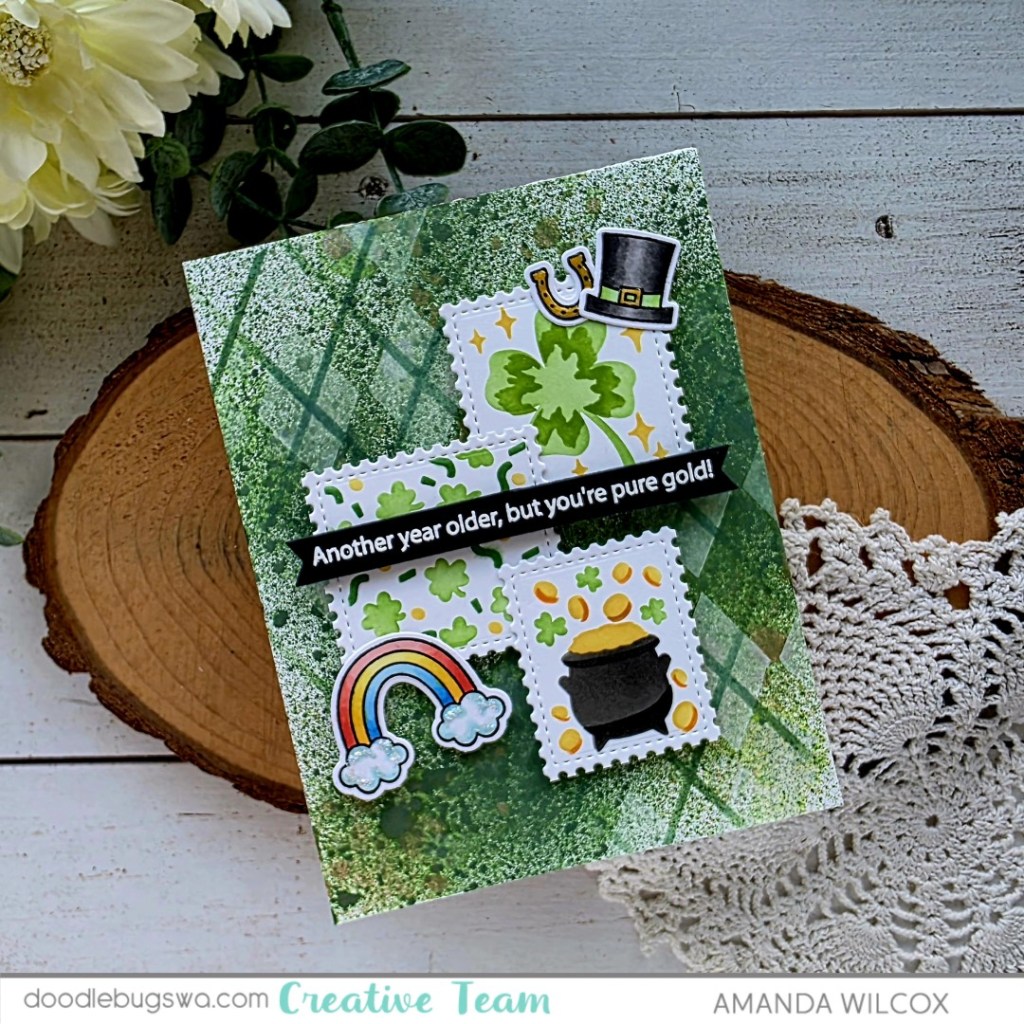
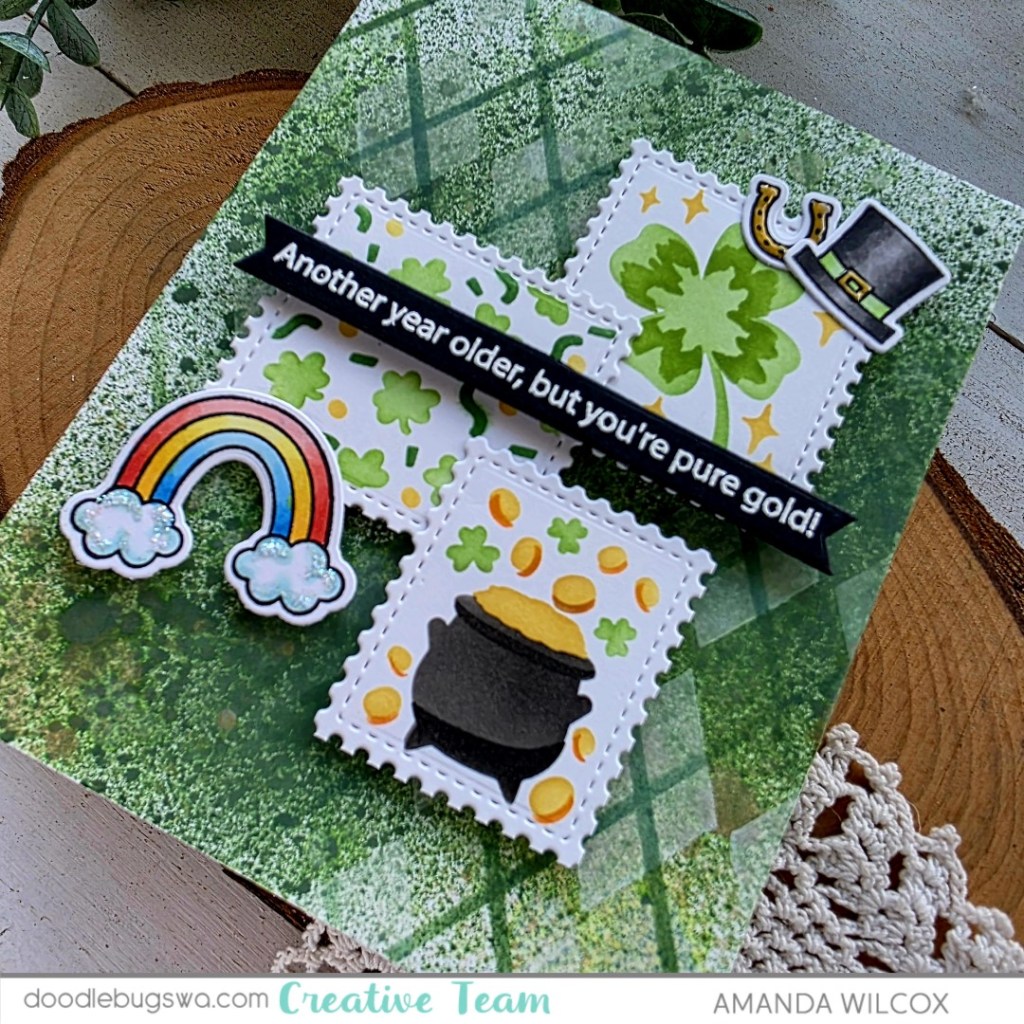
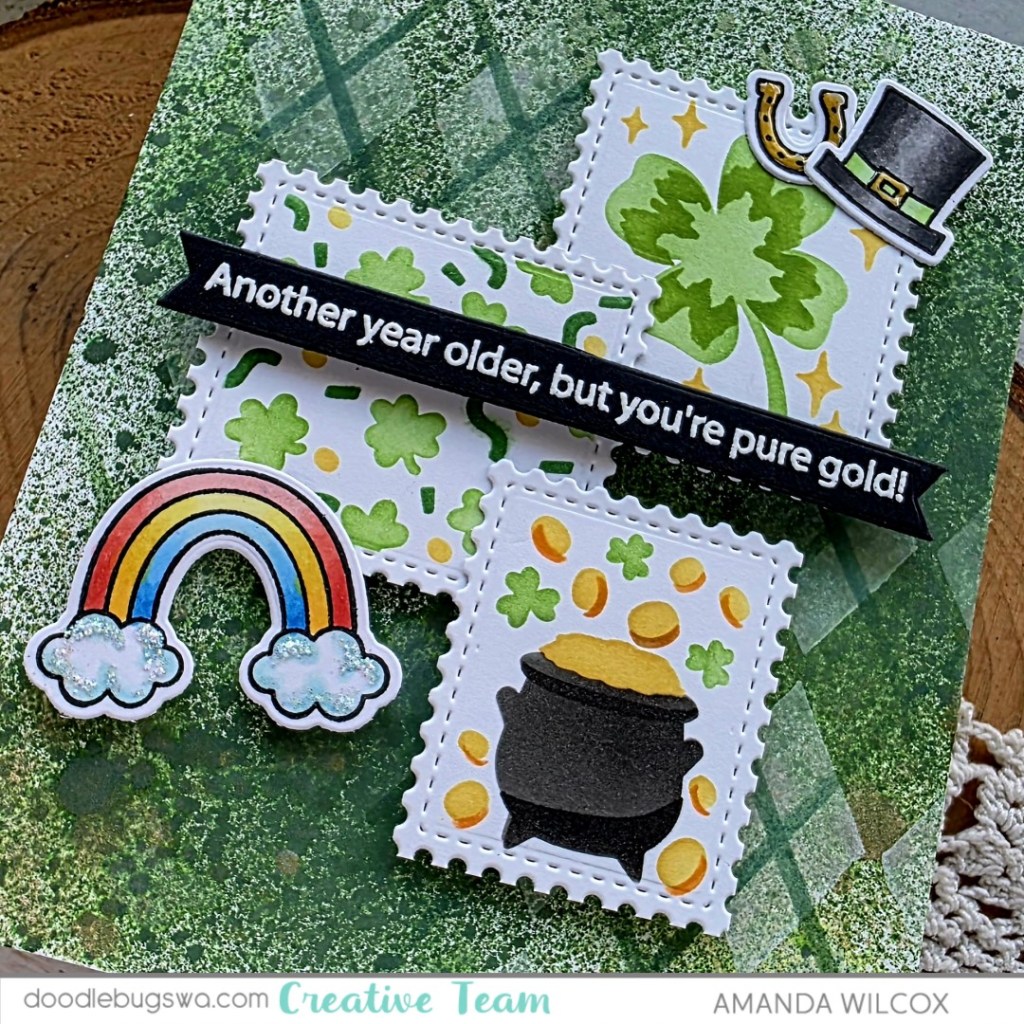
Hey friends! It’s Mix it Up Monday on the Doodlebugs blog and today we’re making everything green to get in the spirit for St. Patrick’s Day coming up! According to Ancestry.com I don’t have an ounce of Irish in me, but my heart says otherwise because I love doing all the fun things for St. Patrick’s Day and I always have!
For today’s card, I pulled out the amazing Waffle Flower postage collage series – dies and Lucky layered stencil set – and got to inking everything up. Once I had the set stenciled, I used my scissors and cut the stamps apart. I absolutely loved these 3 for the extra green vibe I was going for so I set the others aside for another day.
Next, I pulled out the Pretty Pink Posh Lucky stamps and dies and got to work on all the images from that set. After coloring and die cutting them all, I played around with layout and landed on what you see here. I used liquid glue to adhere the layers together and set them aside to dry while I got messy on my background.
For the background I used a combo of Distress Spritz sprays and Distress Oxide sprays. The spritz have a serious shimmer to them and the oxides are a great, dense color. They play very well together.
After I heat set the sprays on my cardstock, I pulled out the Pretty Pink Posh Argyle stencil set and inked it up with a combination of Lawn Fawn Yeti ink and Distress Oxide Rustic Wilderness. These are pigment inks so they sit on top of what they are inked on. This works great for the cardstock I’ve already inked up with the sprays. Dye inks would have gotten lost.
Finally, I stamped and heat embossed a sentiment from the Waffle Flower Lucky stamp set that coordinates with the postage stencils. I cut it out with a banner die and now I can assemble all my layers.
The background was glued to a card base directly. Then, the images and sentiment strip are all popped up with foam squares. With my finished touches being a little glossy accents on the horseshoe and hat, and stardust Stickles on the rainbow’s clouds.
What a festive and fun birthday card?!? I love it!
Products used: Waffle Flower Lucky stencils and stamps Waffle Flower Postage Collage dies Pretty Pink Posh Argyle stencils Pretty Pink Posh Lucky stamps and dies Distress Oxide ink and spray – rustic wilderness Distress Spritz – twisted citron Lawn Fawn inks – yeti, cilantro, jalapeno, no. 2 pencil, sunflower, jet black Blending brushes Glossy accents Stickles – stardust Liquid glue Foam squares and strips
I appreciate you sharing your time with me. Have a fabulous day!
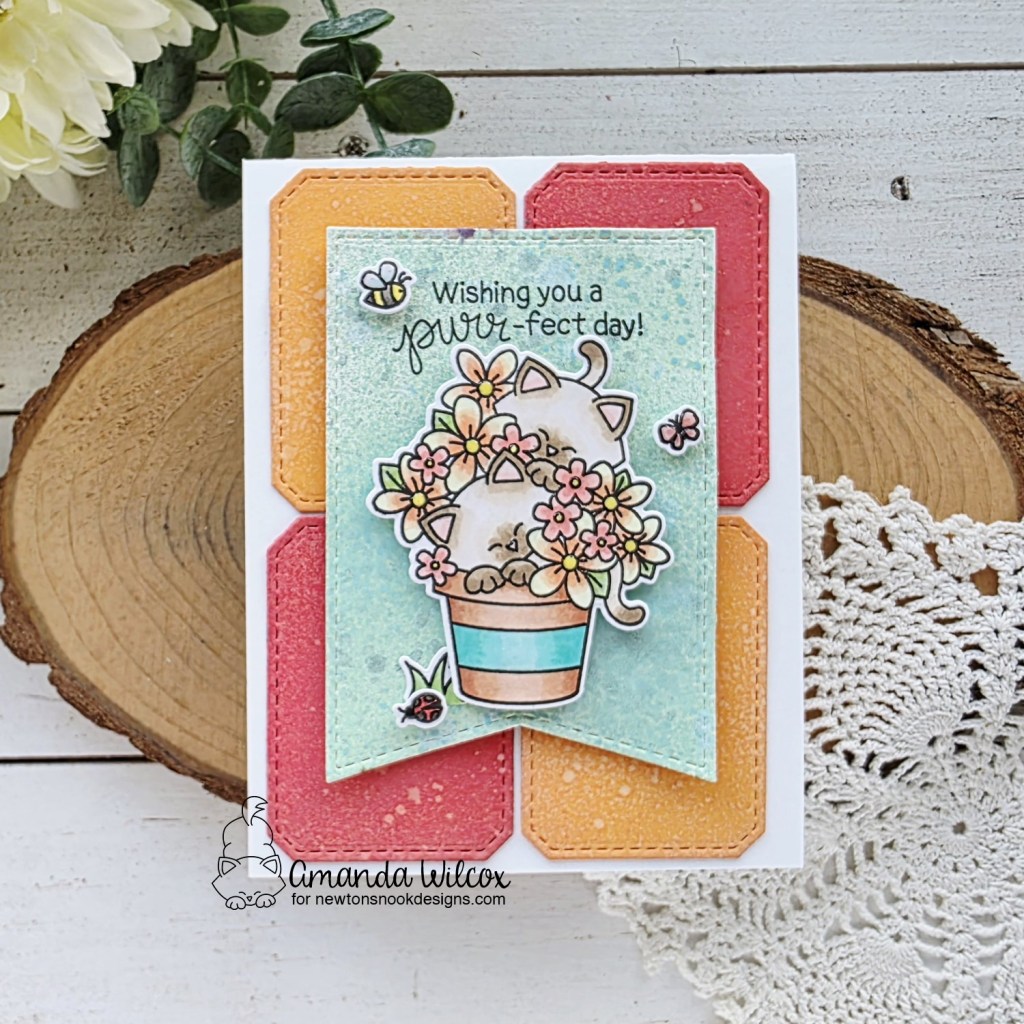
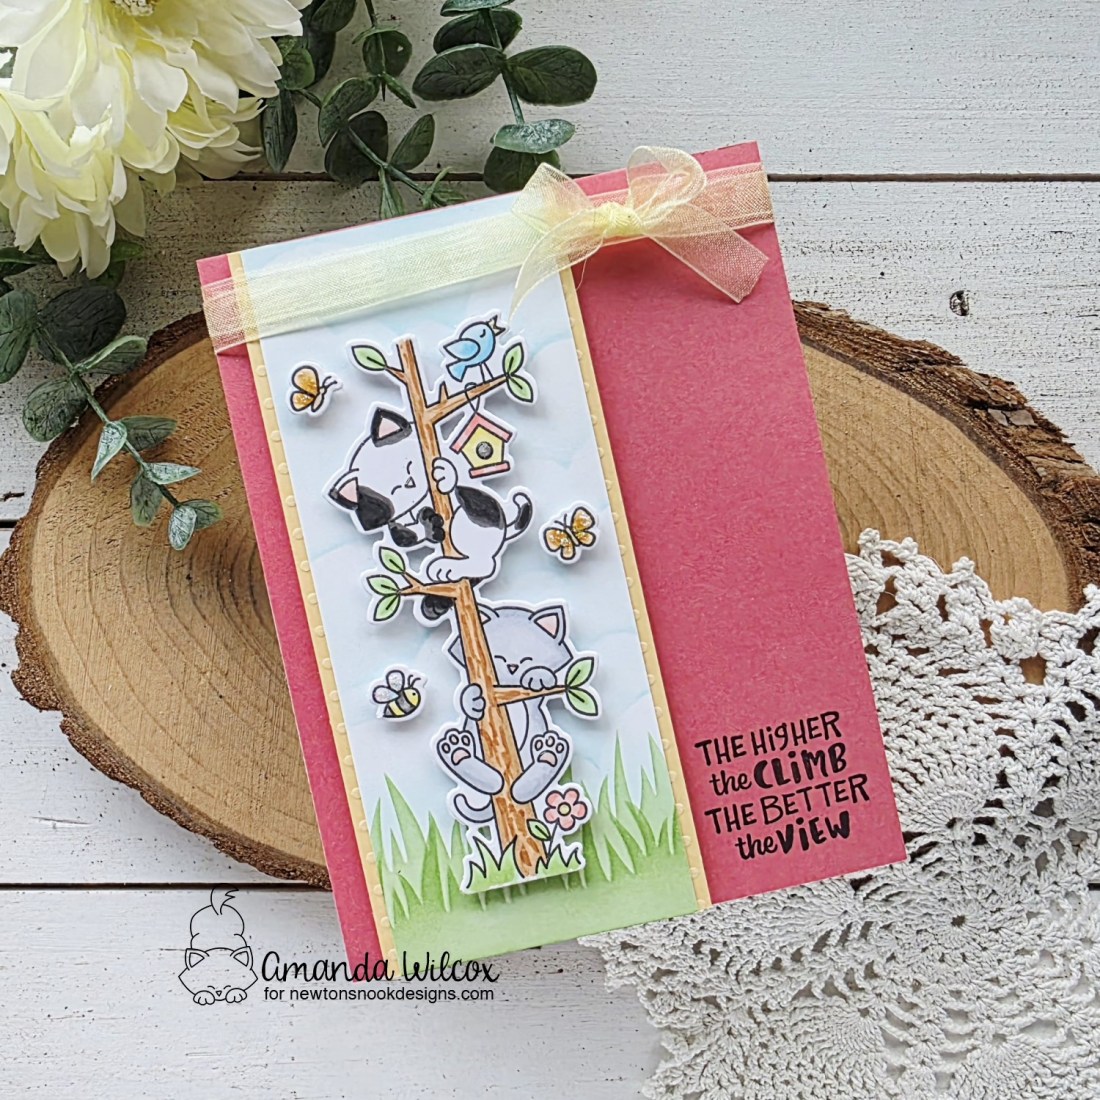
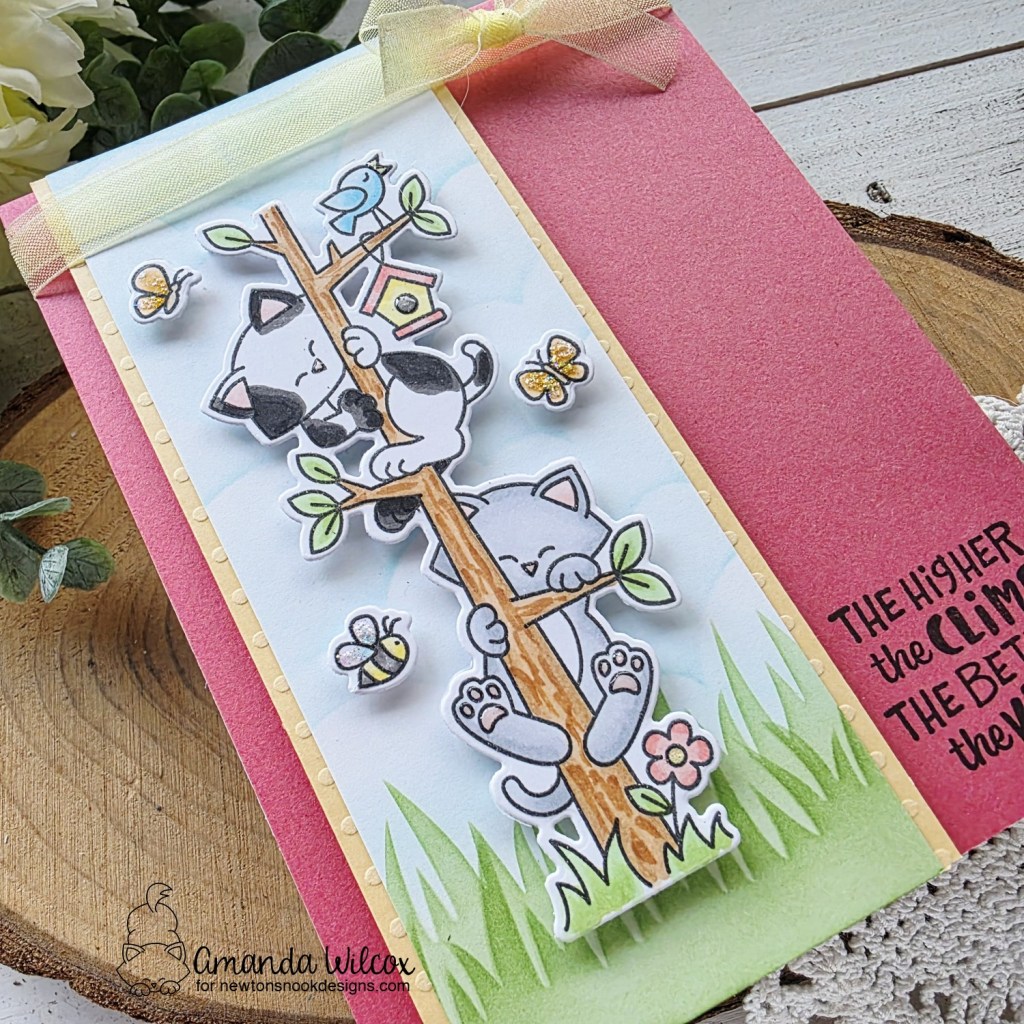
Happy Thursday everyone! I’m over on the Newton’s Nook blog today with a fun spring themed card that I plan to use for a birthday card. The sentiment is super versatile which is awesome!
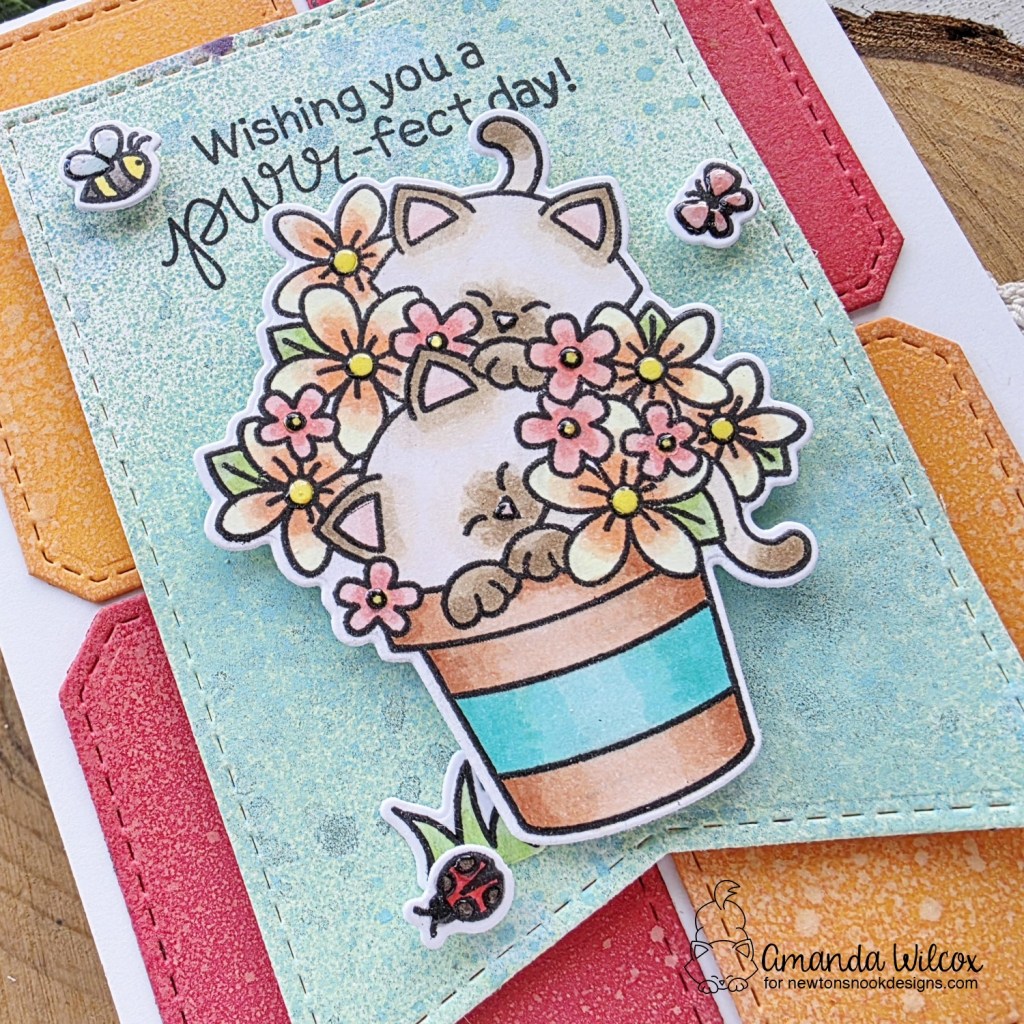
I started by stamping and coloring my images from Newton’s Blooms. Then I used the coordinating dies to cut everything out and set them aside to get inky for my backgrounds.
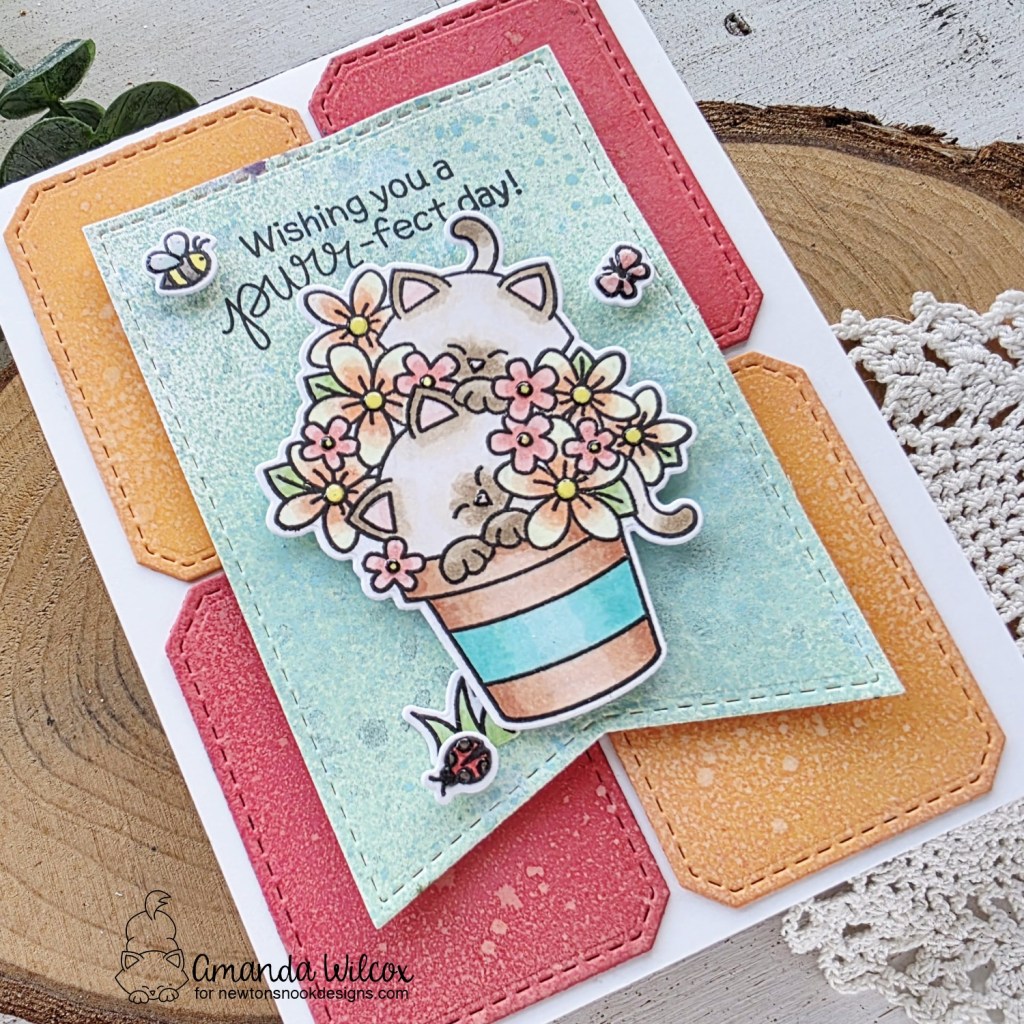
I pulled out the Basic Frames dies to create all the panels for my background. I cut the banner from white cardstock and the notched rectangles from melon and peach cardstocks. Next, I used distress oxide sprays on all the panels – salvaged patina, abandoned coral and wild honey – on the corresponding cardstocks. Then I splattered those with water once the spray had dried. This gives another level of distressing.
Once the panels were dry, I stamped my sentiment at the top of the banner and adhered my images with foam squares. I used liquid glue to adhere the notched rectangles to a white card base and then popped the banner up with foam tape on top of those.
For finishing touches I added glossy accents to bits of all the images – kitty noses, flower centers, wings and ladybug dots.
Do you find a specific time of year when you need to update your stash? Most of our birthdays and celebrations are at the end of the year so after Valentine’s Day I feel like my boxes are empty and I have to get moving creating a variety of themes.
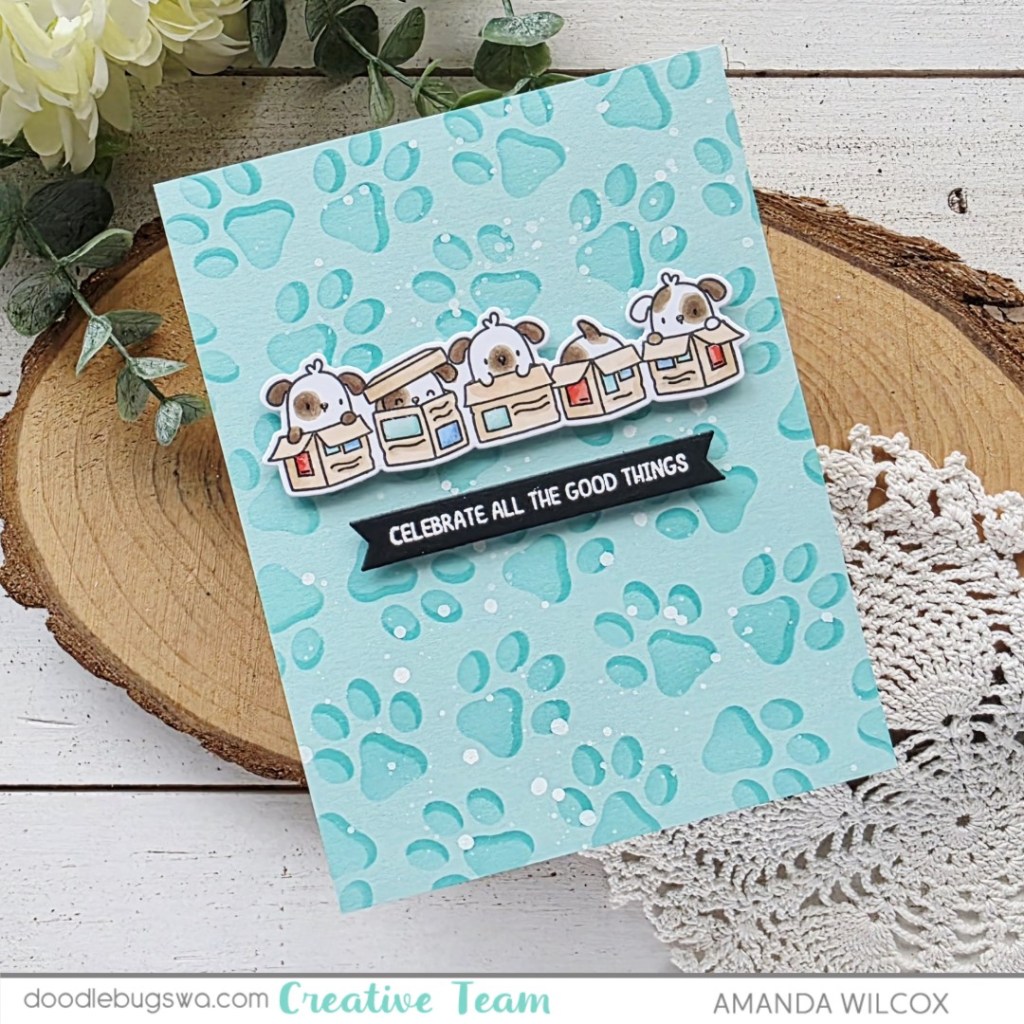
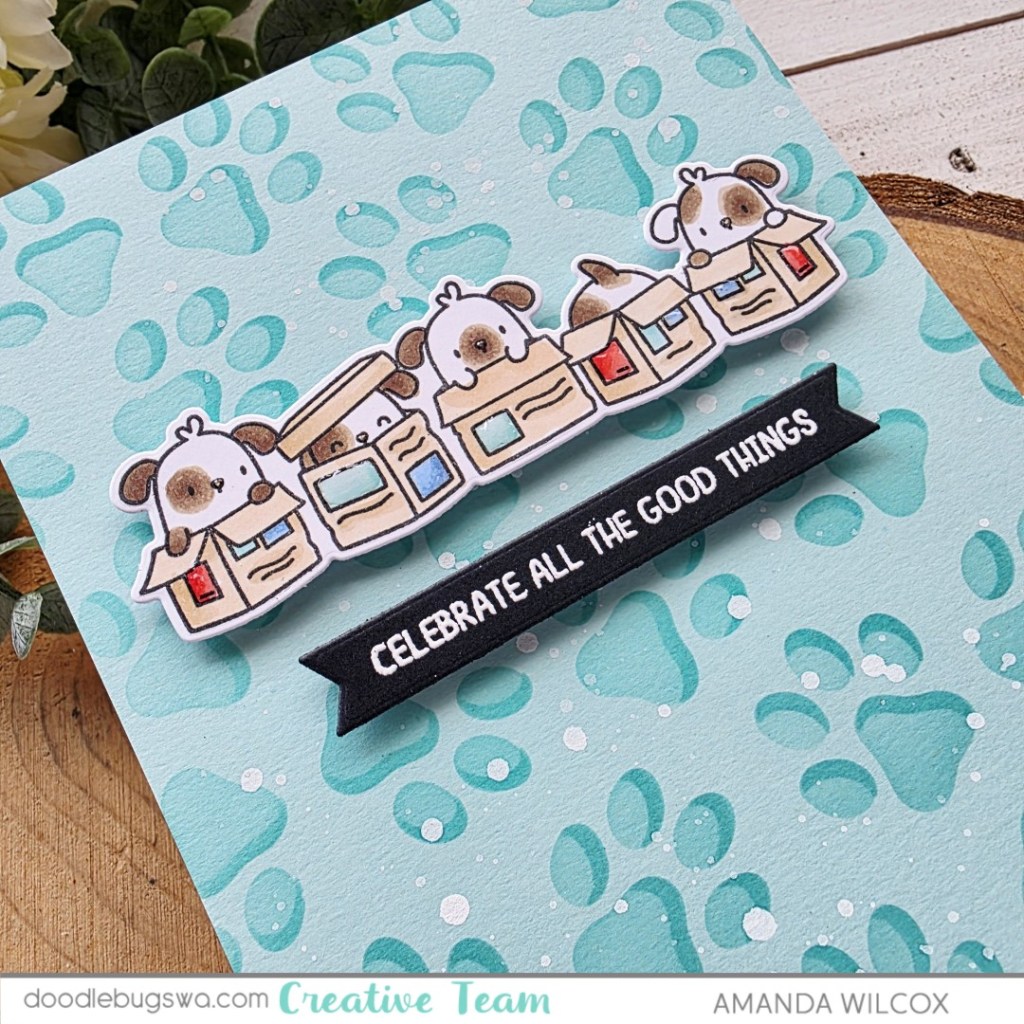
Hi friends! I have a fairly simple card to share with you today that I’m just smitten with! I love my critters, you all know that! So to be able to mix and match things along that theme together makes me extra happy! Today we’ve got a fun background and some adorable puppies to celebrate with!
I was digging around in my stash and came across this fabulous layered stencil set from Waffle Flower called Paw Print Duo. It’s a two layer stencil and gives these awesome paw prints for your background. Today I inked them up with peacock and mermaid inks from Lawn Fawn and then splattered the panel with white paint for a little interest and texture.
While that was drying, I stamped the puppy image from the Mama Elephant Little Line Agenda stamp set and colored them with my copic markers. I used the coordinating die to cut it out and added foam squares to the back.
From the same stamp set, I stamped and heat embossed my sentiment on black cardstock. Then I used a banner die to cut it out and also added foam strips to the back of this.
With the background dry, I glued it to a card base and simply removed the release paper on my image and sentiment strip, popping them in the upper center. Then, for finishing touches I added a dab of glossy accents to all the puppy noses and about half of the labels on the boxes. No rhyme or reason, just some glossy bits here and there.
Aren’t they the cutest thing you’ve ever seen!?! I can’t say it enough, I love the Mama Elephant Little Agenda line. They’re the perfect size to play with and too cute for words!
Products used: Mama Elephant Little Line Agenda stamps and dies Waffle Flower Paw Print Duo stencil Lawn Fawn Extra Sentiment Banners dies Blending brush Lawn Fawn ink – peacock and mermaid VersaFine ink Anti-static bag Embossing powder – white Glossy accents Liquid glue Waffle Flower Grip Mat (4×6) Foam strips and squares
I appreciate you sharing your time with me. Have a fabulous day!
Happy Friday everyone! We’ve revealed all the wonderful things and it’s all available to purchase in the Newton’s Nook shop now! To add to the release festivities we’re having a hop over on Instagram full of inspiration too!
Here are the details for my card but be sure to comment on Instagram for your chance to win!
I told you on the reveal day that I had to color both of the Spring Heights images right away because I just loved them so much! Well, since I created a tag with the other image I wanted to create a card to share with you for this image.
After coloring and die cutting the image, I cut a piece of white cardstock a couple inches wide and stenciled a mini scene with the clouds stencil and hills & grass stencil. I glued that to a piece of yellow cardstock and popped my images up with foam squares.
Next, I cut a piece of melon cardstock and glued it to a white card base before popping my scene panel up on it with foam tape. I used my MISTI to stamp my sentiment after it was all put together and finished it off with some ribbon tied at the top.
For finishing touches on the images, I added glossy accents to all beaks, noses and toe beans, plus stardust Stickles to wings and flower centers.
Remember to head to Instagram now and comment as you hop along for another chance to win!
I appreciate you sharing your time with me. Have a fabulous day!
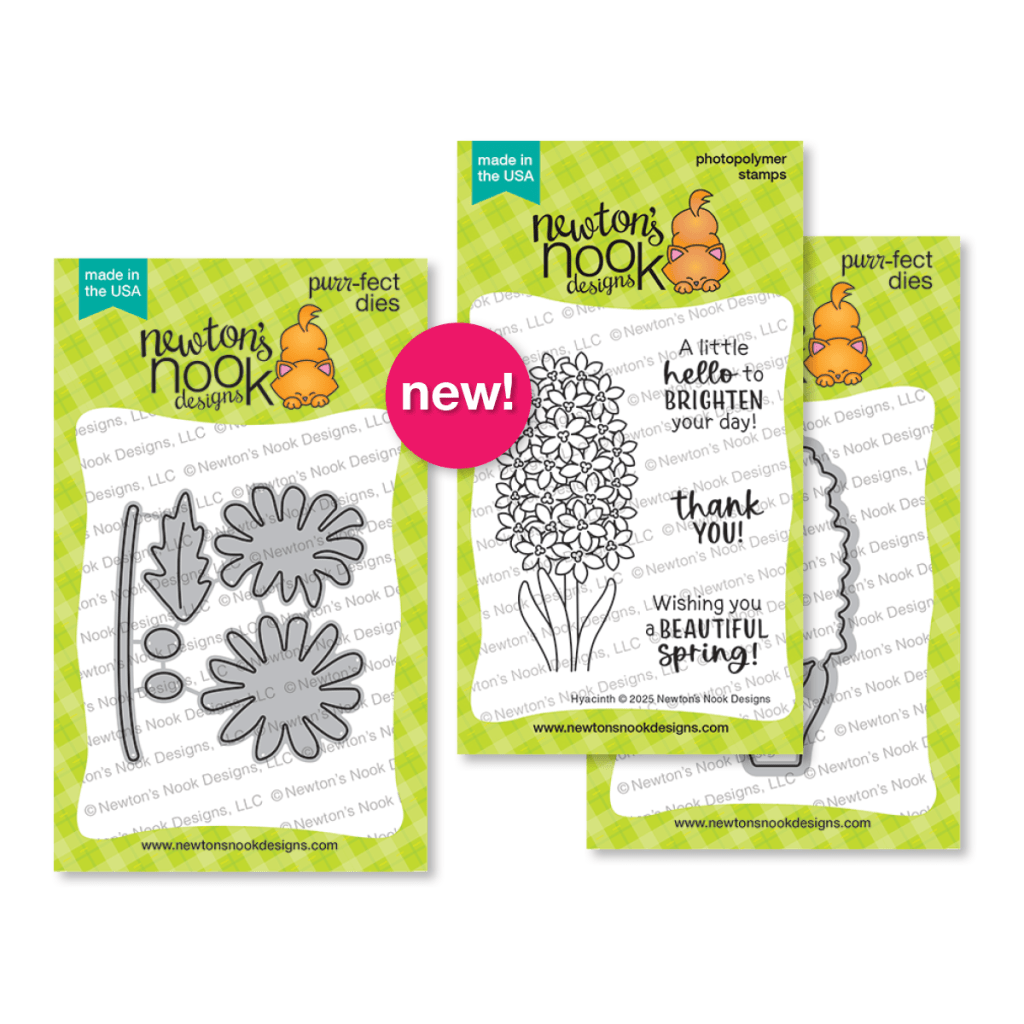
Welcome back everyone! Today is the final day of release reveals. Tomorrow you can hop with us for extra inspiration on Instagram and also hit the Newton’s Nook shop to grab your favorites too! But first…today’s reveal!
Hyacinth stamps and dies and Daisies dies
These new products are really sweet and fun to create with so I have 2 cards to share with you today! Let’s start with the fun Hyacinth image.
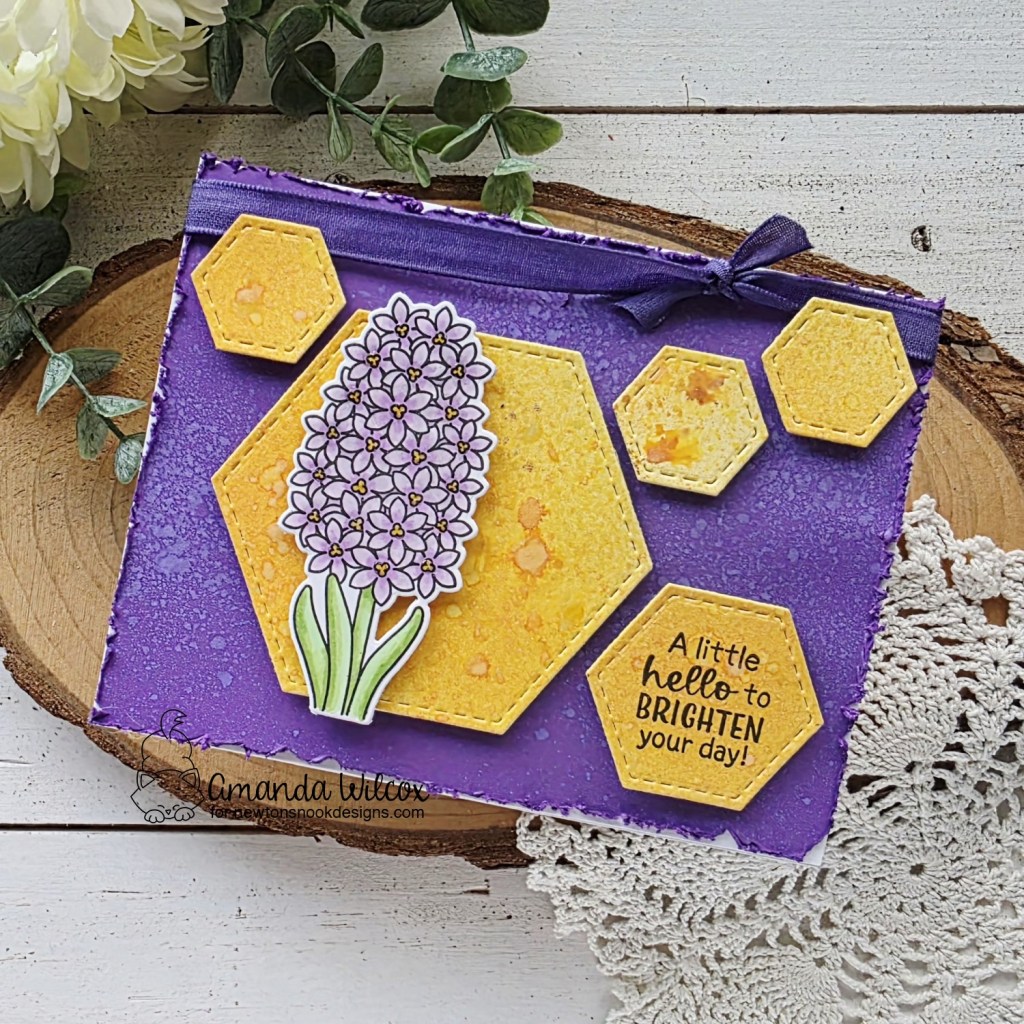
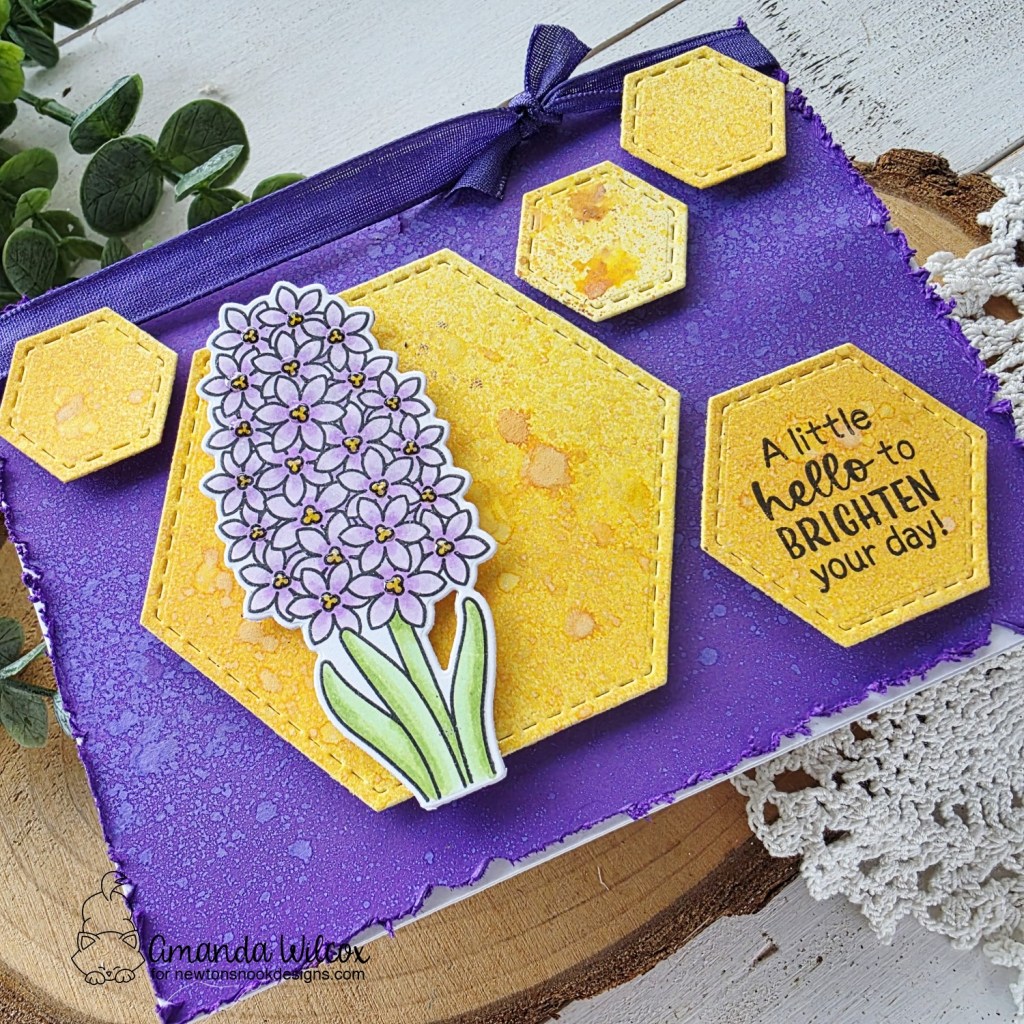
After creating so much pastel for this release it was really fun to go bold with these florals, and my favorite, get inky messy too! I started by stamping and coloring the image, then cut it out with the coordinating die. I already had a design in mind so I pulled out the Hexagon Frames dies and started cutting them from yellow cardstock.
Once the hexagons were cut out and arranged, I cut a piece of dark purple cardstock for my background. Then I spritzed the papers with distress oxide sprays for fun visual texture. I used Wilted Violet and Wild Honey on the respective cardstocks. Once the purple was dry, I distressed the edges before gluing it to a white card base.
I stamped my sentiment on one of the hexagons and then popped them all up with foam squares. Next, I added the hyacinth image the same and finished that off with glossy accents on all the stamen. Last, I wrapped some purple ribbon around the top and tied it in a knot.
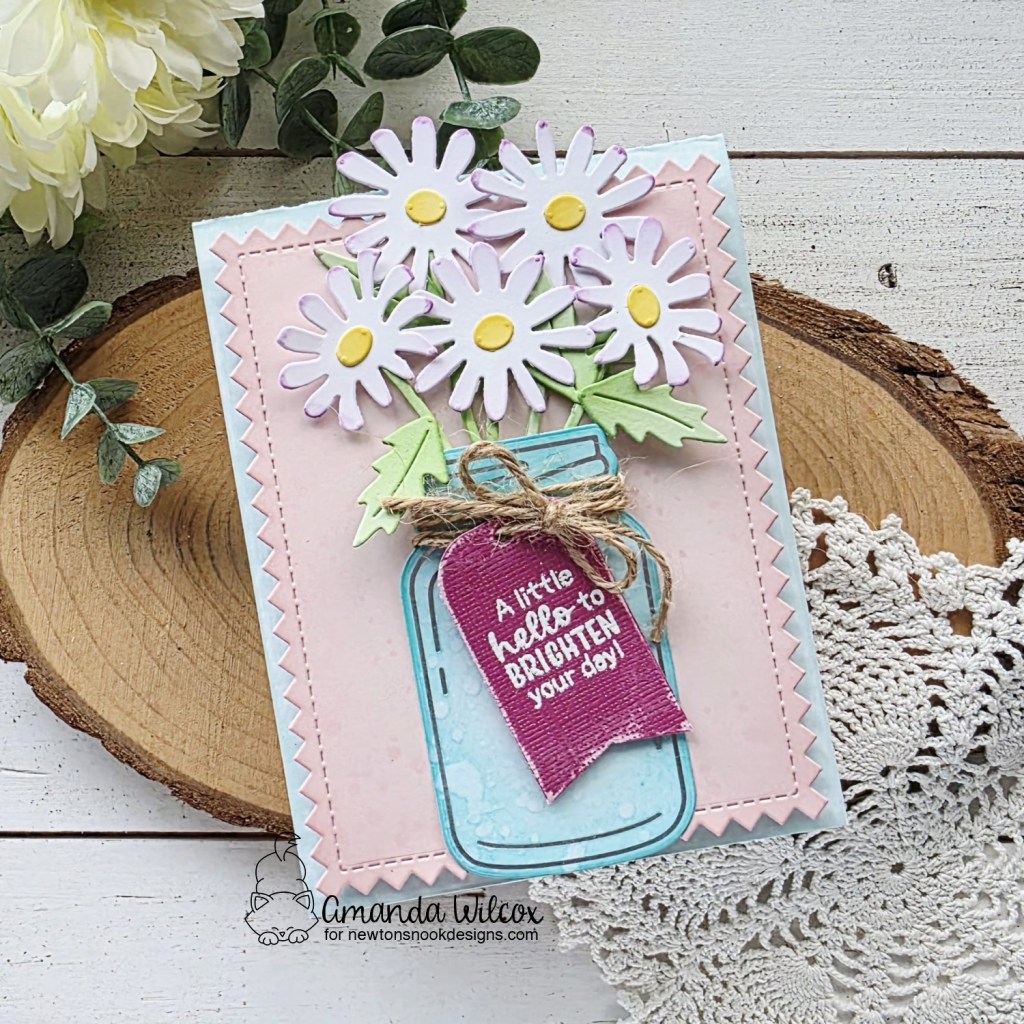
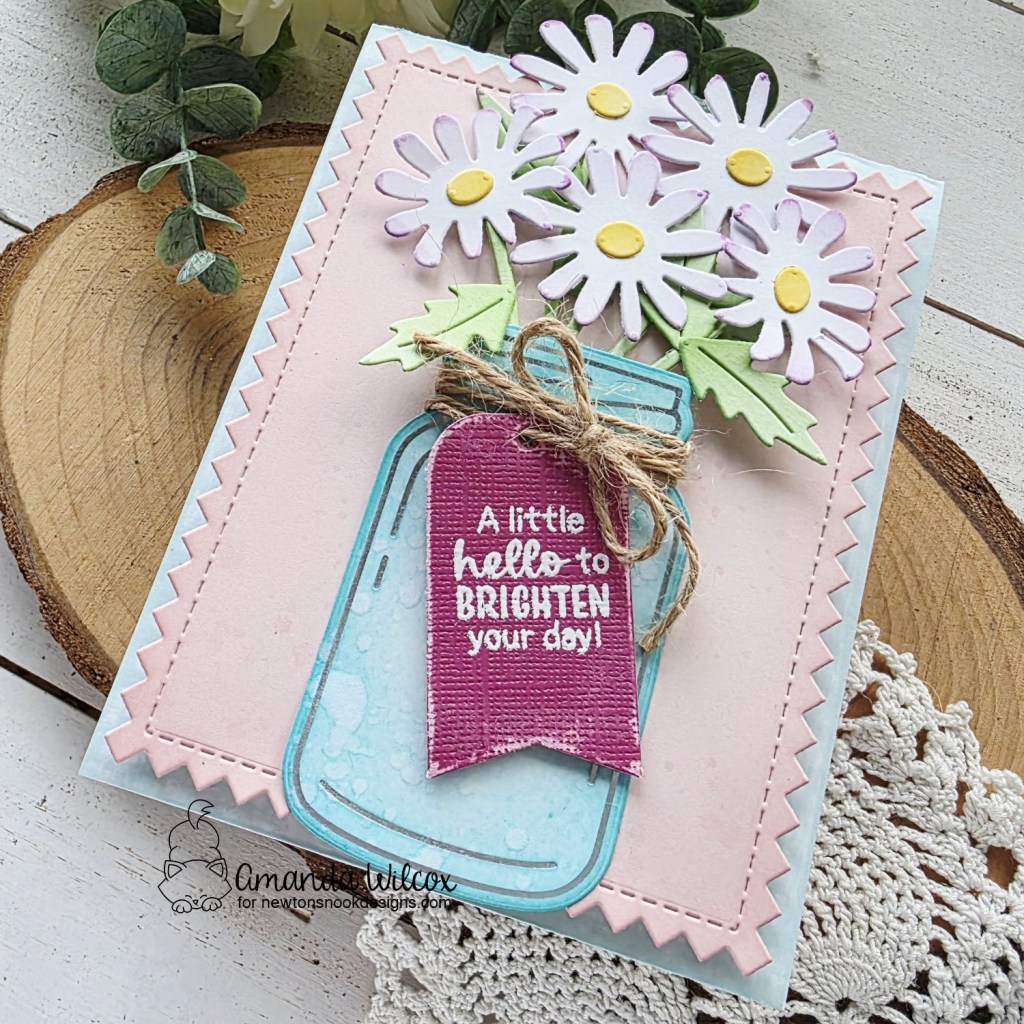
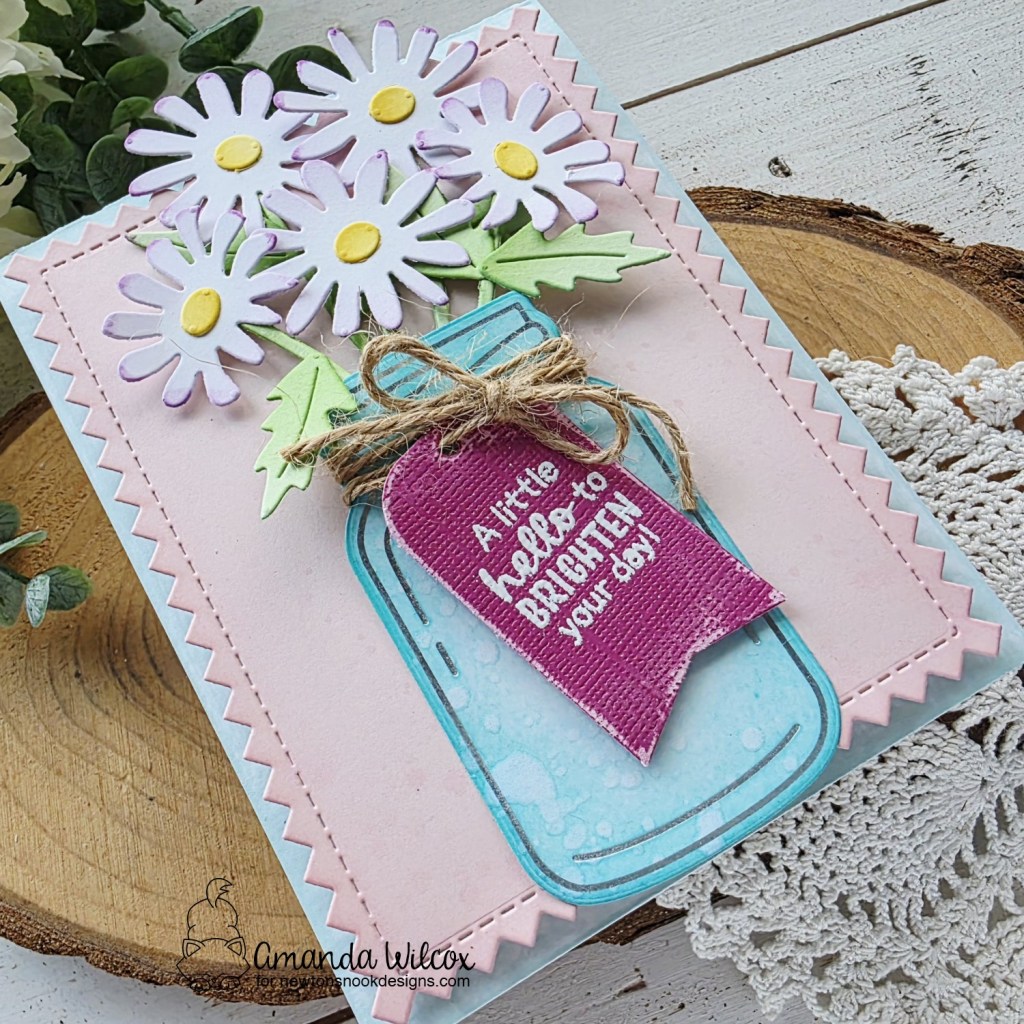
Now, we move on to the fun new Daisies die set! I couldn’t just make one either, we needed a whole bouquet!
And with a bouquet, we needed somewhere to keep it. So I used the Jar hot foil plate on white cardstock and then inked it up with light teal ink. I splattered it with water for texture and used washi tape to adhere the daisy stems to the back to hold them in place.
Next, I pulled out the Frames & Tags die set and cut the largest one from pink cardstock. I splattered it with light pink ink and set it aside. Then, I cut one of the tags from the same die set from a purple distress cardstock and heat embossed my sentiment on it from the Hyacinth stamp set. I used a piece of sand paper to distress it a little and attached it to the jar with jute twine.
Before adhering all the layers together, I took my light teal ink pad directly to the white card base, dragging it along each side. It is a quick, fun way to add textured color to your cardstock. Next, I popped the pink panel up with foam tape. Then I glued the jar down with liquid glue and adhered the flowers with a combo of liquid glue or foam squares. Last, I went ahead and adhered the tag in place with a foam square so it wasn’t floating freely.
Enter to Win a $25 Prize!
One lucky winner will receive a $25 store credit to spend at Newton’s Nook Designs online shop! The winner will be chosen at random from the collective blog posts featuring our new products this week. For a chance to win, leave comments on the Design Team Member Blog Posts (see list below) from Tuesday, February 25th through Thursday February 27th. You will not know which blog will be randomly chosen so the more you comment on the better your chances are of winning! You have until Thursday, February 27th at 9 pm ET to comment — winners will be announced on the NND blog on Friday, February 28th.
Want another chance to win? We will be having an instagram hop on Friday with a second prize! Please join us over on Instagram on Friday, February 28th for details!
Check out all the awesome Design Team Blogs below to enter: