Hello everyone! Today I’m sharing 2 sets of the same tags. One take a little longer and the other is fabulous for mass production if you have lots to make. Let’s jump right in!
These tags are from the awesome Lawn Fawn sets – Slow Down and Enjoy and For You Deer. I was so excited when they came out that I’ve just made them over and over again. Sometimes they are tags, others are bookmarks. I also just hang the critters on things because they are so stinking fun to make!
Today, I did the same tags twice. The ones above are colored with copics which took a little bit of time. Not a ton but definitely more than the ones below.
These were cut from colored cardstock and then the accent colors were added with colored pencil. Both versions are super cute and really, the recipient could use them for bookmarks after they take them off of the gift too!
I never tire of the adorable Lawn Fawn critters. They’re just so much fun!
Don’t forget there are prizes to be won. Comment each day on here, on my Instagram post for the day and then head to Caffeinated Craftiness and do the same for her. Four comments per day gives you a shot at any one of four prizes!
I appreciate you sharing your time with me. Have a fabulous day!
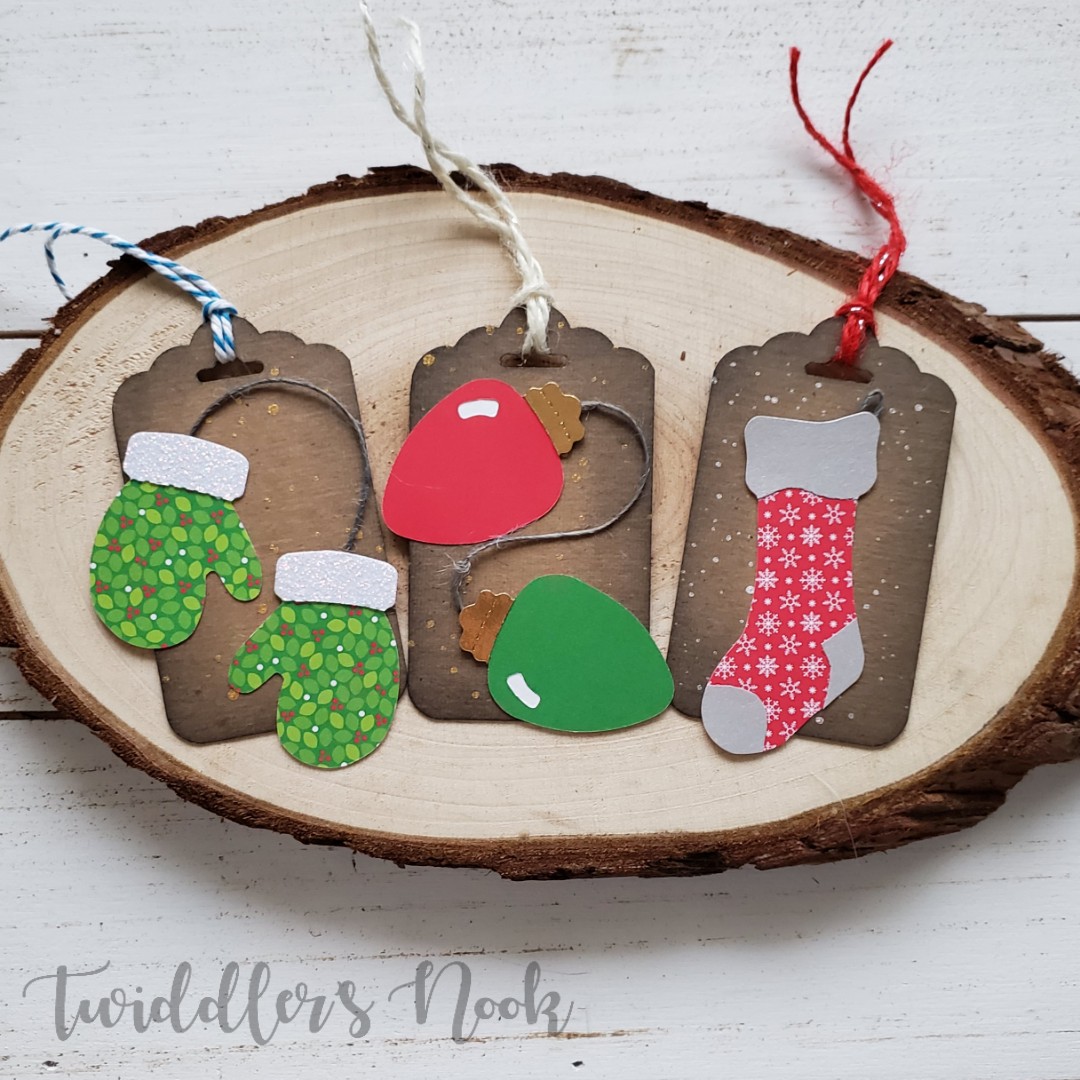
Welcome back everyone! Today I’m going a little retro and simpler for mass production. I pulled out my original Sizzix dies for this one and paper pieced everything together.
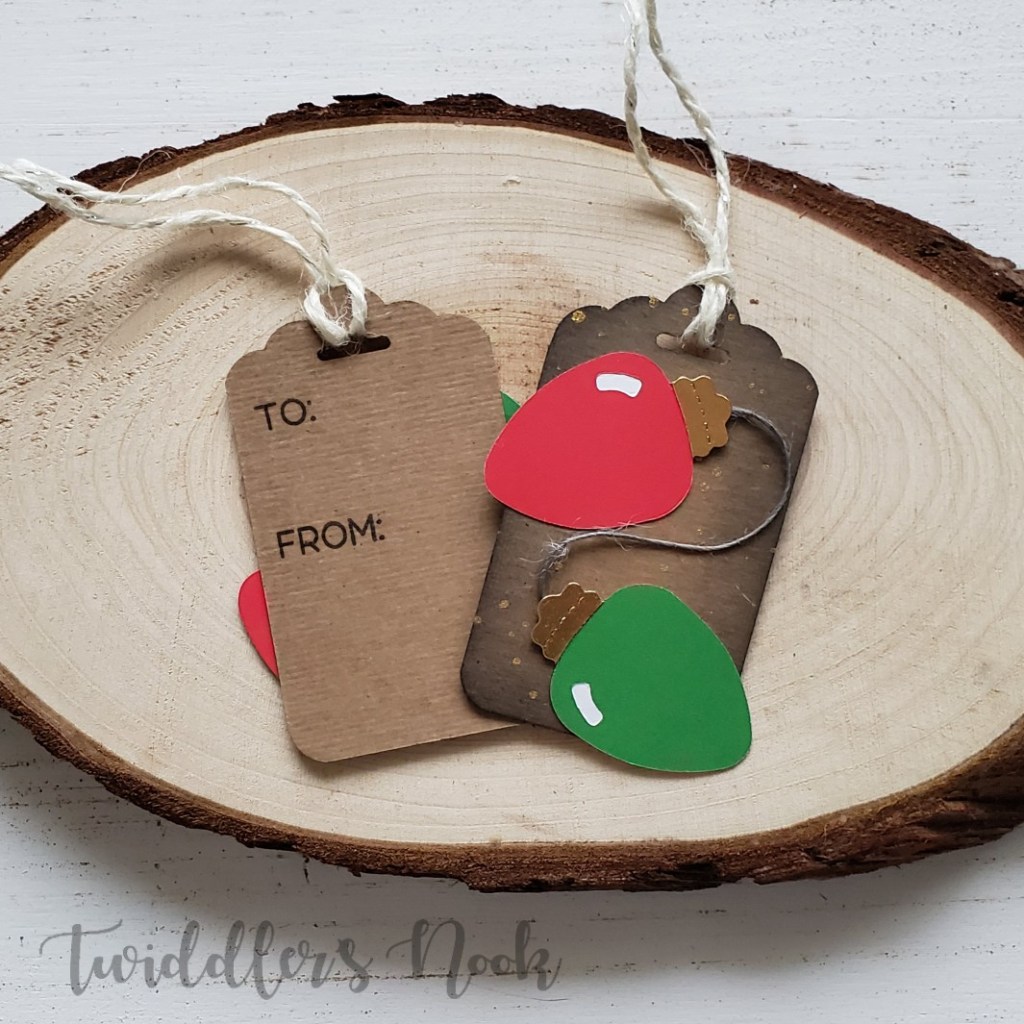
To start off I took a 2×3 inch piece of tagboard and punched it with my tag topper punch. Then I took a corner rounder to the bottom 2 corners. Next, I inked the edges with black soot distress ink and splattered gold and silver watercolor on them.
For the lights I added gold ends to the bulbs and then inlaid white for the highlight. I used glue dots to add a little twine as string to make them look connected.
The mittens were cut from some adorable Doodlebug paper and the cuffs from white glitter cardstock. Then I also used twine to make them look like those kids mittens that have a string connecting them so you don’t lose one.
Last I have a stocking that was cut from the same pad of Doodlebug paper and I added silver to the cuff, heel and toe. I thought they looked out of place hanging there so I added a loop to the top with twine for them to hang from.
I looped twine through the tops of all the tags and stamped to and from on the backs. These came together really quickly and are super easy to coordinate with your packaging if you wanted to.
Don’t forget there are prizes to be won. Comment each day on here, on my Instagram post for the day and then head to Caffeinated Craftiness and do the same for her. Four comments per day gives you a shot at any one of four prizes!
I appreciate you sharing your time with me. Have a fabulous day!
Hello again! I’m taking over The Rabbit Hole Designs blog today with this fun, clean and simple Valentine card.
I was inspired by another crafter who did two versions of the same card a while ago – one was in full color and the other was simple and just the outline. This is something that I never do and was excited to try.
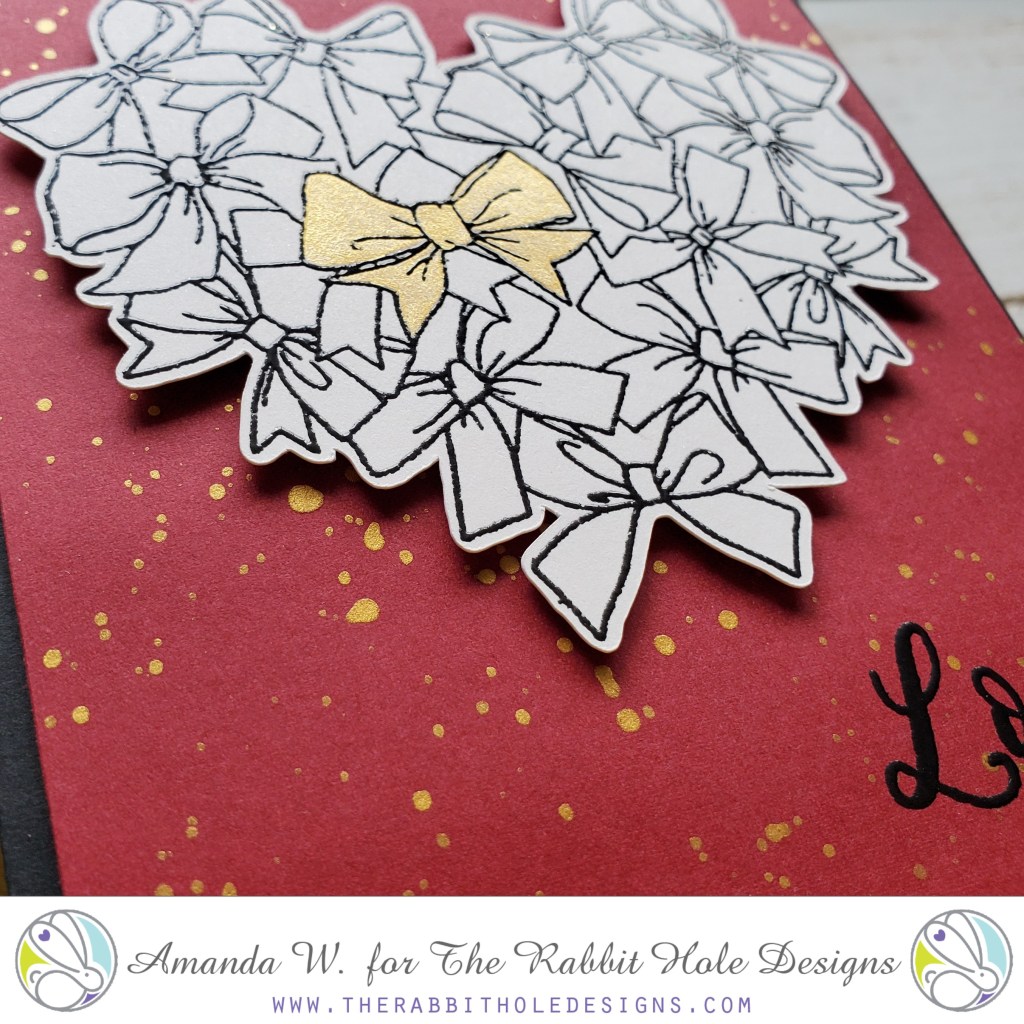
I heat embossed my bows in black and painted one that stood out to me with gold watercolor. I took the same watercolor and flicked it on a red panel. Then heat embossed love in black on the bottom right corner. I popped the red panel on a black card base and popped the bows up with foam squares.
The shine of the embossing and the shimmer of the metallic watercolor make this clean and simple card just a little bit more. It catches your eye and is just striking. I love this color combo!
Over the next 12 days, my friend Shanna over at Caffeinated Craftiness, and I are going to share different Christmas tag ideas with you. We’re hoping to inspire you to spice up your gift wrapping this year. Be sure to check out both blogs and leave comments for a chance to win at the end of our 12 days.
Shanna and I are giving away 2 prizes each. A gift certificate for $15 to Newton’s Nook, $15 to Trinity Stamps and we’ve both created loaded envelopes with handmade goodies from us! We will each choose an Instagram commenter and a blog commenter. That’s a chance at 1 of 4 prizes! Comment each day because you never know which day will be the lucky one.
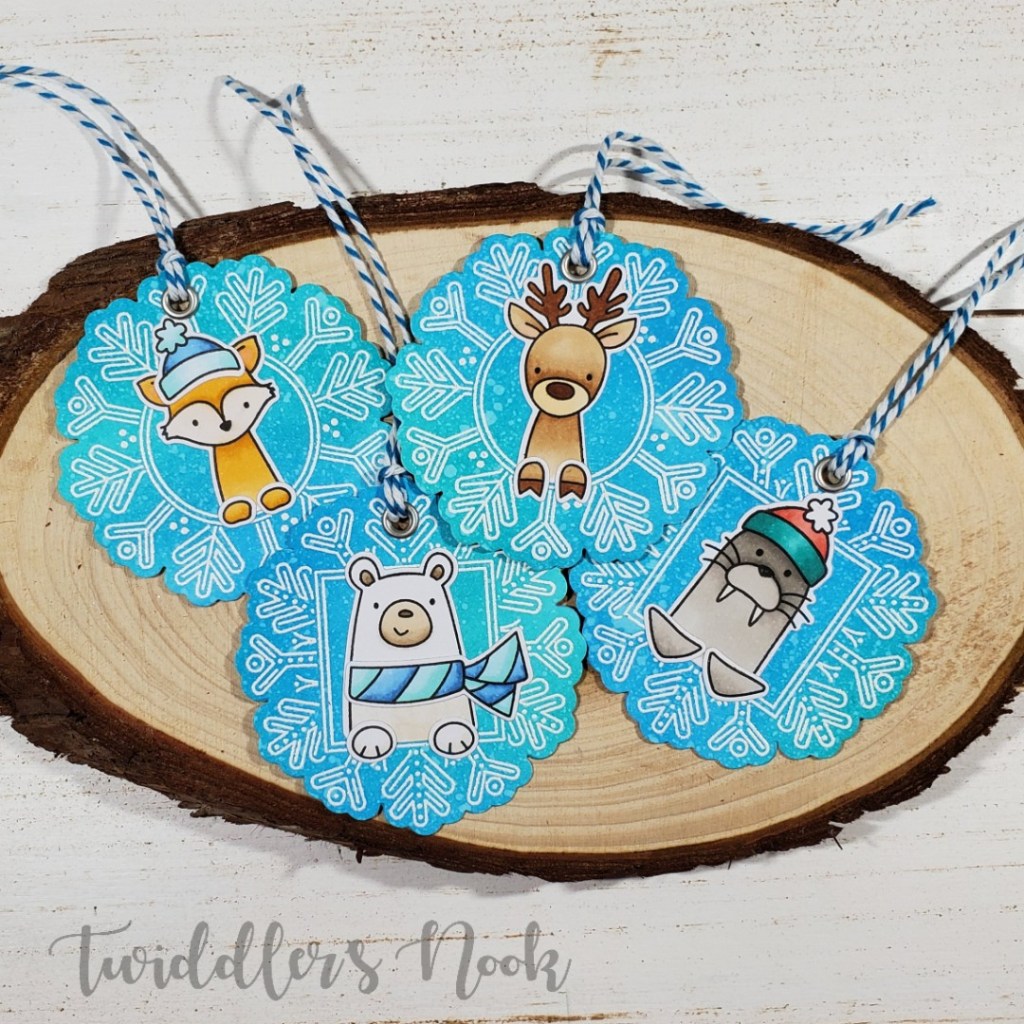
First up today I’m using stamps and dies from Avery Elle. I love this company and can’t get enough of everything they release! Today we’re using Snow Tags, Polar Peek-a-boo Pals and Christmas Magic. But keep in mind that these ideas are meant to inspire you to dig in your stash and see what you have to use.
I made two sets of tags to show you different ideas with the same set of stamps.
This first set is to die for! I love them so much! I distress inked a giant panel, stamped and heat embossed the snow tag image and die cut them. Then I stamped, colored and die cut my polar peek-a-boo pals and glued them down. I also die cut a second set of the snow tags and heat embossed to and from on them, then glued the two together. To add a little pizzazz I used a rivet setter and riveted the holes before adding some striped baker’s twine from my stash. Here’s a look at the backs too.
Next I’m going to show you the exact same tags but with a simpler twist. This might help if you have tons to make and don’t have time for the ink blending and so much coloring.
With this set of tags I have two that are stamped in colored ink on white cardstock and three that are heat embossed on solid cardstock. They all have the same cute snowman from Christmas Magic on them and different sentiments from the Snow Tags set. Same idea, much easier to mass produce. And here’s a look at the back of these as well.
I hope you’ve enjoyed day 1 of our 12 Days of Christmas Tags adventure! I hope to see you back tomorrow.
I appreciate you sharing your time with me. Have a fabulous day!
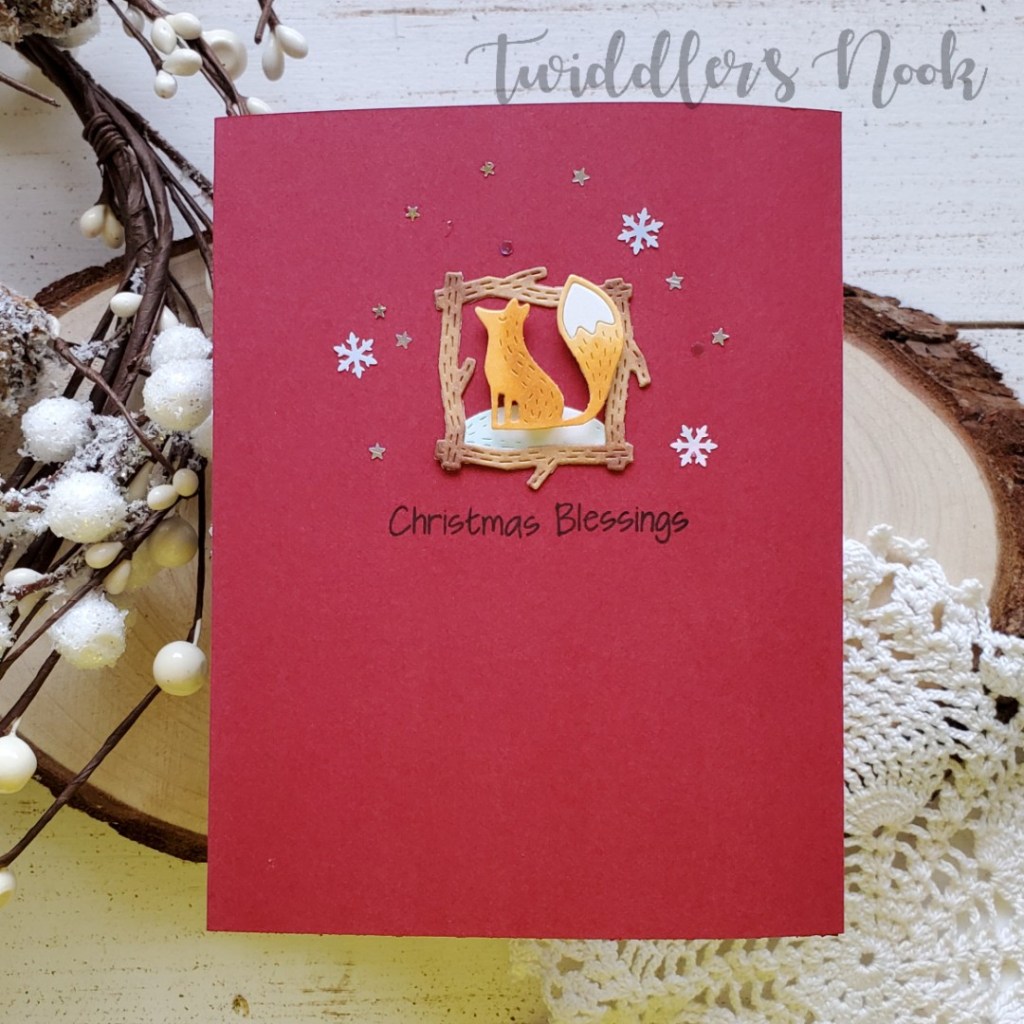
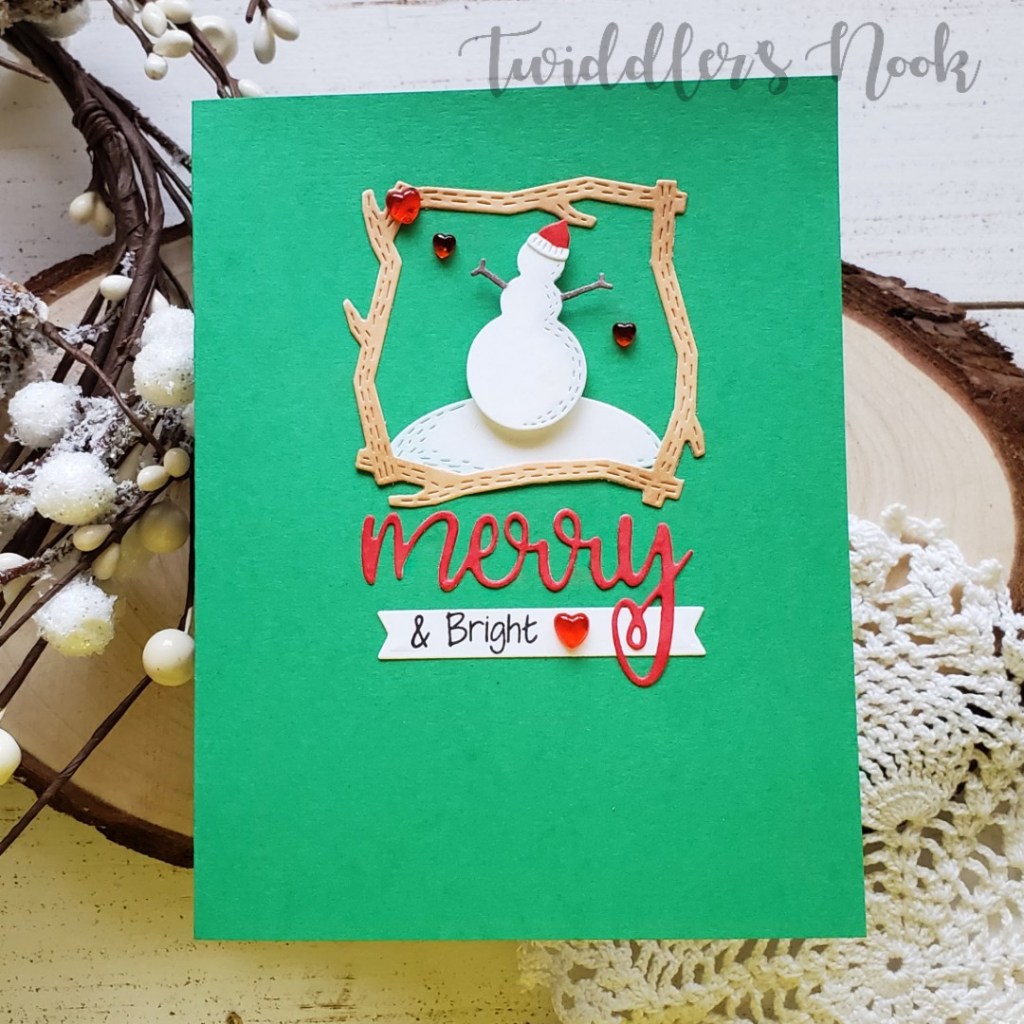
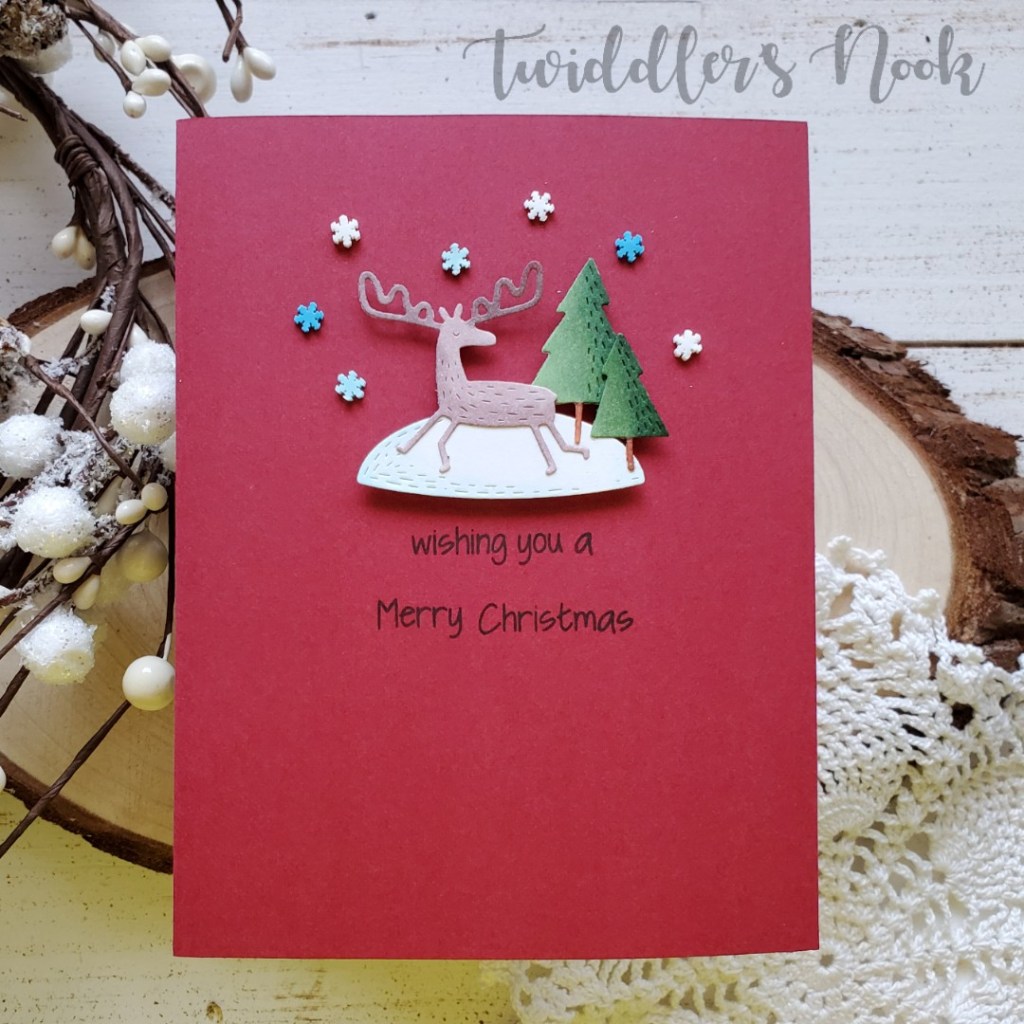
Hello again! Today I’m sharing a set of three clean and simple (CAS) cards featuring a recent prize I won during the Coffee Loving Cardmakers blog hop – a gift certificate for Poppystamps. I chose a handful of dies from their “whittle” collection. These really caught my eye and I was excited to play with them. I decided to pair them with a Trinity Stamps new sentiment set called Merry Christmas Senti-mini.
For each of these cards I die cut the elements from white cardstock and custom colored them with my copic markers. Then adhered some with liquid glue and others with foam squares.
I chose a sentiment and stamped it either directly to the card front or, like the one above, die cut and glued on.
And then for finishing touches on each I glued embellishments to the background to go with the scene I had created.
These cards came together quickly and would be wonderful if you’re making a mass amount for the holidays. I love the earthy feel that they give, completely different from anything I typically gravitate toward.
I appreciate you sharing your time with me. Have a fabulous day!
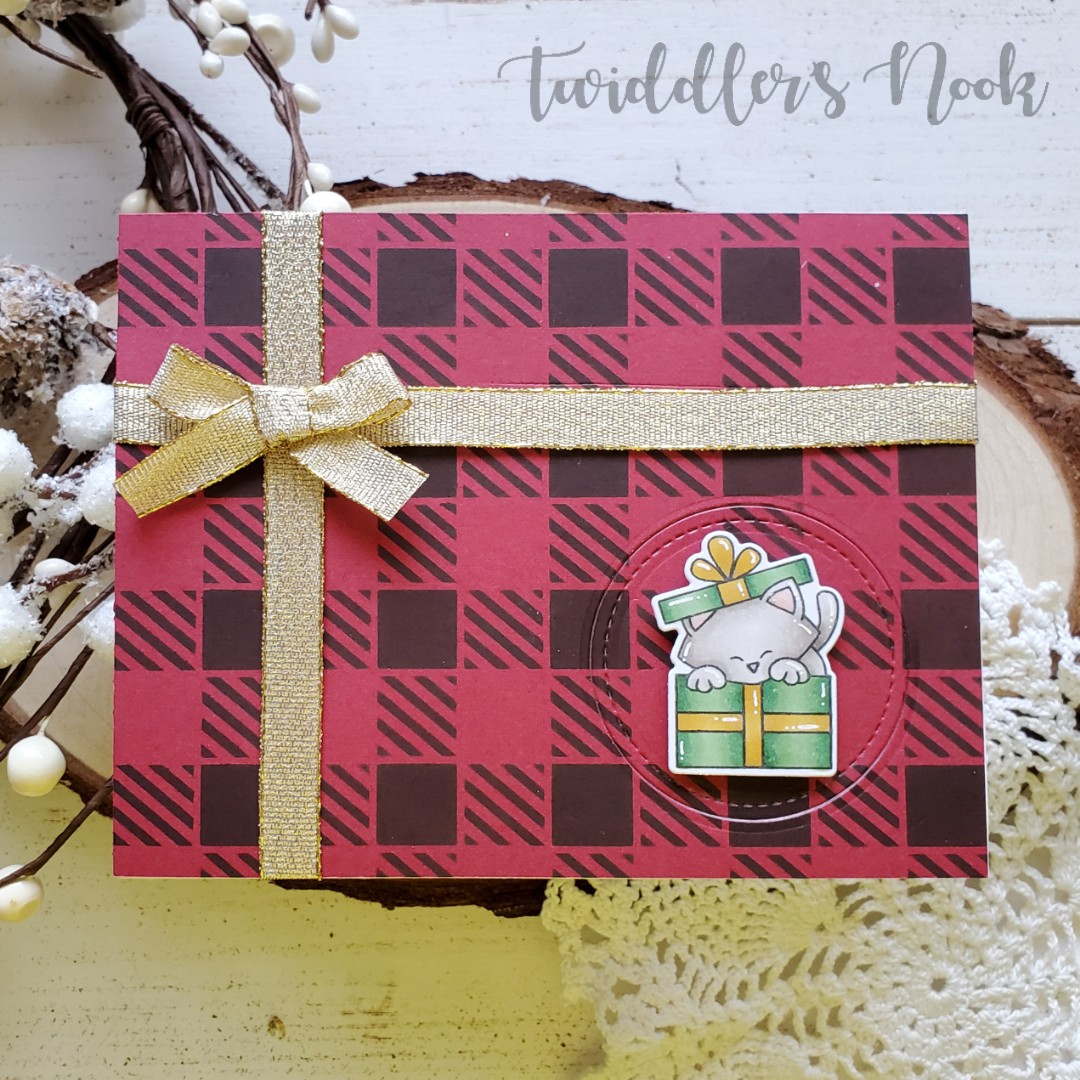
Thanks for stopping by today. I have had this idea in my head for a while and I was really happy to have a chance to make it a reality AND it came out just as I hoped!
Using the Gingham stencil, I inked black over red cardstock, added gold ribbon to make it look like a package and then glued it to a card front. Next, I die cut a circle from the card front and glued the circle to the inside card panel.
I stamped my Newton in a present from Purr-fect Present and die cut him out. Then popped him up on the circle with foam squares. Next I stamped the sentiment off to the left and couldn’t resist coloring in the holly at the bottom of it.
For finishing touches I added white gel pen accents, glossy accents to Newton’s ears and nose and Wink of Stella glitter brush pen to the package’s ribbon and bow.
This image is just adorable and I love how this sweet card turned out. It gives the recipient a little surprise when they open it up. So much fun!
I appreciate you sharing your time with me. Have a fabulous day!
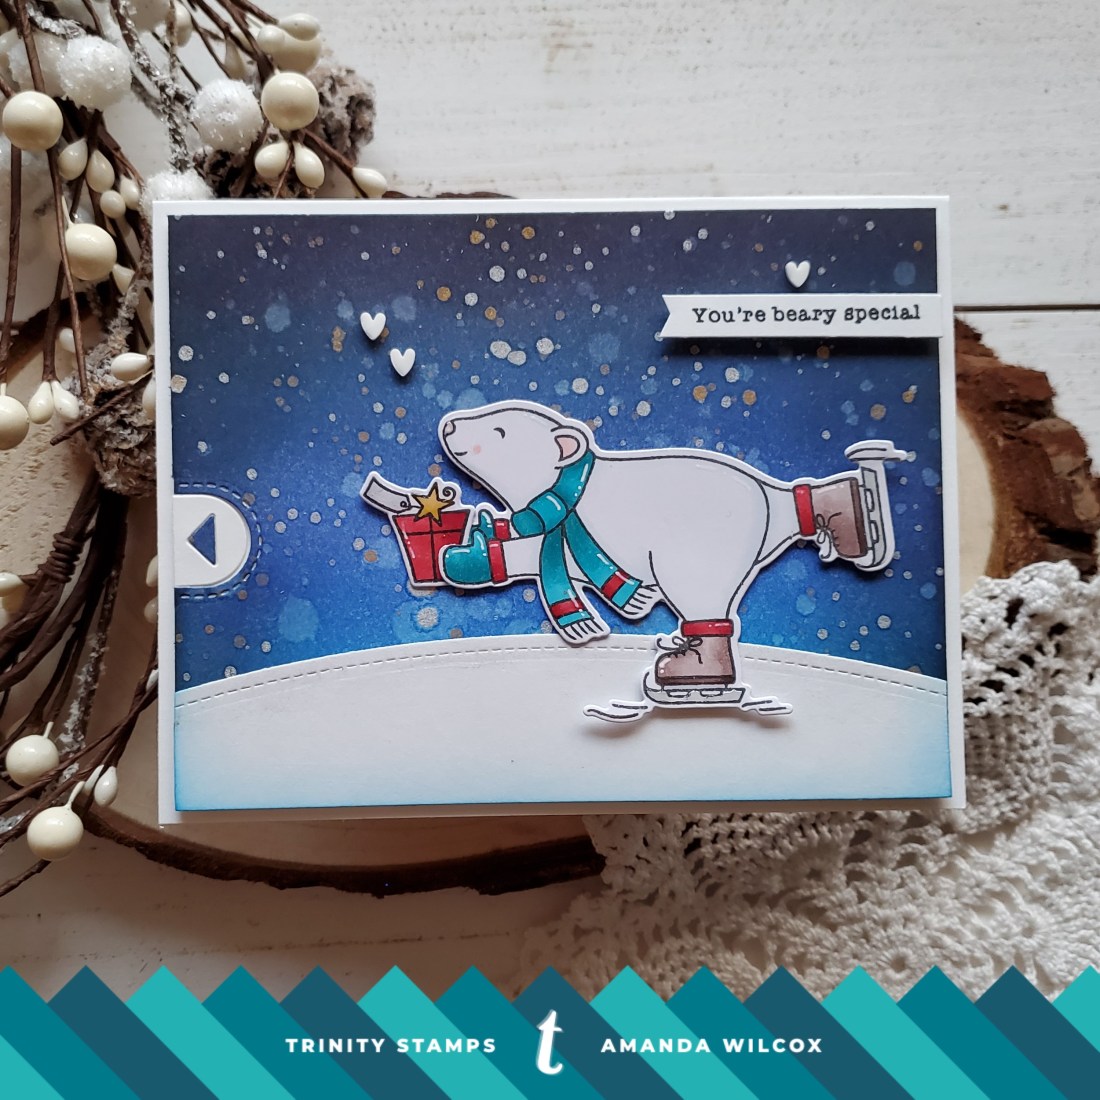
Thanks for joining me today. I’m so honored to be guest designing for Trinity Stamps with this fun, interactive Have an Ice Day card.
Interactive cards are my favorite to create. I love giving them to people even more than making them! It’s so cool to see their response when a thing I made from paper moves and interacts. When I saw this polar bear, I just knew I had to make him skate on ice, at least once. 😉
So I set to work and stamped, colored and die cut him in order to plan out the rest of my card. I’m really partial to the cup of cocoa but I used that last time and decided to change it up with the package this time.
This is the card front when the pull tab is closed. (You can see it on the left side.) I wanted to make a darker starry and snowy sky so the polar bear wouldn’t get lost. I did this by blending salty ocean, blueprint sketch, faded jeans and black soot distress inks. Then spritzed it with water and then flicks of gold and pearl watercolor.
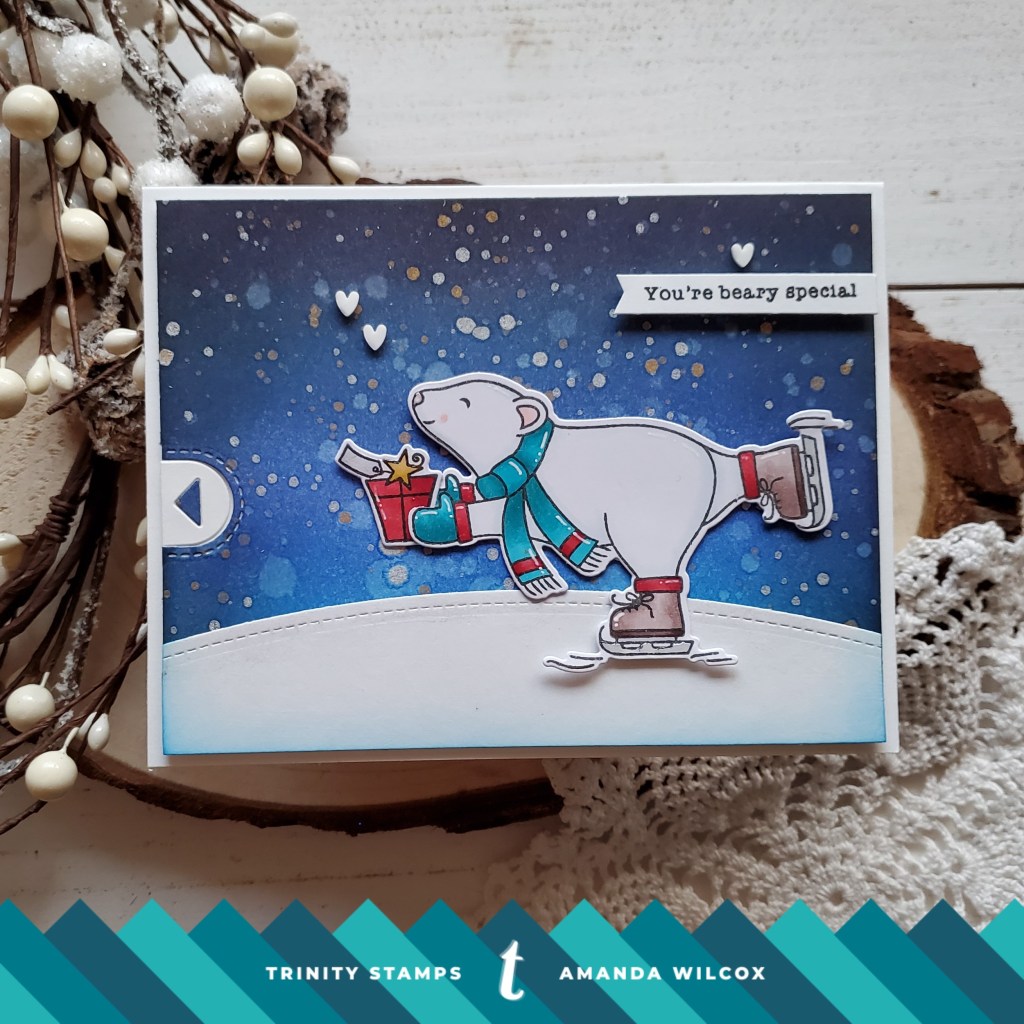
And here is it will the pull tab open. He’s just so cute! I played with it for a ridiculous amount of time after it all came together. He skates back and forth so perfectly!
I stamped my sentiment and cut it in a flag, then popped it up with foam squares. I added white gel pen accents throughout the images and then Wink of Stella glitter brush to all the red accents on the bear and package.
I also added glossy accents to the bear’s nose and skates and the star on the package. And the last thing I decided to do was add a few cream vanilla heart sprinkles to the background. I love adding lots of texture and dimension to cards.
If you’d like to follow more of my craft adventures, you can find me at the following places: Facebook: @twiddlersnook Instagram: @twiddlersnook Blog: twiddlersnook.com
I appreciate you sharing your time with me. Have a fabulous day!
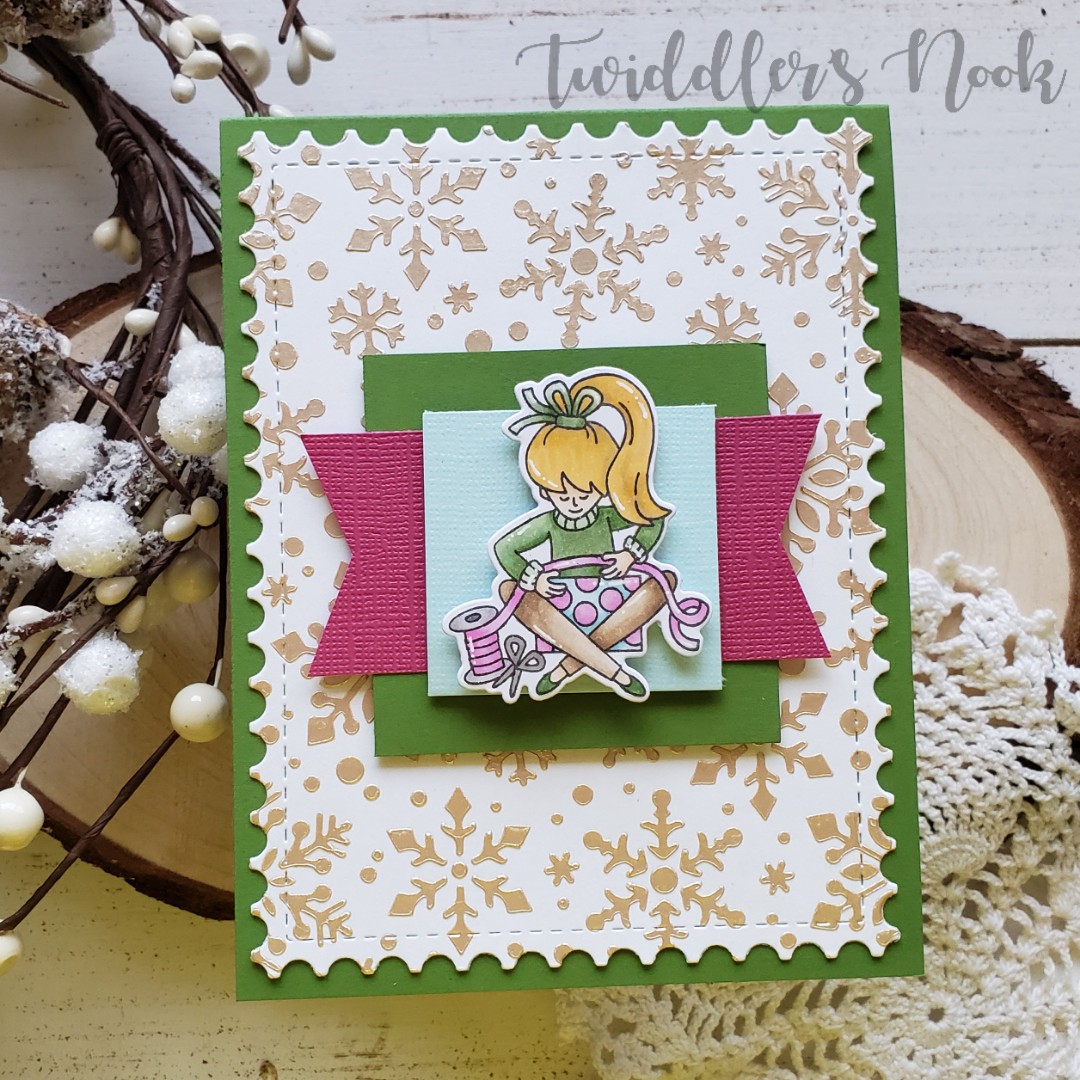
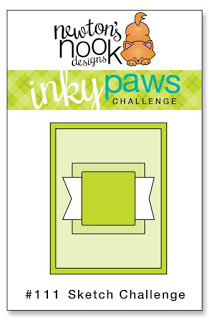
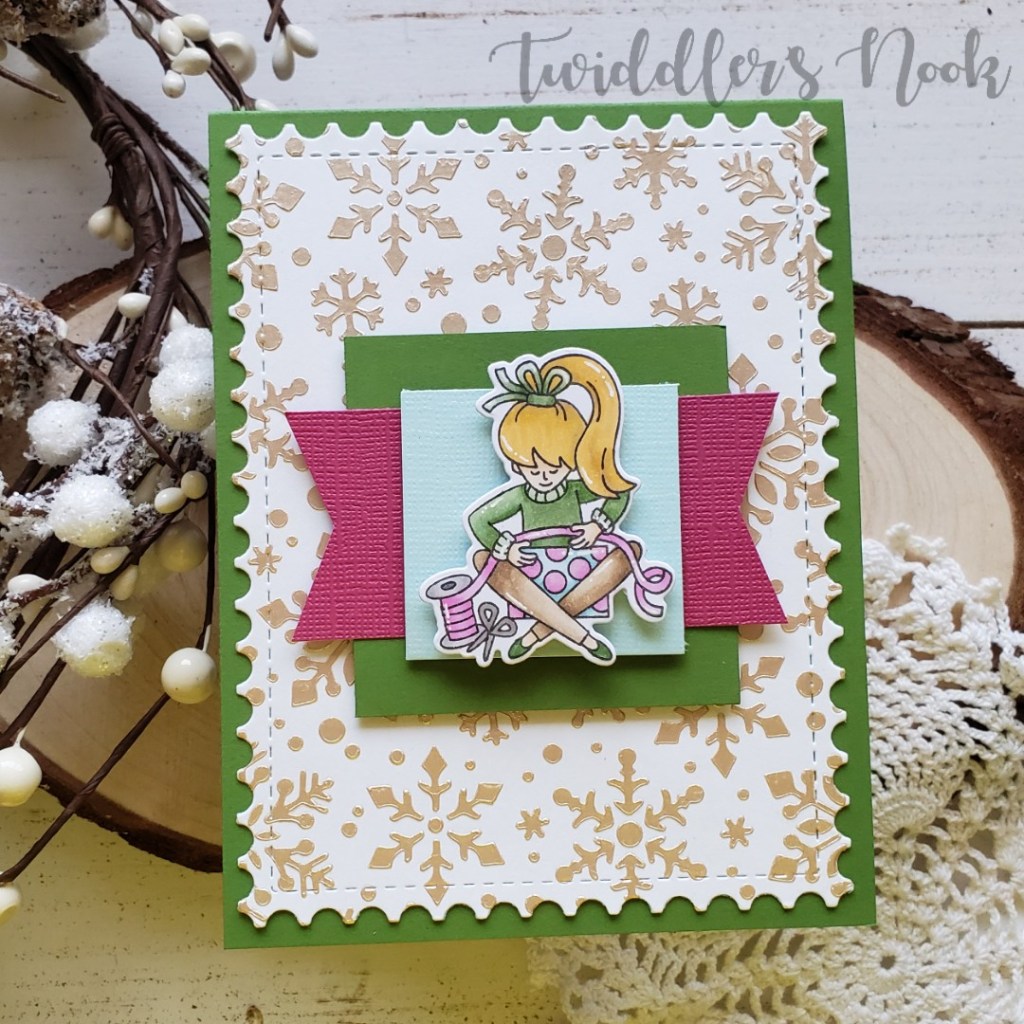
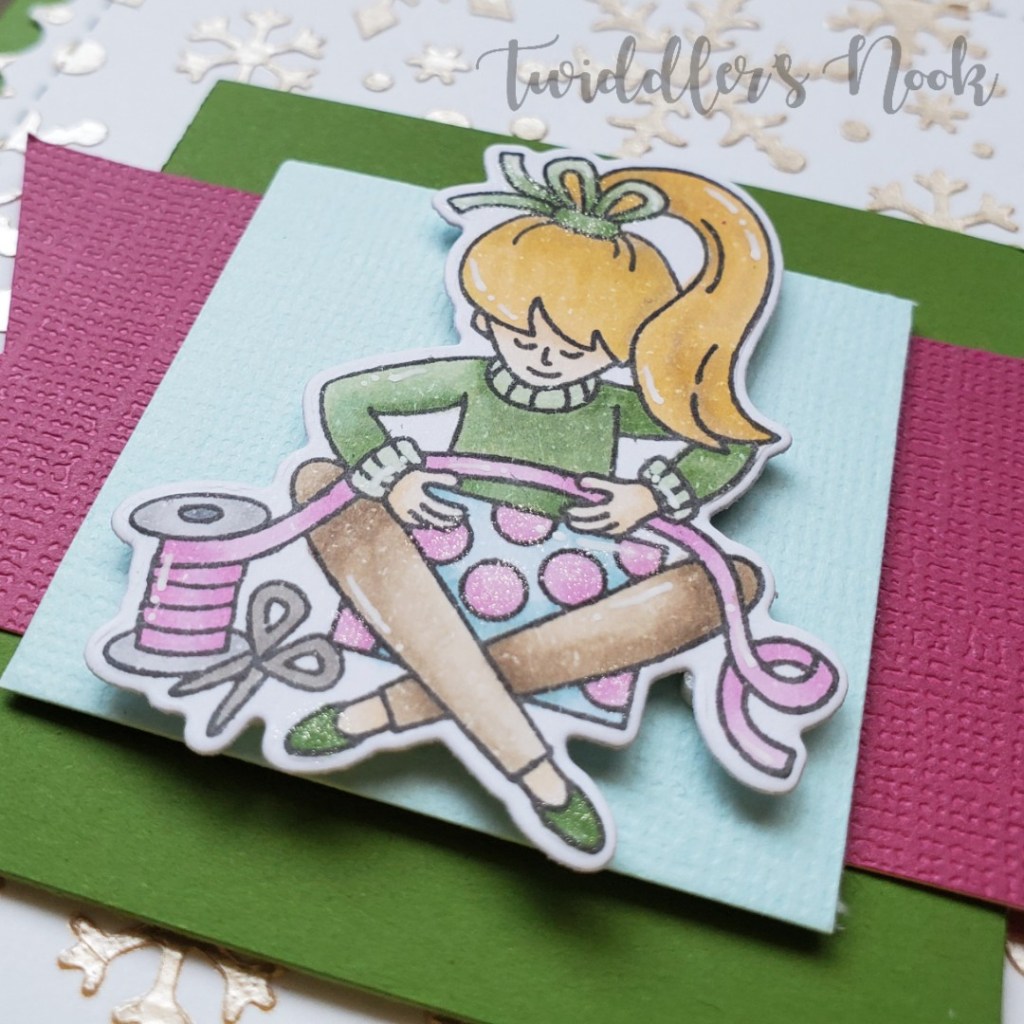
Welcome back everyone! Today is my final entry into the current Inky Paws Challenge with Newton’s Nook. It’s a sketch challenge this time and I’m having a blast with it! These are my absolute favorite type of challenge.
This is the format we are challenged to mimic. I kept things pretty much exact to the sketch this time but used some fun products while doing it.
To make this card I stamped one of the girls from Christmas Trimmings and die cut it, then set it aside. Next, I took a white panel and used champagne mist metallix gel over the Snowfall stencil. Once it was dry I die cut it from the largest of the Framework dies. I glued that panel to a green card base and moved on to the other pieces of the sketch. The green square is popped up with foam squares, the banner glued directly to that and then the pool colored square is popped up as well. Finally the stamped image is popped up with foam squares.
Finishing touches for this card were very simple – just white gel pen accents and then Wink of Stella glitter brush pen on the girl’s hair bow and shoes and the dots on the wrapping paper.
I love the non-traditional colors for this Christmas card. It made me realize that this image really could be used year round for fun birthday cards too!
I appreciate you sharing your time with me. Have a fabulous day!
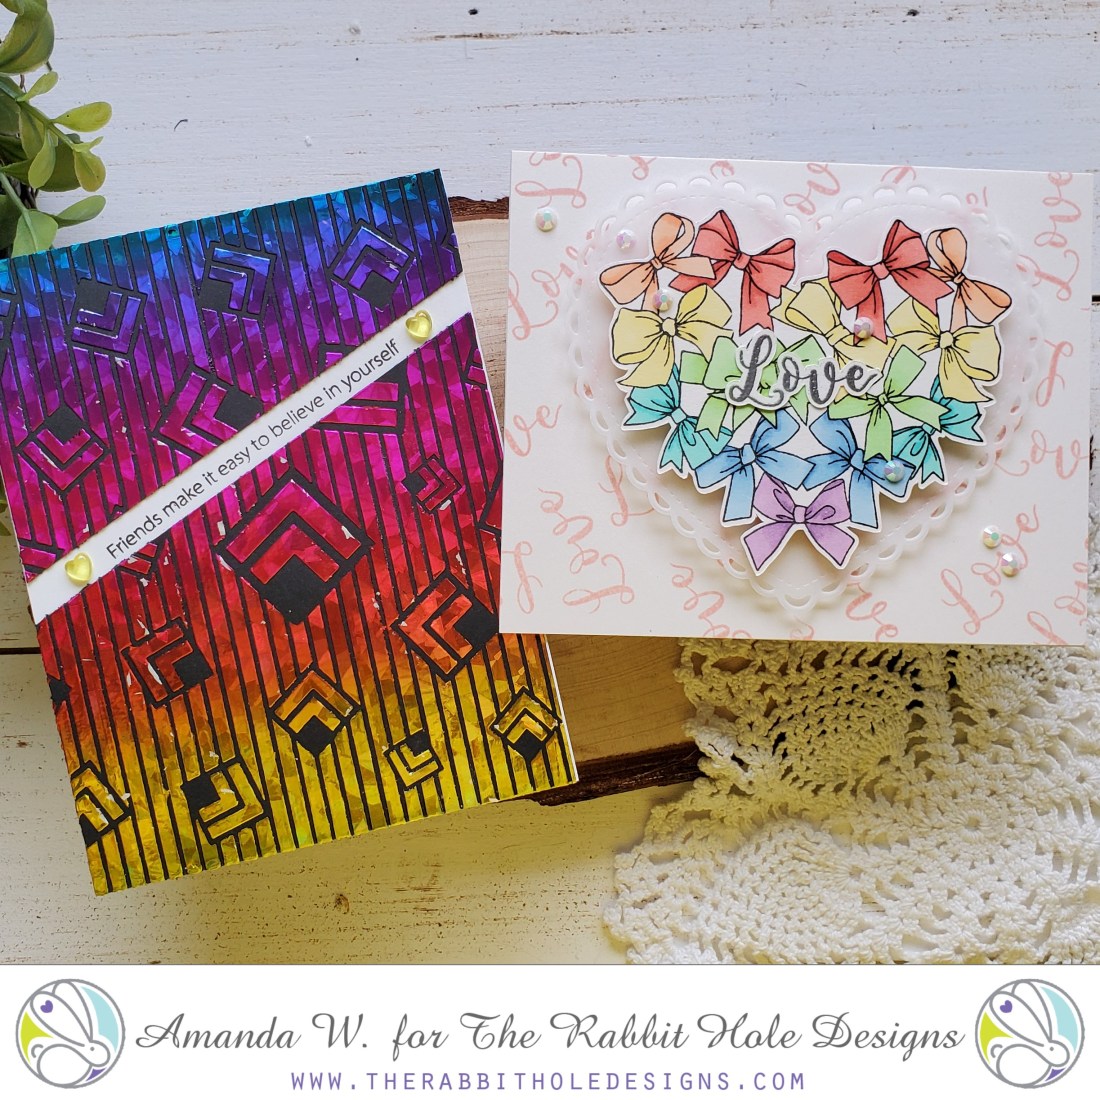
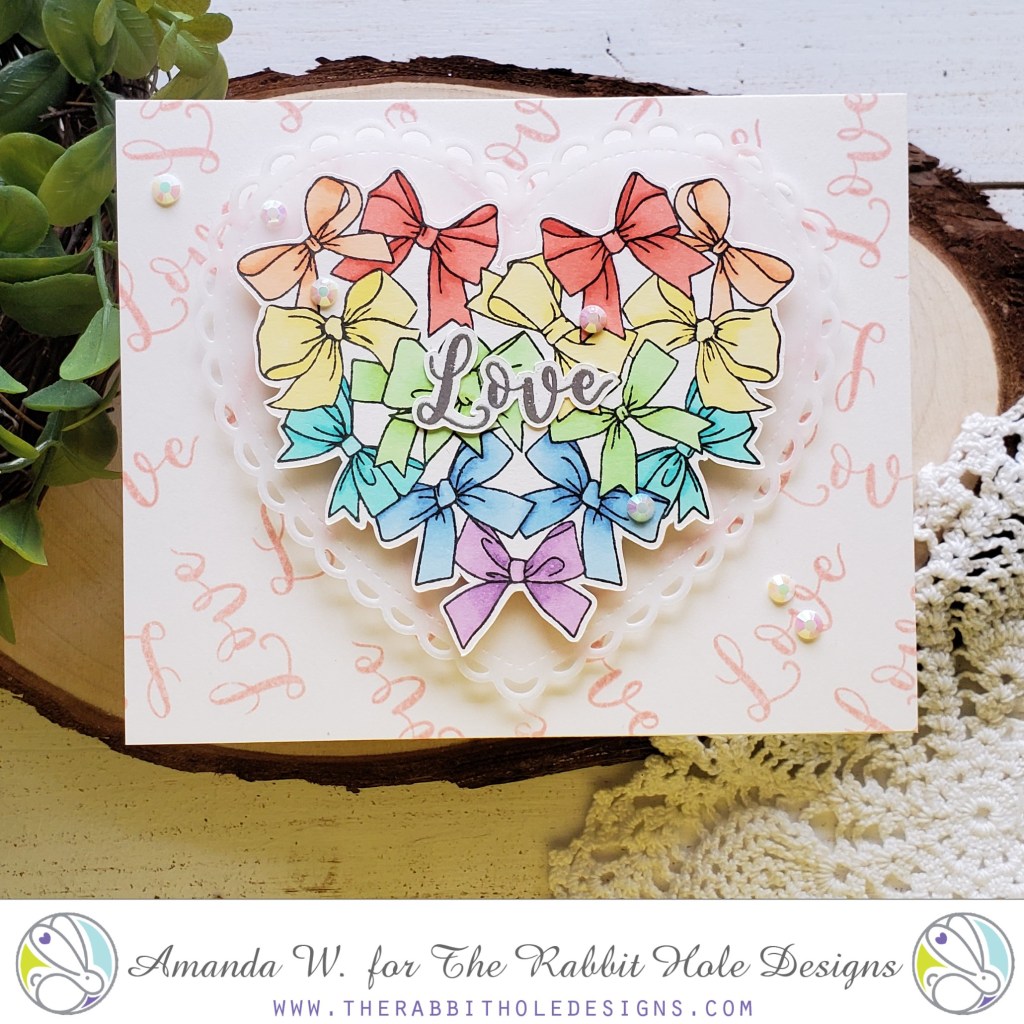
Thank you so much for stopping by to celebrate day 3 of The Rabbit Hole Designs new release blog hop! It’s been so much fun so far and today we’ve got even more to share. The stamp set for today is called Put a Bow On It and it’s adorable! There’s also another stencil that is mind blowing – Square Illusion. These are versatile and so fun to play with.
As soon as I saw the Put a Bow On It stamp set, I knew I wanted to try a rainbow. And I absolutely love how it turned out!
For this card, I stamped the love sentiment in pink all over my background. Then stamped, colored and cut out my bows. I decided I wanted to break things up a bit between the card base and the bows so I added a vellum heart between with foam squares popping each up so there’s lots of dimension. I stamped and heat embossed love in silver and glued it to the bow heart. Then to finish things off I added some gems across the card front.
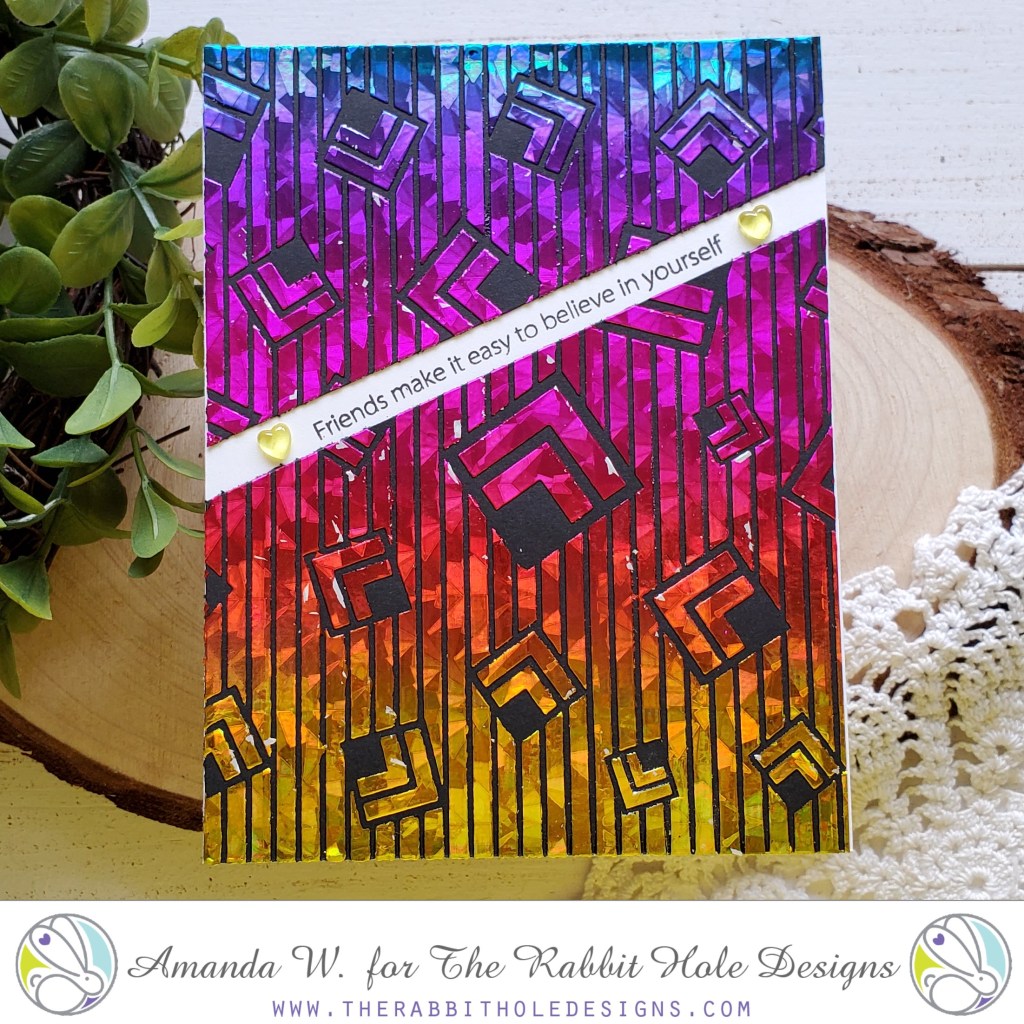
Soft and sweet! But my next card is the polar opposite! If you like bold and bright, let’s move along with the show.
Using the Square Illusion stencil I added transfer gel to a black panel and set it aside to dry. Then I sent it through my laminator with some fractured rainbow deco foil for a bold background. Not wanting to take away from that, I decided to slice the panel at an angle and cut off about a quarter inch from each side. It gave me a perfect gap to add a simple sentiment from Sassy Sentiments and some heart embellishments.
Every order placed will be eligible for a 20% discount. Discount Code TRHDTHANKFUL20 this code will only be accepted until Friday 11-29-2019 12:01 a.m. PST. There are no exclusions on this code it is applicable to your whole order. Not applicable to previous orders. May be used more than once. Does not apply to shipping and tax. *Please Note: Free shipping WILL NOT be available during the time this discount code is in effect.
GIVEAWAYS: To celebrate day 3 of inspiration The Rabbit Hole Designs is giving away the Stamp and stencil promoted on day 3, to One lucky winner. Winner will be chosen at random from the comments left on participating blogs, so make sure to visit each stop and leave a comment. Leave comments by 11:59 pm PST 11-28-19 on all participating blogs. Winner will be announced on The Rabbit Hole Designs blog 11-29-2019
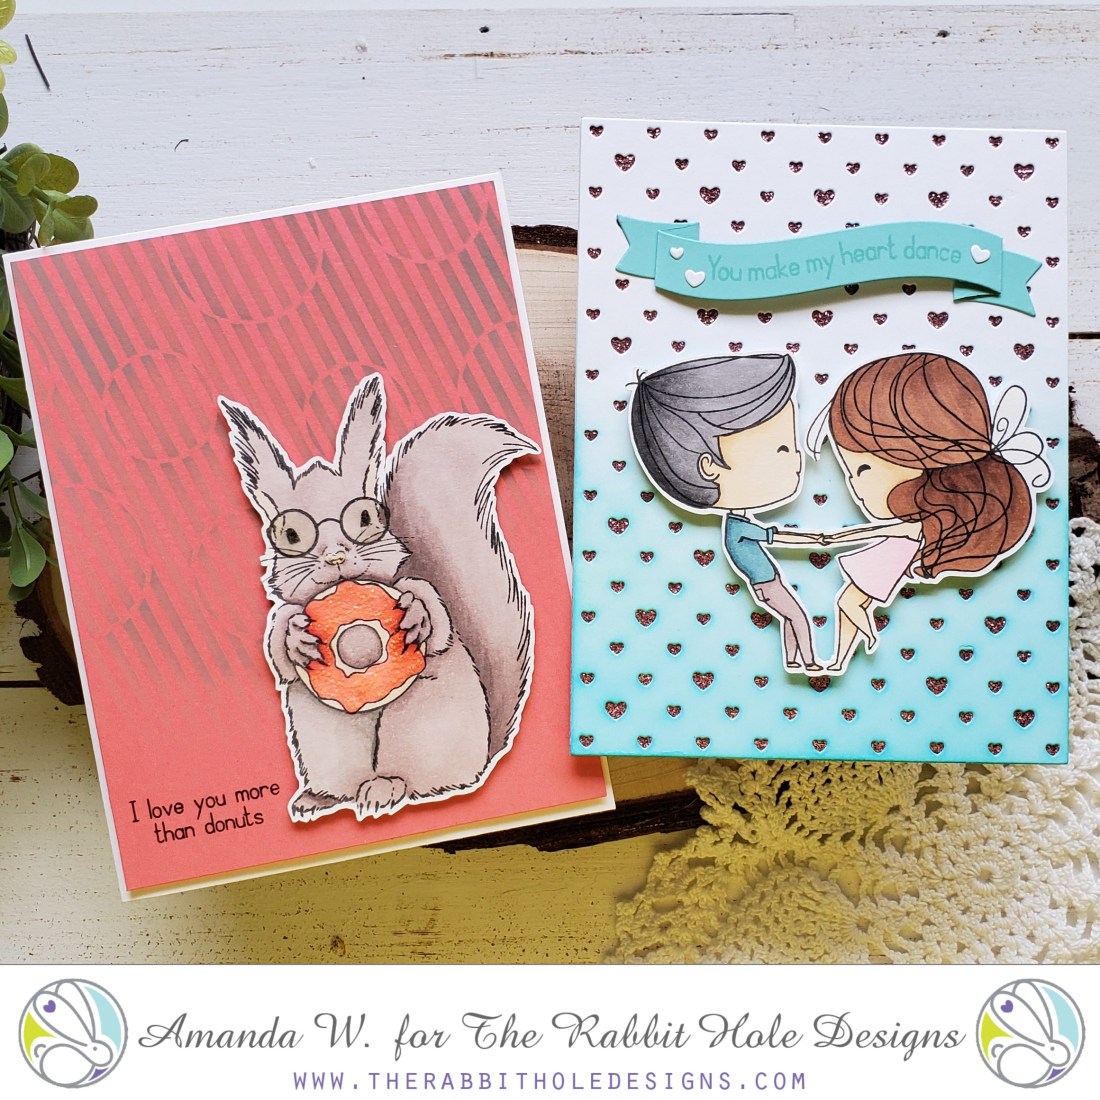
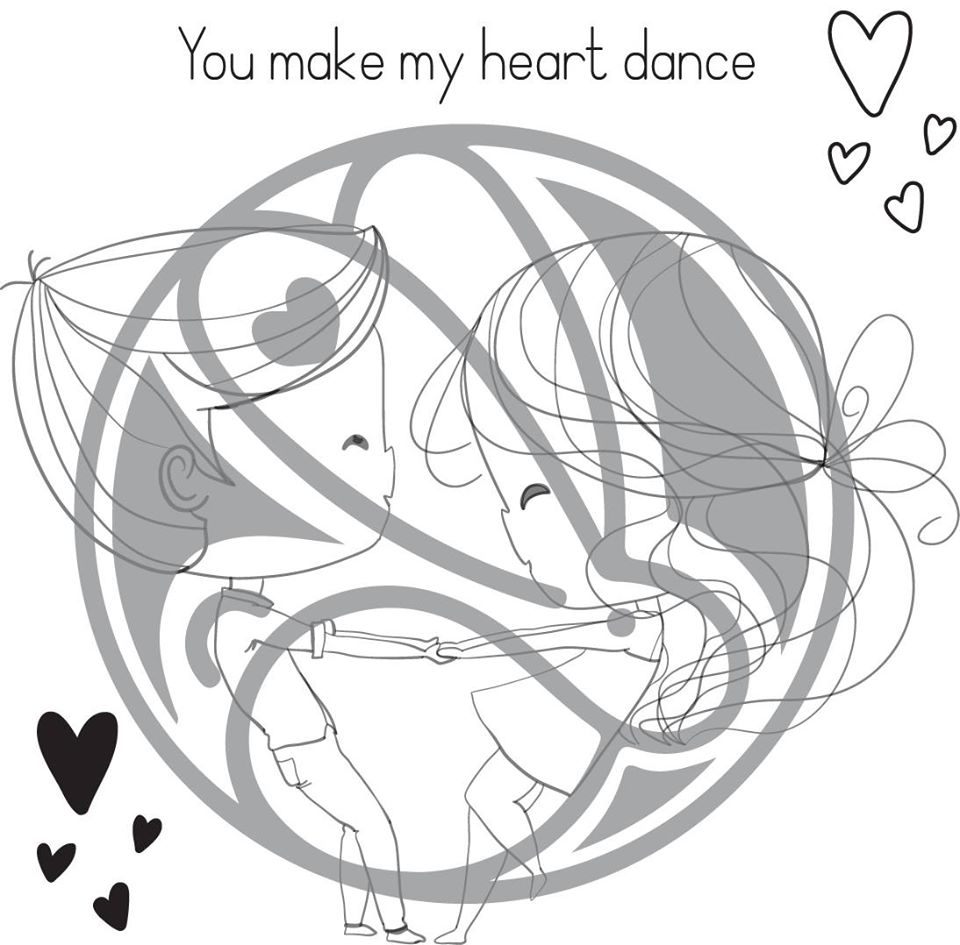
Thanks for stopping by for day 2 of The Rabbit Hole Designs new release fun! Today we’re dancing up a storm and having a blast! The stamp set for the day is Heart Dance and we’ve got a new stencil called Circle Illusion.
I had so much fun creating both of these cards! I’m going to start off by sharing Heart Dance because I’m just loving this stamp set! This couple is adorable and I’ve got tons of ideas for them!
For this card, I stamped, colored, cut out my couple and set them aside. Next, I cut a pink glitter panel down to A2, then die cut a heart backdrop to go over it. I didn’t like the plain white so I used distress ink and blended it darker up to nothing at the top. I glued all my layers together, popping the couple up with foam squares and stamped my sentiment on a banner. I finished it off with a couple of hearts that came out of the backdrop on either side of the sentiment. These barefoot dancers are just adorable! I love them!
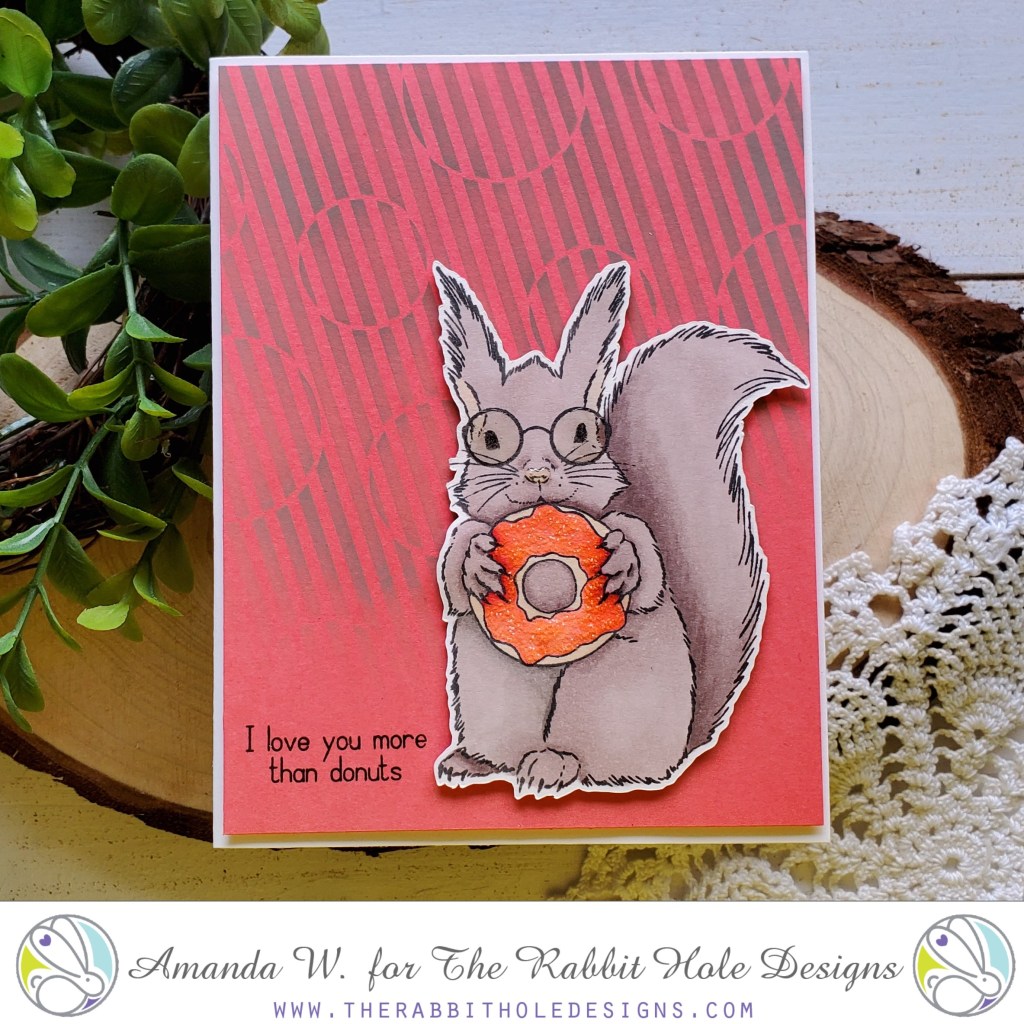
For the next card, I had to pull out my squirrel again because he was so much fun to color!
For this card, I used a gray pigment ink on a melon colored background with the new, amazing Circle Illusion stencil. Then I colored my squirrel more gray tones, cut him out and popped him up. I stamped my sentiment next to him and then just had to add glossy accents to his glasses and nose, and some sugar Stickles to the donut frosting.
So much fun! I love the cool interest the stencil gives to the background of an otherwise simple card.
Every order placed will be eligible for a 20% discount. Discount Code TRHDTHANKFUL20 this code will only be accepted until Friday 11-29-2019 12:01 a.m. PST. There are no exclusions on this code it is applicable to your whole order. Not applicable to previous orders. May be used more than once. Does not apply to shipping and tax. *Please Note: Free shipping WILL NOT be available during the time this discount code is in effect.
GIVEAWAYS: To celebrate day 2 of inspiration The Rabbit Hole Designs is giving away the stamp and stencil promoted on day 2, to One lucky winner. Winner will be chosen at random from the comments left on participating blogs, so make sure to visit each stop and leave a comment. Leave comments by 11:59 pm PST 11-28-19 on all participating blogs. Winner will be announced on The Rabbit Hole Designs blog 11-29-2019