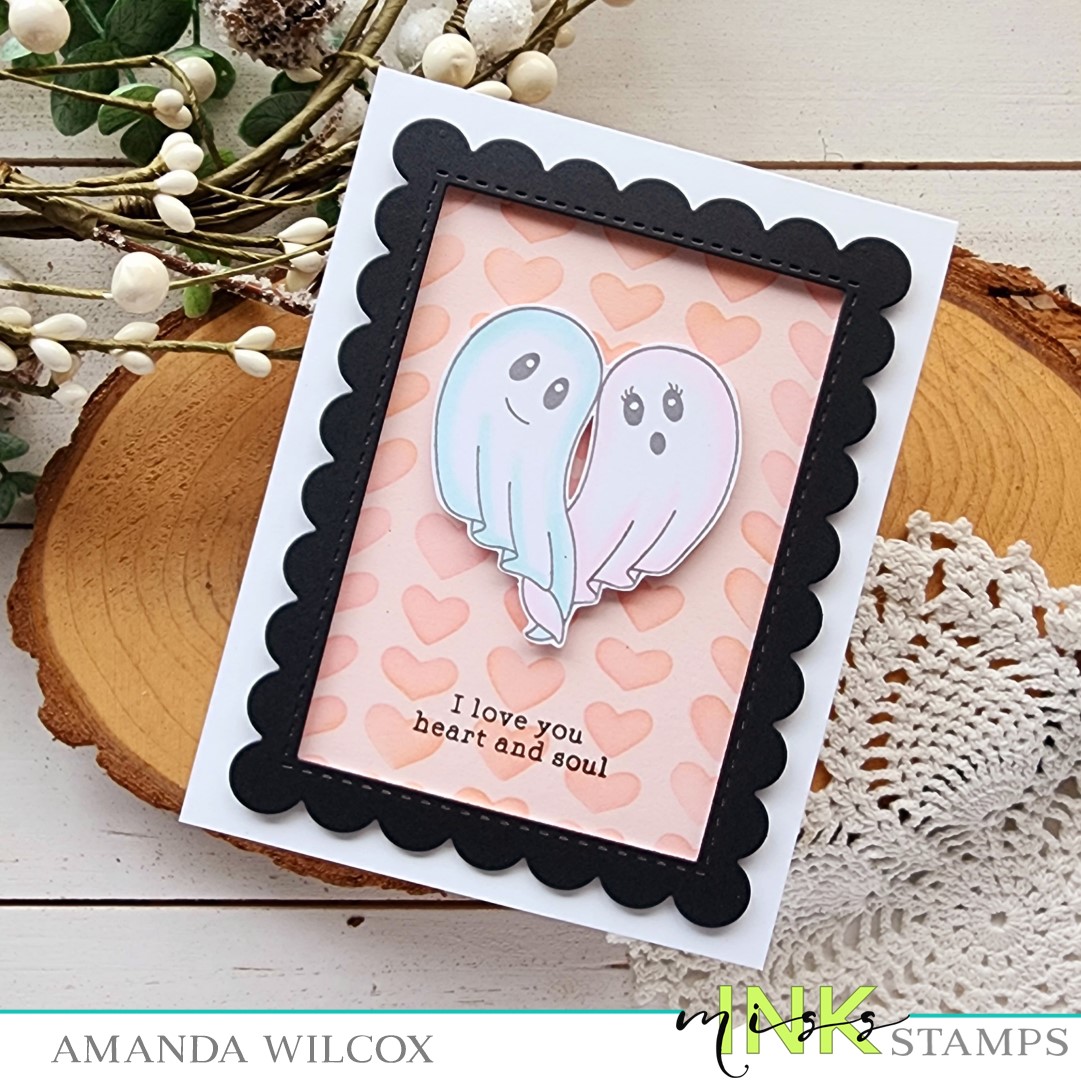
Hi friends! You know how much I love Halloween and Valloween is totally a thing so I couldn’t resist playing with some of my favorite Miss Ink Stamps goodies and pairing them together.

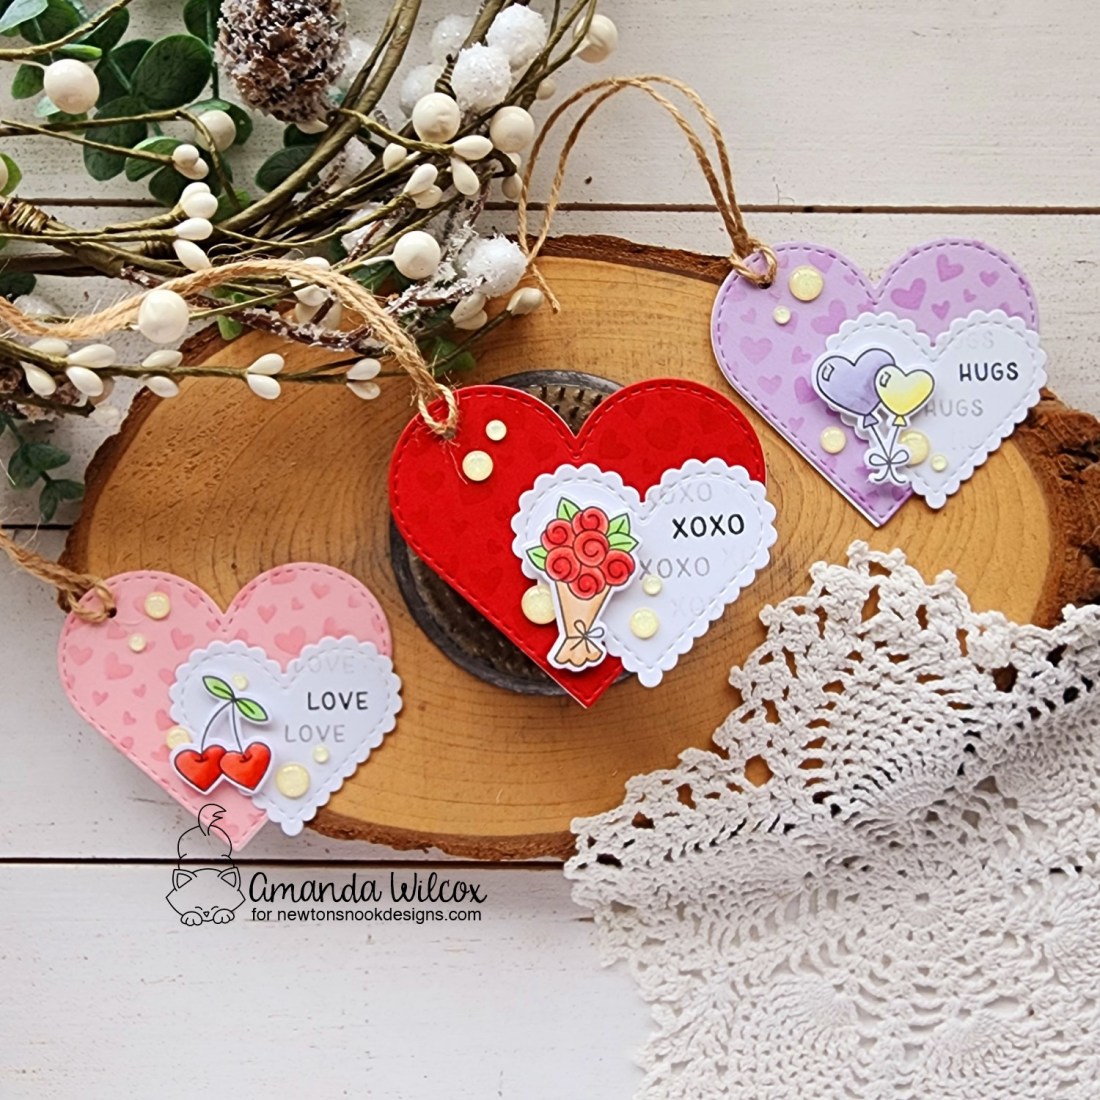
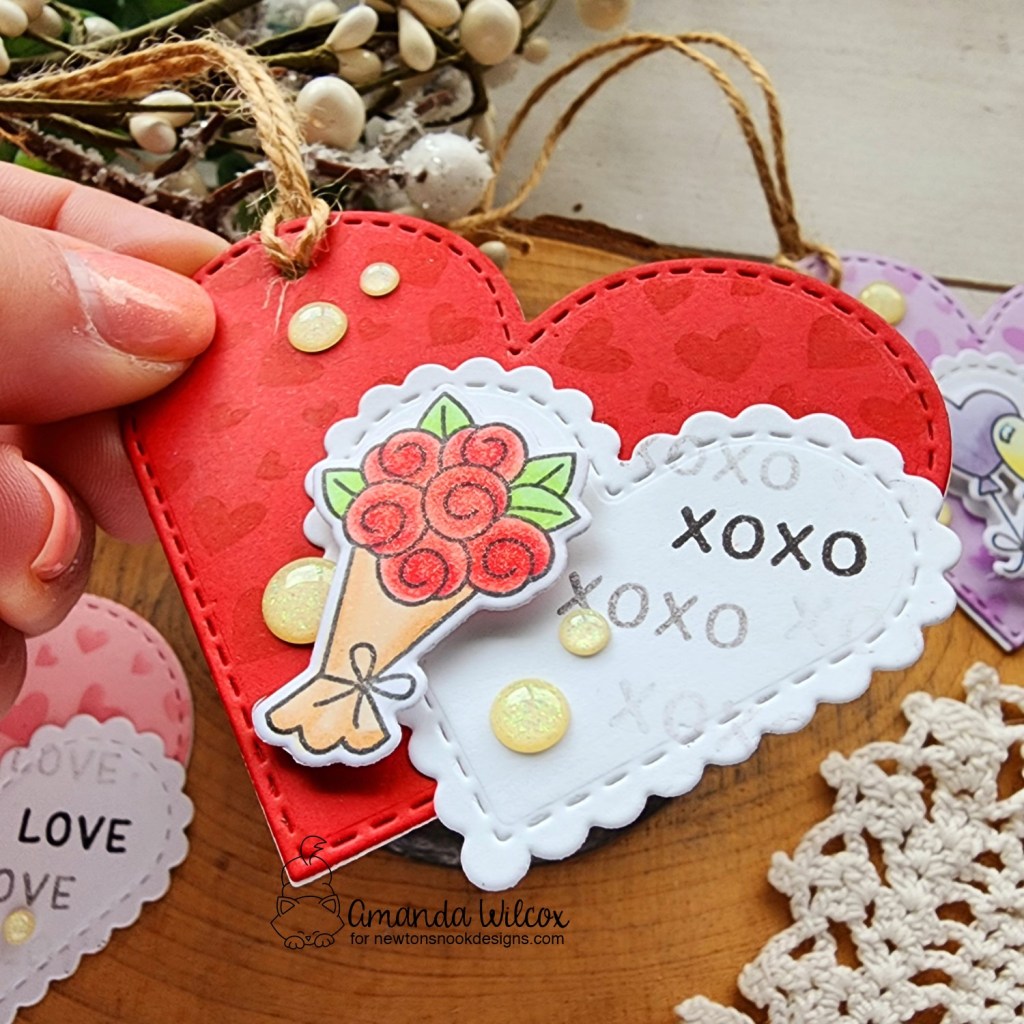
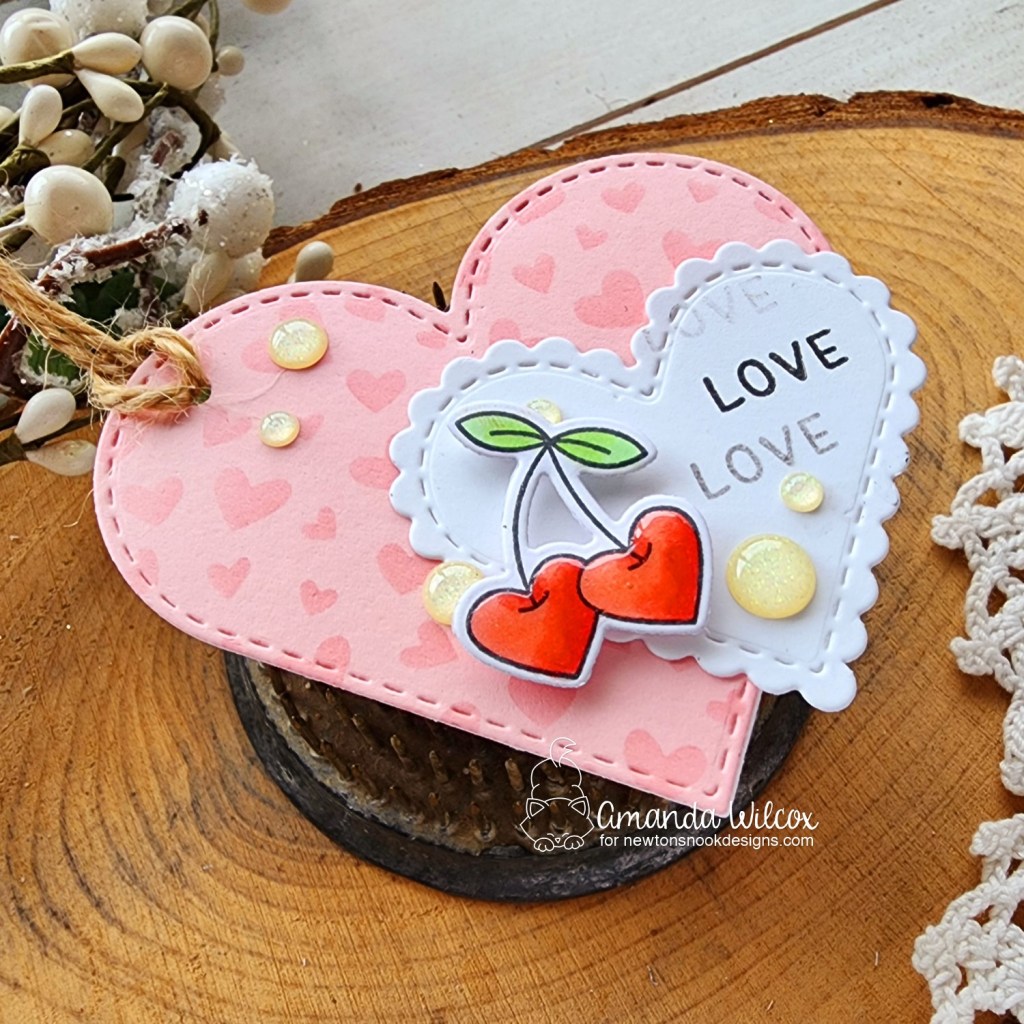
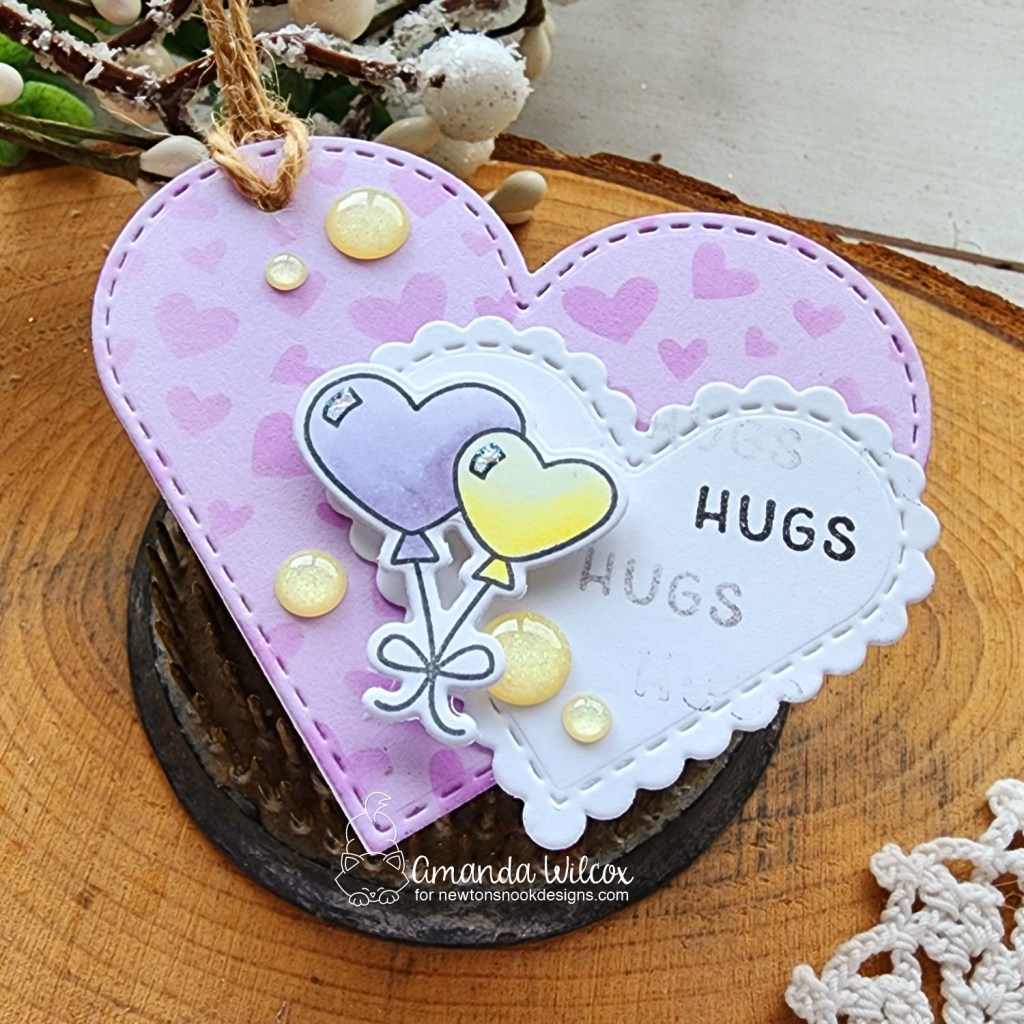
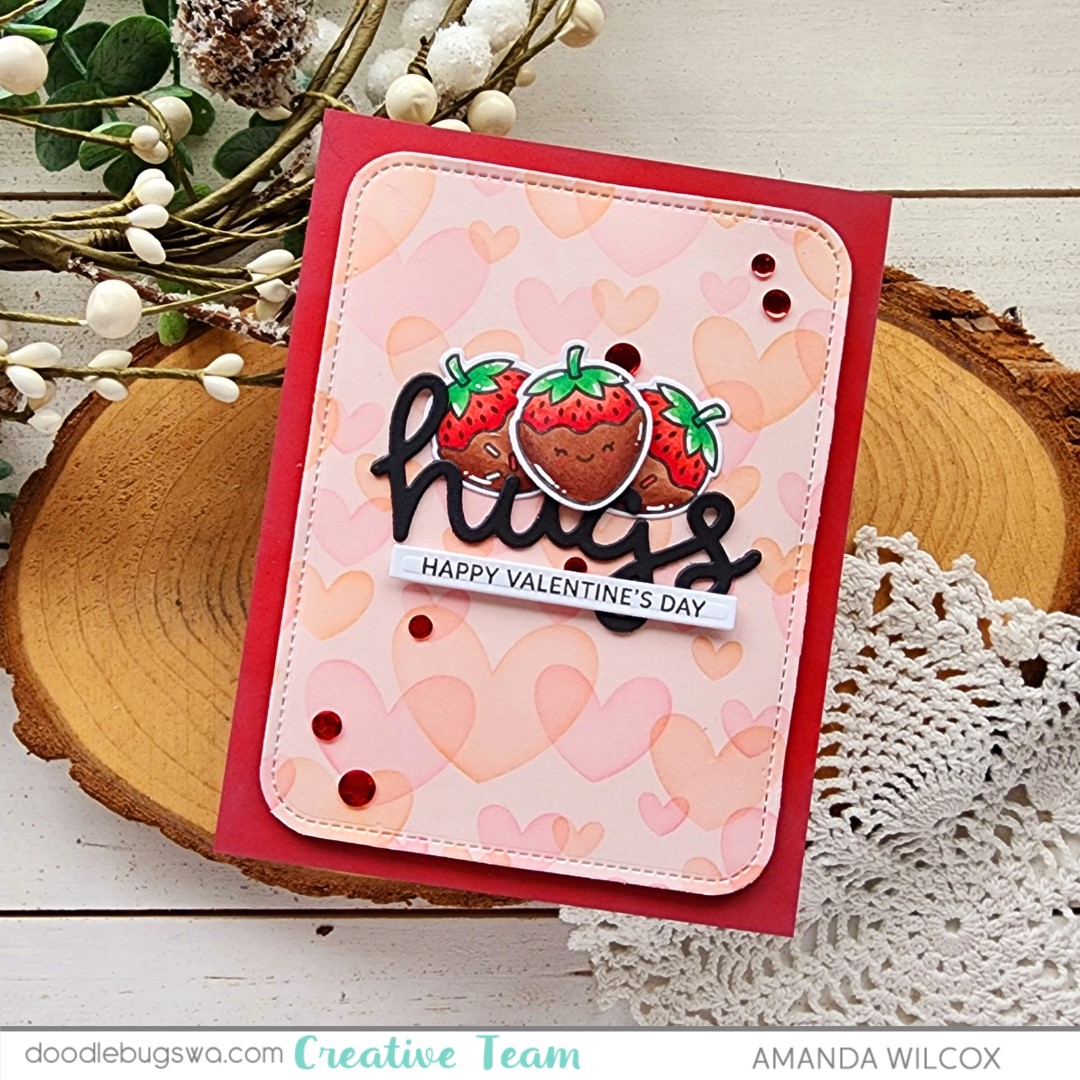
I started with the Kindred Spirits image – stamping in gray ink and coloring it with sheer copic colors. I cut them out by hand and set the image aside.
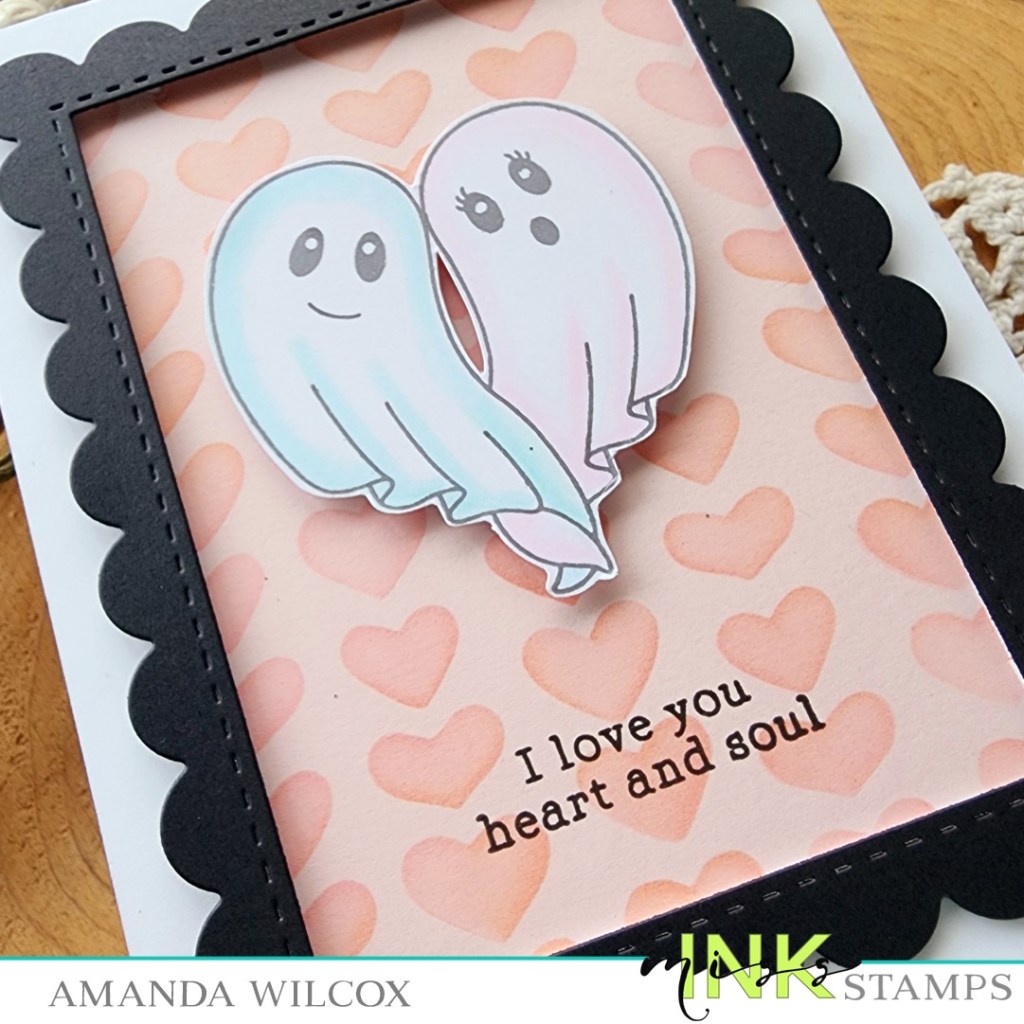
Next I cut a black frame from the EIEIO Frames die set and a pink panel to back it. I ink blended apricot and pink with the Hand Drawn Hearts stencil on that before popping the frame up with foam strips on it.
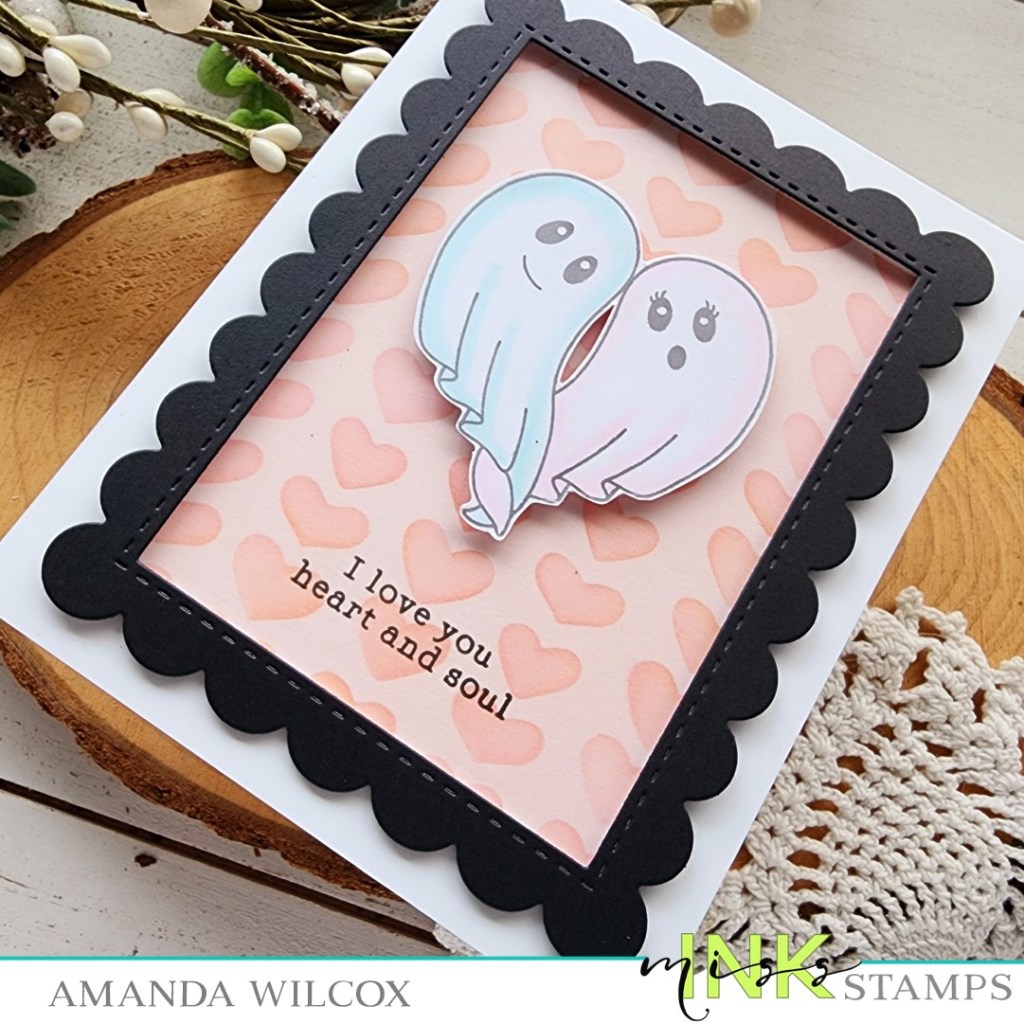
Using my image as a guide, I stamped my sentiment in the lower center of the panel and them popped the ghosts up with foam tape. Last, I glued the whole panel to a card base.
Products used:
Kindred Spirits stamps
EIEIO Frames dies
Hand Drawn Hearts stencil
Blending brush
Lawn Fawn ink – apricot and ballet slippers
Liquid glue
Foam tape and strips
I appreciate you sharing your time with me. Have a fabulous day!