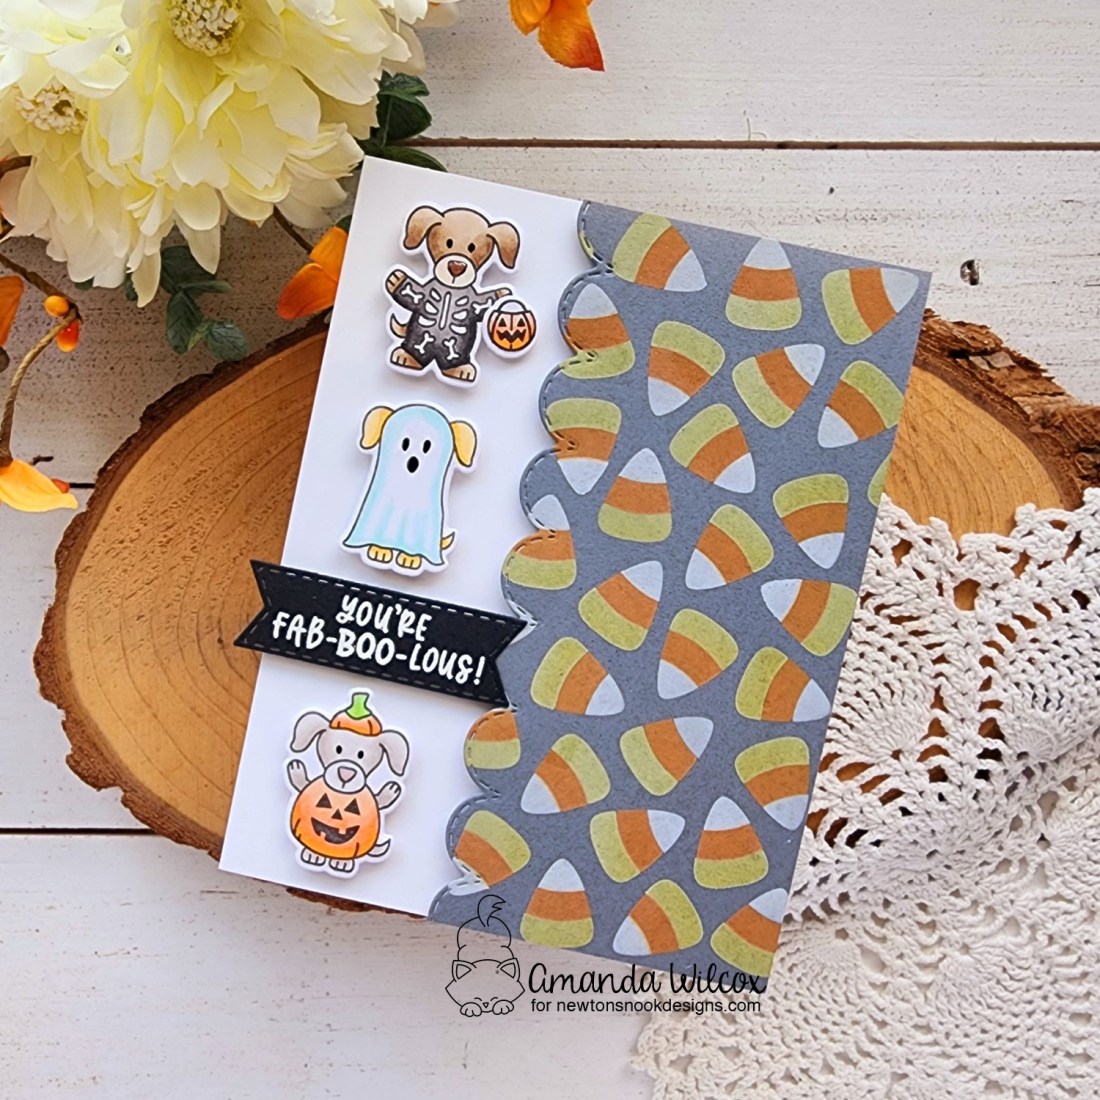
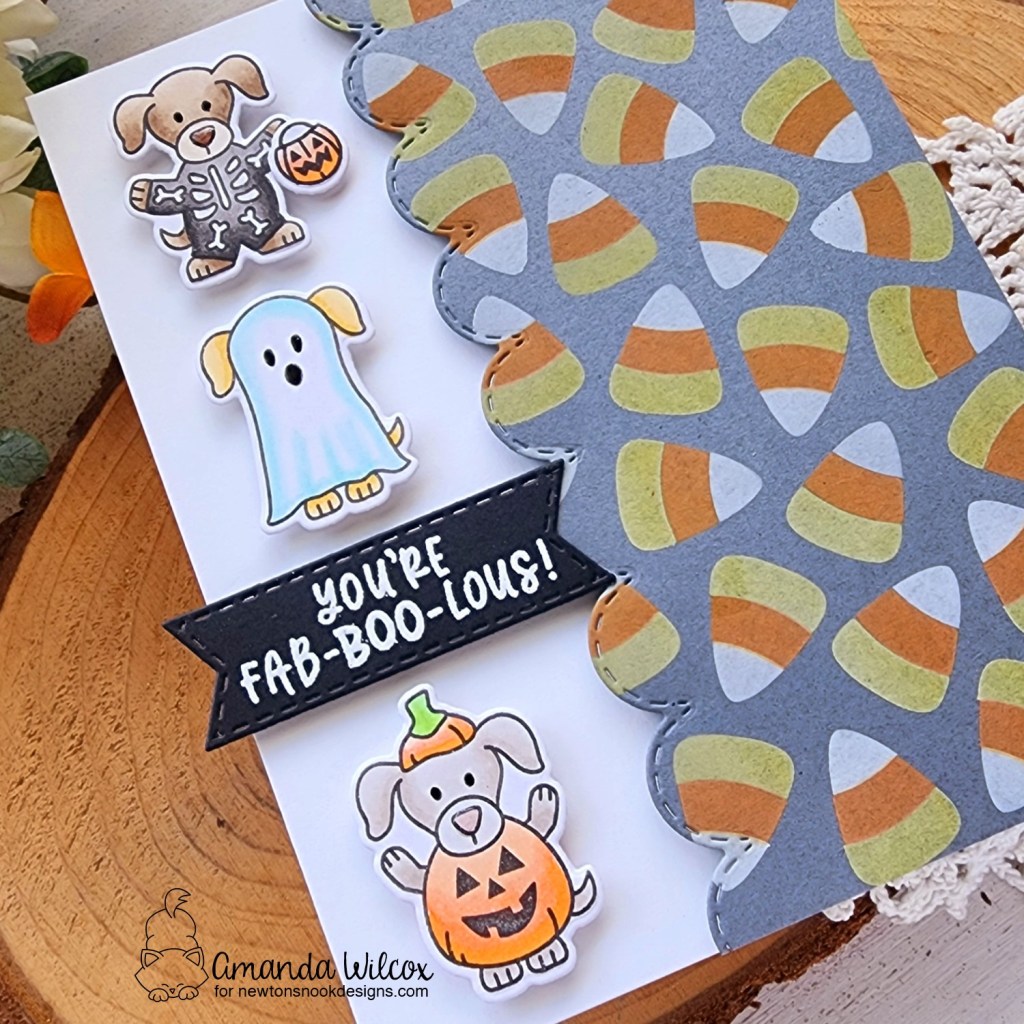
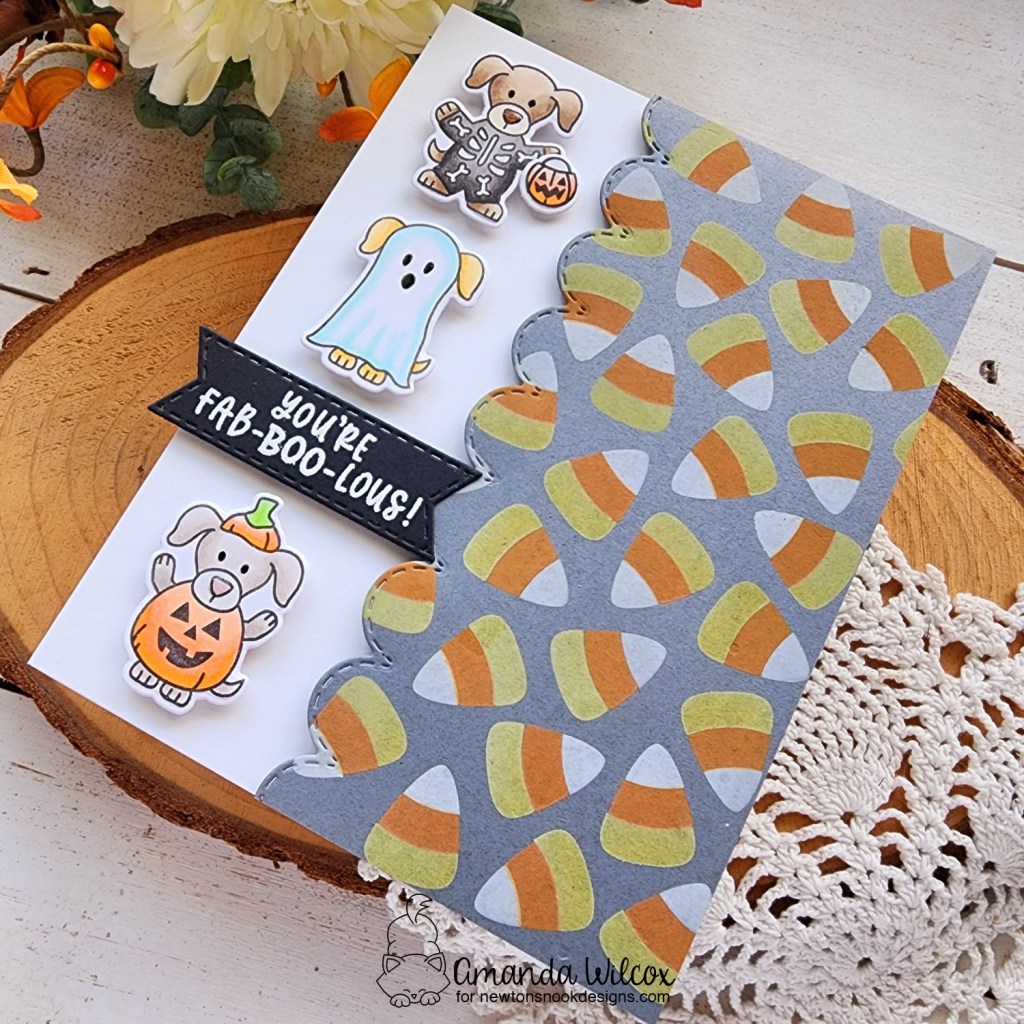
Hi friends! Thanks for stopping by again today. Things have been packed with the Newton’s Nook release and I’m not even done sharing creations from it! I’m back today with another card, this time featuring the Trick or Treat Puppy set that I’m equally as obsessed with!
This time I stamped a few of the images and colored them with copic markers, using the coordinating dies to cut them out. Aren’t they adorable!?!
I inked up the Candy Corn stencil on gray paper with distress oxide inks so they stayed nice and bright. Using the images as a guide on a card base, I used one of the Cloud Border dies to trim the edge off my stenciled panel. Then I popped it up with foam tape.
I die cut a banner using one of the Banner Trio dies, stamped and heat embossed my sentiment and then lined it back up in the banner die to cut the edge off to make it just the right size. After that I popped the puppies and sentiment banner up with foam squares.
For finishing touches I added black glaze pen to the eyes and glossy accents to puppy noses.
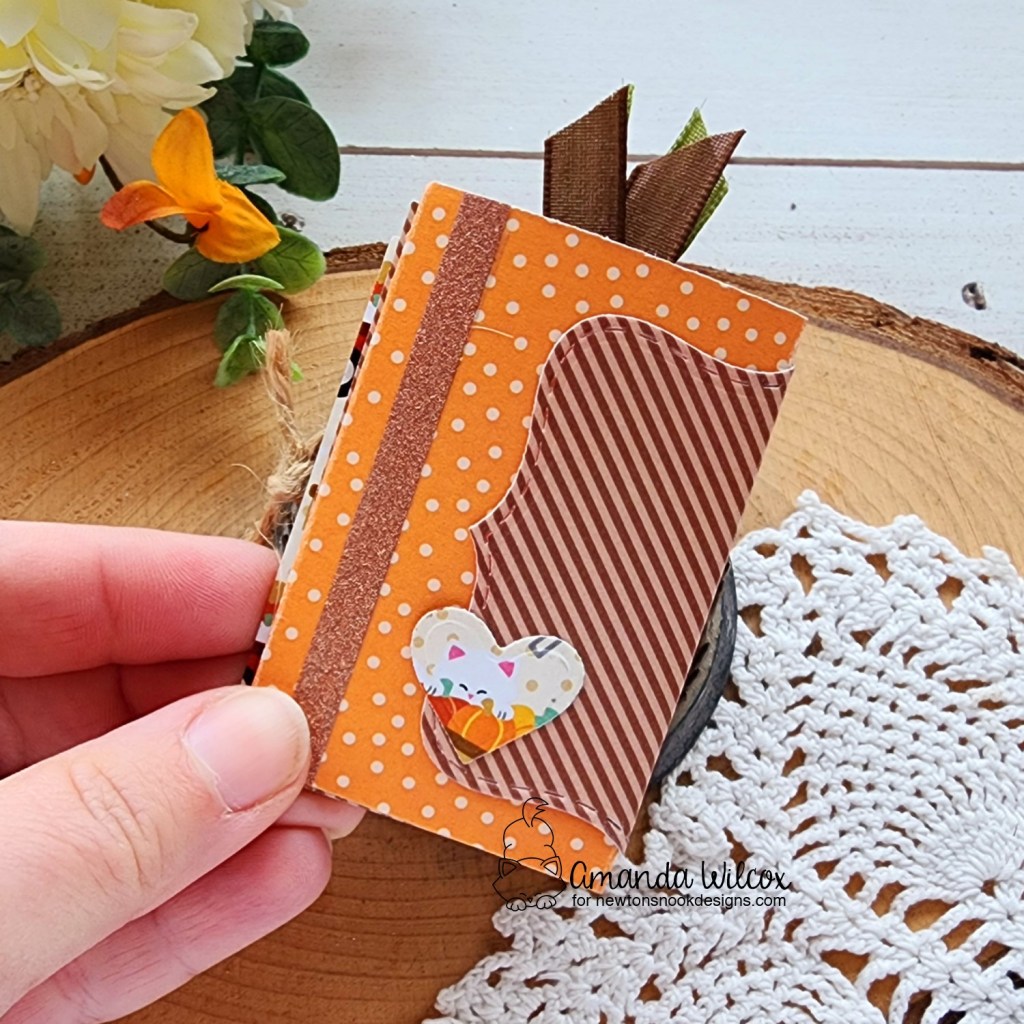
Happy Friday friends! We’re having an Instagram hop to celebrate the September Newton’s Nook Release today! I have a really fun, but sort of involved project to share with you for the release.
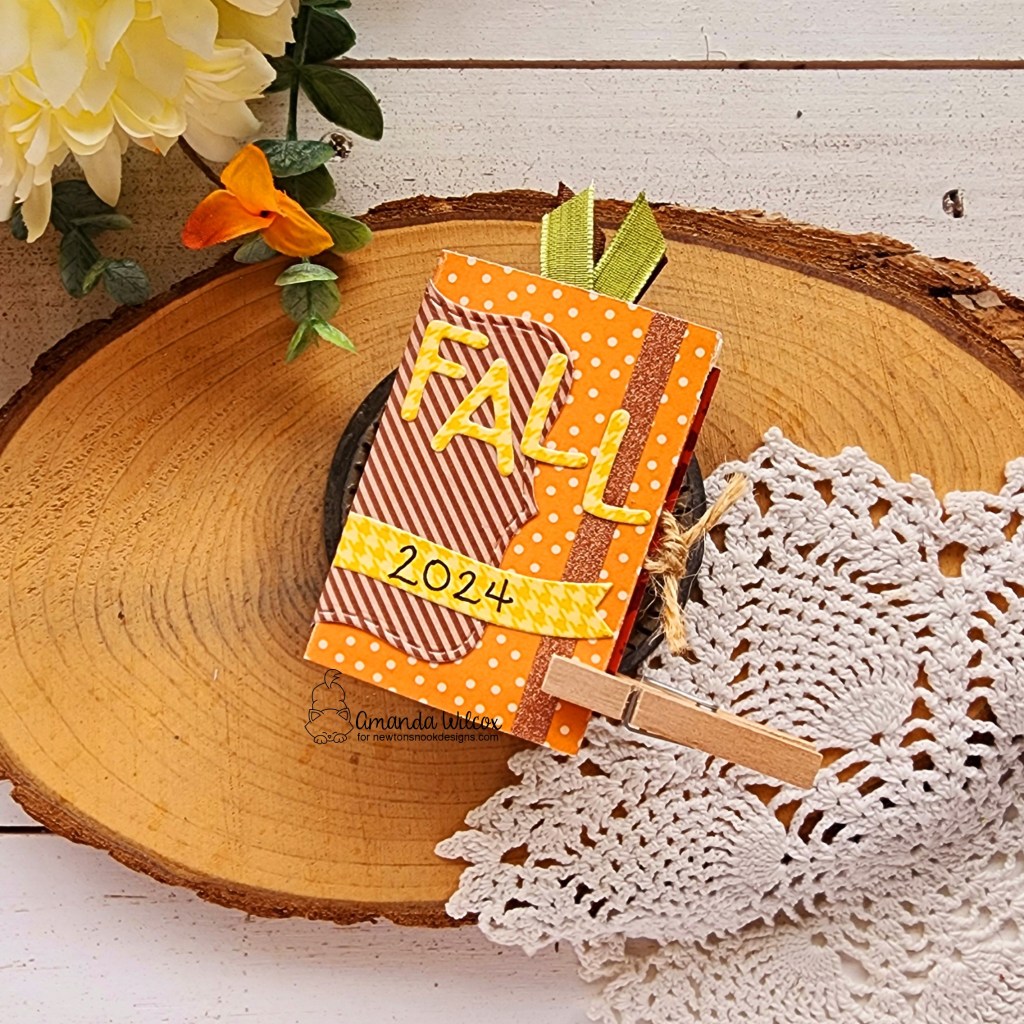
It looks simple on the front but this is a really fun mini book/album using the new Autumn Meows paper pad, along with some other fun products. It can stand up and be a decoration or tuck away to pull out when you want to look at it too.
When you flip open the first page, you have a pocket on the left that I made a little pull out for. I plan to write something on the back and add a small photo to the front. Then in the center (on the right here) you have another pull out slot that I’m going to add small photos to both sides of.
Here is a look at the back section. On the left you see the back of the leaf paper from the previous picture, along with another pocket on the right with a tag to pull out. I’ll probably do the same idea here with a photo on one side and write on the other.
And last, here’s the back of it. It’s such a sweet little book and was really a fun immersive crafting session to create it. I started with the basic shell and once I started cutting and adding little bits here and there, then I was totally invested in completing the whole thing. Next thing I knew, it was bedtime!
Remember to head to Instagram for the Newton’s Nook Release Hop for a chance to win a gift card to the shop!
I appreciate you sharing your time with me. Have a fabulous day!
We’re on the final day of release reveals and today is almost as packed as Monday was! Let’s take one more dive and tomorrow you can hop on and snag all of these new goodies for yourself!
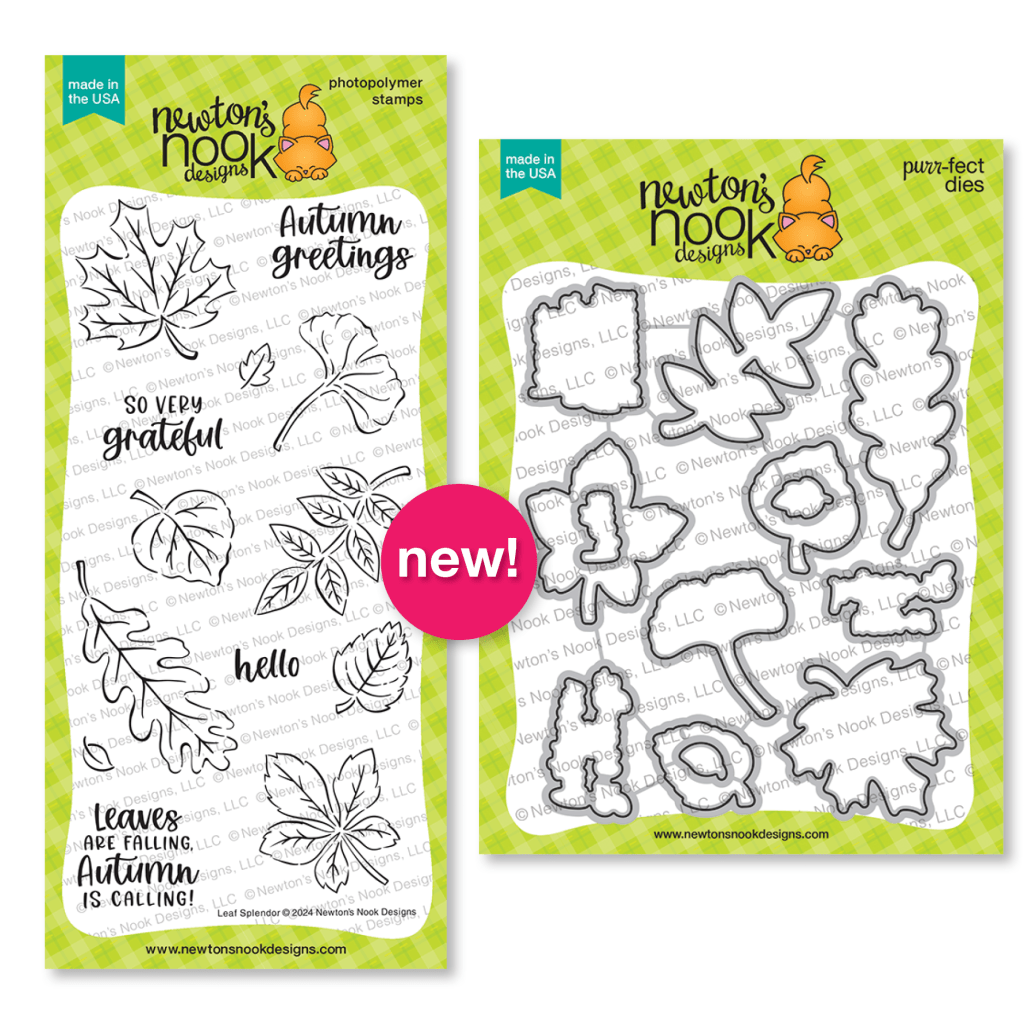
Leaf Splendor stamps and dies
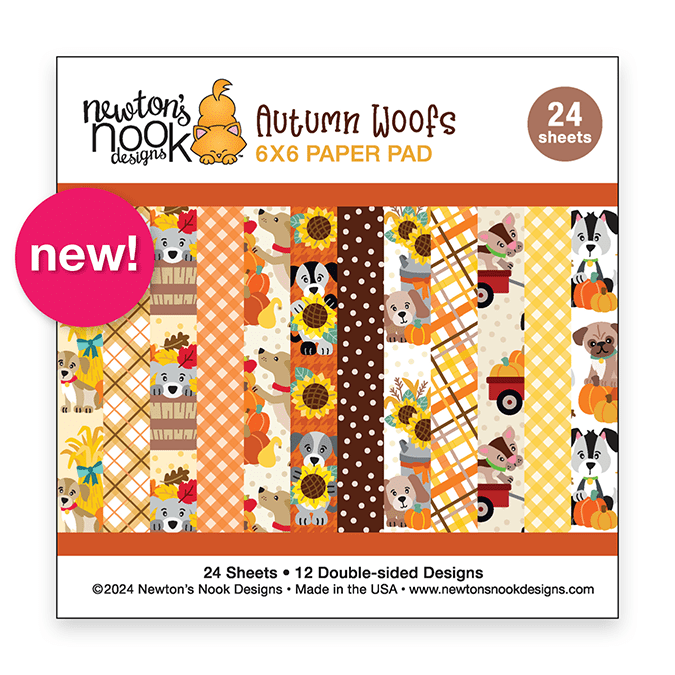
Autumn Woofs paper pad
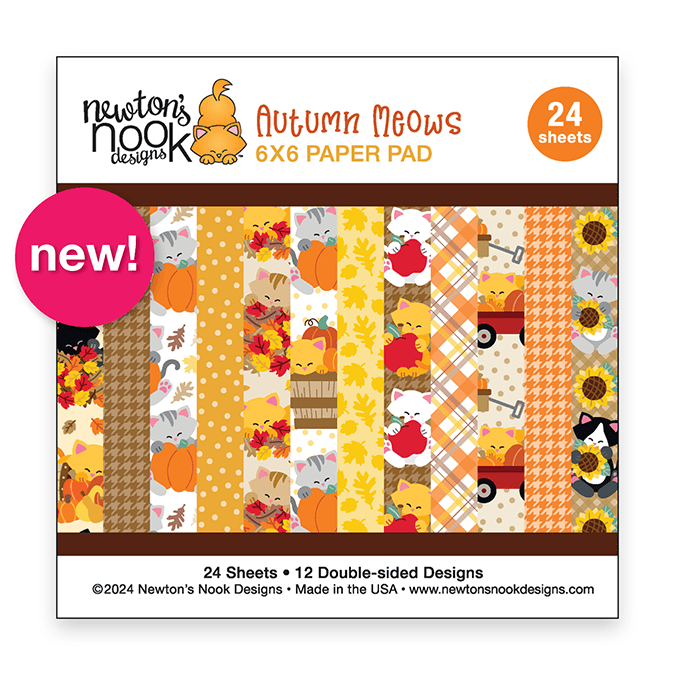
Autumn Meows paper pad
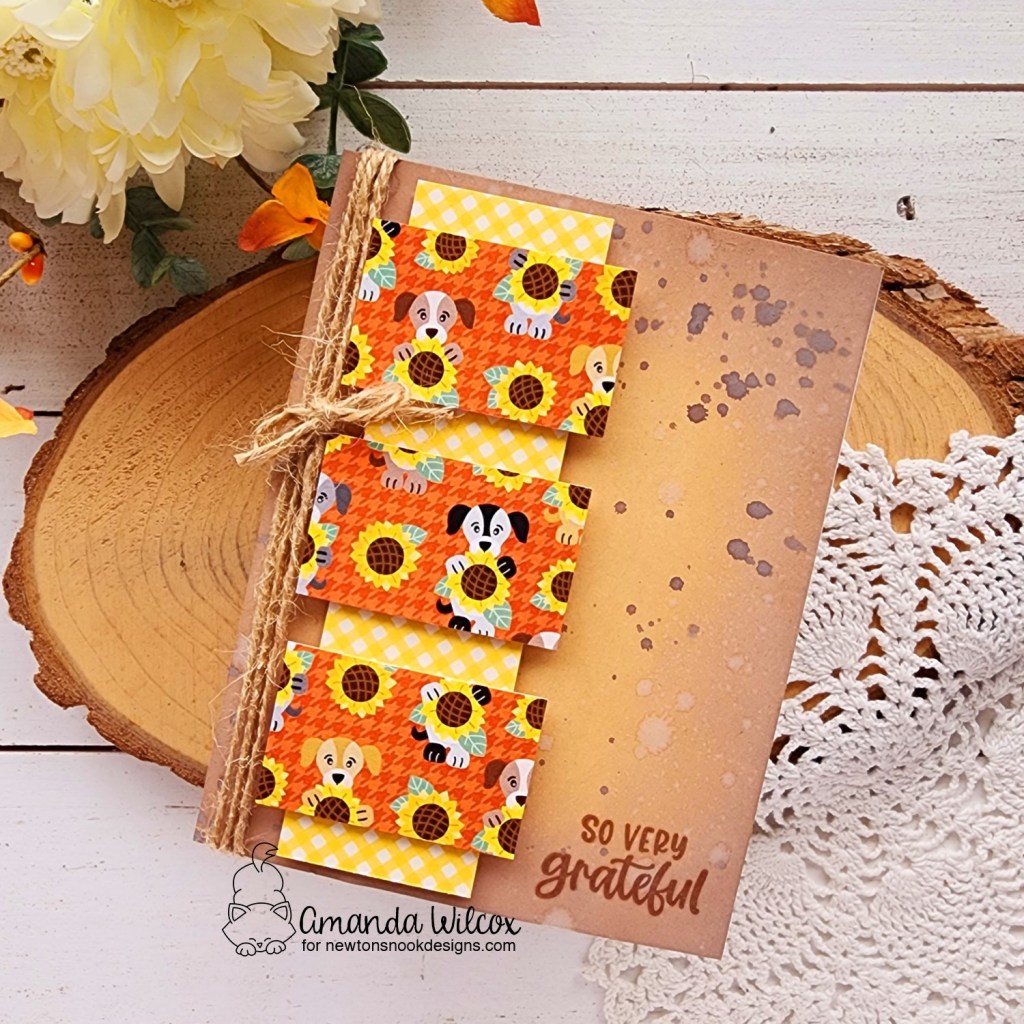
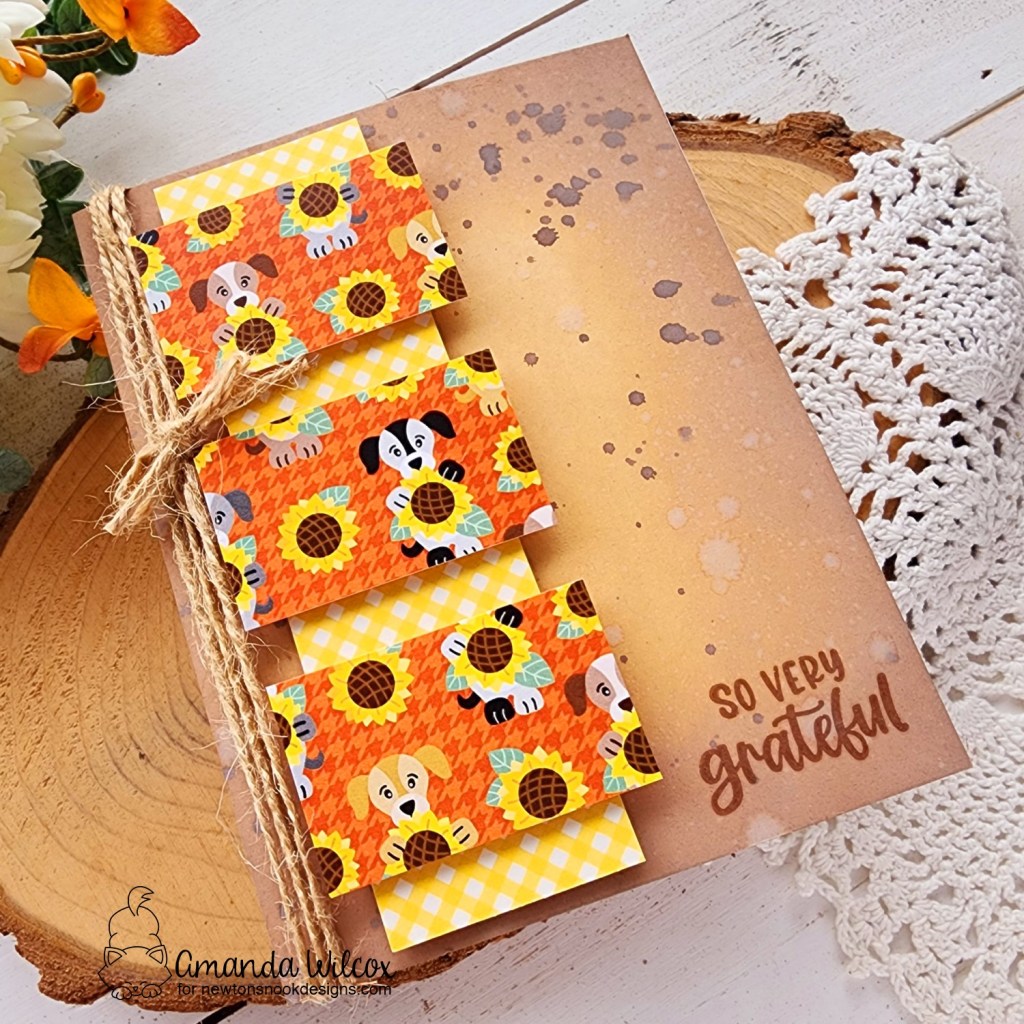
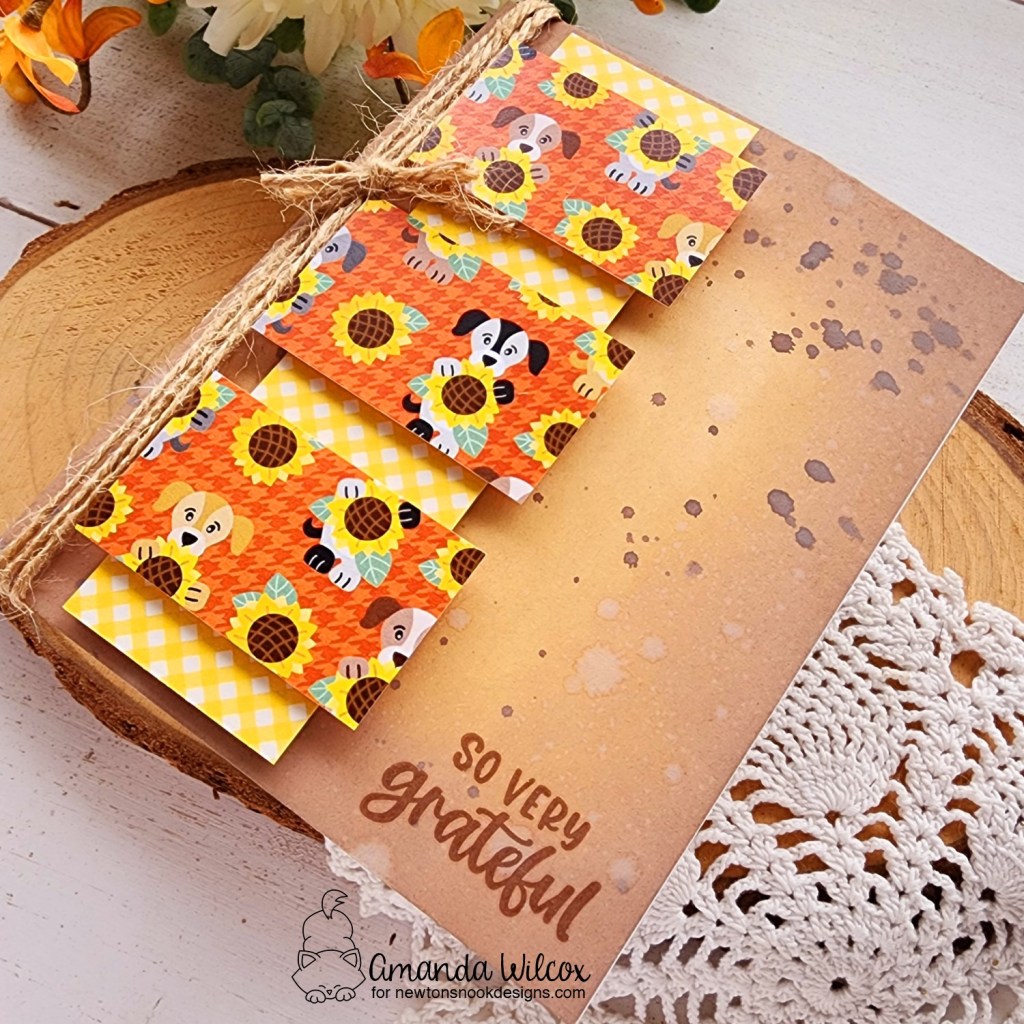
Today I have 2 cards to share with you. First up, a sweet little card using the new Autumn Woofs paper pad and a sentiment from Leaf Splendor. They go so well together!
For this card, I found a sketch on Pinterest and thought it would be fun to try with the new paper pads. I chose my paper and started cutting. The strip is 1.5×5.25 inches and the rectangles are 1.25×2.25 inches.
Then I cut a piece of kraft cardstock and inked the edges up with gathering twigs distress oxide ink. I splattered it with ground espresso ink and stamped my sentiment in the lower right corner before gluing it to a white card base.
I popped the papers up with foam squares and finished the design off with some jute twine wrapped around the inside fold.
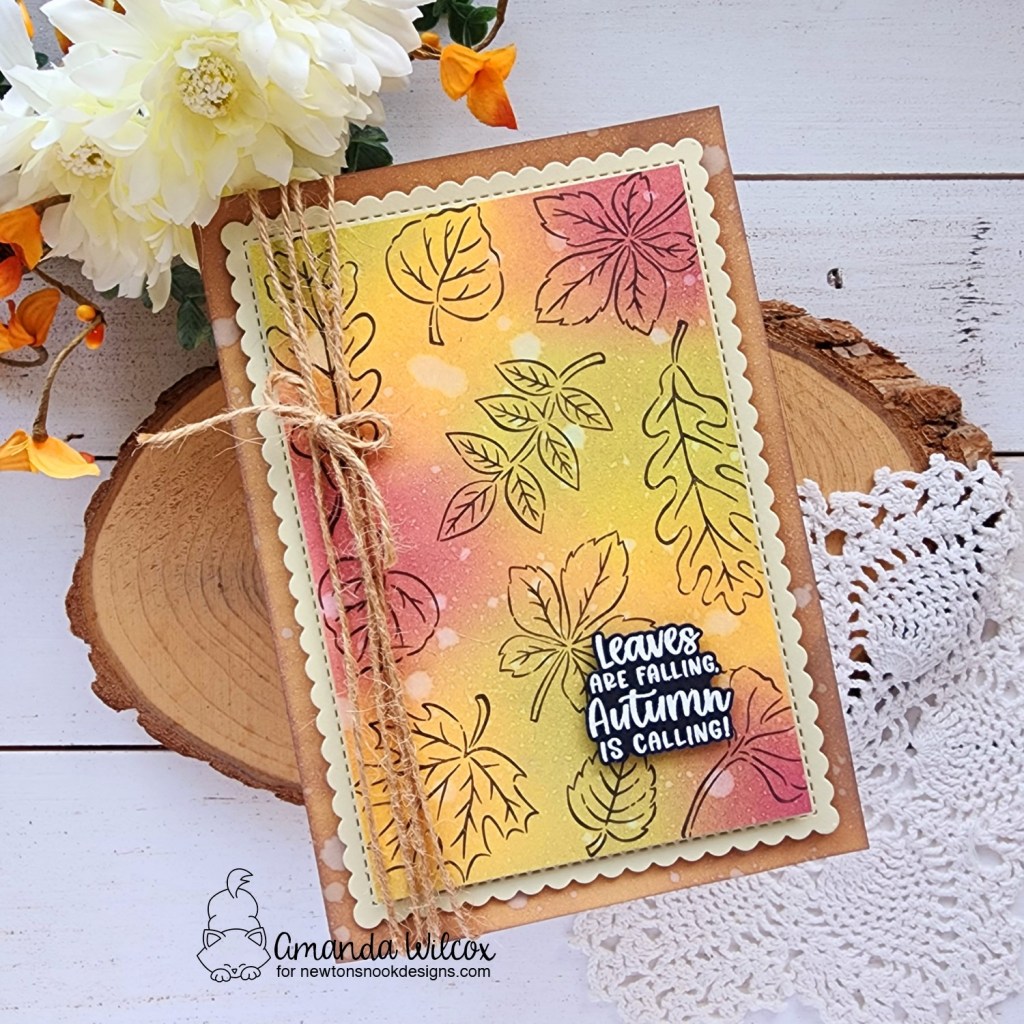
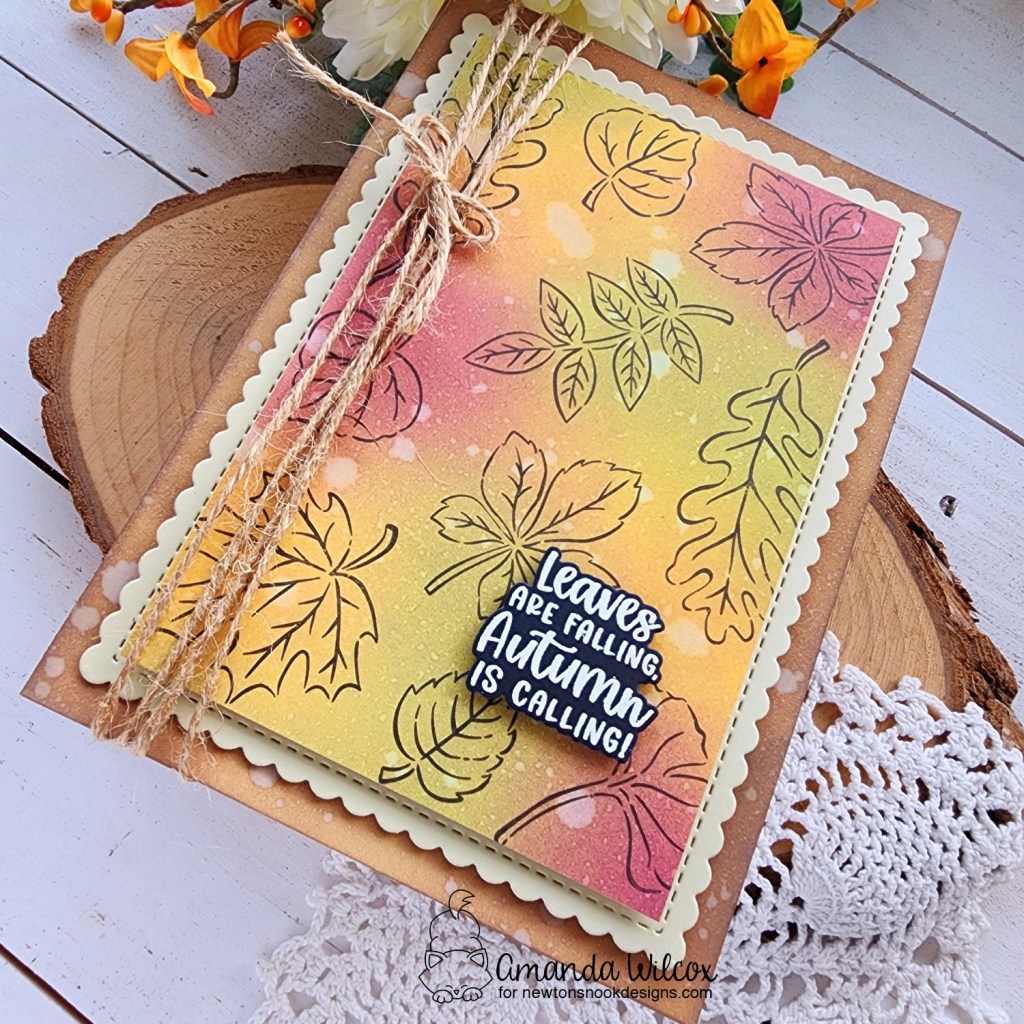
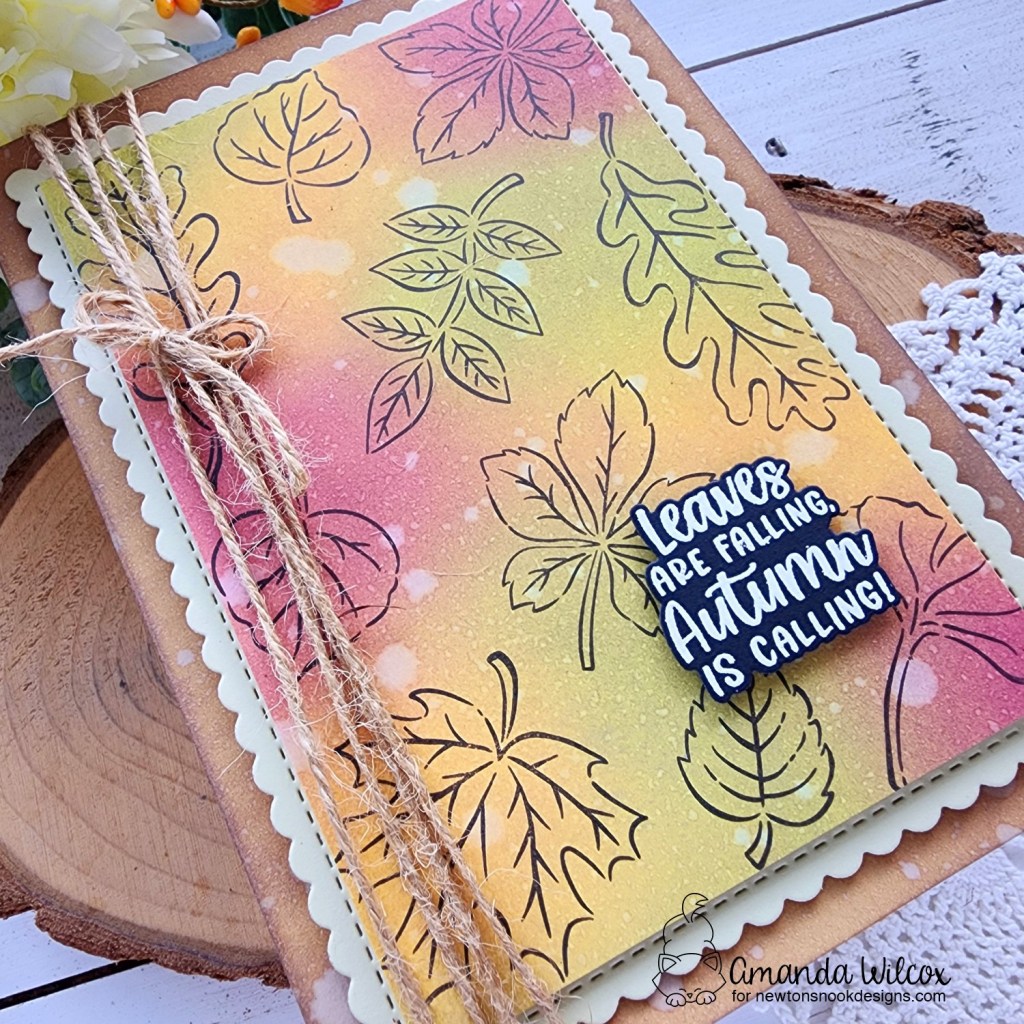
Next, I have a simple card using the Leaf Splendor stamp set which started one direction and took a hard left to something completely different. The end result was very inviting for me to mass produce as a fall card to share with extended family.
I started with a piece of watercolor cardstock and my distress oxide inks. These were wild honey, aged mahogany and peeled paint. I was going to add lots of water to blend the colors together, stamp the leaves and die cut them out but I ended up stamping the leaves first, loving the look and turning this into an A7 size card instead.
So at this point, I cut the large scalloped rectangle in the A7 Frames die set from a muted green cardstock in my stash and trimming the leaf panel just smaller than the stitching edge. I stamped and heat embossed my sentiment, using the coordinating die to cut it out.
I plain card front wasn’t working for me so I ink blended gathered twigs distress oxide on the edges and spritzed it with the sprayer too. After popping all the layers up with foam tape I finished the design off with jute twine again.
If you can’t tell that’s a favorite for my fall themed cards. I love the rustic touch it gives to any design.
Enter to Win a $25 Prize!
One lucky winner will receive a $25 prize to spend at Newton’s Nook Designs online shop! The winner will be chosen at random from the collective blog posts featuring our new products this week. For a chance to win, leave comments on the Design Team Member Blog Posts (see list below) from Monday September 9th through Thursday September 12th. You will not know which blog has been chosen so the more you comment on the better your chances are of winning! You have until Thursday, September 12th at 9 pm ET to comment — winners will be announced on the NND blog on Friday, September 13th.
Check out all the awesome Design Team Blogs below to enter:
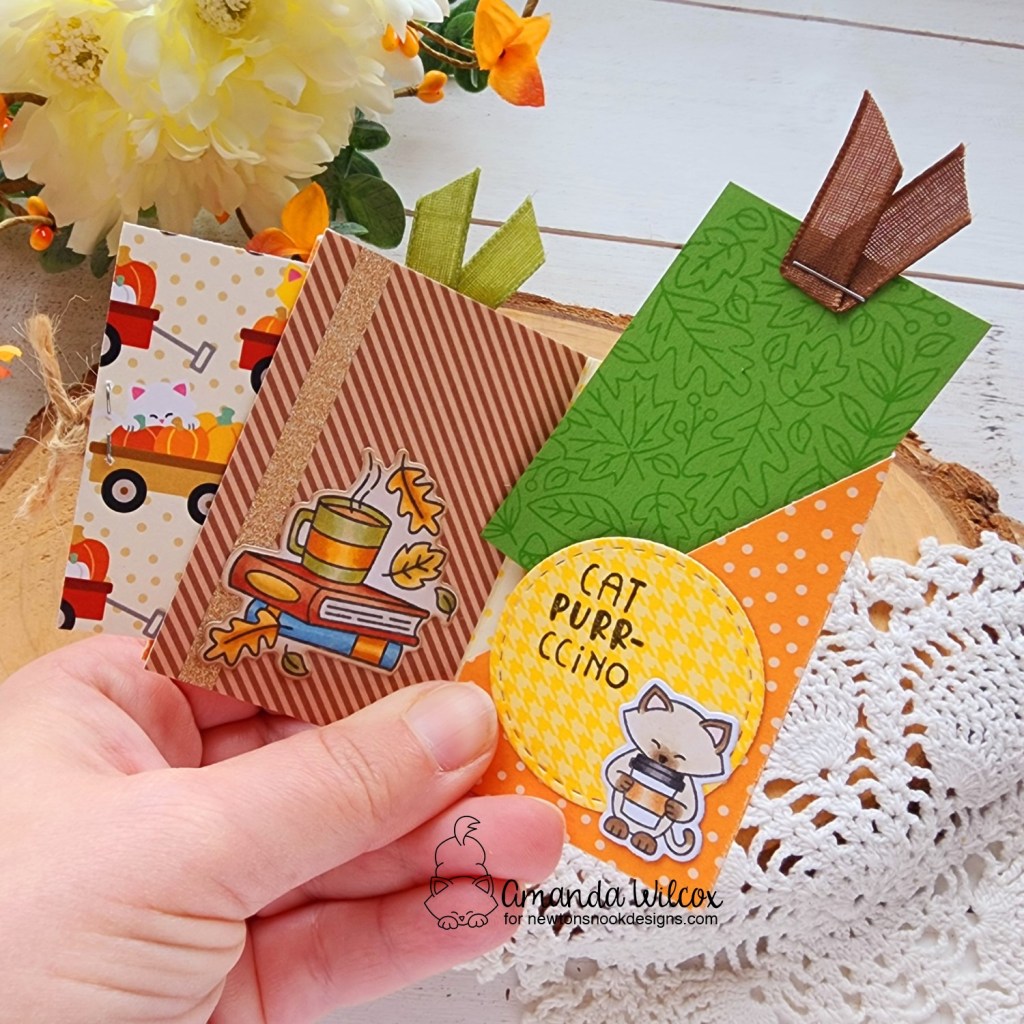
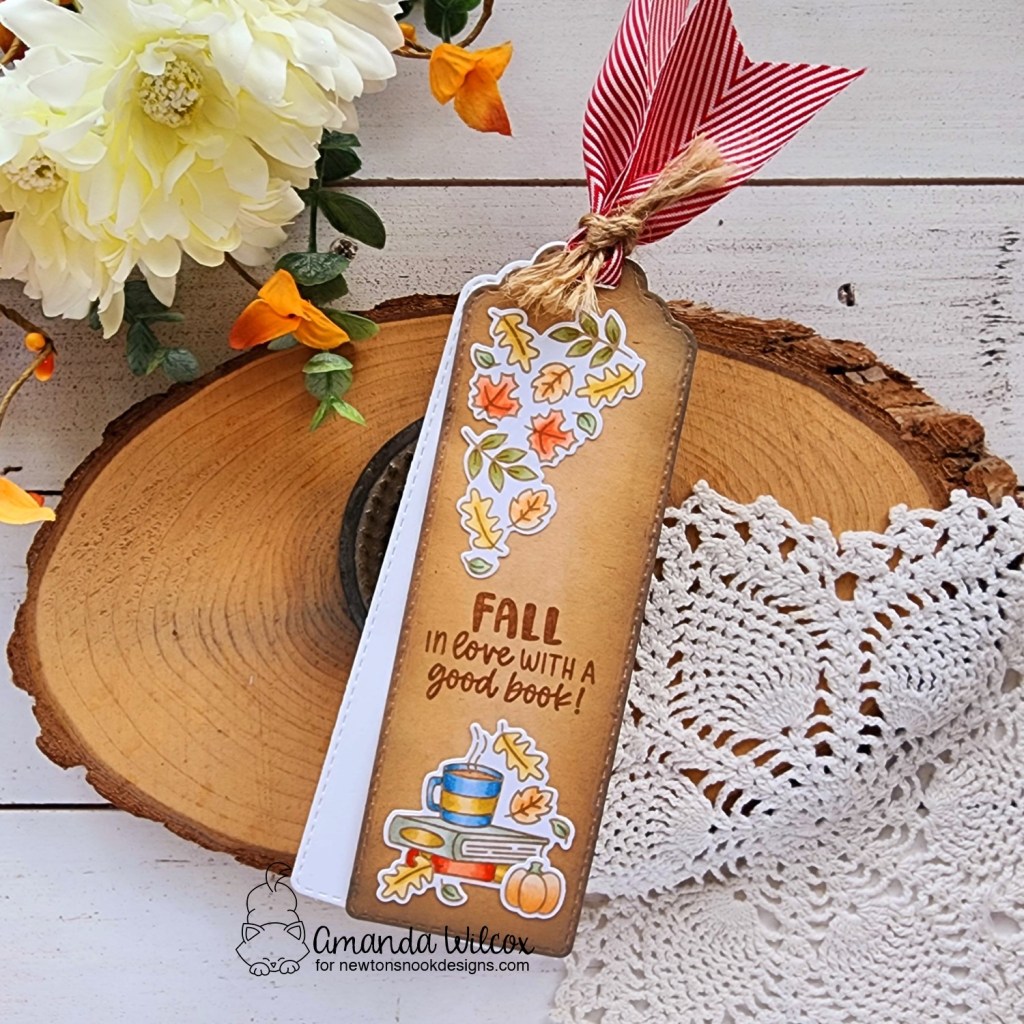
Alright friends, let’s switch gears to some beautiful fall images. We’re sticking with the bookmark theme though so all the bases are covered!
Autumn Reads
I love the mix of tall and small images in this set. It’s going to be great for bookmarks like I have to share today but also pairing with your other bookish and coffee images for fall on regular size card fronts.
I stamped my images from Autumn Reads in brown copic-friendly ink and colored them with my copic markers. Then I used the coordinating dies to cut them out.
This time I pulled out the Bookmark dies and cut my main one from kraft cardstock. I inked up the edges with distress oxide ink for a little depth and stamped my sentiment in the center.
I glued the images directly to the bookmark and threaded my ribbons through the top.
Enter to Win a $25 Prize!
One lucky winner will receive a $25 prize to spend at Newton’s Nook Designs online shop! The winner will be chosen at random from the collective blog posts featuring our new products this week. For a chance to win, leave comments on the Design Team Member Blog Posts (see list below) from Monday September 9th through Thursday September 12th. You will not know which blog has been chosen so the more you comment on the better your chances are of winning! You have until Thursday, September 12th at 9 pm ET to comment — winners will be announced on the NND blog on Friday, September 13th.
Check out all the awesome Design Team Blogs below to enter:
Today we’re continuing with the spooky Halloween theme but we have just one stamp and die set to share. It’s really fun and going to be versatile for both bookmarks, tags and little scenes.
Spooky Stories stamps and dies
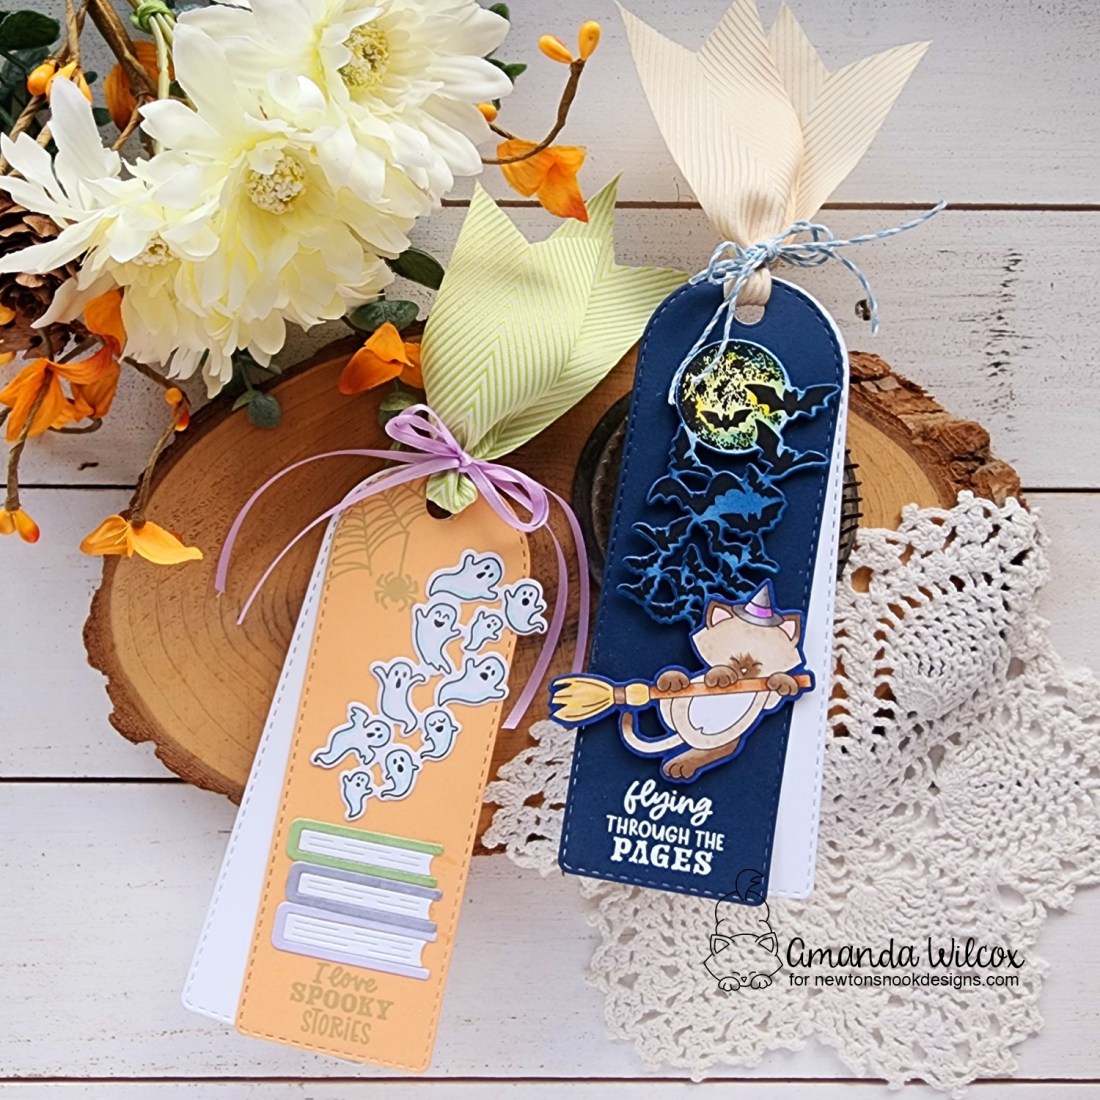
I created a couple of bookmarks to share today but am really itching to also create some mini scenes using these fun images really soon!
I used the new Bookmark II dies for both of these bookmarks. Starting soft and pastel with the ghosts and going to a dark night sky for the cool bats!
I stamped the sentiment and images with gray ink so it wasn’t harsh and used the book stack dies from the Bookmark II set. I added the ghosts like they’re coming out of the spooky stories, keeping everything flat since it’s a bookmark.
For this second one, I started with a dark blue background, heat embossing the sentiment at the bottom. Then I stamped and die cut the bat image from Spooky Stories. I colored the moon with some yellow markers and used a blending brush to add dark blue to the rest.
I stamped and colored the witchy Newton from Newton’s Boo-tiful Night, cutting it out with the coordinating die. I didn’t like the white edge so I colored it with a dark blue marker so it blended in better.
Not thinking about my bookmark rule, I did pop all of these images up with foam squares. Oops, you know how much I like my dimension. Haha!
Enter to Win a $25 Prize!
One lucky winner will receive a $25 prize to spend at Newton’s Nook Designs online shop! The winner will be chosen at random from the collective blog posts featuring our new products this week. For a chance to win, leave comments on the Design Team Member Blog Posts (see list below) from Monday September 9th through Thursday September 12th. You will not know which blog has been chosen so the more you comment on the better your chances are of winning! You have until Thursday, September 12th at 9 pm ET to comment — winners will be announced on the NND blog on Friday, September 13th.
Check out all the awesome Design Team Blogs below to enter:
Hey friends! It’s a fabulous week on the blog! We’ve got Newton’s Nook September Release reveals all week, with an Instagram Hop happening on Friday when everything goes on sale! Let’s have a look at the reveals for today, shall we?
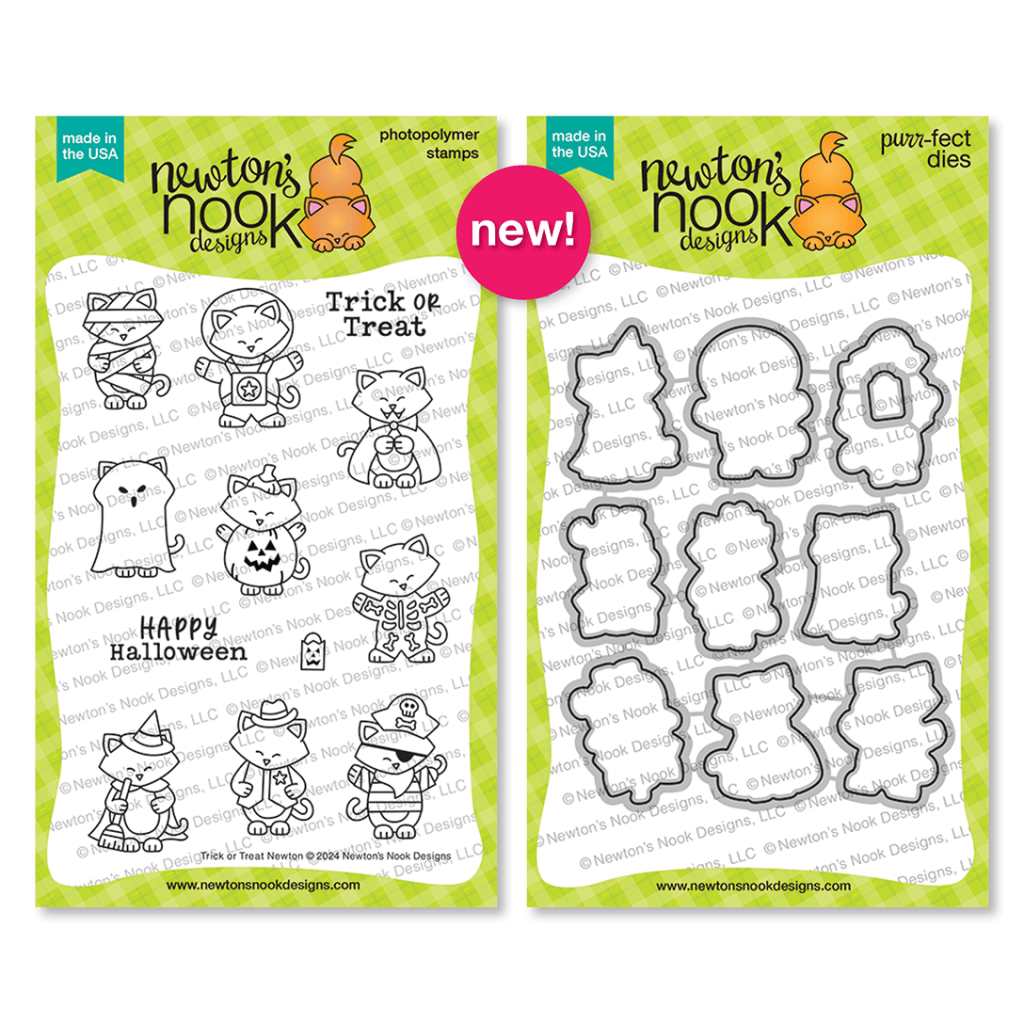
Trick or Treat Newton stamps and dies
Trick or Treat Puppy stamps and dies
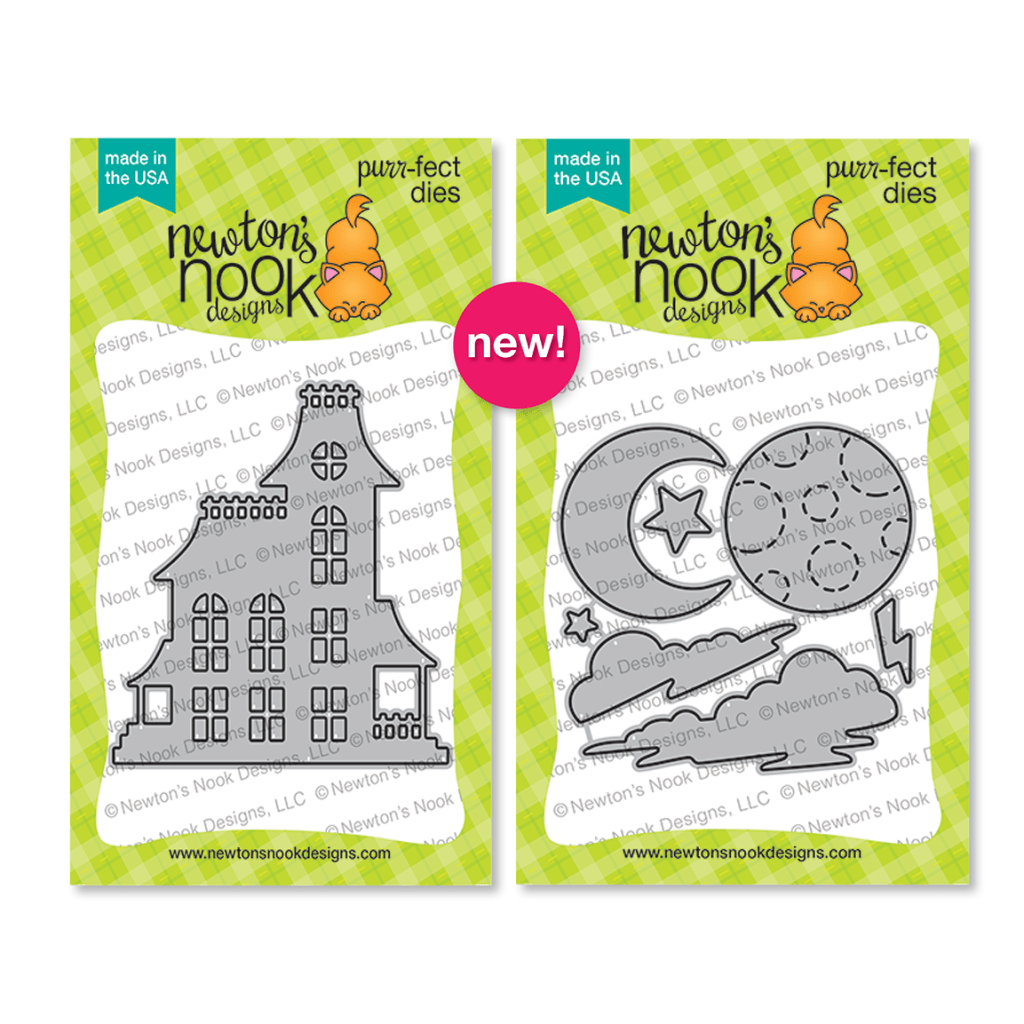
Haunted House and Spooky Skies dies
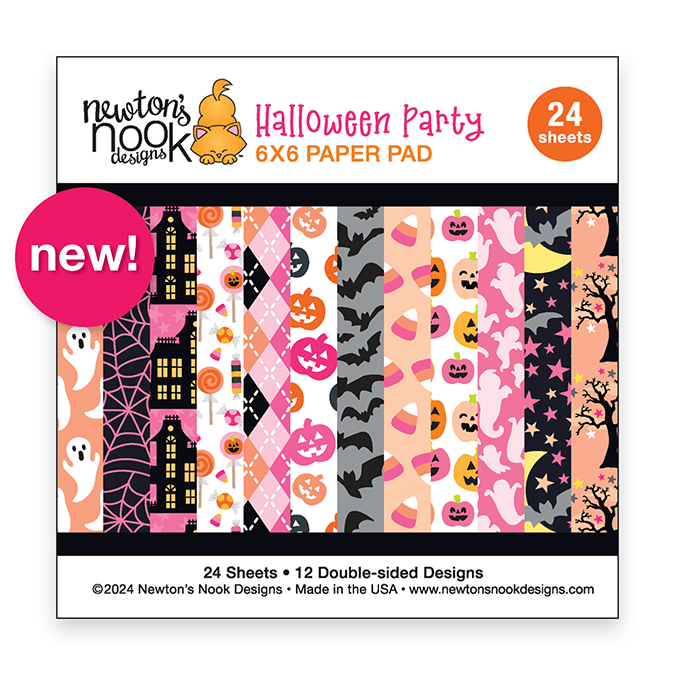
Halloween Party paper pad
If you’ve been her for a minute you know already that I’m obsessed with every bit of today’s reveals! There is a ton and it’s all AMAZING!!! I scaled it back and am sharing 2 cards with you today.
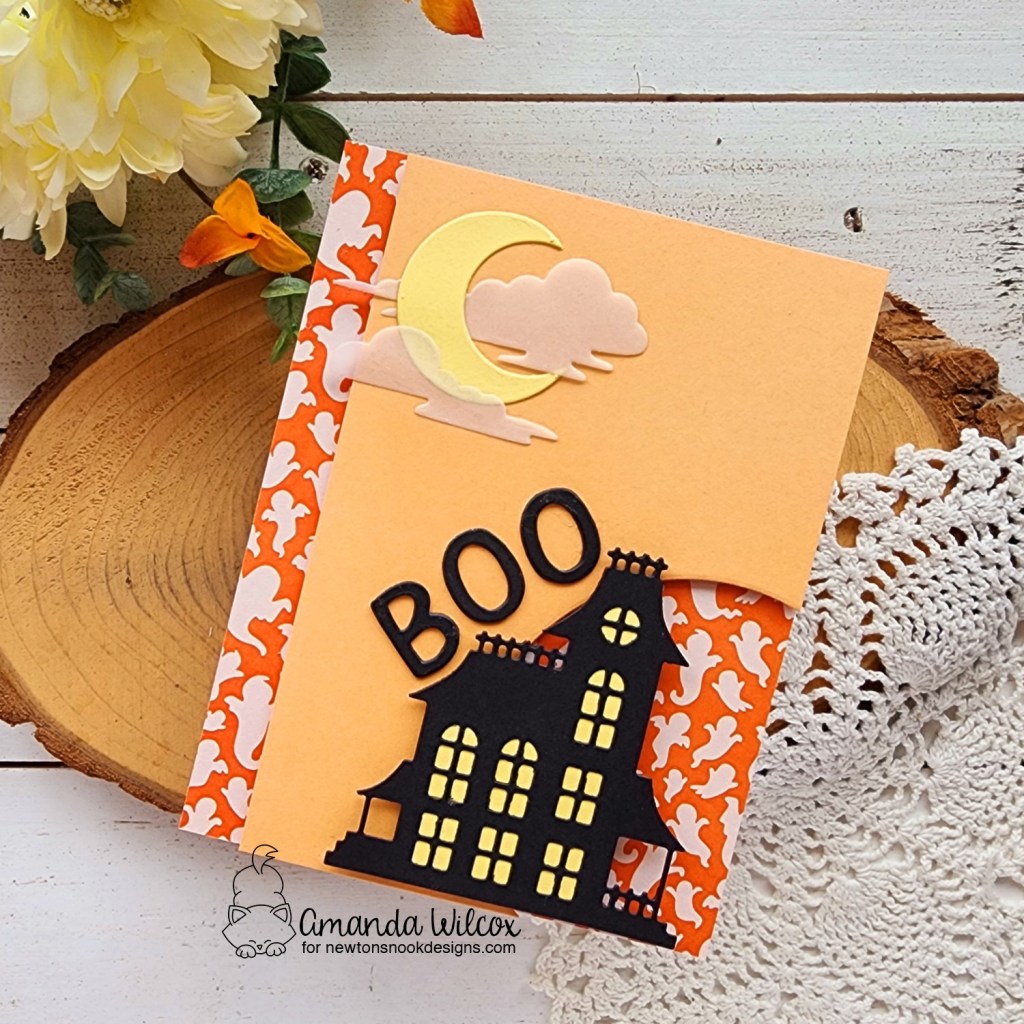
First up, a fantastically fun card using the new Haunted House and Spooky Skies dies, along with a piece of the Halloween Party paper pad.
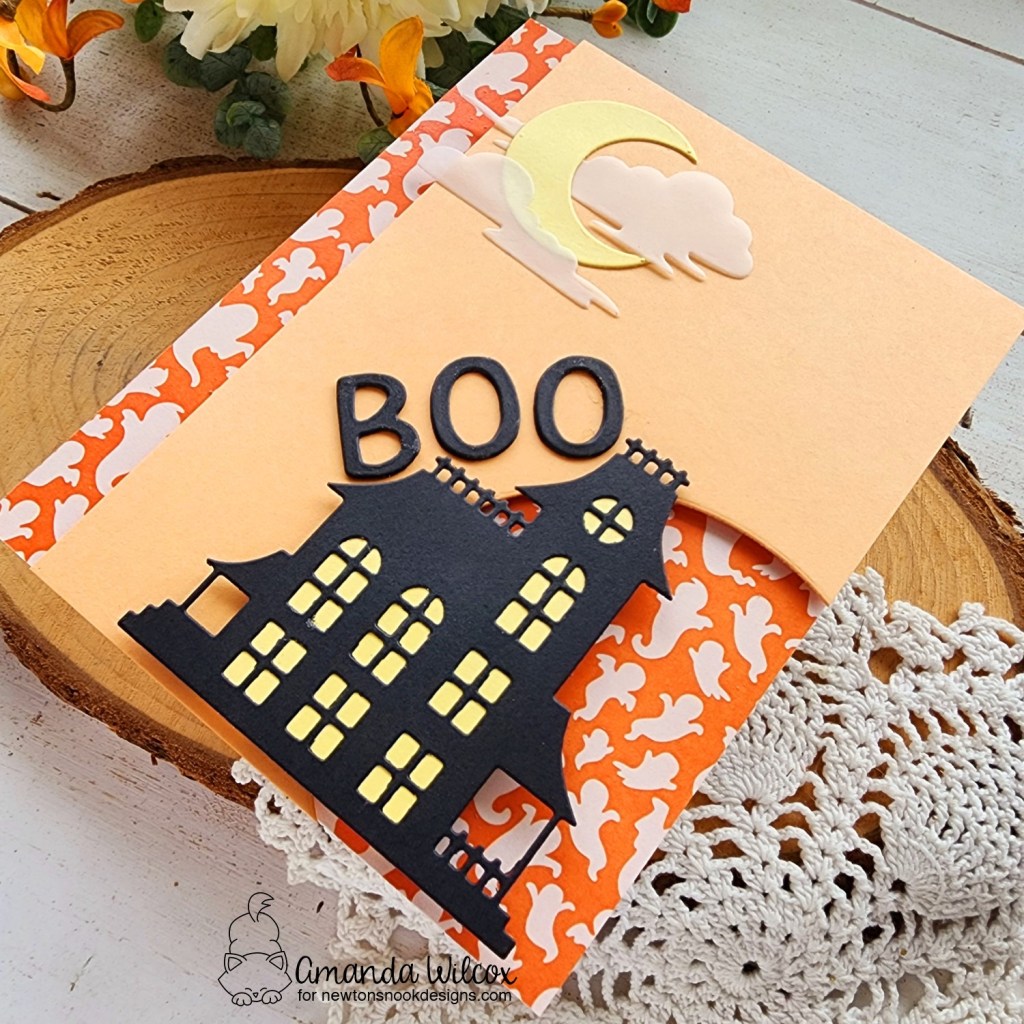
Such a simple card but it was so fun to create and build on as I was going. I just trimmed the ghost paper from the pad to cover my card front, then cut a piece of orange cardstock to 3.75 x 5.5 inches and used a circle die to cut the corner out. I popped that up on the ghosts with foam tape.
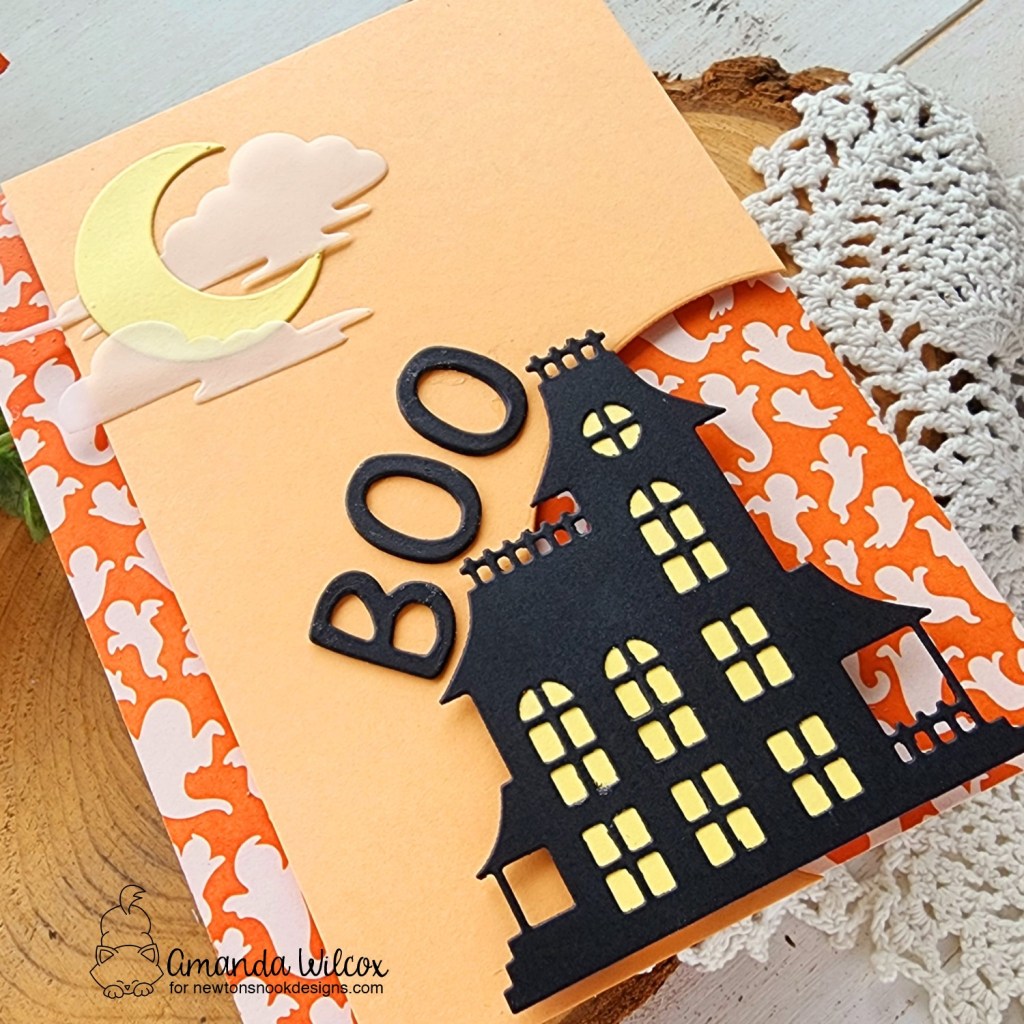
Then I cut the Haunted House from black cardstock and lined the windows with yellow. I popped it up with foam tape and arched my BOO sentiment around the side. Then I finished the sky off with elements from the Spooky Skies die set. These are the perfect addition!
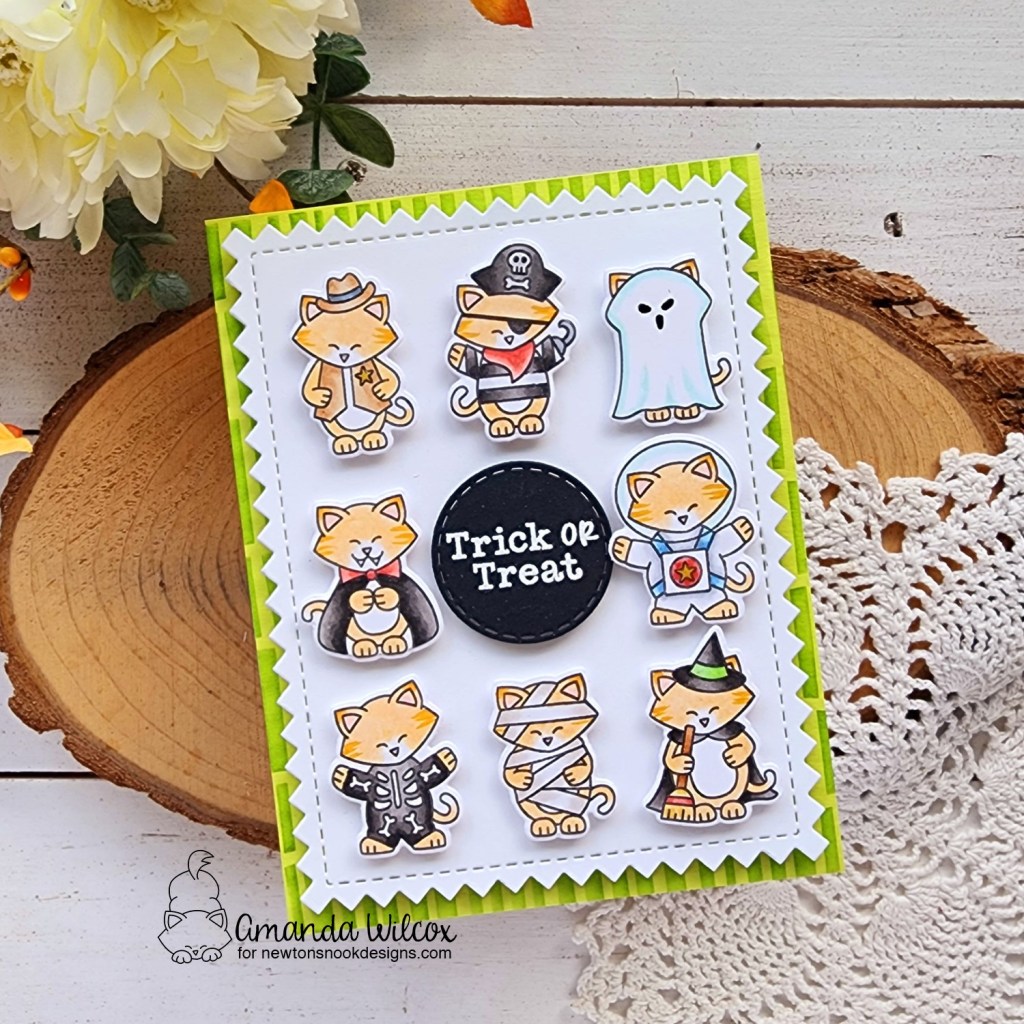
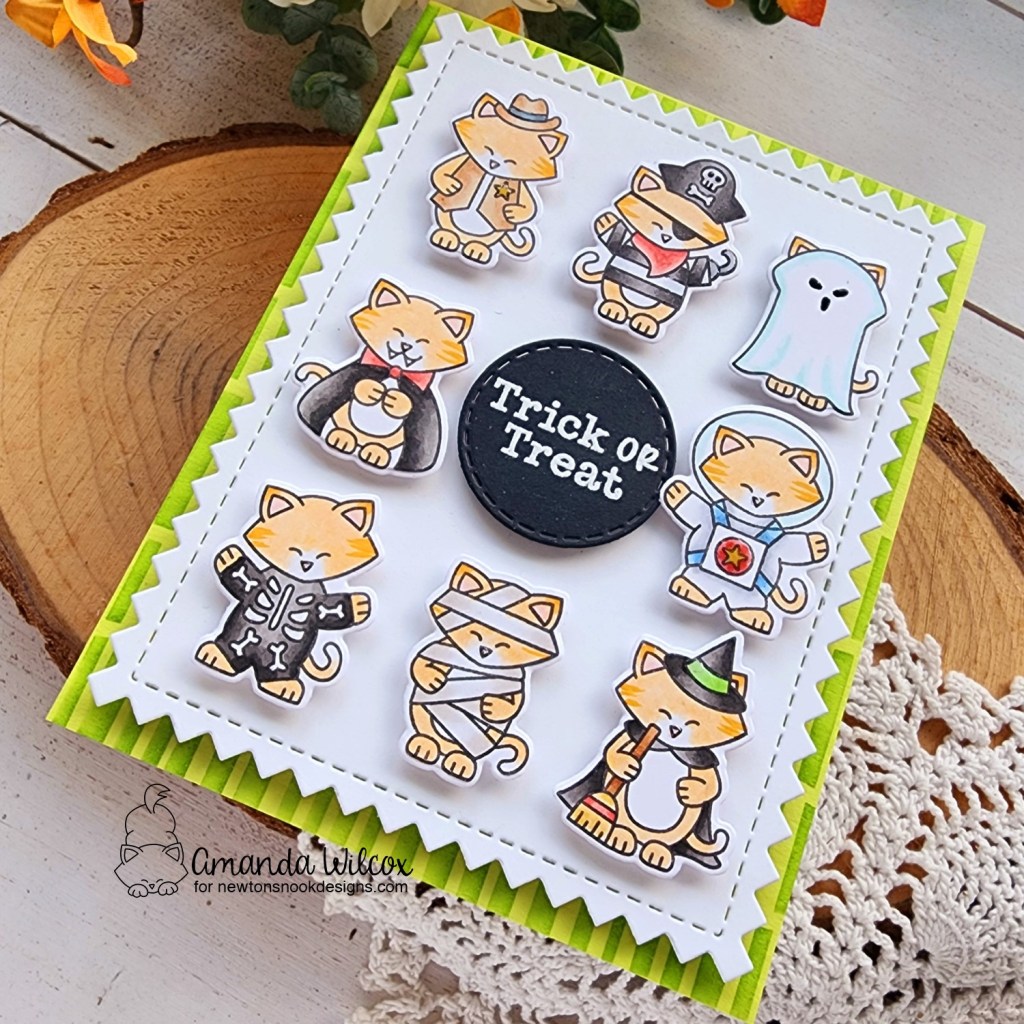
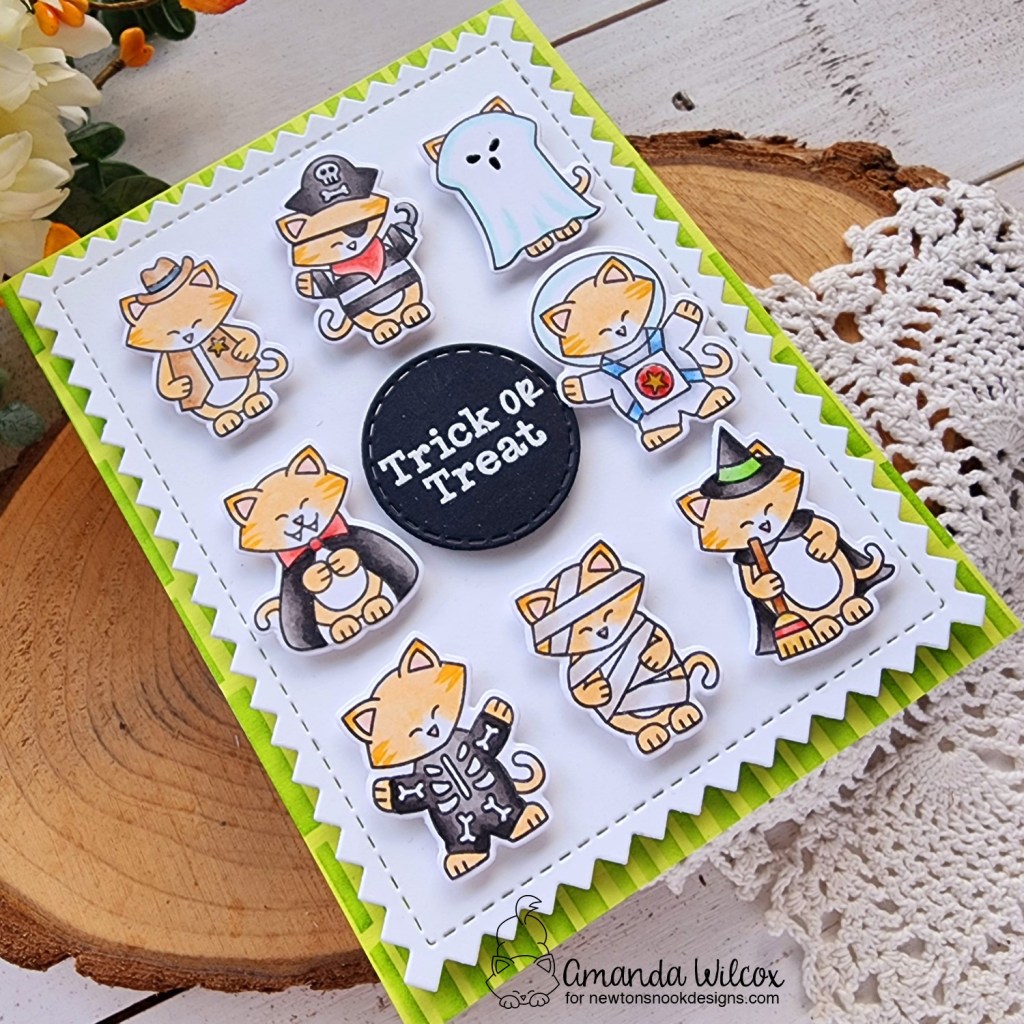
Seriously, so much fun! Now we’ll switch gears to a card featuring those absolutely adorable Trick or Treat Newton cuties! I’m obsessed with both of these new sets. The size of the images are so fun to color, addicting really because they go so fast!
So, let’s be real…you know I stamped each one of these images, I couldn’t leave just one out. But knowing that one image didn’t fit in my design idea, I chose a spooky one to set aside for it’s very own card.
I cut the largest rectangle in the Frames & Tags die set from white cardstock and popped all my kitties up on that. Then I stamped and heat embossed my sentiment on a circle from the Circle Frames set and popped that up too.
For the background panel, I cut a piece of green cardstock and inked it up with the Serene Stripes stencil using green ink. This is a great texture stencil to add interest but not detract from your design.
After everything was assembled, I came in with some glossy accents on parts of different kitties for a little shine here and there.
Enter to Win a $25 Prize!
One lucky winner will receive a $25 prize to spend at Newton’s Nook Designs online shop! The winner will be chosen at random from the collective blog posts featuring our new products this week. For a chance to win, leave comments on the Design Team Member Blog Posts (see list below) from Monday September 9th through Thursday September 12th. You will not know which blog has been chosen so the more you comment on the better your chances are of winning! You have until Thursday, September 12th at 9 pm ET to comment — winners will be announced on the NND blog on Friday, September 13th.
Check out all the awesome Design Team Blogs below to enter:
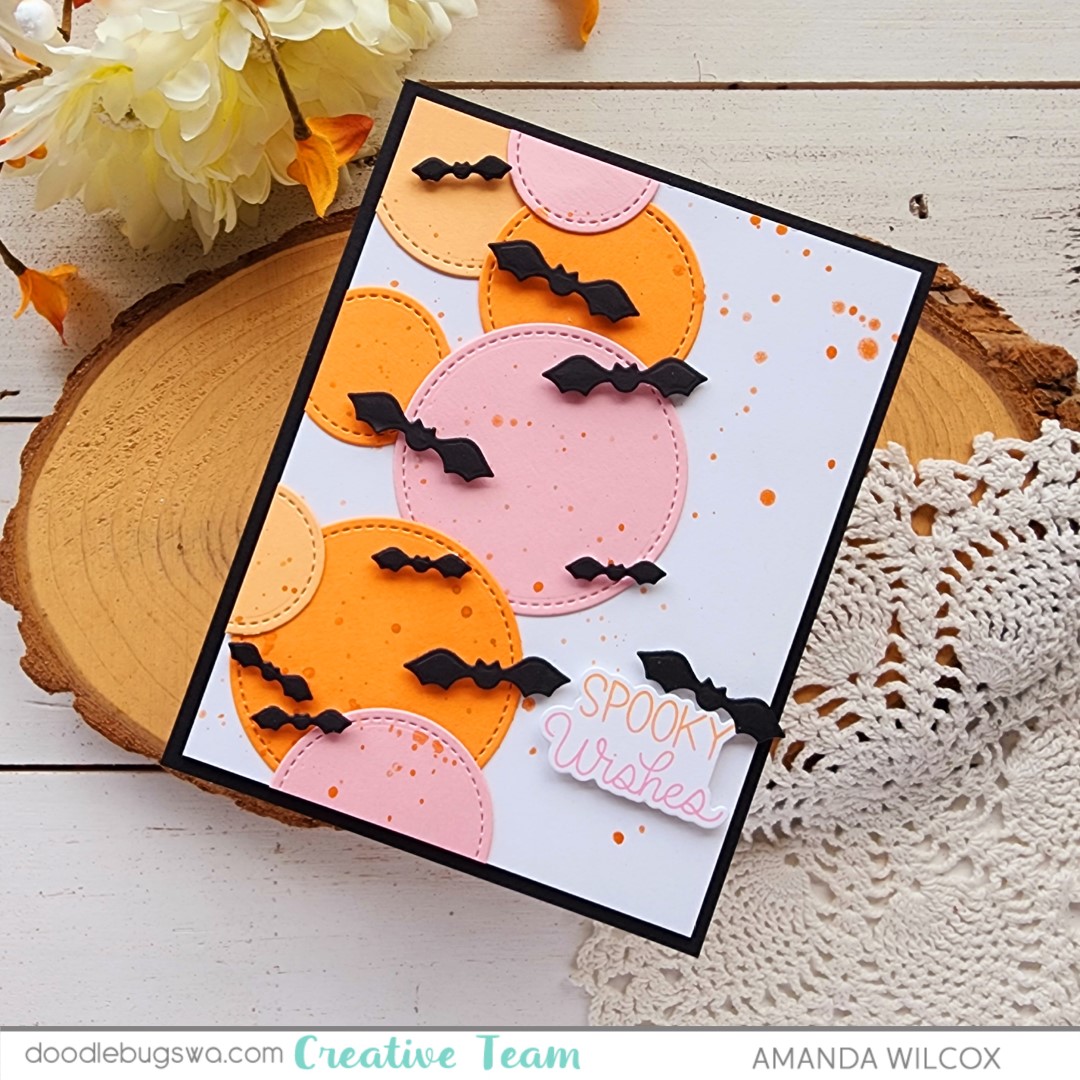
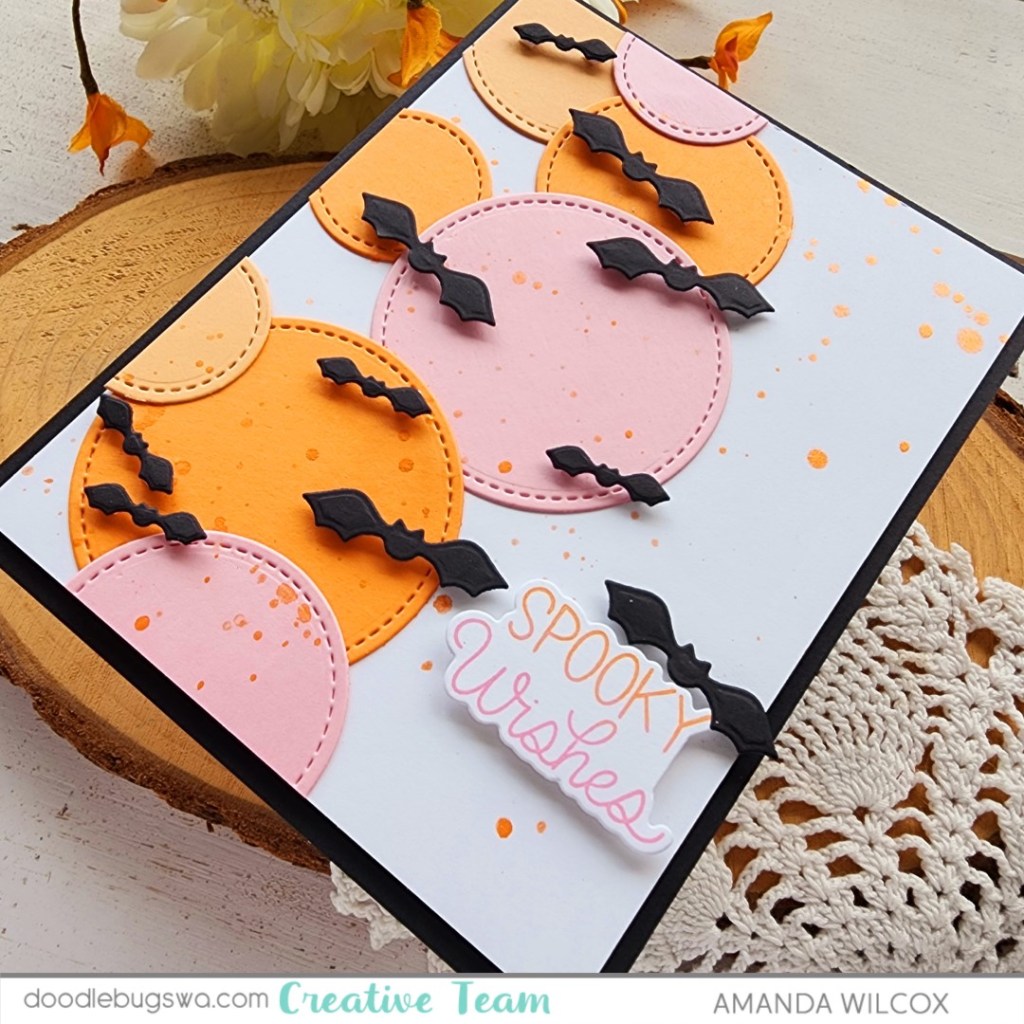
Hey friends! I’m back to my usual antics with a fun Halloween card for Mix it up Monday on the Doodlebugs blog. Today we’re playing with repeat die cuts to create a fun background on your card.
I’ve had the Mama Elephant Circle Combo dies out quite a bit lately so they were my first to reach for with the variety of stitched circle sizes in that set. I chose 3 fabulous colors that seem to be my Halloween palette for 2024 and cut the 3 smallest circles from each one. I arranged them on my 4×5.25 inch piece of white cardstock and used liquid glue to adhere them in place. I trimmed off the excess of the circles hanging over the edge and splattered the panel with orange metallic watercolor.
Next, I pulled out some of the Pretty Pink Posh Halloween release and cut bats from the Ghost Holder die set. I used mini foam squares to pop them up all over my design. Then I used a sentiment from the new Halloween Corners stamp set using Distress Oxide ink in kitsch flamingo and spiced marmalade. I love that this stamp set has dies for the sentiments along with the images.
I popped my sentiment up along with one final bat. Then I popped the panel up one an A2 size piece of black cardstock and used liquid glue to adhere the whole thing to a white card base. Sometimes I use black card bases with another white insert inside but I’m running low on black cardstock we have to ration things until my order comes. haha!
How do you feel about the abundance of non-traditional color palette for holidays lately? I feel like it’s getting more popular every year and I’m absolutely here for it!
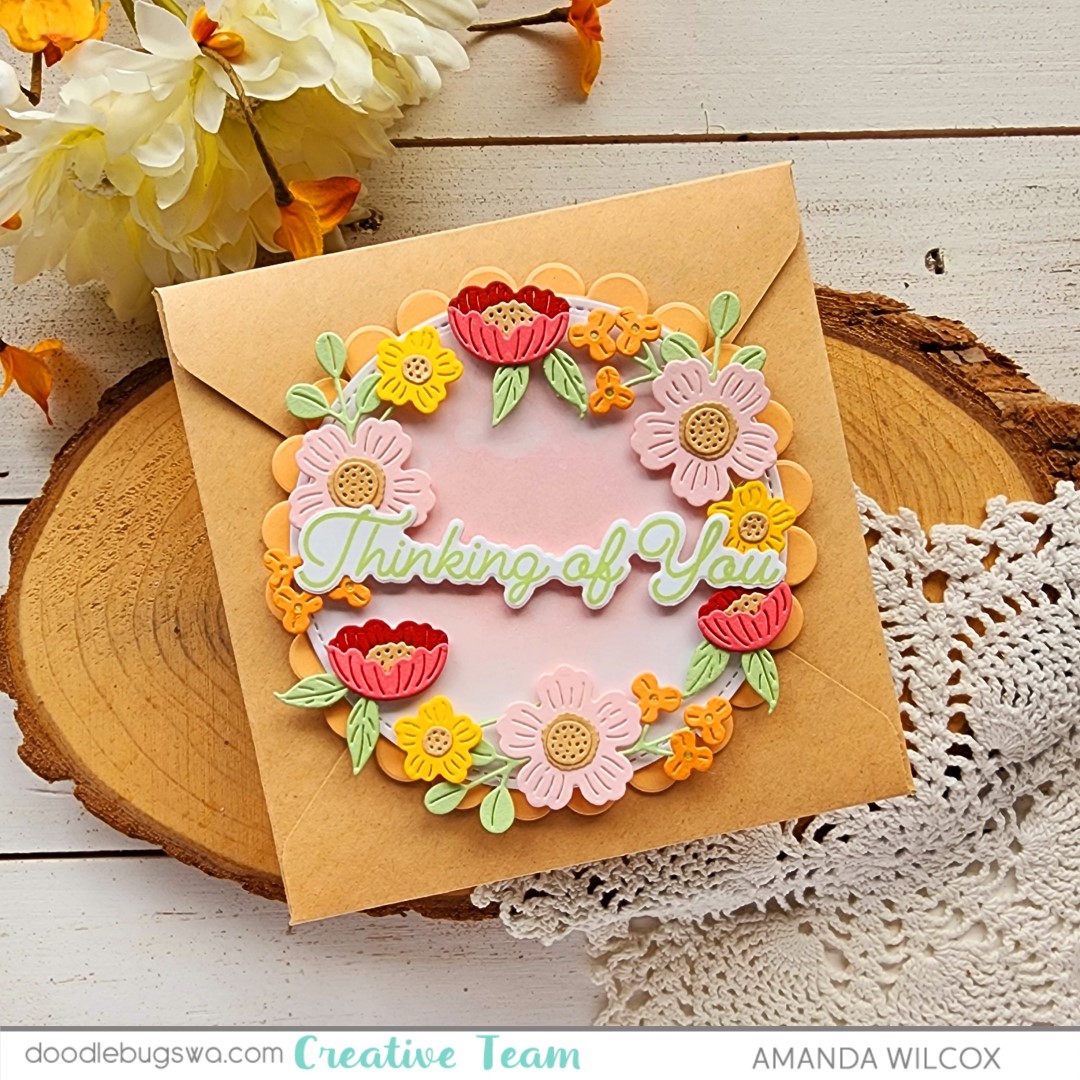
Hey friends! It’s Mix it up Monday on the Doodlebugs blog and I’m moving outside of my typical and playing with florals. There are some newer die sets from Spellbinders that are a fabulous price point but adorable, fun to create with and really versatile. The one we’re playing with today is called Little Blooms. The dies in this collection range from $7 to $15 and you can use them for a billion and one different cards!
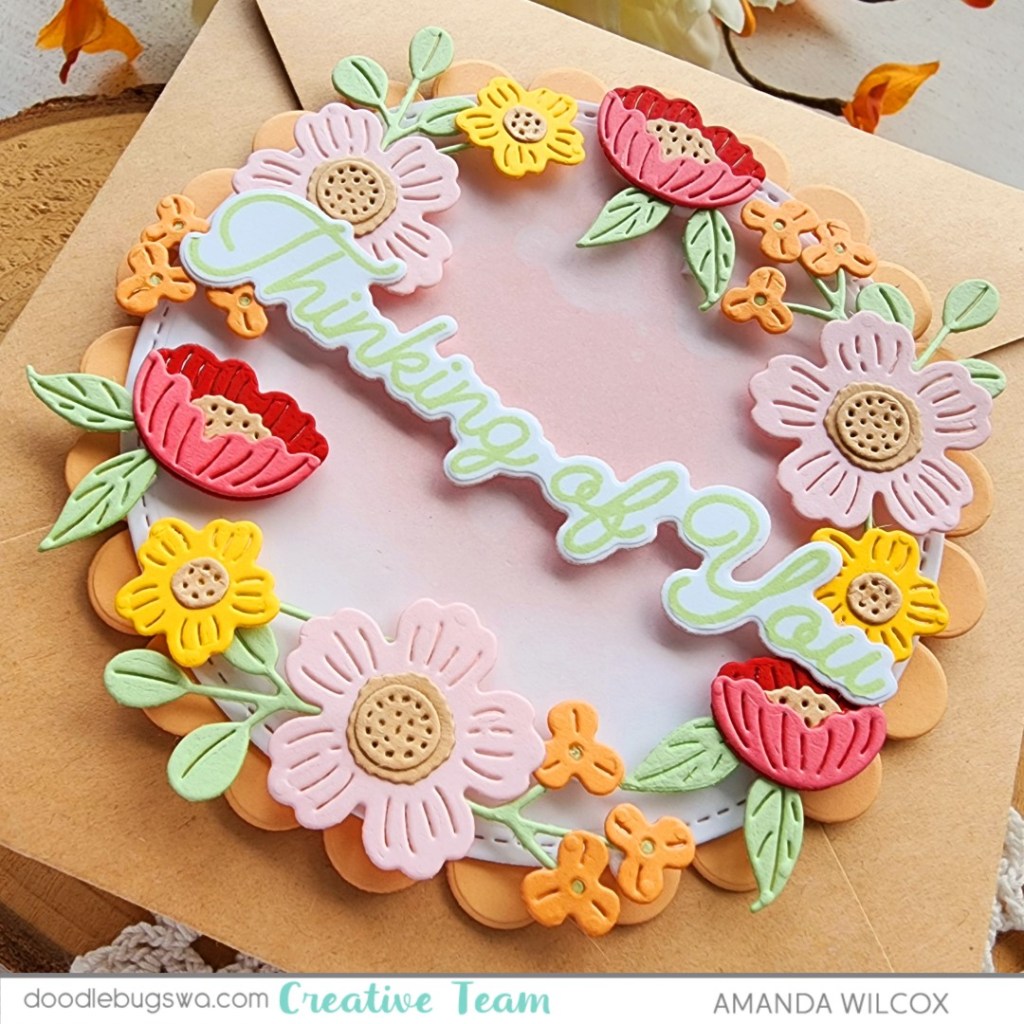
For today’s card, I cut the different elements from a limited color palette (happens to be a favorite these days) and used liquid glue to assemble all the pieces. I played around with arrangement on my craft mat and landed on a loose circle. To make it easy to add them to a card front, I used a piece of Press-n-Seal to hold them together while I added foam squares to the back of everything. This also made it a piece of cake to figure out what size circle die I could use for my background and actually adhering all the pieces to that circle at once. Definitely a kitchen item to keep in your craft room.
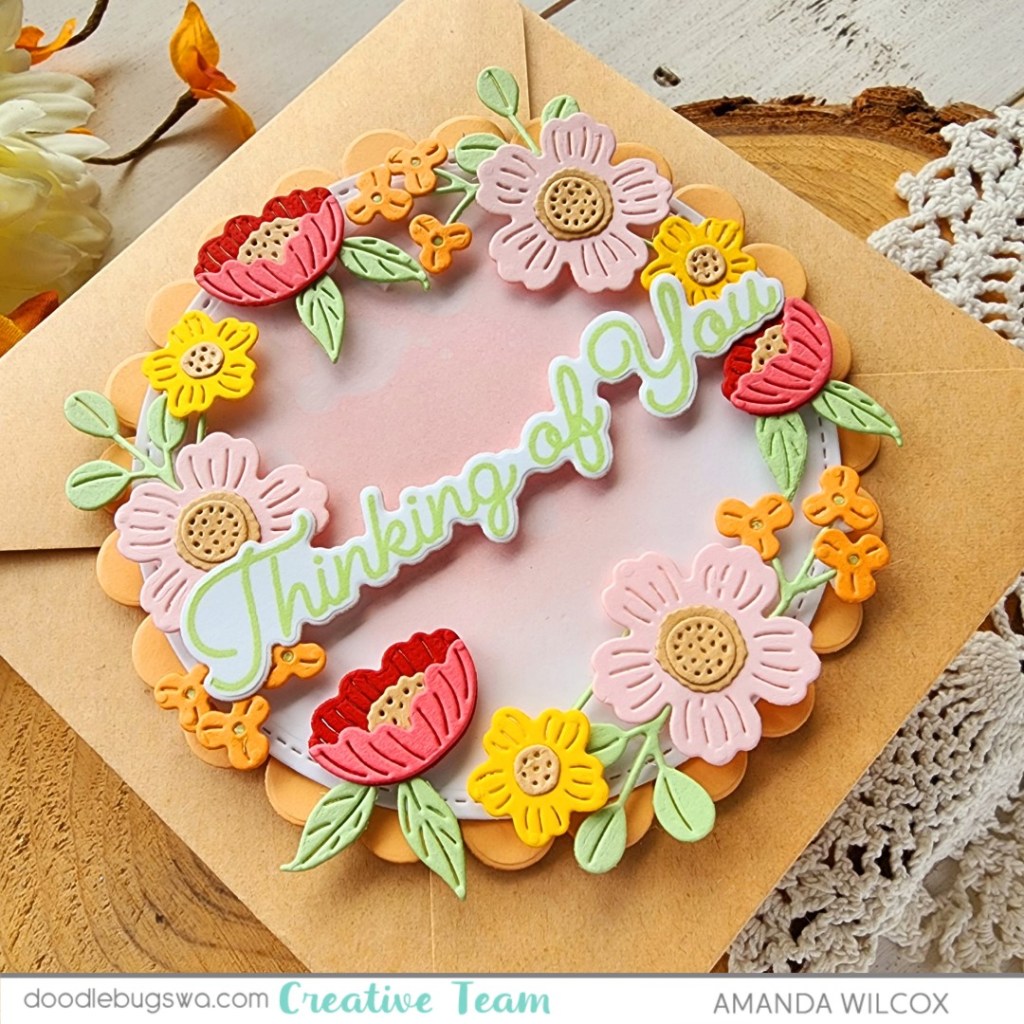
So after the florals were stuck to the Press-n-Seal, I die cut a white circle from the Mama Elephant Circle Combo dies and ink blended distress oxide spun sugar to the center. I spritzed it with water and blotted it dry. Then I cut two of the scallop layers from a peach-orange cardstock and used liquid glue to adhere all my layers together.
After removing the release paper from the foam squares on my flowers I popped them in place on the scalloped circle card front. To turn this into a card, I cut the same stitched circle a second time, scored it 3/8″ from one side and used liquid glue to adhere it to the back.
I went digging for a specific theme of sentiment and landed on it in the Spellbinders I’ve Got You Covered stamp and die set. I stamped it with celery stick ink and cut it out before popping it up across the center with foam strips.
I’m not a floral crafter but sometimes they’re just what you need. This little die set will be a long standing part of my stash for that reason. It’s simple and so pretty.
Products used: Mama Elephant Circle Combo dies Spellbinders I’ve Got You Covered stamps and dies Spellbinders Little Blooms dies Liquid glue Reverse tweezers Blending brushes Distress Oxide Ink – spun sugar Lawn Fawn Ink – celery stick
I appreciate you sharing your time with me. Have a fabulous day!
Happy 31st of the month everyone! Please hop on over to Instagram and join us for one of the final Spooktacular hops of 2024. We’ve got a super fun lineup of spooky inspiration for you just in time for the masses to really start fall crafting.
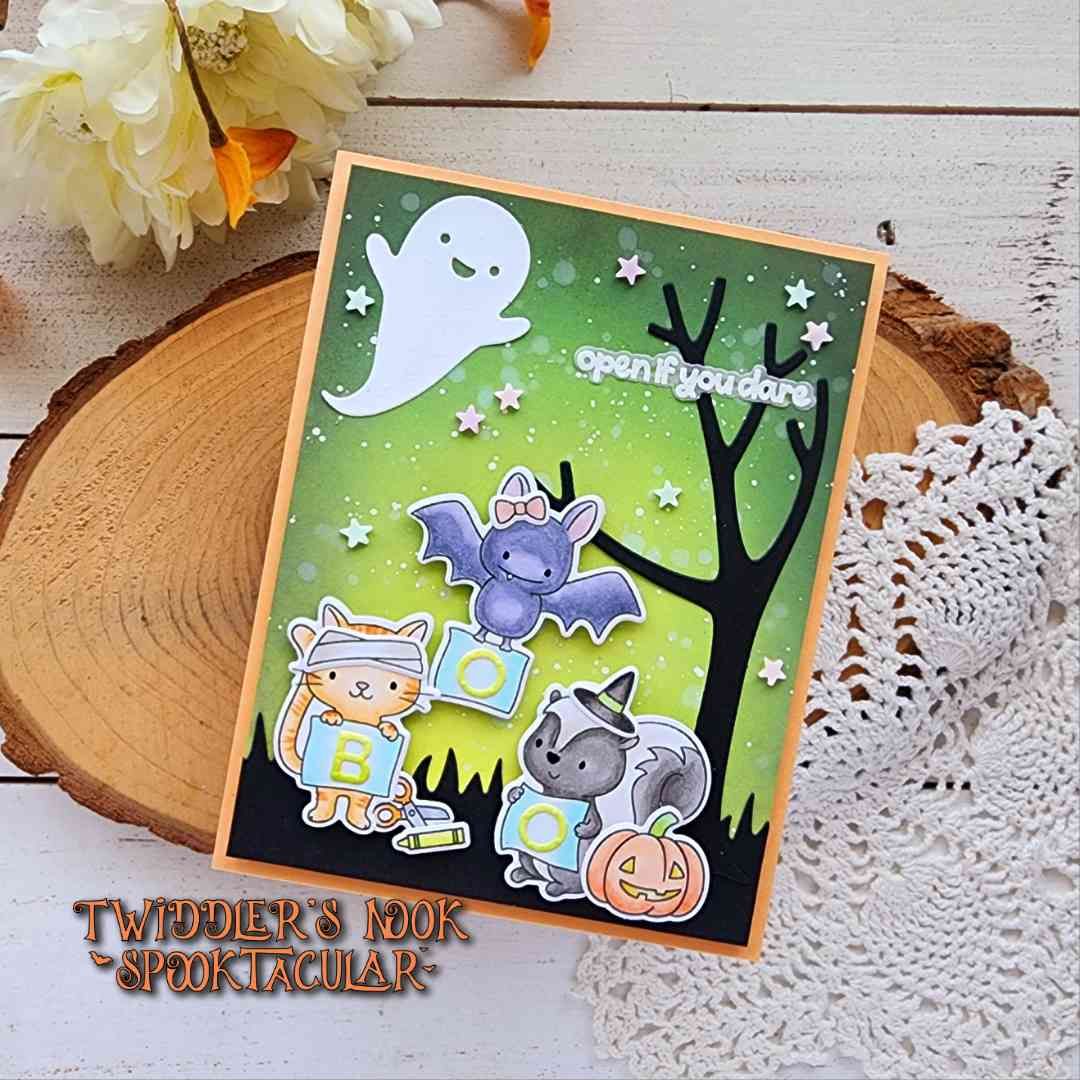
Today I’ve mixed Hello Bluebird cuties with some of my favorites from Mama Elephant for a sweet scene card that extends into the inside of my card too.
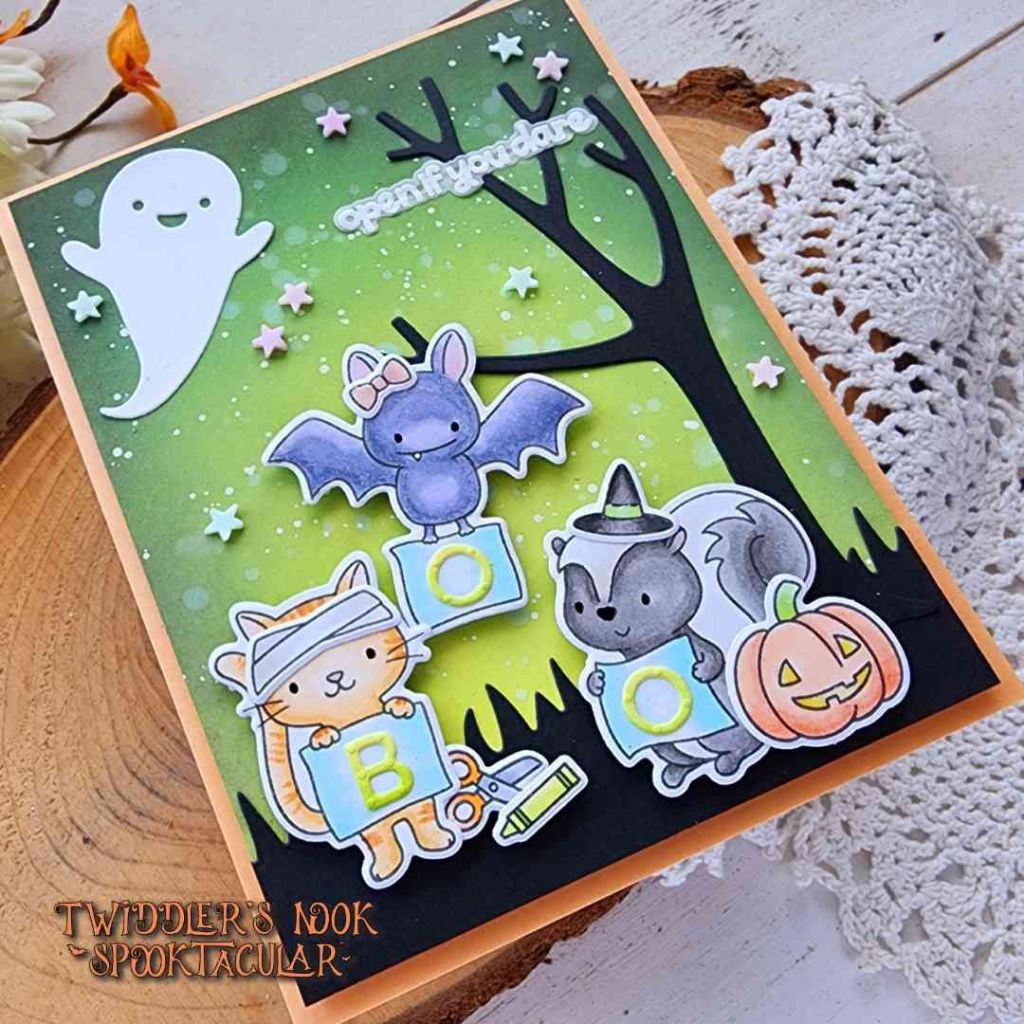
The images I chose today are from Hello Bluebird Spooky Spellers. They are adorable and can be dressed up and their signs customized too! I love how these features make this stamp set super versatile all year long!
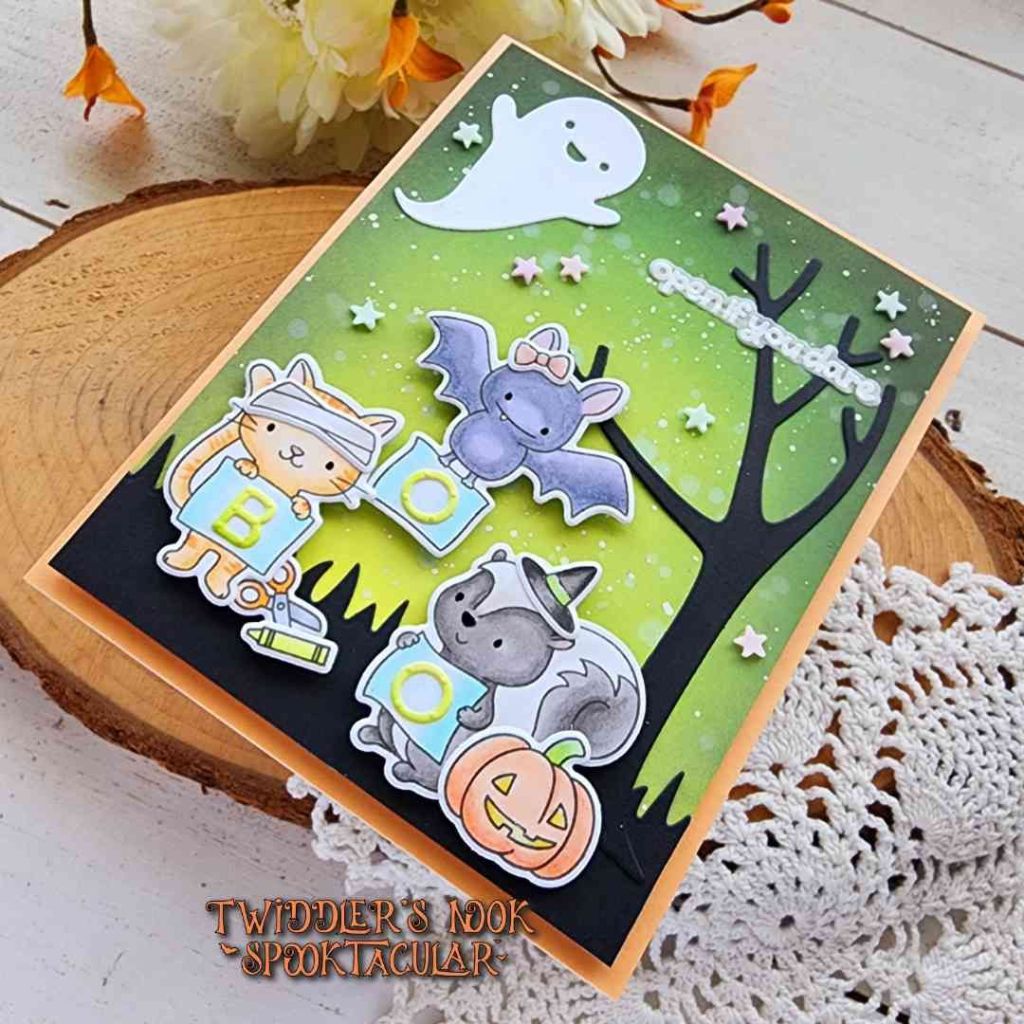
For my background, I ink blended distress oxide ink from twisted citron to mowed lawn with an edge of black soot to darken things up. I added a spooky black grass border from Newton’s Nook along the bottom and a spooky tree and ghost from the Hello Bluebird Halloween Tree die set.
I stamped and heat embossed the beginning of my sentiment using the Mama Elephant Be Scary stamp and die set. I adhered it by hiding dabs of liquid glue behind the embossing powder.
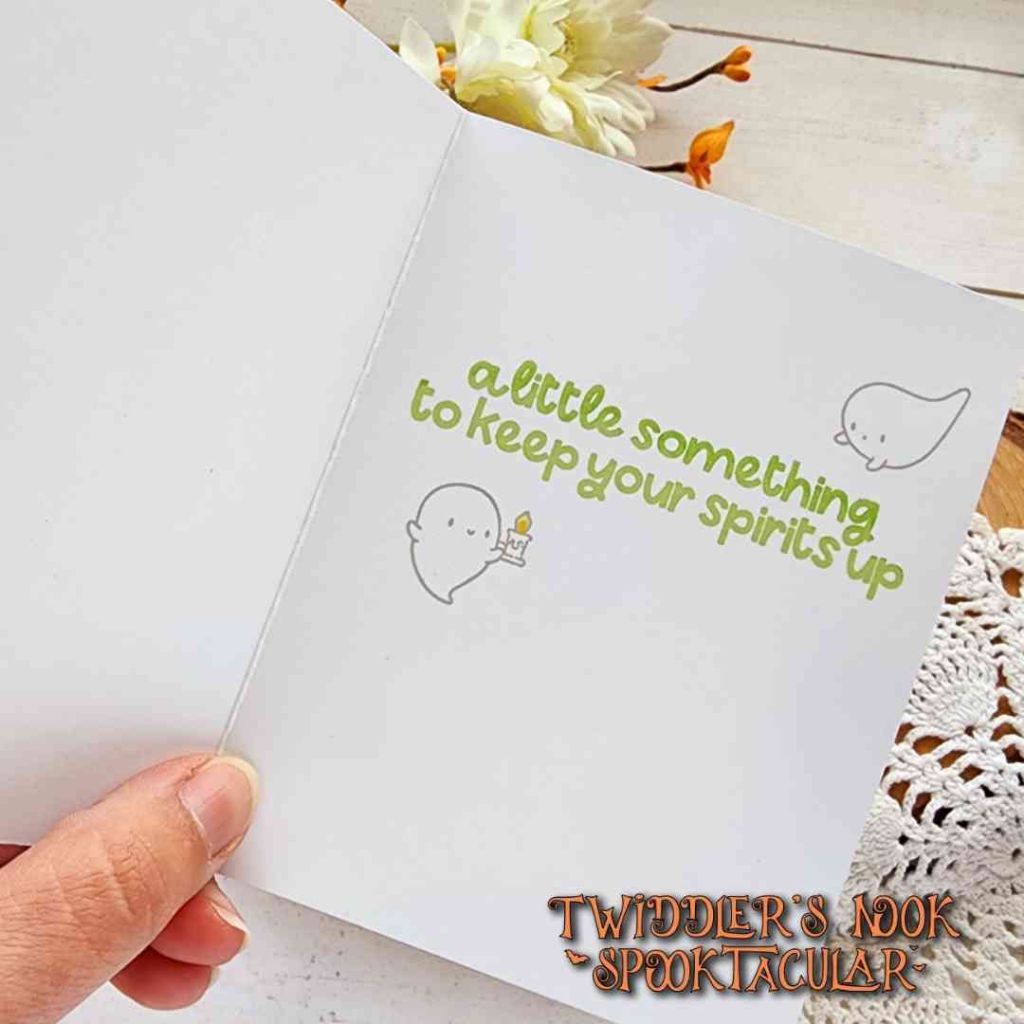
Before finishing things up on the front, I went to the inside with the rest of my sentiment and also added some Mama Elephant Little Ghost Agenda cuties to liven things up a bit.
Back to the front, I added glossy accents to noses, the pumpkin face and accents on the bat and skunk. Then I added black glaze pen to all the critter eyes so they stood out a bit better too.
Finally, I glued a scattering of Twiddler’s Nook Pastel Wishes clay embellishments across the sky. I really like the combination of softer pastel elements and the dark black shadows on this card. The contrast is really cool!
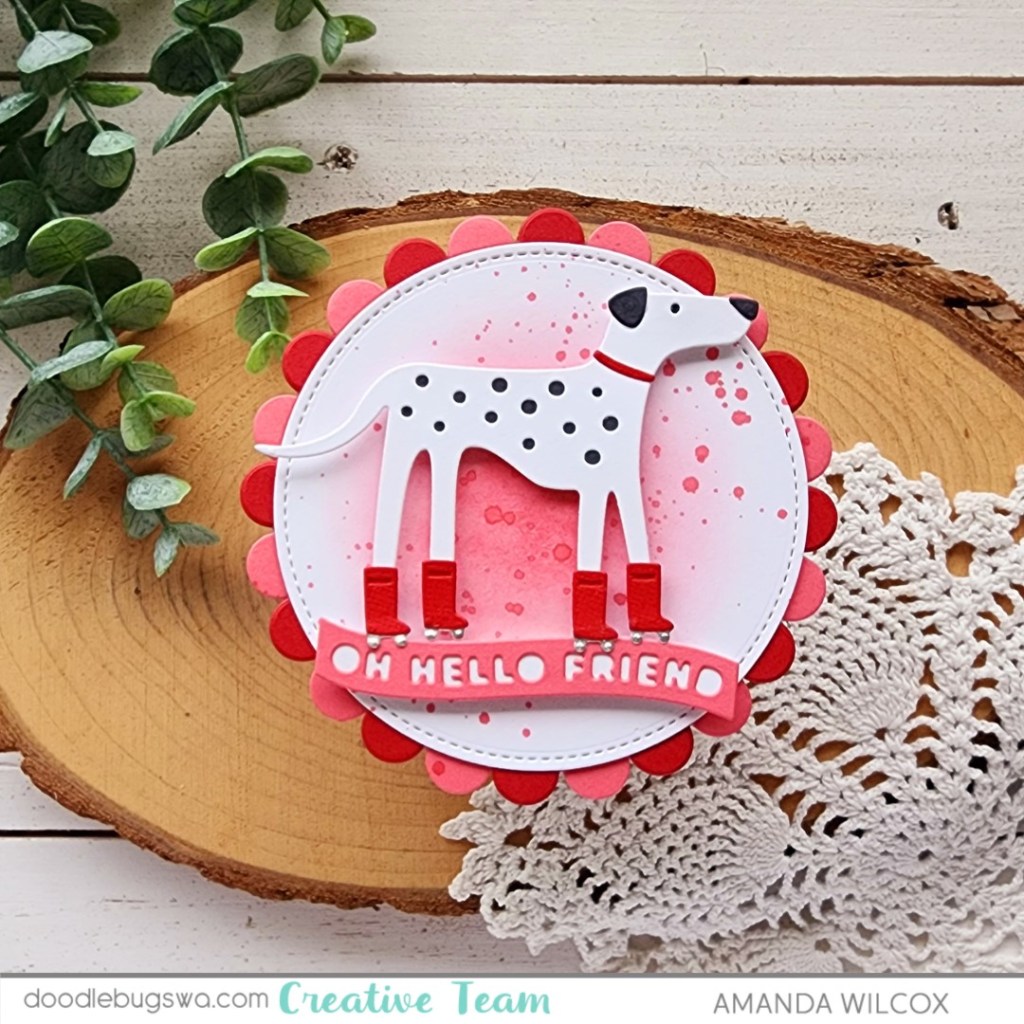
Happy Mix it up Monday everyone! On the Doodlebugs blog I’m playing with monochromatic designs and shaped cards to make things a little extra interesting.
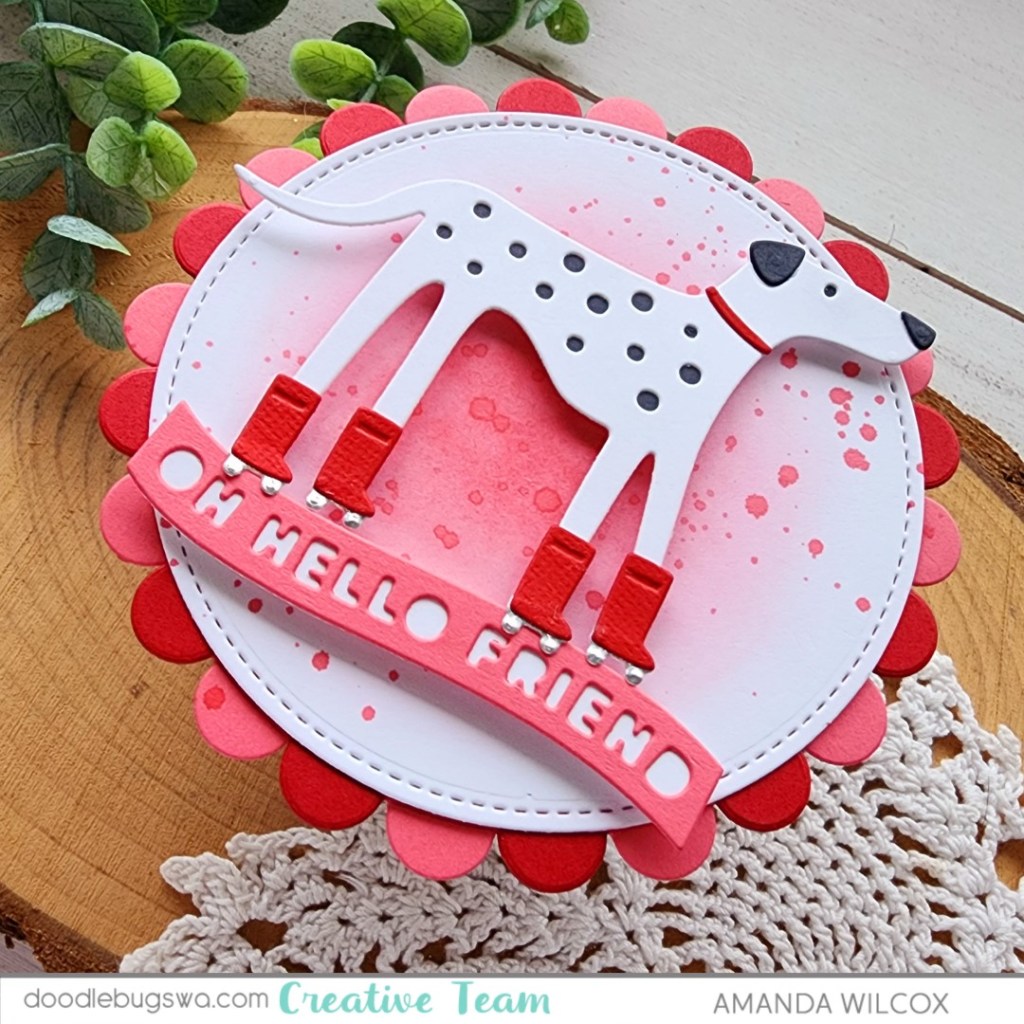
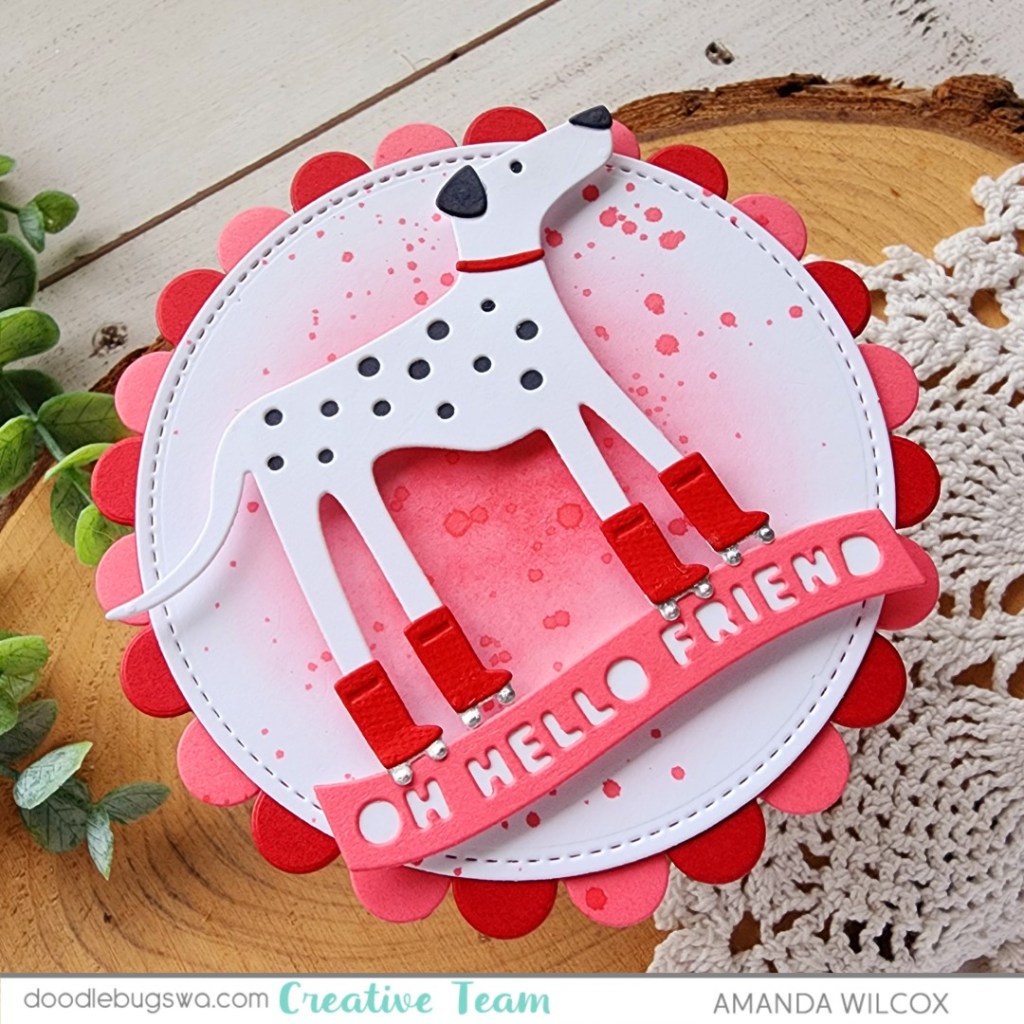
I started by creating an adorable Spellbinders Roller Disco Dottie with a red collar and red skates. She’s the cutest but I couldn’t decide on a complimentary color that I liked today. So I decided to keep it all in the family, the red family.
Next, I pulled out some Mama Elephant dies and created a sentiment banner using Spring Banner Greetings dies. Then I created my card base with the Mama Elephant Circle Combo dies. I love the wiggle room of liquid glue for all of these types of things. It gives you that couple of seconds to line things up.
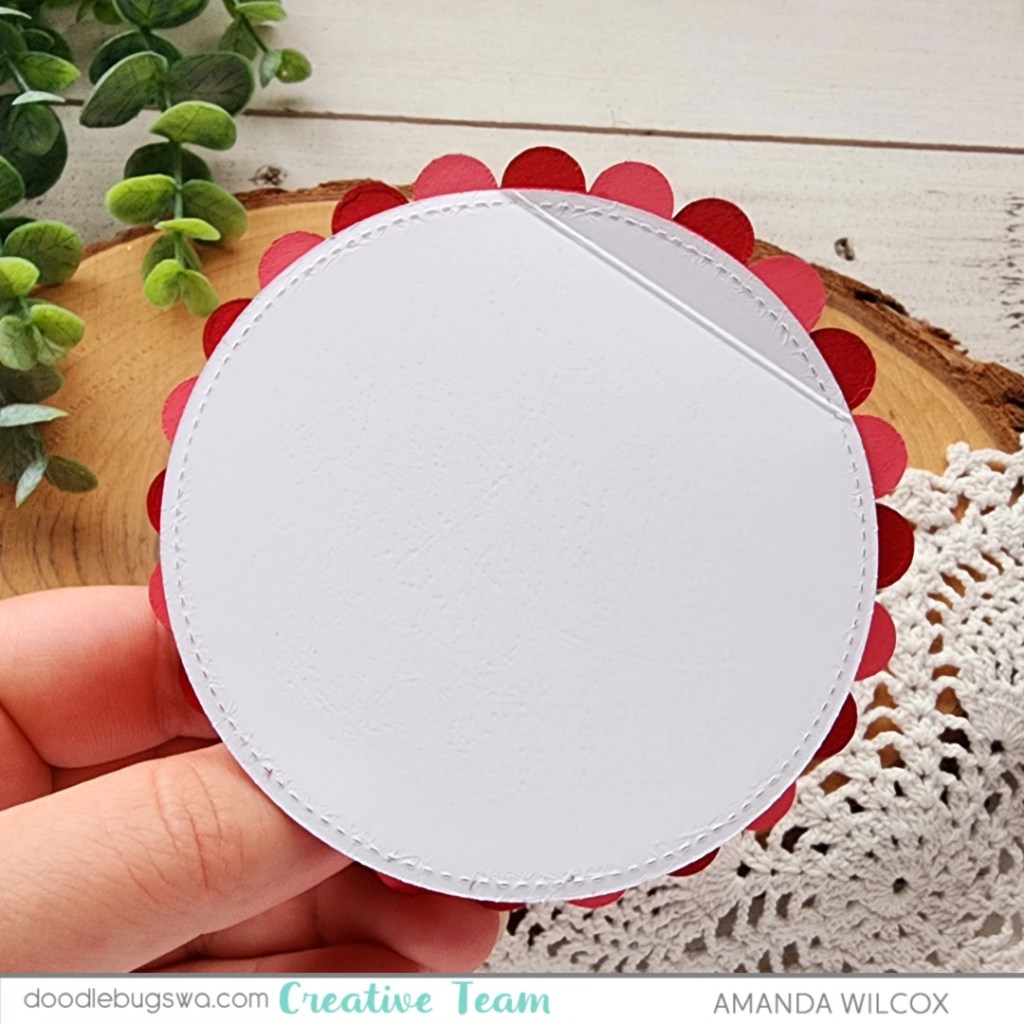
After creating the 3 top layers of my circle, I cut an additional white circle, scored it about 3/8″ away from one edge and then used liquid glue to adhere it to the back of the stacked circle combo. You can decide if your card opens up or to the side this way too. Total flexibility.
I ink blended the center of the circle on the front and splattered it with the same red ink color. Then I popped Dottie and her sentiment banner up with foam squares and strips.
I’m excited to pop this cutie in the mail to a special friend along with some crafty goodies I picked up.