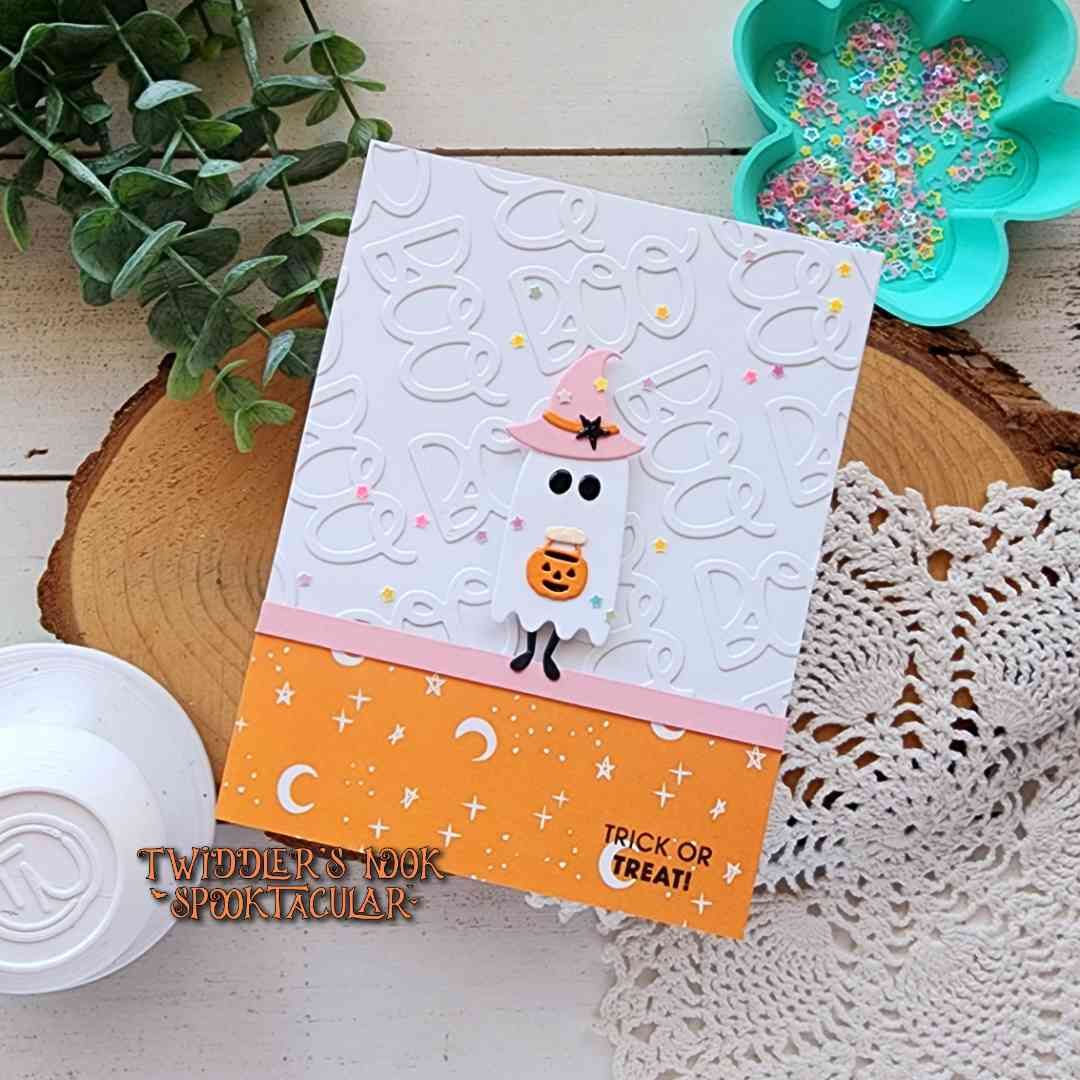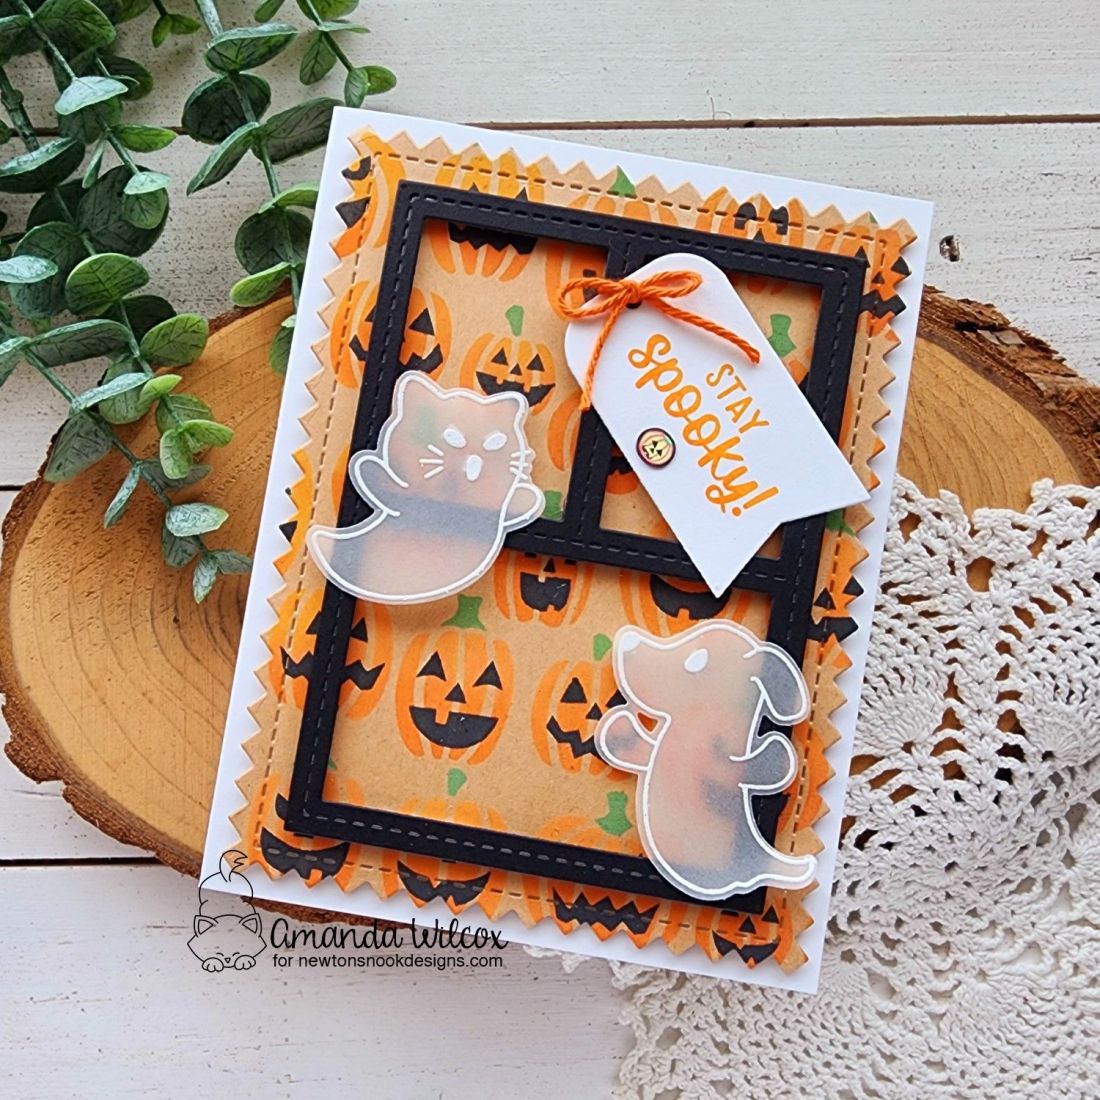
Hey friends! I’m over on the Newton’s Nook blog today with an extra fun Halloween card. I had some inky fun stenciling on kraft and creating vellum ghosts which is always super cool looking!

I used distress oxide inks for my stenciling so the ink sat on top of the kraft cardstock and showed up really well. The colors I chose were carved pumpkin with a little ripe persimmon on the bottoms, mowed lawn and black soot. I cut that panel with the largest Frames & Tags die for that awesome zigzag edge. Then cut the frame in that set from black cardstock and popped it up with foam strips.
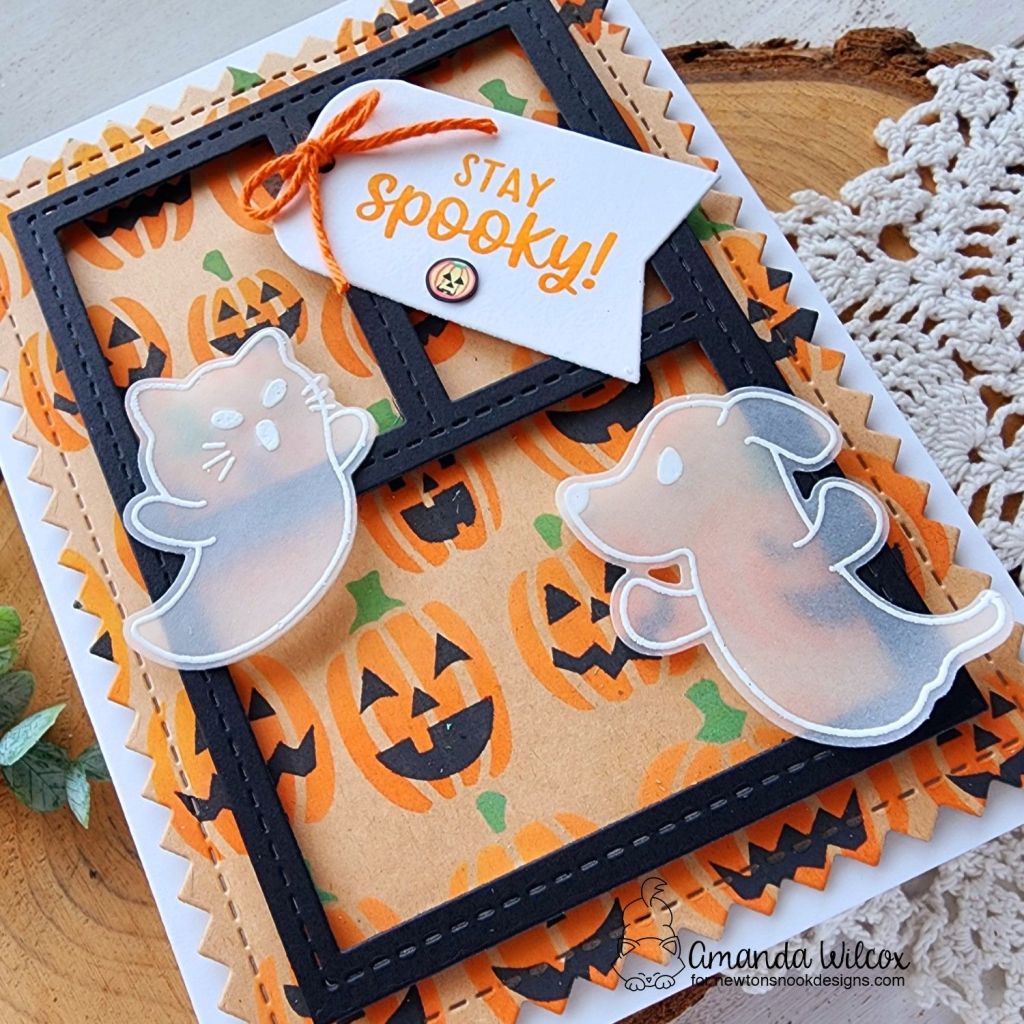
I heat embossed the ghosts from Ghostly Good Times and used the coordinating dies to cut them out. I adhered them to the card front by cutting tiny foam squares to hide behind their eyes, mouth and nose.
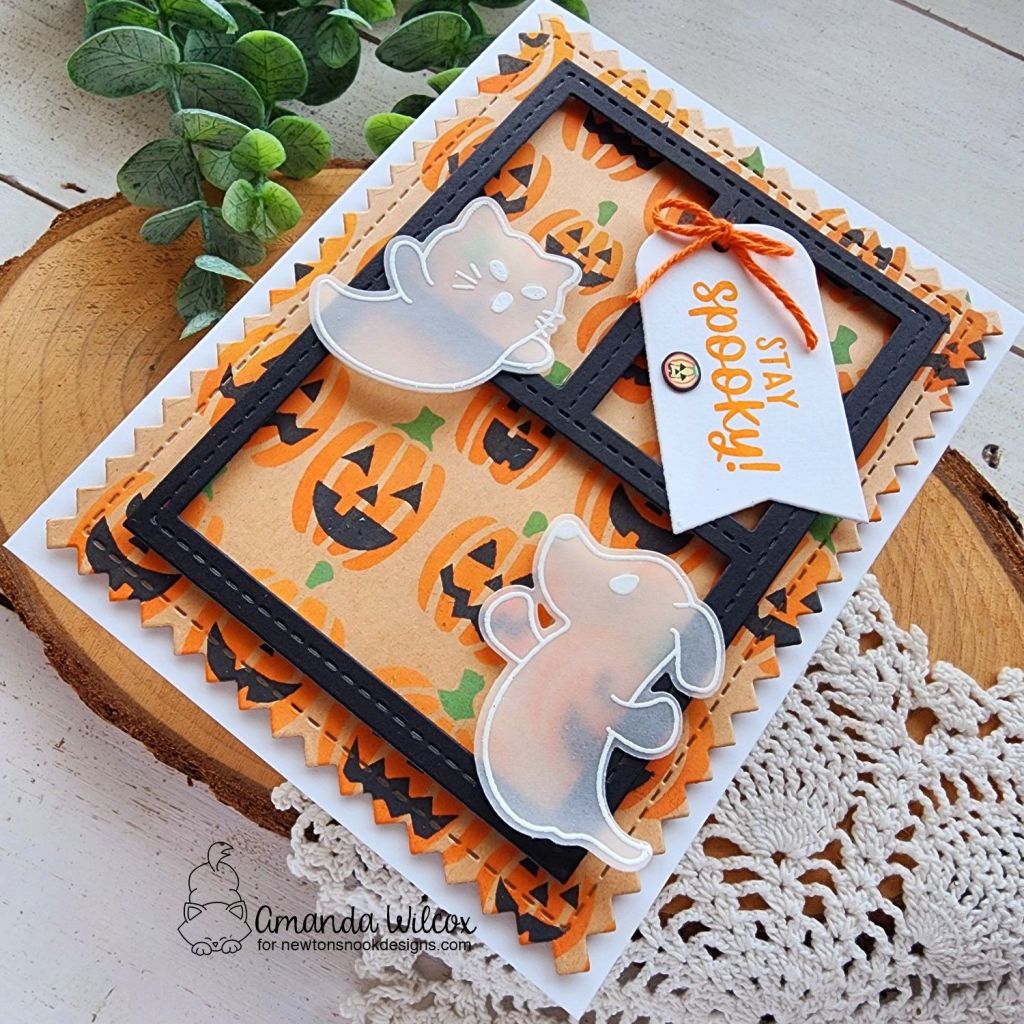
Last, I stamped a sentiment on one of the tags in the same die set using the same distress oxide inks as the pumpkins. I tied a little bow with some twine and added it with foam squares. I finished that off with one cute jack-o-lantern embellishment and popped the whole panel up on a white card base with foam tape.
You know how much I love Halloween so this card was a blast to create! I wanted to mention that the face layer of this stencil set is also optional if you wanted to create fall cards with it too. Definitely extends the use tons!!!
Products used:
Ghostly Good Times stamps and dies
Jack-O-Lantern stencils
Frames & Tags dies
Foam squares and tape
Distress Oxide Ink – carved pumpkin, ripe persimmon, mowed lawn, black soot
Twiddler’s Nook Happy Jacks embellishments
I appreciate you sharing your time with me. Have a fabulous day!