Hi there! I’m on the Doodlebugs blog for Mix-it-up-Monday. Today we’ve got Spellbinders dies with Pretty Pink Posh stamps and dies. But the big thing I want to touch on today is a fun and easy way to add gorgeous color to your die cuts…ink blending before you cut!

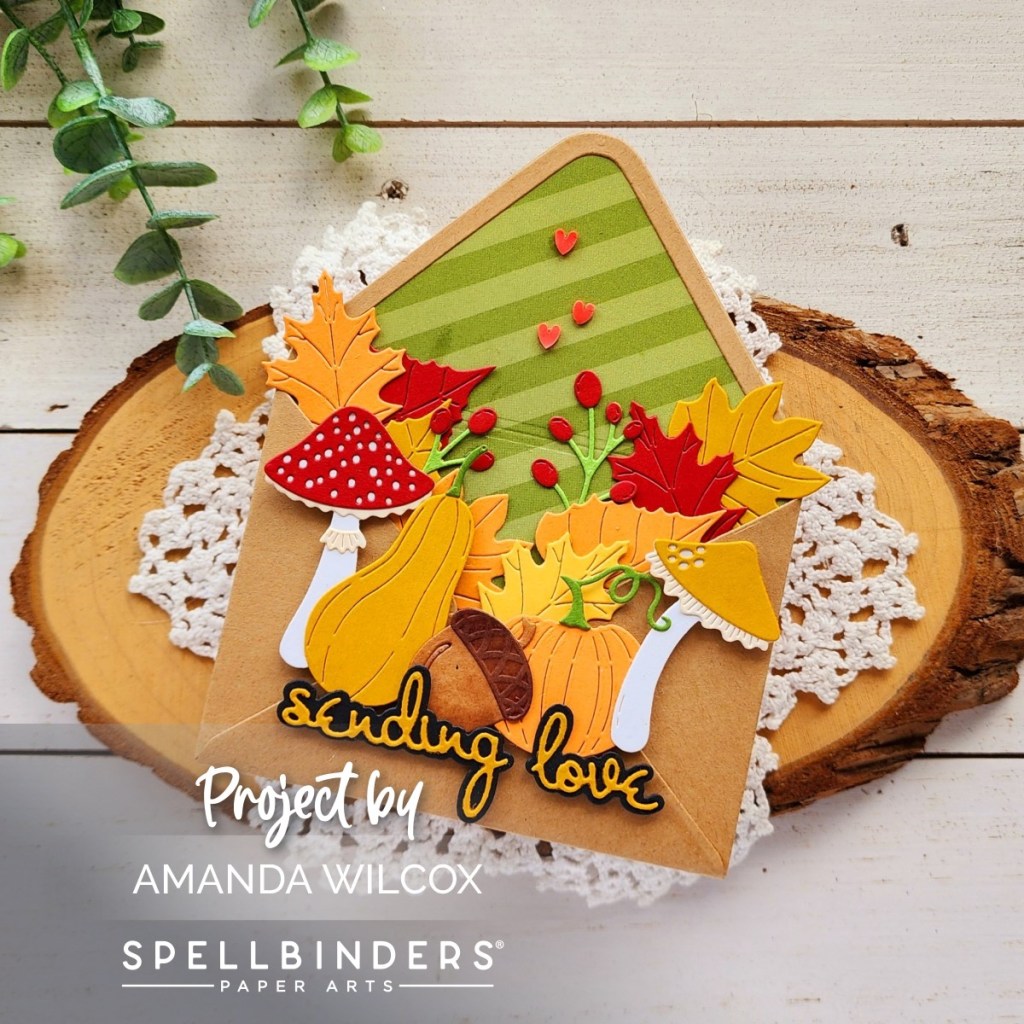
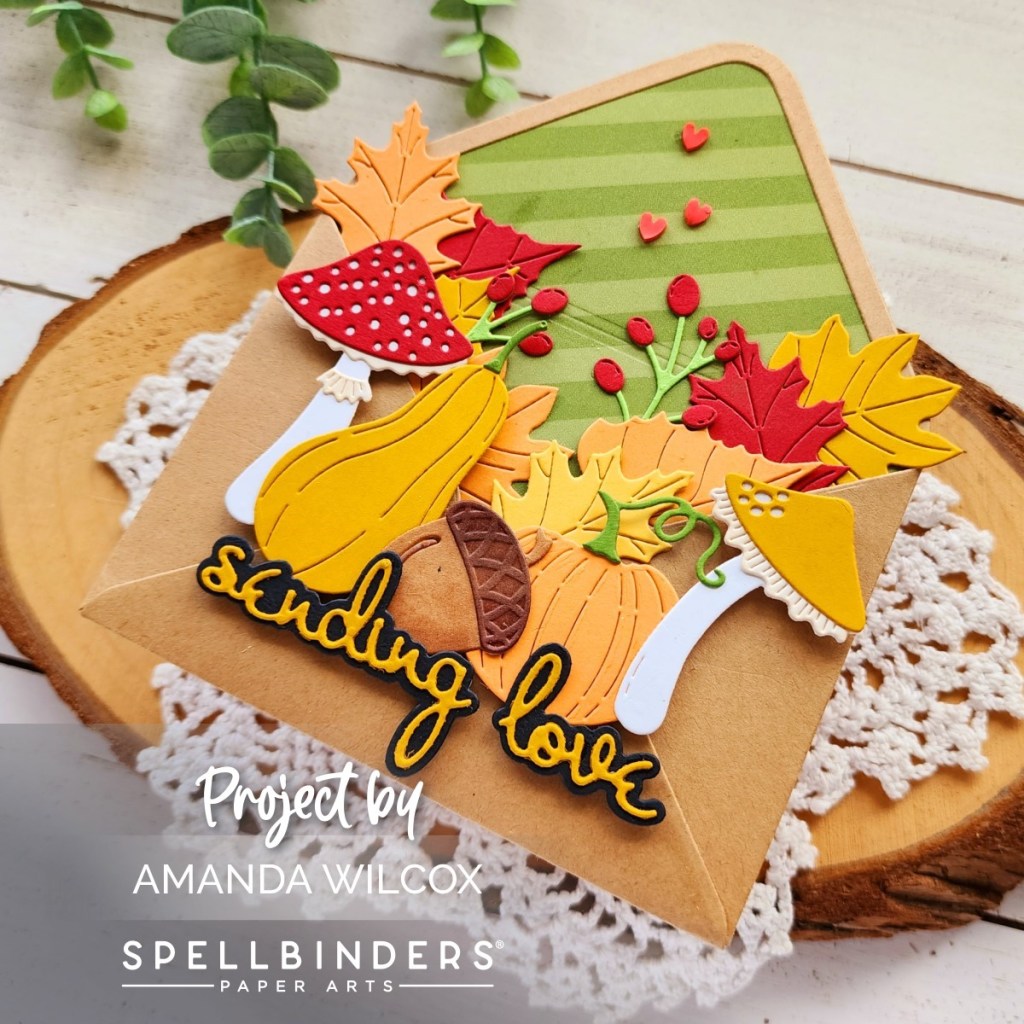
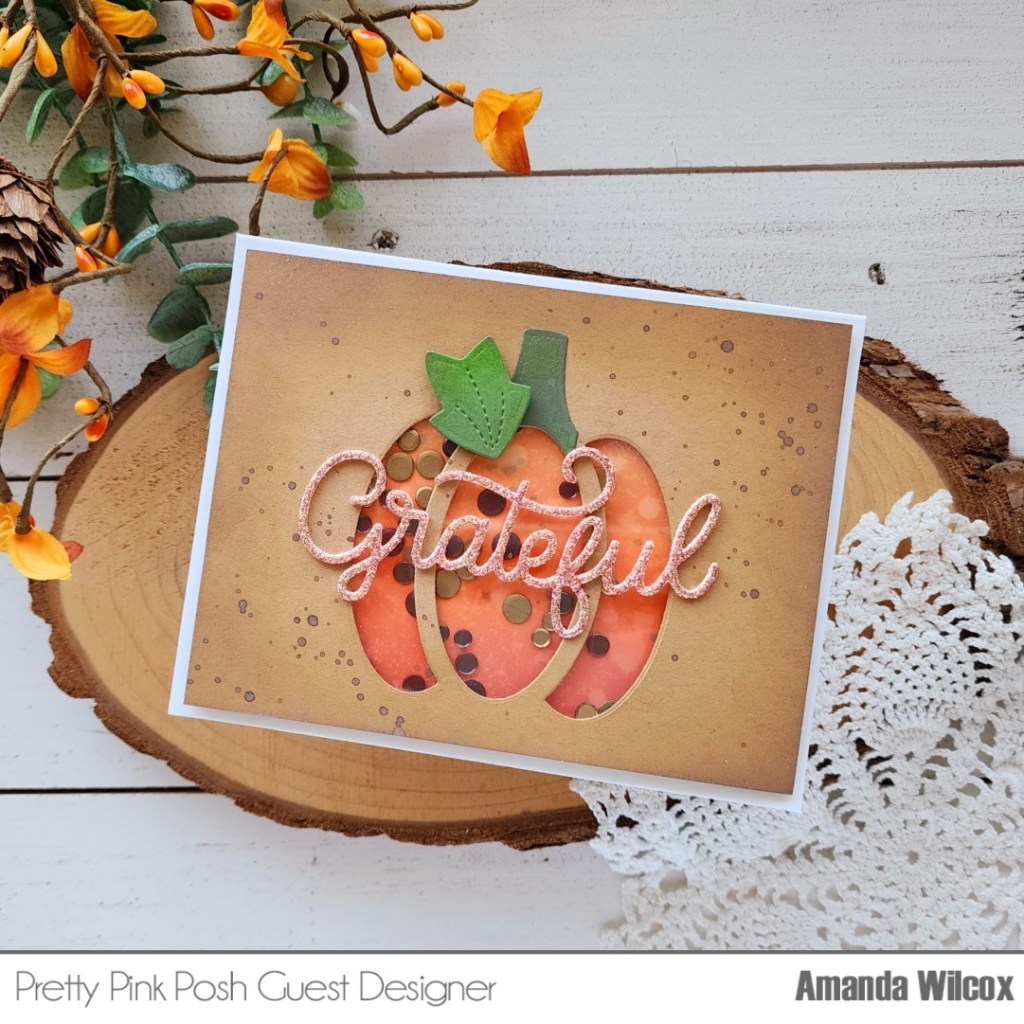
Today I created a shaped card using the Spellbinders Envelope of Wonder and Autumn Wonder die sets. The envelope base comes in the Envelope of Wonder set, then there are add on sets for autumn, Halloween and Christmas so far. You can snag a bundle of all the sets to save some money at Doodlebugs if you’re quick. This is a really fun set and I’m sure once you get the first one, you’ll be back for more.

To start today, I cut the envelope base using kraft cardstock and tear tape to adhere all the pieces. I set that aside and took a piece of white cardstock and an array of fall coloring distress oxide inks. I just covered the whole panel with no rhyme or reason and not a lot of blending between colors either. I started light adding blobs here and there, working my way to my darkest. I used colors like mustard seed, crackling campfire, gathered twigs and forest moss. I spritzed the panel with a distress sprayer and blotted it dry. Then I used a heat tool to completely dry the panel before die cutting all of my Autumn Wonder elements. I have a stack of A2 white cardstock panels ready to go at all times and I’ll be honest that I went back and blended a second panel of just leaves, plus a white panel for the mushroom stems and such to fill my envelope to my liking.

Once those were all cut out, I stamped a sweet squirrel from Pretty Pink Posh Cozy Fall Critters and colored him with copic markers. Then I used the coordinating die to cut him out. I also die cut Pretty Pink Posh Give Thanks Script from brown glitter paper.
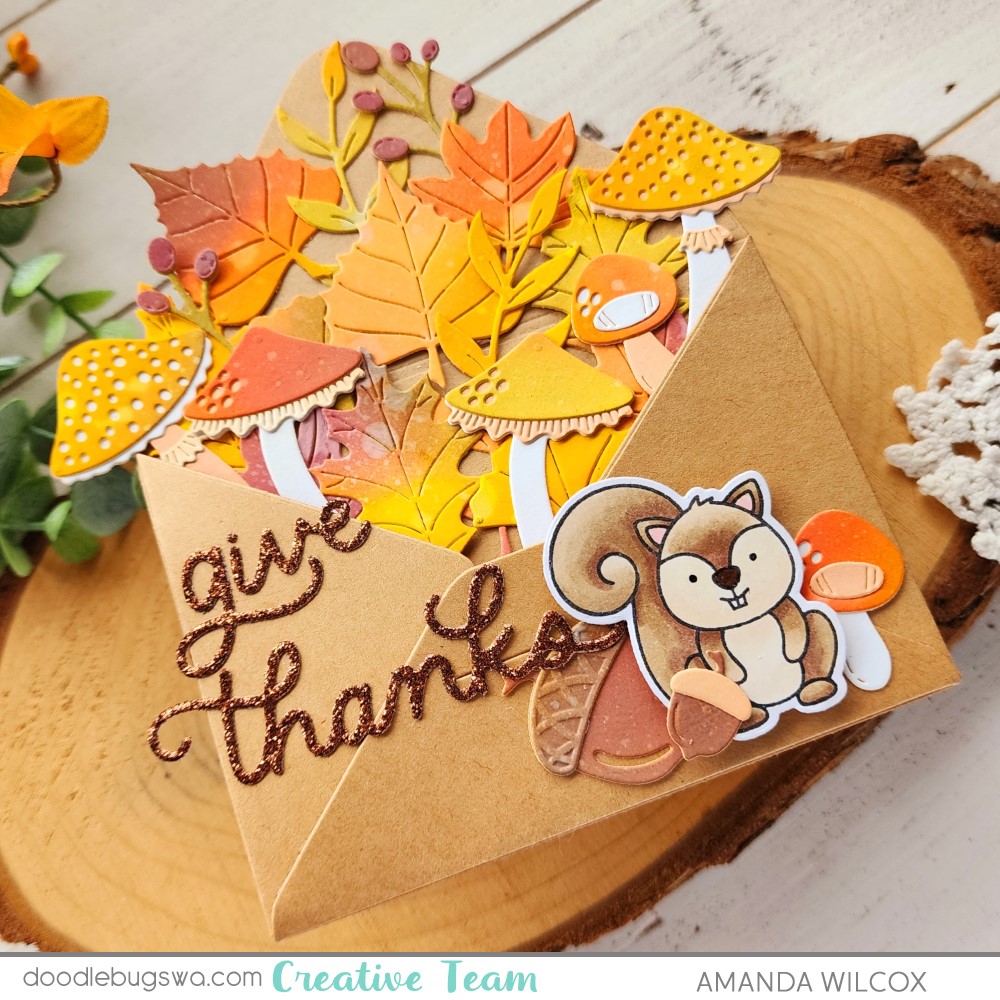
I arranged everything in my envelope and used press ‘n seal to pick it all up, added liquid glue and carefully slid it back in the envelope. Last, I used liquid glue to add my sentiment, big acorn and mushroom to the front. Then I popped the squirrel and his small acorn up with foam squares.

For finishing touches I added black glaze pen to the squirrel’s eyes and glossy accents to his nose. I just can’t resist those little touches, especially with critters!
My daughter promptly stole this card from me so it won’t be going in the mail but I think I’ll definitely be trying out some of those other add on sets to the Envelope of Wonder for Halloween and, of course, Christmas too! They’re too cute!
I appreciate you sharing your time with me. Have a fabulous day!