Happy Friday my friends! I’m so glad you’re here. Thanks for stopping by. Today I’m sharing a fun card using stamps, dies and stencils from the Trinity Stamps Autumn Gathering release. They did just have a new release this week (those goodies are on their way to me now) so be sure to check it all out for fall and winter crafting goodness! Click HERE to get to their store.
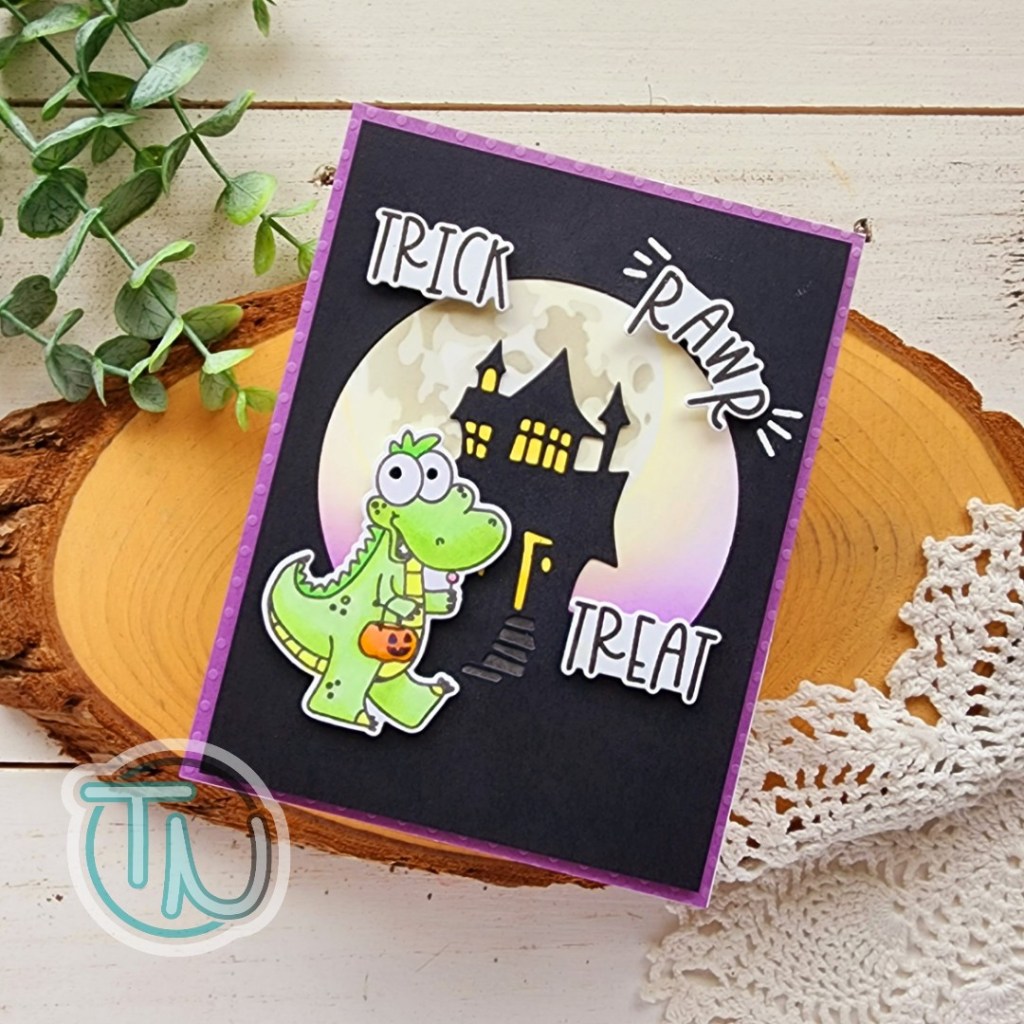
For my card today, I really wanted to play with the Moon Layers stencil so that’s where I started. I just used dye inks from my stash in light gray and yellow, with a little purple for the bottom part of the panel. Then I took a 4×5.25 inch piece of black cardstock and used the Haunted House Cutout die on the upper middle of the panel.
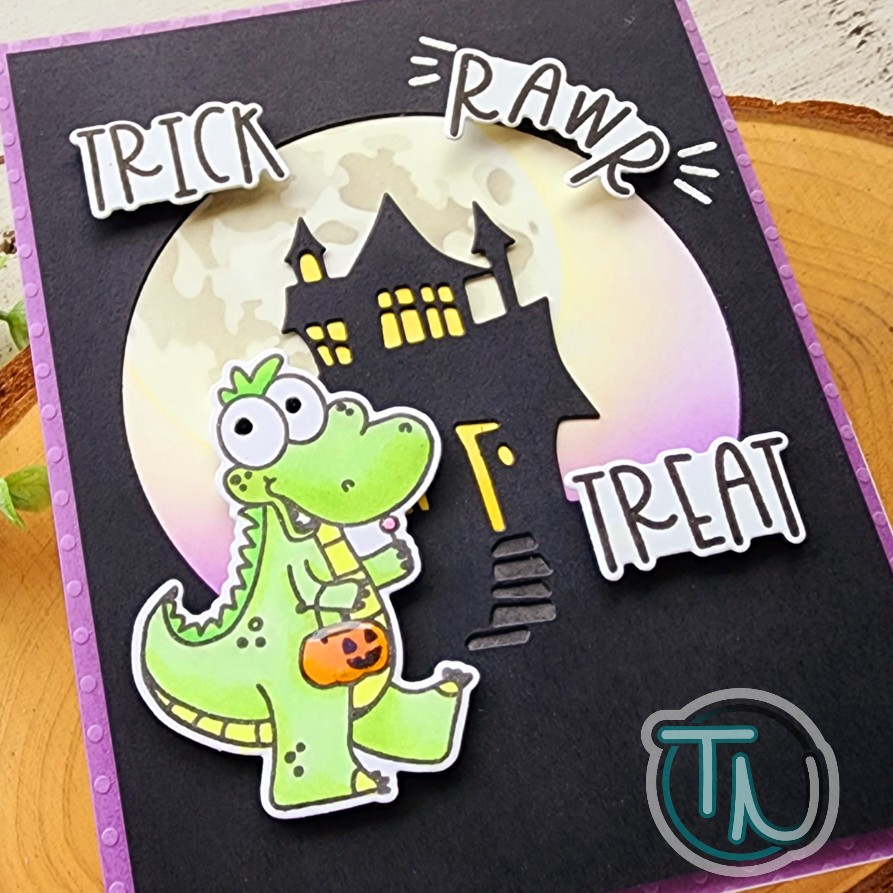
I stamped and colored that cute dino from Spookysaurus with my copic markers and used the coordinating dies to cut him and the sentiments out. Now it’s time to assemble all the layers together.
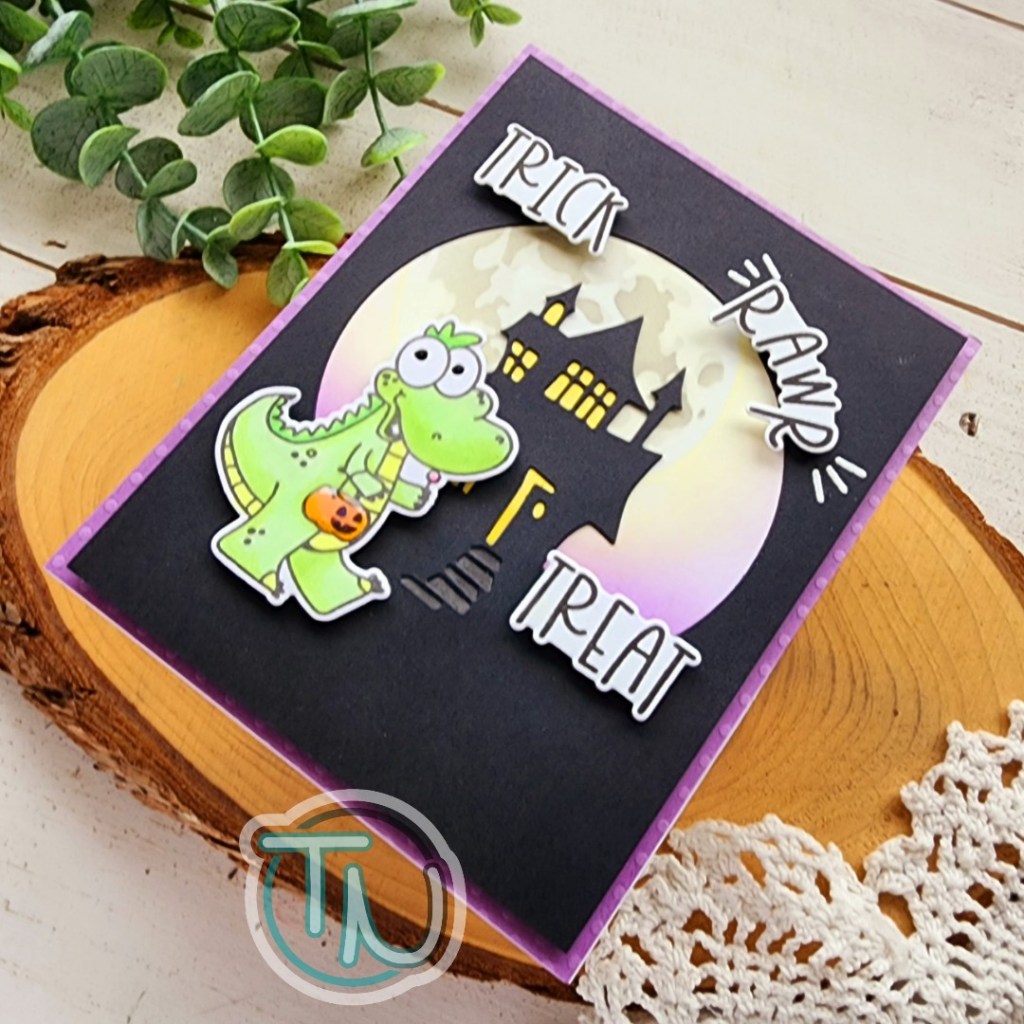
I glued the haunted house panel to the moon panel with liquid glue and colored in the openings with copic markers. I popped that panel up on a piece of purple dot texture cardstock from my stash with foam tape. Then I added the dino and sentiments with foam squares for that extra dimension.
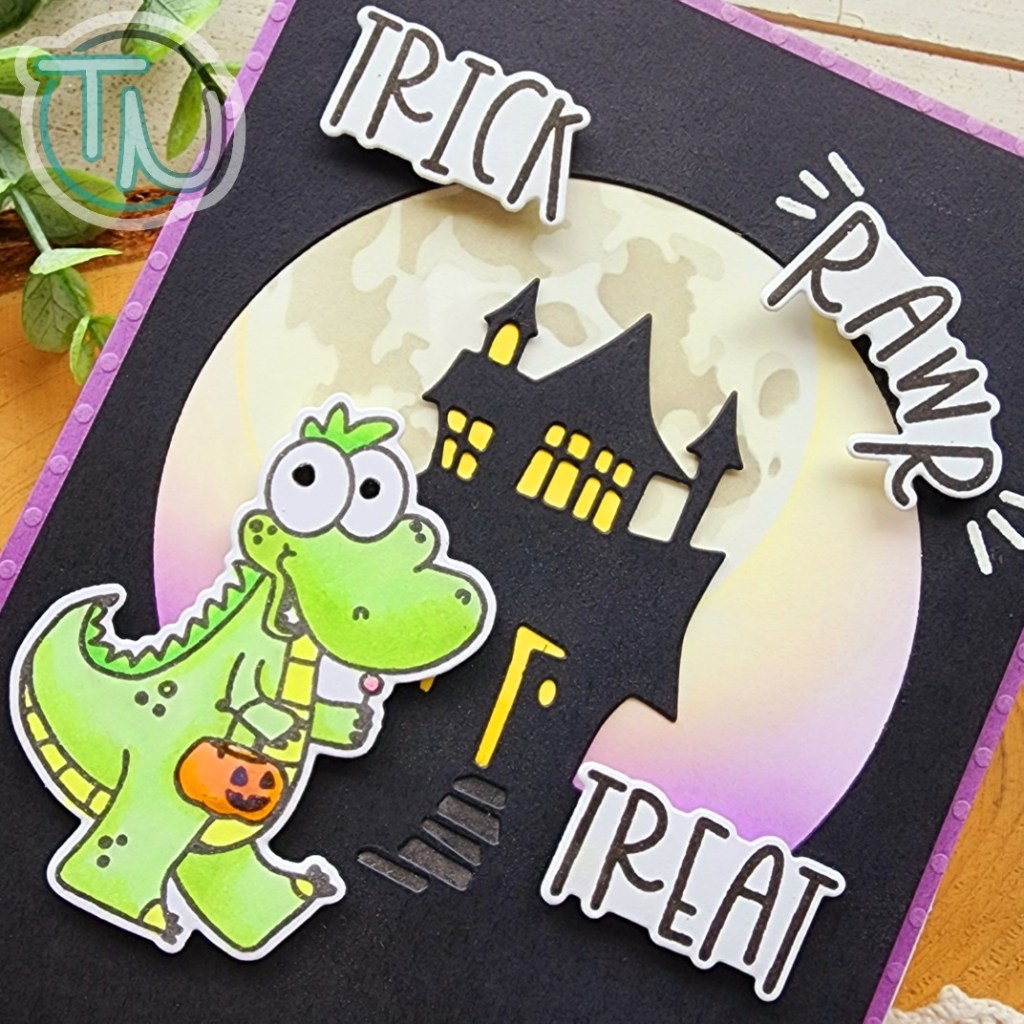
For finishing touches, I stamped the emphasis marks on the black panel and heat embossed them white to make that RAWR stand out more. Then I added black glaze pen to the dino’s eyes and glossy accents to his sucker and pumpkin bucket.
I love this so much! I have a fun shaker card planned for the haunted house die next. And maybe a sweet tag for a treat bag with that dino. He was really fun to color. Are you still making Halloween projects?
Products used:
Spookysaurus stamps and dies
Haunted House Cutout die
Moon Layers stencil
Foam tape and squares
Glossy accents
I appreciate you sharing your time with me. Have a fabulous day!