The Newton’s Nook Designs Team is hopping along today to share some great Sweet Treats – just in time for Valentine’s Day! Make sure you scroll down to the bottom of this post to see the whole list and hop along and comment for a chance to win!
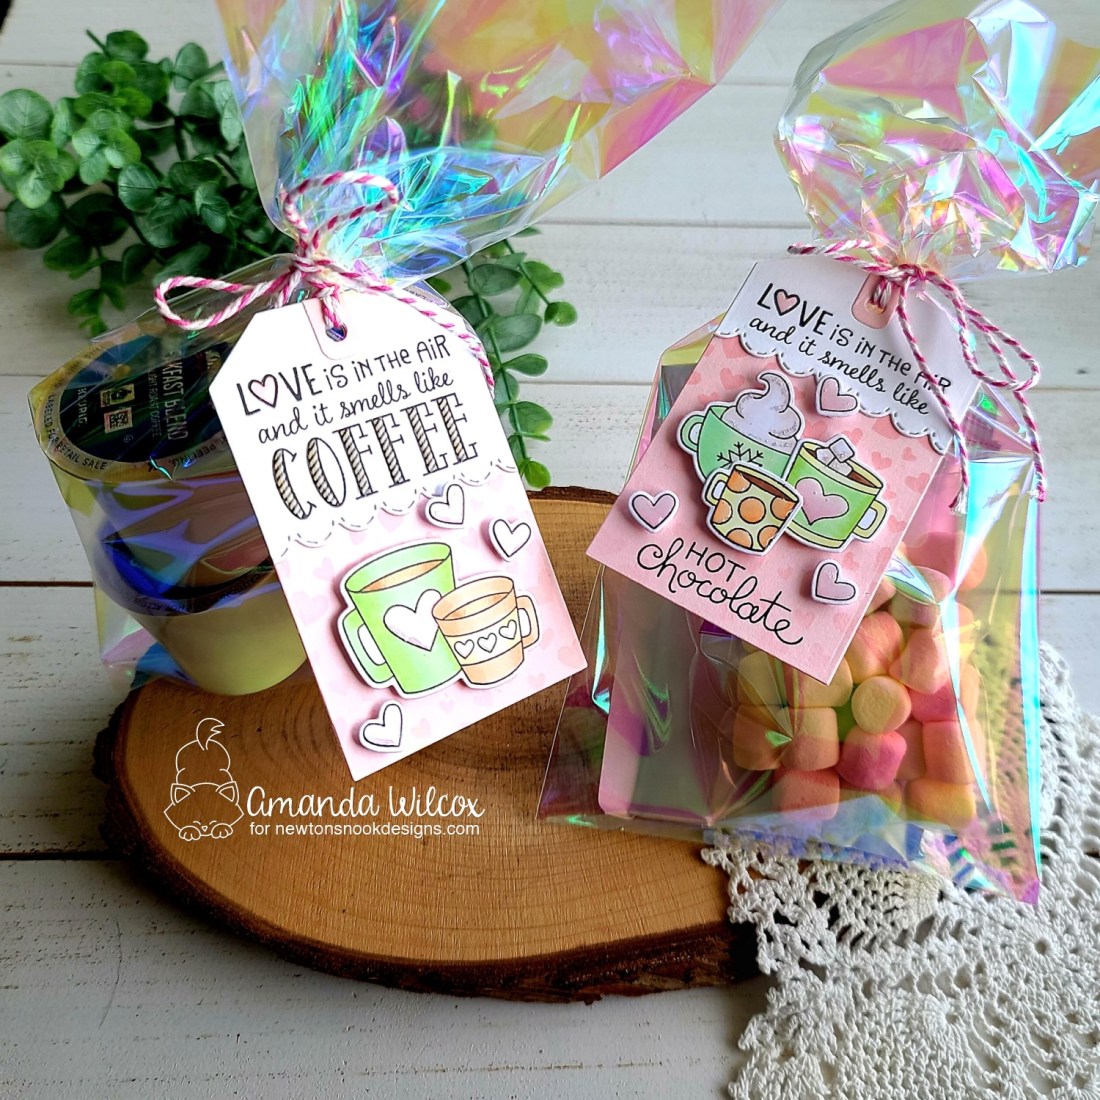
I have 2 fun tags to share with you today – a coffee version and a hot cocoa version – to customize for your recipient.

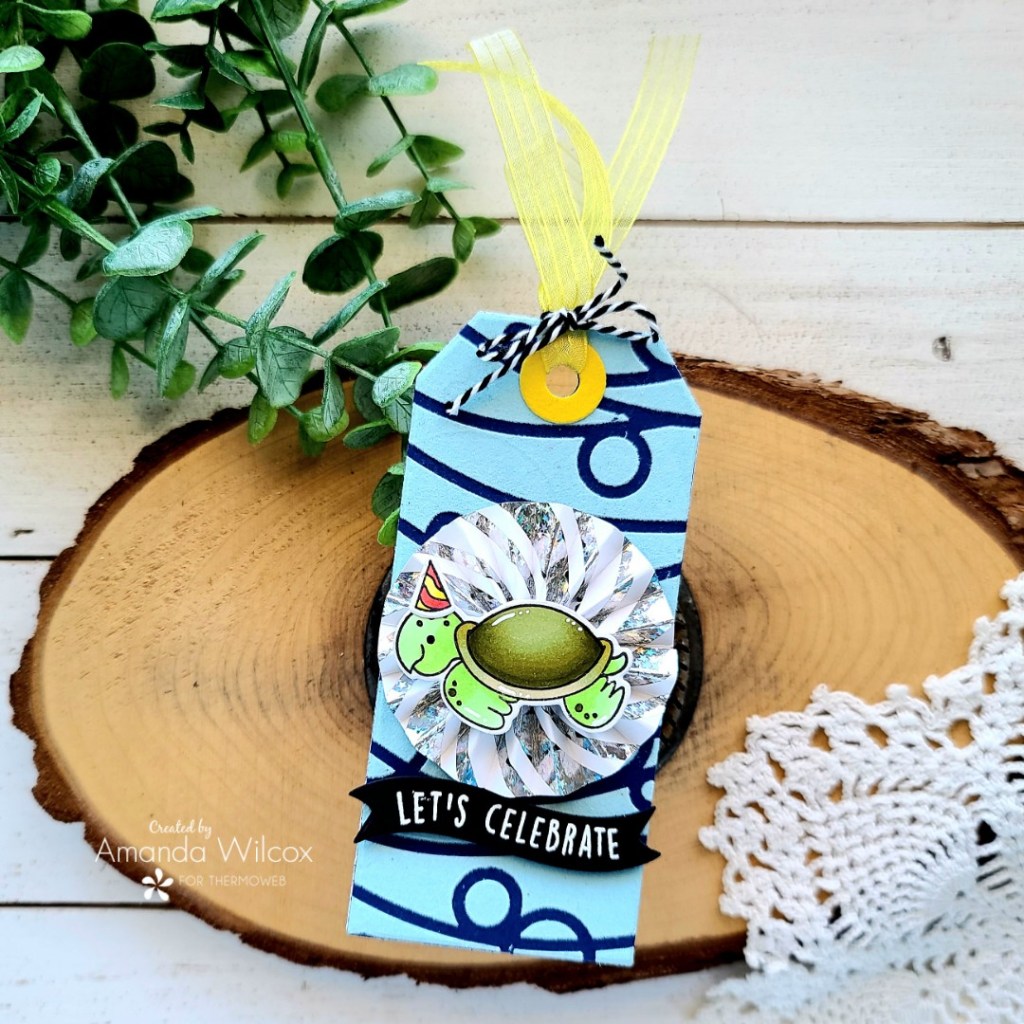
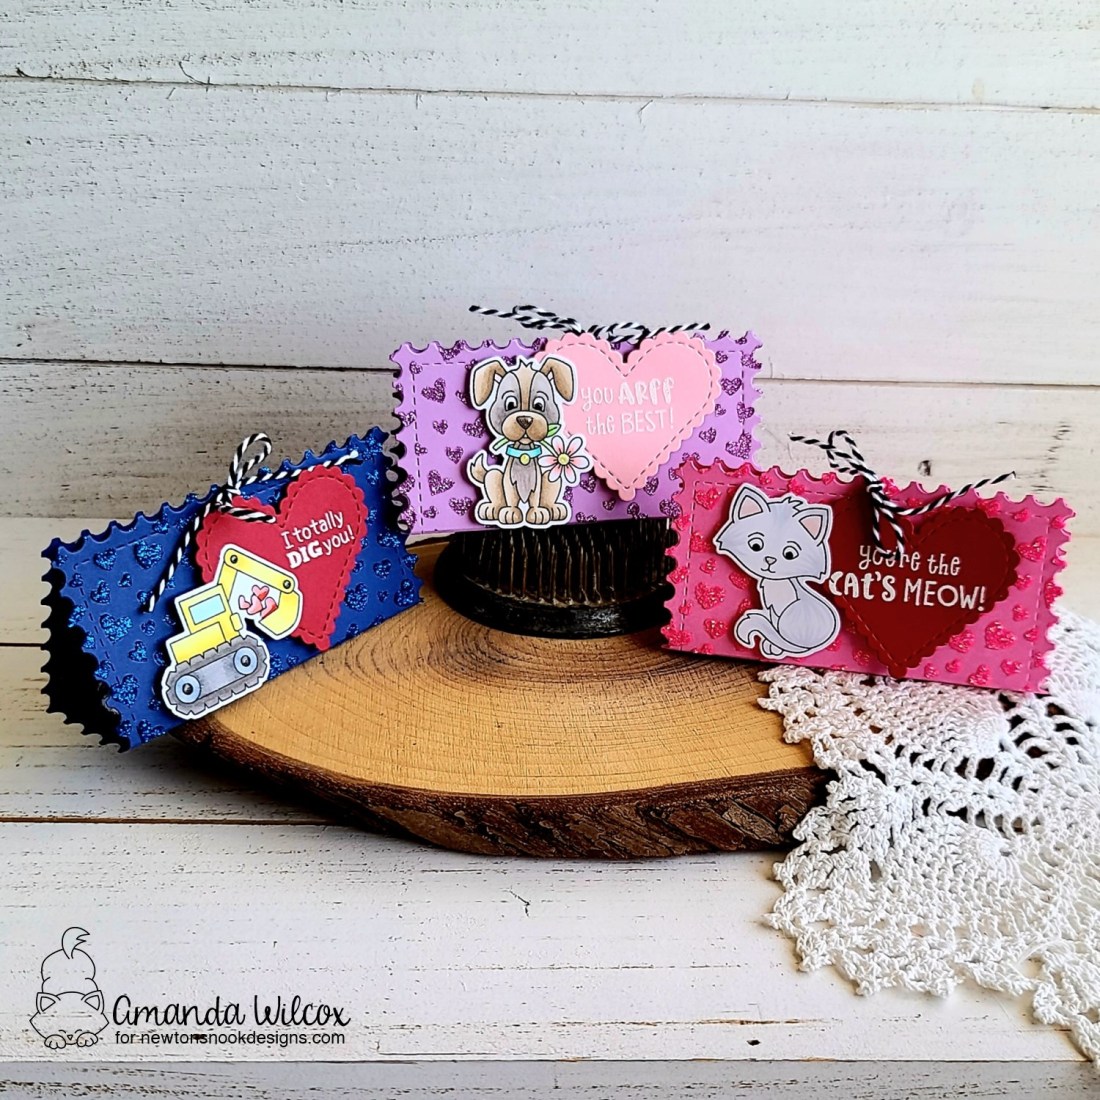
To create my tags, I started by cutting four pink tags from the Fancy Edges Tag die set. Then I cut two more of the top half from white cardstock. I inked up two of the pink ones with the Petite Hearts stencil and some pink dye ink with a blending brush.
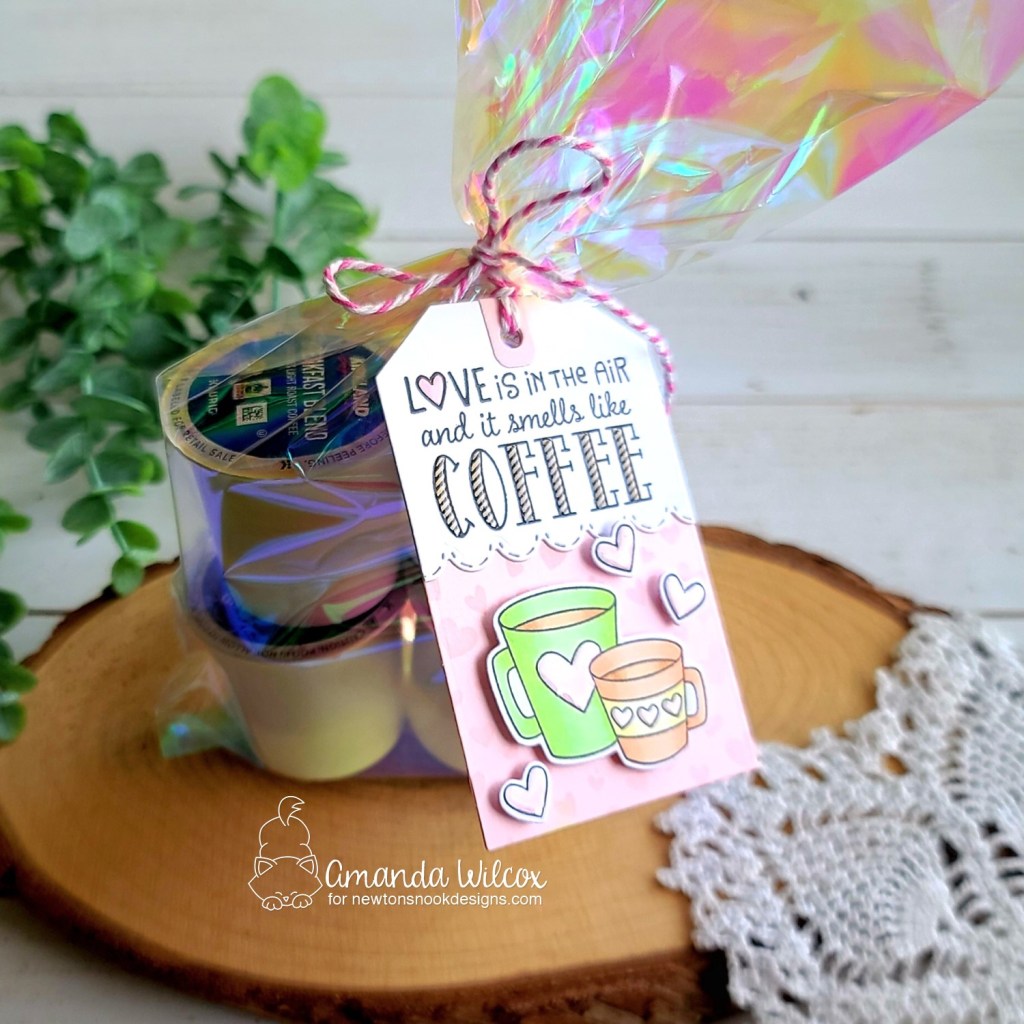
For the coffee tag, I stamped the sentiment from Love Cafe on the white tag topper portion, then lined up the scallop border and ran it through the die cutter. I also stamped the coffee cup image in the set and some hearts from Cup of Cocoa (which we’ll use on the next tag as well) and colored everything with my copic markers. I used the coordinating dies to cut everything out and assembled my layers, popping up the images with foam squares.
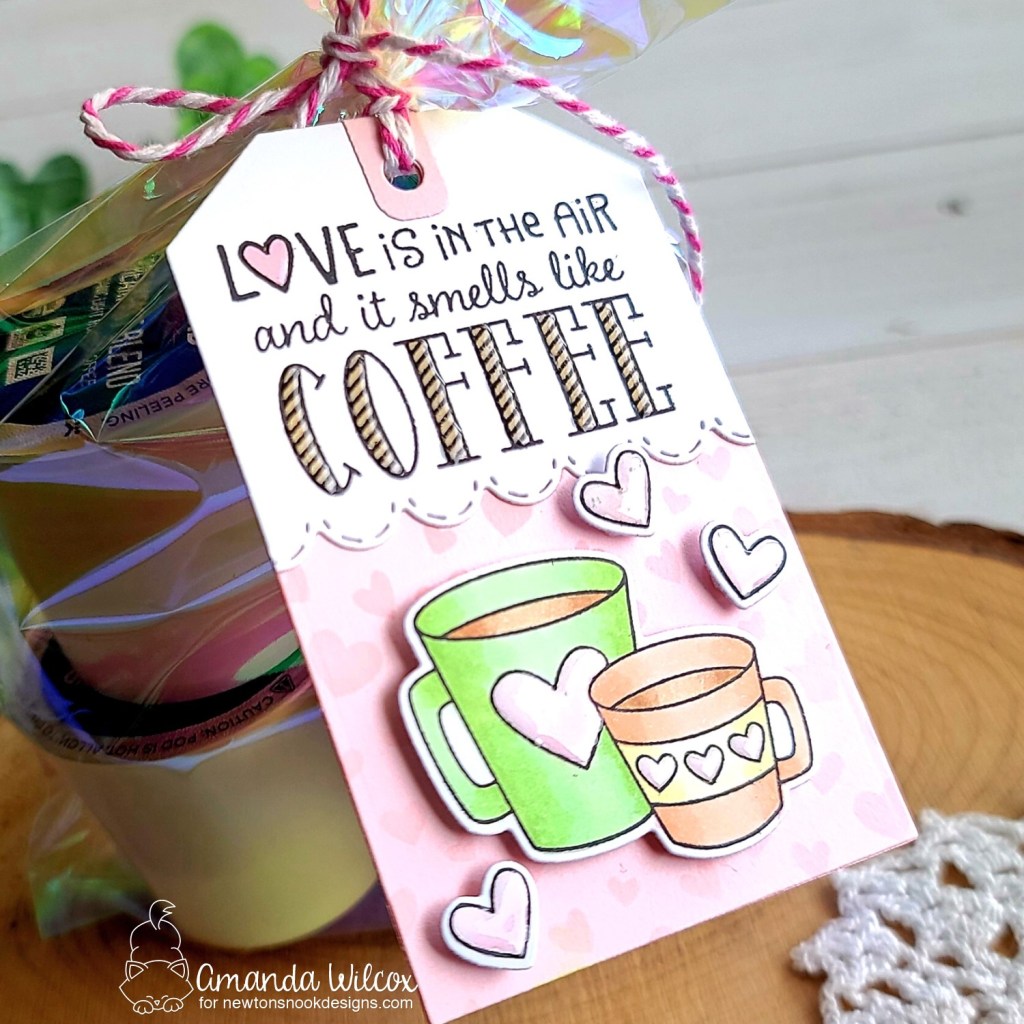
For finishing touches, I added glossy accents to all of the hearts on the tag and the word “coffee” as well. Then I threaded pink baker’s twine through the hole and tied it to a bag of K-cups.

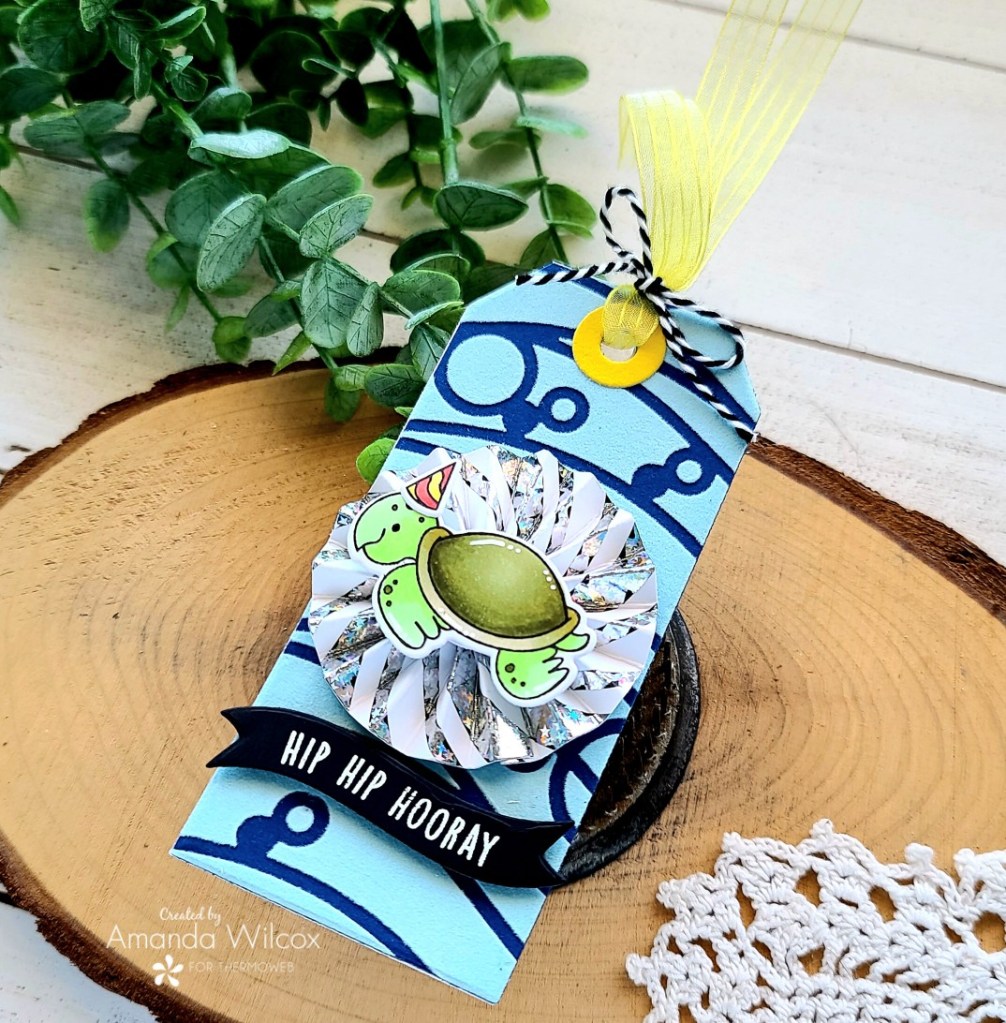
Switching gears to the hot cocoa tag, we need to do some simple masking. I placed the Love Cafe sentiment in my MISTI, put a sticky note over the word “coffee” and inked it up. I removed the sticky note and stamped the inked up portion of the sentiment on the tag topper. Then, I took the “It’s a HOT chocolate kind of day!” sentiment from Cup of Cocoa and did the same thing to mask off portions to only stamp “HOT chocolate” on the bottom of my tag.

I stamped mugs from Cup of Cocoa and Time for Coffee and colored them with my copic markers. I used the coordinating dies for each set to cut them out and assembled my tag the same as the first one.
For finishing touches on this tag I added glossy accents to the hearts and dots on the mug. Then I also added unicorn Stickles to the whipped cream and marshmallows for a little sparkle to with with the shine.
I hope you enjoyed these fun tags and found some inspiration to create something wonderful to share with someone.
Products used today:
Cup of Cocoa stamps and dies
Love Cafe stamps and dies
Time for Coffee stamps and dies
Fancy Edges Tag dies
Petite Hearts stencil
Blending brush
Lawn Fawn ballet slippers ink pad
Glossy accents
Stickles – unicorn
Foam squares
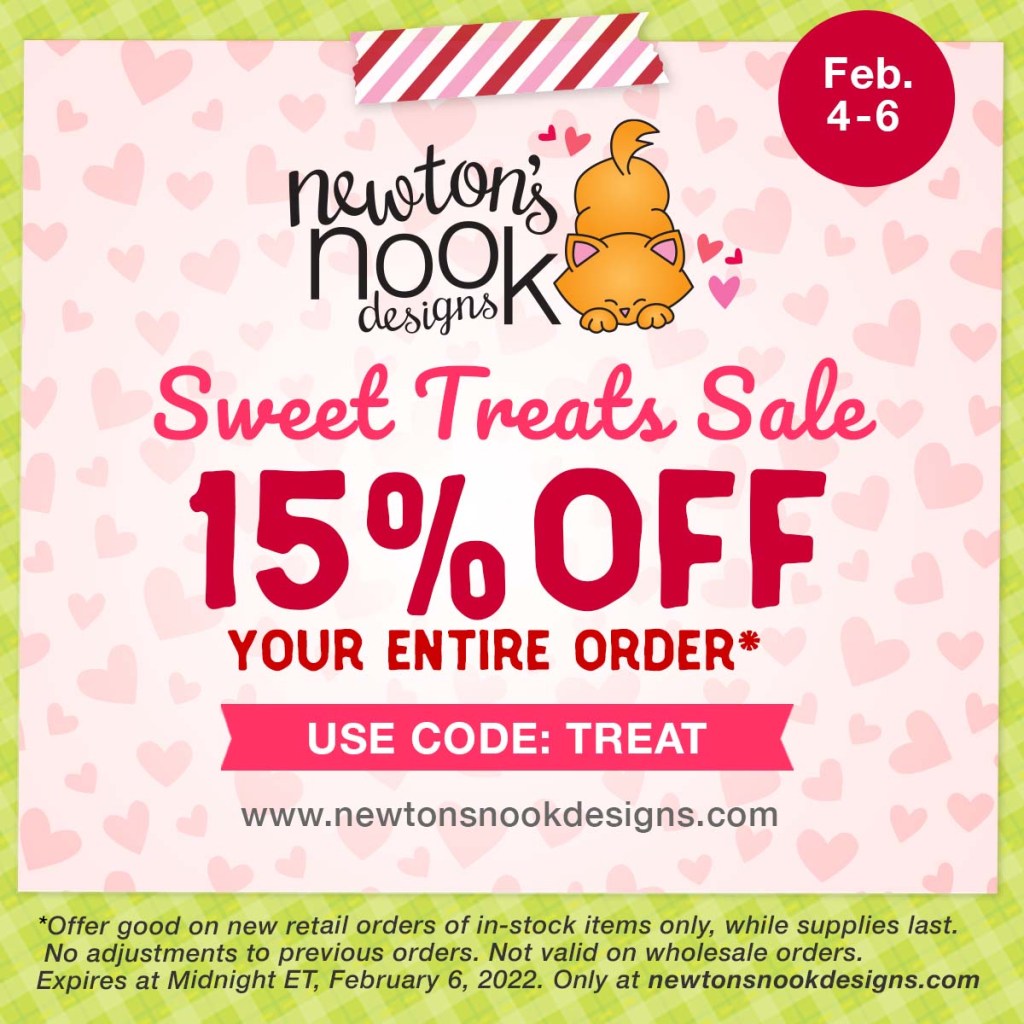
Sweet Treats SALE!
As an extra treat to you, we are celebrating with a SALE! Use code TREAT to receive 15% off your order this weekend! Now through Sunday, February 6th, at www.newtonsnookdesigns.com
Enter to Win! Sweet Treats Blog Hop Prizes!
We will be choosing two lucky winners to win a $25 store credit for Newton’s Nook Designs online shop! To enter, just leave comments on the Design Team Member and Guest blogs (see list below)! Two winners will be chosen at random from the collective blogs in the blog hop. Make sure to check out each of their blogs and comment for your chance to win. You will not know which blog has been chosen so the more you comment on the better your chances are of winning! You have until Sunday, February 5th at 9 pm EST to comment — winners will be announced on the NND blog on Monday, February 7th.
Check out all the awesome Design Team Blogs below to enter:
Newton’s Nook Designs
Donna Idlet
Ellen Haxelmans
Tina Herbeck
Larissa Heskett
Samantha Mann
Zsofia Molnar
Maria Russell
Farhana Sarker
Tatiana TrafimovichAmanda Wilcox