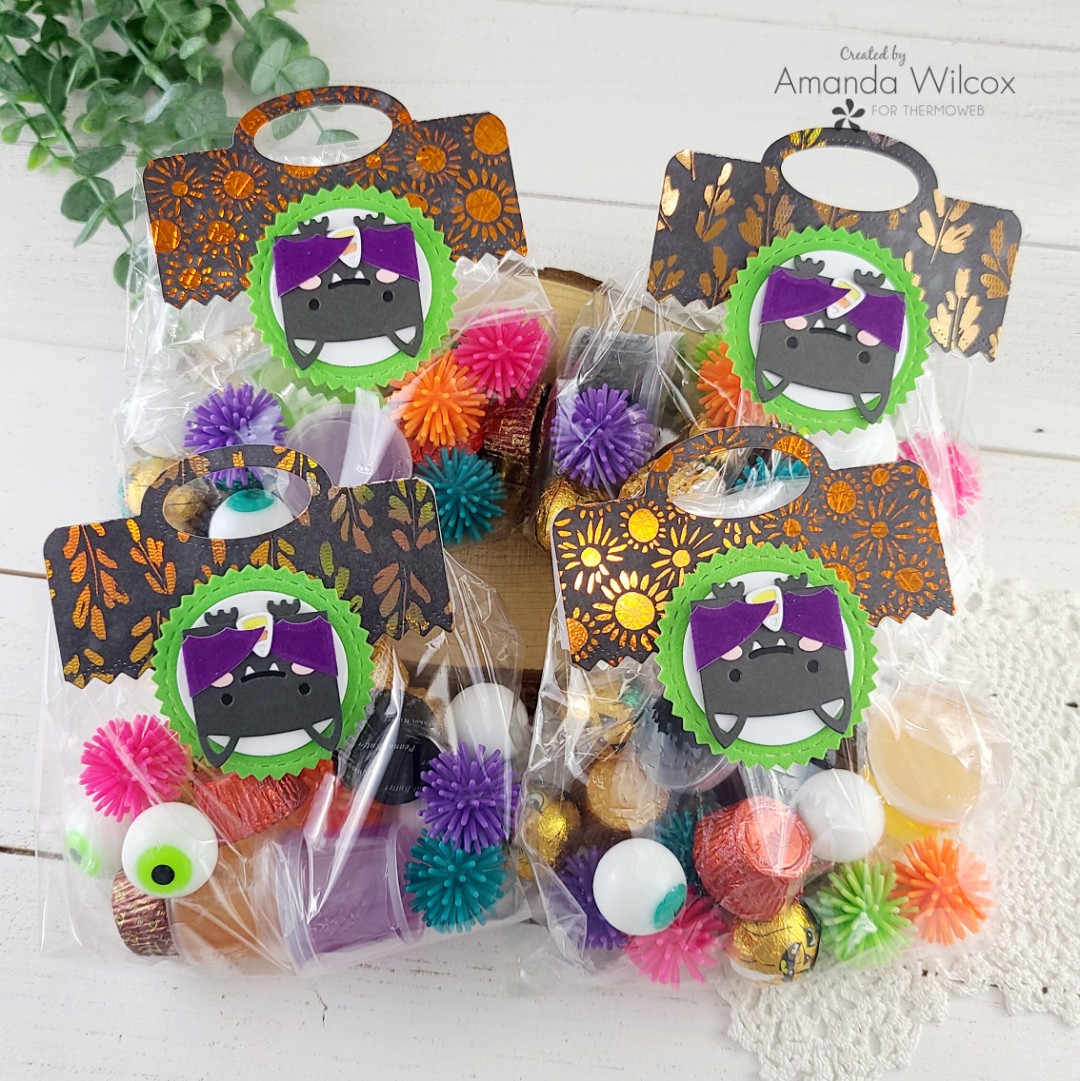
Hello again. It’s a super busy day on here. Just popping in really quick to share a set of adorably fun treat bags I made featuring foiling and flocking fun. All the details are over on the Thermoweb blog today.
I love making gift packages like this! Add the Halloween theme to it and I was over the moon! I had so much fun putting these together!
For all the details, click HERE to get to the blog post.
I appreciate you sharing your time with me. Have a fabulous day!
Welcome back friends! It’s day 2 of the reveal week for the Newton’s Nook Holiday release! Today we’ve got 2 fun stamp and die sets to share with you.
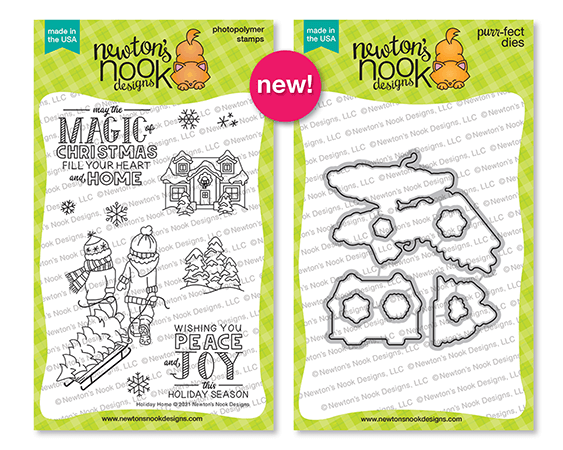
Holiday Home
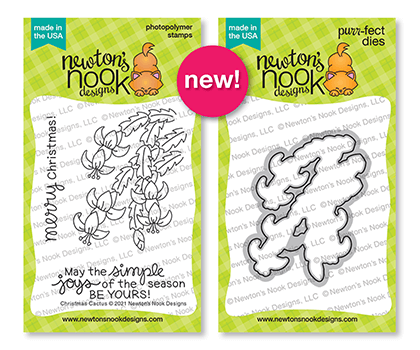
Christmas Cactus
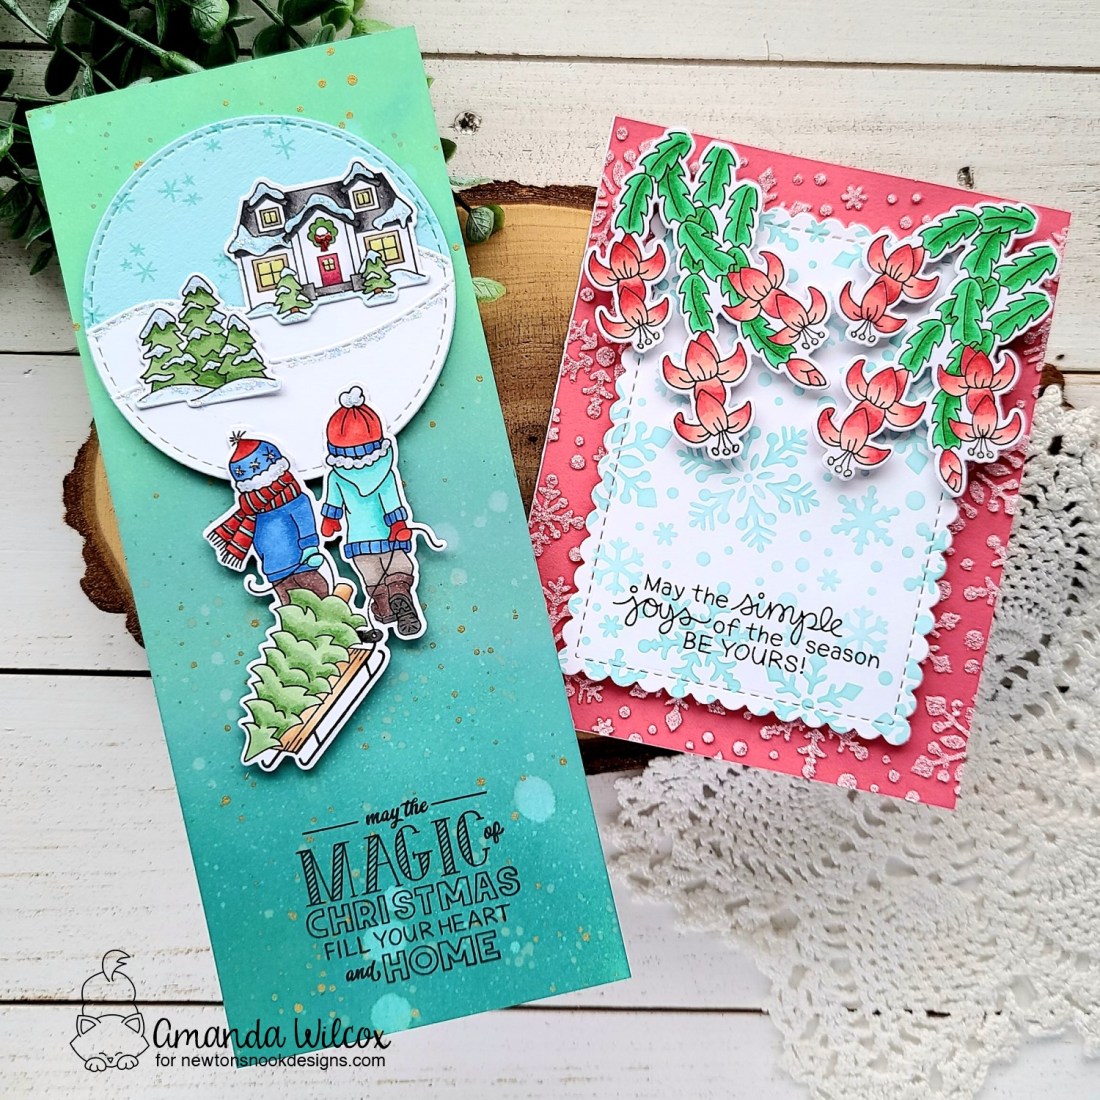
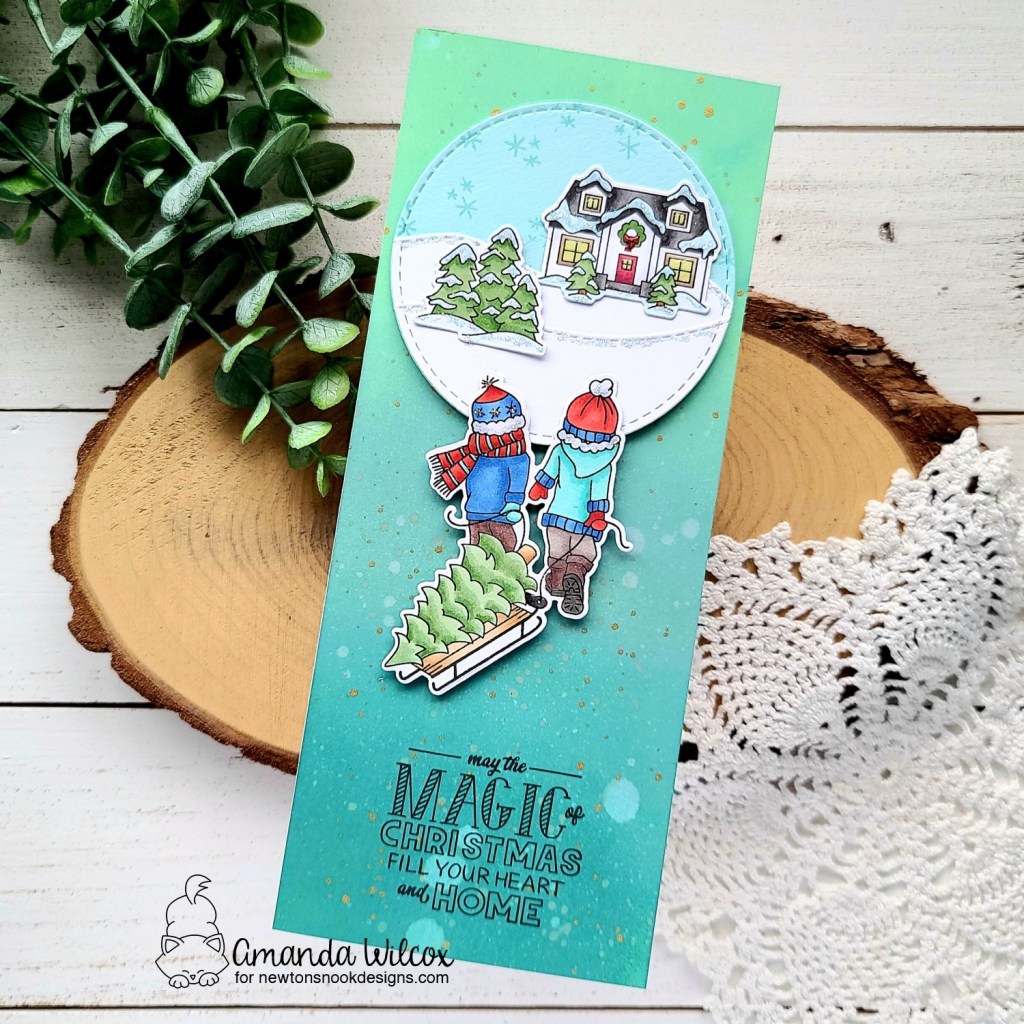
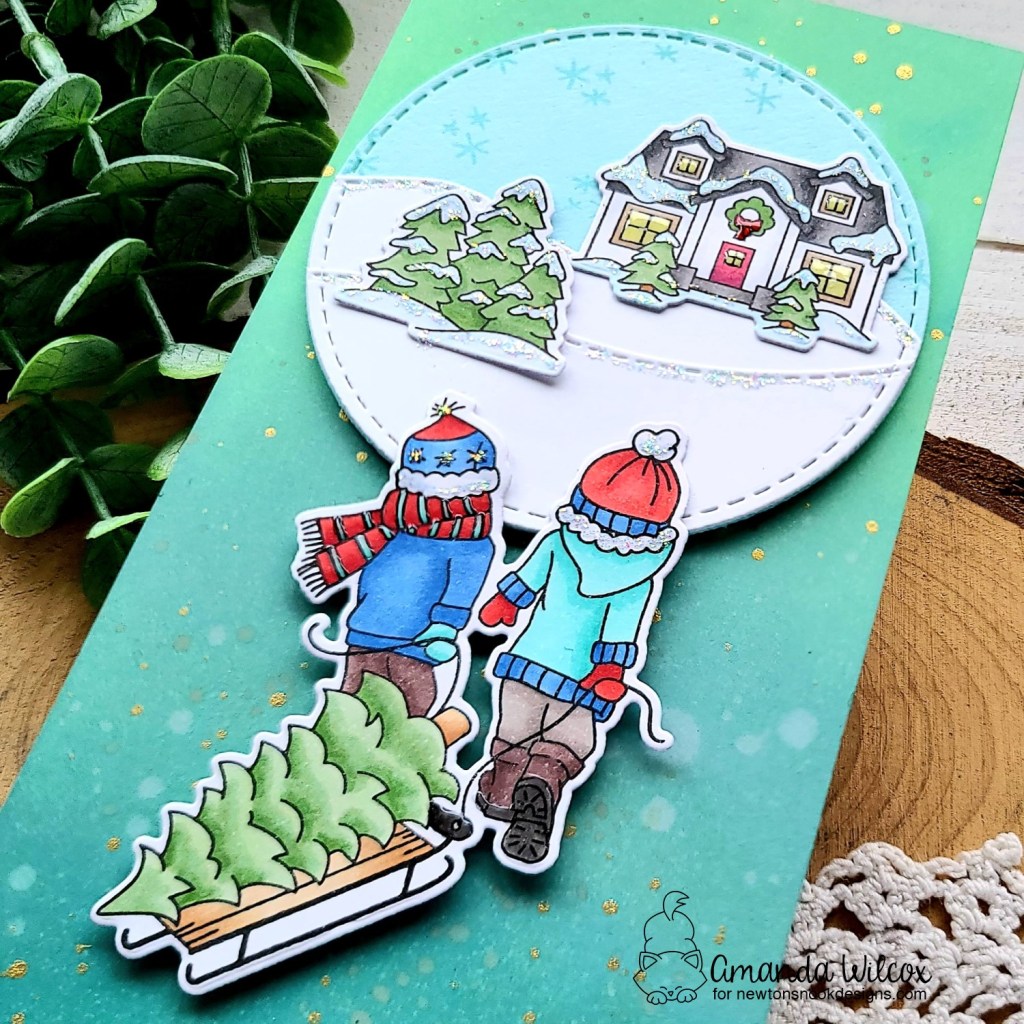
I’ve got a pair of really great cards to share with you today. First up, I created a beautiful slimline scene card with the Holiday Home set.
For this card, I stamped a few images from the set and cut them out with the coordinating dies. Then I cut 2 circles using the Circle Frames dies. I took the white circle and used the Land Borders dies to cut one snow drift and the Sea Borders dies to cut the other one. Before adhering the snow drifts to the blue circle, I stamped a few snowflakes in the sky. After the circle layers were adhered I added the trees and house with liquid glue.
For my background panel, I inked up a piece of white cardstock with evergreen bough, iced spruce and cracked pistachio distress oxide inks. Then I spritzed it with water and flicked gold watercolor all over it. Using my images as a guide, I stamped the sentiment at the bottom and assembled my card.
I added the background panel to a white slimline card base. Then popped the circle scene up with foam tape and added the kids with a combo of foam squares and liquid adhesive.
For finishing touches I added unicorn stickles and glossy accents to various parts of the images and scene.
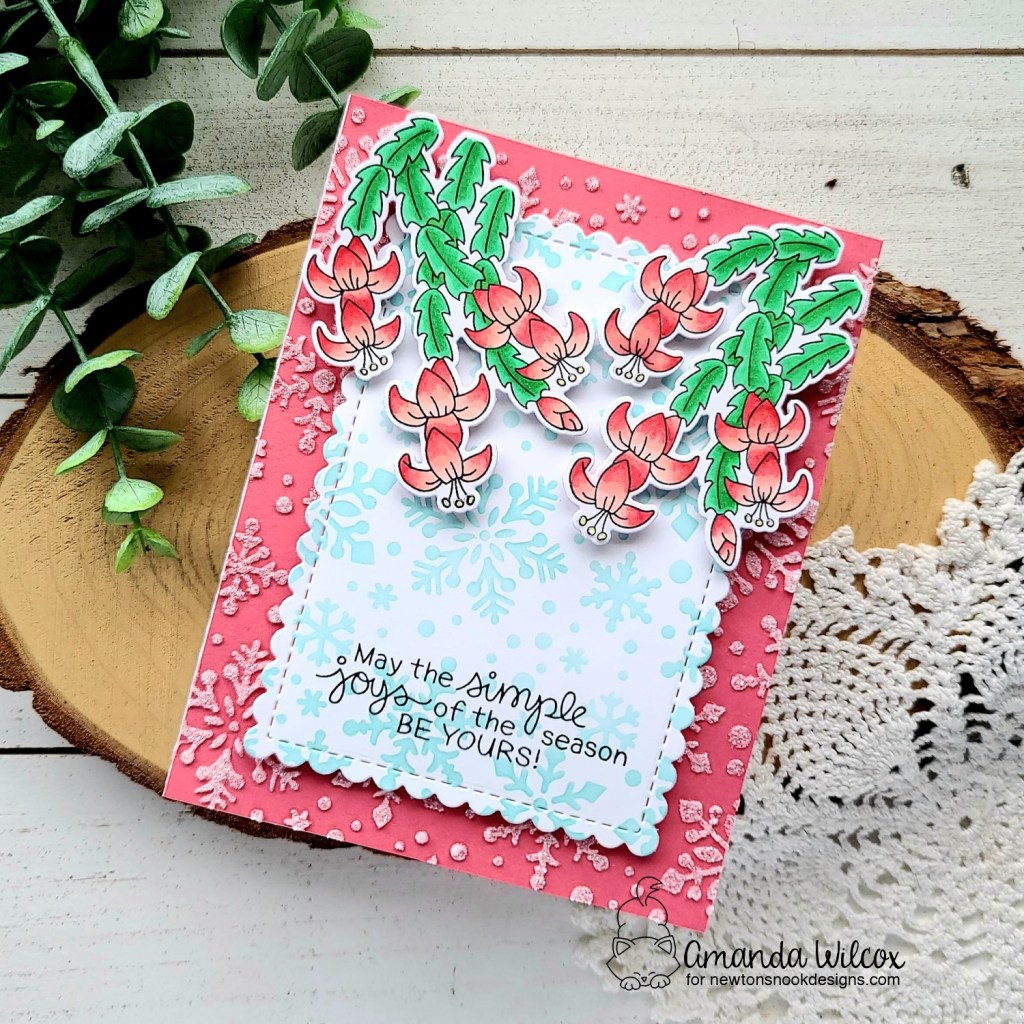
For my second card today I created something that reminds me of a Christmas cactus my mom had when I was a kid. It was in a macramé hanger and the arms of the cactus would hang over the edge.
I started by stamping and coloring 2 of the Christmas cactus image. I used the coordinating dies to cut it out and found a cardstock in the same pink tone as my flowers. Next, I adhered the Snowfall stencil to it and spread iridescent glitz glitter gel through the stencil. I cleaned up and set my panel aside to dry. Next, I die cut a scalloped rectangle from the Framework die set and inked the same stencil up with light teal ink and a blending brush. Then I stamped my sentiment at to bottom.
Once my background panel was dry, I adhered it to a white card base and popped the smaller panel up with foam tape. I adhered the Christmas cactus with foam squares and finished my card off with some glossy accents on the flower stamen.
Would you like to win the “Holiday Home” or the “Christmas Cactus” Stamp Set? We will choose ONE lucky winner for each stamp set!
Here’s how to win: Comment on the NND blog and Design Team blogs (see list below)! Thewinner will be chosen at random from the collective reveal posts. Make sure to check out each of their blogs and comment for your chance to win. You will not know which blog has been chosen so the more you comment on the better your chances are of winning! You have until Thursday October 14th at 9pm ET to comment — winners will be announced on the blog post on Friday, October 15th.
Check out all the awesome Design Team Blogs below to enter:
Happy Tuesday friends! It’s time for Tuesday Tea with Twiddler’s Nook on the Coffee Loving Cardmakers. So be sure to grab a cuppa and settle in because I’ve got a really fun project to share with you today!
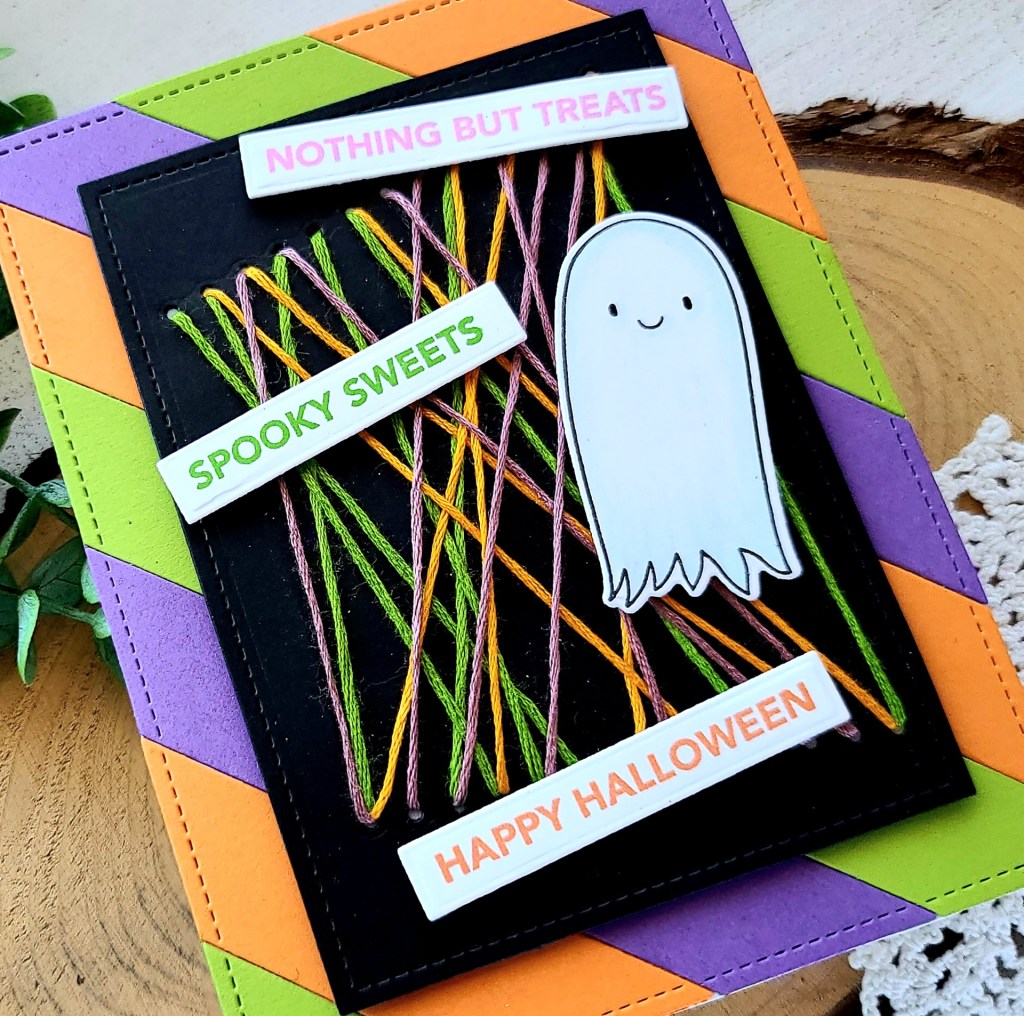
I couldn’t resist this super fun Halloween set from Ellen Hutson called Halloween Treat Tags. The ghost and bat in this set are beyond adorable! Today I’m just using the ghost for a super fun coffee sleeve with the Bear Cozy Kit and then switching gears to a card that coordinates!
For the cozy, I die cut the bear cozy main die from black felt and trimmed off the ears with scissors. Then I cut the ghost from sprout, lilac and sunset felt. I placed the negative from one of the ghosts in my MISTI and used it to align the stamp. Then I simply placed each ghost in the negative and stamped the image right on it. I happen to have a craft ink pad for fabric but I did a little research and you can you Ranger Archival ink on fabric too! I used Thermoweb Fabric Fuse liquid adhesive to adhere my ghosts in place and set it aside to dry.
While it was drying, I die cut a piece of black cardstock with a Lawn Fawn stitched rectangle. Then I took the die from the Bear Cozy kit that gives you stitching holes to sew your cozy together and cut two strips on my black cardstock. I dug through my embroidery floss and stitched a fun, random mess back and forth across the cardstock. I adhered the ends on the back with some washi tape. Then I cut the Lawn Fawn diagonal striped cover plate from coordinating cardstock and adhered it to a card base. Once that was done I used scrappy tape to adhere the stitched panel in place.
I chose sentiments from Tag It Halloween and stamped them in coordinating colors. Then I used a Pink & Main sentiment strip die to cut them all out. I stamped another ghost and used the coordinating die to cut him out and popped everything up with foam strips and squares.
With my card all finished and the ghosts on my cozy dry, I used the stitching die to cut holes on both ends, sewed a fun blanket stitch on the edges and then sewed the ends together, completely my little gift set!
This is going to be such a fun set to give away! I’m super excited!
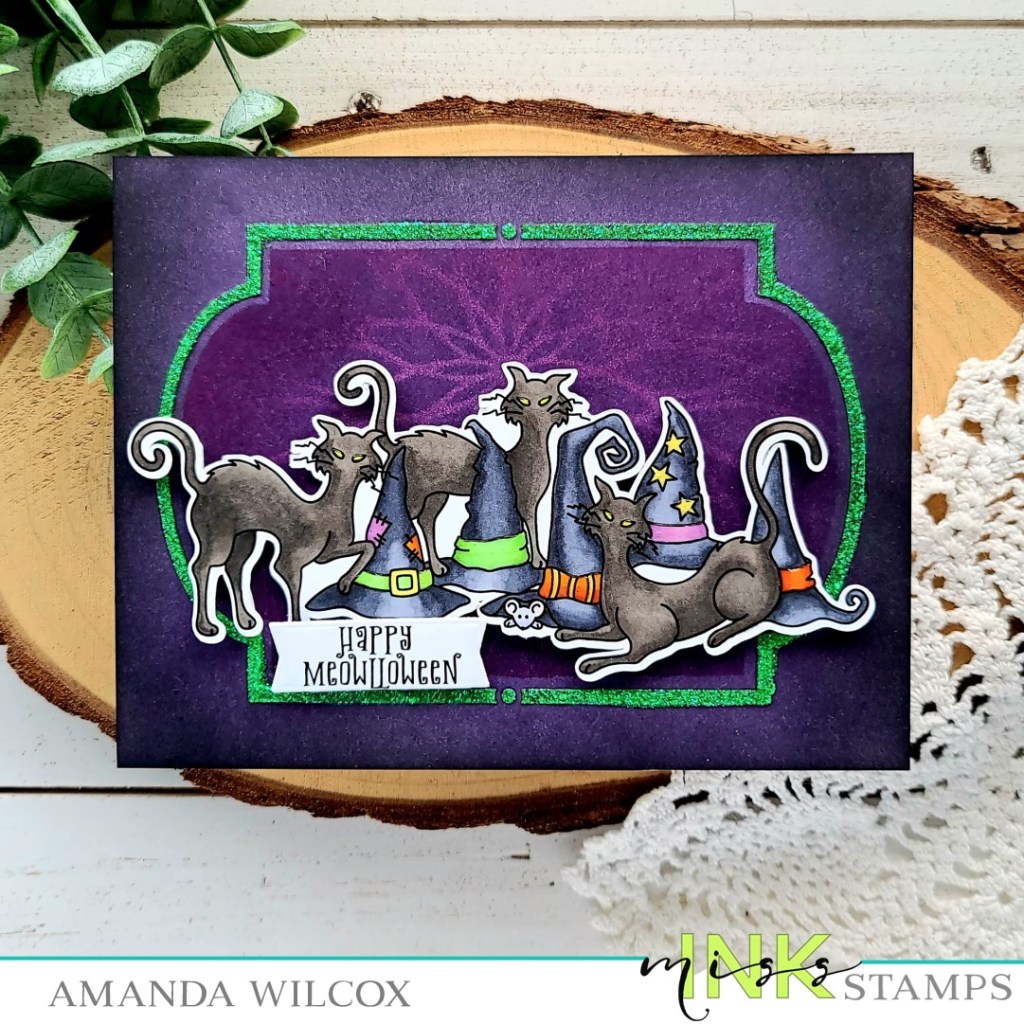
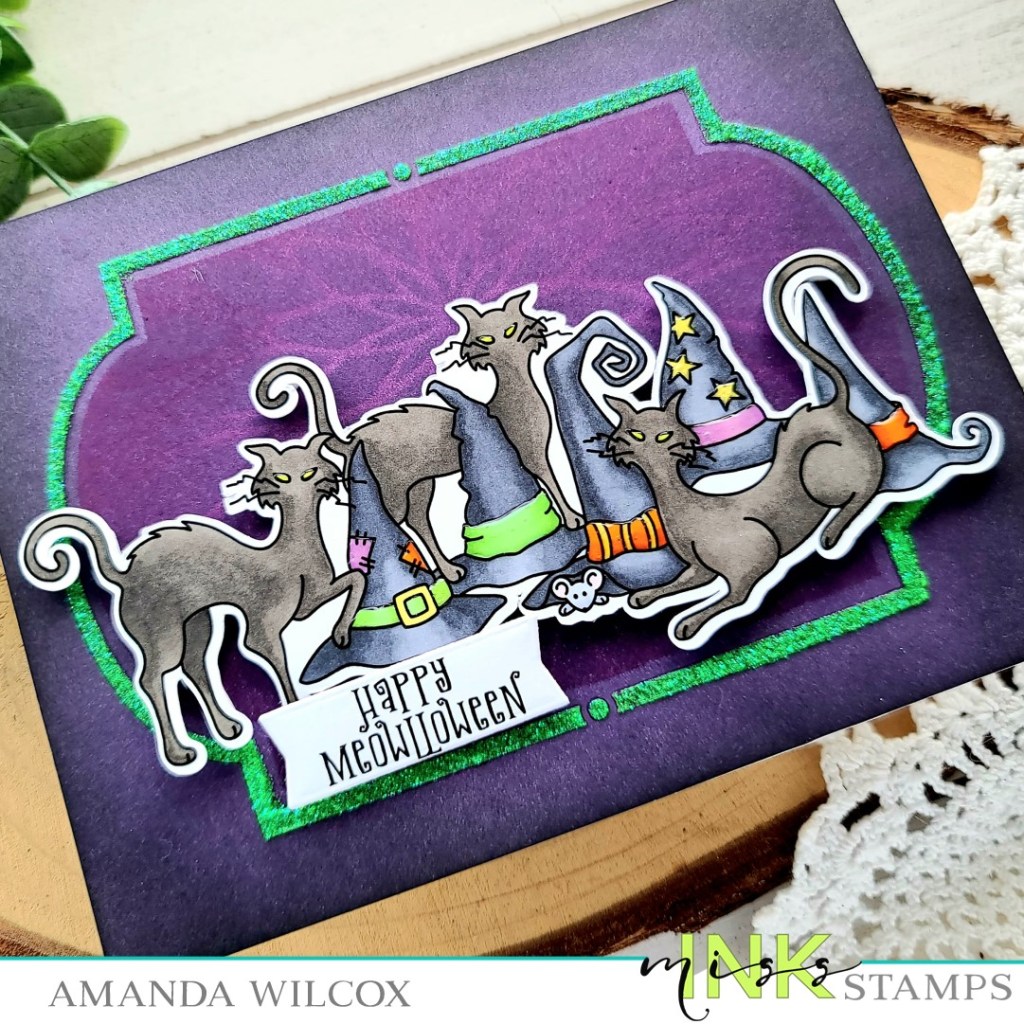
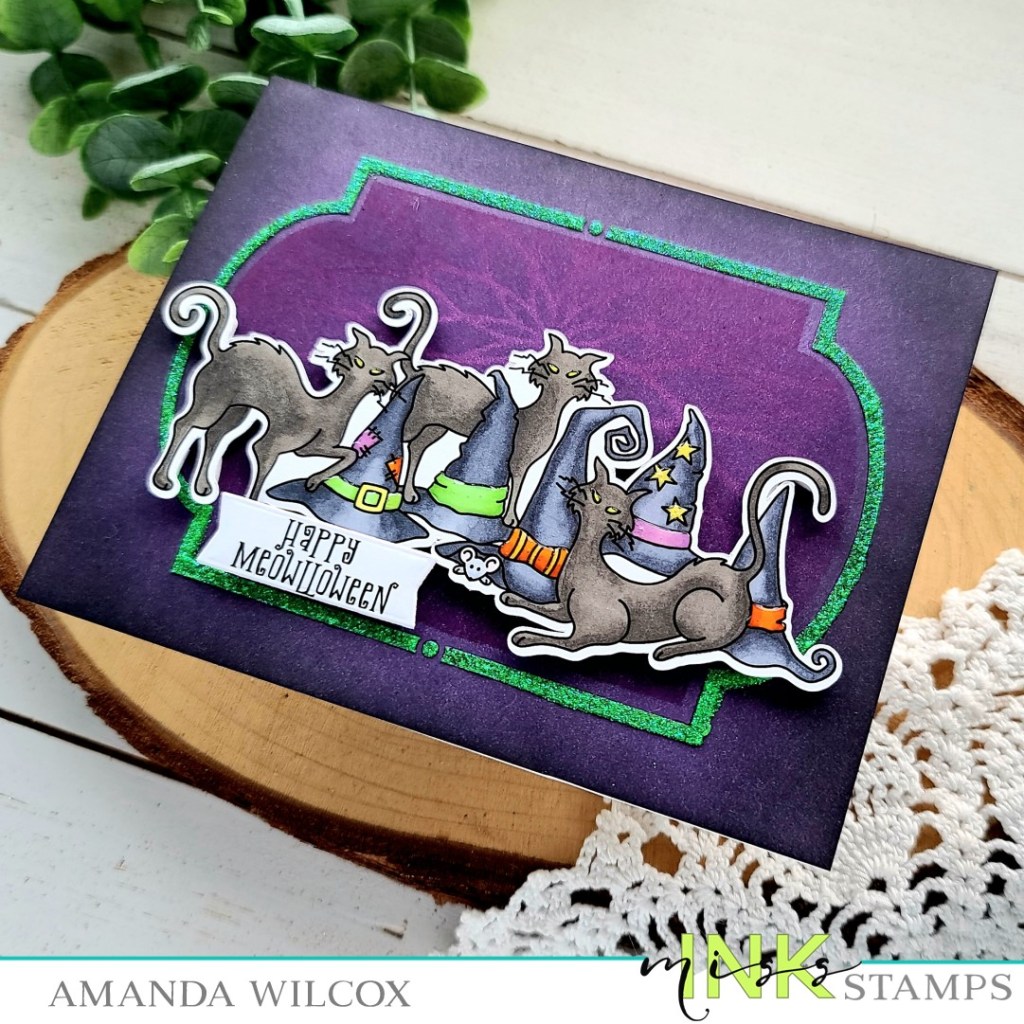
Hello everyone! Today I’m over on the Miss Ink Stamps blog with more Halloween goodness featuring the most recent release goodies! I had so much fun putting this card together. Layering stencils and getting inky! It was so great!
I started by stamping and coloring the main image from Feline Spooky with my copic markers. I used the scan-n-cut to cut it out and also stamped and die cut a sentiment banner to go with them.
Next, I took a white cardstock panel and inked it up with seedless preserves, dusty concord and black soot distress inks. I added the Ins & Outs Hollywood stencil over the top and added another layer of seedless preserves before layering the floral wave offset stencil over the top and inking that with dusty concord. All these layers add for a really cool color effect!
Next, I swapped out all the stencil layers for the Ins & Outs Hollywood frame layer and spread Rina K Glitz Glitter Gel in Screamin’ Green! It just glows off this awesomely dark background!
After that was dry, I added it to a white card base and popped my image and sentiment banner up with foam squares. For finishing touches I added glossy accents to the kitty eyes and various parts of each hat like stripes, buckles, etc.
Hello there! I’m so excited to, once again, be revealing another super amazing Newton’s Nook release this week! Today is day 1 and we’ve got amazing stuff right out of the gate to share with you!
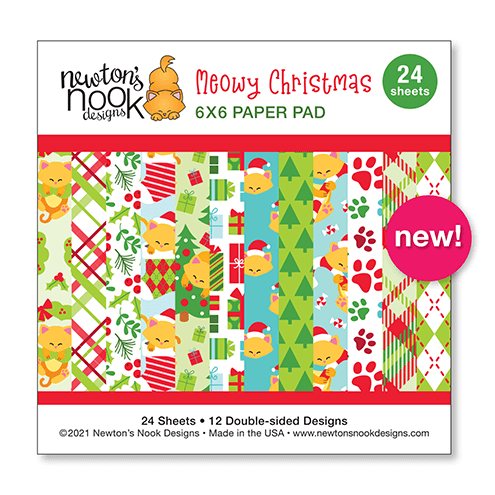
Meowy Christmas Paper Pad
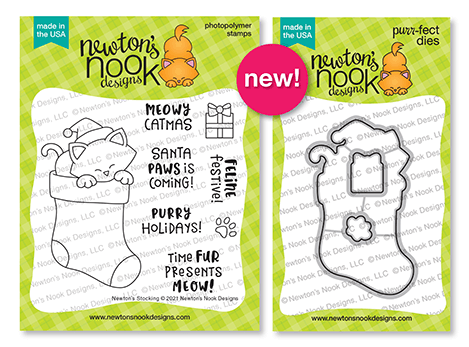
Newton’s Stocking stamps and dies
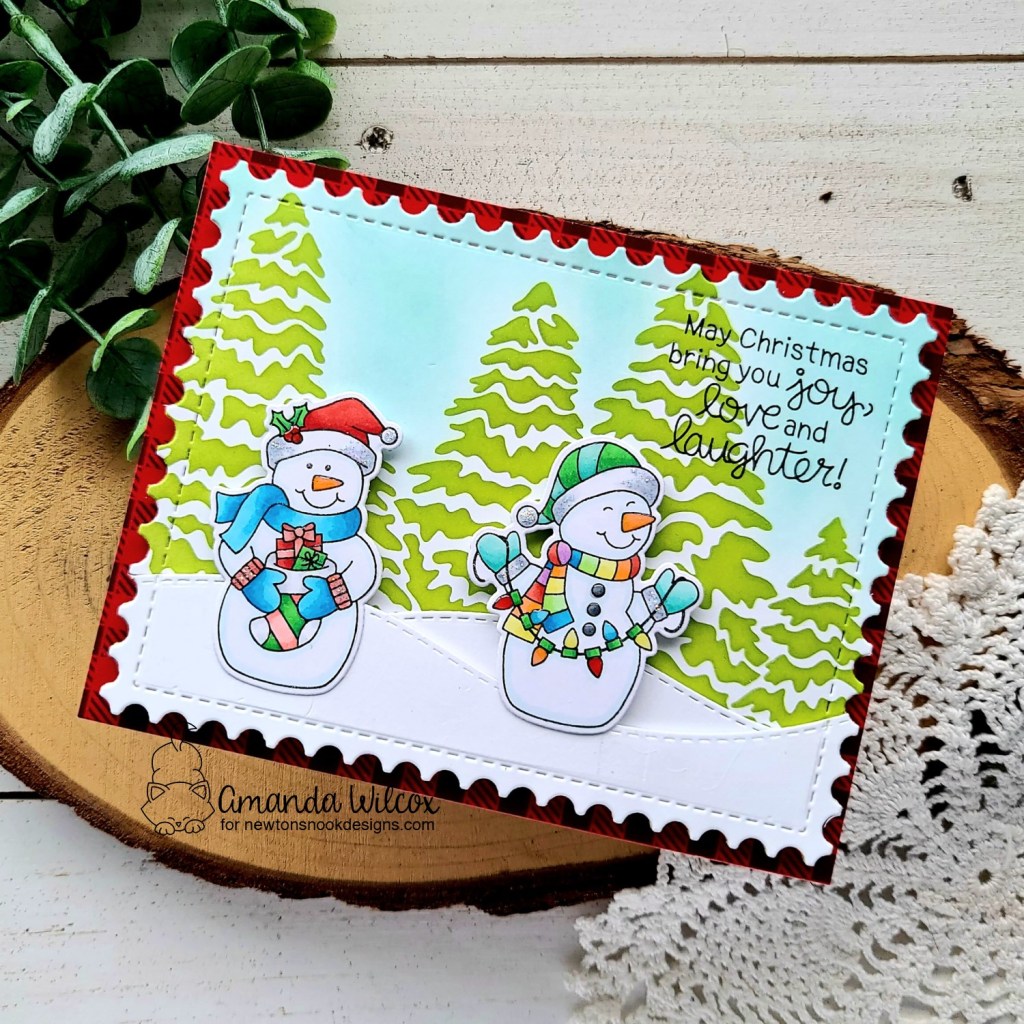
Snow Much Cheer stamps and dies
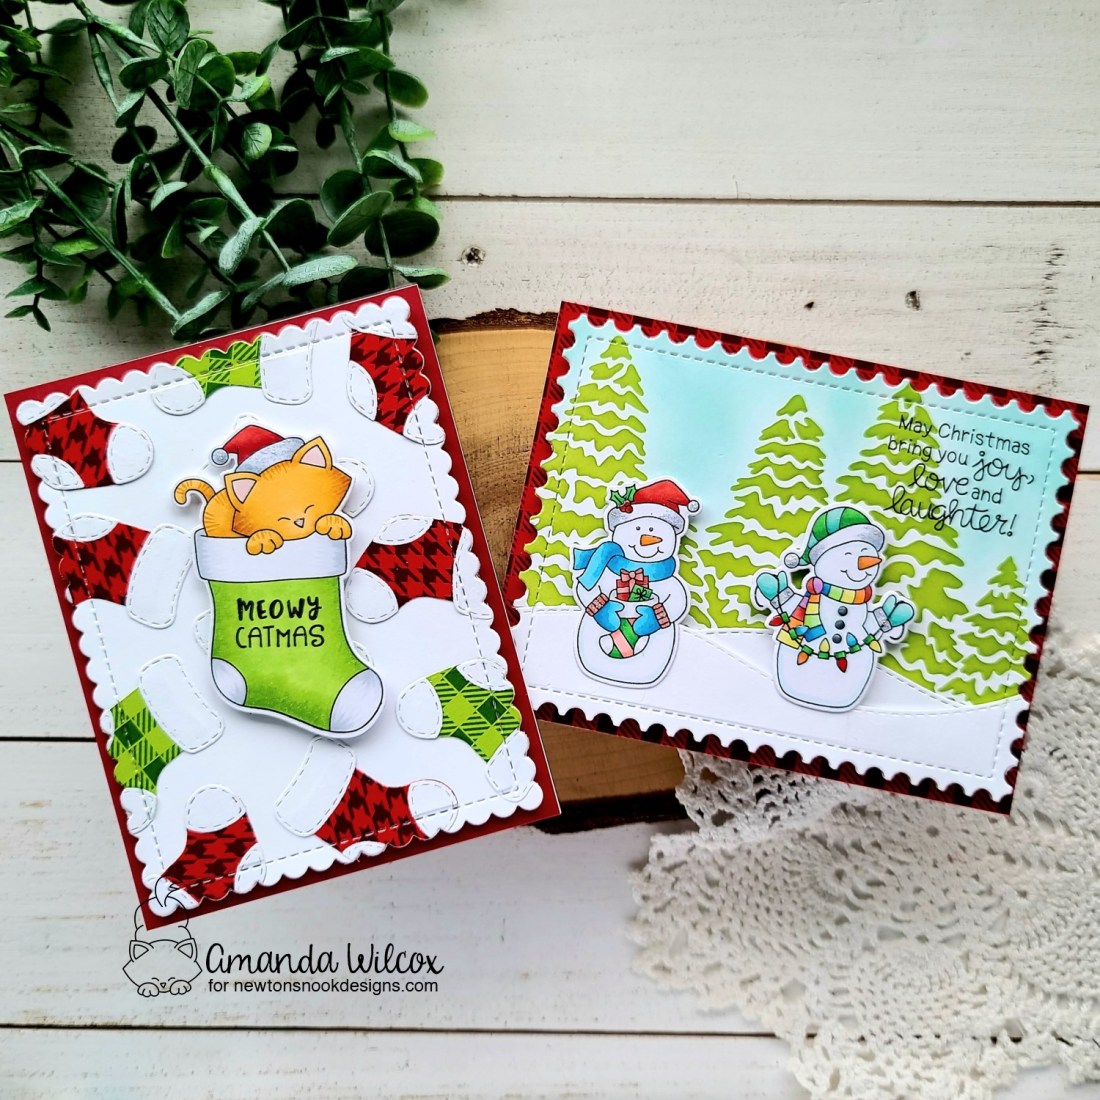
Aren’t these just the most adorable goodies to kick off the week with?!? I’m using the amazing new paper pad throughout the week so keep an eye out for fun ways to use these great patterns! First off, I’ve got a sweet card using Snow Much Cheer.
I stamped and colored the images with my copic markers, then used the coordinating dies to cut them out. For the background of my scene, I inked up the Evergreens stencil and die cut a couple of snow drifts using the Land Borders dies. Then I layered everything together and cut it out with the largest Framework die so the edges lined up correctly.
I cut a piece of gingham paper from the pad and adhered it to a card base before popping up the background scene with foam tape. I adhered the back snow drift with liquid glue and popped the front one up as well. Then I used a combination of liquid glue and foam squares to add my snowmen. Last, I place the card in my MISTI and stamped the sentiment on the top right corner of the scene.
Moving on to finishing touches, I added some glossy accents and unicorn stickles to both of the snowmen. Aren’t they snow much fun!?! I love this new set!
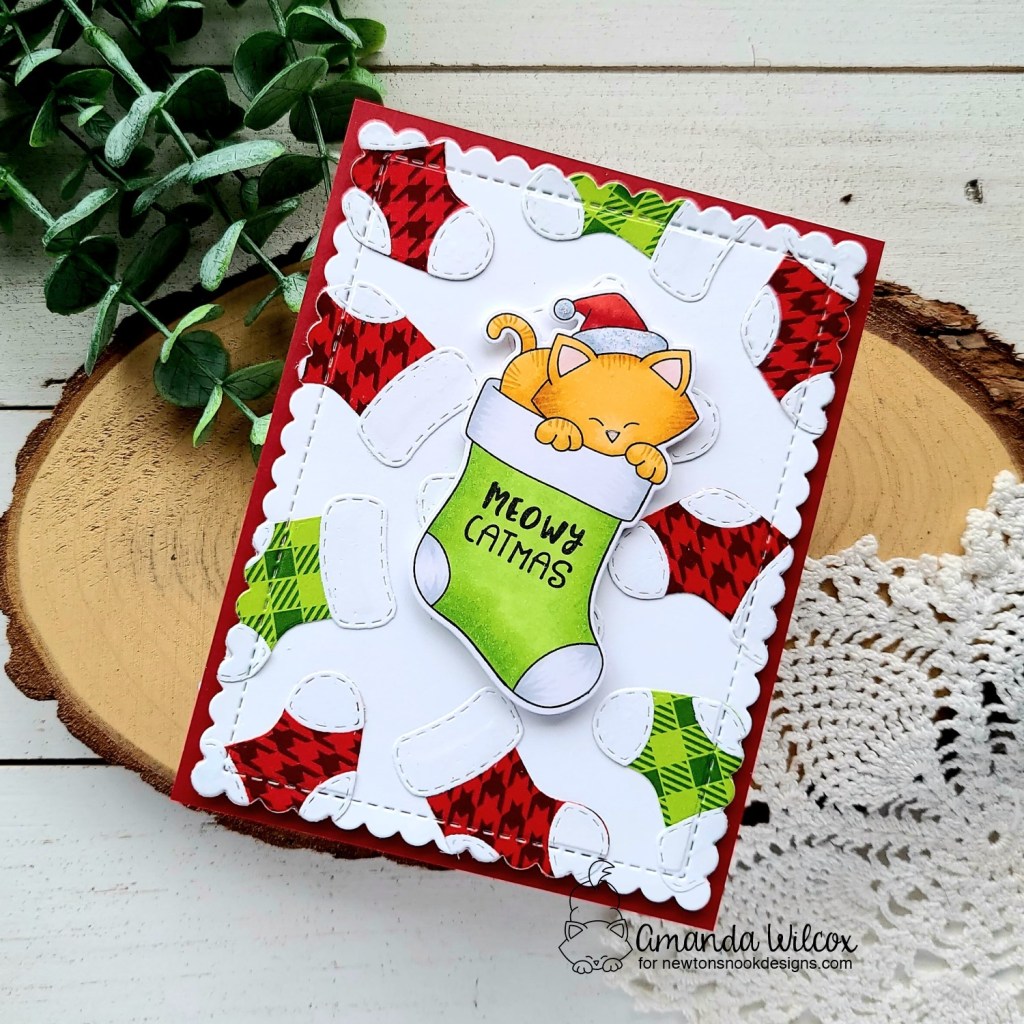
Next up, Newton’s Stocking is such a fun set! I love how the sentiments can fit inside the stocking if you want or they can be used separately too! Options are always fun!
I used the Stylish Stockings die set and the new paper pad to create some fun red and green stockings for my background. After adding the stockings to a white panel I used the largest Frames & Flags die to cut the panel out. Next, I stamped and colored my image with copic markers. Once it was colored I stamped a sentiment from the set inside the stocking and used the coordinating die to cut it out.
I cut a piece of red cardstock and added it to a white card base before popping the background panel up with foam tape and then popping Newton up again.
For finishing touches on this fun card, I added glossy accents to Newton’s nose and unicorn stickles to his hat.
Would you like to win the “Snow Much Cheer” or the “Newton’s Stocking” Stamp Set? We will choose ONE lucky winner for each stamp set!
Here’s how to win: Comment on the NND blog and Design Team blogs (see list below)! Thewinner will be chosen at random from the collective reveal posts. Make sure to check out each of their blogs and comment for your chance to win. You will not know which blog has been chosen so the more you comment on the better your chances are of winning! You have until Thursday October 14th at 9pm ET to comment — winners will be announced on the blog post on Friday, October 15th.
Check out all the awesome Design Team Blogs below to enter:
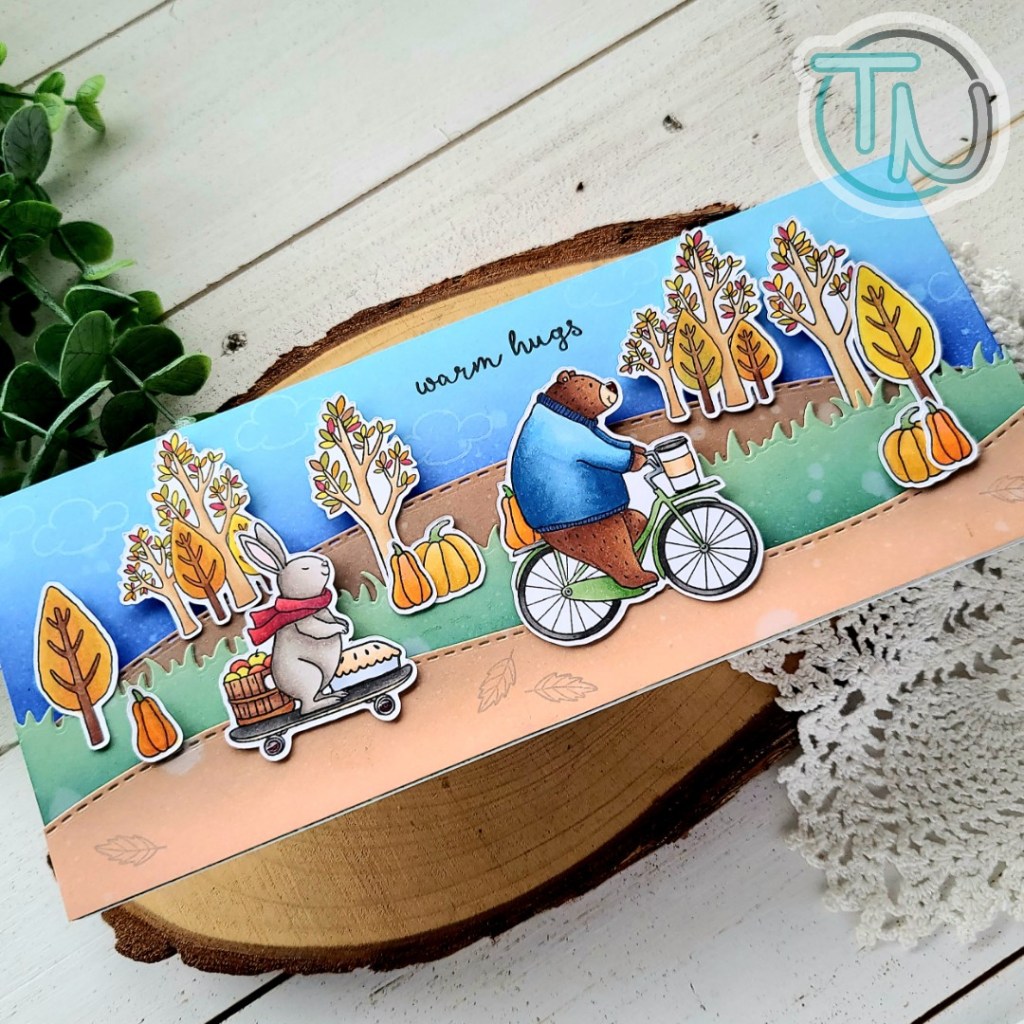
Hey friends! I am SO EXCITED to be apart of the Jane’s Doodles release hop for the adorable Warm Hugs set. Today I have a fun slimline card to share with you for a little inspiration.
I wasn’t sure if I was going to create a slimline card or an A2 size card with a tag so I just started by stamping a bunch of the images from the set. I did a little masking to add things to the bike and skateboard with those cute critters! I colored them all with my copic markers and used the scan-n-cut to cut them all out.
After playing with the images a bit I obviously landed on a slimline card. So the next step was inking up my background layers. The sky is blueprint sketch and tumbled glass. The dirt mound is gathered twigs, the grass is evergreen bough and shabby shutters, while the front dirt path is tea dye and gathered twigs. After inking the panels I used Trinity Stamps slimline dies to cut the borders.
I adhered dirt mound with foam tape, then the grass to that with liquid glue. Finally I added the front dirt road with another layer of foam tape. All of the images were then adhered with a combination of foam squares and liquid adhesive. To add little details to the sky and ground, I pulled out Sky’s the Limit and used a cloud with white pigment ink in the sky. Then I came in with a leaf from Warm Hugs and stamped some in brown on the ground.
I popped the whole card in my MISTI and stamped a sentiment in an open area in the sky and moved on to finishing touches. I kept those simple for this card because the scene is busy. I used glossy accents on the critter noses, pumpkin stems and various other small parts of the images.
GIVEAWAY To enter, leave a comment on the stops of the hop. The winner will be able to choose a stamp set of their choice. Winner announced on Monday, October 11.
SALE Jane’s Doodles is having a sale to celebrate the new release. 25% off the entire store, no code needed!
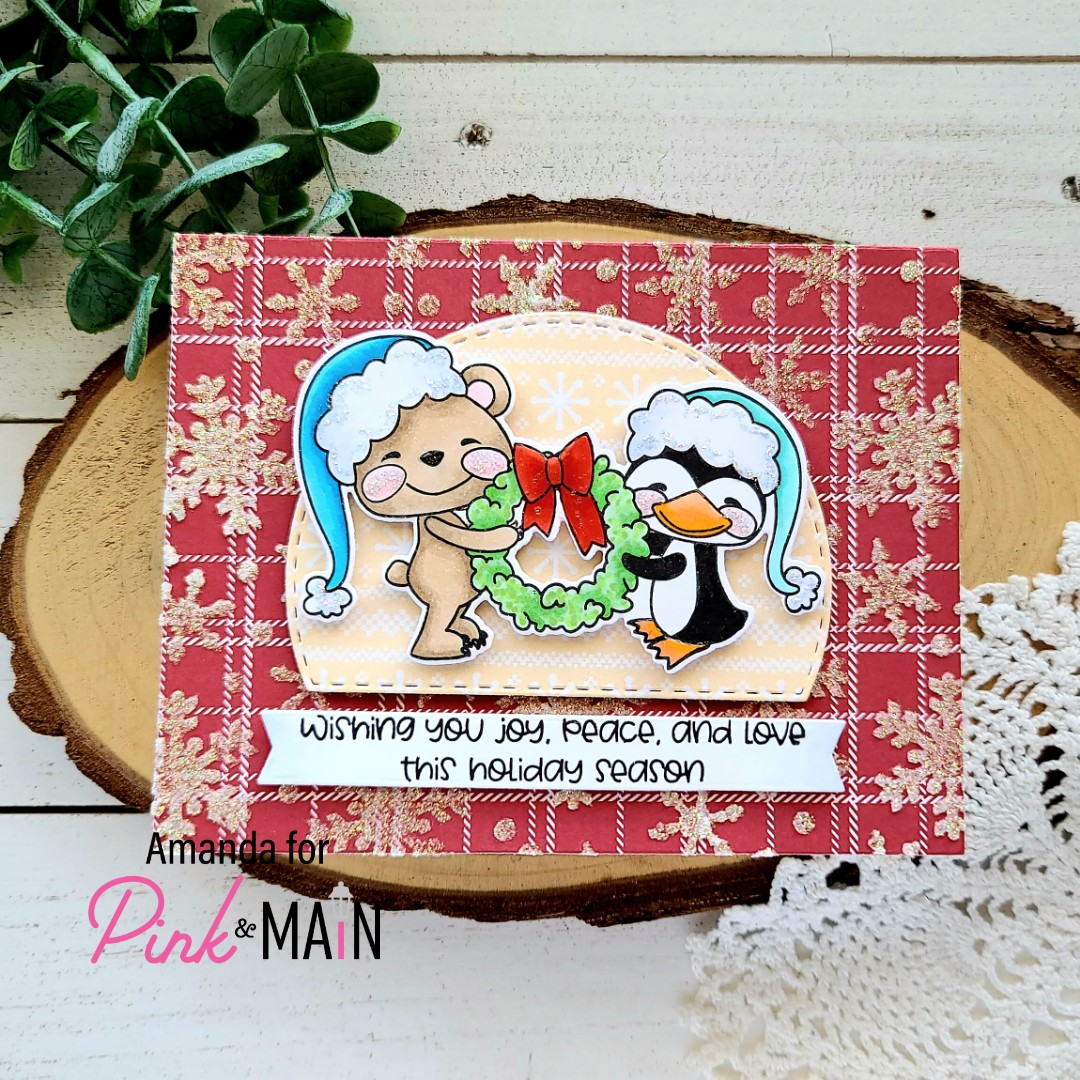
Happy Friday friends! I’m over on the Pink & Main blog today with some more Christmas fun from the September release. The Polly and Pete series are just too cute for me to leave alone. I love them!
I had a layout in mind so I stamped my cute image and colored it with my copic markers. Then I used the coordinating dies to cut it out. I chose a large sentiment strip die that would fit the sentiment, cut the banner and then stamped the sentiment. Because this is a little squishy it gave me more control over where my stamping landed on the banner.
Next I chose 2 patterned papers from the Homespun Holiday paper pack and cut one with the largest layered rectangle dies and the other from the largest double stitched dome dies. I layered the new blizzard stencil over the rectangle and spread iridescent glitz glitter gel through it. The snowflakes over the plaid just make me so happy! I love them together!
Once the panel was dry I adhered it to a white card base with EZ Squeeze liquid adhesive. Then I popped the dome and sentiment banner up with foam squares and then did the same with my image.
For finishing touches I added glossy accents to the bow, bear nose, penguin beak and feet; and unicorn stickles to their hats and cheeks.
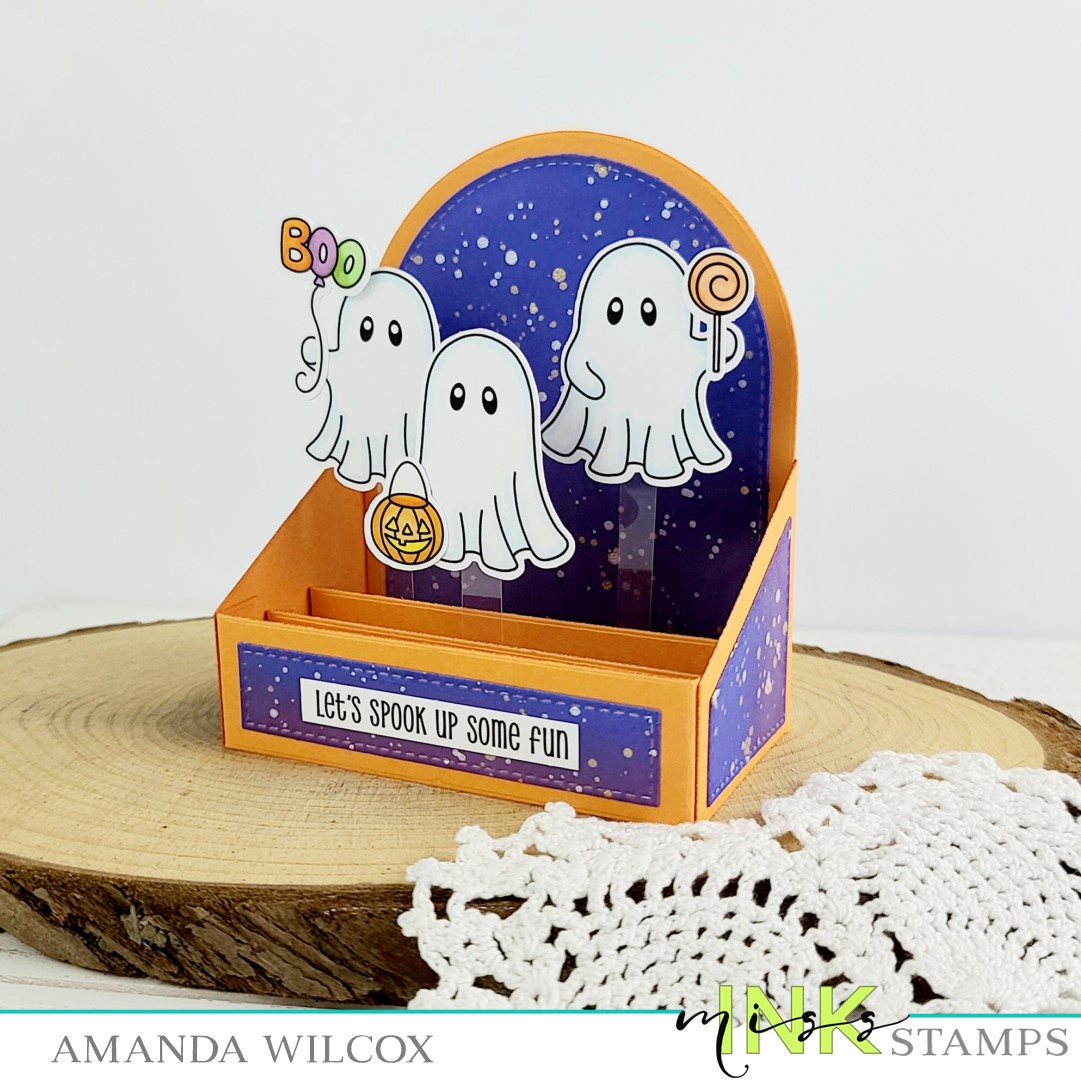
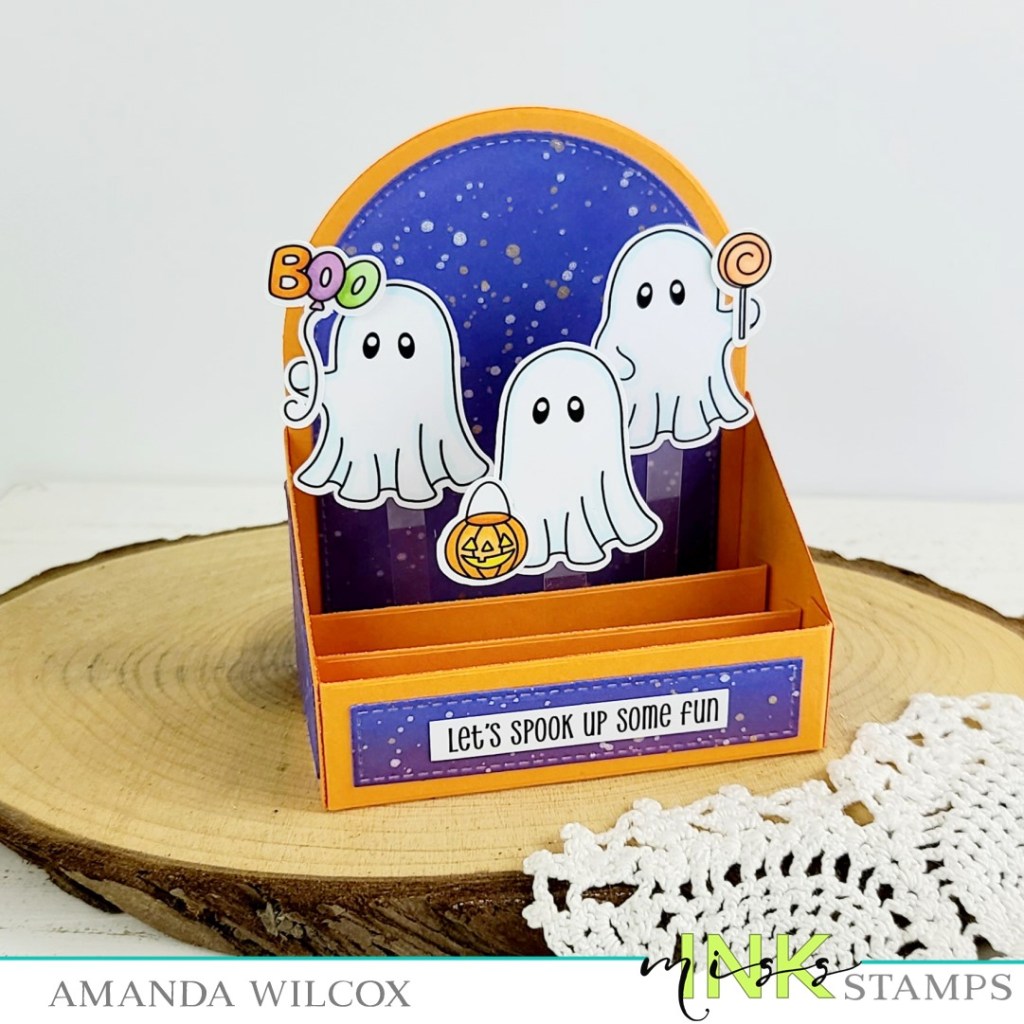
Thanks so much for stopping by today! I have a REALLY FUN box card featuring some Miss Ink Stamps ghosties that are just too cute for words! This set is adorable and the sentiments take it over the top!
To create my card, I stamped images from Boo Sheet and colored them with my copics. I used the scan-n-cut to cut them all out and adhered the supporting small images to each ghost with liquid adhesive.
Next, I cut the pieces of my box card with orange cardstock and the decorative panels from white cardstock. I inked up all the decorative panels with seedless preserves and blueprint sketch distress oxide inks. I spritzed them with water and flicked pearl and gold watercolor on them too. After they were dry, I used scrappy tape to adhere the box together.
I also used scrappy tape to add acetate strips to my ghosts and then adhere them to the different supports going across the inside of the box. I stamped a sentiment and trimmed it into a strip adhering it to the front of the box with liquid adhesive.
I didn’t like the texture my cutting plates left on the back of my box card so I cut another backing piece from white cardstock and adhered it with liquid glue so I have a clean white space on the back to write a fun message to the recipient too!
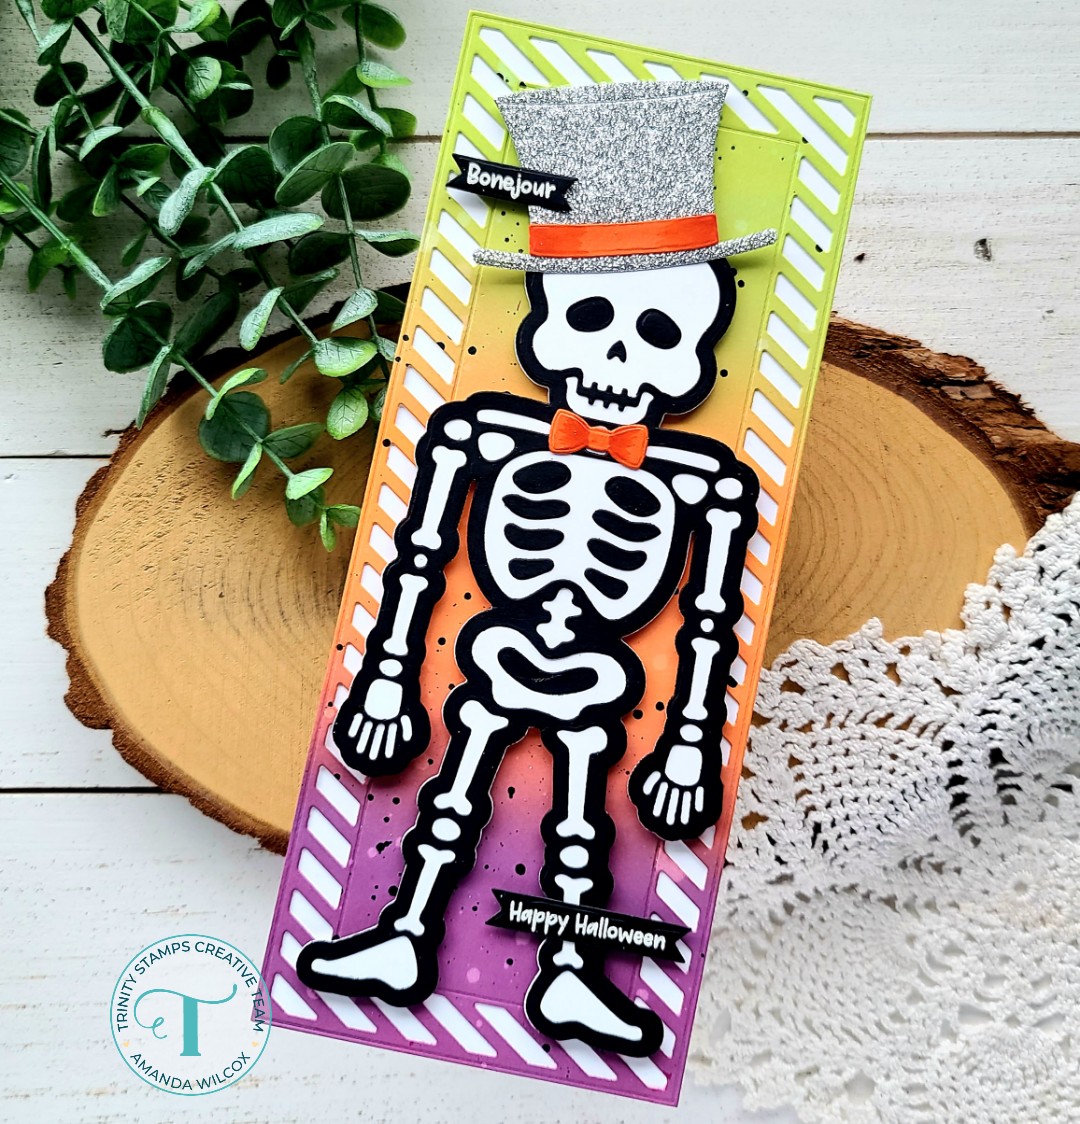
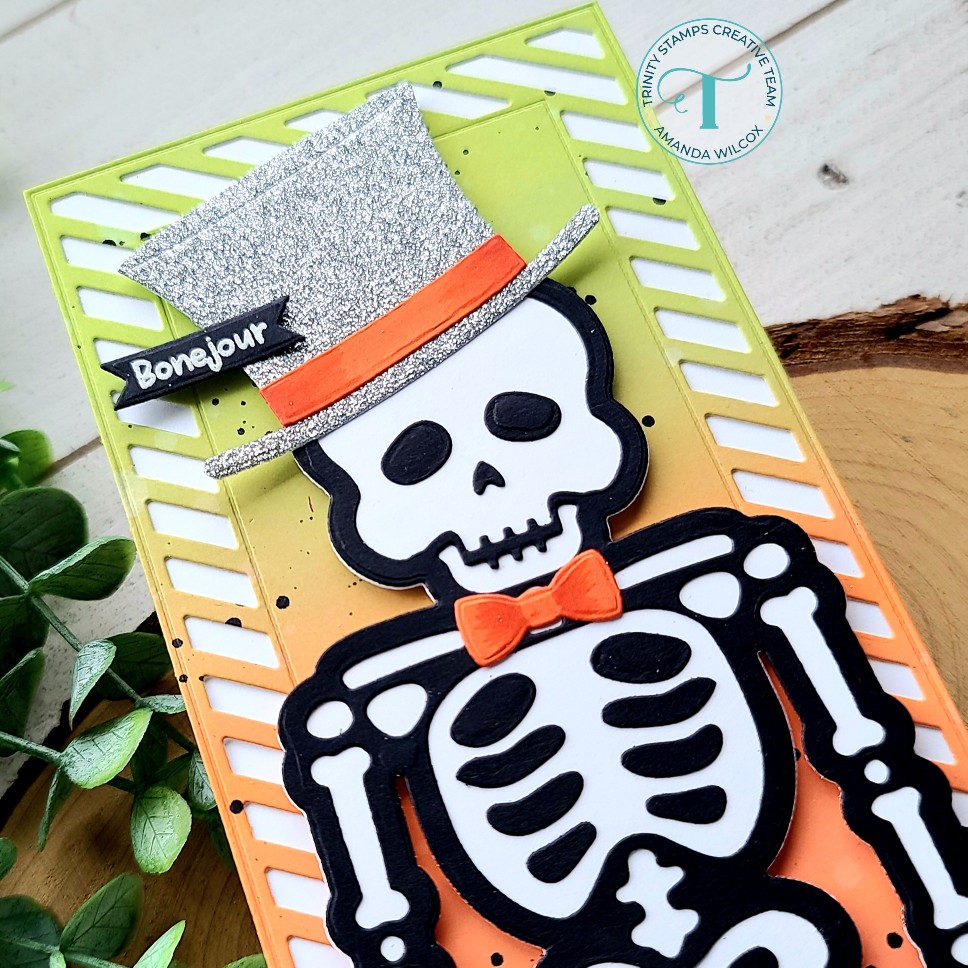
Welcome everyone! Thanks for stopping by. Today I have a SUPER snazzy slimline skelly to share with you. He’s so fun and I found a simpler way to use these awesome dies!
I started this card by playing around with the slimline skelly dies. I cut the base from black cardstock, thinking I would glue the white bones onto it. Then I had the idea to cut the bones from the black cardstock and cut another base layer from white and glue them together! Then all I had to do was inlay the pieces in the pelvis, ribcage and skull. So awesome!
Then I cut the hat from silver glitter cardstock, the band and bowtie from orange. Then I took YR09 and YR07 and gave the orange pieces a little shadow and depth.
Switching gears to the background, I inked up a panel with seedless preserves, twisted citron and carved pumpkin distress oxide inks. I spritzed the panel with water and flicked black paint on it. After it was dry, I die cut it with the slimline striped frame panel and adhered it to a white card base. I used liquid glue to adhere the band to the hat and then the hat and bowtie to the skelly.
I added foam tape to my skeleton and popped him in place. For the sentiment, I chose 2 from the Shake Your Bones stamp set and heat embossed them in white on black cardstock. Then I die cut them with a banner die from the 4-bar card die set. and added them with foam strips and liquid glue.
This card is so much fun and I really can’t wait to share it with a special little guy who I know will just love it!