13 Days of Tricks and Treats – Day 13

Thank you so much for joining me on our finale of the 13 Days of Tricks and Treats! It’s been a blast to create all of these, so much fun to hand them out and I sincerely hope that you have enjoyed following along.

Today’s final treat box was a total collaboration between my daughter and I. I chose the box and she helped with the decorations and stamps. We had a blast!

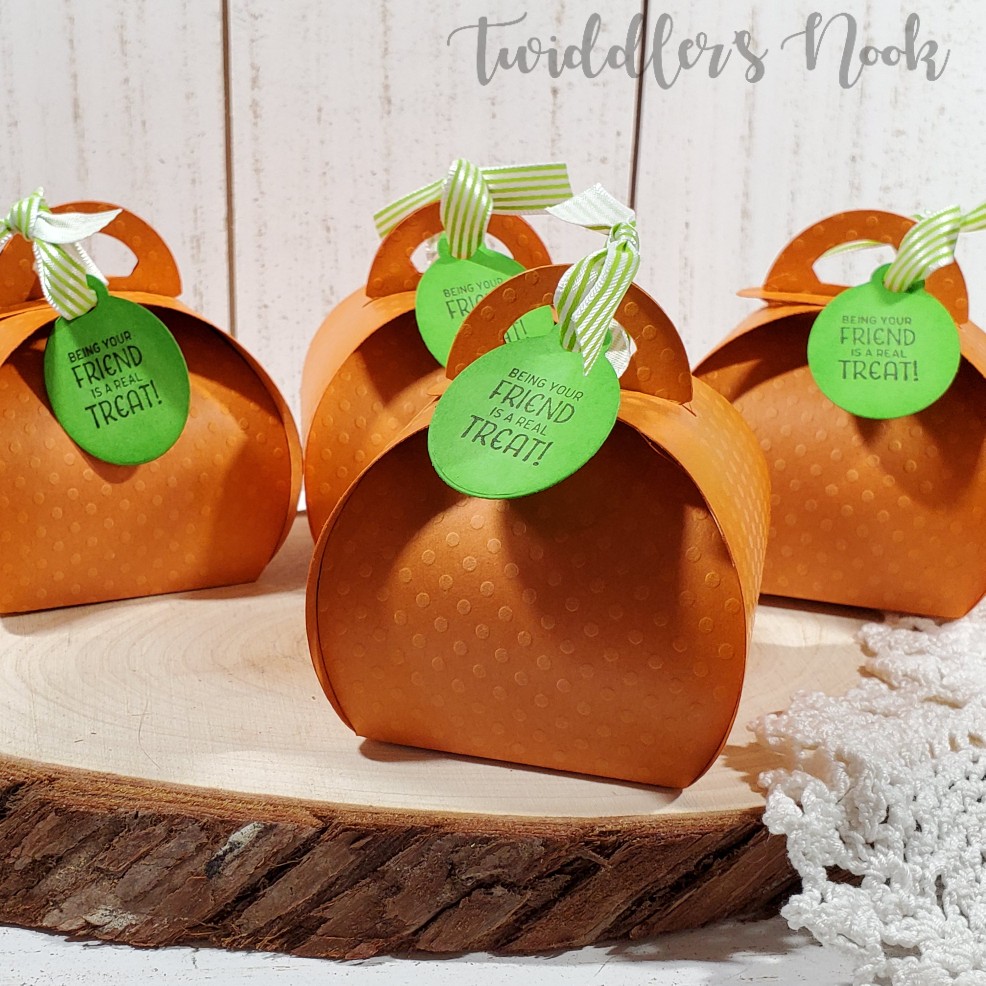
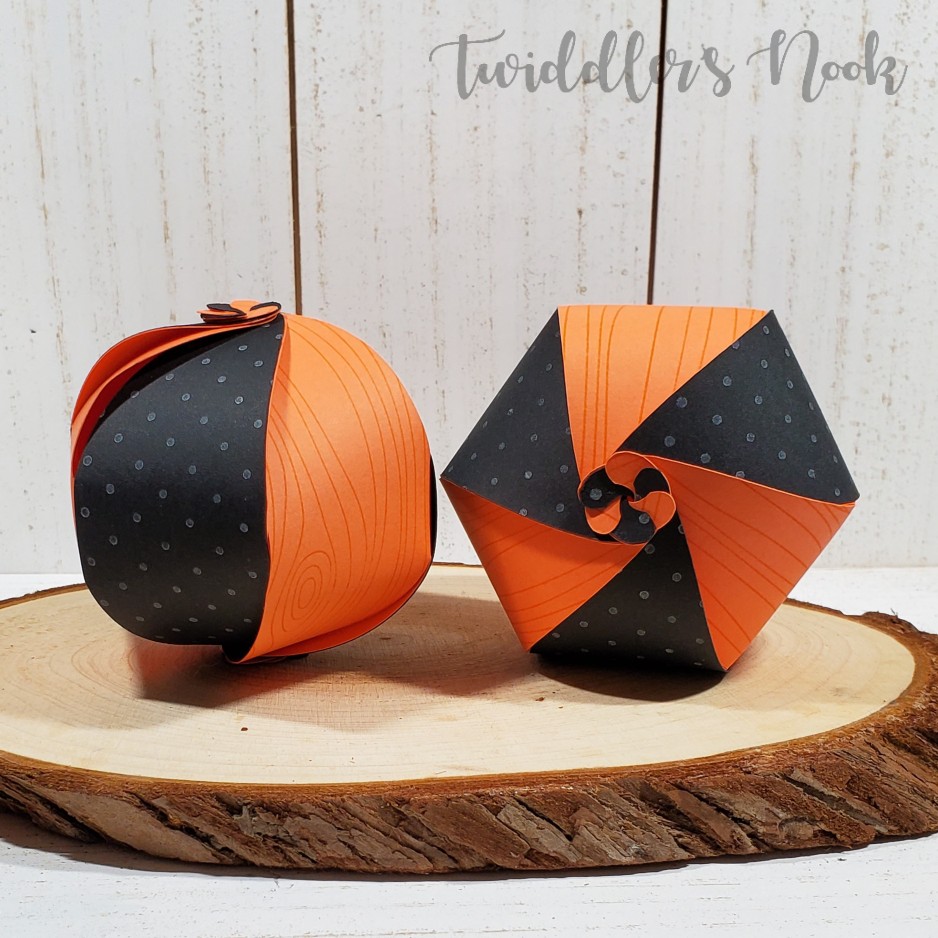
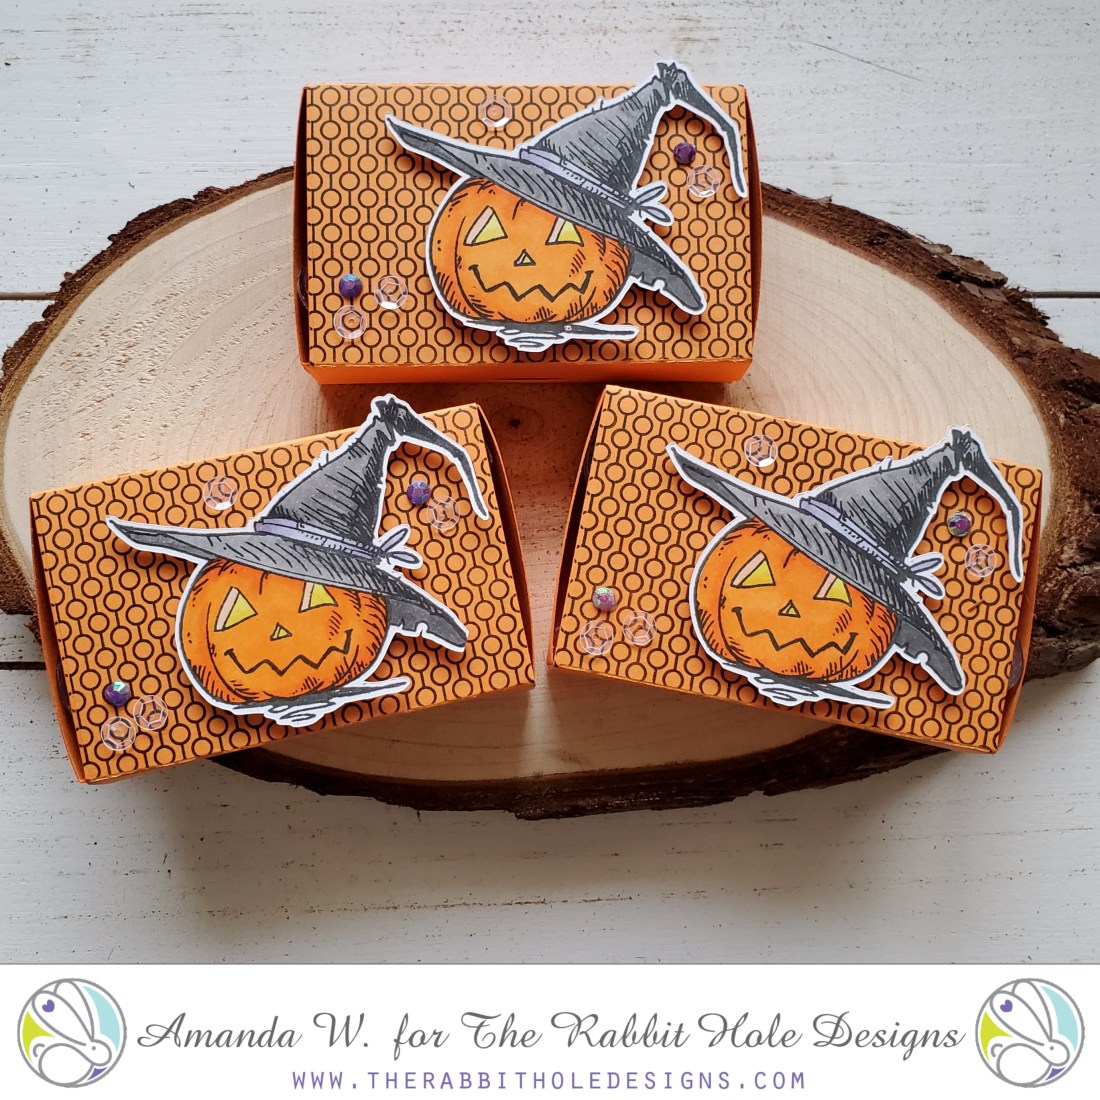
The box die is one I was gifted a while back and is from Creative Memories. It is meant to hold a gift card, which is what we are doing with a couple of them.

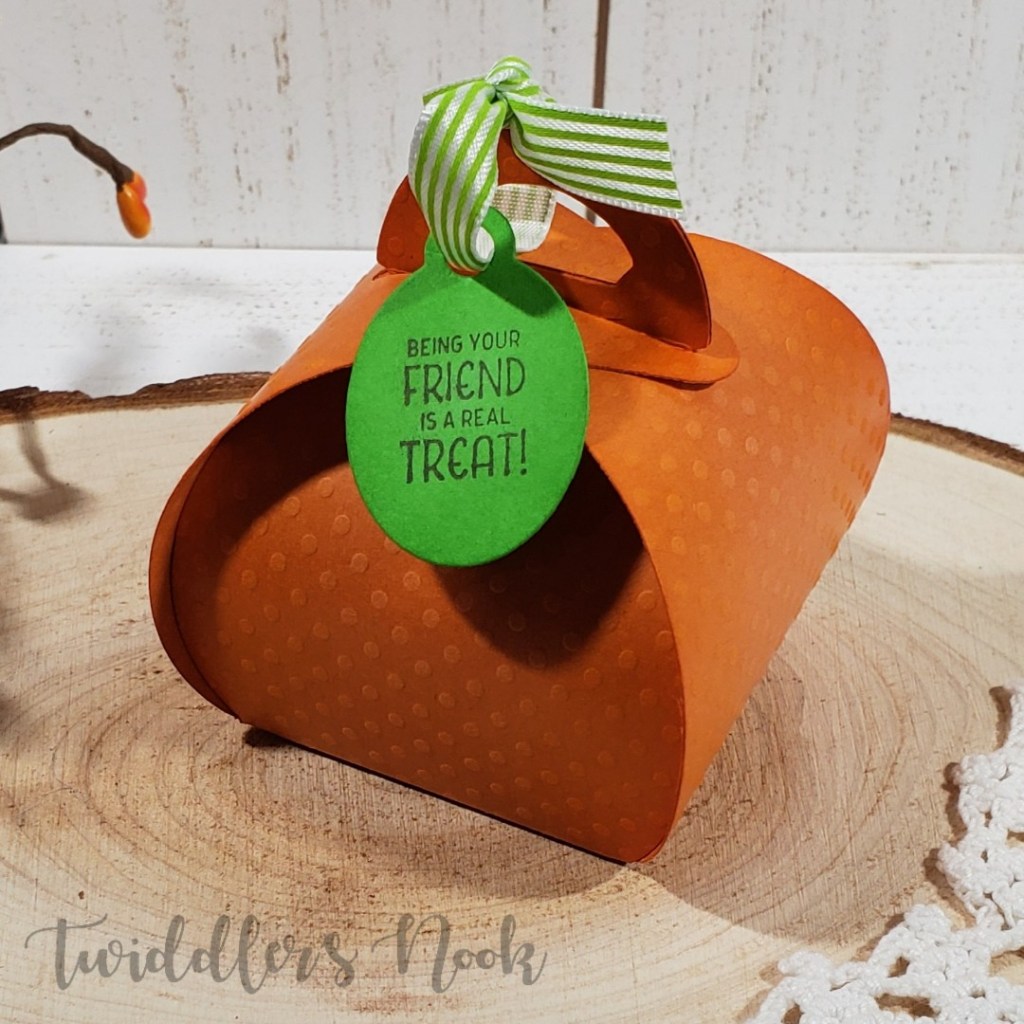
I used a background stamp on just the top portion that you see. Stamped, colored and cut out my Gourd-geous pumpkin from The Rabbit Hole Designs and then popped it up on the box top. We finished these off with clear sequins and purple gem stones and a little Wink of Stella glitter brush pen on the glowing pumpkin eyes.

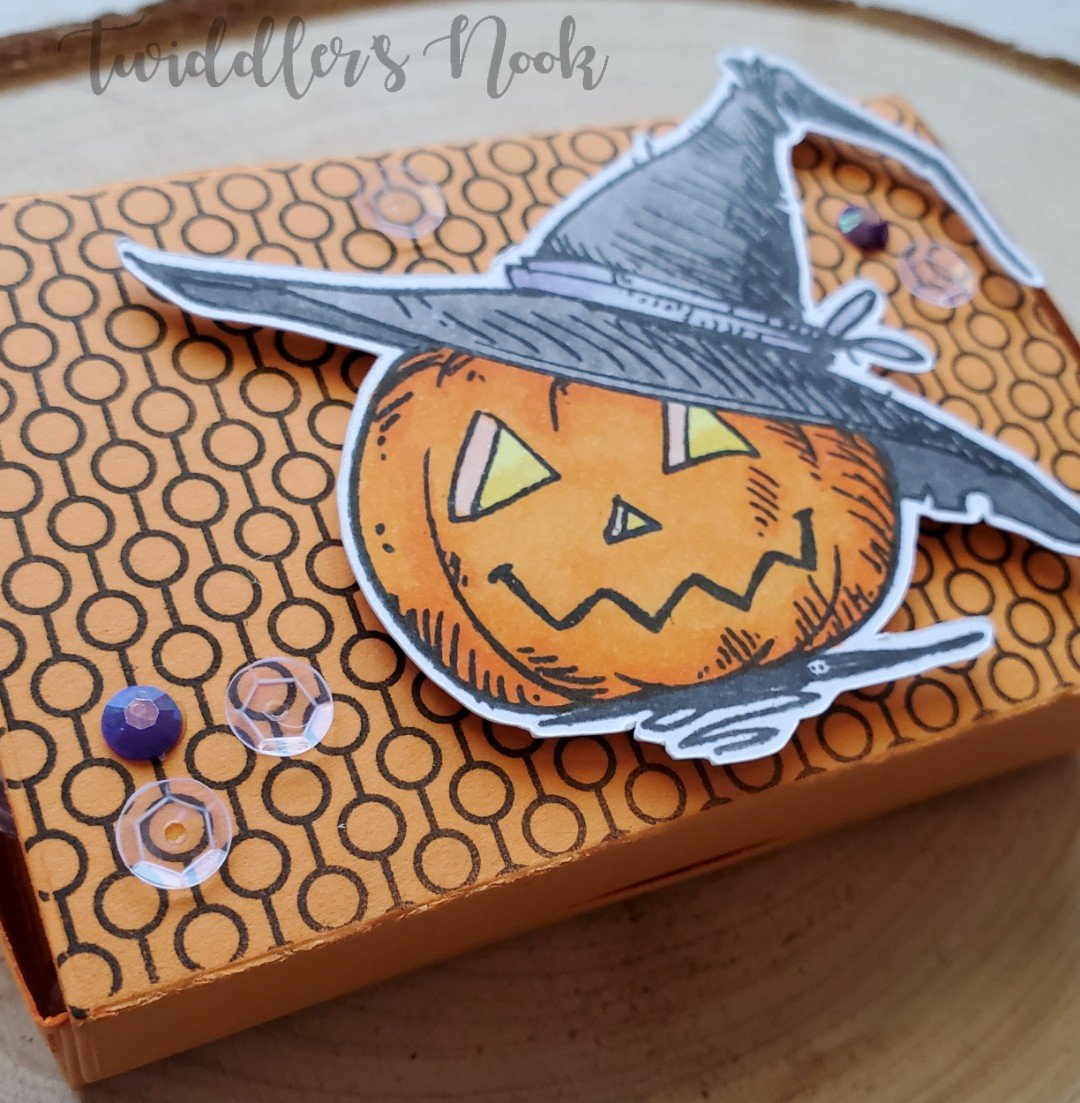
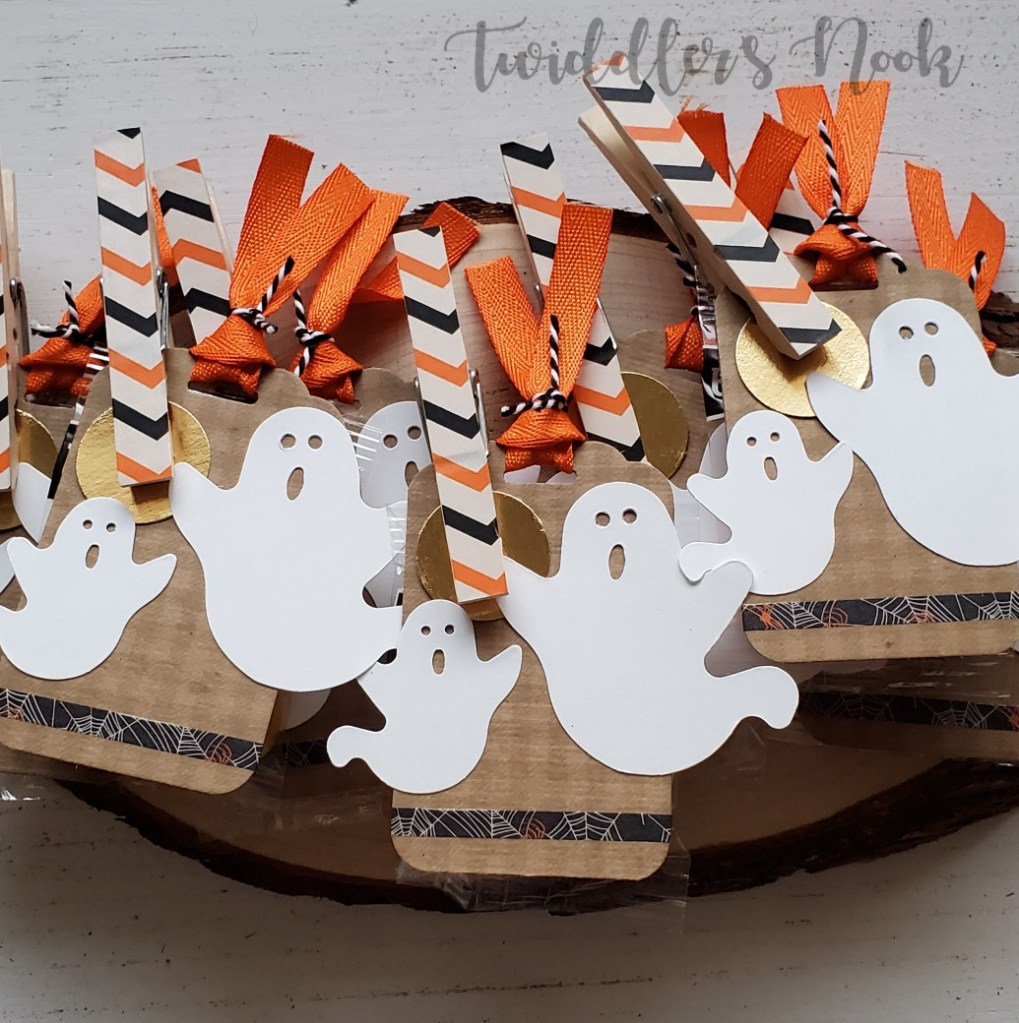
Here’s a closer look. We managed to fit small Halloween toys in a couple of these going to kids and then gift cards in a couple of others going to my daughter’s teachers for a little fall pick me up.

This is the end of our fun 13 Days of Tricks and Treats series. I really hope you enjoyed it and got a little inspiration along the way.

If you don’t mind, I’d love for you to leave a comment with your favorite one and if you plan to make any treats to hand out this year.

Thank you so much for stopping by. I appreciate you sharing your time with me. Have a fabulous day!

13 Days of Tricks and Treats – Day 12

Thanks for stopping by. We’re keeping the kids on their toes and dishing another trick their way today. Jumping spiders! Okay, they won’t really jump out of the boxes but they are toy spiders that leap up when the suction cup gives way. Silly and fun.

The die set I used for these is Stampin’ Up’s Curvy Treat Box. I cut them out of a polka dot embossed cardstock and sponged the edges with spiced marmalade distress ink. Then cut the tags from bright green (My daughter’s request, she really loves those eye-popping colors. I think she was meant to be raised in the 80s.) but I inked the edges of them with mowed lawn distress ink. We assembled the boxes, inserting the spiders and then tied the tags on with green ribbon from my stash.

The sentiment we chose was from Stampin’ Up’s Seasonal Chums stamp set which she thought was hilarious given what’s inside of the boxes.

I appreciate you sharing your time with me. Have a fabulous day!

13 Days of Tricks and Treats – Day 11

We’re closing in on the end of our tricking and treating adventures. Just a few days left. I hope you’ll continue to join me for these last few.

I’m absolutely in love with how today’s project turned out. In all actuality, there are about 7 shown here but I’ll be making close to 50 of them to hand out to various people in our lives. They are so fun and were really quick to come together.

Spooky right?!? Ha! Well, here’s how I made them…

Starting with reaching WAAAAAAAAAAAAAAAYYYYYYYYY back into my stash. The ghosts are a die from the original Sizzix series that showed up in craft stores almost 20 years ago. Yes, I still have them. No I will probably never let them go because I love them. 🙂 Also used, from pretty deep into my stash, was the scalloped tag topper punch from Stampin’ Up.

The general idea was to stamp the Lawn Fawn gingham backdrop stamp on 2×3 inch tagboard (quite literally the cardboard backing from your notepads; I keep them), punch with the tag topper and corner rounder. Die cut 1″ circles from gold cardstock and glue them down. Then adhere the ghosts and add some fun spiderweb washi tape to the bottom. I threaded some orange grosgrain ribbon from my stash and then tied it with black and white baker’s twine. Last, I added washi tape to one side of a clothespin and used it to clip the tag to a mini bag of candy corn.

Here’s a less cluttered look at just one of these fun treat tags! Isn’t it so fun??? There are always so many ideas that lead to other ideas and these have my mind swirling.

I think it would be great to write a message on the back of the tag, use a simple to and from stamp or just leave it blank. In the past I have glued strong magnets to the back of clothespins like these too. That would make for an extra gift with your gift!

I hope you’re enjoying the fun treat giving ideas and will join me for the last few. Be sure to subscribe so you don’t miss any.

I appreciate you sharing your time with me. Have a fabulous day!

13 Days of Tricks and Treats – Day 10

Welcome back everyone! Today I’m sharing a trick, of sorts. I’m using the Stampin’ Up Mini Treat Bag die set to create thin pocket-type bags. Over the years I have filled these with everything from gift cards to instant soup packets and hot cocoa. Today these kiddos are getting really corny Halloween jokes taped to apple cider packets for a trick to go with their treat.

The die set gives you everything you need to make super fun, complete bags. I almost always use double-sided cardstock so the inside part that shows up top is just as pretty as the rest. For these I used three pieces of double-sided cardstock in various ways to mix and match the patterns.

The dies I used in the set were the star, star border, bow and washi tape along with the actual treat bag. They are all just layered together with liquid glue and then I placed acrylic blocks on them while I cooked dinner to make sure they dried really well.

I love the added bling of the gold cardstock for the bows. Just a little shine among all of the drab is super fun.

Also, the washi tape pieces were die cut from regular cardstock and ink blended with black soot distress ink because they were just a little too bright for the rest of the design. The “trick or treat” sentiment is from Stampin’ Up Seasonal Chums.

I hope you enjoyed today’s trick. Come back tomorrow for more fun Halloween ideas!

I appreciate you sharing your time with me. Have a fabulous day!

13 Days of Tricks and Treats – Day 9

Welcome to Day 9 of our Tricks and Treats series! Today’s boxes were so much fun to make! I actually ended up making 8 of these and we filled them with a variety of fun things and gave them to different kiddos in our lives.

One extra thing I love about this treat box is that it can hold a gift card with some little candies perfectly. Such a fun way to spruce up the typical gift card holder. I’ve also been known to squish rolled up socks in these for a total surprise to the recipient.

Now that I’ve given you a few ideas what to fill these with, let’s get on with the show.

All of the products I used today are Lawn Fawn except the paper (It’s just from my stash.). I used the scalloped treat box, spooky fence, stitched hillside borders, pick of the patch and jump for joy.

For these boxes, I figured out my general layout and then did them assembly line style – die cut all the pieces; then stamped, colored and die cut the images; then assembled them all. Pretty easy and I got all 8 of them made in an evening.

Here’s a closer look at one of them all put together. They are so fun and I’m sure the kids will have a blast finding what’s inside.

Do you give treat holders out for Halloween? What sort of goodies do you give? Leave a comment below and tell me about it. I’d love to hear.

I appreciate you sharing your time with me. Have a fabulous day!

13 Days of Tricks and Treats – Day 8

Welcome back! Today we’ve got a super cute mini milk carton treat holder to share. To make these cuties I used an older die from Stampin’ Up but many other companies have milk carton style dies available.

To whip these up I just die cut the carton, stamped the starry night background stamp from Lawn Fawn and then assembled the boxes with scrappy tape. Next I stamped, colored and die cut my Happy Howloween pups and accessories and glued them directly to the milk carton. You can glue the carton tops shut but I found over the years that the mini clothespin is super cute and it allows you to open the whole top to get treats in and out so the boxes don’t get destroyed in the process.

Here’s another look with the cartons open. You can see that the clothespin is offset just a bit so it stays on when you open and close the carton. I put some chocolate balls inside that are wrapped in foil to look like eyeballs. It made me laugh to look inside and have something looking out at me.

I hope you’re enjoying all of these treat ideas and find some inspiration in at least one of them.

Thank you for sharing your time with me. I appreciate it. Have a fabulous day!

13 Days of Tricks and Treats – Day 7

I’m silly excited to share a trick with you today! I didn’t want to have too many since these were going to kids but what’s the fun if it’s all treats???

We made these super easy and adorable little boxes and squished rubber snakes in each one. Here is the link to the original post where I got my instructions. She has a video which is always helpful as well.

For mine I cut the box out of purple cardstock and simply took the bats from The Rabbit Hole Designs Hex Yeah stamp set and stamped them all over. I punched the wholes, adhered them with Scrappy Tape and tied them up with orange ribbon.

I did contemplate a sentiment strip somewhere on it but my daughter was so excited with the unassuming simplicity that she convinced me to leave them alone. She’s so excited to share these at school. I think she’s honestly more excited to share the tricks than the treats. She must be my child!

Here’s another look from above so you can see the dimension that you end up with.

I’ve made these numerous times in the past and put whatever candy suits me at the time. There is plenty of room for a few Hershey’s kisses or even the mini candy bars.

I appreciate you sharing your time with me. Have a faboooolous day!

13 Days of Tricks and Treats – Day 6

Thanks for stopping by today. I’m excited to share this project because my husband and I created it together. I found a pattern on Pinterest for this cool ball-type treat holder but it was going to require a lot of tracing and hand cutting…not my favorite. So, together we (he did most of the work) created a cut file for my Cricut so I could let the machine do all the work! It’s fantastic!

These cool ball treat holders require no adhesive to keep them together and are easy to put together and take apart as many times as you want. If you created them for decorations you could take them apart and store them flat too!

I cut the main file out of orange cardstock and then cut one of the sections apart and used 3 of those per ball out of black. Then I used a couple of background stamps I had and stamped texture to them. The black has white polka dots and the orange has orange woodgrain. I glued the black to the orange panels and just going in order hooked the ends around each other until they are all hooked and it’s closed. That’s that!

See when you gently squeeze the top and bottom, the open side shows itself which makes a great place to slide in tricks or treats. 😉 And also for the recipient to get them out without needing to open the whole ball.

These were fun to make and while I was at it I cut out a bundle of red, green and white ones for Christmas too! Stay tuned for those to be finished. I’m thinking some glitter stenciling for those.

I appreciate you sharing your time with me. Have a fabulous day!

13 Days of Tricks and Treats – Day 5

Welcome back! Today I’ve got a really fun treat holder for you and can be adapted for other candies and your toppers could be for any occasion! I’ve made these with cute apples on top for Teacher Appreciation Week before and filled them with Smarties. They were a total hit!

These treat bags are from Stampin’ Up but you can get them almost anywhere. They happened to hold 3 packages of Sixlets perfectly which I loved because of the colors being darker and bolder for fall.

For the topper, I die cut 2 Lawn Fawn stitched circles (next to the smallest) for each one and stamped a star background stamp in yellow ink for a little interest. I stamped, colored and die cut my bunnies from Critters in Costume. Then stamped, heat embossed and die cut the word bubble from the same set. The bunny and speech bubble are both popped up with foam squares. Finally, to seal them off I used Scrappy Tape on the back of both circles so they are adhered to each other and to the top of the bag.

These have inspired me to think Christmas and make another set filled with red and green M&Ms. I think that would be so cute! Don’t you?

I appreciate you sharing your time with me. Have a fabulous day!

13 Days of Tricks and Treats – Day 4

Thanks for stopping by again! We’re on day 4 and having so much fun already! Today is a really quick and easy idea that I love making tons of! It’s an origami fold that easily fits all kinds of treats or maybe even a gift card. You can also alter the size simply by making your starting square larger or smaller.

Look at those kiddos! They are seriously to die for!!! I’m going to link you to a great tutorial to make these cute little treat holders HERE. These cuties were made from a 6×6 piece of Doodlebug paper and then embellished with the coordinating Doodle-pops stickers.

Here’s a closer look without the candy in them. Still cute as ever! And who doesn’t have 6×6 pads of paper that would be perfect to use these on!

That black kitty is my absolute favorite! Remember, these are wonderful for Halloween but they would be equally is great for any holiday or party favors too. They are totally customizable depending on the paper you use and the decoration you put on the front.

Stop by tomorrow for more Halloween fun!

I appreciate you sharing your time with me. Have a faboolous day!