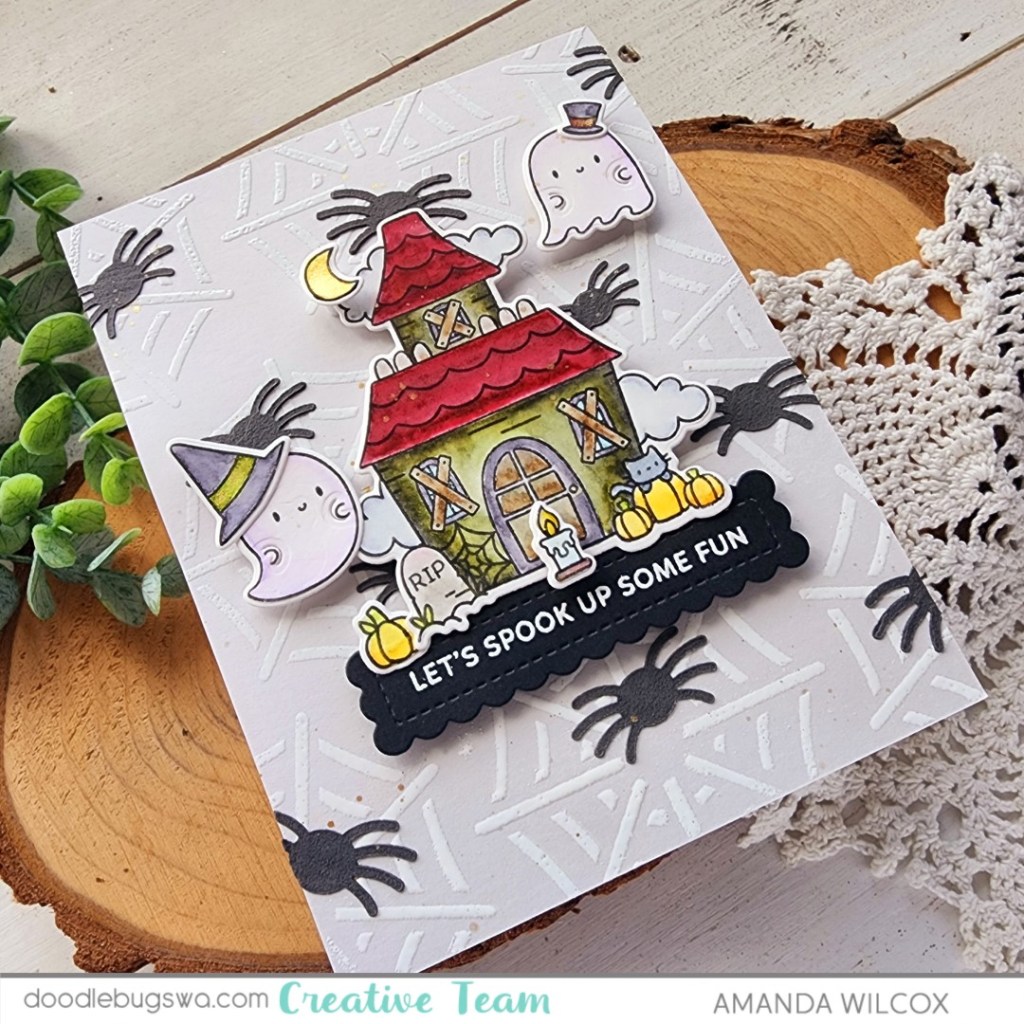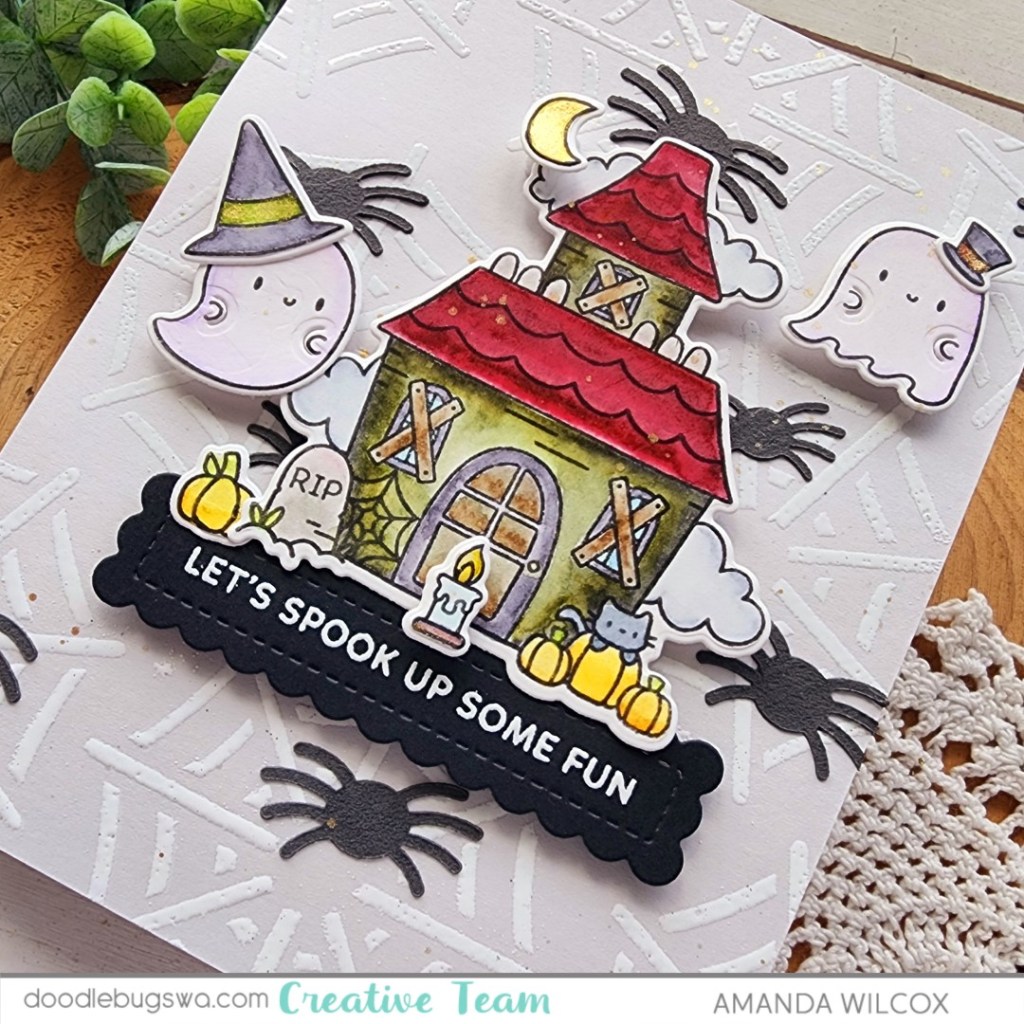
Welcome to another Mix it up Monday for the Doodlebugs blog! Today I’m playing with a few different die sets that were released during other times of the year but if you just change the color palette you use them with, it’s fun and easy to use them all year long.
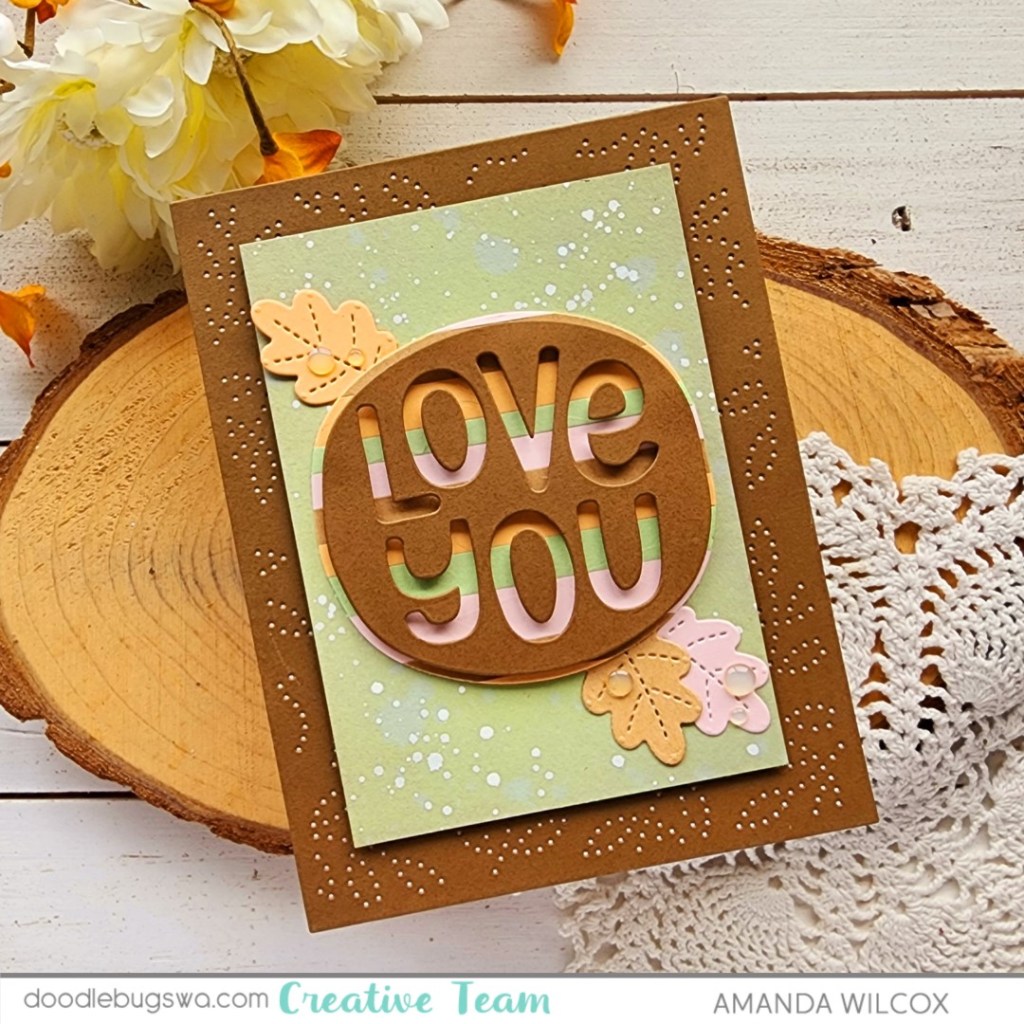
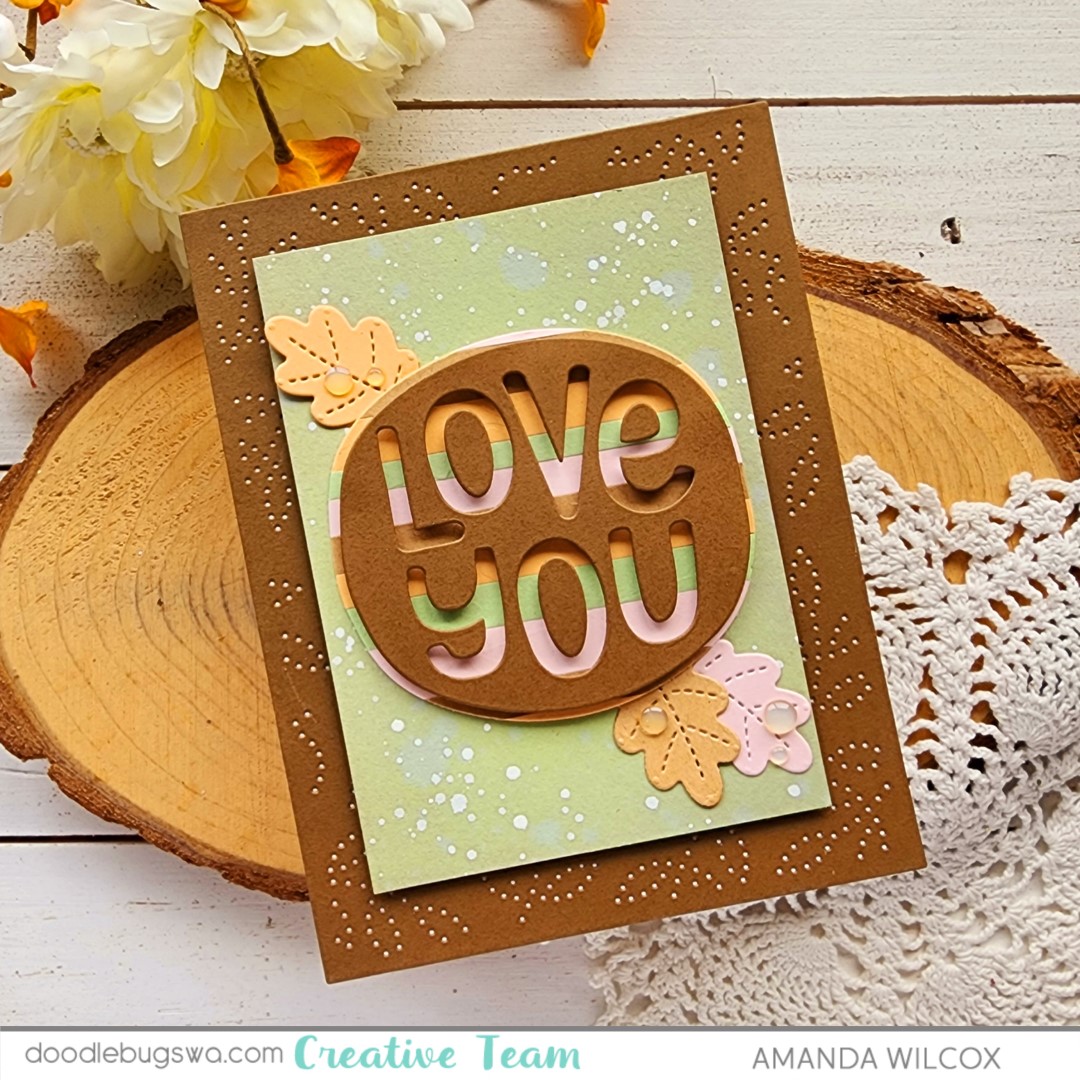
I started with this great Love You die from the Concord & 9th Markered Messages die set. I cut some strips from my chosen color palette. I was thinking soft fall vibes. I glued those to a piece of cardstock and cut the “shadow” circle from that stripes. Then I chose a chocolate cardstock from my stash to cut the word portion out. I used foam squares to adhere the two together.
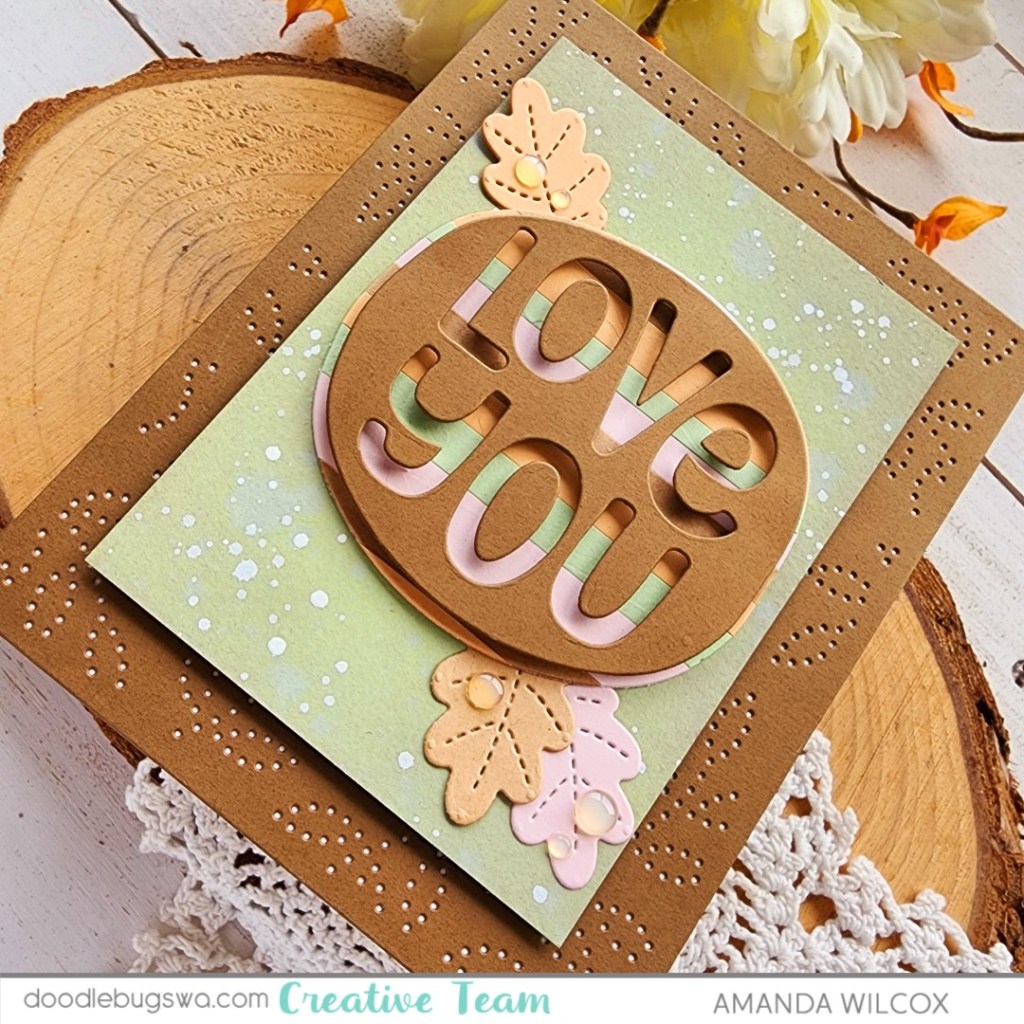
For my background, I wanted to tie the brown in more so I cut the Pretty Pink Posh Pierced Leafy Vines background die from it and glued that to a white card base. To separate the sentiment from the background panel, I used shabby shutters distress oxide ink on a piece of cardstock. I spritzed it with water and flicked white paint on the panel before popping it up with foam tape.
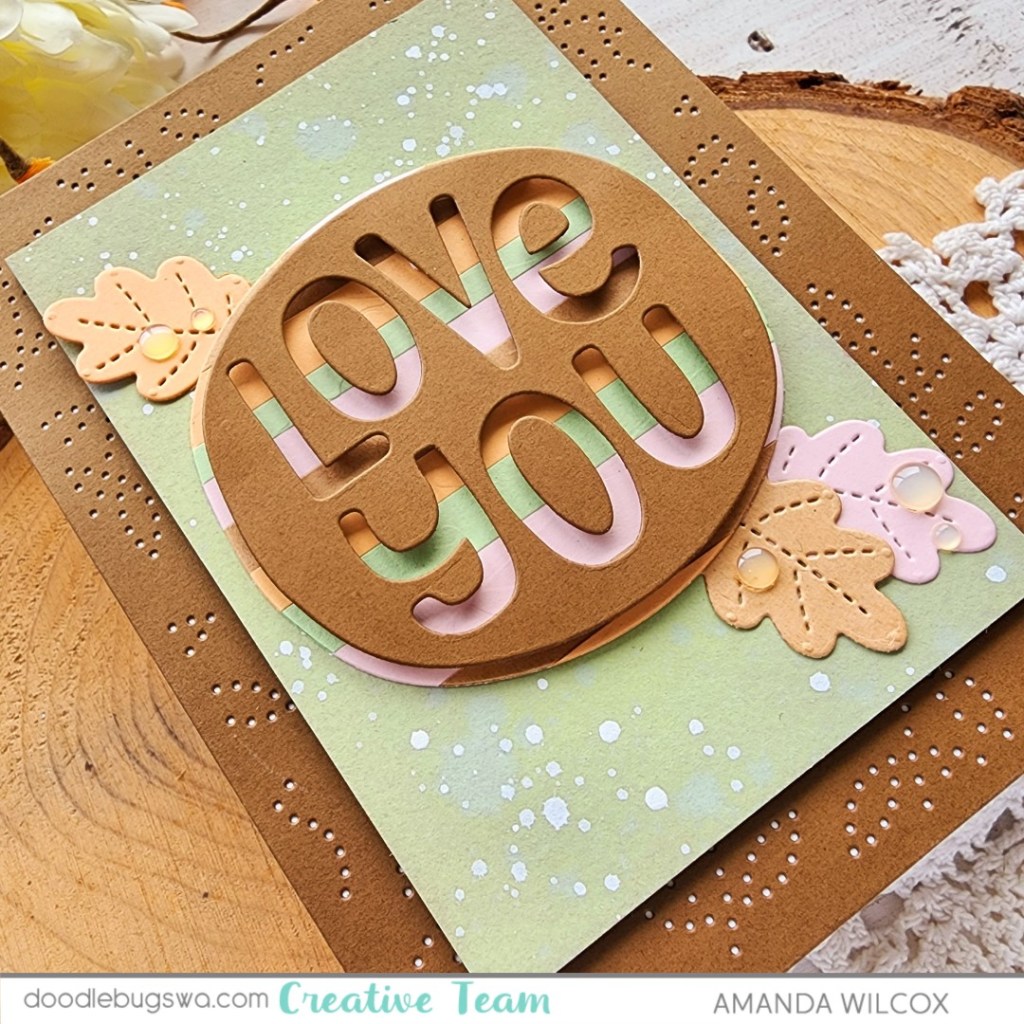
Last, I went digging for leaves that fit my vibe to adorn my sentiment panel. I found this one in the Pretty Pink Posh Winter Mug die set. I cut it from a few colors in the stripes and glued them in place with liquid glue. To finish off the design I found a few baubles that resembled water drops to glue to my leaves.
I appreciate you sharing your time with me. Have a fabulous day!