Miss Ink Stamps – Boho Thanks

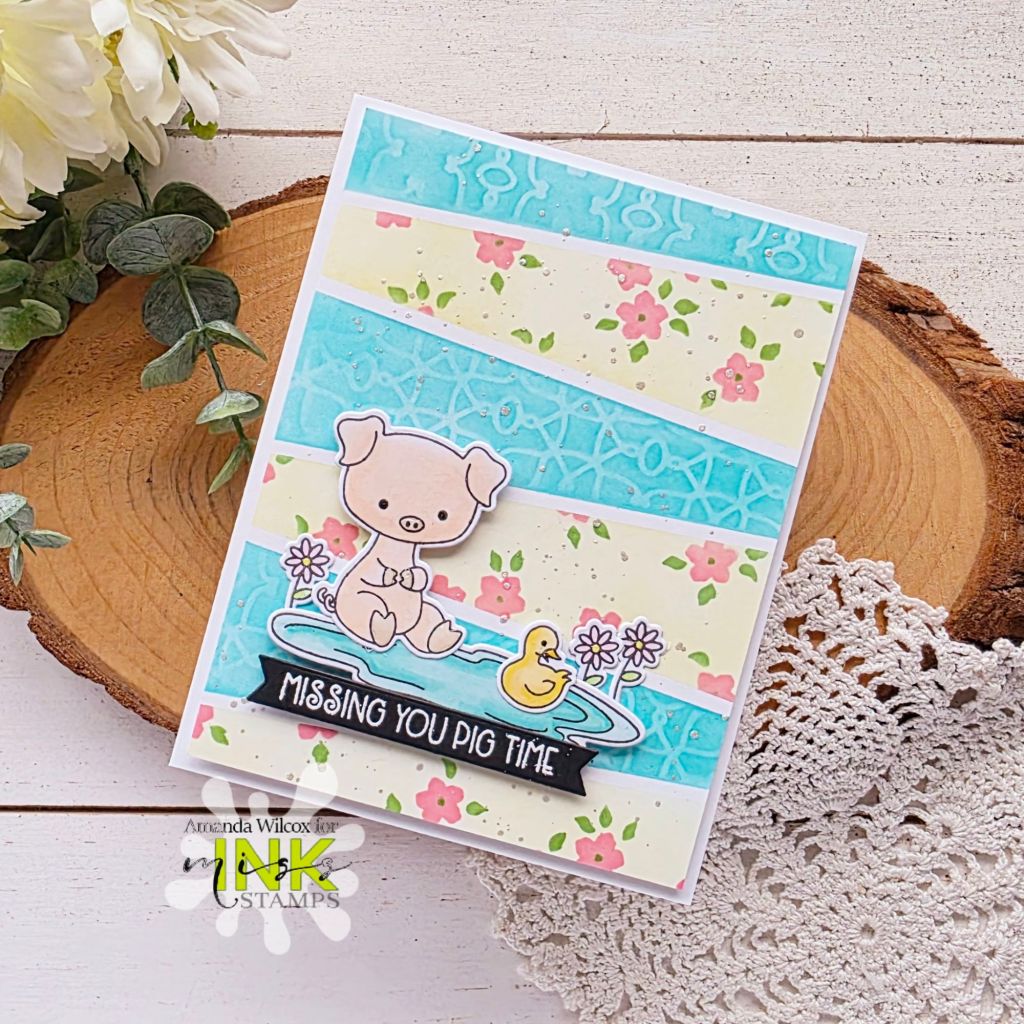
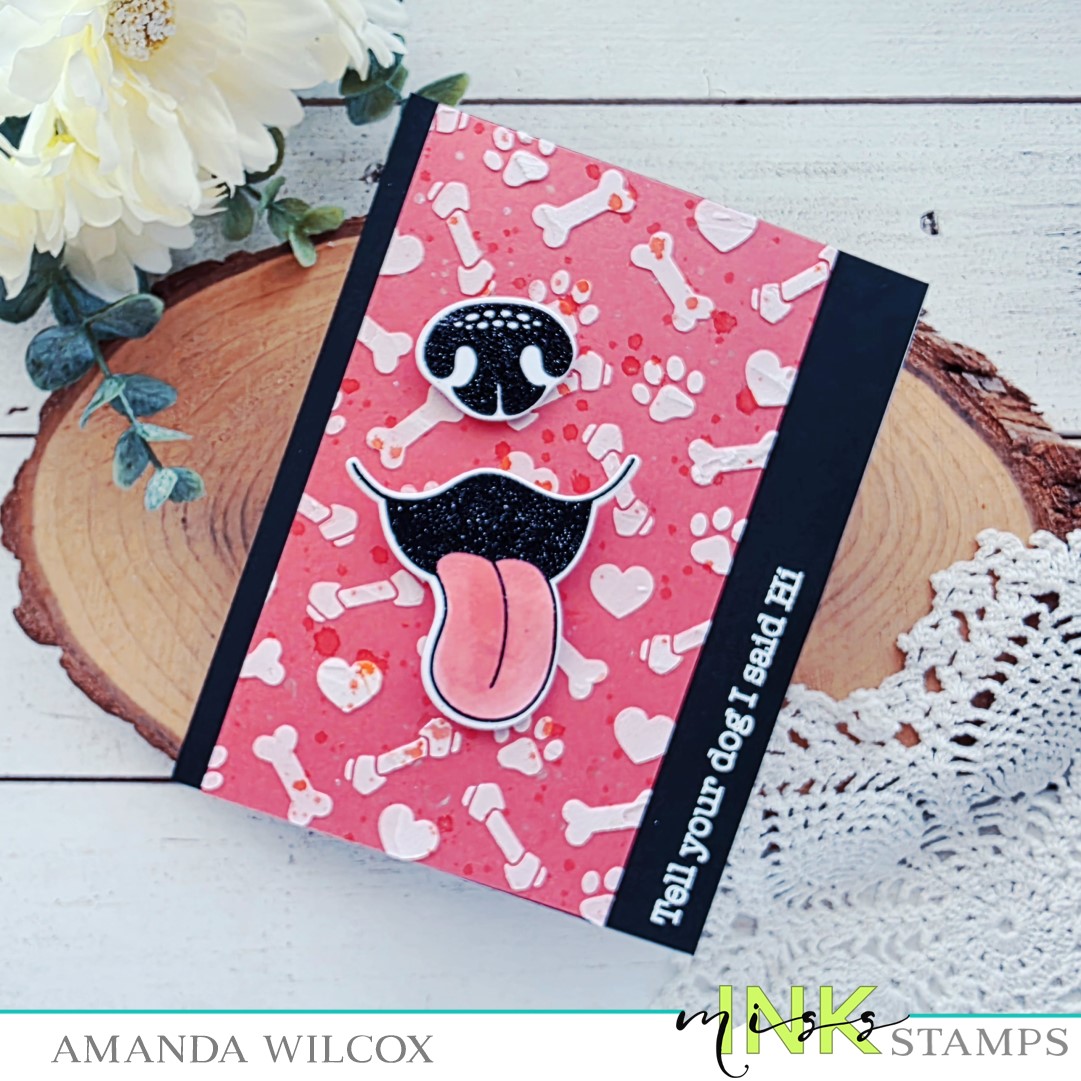
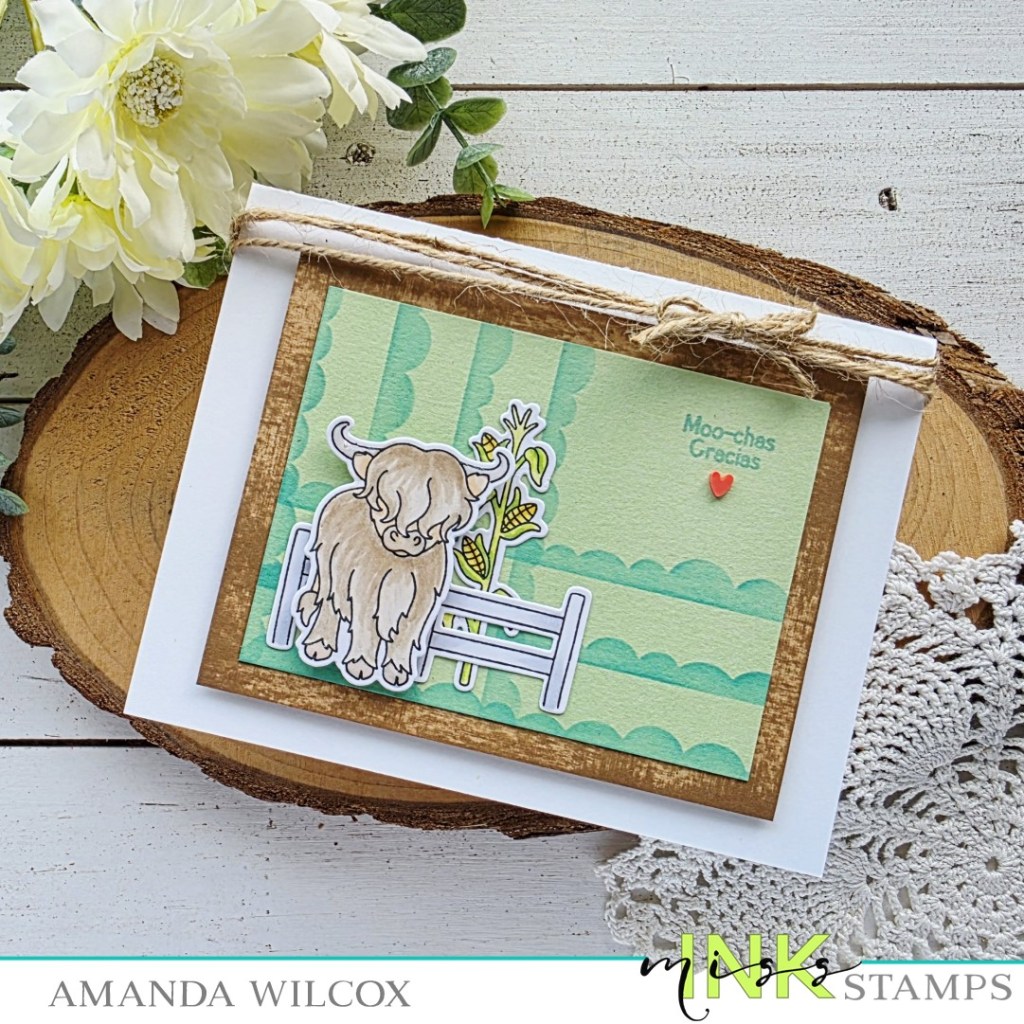
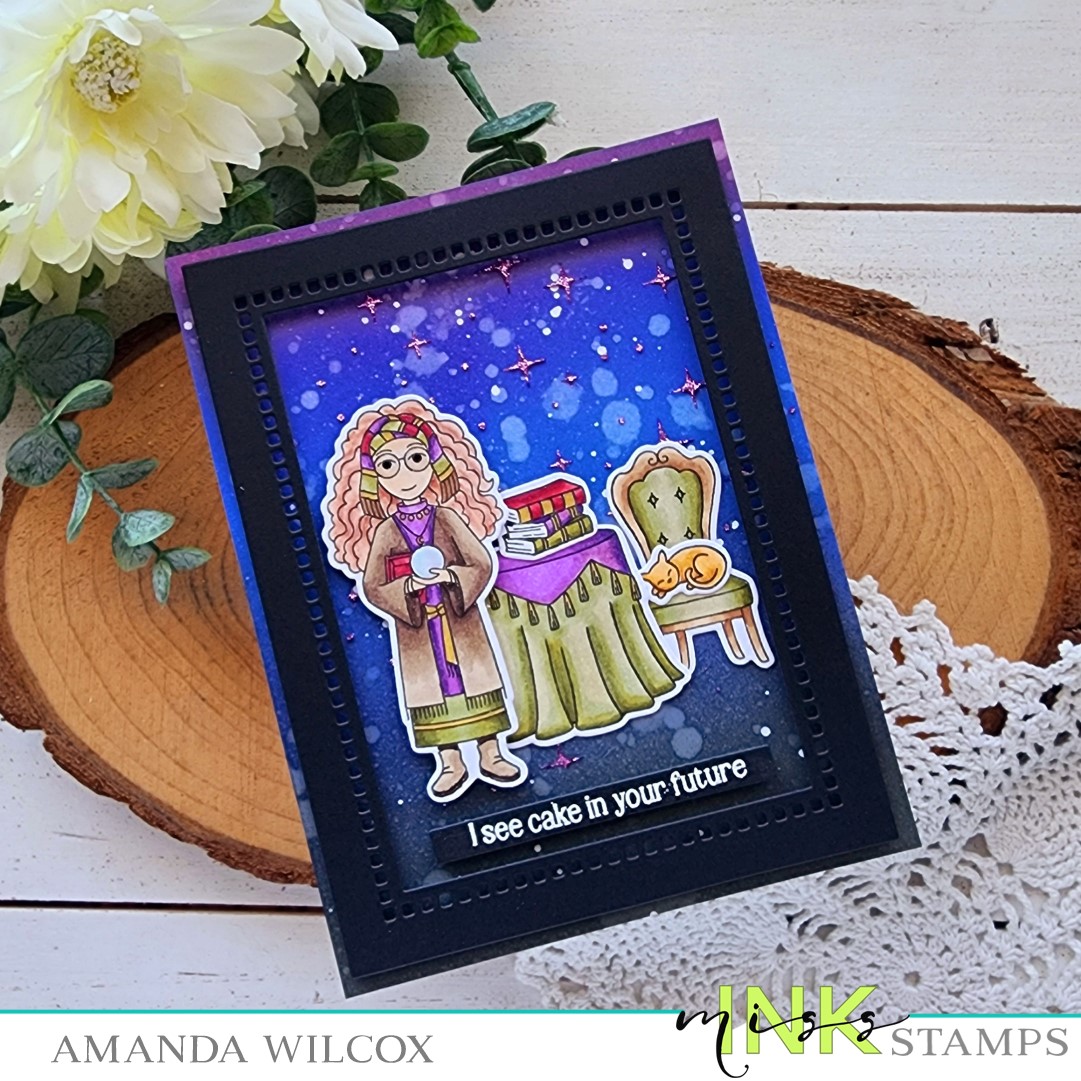
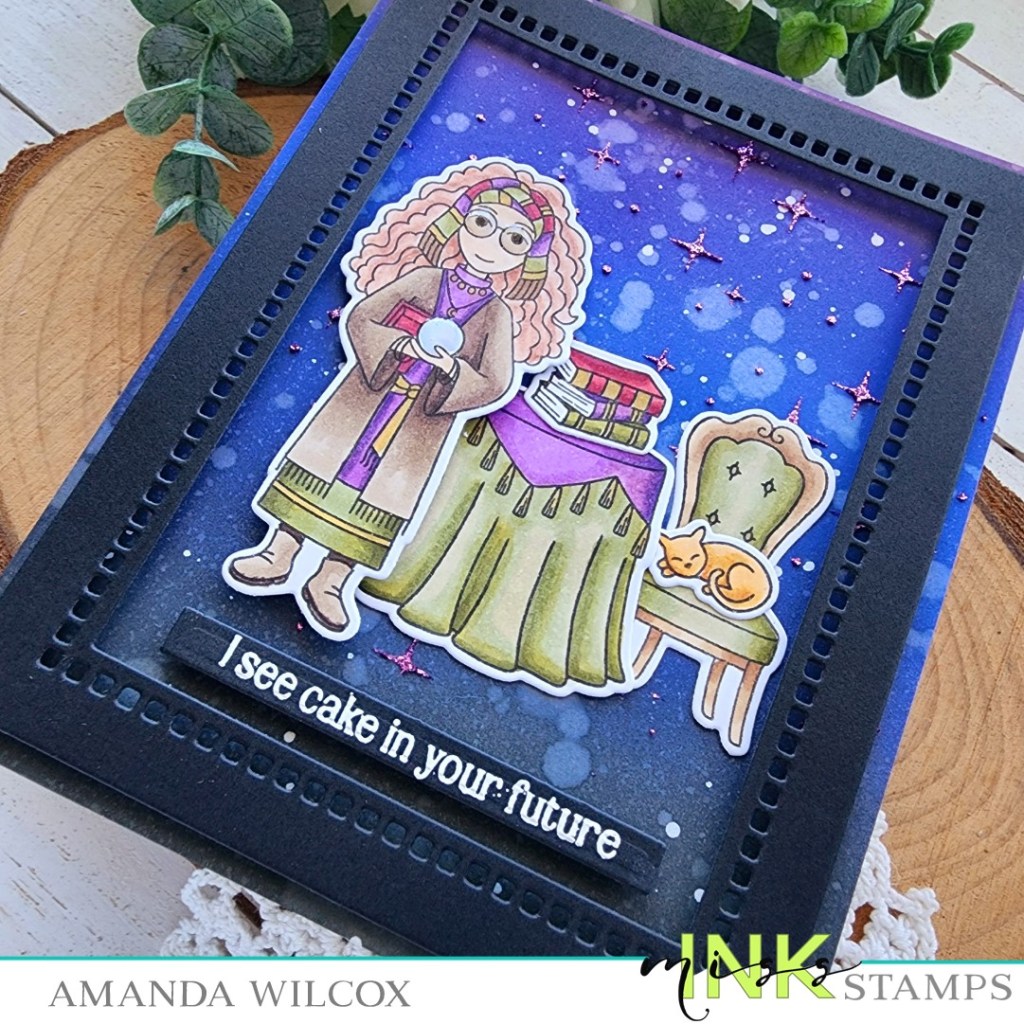
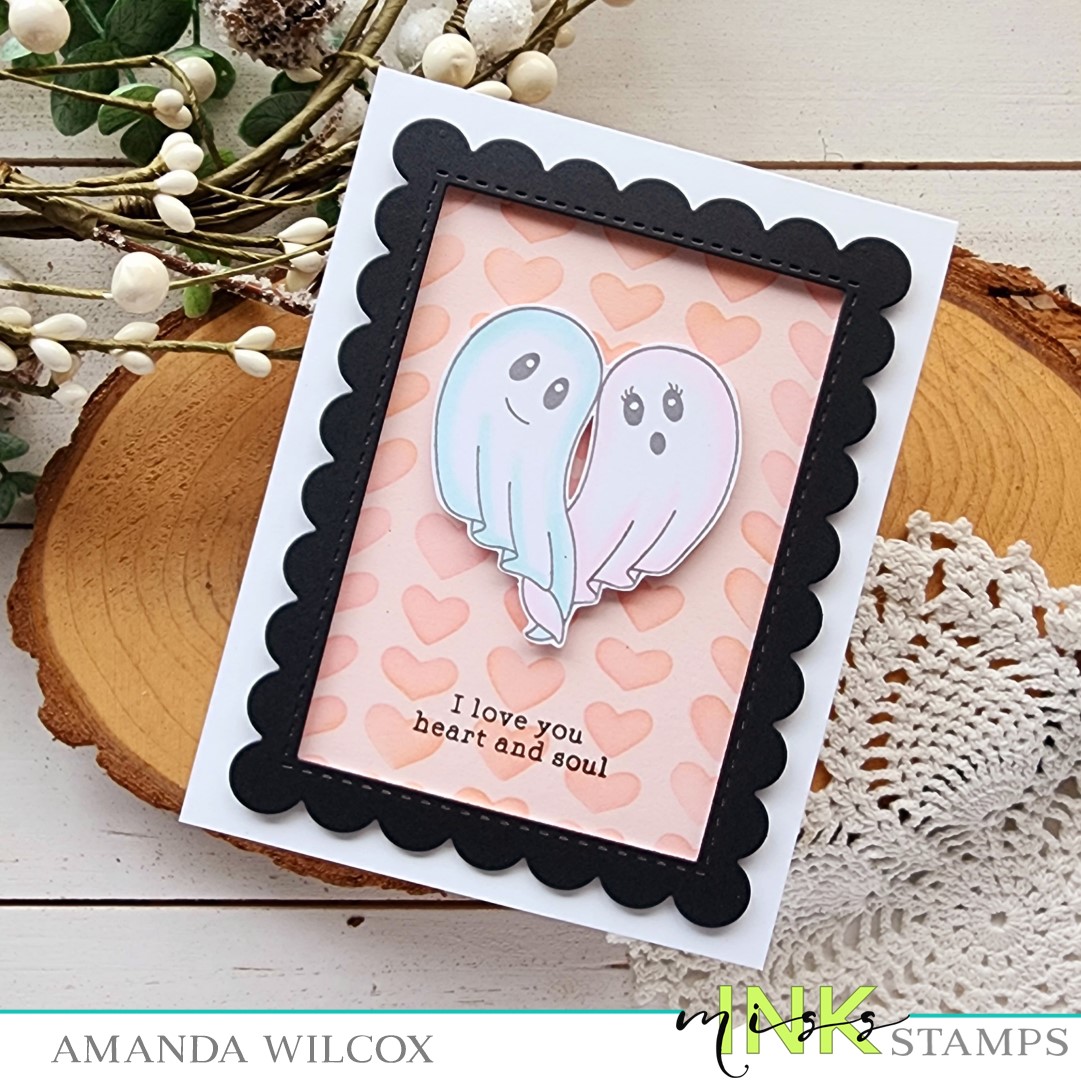
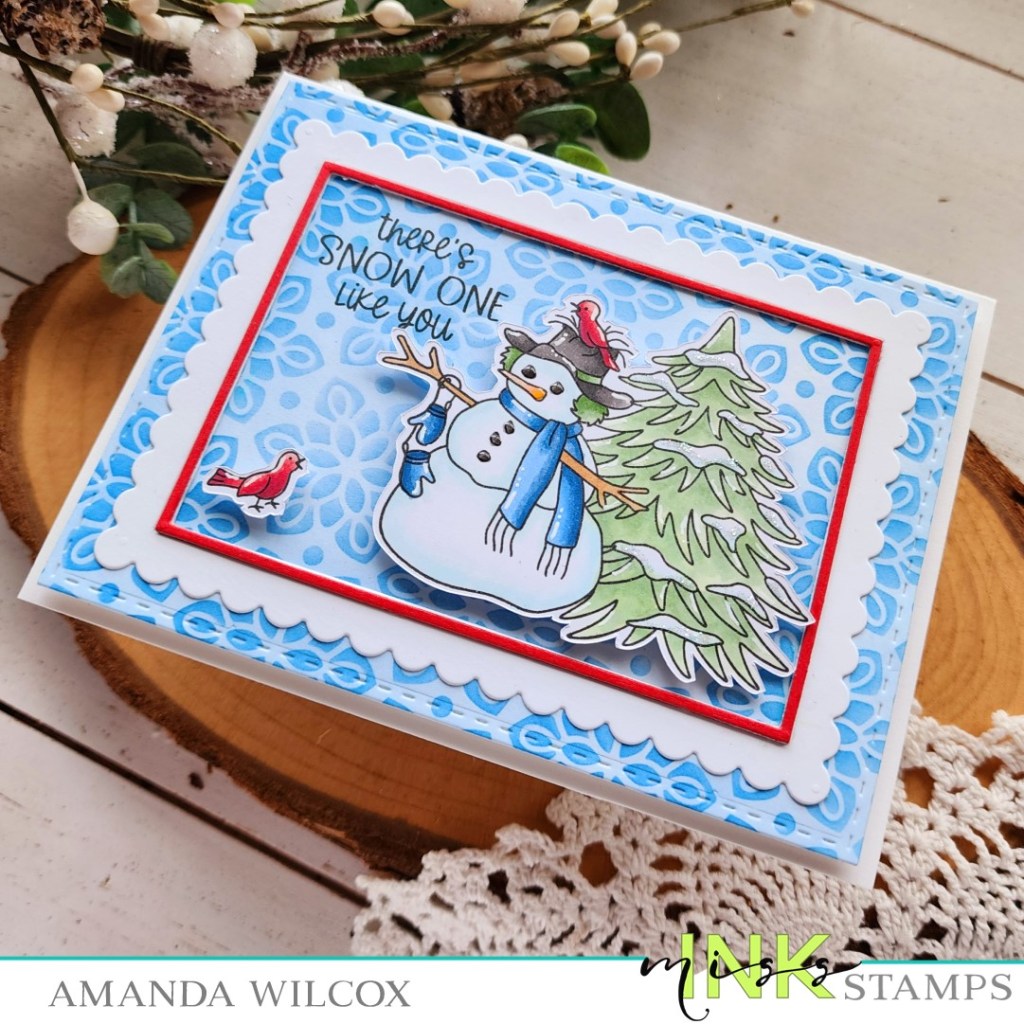
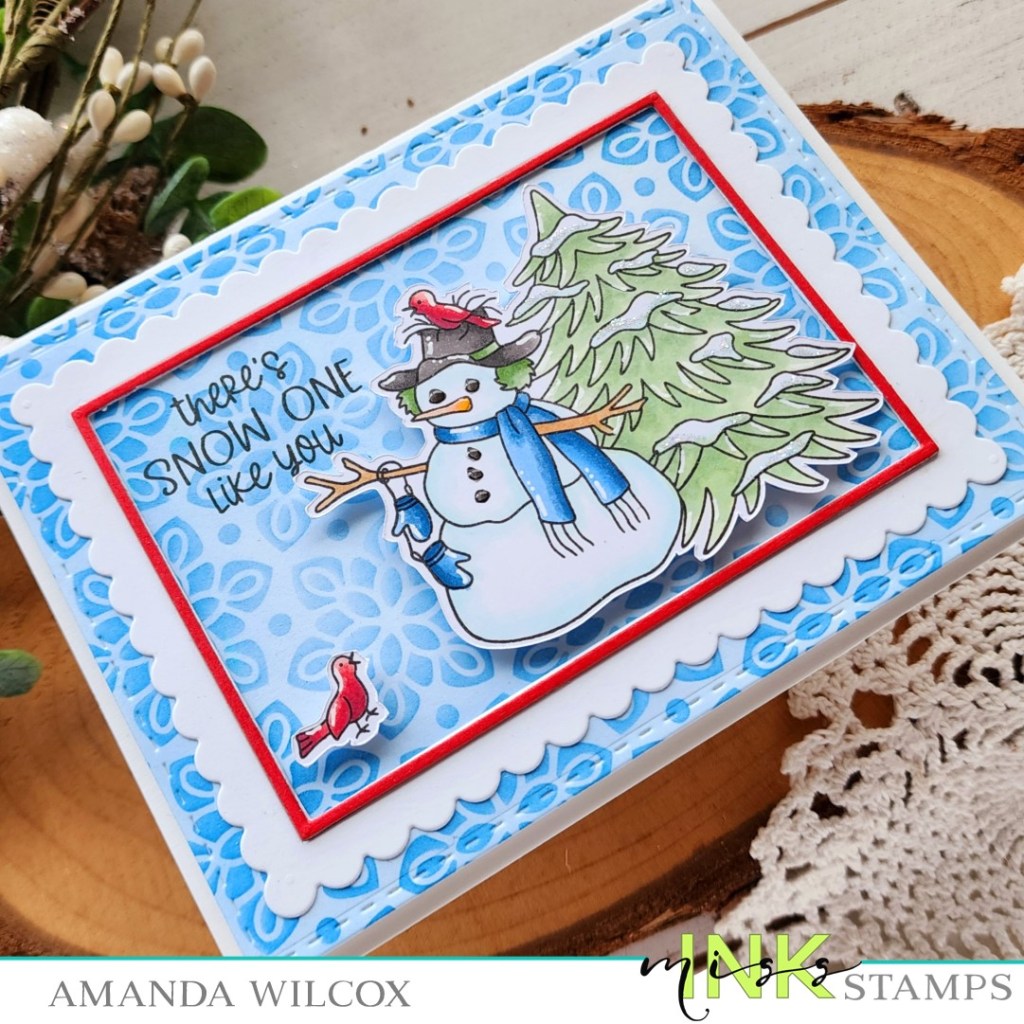
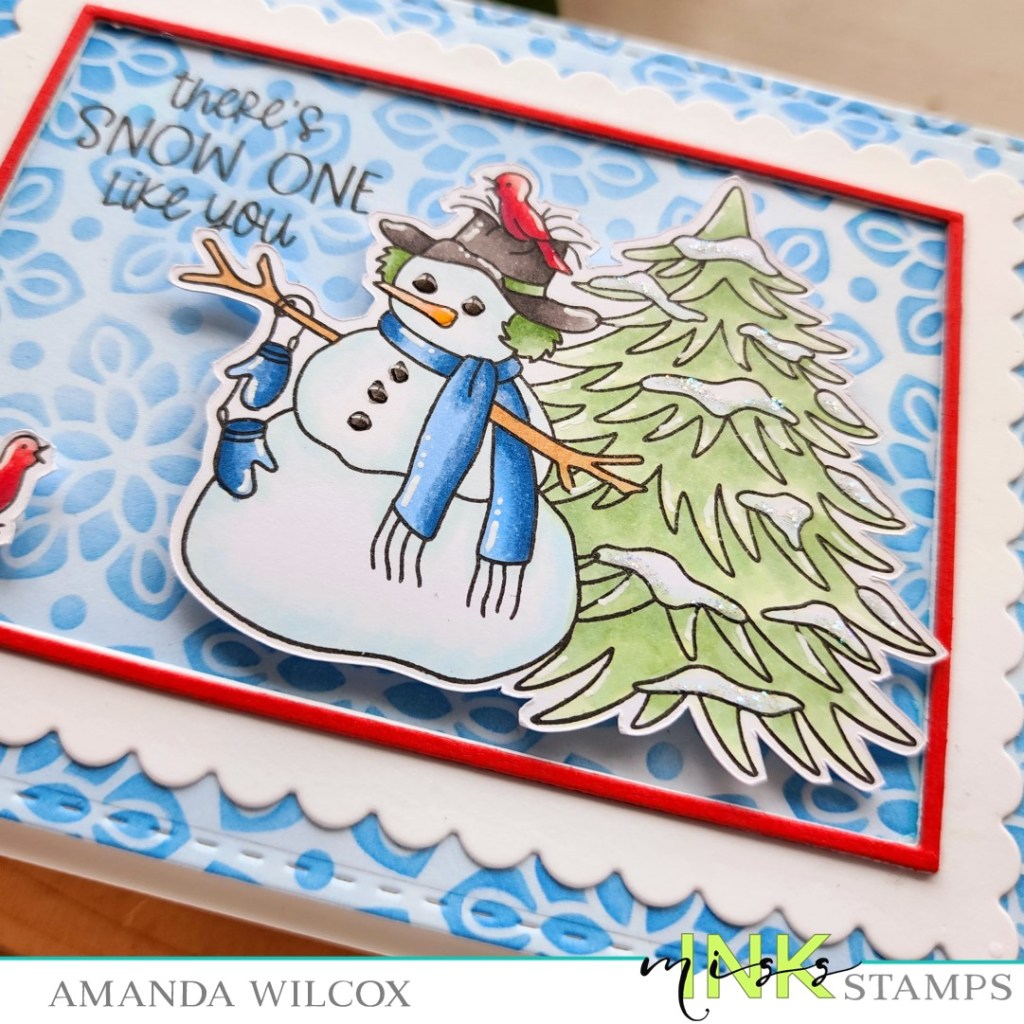
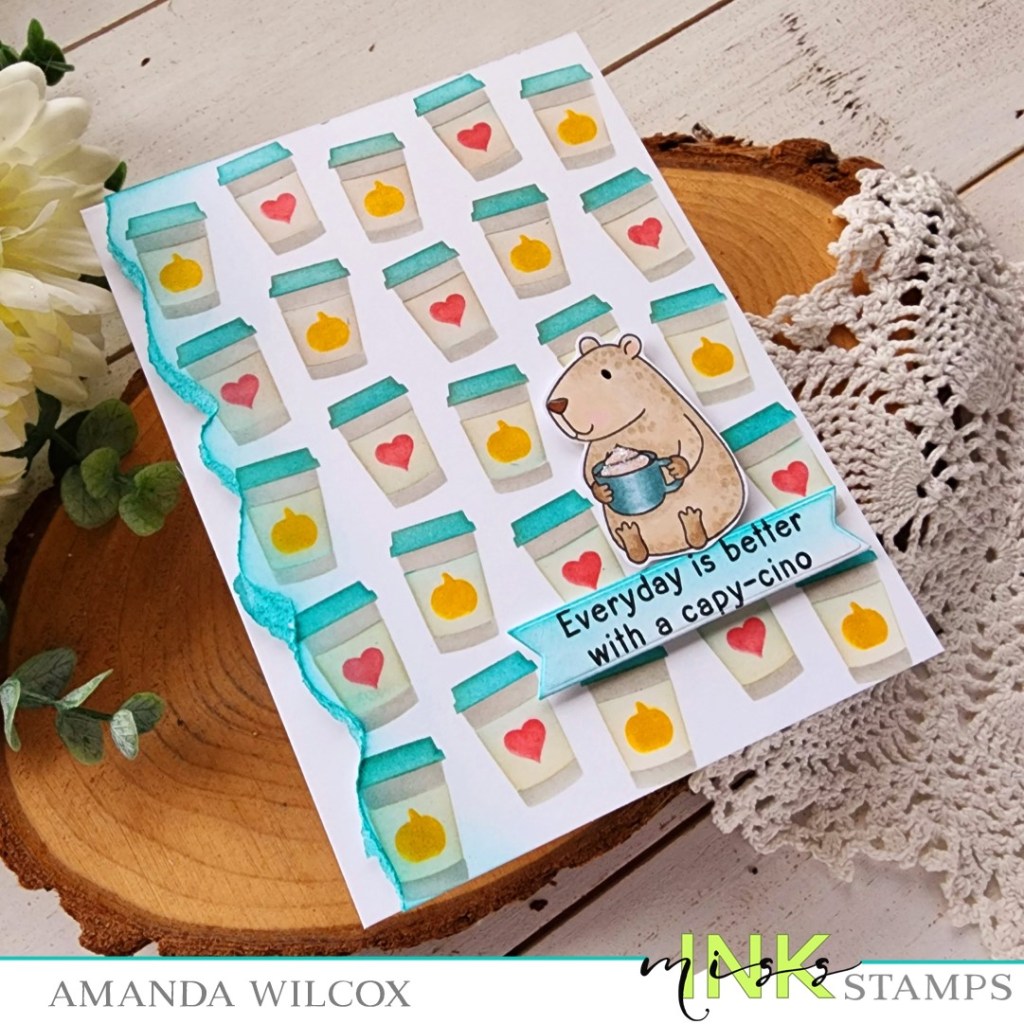
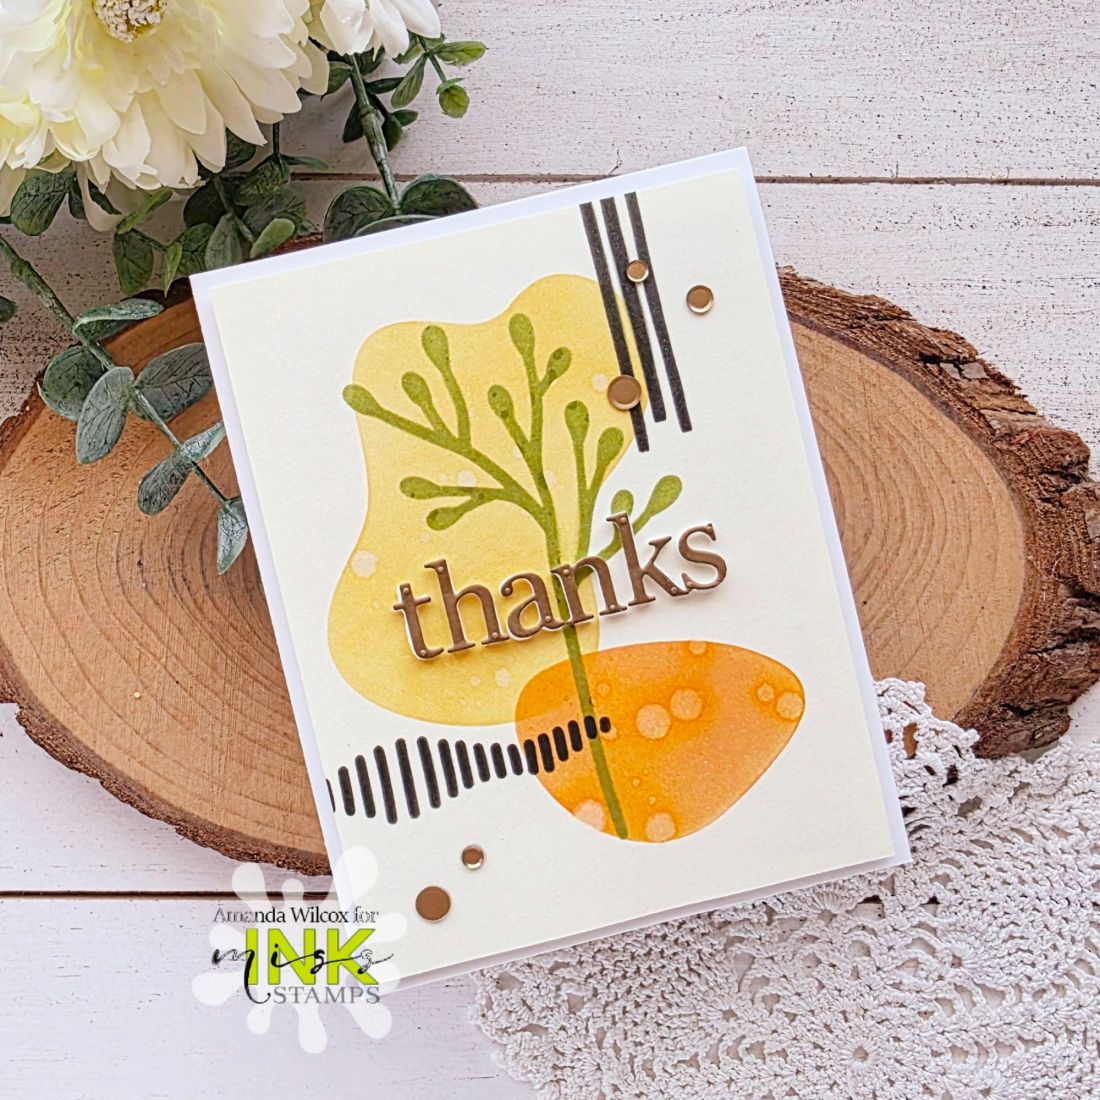
Hi friends! It’s time for some Miss Ink Stamps inspiration again. Following suite with my stencil theme these days I pulled out an old favorite to play with and added a custom simple sentiment – all in a fabulous boho theme.

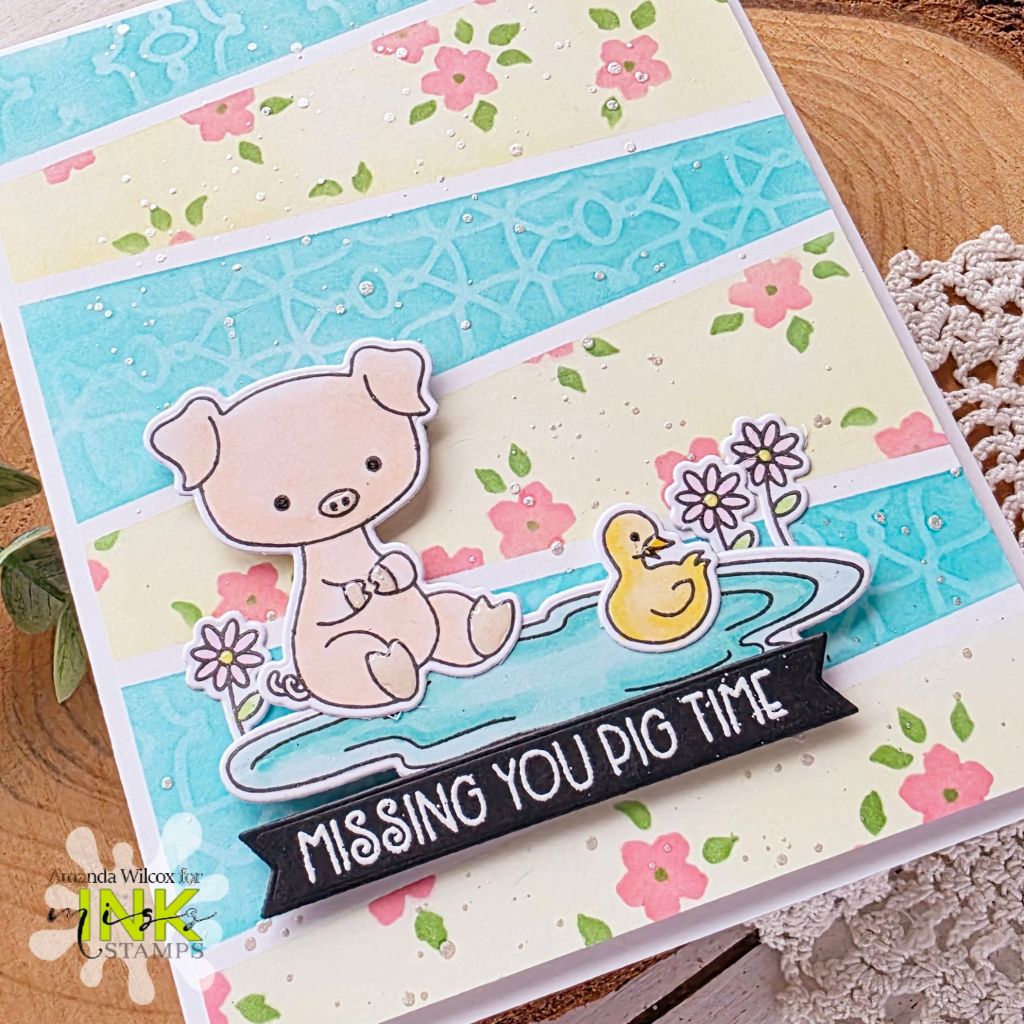
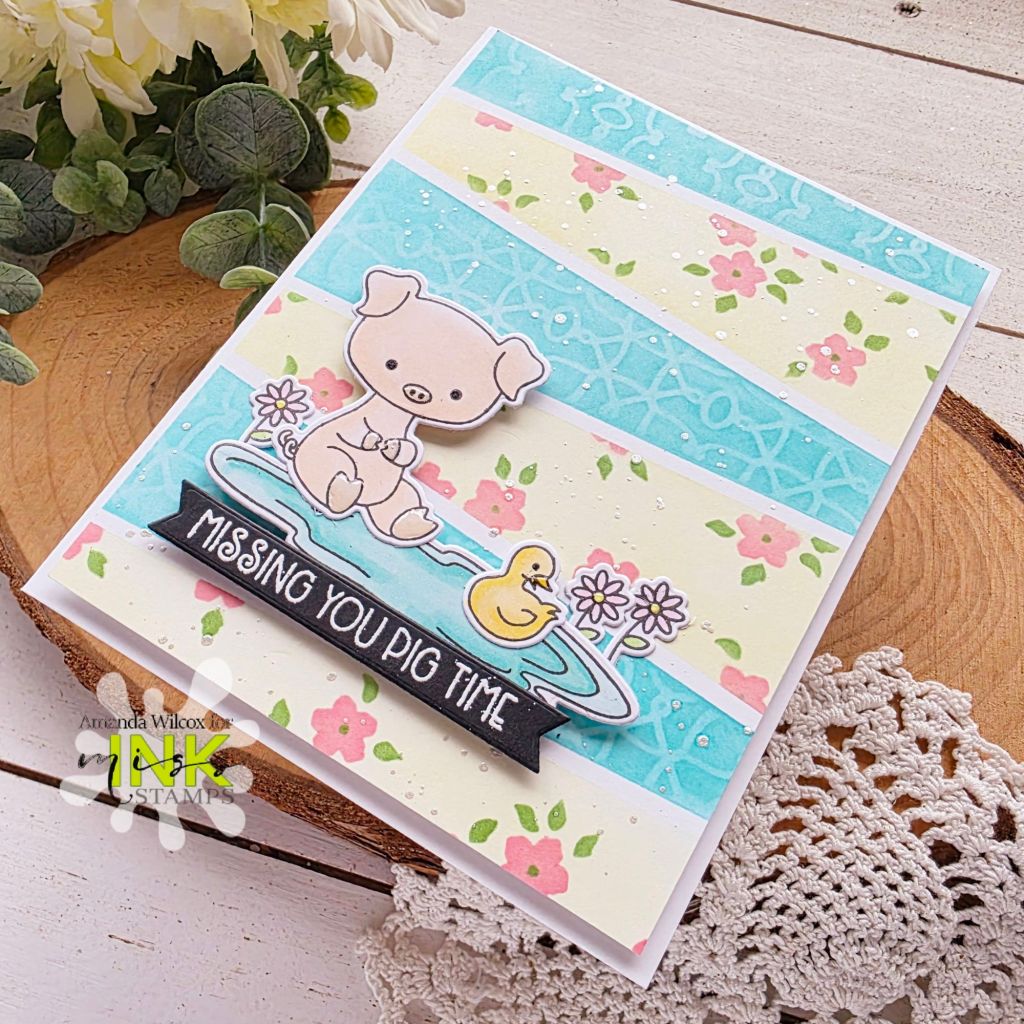
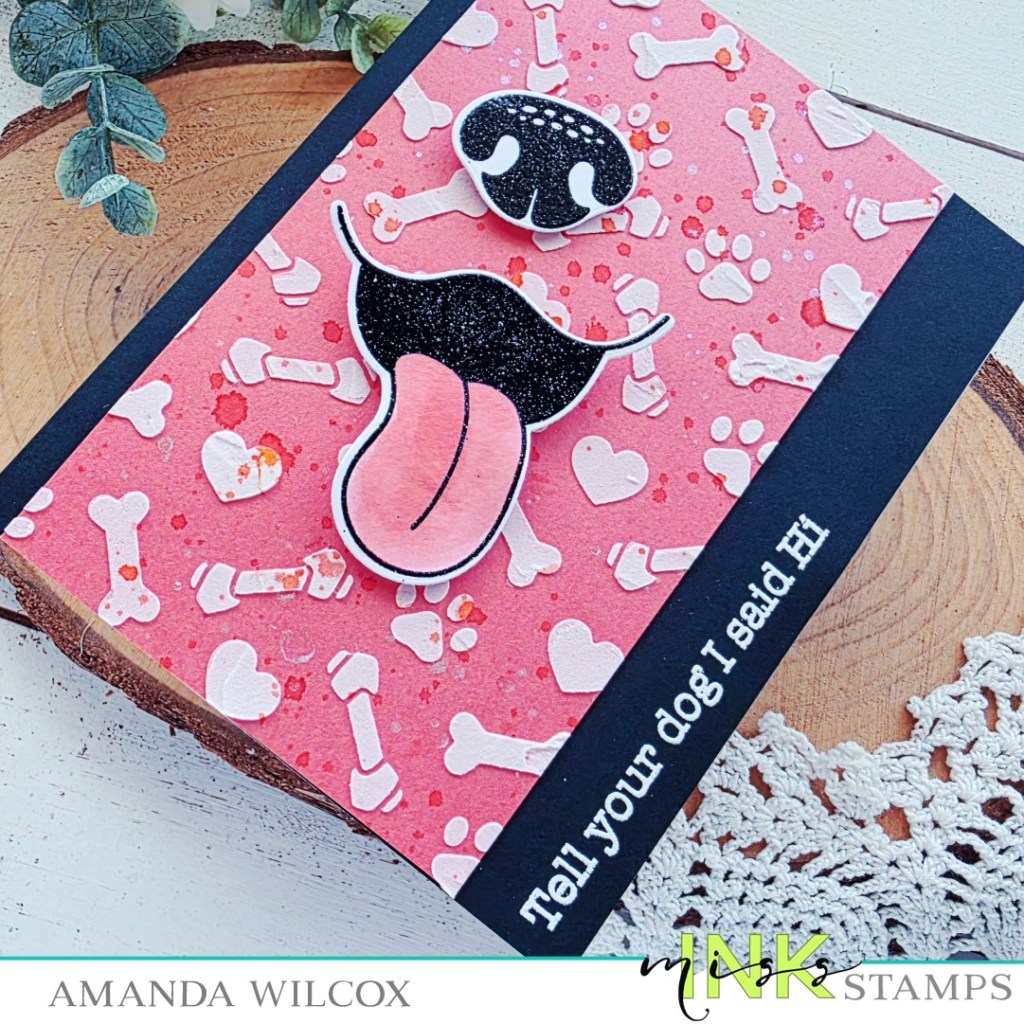
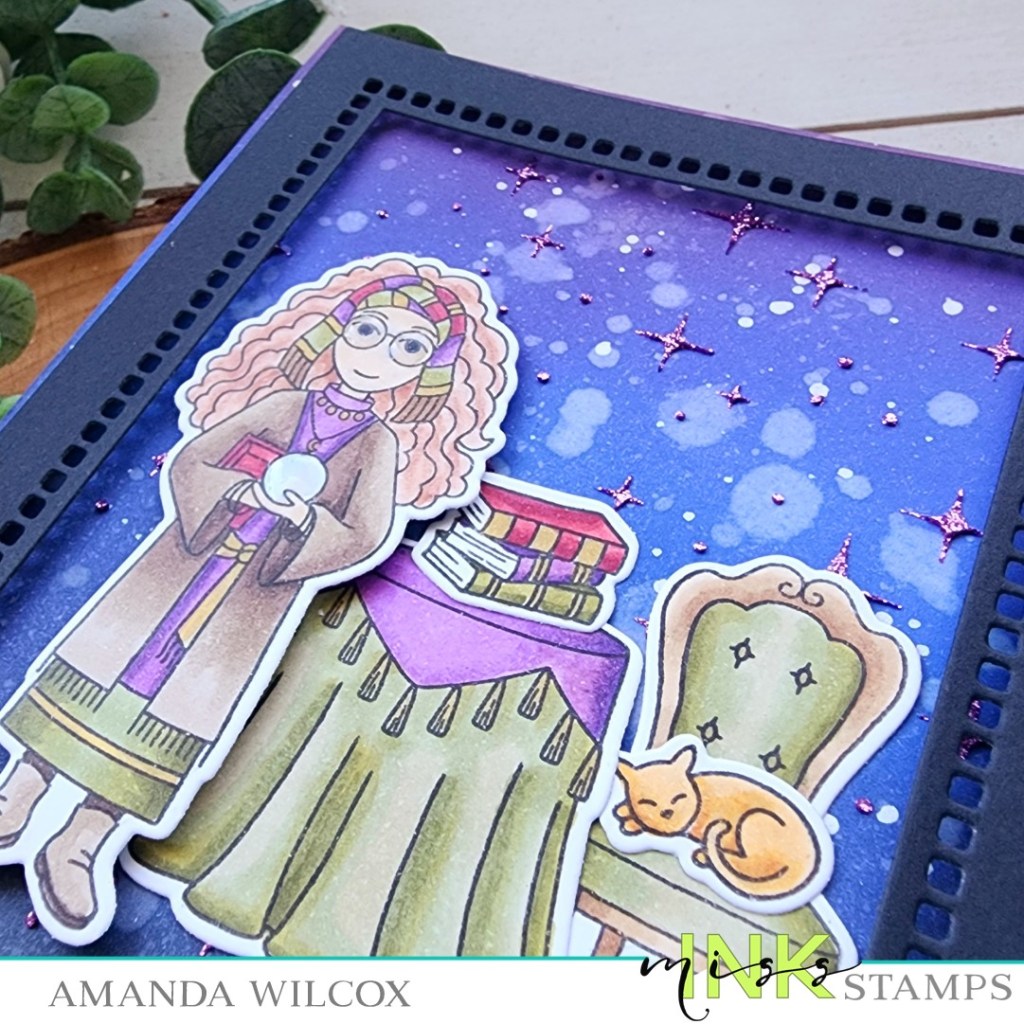
The stencils used for the background is the Artsy Abstracts stencil set. It has 4 stencils in the set to mix and match however you like. I used all dye inks and blending brushes on a piece of cream cardstock. Then I splattered a little water on the panel and blotted it dry.

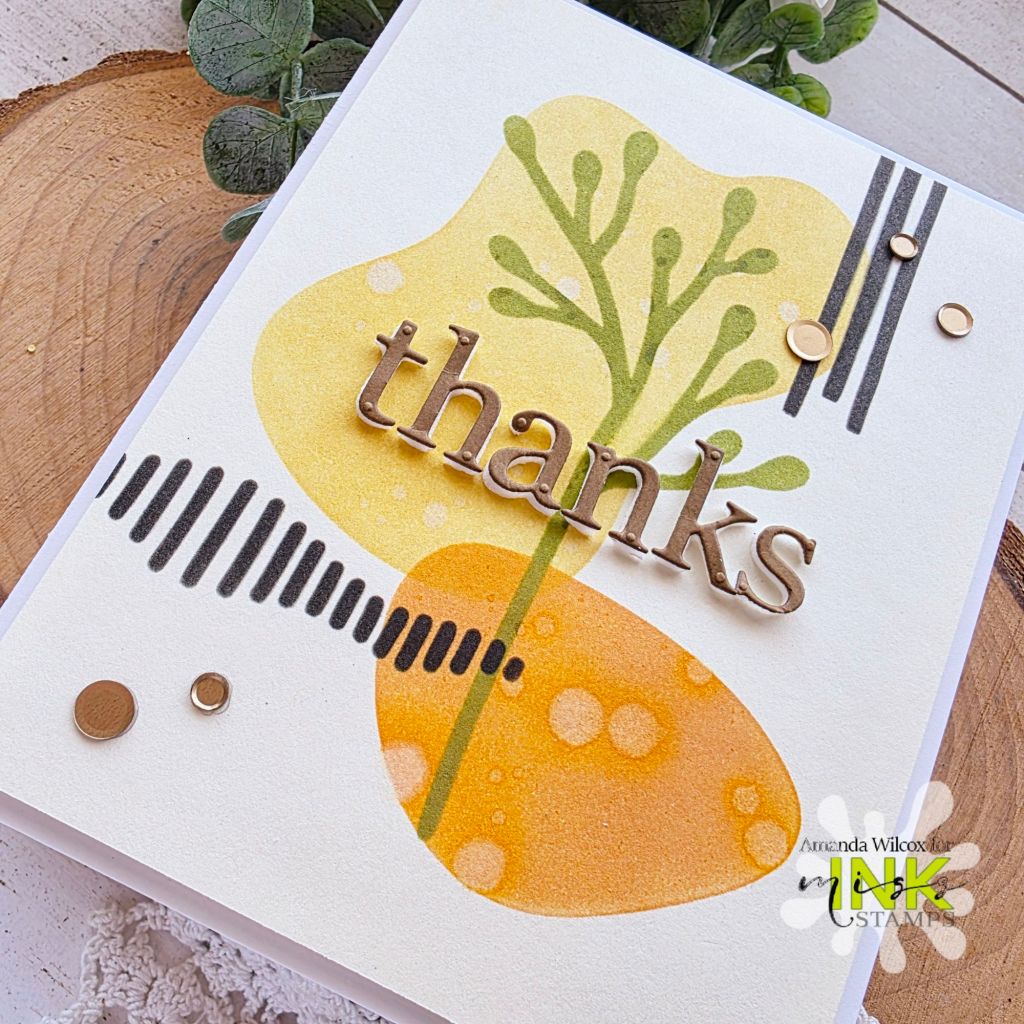
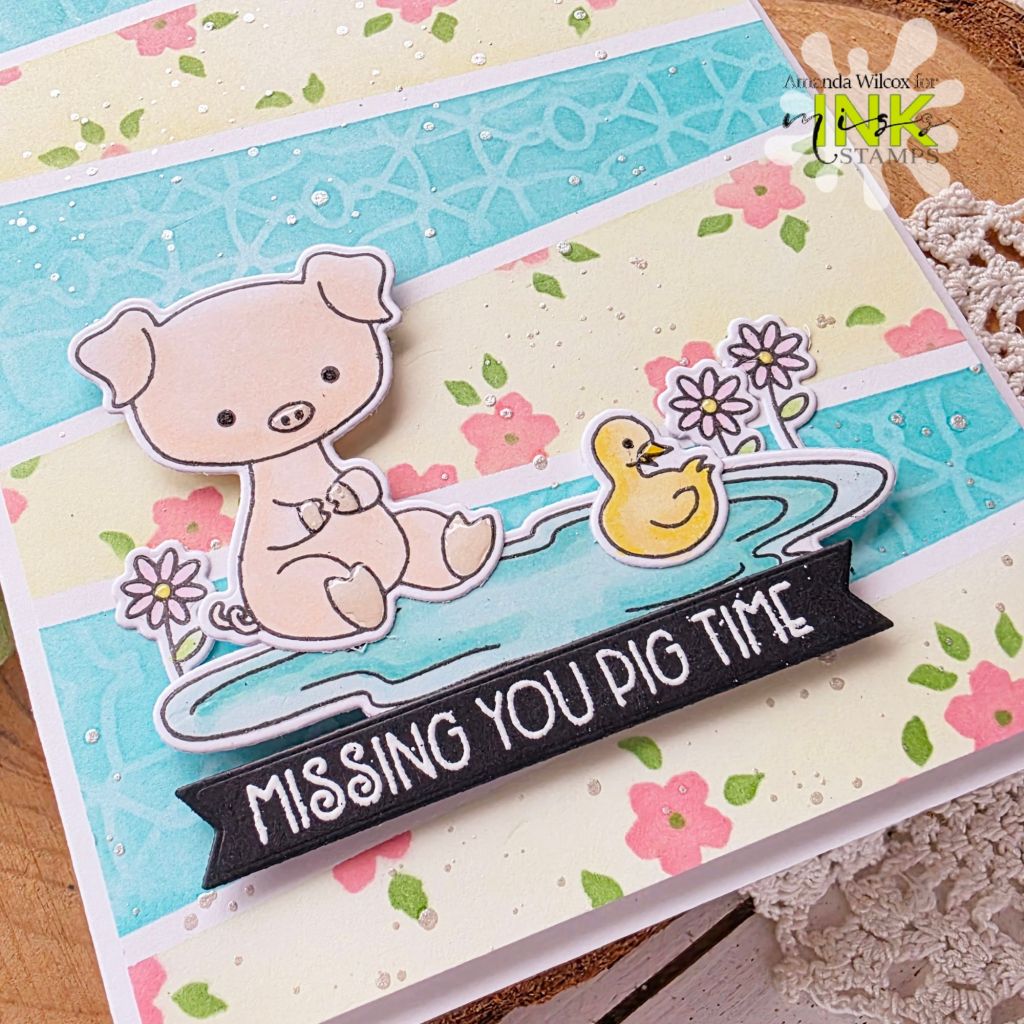
Next I used double-sided adhesive sheets to adhere brown cardstock to craft foam and die cut that with the Modern Typeset dies to create a thanks sentiment. I used a ruler to keep my letters straight.

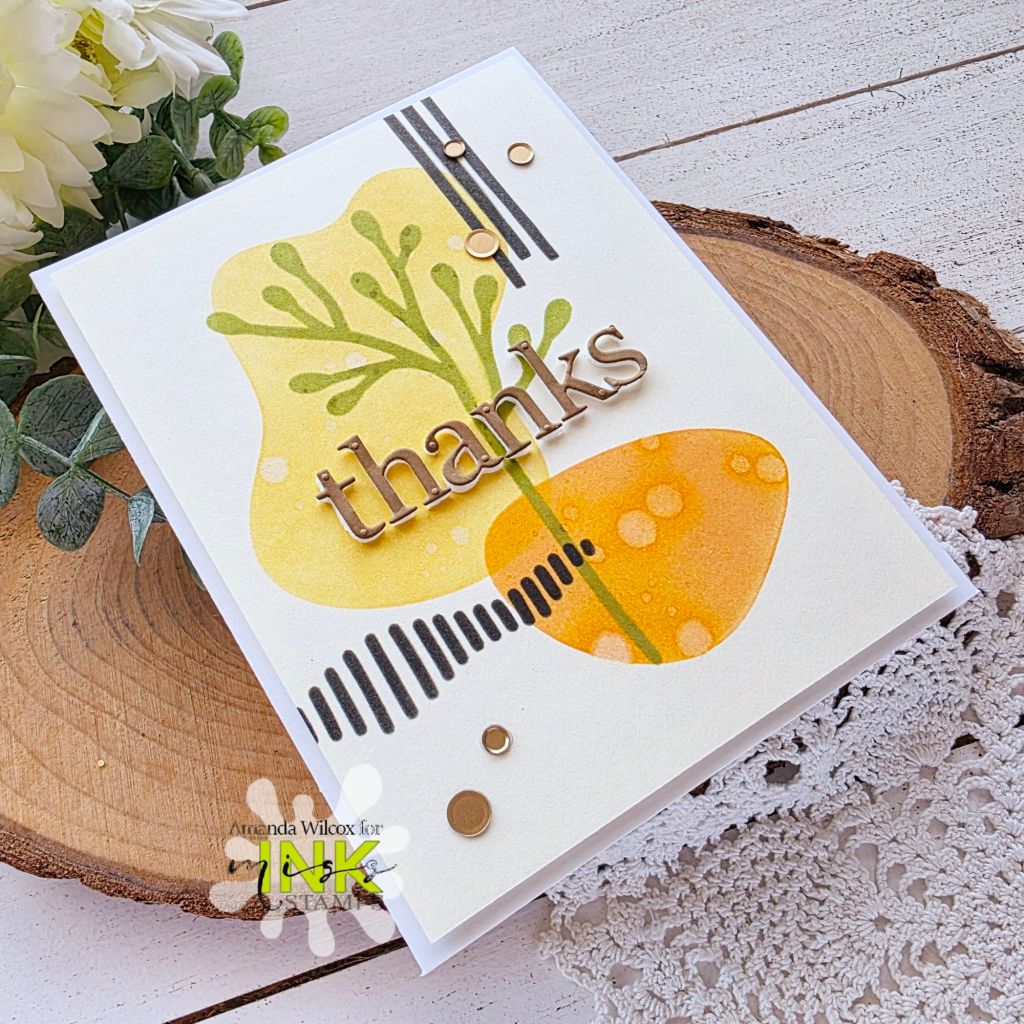
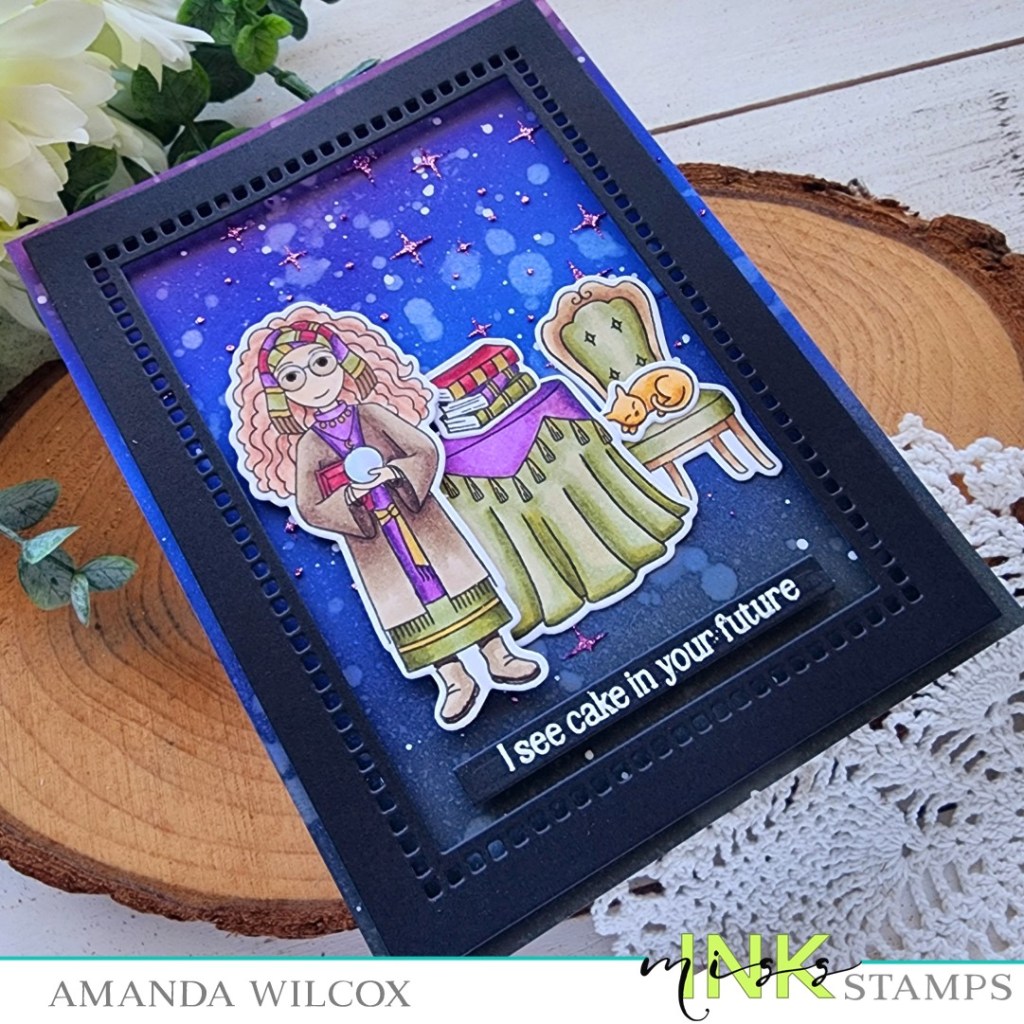
And last, I popped the panel up with foam tape on a white card base and glued a small scattering of matte gold sequin discs on the design.

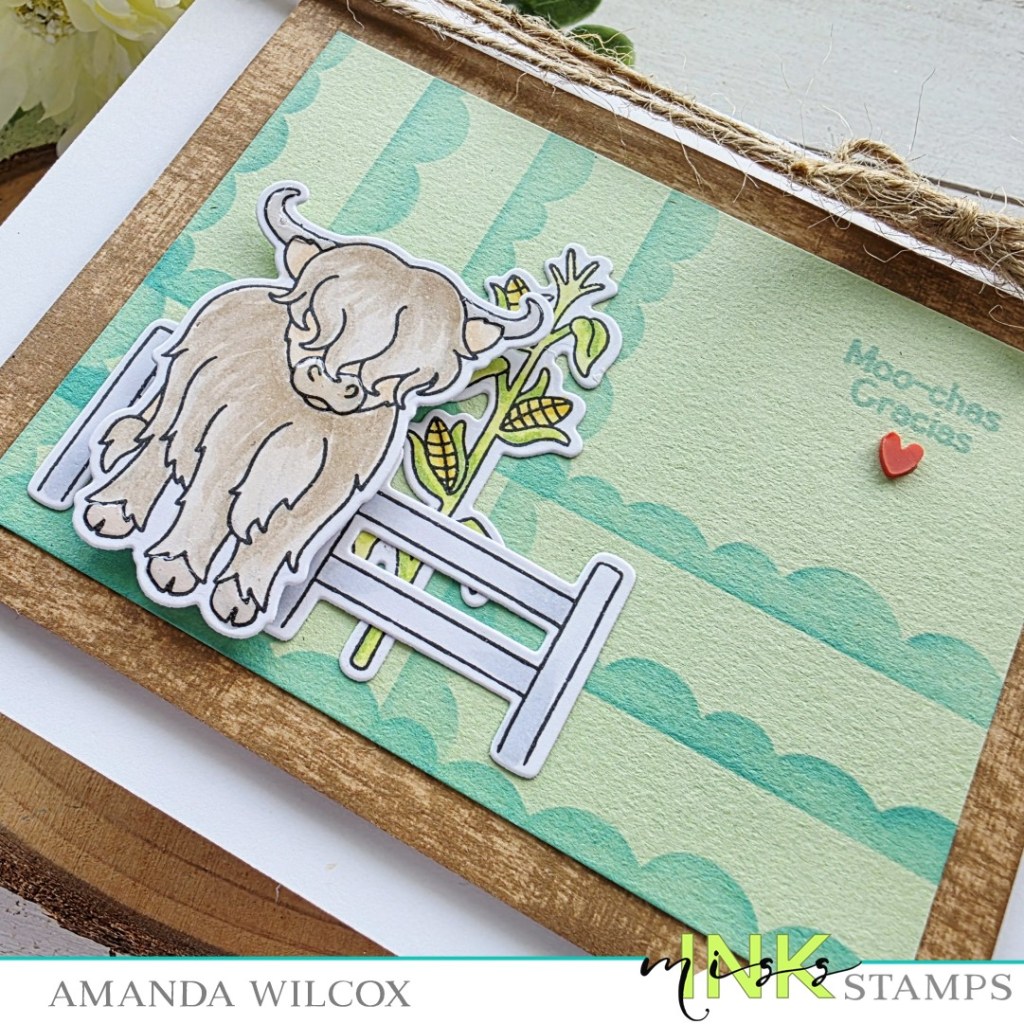
I love that these stencils are so fun to play with in any color combo you’re vibing for the day and there is no wrong way to combine them!

Products used:
Artsy Abstracts stencils
Woodgrain Frame dies

Blending brushes
Lawn Fawn dye inks
Matte gold sequins
Foam tape
Adhesive sheets
Liquid glue

I appreciate you sharing your time with me. Have a fabulous day!

Miss Ink Stamps – Stencil Layering with Punny Farm Pigs

Hello everyone! I’m here with a little dose of Miss Ink Stamps inspiration today. I’m in my stencil everything era so that’s what we’re focusing on today. It’s really fun and gives a great impact on any card design. There are so many options and ways to use them, plus they are a lower price point crafty supply which is nice when that budget isn’t what we wish it was.

For today’s card, I chose 3 stencils to create my background. First I layered the Diagonals Masking stencil over a piece of white cardstock. I inked it up with a light yellow ink, then I added the first layer of the Flower Shower stencil set on that and inked up my flowers with guava ink. I removed the flowers and added the leaf layer, inking those with jalapeno ink.

Now, I removed the masking stencil, flipped it around and positioned it to ink up the in between stripes. When the masking stencil was in place, I added the Enchanted stencil over that, inking it with mermaid ink. After removing that stencil I didn’t like the white so I went over the whole area with more mermaid ink which darkens the first layer and gives a light layer to what was white.

I trimmed that panel to 4×5.25 inches and splattered it with pearl watercolor paint. While that was drying, I stamped and colored images from Punny Farm Pigs and used the coordinating dies to cut them out. I also stamped and heat embossed a sentiment on a banner from the same stamp set.

When the watercolor was dry, I popped the panel up with foam tape on a white card base. Then I added the images and sentiment strip with a combo of liquid glue and foam squares, finishing things off with a little glossy accents on the piggy, duck and flower centers.

Have you tried masking stencils or using a shape as a mask to stencil only a certain area? It’s almost magical and also a really fun way to think outside the box of supplies you already have.

Products used today:
Punny Farm Pigs stamp and dies
Diagonal Lines masking stencil
Flower Power layering stencils
Enchanted stencil

Banner die
Blending brushes
Lawn Fawn inks – guava, jalapeno, butter, mermaid
Pearl watercolor
Foam squares and tape
Liquid glue
Glossy accents

I appreciate you sharing your time with me. Have a fabulous day!

Miss Ink Stamps – Tell Your Dog I Said Hi

You all know by now that I’m a critter lover of all kinds, so I couldn’t let this adorable pup set from Miss Ink Stamps sit on my shelf for too long before giving it a go. And I had some messy fun with my background while I was at it.

I simply stamped and heat embossed the images from Snoot Boops and used the coordinating dies to cut them out. Then I pulled out the Lucky Dog stencil to get messy. I used texture paste on that and set it aside to dry while I cleaned up and heat embossed my sentiment on the right side of an A2 size black cardstock panel.

When the texture paste was dry, I splattered it with watered down red ink and pearl watercolor, then I watercolored the tongue on my pup face with the same red ink.

I adhered the stencil panel to the black panel with liquid glue and popped the images up with foam squares. Last, I glued everything to a white card base. I left the inside of this one blank so it’s really versatile for a grab and go card in my stash.

Products used:
Lucky Dog stencil
Snoot Boops stamps and dies

Texture paste
Lawn Fawn guava ink
Stencil Pal
Embossing & Watermark ink
Magic anti-static brush
Embossing powder – frosting and licorice
Liquid glue
Foam squares

I appreciate you sharing your time with me. Have a fabulous day!

Miss Ink Stamps – Moo-chas Gracias

Happy Thursday everyone! I’m here with a little fun inspiration featuring Miss Ink Stamps products. I love these highland cows but they got buried so when I came across them I just had to give them some love.

First, I stamped and colored my images from Highland Cows and then used the coordinating dies to cut them all out. Next, I cut a piece of cardstock measuring 3×4 inches and used the Wonky Scallop stencil on it. Using a blending brush I inked up a few rows one way, rotated the stencil and inked up a few more rows going the other way. Just a fun way to add texture to the background.

Next I cut a piece of kraft cardstock 3.5×4.5 and drug my brown ink pad across the edges for textured color on that panel too. I used liquid glue to adhere them together and then also added the images to the bottom left corner. After that I place the panel in my Misti and stamped a sentiment in the upper right corner.

I popped that panel up with foam tape on a white card base and tied some jute twine around the top. Then I finished things off with glossy accents on my sweet cow and a little clay heart under the sentiment.

Products used:
Highland Cows stamps and dies
Wonky stencil

Blending brush
Foam tape and squares
Liquid glue
Glossy accents
Lawn Fawn peacock and walnut ink

Twiddler’s Nook sweethearts embellishment mix

I appreciate you sharing your time with me. Have a fabulous day!

Miss Ink Stamps – Fortune Teller

Hi friends, I’m back one more time today with some inspiration featuring part of the new Miss Ink Stamps release. More fabulousness from the Magic category and I had so much fun creating with it!

The set is called Fortune Teller and it lends itself to having so much fun with color combos! I coordinated it all and had to add the sweet sleeping kitty to my little scene too! After stamping and coloring, I used the coordinating dies to cut them all out. Then liquid glue to layer the kitty, chair and table together. I added foam tape to the back of Ms. Trelawney.

For my background, I ink blended distress oxide inks from black soot to chipped sapphire, then into blueprint sketch and last a little seedless preserves at the top. I splattered the panel with water, blotted it dry and then went in with white paint splatter too. After the paint dried, I spread glitz gel through the Sparkles stencil to add to the magic of it all.

While the glitz was drying I cut a black frame from the Modern Typeset Frame die set and added foam strips to the back. I also stamped and heat embossed my sentiment and cut it out with a sentiment strip. This also has a foam strip behind it.

After adhering all the layers to a card base, I finished the design with some glossy accents on the crystal ball and Ms. Trelawney’s glasses.

Products used:
Fortune Teller stamps and dies
Sparkles stencil
Modern Typeset Frame dies

Foam strips and squares
Glitter Glitz Gel – purple
Glossy accents
Liquid glue

I appreciate you sharing your time with me. Have a fabulous day!

Miss Ink Stamps – Valloween Fun

Hi friends! You know how much I love Halloween and Valloween is totally a thing so I couldn’t resist playing with some of my favorite Miss Ink Stamps goodies and pairing them together.

I started with the Kindred Spirits image – stamping in gray ink and coloring it with sheer copic colors. I cut them out by hand and set the image aside.

Next I cut a black frame from the EIEIO Frames die set and a pink panel to back it. I ink blended apricot and pink with the Hand Drawn Hearts stencil on that before popping the frame up with foam strips on it.

Using my image as a guide, I stamped my sentiment in the lower center of the panel and them popped the ghosts up with foam tape. Last, I glued the whole panel to a card base.

Products used:
Kindred Spirits stamps
EIEIO Frames dies
Hand Drawn Hearts stencil

Blending brush
Lawn Fawn ink – apricot and ballet slippers
Liquid glue
Foam tape and strips

I appreciate you sharing your time with me. Have a fabulous day!

Miss Ink Stamps – Snow One Like You

Hi friends! Happy Thursday to you all!!! I’m popping in with Miss Ink Stamps inspiration today. I am still making a few more Christmas cards before they all hit the mail and wanted to share this one.

I started by stamping my images from Snow One Like You and colored them with my copic markers. I used my scan-n-cut to cut them out, added foam to the back and set them aside.

Next I inked up a panel with the Frosty Flakes stencil using light blue ink. I removed the stencil and added another layer of the same ink over the top. Then I started die cutting using the layers in the Oh Happy Day Frame die set. I cut the stenciled panel and added it to a white card base with foam tape.

Next, I cut the scallop frame and tiny insert from white cardstock. This is one die. Because of that I had an extra white and red frame in my pocket that wasn’t used previously and thought they would be PERFECT for this card. I used liquid glue to adhere everything to the stenciled panel. I used my images as a guide and stamped my sentiment, then popped those in place too.

For finishing touches I added white gel pen highlights all over. Then I came in with glossy accents on the snowman eyes, buttons and nose; and stardust Stickles all over the snow on the tree.

How is your Christmas card stash coming along? Or have you already mailed them? I’m almost there but not quite. And I seem to keep adding people to the list which doesn’t help my case.

Products used today:
Snow One Like You stamps
Frosty Flakes stencil
Oh Happy Day Frame dies

Blending brush
Glossy accents
Stickles – stardust
Lawn Fawn ink – forget me not
Foam tape

I appreciate you sharing your time with me. Have a fabulous day!

Miss Ink Stamps – Tag Duo to Continue the Scene

Happy Thursday everyone! I’m back one more time with a couple of gift tags I created using Miss Ink Stamps images, dies and stencils. I wanted to use the large snow slope image but it’s so long that it seemed like a waste if I only made one tag with it…so I split it in half and made two tags!

I cut two tags from green cardstock and inked up the Perfectly Plaid stencil with green ink over it. I added the ground to the larger tag first and trimmed the excess off the edge, then glued the rest to the smaller tag.

I glued the Santa hat on my penguin and then adhered him with the present to the tag front.

On the second tag I used smaller penguins and also gave each of them something fun to hold. Next, I cut the smallest tag in the die set and stamped my sentiment on both.

I threaded some pretty ribbon through the hole and tied it with black embroidery floss, adding the smaller tag before tying the bow. To keep things in place I added a foam square to the red tag and adhered it in place on the green tag.

For finishing touches I added clay hearts to the small tag and glossy accents to the penguin beaks and feet, bow on the gift and fish. Then I added a little stardust Stickles to the Santa hat and candy cane.

Products used:
Tags dies
Ice Day stamps
Perfectly Plaid stencil

Blending brush
Sweethearts clay embellishments

I appreciate you sharing your time with me. Have a fabulous day!

Miss Ink Stamps – Capy-cino Makes Everything Better

Happy Thursday everyone! Still playing along with the Coffee Lovers Fall | Winter Hop and today I’m here with Miss Ink Stamps inspiration to share! This new set called Caffeinated Critters is a match made in heaven…coffee and cute critters! What could be better?!?

So today I inked up the cute capybara and colored him with my copics. I cut him out and set him aside while I created my sentiment banner and prepped to get inky!

I pulled out the Cuppa Joe To Go stencil set and used the “pumpkin spice” layer to adorn my coffee cups. I love that this set has two versions. After inking up the stencil layers I went messy and tore one edge off my panel. Then I went back and inked the edge with the same teal theme I have going on.

I popped the panel up on a white card base and then popped the senitment strip and capybara up with foam squares too. For finishing touches I added glossy accents to his nose, glaze pen to his eye and a little stardust Stickles to the whipped cream in the cup.

Are you playing along with the Coffee Lovers Hop? It’s really so fun and gives you a little boost to create. Give it a try if you haven’t. You might win a prize too!

Products used:
Caffeinated Critters stamps
Cuppa Joe To Go stencils

Blending brushes
Lawn Fawn dye inks
Foam tape and squares
Glossy accents
Stickles – stardust
Sakura Glaze Pen – black

I appreciate you sharing your time with me. Have a fabulous day!

Miss Ink Stamps – Halloween Hill on a Tag

Hello again my spooky friends! I’m popping in with a fun little tag I created especially for today! The new Halloween Hill stencil set has a number of fun things to adorn the top of the hill and today I just had to add those famous trick-or-treaters!

I created this tag by die cutting the tag shape first and then finessing where I wanted my stenciling to go. But you could always stencil a panel and die cut it out after if that’s better for you!

Like always I cut a second layer tag where I can write a message to the recipient of the gift too. I keeps my fun tag nice and clean but gives lots of space to write because, 1 – I can have a lot to say and 2 – I tend to write big.

Another thing to remember with this stencil set in particular is that there are Christmas images to put on that hill as well so don’t you dare put it away just yet! We’re just going to switch gears and color schemes in just a minute.

I hope you all have a wonderful Halloween and be sure to snag this stencil set because we’re going to get Christmassing with it real soon!

Products used:
Miss Ink Stamps Tag dies
Miss Ink Stamps Halloween Hill stencils

Blending brushes
Lawn Fawn dye inks
Liquid glue

I appreciate you sharing your time with me. Have a fabulous day!