Miss Ink Stamps – Happy Spring + Sneak Peek

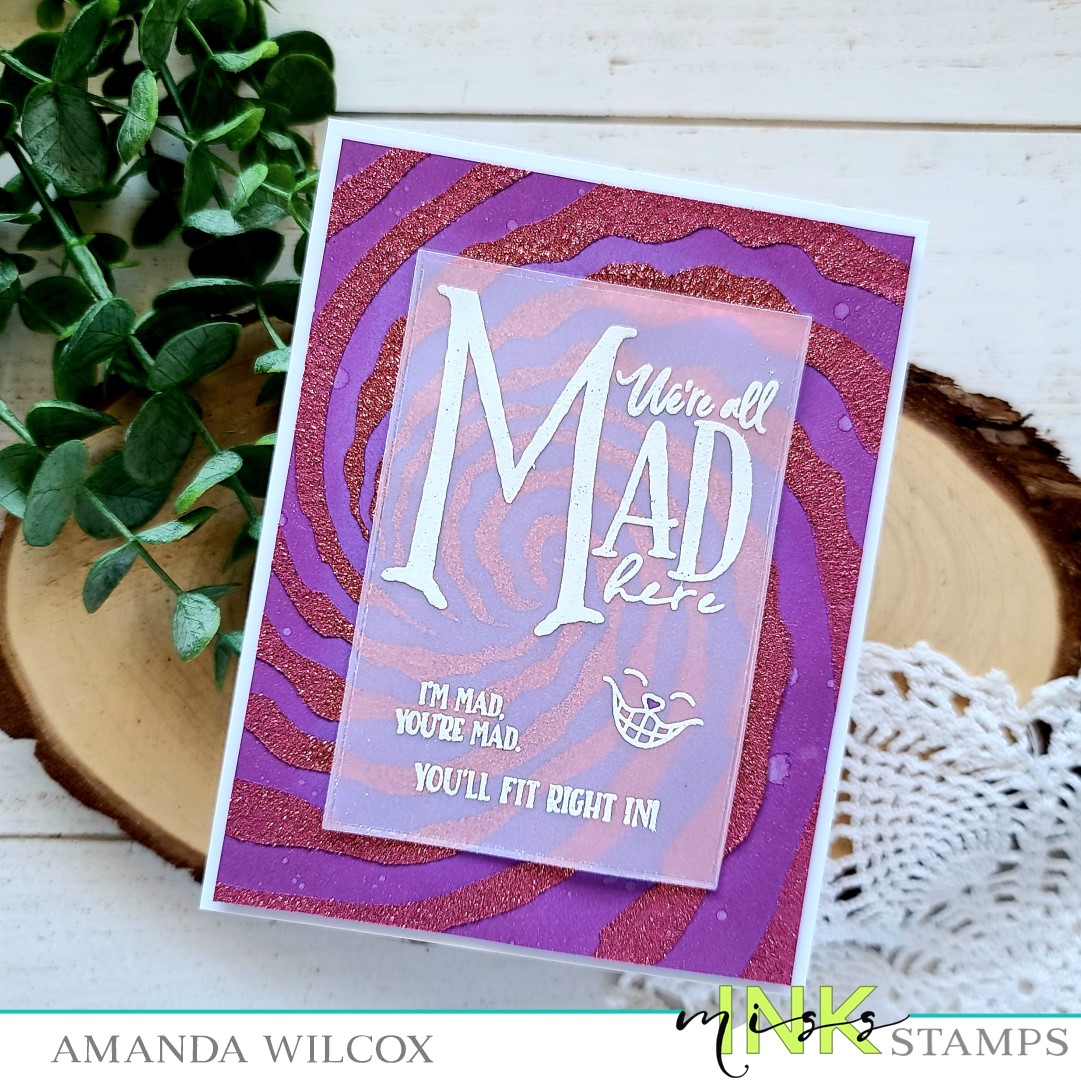
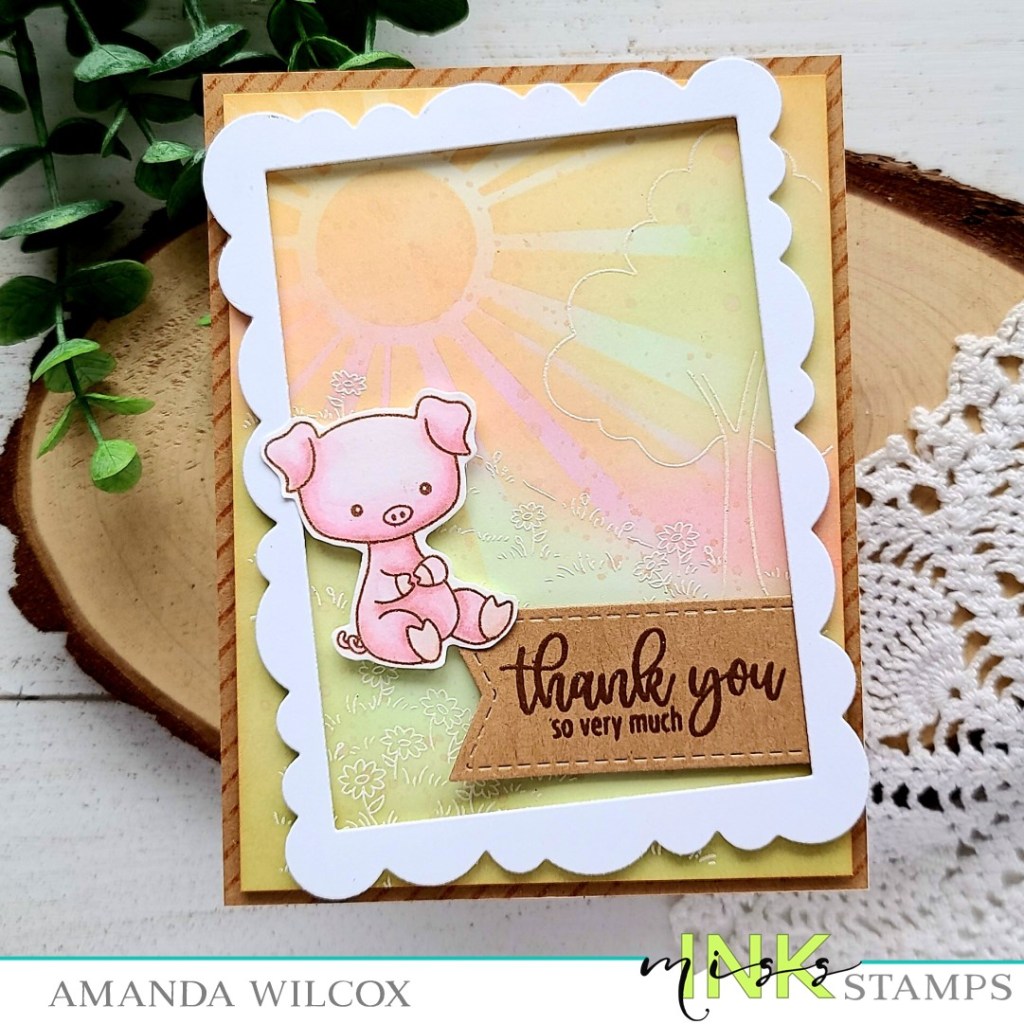
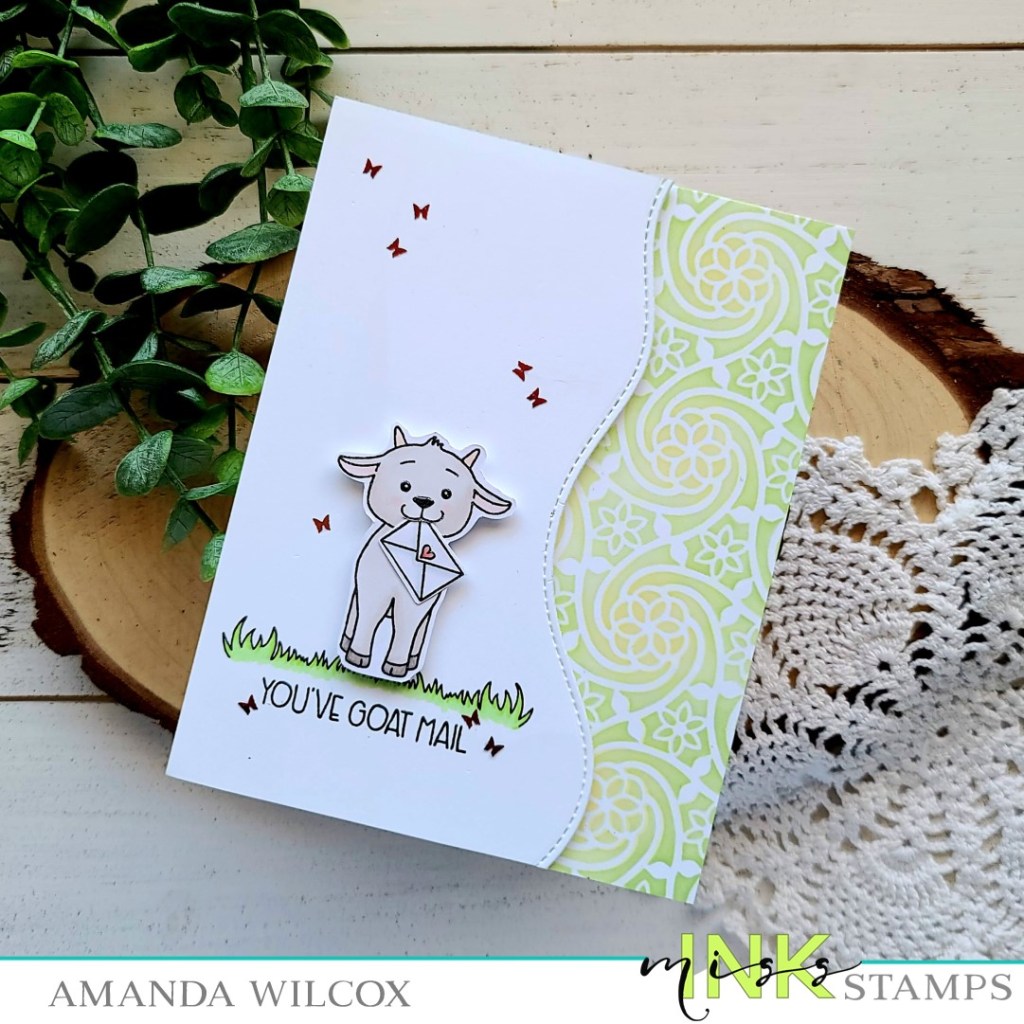
Hello everyone! I have a gorgeous Miss Ink Stamps card to share with you today and it has a sneak peek in it too! We’re having a new mini release of stencils tomorrow and I’m using one on my card today called Enchanted. The name is totally what directed the feel of my card and I just love it.

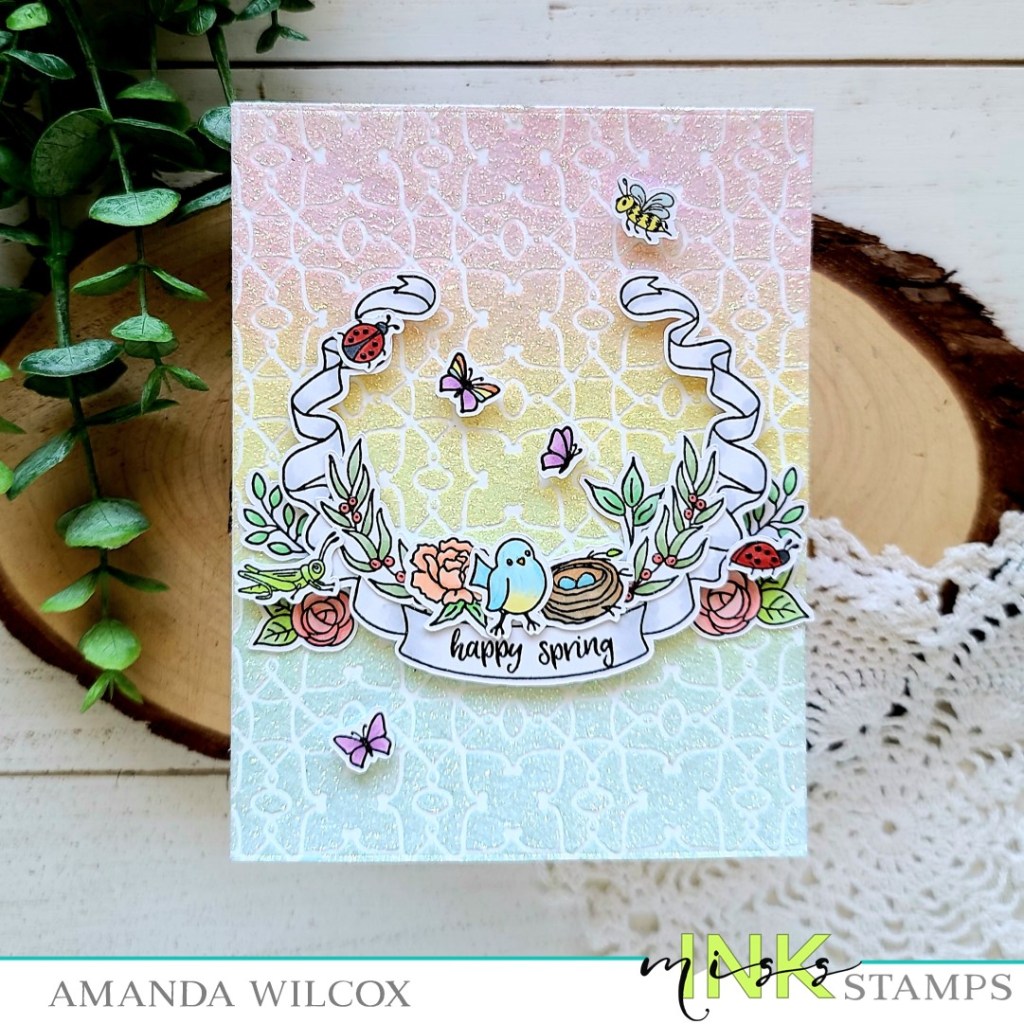
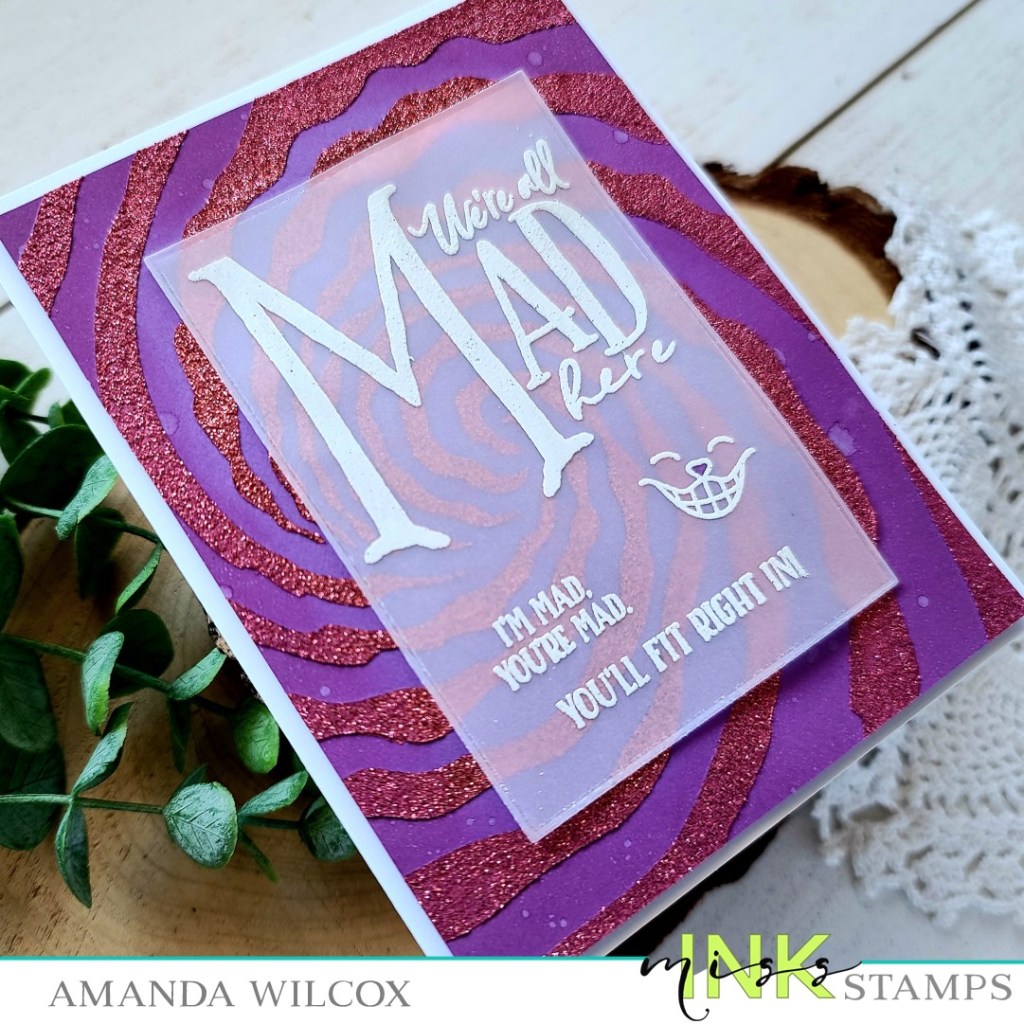
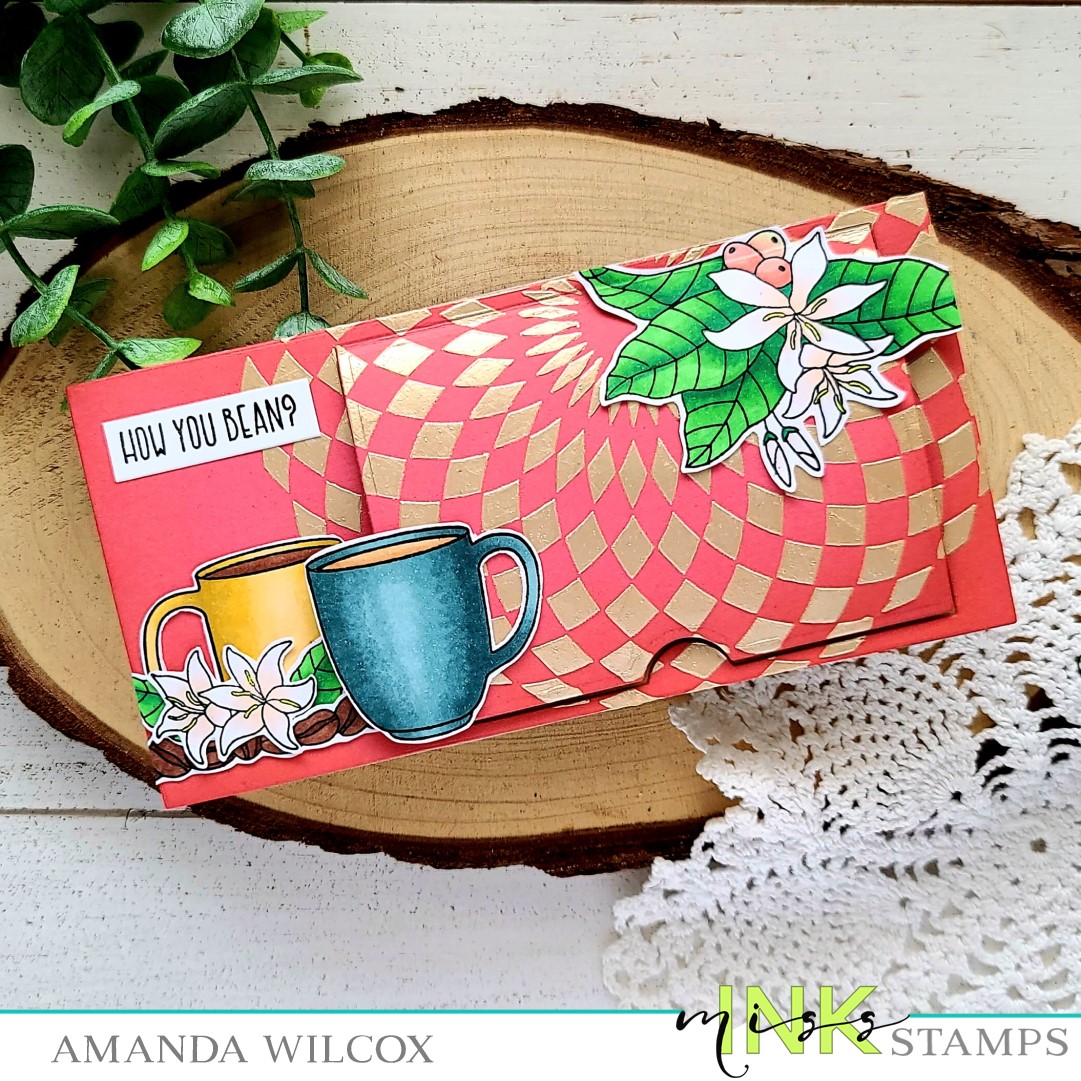
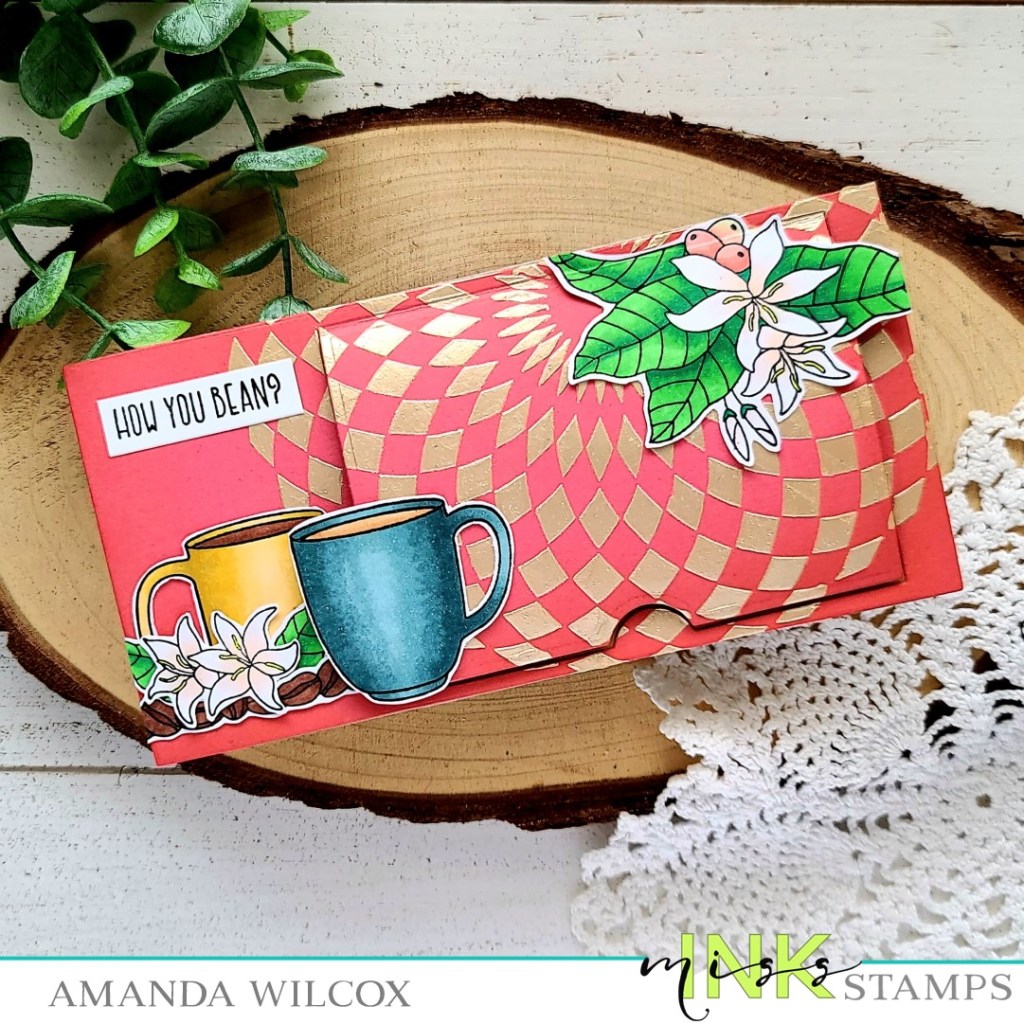
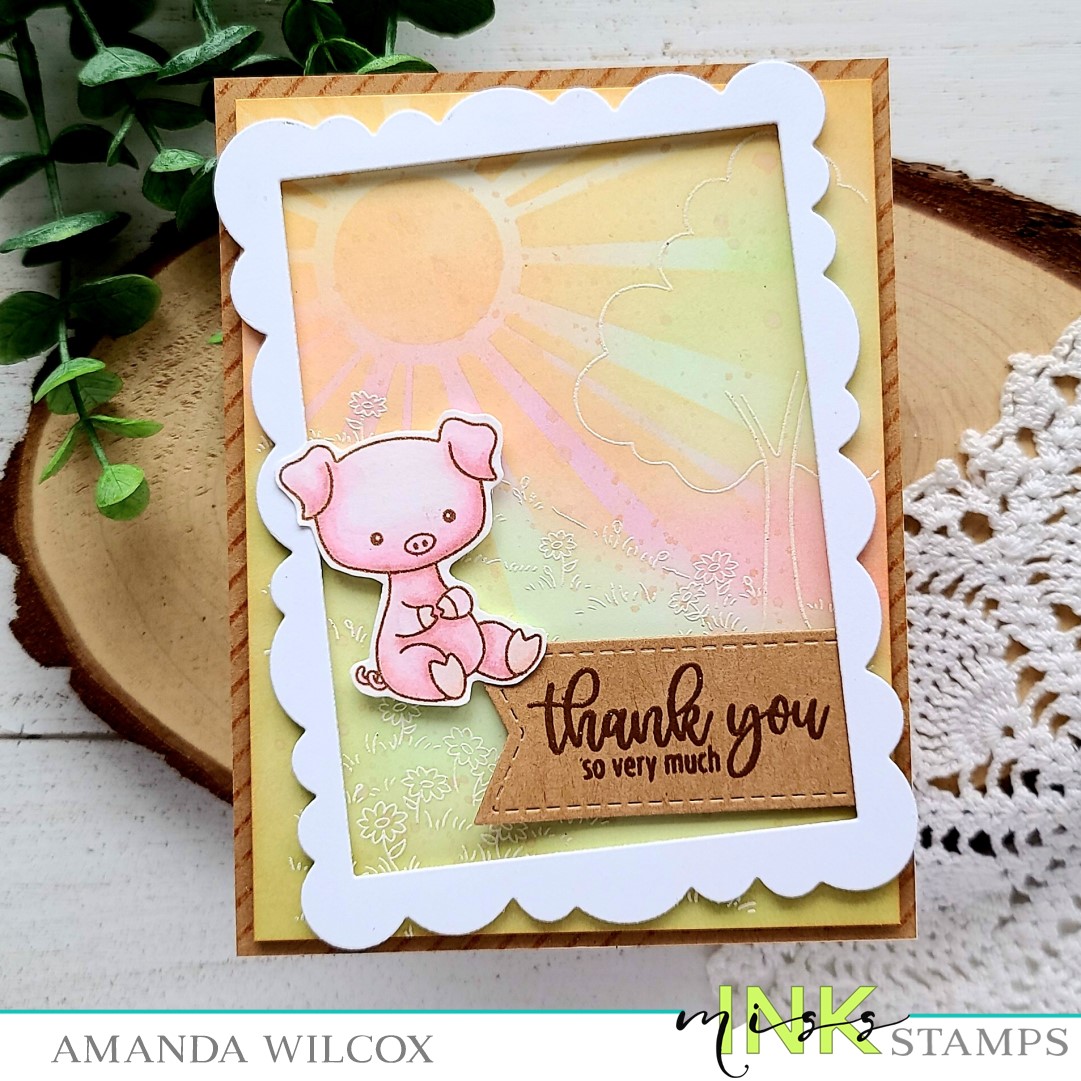
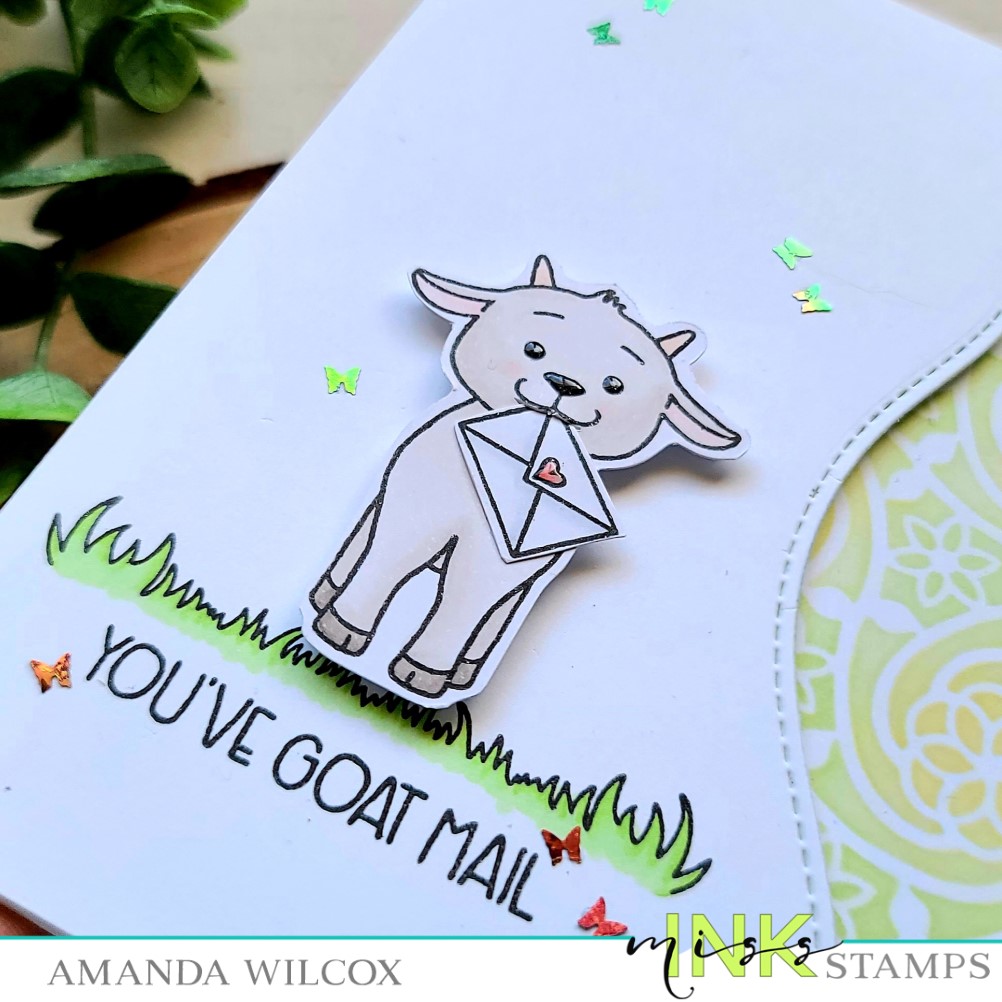
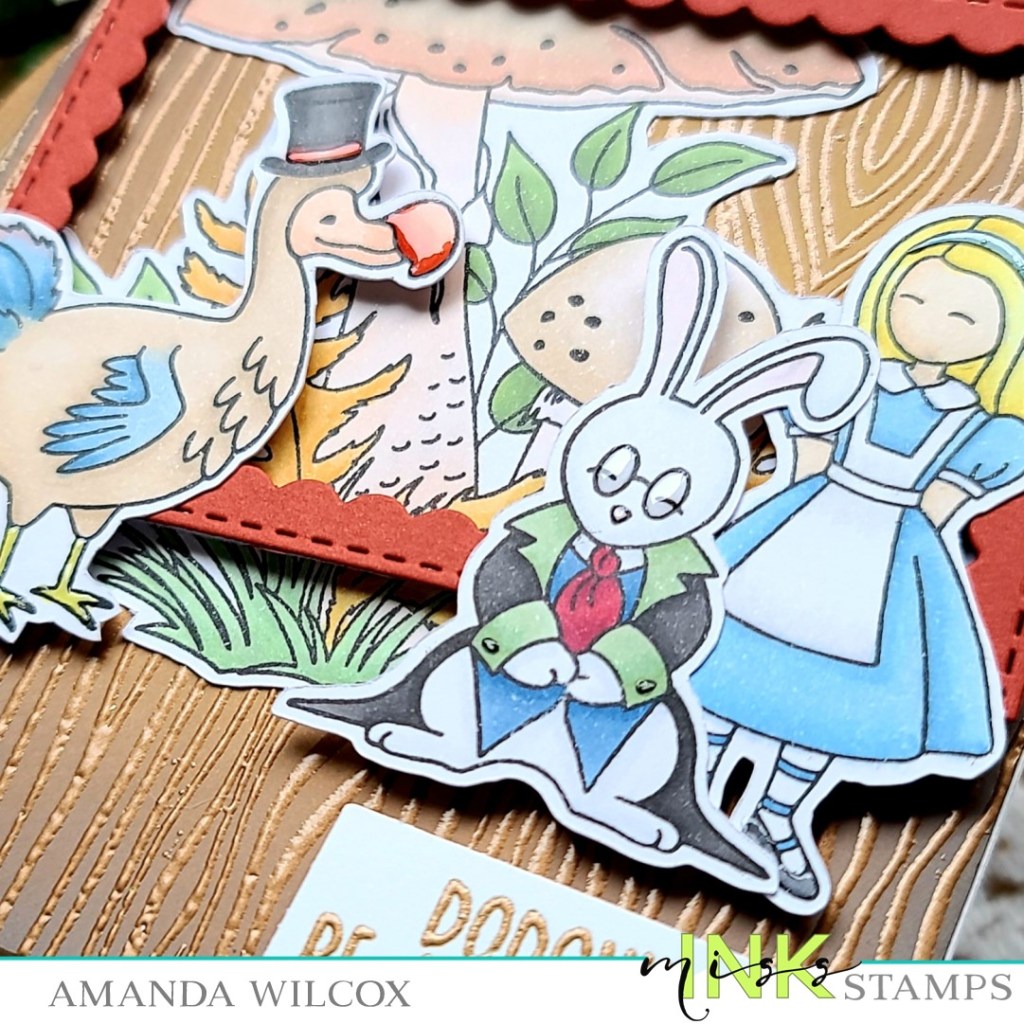
I sprayed my stencil with Pixie Spray and adhered it to a white panel. Then I used my Lawn Fawn dye inks in kiddie pool, butter and ballet slippers and a blending buddy brush to ink up the stencil. I wiped my stencil off and added iridescent Glitter Glitz Gel over the top. I set that aside to dry while I cleaned up and stamped my images from Springtime Banners. I colored those with my copic markers and used the Scan-n-cut to cut them all out. Then, I stamped a sentiment from Springtime Bunnies in the banner.

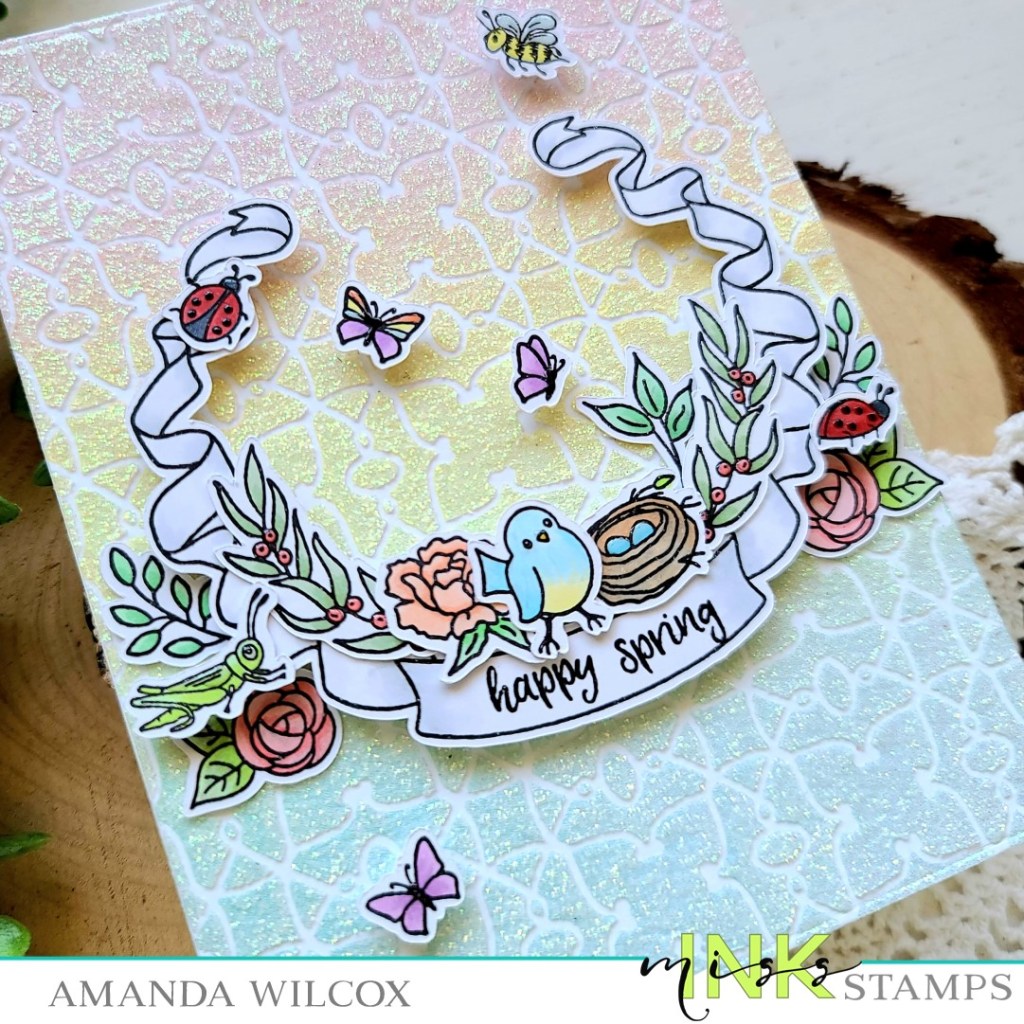
Once the glitz gel was dry, I ran the panel through my die cutter with the largest Trinity Stamps embossed edge rectangle die. I used liquid glue to adhere the panel to a white card base and started adding images. These were done with a combination of foam squares and liquid glue for some dimension.

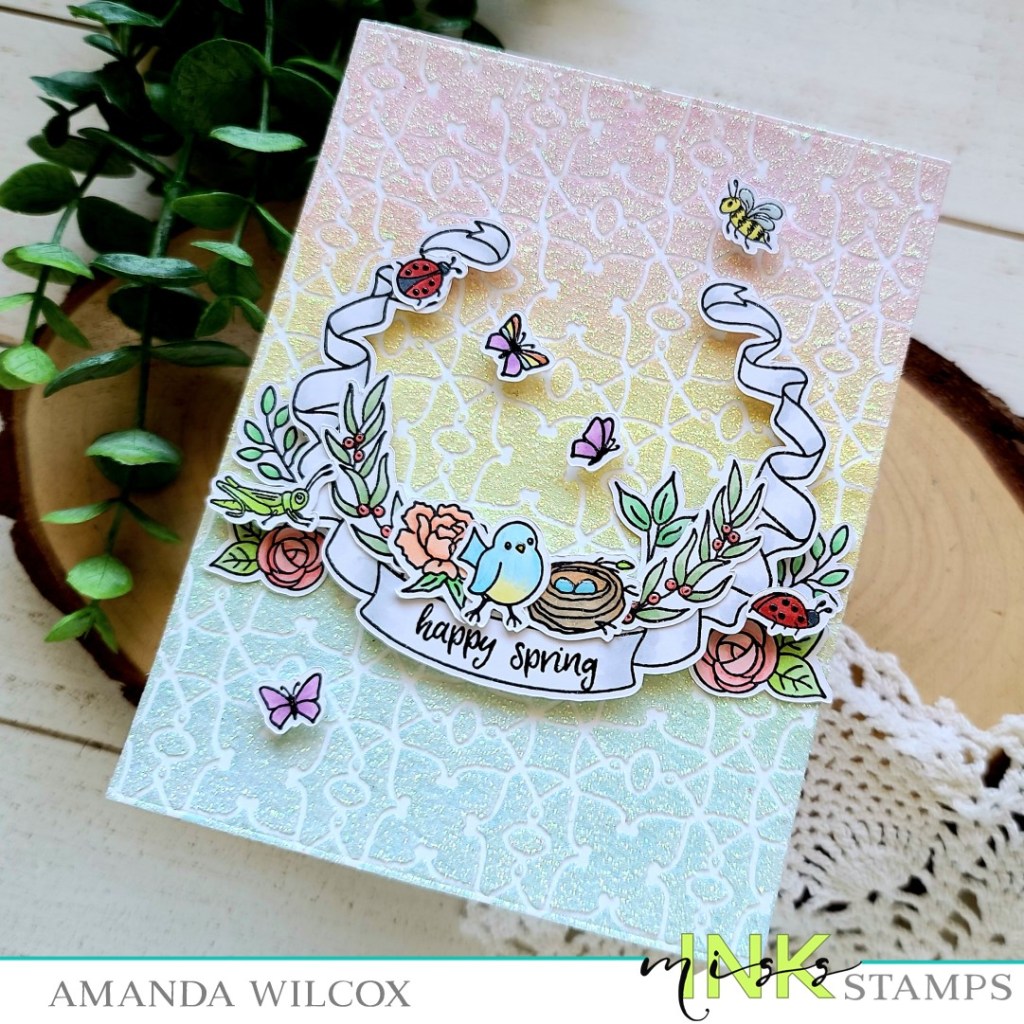
I kept finishing touches very light because I wanted to focus to be on that amazing glittery background and cool stencil design – just some simple glossy accents to butterfly bodies, bird eggs and beak, dots on the ladybugs, things like that.

I appreciate you sharing your time with me. Have a fabulous day!

Miss Ink Stamps – We’re All Mad Here

Hi again! I’ve fallen down the rabbit hole again…those wonderful Miss Ink Stamps Alice in Wonderland products are ahhhhh-mazing! This time for some reason, when I looked at the rabbit hole stencil looked a bit like the Cheshire Cat’s stripes so I decided to play a little bit.

I took some Glitz Glitter Gel in bubblegum and the rabbit hole stencil from Miss Ink Stamps on purple cardstock! It’s totally brilliant and I love it! I left it overnight to dry and when I came back the next day I did think the purple cardstock was a little flat so I inked up the edges with distress oxide ink in wilted violet and spritzed it with my distress sprayer.

I arranged my stamps how I wanted them and found a Trinity Stamps modern embossed rectangle the correct size and die cut a piece of vellum. Then I stamped and heat embossed my sentiments from Miss Ink Stamps Madness and that awesome image of Chesh’s face from Wonderland Wisdom. I hid some liquid glue behind the embossing and placed it on the stenciled panel, topping it with some acrylic blocks to help it dry flat.

I left it be for a while and came back to finish things up. I trimmed 1/8 inch off each side of the stenciled panel and added foam tape to the back. Then I adhered it to a white card base and my card is finished.

Isn’t it splendid?!? I just love how the bright, vibrant colors turned out! It’s so fun and the Alice sentiments just make me happy.

I appreciate you sharing your time with me. Have a fabulous day!

Miss Ink Stamps – How You Bean?

Hi everyone! I shared this card on social media earlier in the week but hadn’t had a chance to write up a post about it. Someone had asked so I wanted to pop in with a quick explanation how I created this fun mini slimline card. It features stamps and stencils from Miss Ink Stamps and dies from Trinity Stamps.

I started by die cutting the largest panel from Trinity Stamps Clean and Simple Mini Slimline Panels die set from a melon cardstock and a second from kraft. Then I used champagne metallix gel from Thermoweb over the Circular Harlequin stencil from Miss Ink Stamps and set it aside to dry. I stamped and colored images from Miss Ink Stamps Brewtiful and colored them with my copic markers. Then I fussy cut them all out.

Once the metallix gel was dry I used one of the Trinity Stamps Lift the Flap dies to create a flip up window. Using that panel as a guide, I stamped sentiments on the kraft panel that would show when the flap was opened and moved on to assembly.

I adhered the melon panel to the kraft one with tear tape and then used liquid glue to attach all of my images. The trick here is to not attach something to the flap and the card front. You have to choose one. Haha. I stamped one more sentiment and trimmed it into a small strip and attached it as well. Last, I used liquid glue to adhere the panels to a white card base that measures 3×6 inches and trimmed off images that hung over the edge.

I hope this helps and inspires you to create something wonderful.

I appreciate you sharing your time with me. Have a fabulous day!

Miss Ink Stamps – Grab Life by the Beans

Hi again! I have another fun card featuring a Miss Ink Stamps set called Java Joe today. I think this set is really fun and cool that you don’t always have to use all of the images included. You can fill a scene or keep things simple and they all look great.

To be totally honest, this card did not turn out how I had planned but I love it and it all worked out in the end. I started by stamping the store and brick images in VersaMark ink on a kraft cardstock panel. Then I heat embossed it with white embossing powder. I inked up the edges with fired brick distress oxide ink and hated it. Lol. It just didn’t look like I wanted it to. So I kept going with the fired brick and then took ground espresso distress oxide ink over the storefront image and I started to like it. I spritzed it with water and set it with my heat gun.

I stamped the image of the girl at the table from Java Joe and colored her with my copics, then I fussy cut her out and laid the image on my panel. Again…hated it. She was so bright and stuck out so I took tea dye distress ink and went over the whole image. Now we’re going places! I popped her up with foam squares and moved on to the sentiment. I thought that I would stamp and attach a banner at first but, again, things were not cooperating. So I stamped and heat embossed a sentiment on a strip of vellum and wrapped it around the edge of the panel, attaching it with washi tape. I used liquid glue to attach the panel to a card base and, voila, card finished.

All in all, I think everything worked out pretty well and I really like this card. One thing I forgot to mention…when you’re done blending ink over heat embossed areas, wipe it off with a dry cloth so your heat embossing shows through again. I did this a few times to really get the ink off.

What do you think of today’s card? Have you ever had a card that fought you through the whole process? I feel like it has to happen to someone other than me too.

Anyway, I appreciate you sharing your time with me. Have a fabulous day!

Miss Ink Stamps – Hippopotamiss You

Hey there again! I’m hanging out on the Miss Ink Stamps blog today with a fun slimline mini scene card. Sometimes coloring in whole card front scenes can be daunting and overwhelming so I decided to try something different and just to a mini scene. I love it and I’m totally hooked! Plus, you know I love these hippos more than words!

For today’s card I stamped my hippo and bird from Hippo Hooray and then also stamped masks for them. After cutting and placing the masks I stamped one of the Scene Builder: Meadow images over the top. I removed the masks and colored everything with my copic markers. I die cut the panel with a stitched slimline rectangle and then cut a second one just a smidge bigger out of yellow.

The yellow one is adhered to a card base with liquid glue and my scene panel is popped up with foam tape. I stamped and heat embossed a sentiment from Hippo Hooray on black cardstock with white embossing powder. I trimmed it down into a strip and popped it up with foam squares.

Moving on to finishing touches, I added black glaze pen to the critter eyes and, once it was dry added a white gel pen accent back in. Then I added unicorn Stickles to the flowers in the grass for a little shimmer. The last thing I did was add glossy accents to the bird’s beak and hippos teeth and toes for a little shine.

I appreciate you sharing your time with me. Have a fabulous day!

Miss Ink Stamps – Love You This Much

Hi there! I have a super adorable dinosaur card to share with you today featuring the Miss Ink Stamps Unstoppable set. I love these dinos so much! They crack me up!

I started by stamping my dinosaur and then cut a mask for him. Then I stamped down the claw arms and removed the mask. I colored him with my copics and fussy cut him out. Then I moved on to my card front by inking up the Stripes stencil with blue and teal inks. on a white panel. I trimmed it down to 5.5×4. Then I glued a couple of thin black strips behind the edge for a little interest. I die cut 2 hearts from Trinity Stamps nested hearts dies and adhered them together. They are popped up with foam tape on the stenciled background and my dino is also popped up.

I stamped and heat embossed 2 sentiments from the set on black cardstock and cut them into thin strips. Then I added foam strips and adhered them down. The whole panel is adhered to a white card base with liquid glue.

This card is so stinkin’ cute! I just love the idea of a giant T-Rex holding onto those claw extenders because his arms are so short. Makes me giggle.

I appreciate you sharing your time with me. Have a fabulous day!

Miss Ink Stamps – Thank You Very Much

Hello everyone! I’ve got a fun Miss Ink Stamps card to share with you today. It features one of those sweet Punny Farm Pigs that I love so much, with a thank you sentiment from the Fall Bouquet set. I just love the fonts of the sentiments in that set.

I started today’s card by stamping and heat embossing images from Scene Builder: Meadow on white cardstock. Then I used blending brushes and dye inks to ink up the panel. Then I put the sunburst stencil over top and inked it up again. Once that was done, I trimmed the panel to 4×5.25 inches and used tea dye distress ink around the edges. Then I watered some of the same ink down and flicked it on the background.

I stamped and heat embossed a sentiment from Fall Bouquet in copper on kraft cardstock and die cut it with a banner die from Newton’s Nook. I also took a 4.25×5.5 inch panel of kraft and stamped it with the striped background from MFT Stamps with tea dye distress ink. I stamped one of the pigs from Punny Farm Pigs with brown VersaFine ink and colored it would my Zig markers. Then I fussy cut him out and started arranging my pieces.

I thought the card could use a little something still so I also added a wonky frame from Avery Elle to set the scene. For assembly, I used liquid glue to adhere the kraft panel to a white card base, then popped the inked panel up with foam tape. The frame and banner are attached with foam strips and the piggy with foam squares.

This was a fun card to play around with since it’s so different from my usual style or technique. I hope you enjoyed it.

I appreciate you sharing your time with me. Have a fabulous day!

Miss Ink Stamps – You’ve Goat Mail

Welcome back! I’ve got another sweet card featuring some Miss Ink Stamps products to share with you today. You know how I love my critters so now that I own these adorable Punny Farm Goats, I want to put them everywhere! They are just so happy!

To create my card, I started with an A2 panel and used some blending brushes, dye inks and the Mouse Flower stencil. I used a light yellow ink on the bigger flowers first and then went over the rest of the stencil with light green, filling in all the space. Then I stamped, colored and cut out the envelope and one goat from Punny Farm Goats. I took a second white panel and used my images as a guide to cut the edge with a stitched hillside border. Then I stamped a sentiment and the grass border, also from Punny Farm Goats and colored the grass with some copic markers too.

I adhered my stenciled panel to a white card base. Then I used a craft knife to cut the goat’s mouth open and inserted the letter, adhering it with a dab of liquid glue. I put foam tape on the back of the grass panel and foam squares on the back of my goat and adhered everything down.

For finishing touches, I added glossy accents to the goat’s eyes and nose, and the heart on the envelope. Last, I glued a scattering of Dazzle Butterflies for some added glimmer and shine. These are so cool because they change color in the light.

I appreciate you sharing your time with me. Have a fabulous day!

Miss Ink Stamps – How You Dodoing?

Hey friends! I’m over on the Miss Ink Stamps blog today with an epic Alice in Wonderland card. I’m so happy with how this card ended up. Taking a simple idea from my head, adding, twisting and turning and ending up with a final product that I just love. I hope you love it too!

To create it I started by blending distress oxide inks on a panel and then heat embossed the Woodgrain Background with gold embossing powder. Then I stamped images from Alice and Dodo and colored them with my copics. Once they were cut out with my scan-n-cut I realized I needed something else. I die cut a rust colored frame and then took it one step further and stamped and colored a mushroom image from Smokin’ Caterpillars. I also used the scan-n-cut to cut this out and then moved on to assembling my card.

I used liquid glue to adhere the mushroom image to the embossed panel. Then, I added foam strips to the back of the frame and stuck it down. Last, I added a combination of foam squares and liquid glue to my images and adhered them in place as well. I decided to heat emboss sentiments from Dodo in the same gold embossing powder as the woodgrain and cut them into blocks. Then I added foam squares to the back and put them in place.

Moving on to finishing touches, I just added a few spots of glossy accents to Alice’s shoes and headband; the dodo’s hat, beak and feet; and the rabbit’s glasses, nose and buttons.

This was such a fun card to build. I hope you have found some fun inspiration to create something wonderful.

I appreciate you sharing your time with me. Have a fabulous day!

Miss Ink Stamps – In the Dark

Hello again, I hope your week is moving along nicely. I’m sharing a card featuring some great products from Miss Ink Stamps, particularly their Alice in Wonderland Release that I absolutely adore!

I started my card by inking up a panel with dusty concord, chipped sapphire and black soot distress inks. Then I used VersaFine ink to stamp the Forest Path image over it. Next, I flicked pearl watercolor on the panel, trying to focus on the sky areas but not blocking anything off. Once all of that was dry I stamped and heat embossed the sentiment from Ink the Dark with silver embossing powder.

Next, I trimmed a little off the top and bottom of the panel to make it measure 5.5×4 inches and added foam tape to the back. Then I cut a black card base and added a little polka dot washi tape to the bottom edge. Then I adhered my panel to the front and a light gray insert to the inside so I could write a message easily.

At this point I thought it was missing a little something and the Dazzle Stars go so perfectly with the colors of the ink blending that I decided to scatter a few of those through the sky. I think it was just the perfect touch!

I appreciate you sharing your time with me. Have a fabulous day!