Newton’s Nook – January Release Day 4

Hooray!!! We made it all the way through to the final day of release reveals! I hope you’re super excited for today’s reveal and release day tomorrow! Make your list and check it twice because there is a ton to choose from! Let’s get on with the show for today’s fun reveal!

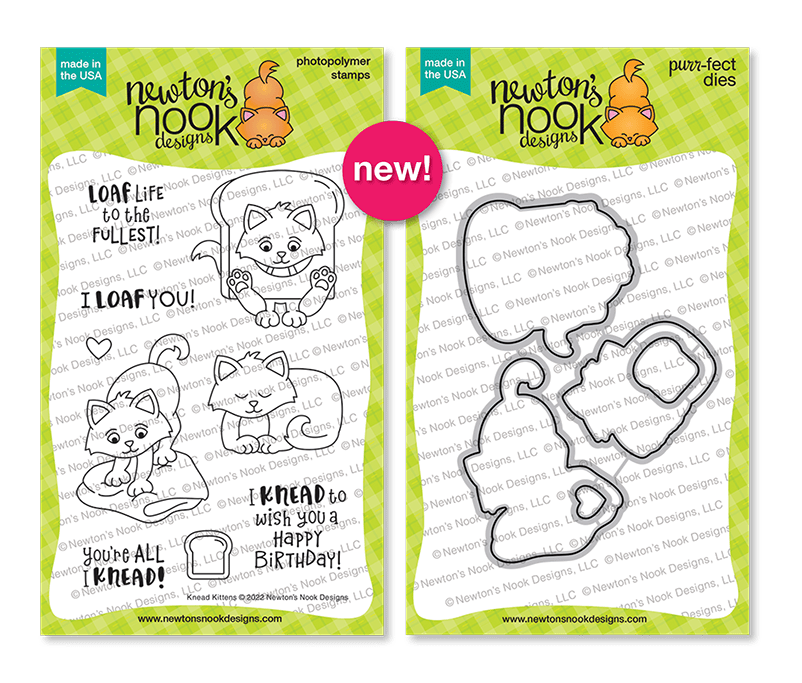
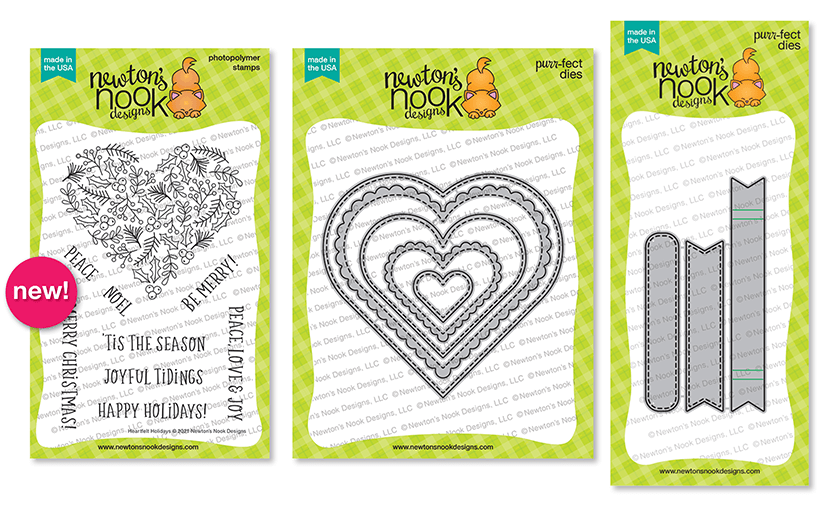
Love Bots stamps and dies

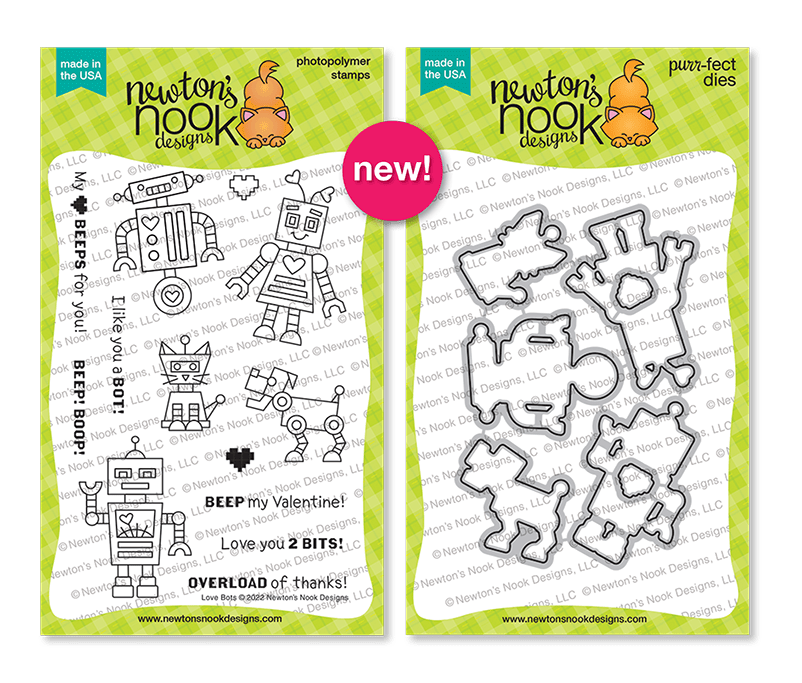
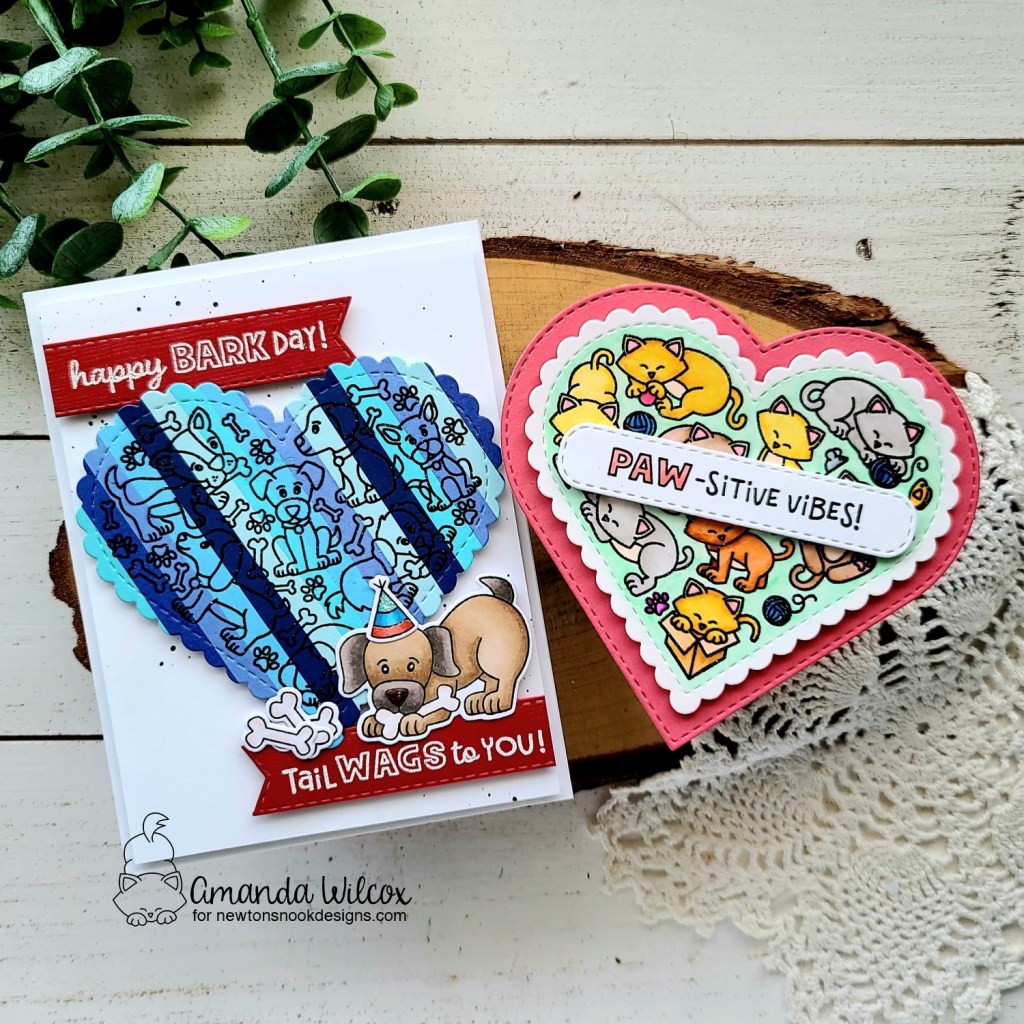
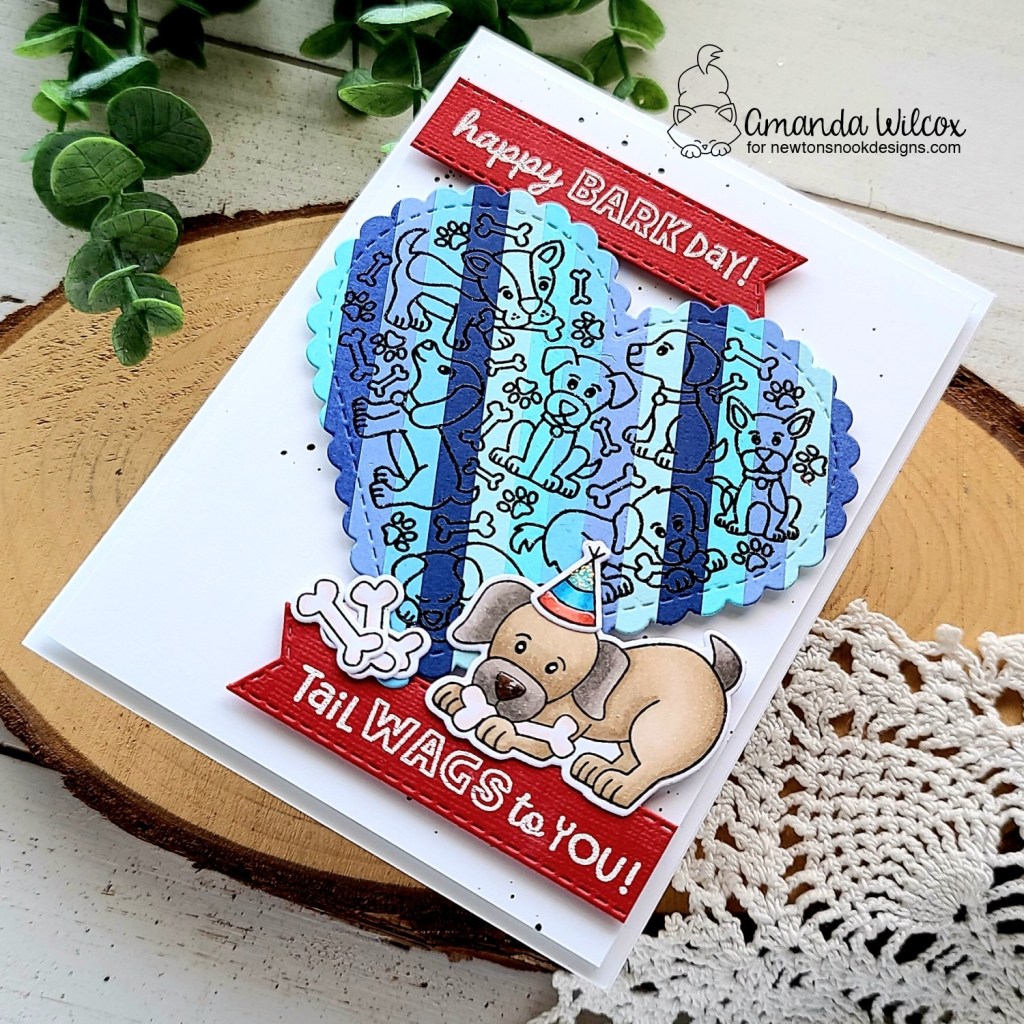
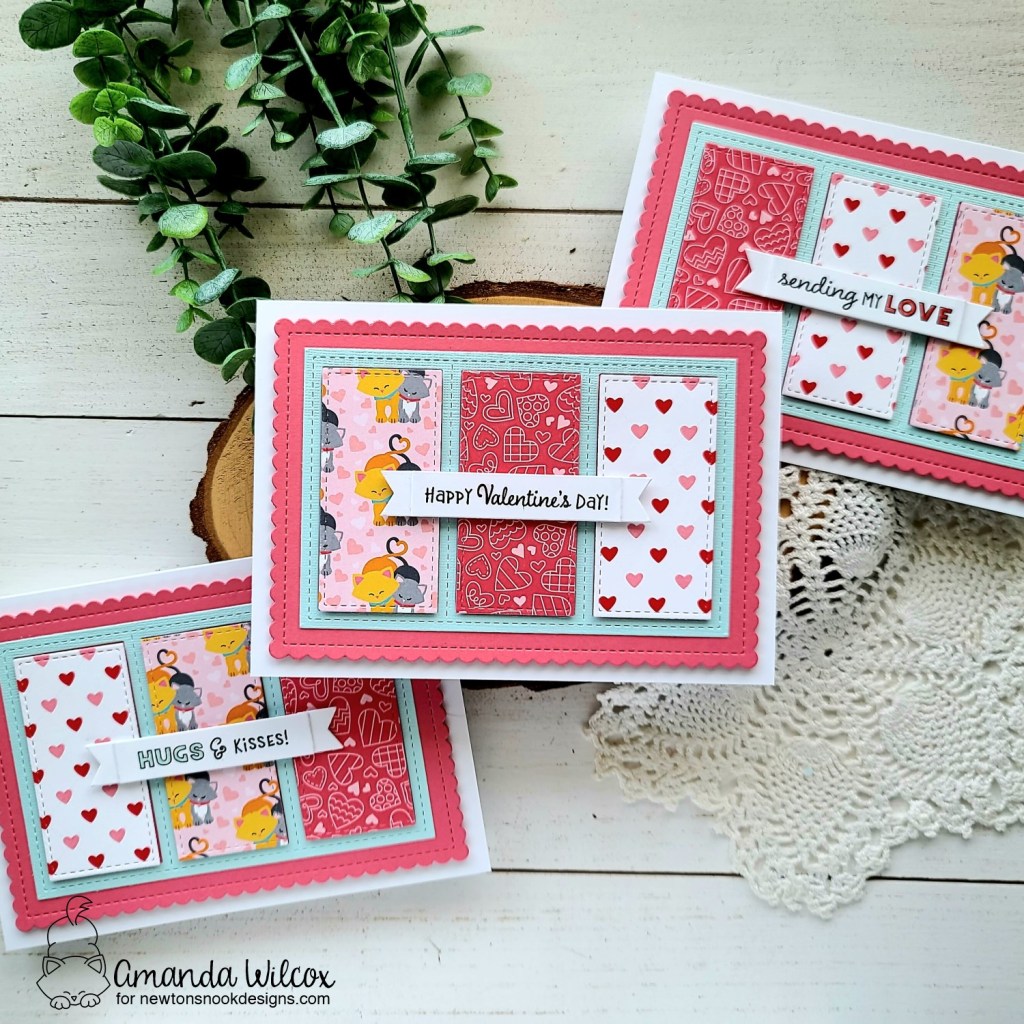
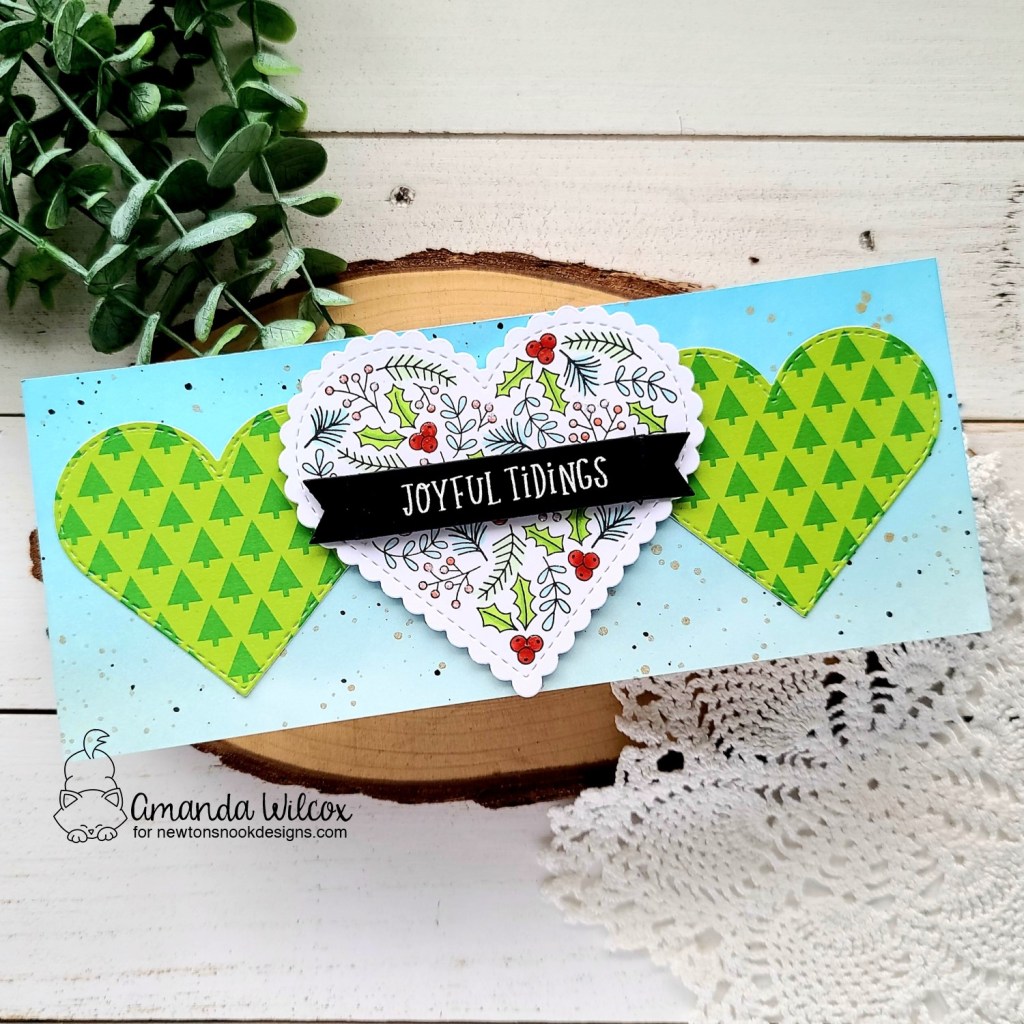
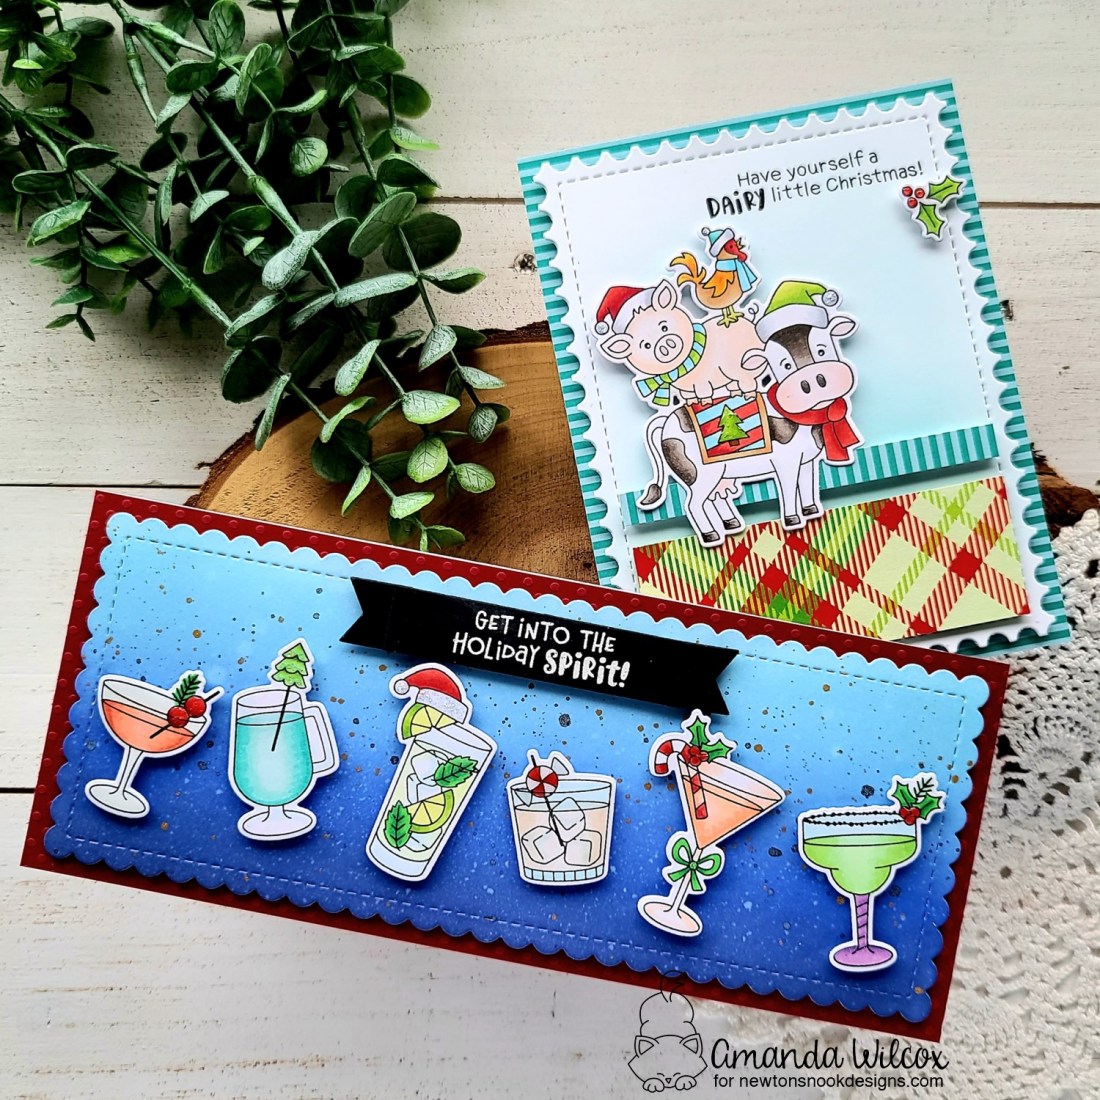
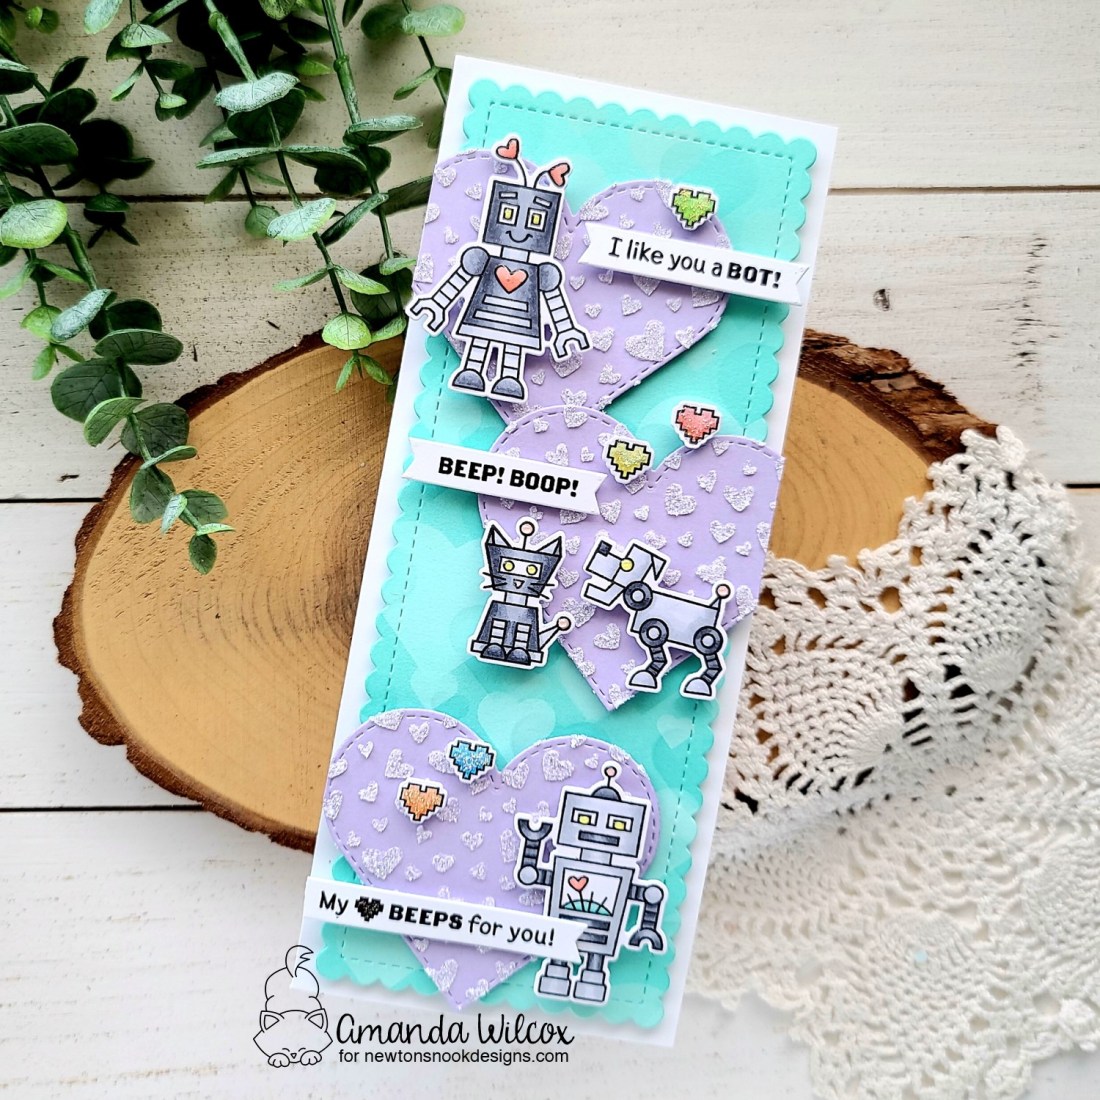
I have so many ideas to create with this new set that it was difficult for me to choose which one to try first. Ultimately this fun slimline design allowed me to play with almost all of the images so I landed on it but be on the look out for more to come with this super fun set!

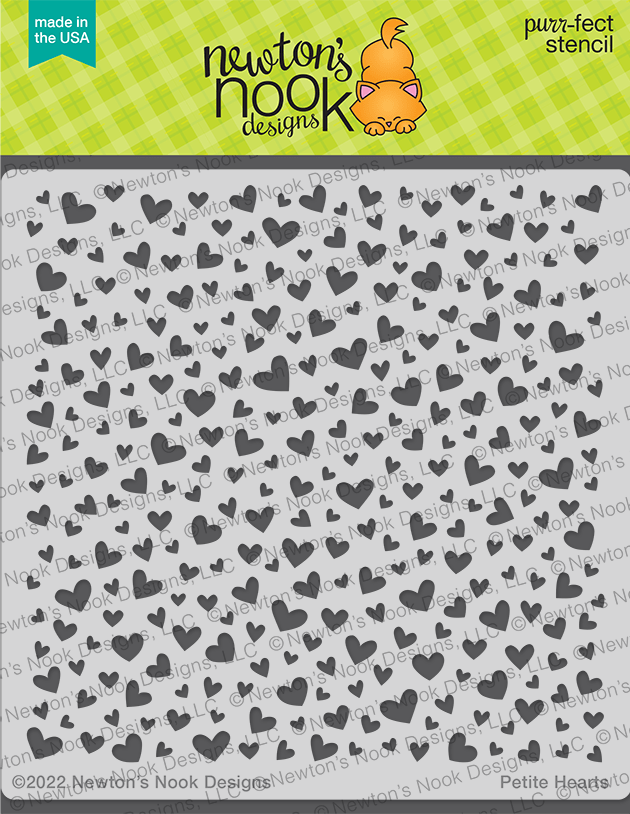
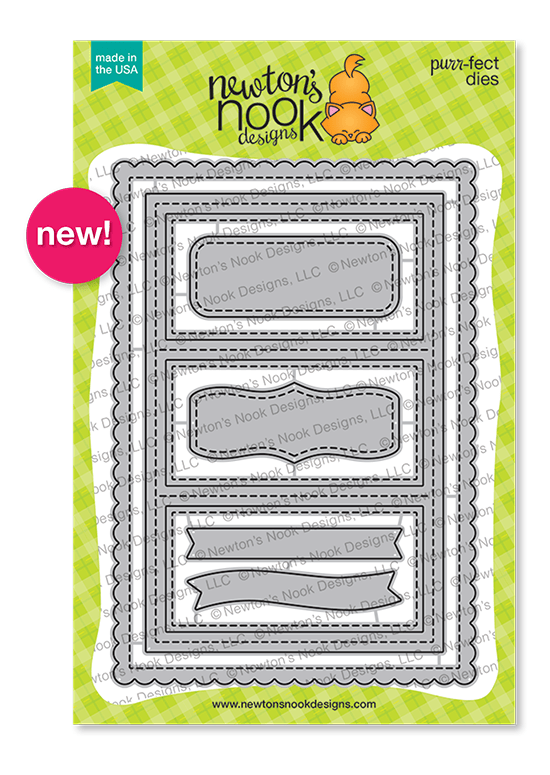
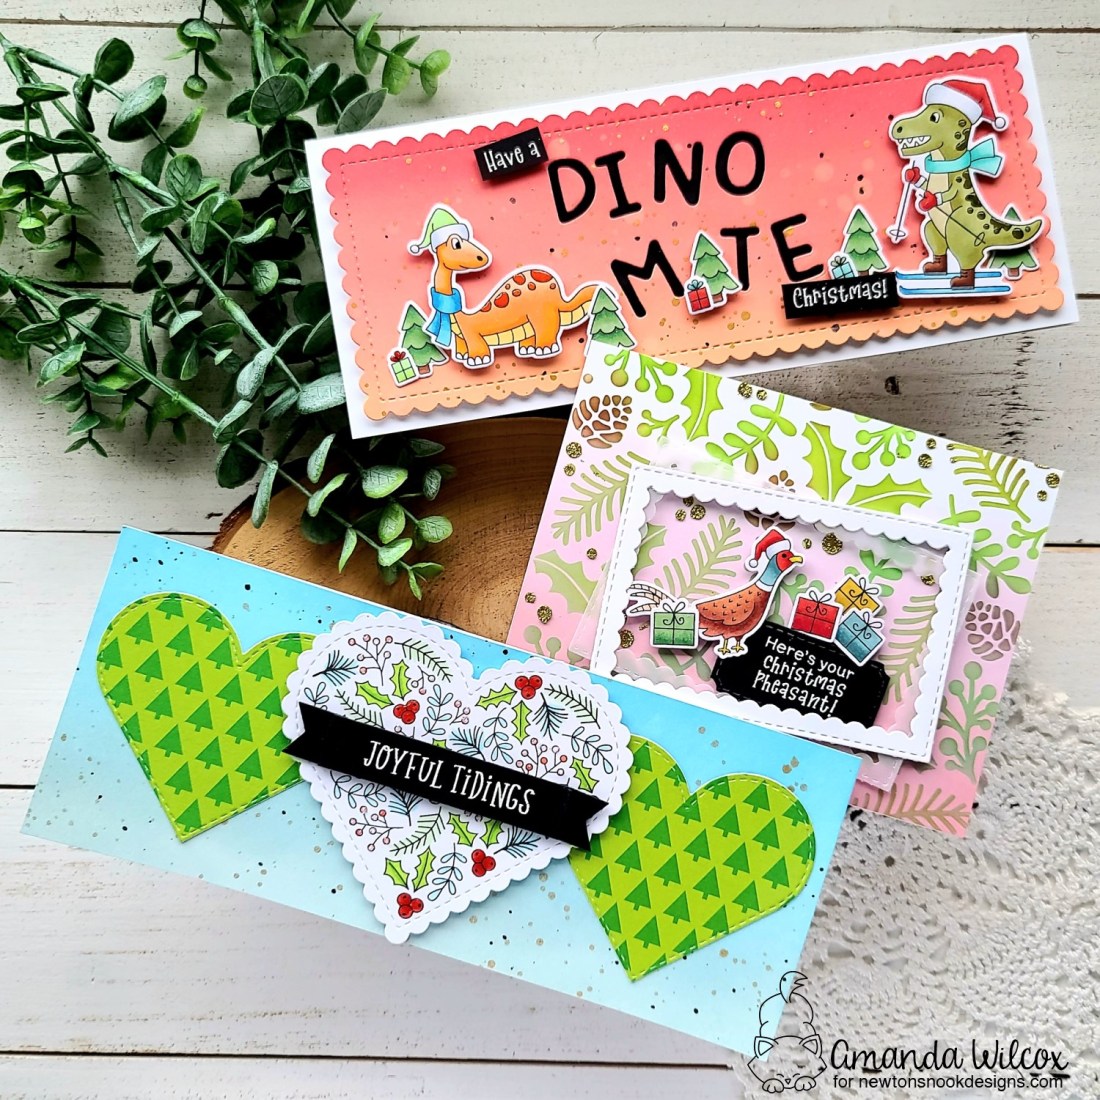
I chose my general design and started with the messy part first so it had time to dry. I cut 3 medium stitched hearts from the Heart Frame die set and spread white glitz glitter gel through the Petite Hearts stencil. I removed the stencil, set my hearts aside to dry and cleaned up.

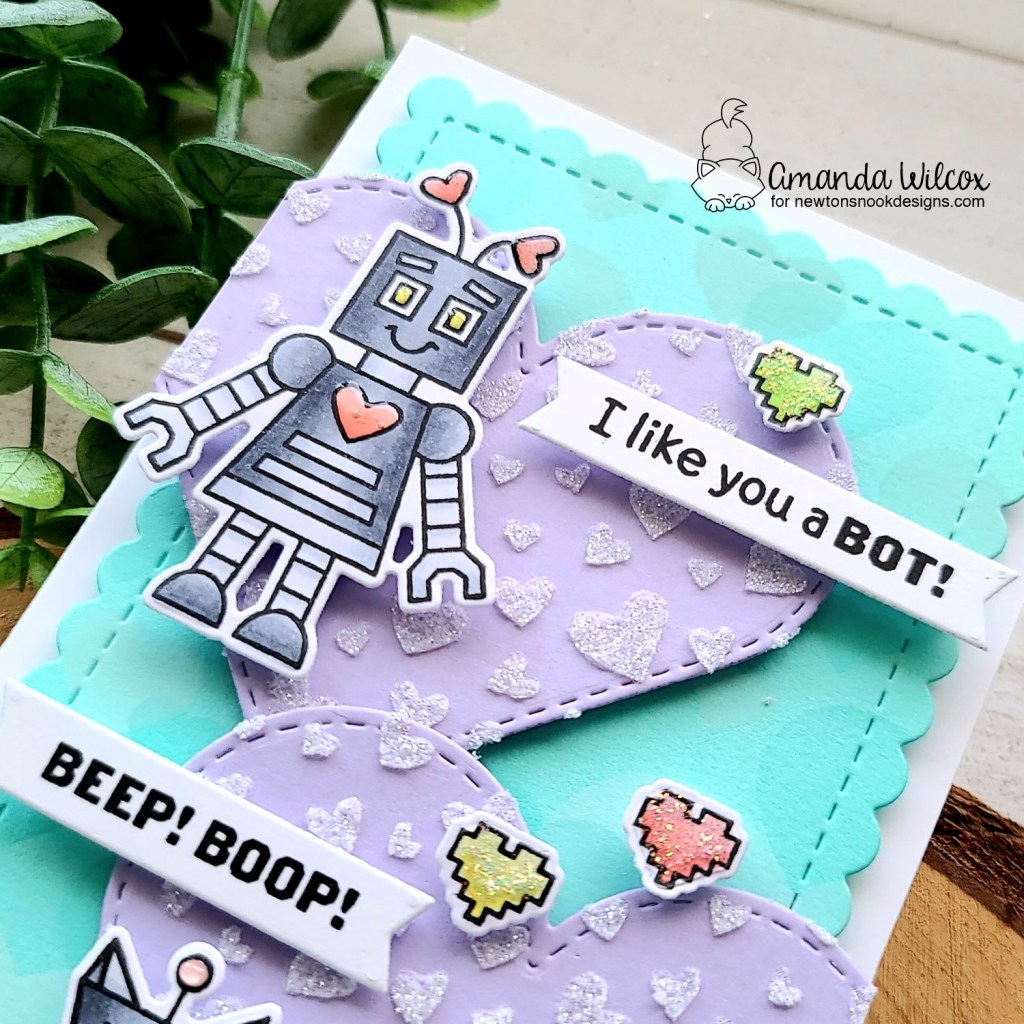
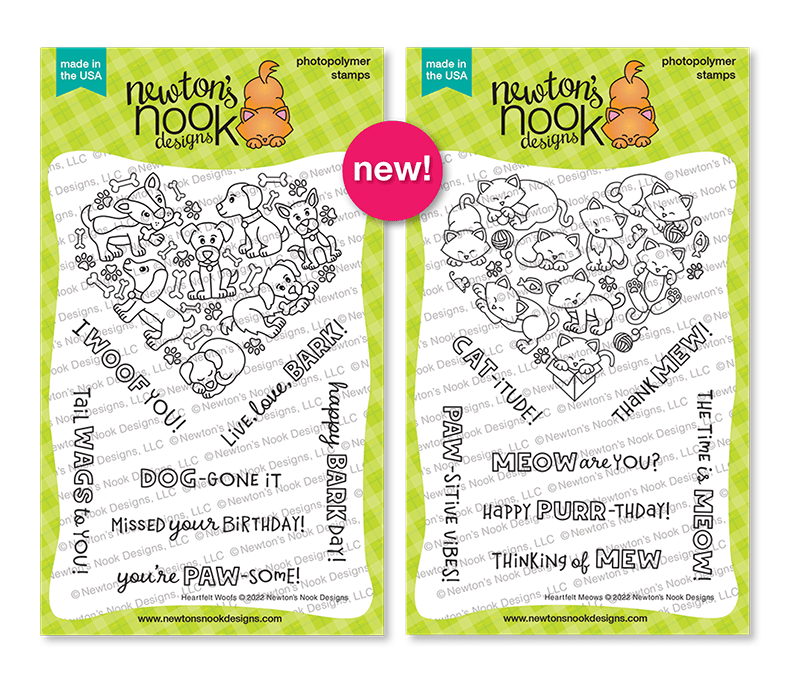
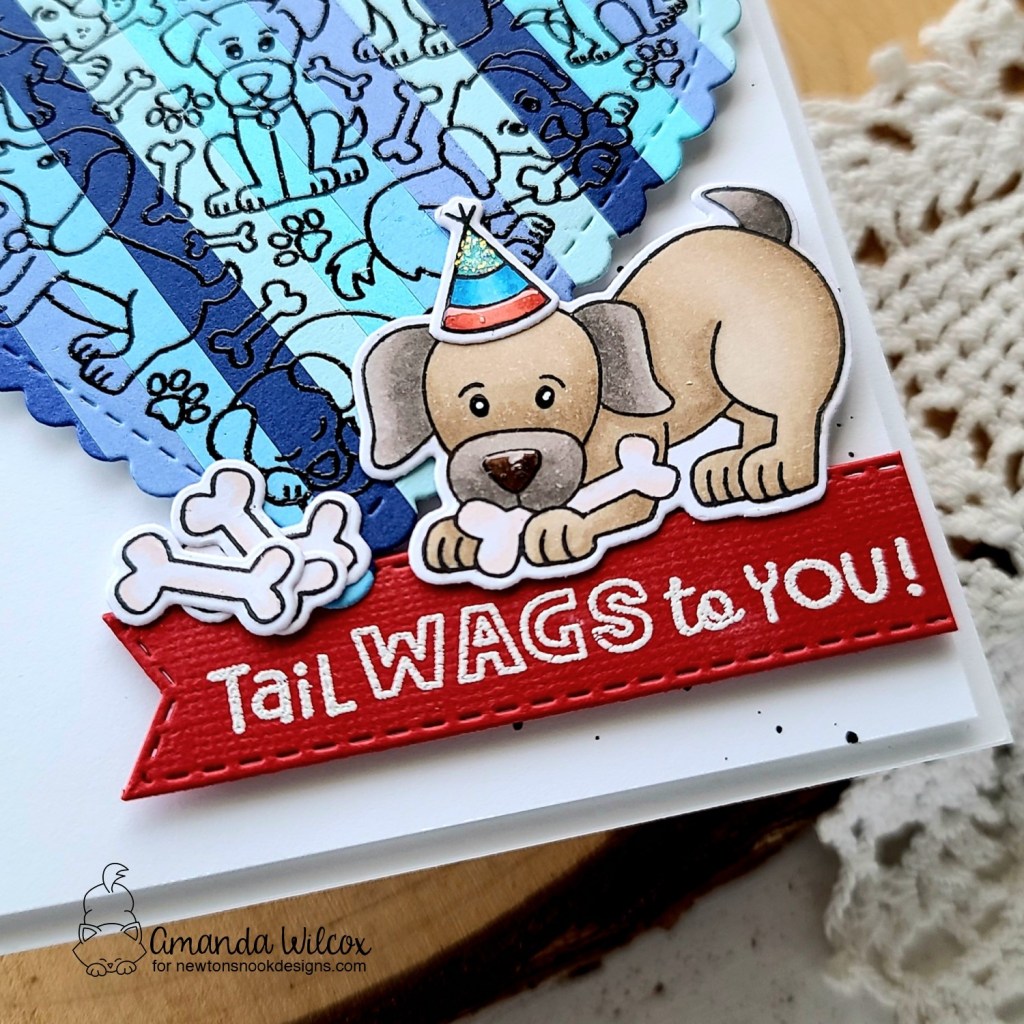
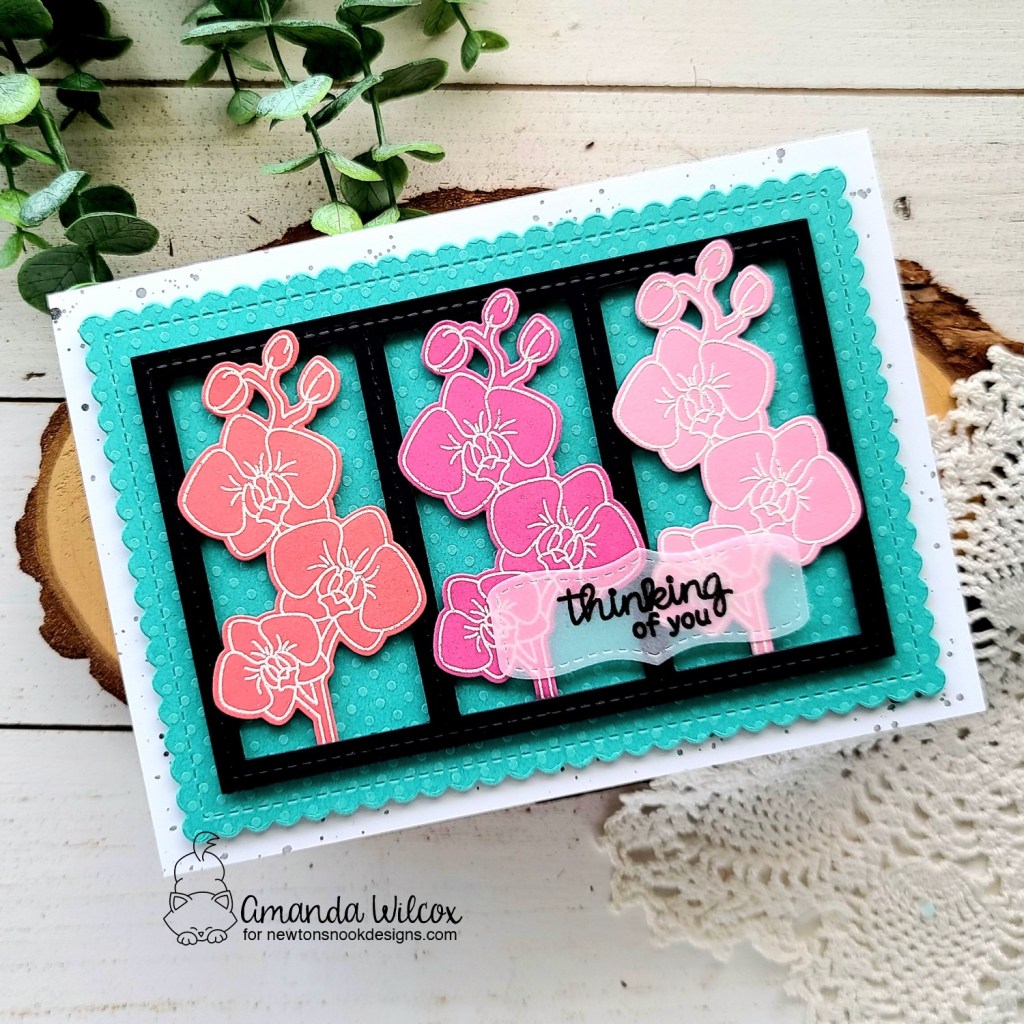
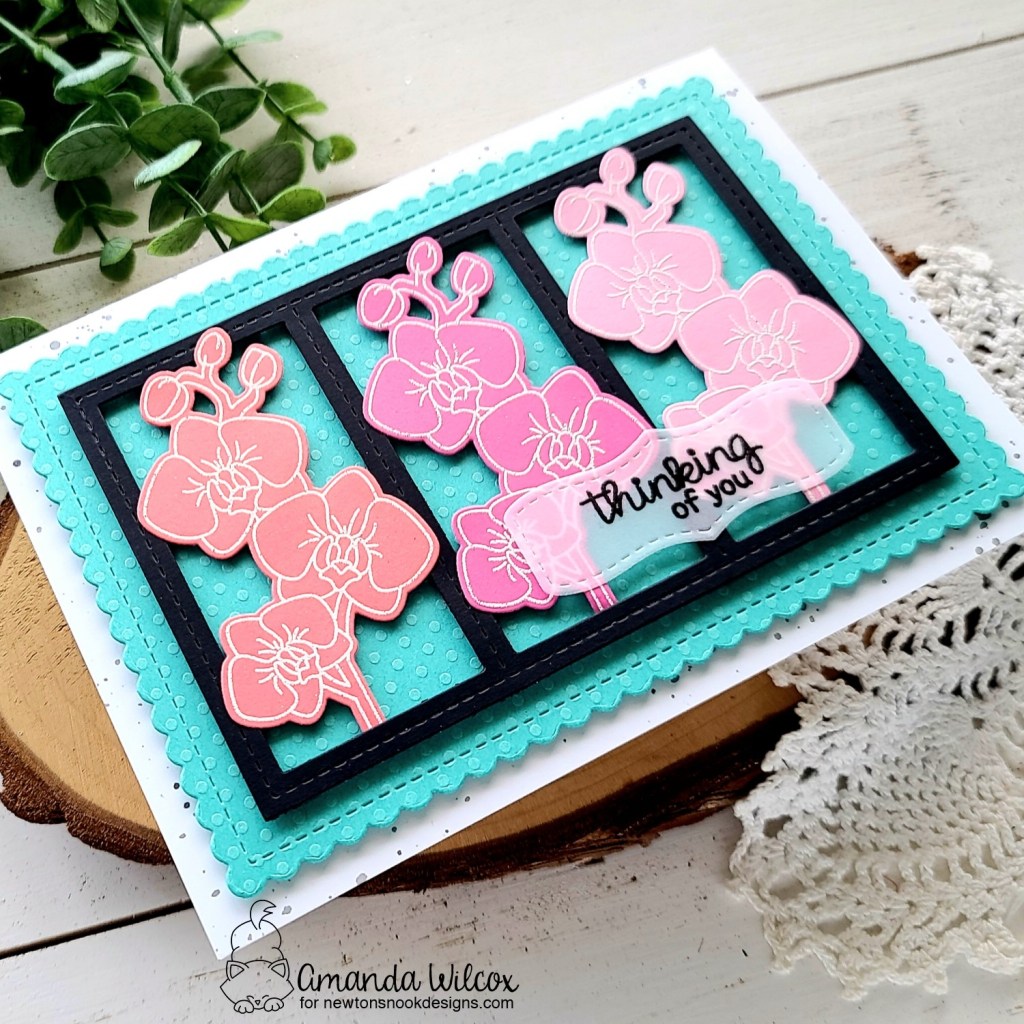
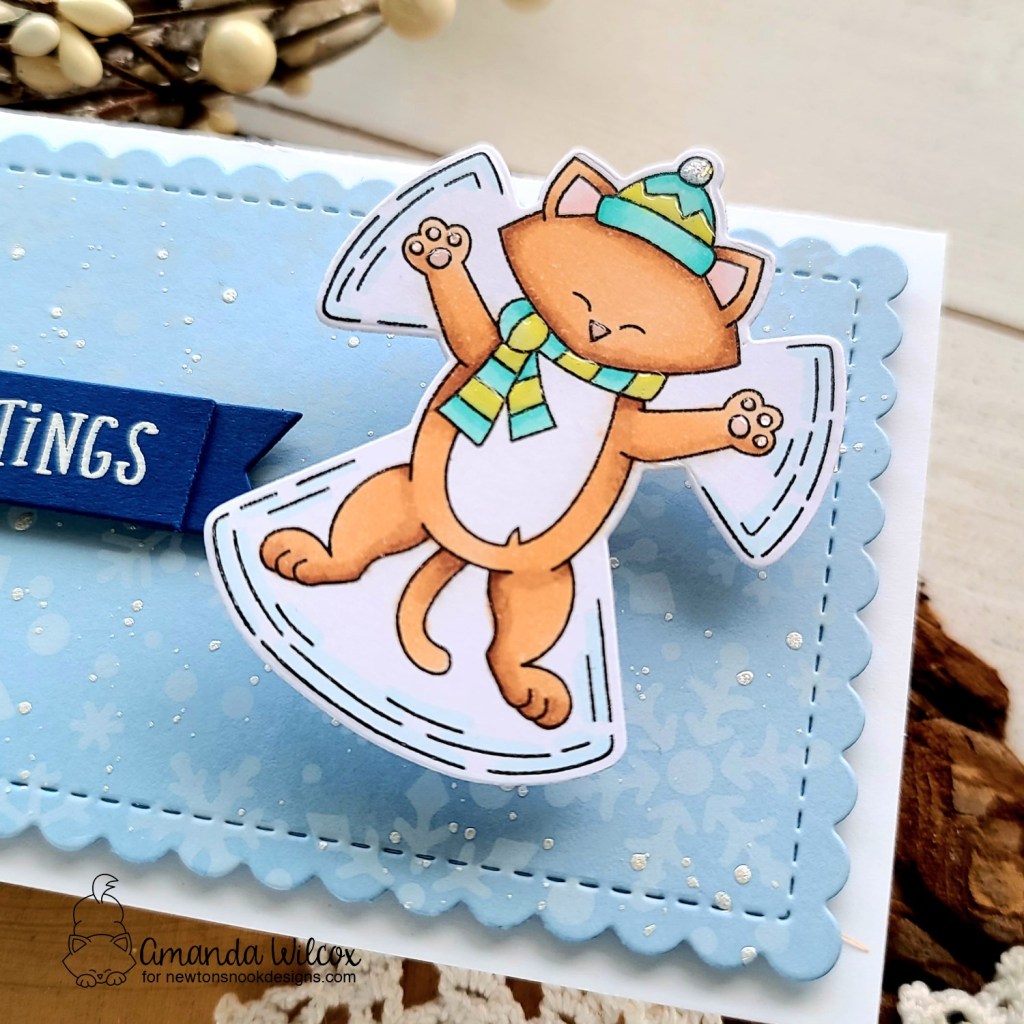
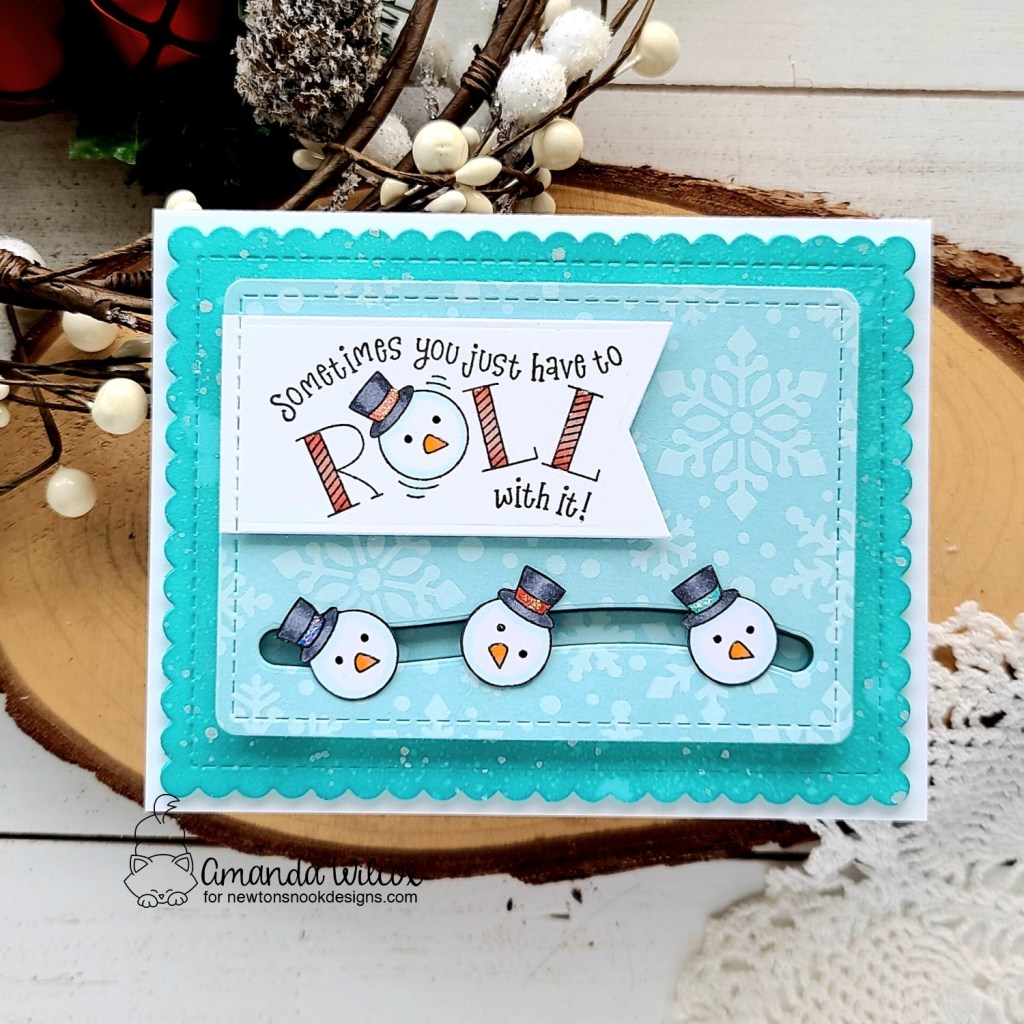
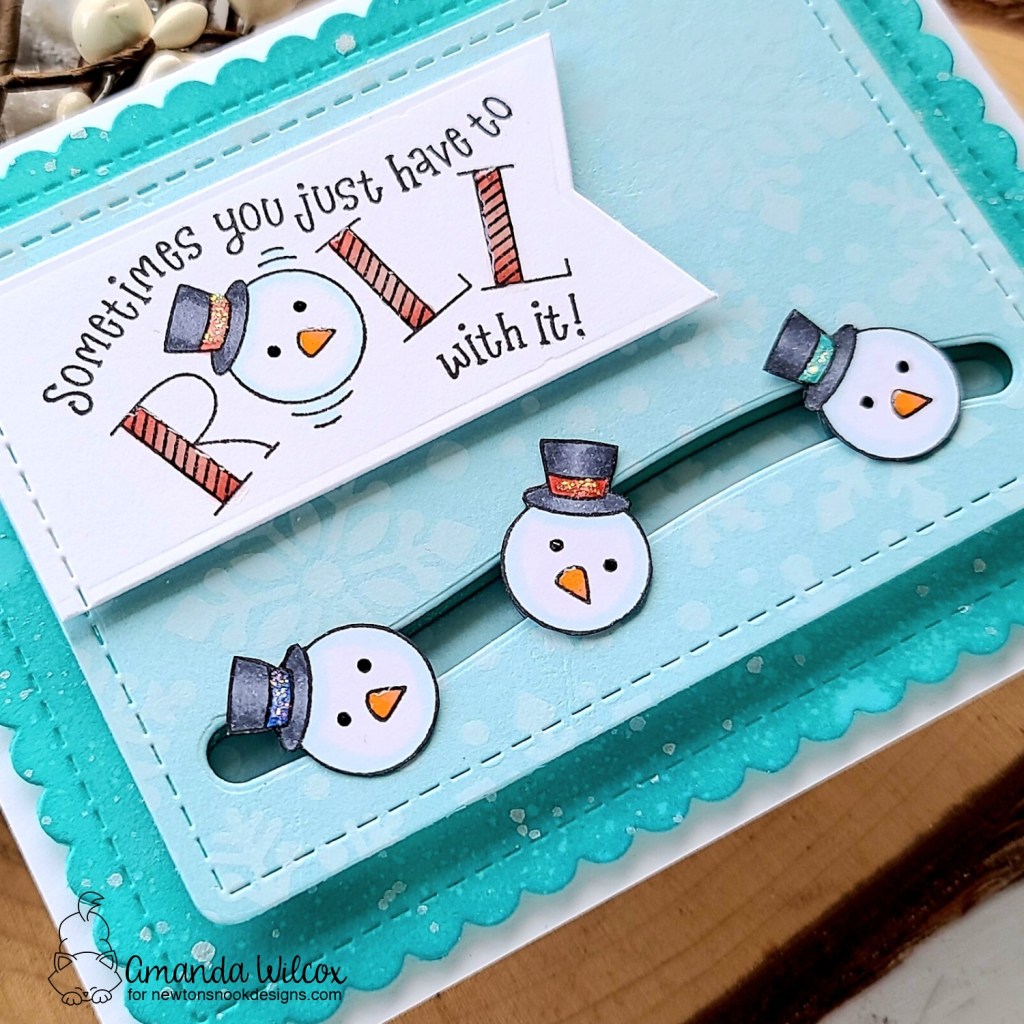
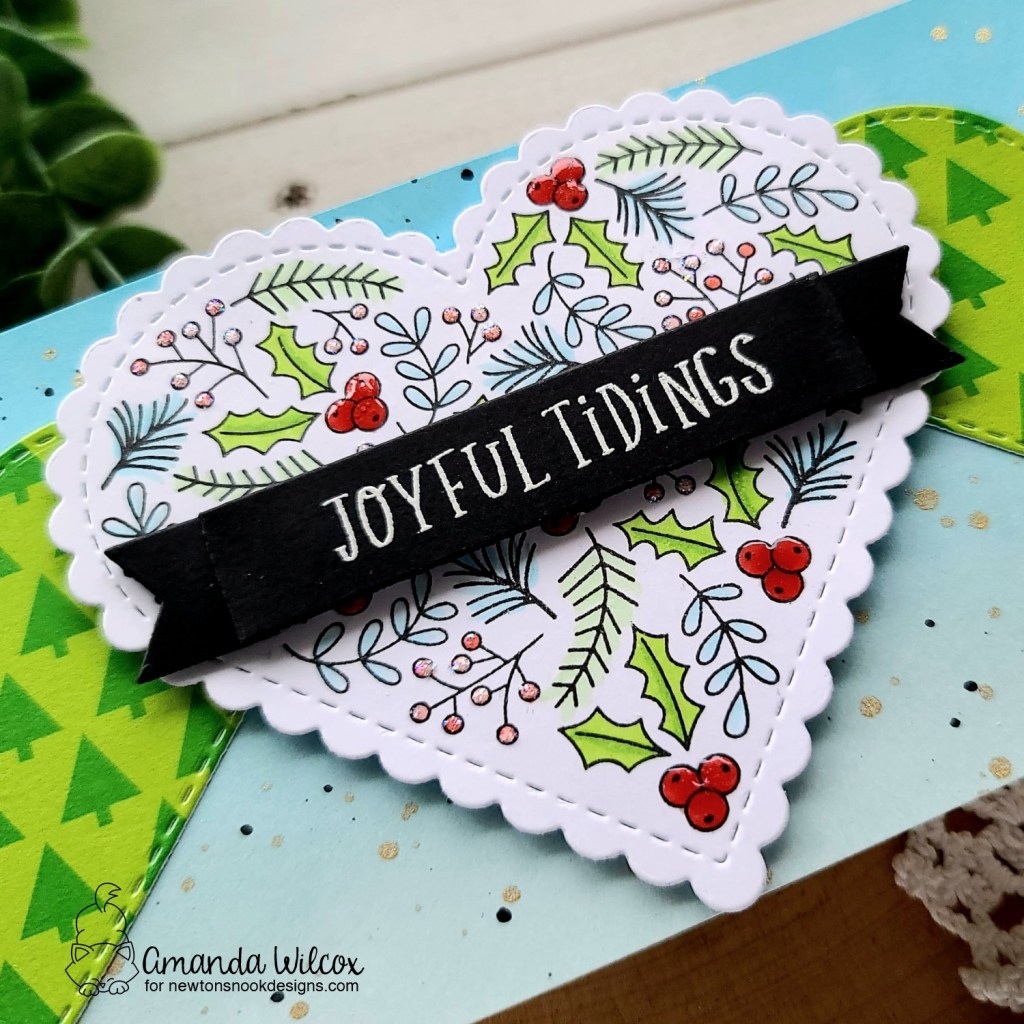
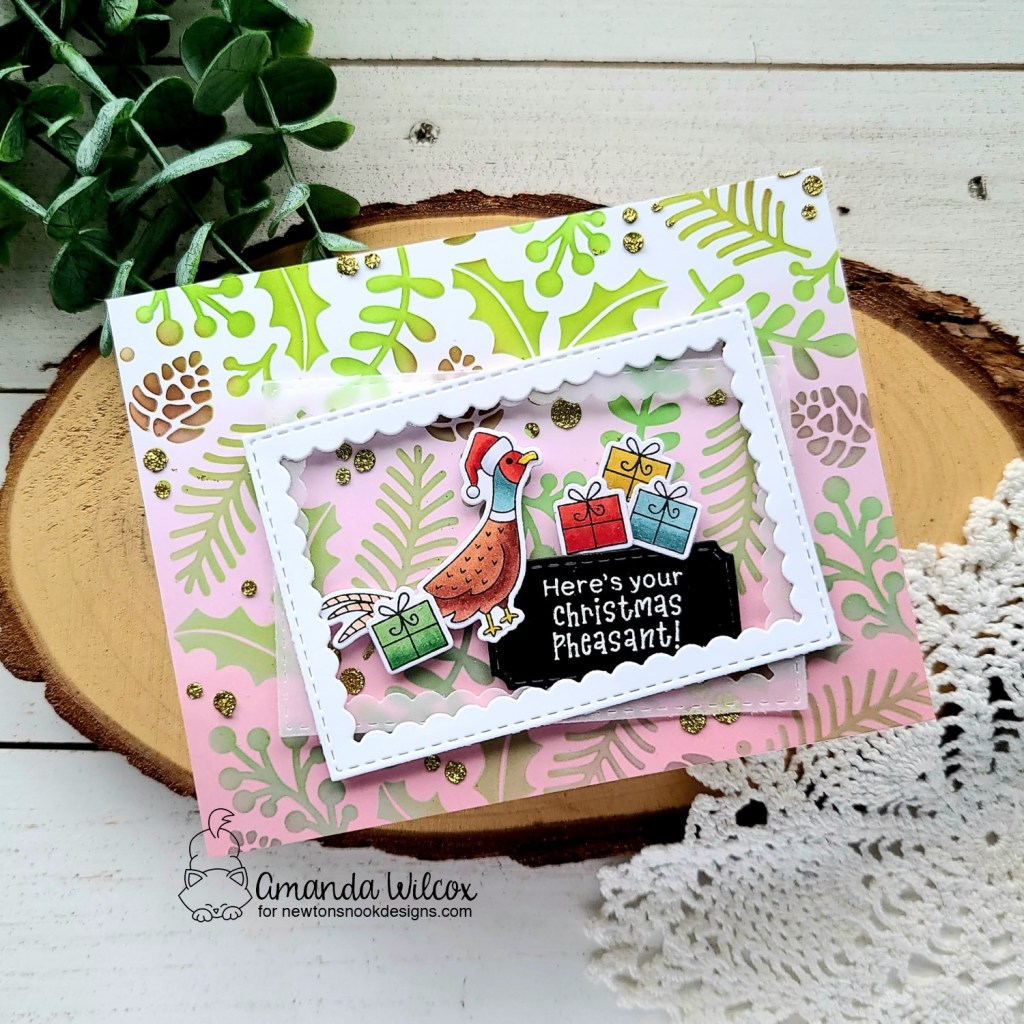
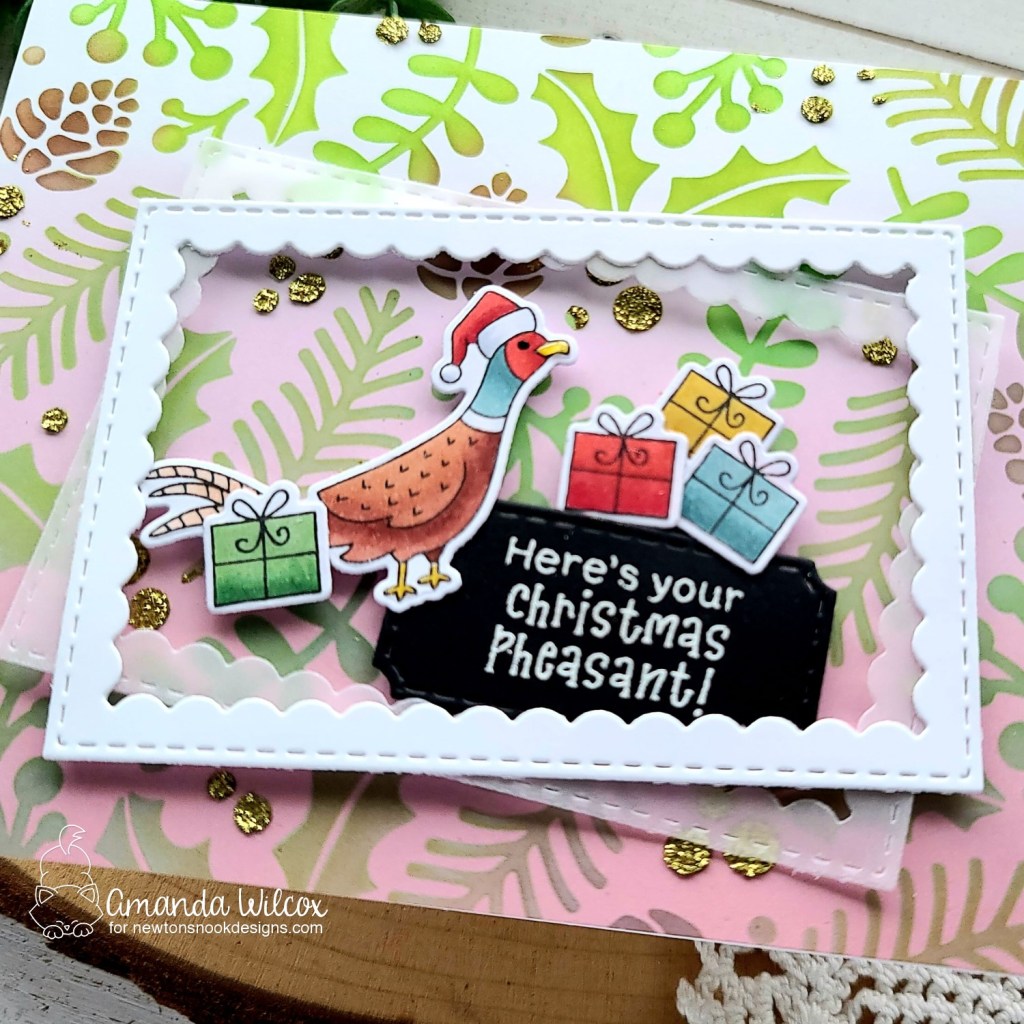
Next, I cut the scalloped rectangle in the Slimline Frames & Portholes die set from teal cardstock and inked up the Bokeh Hearts stencil – one layer with teal ink and the other with white pigment ink. Then I stamped and colored the images from Love Bots with my copic markers and cut them out with the coordinating dies.

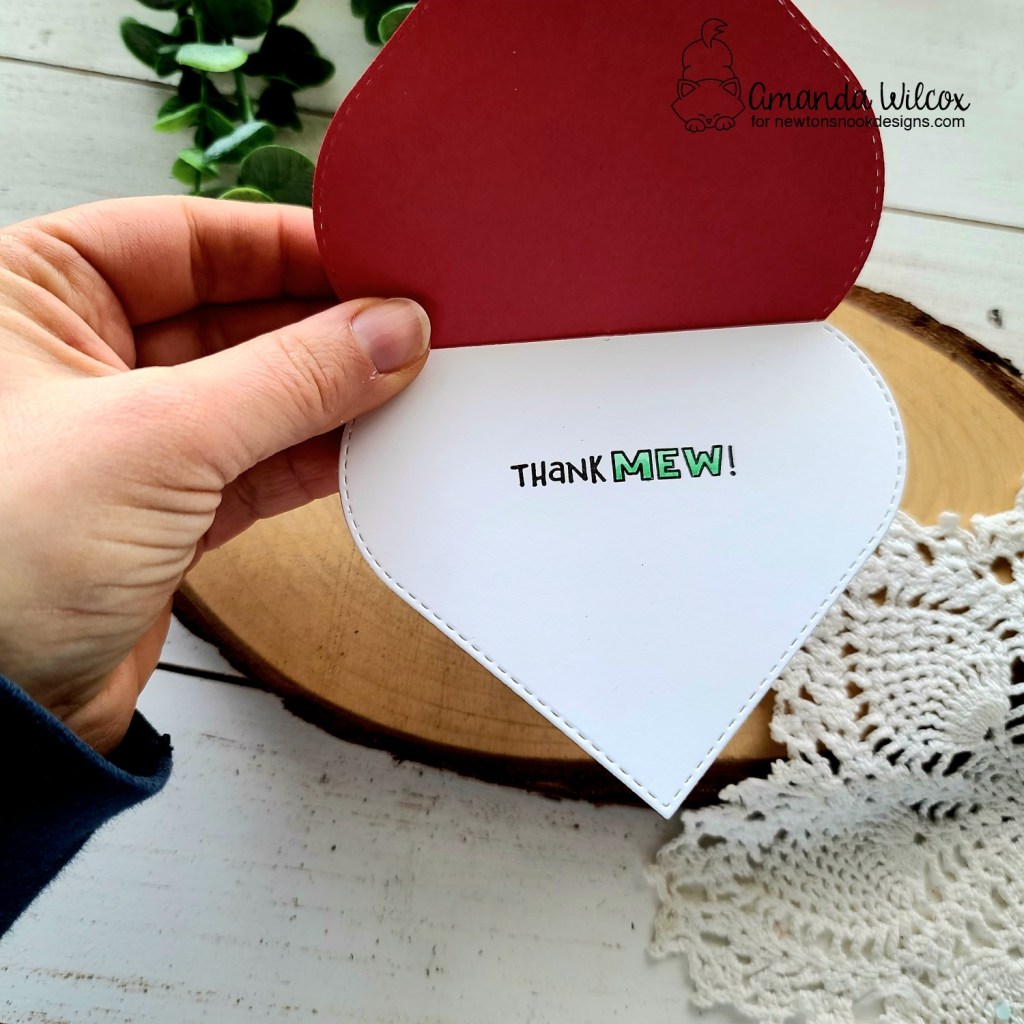
I stamped 3 sentiments from Love Bots and cut them out with a banner from the A7 Frames & Banners set and added foam squares to the back of everything before starting to assemble my card.

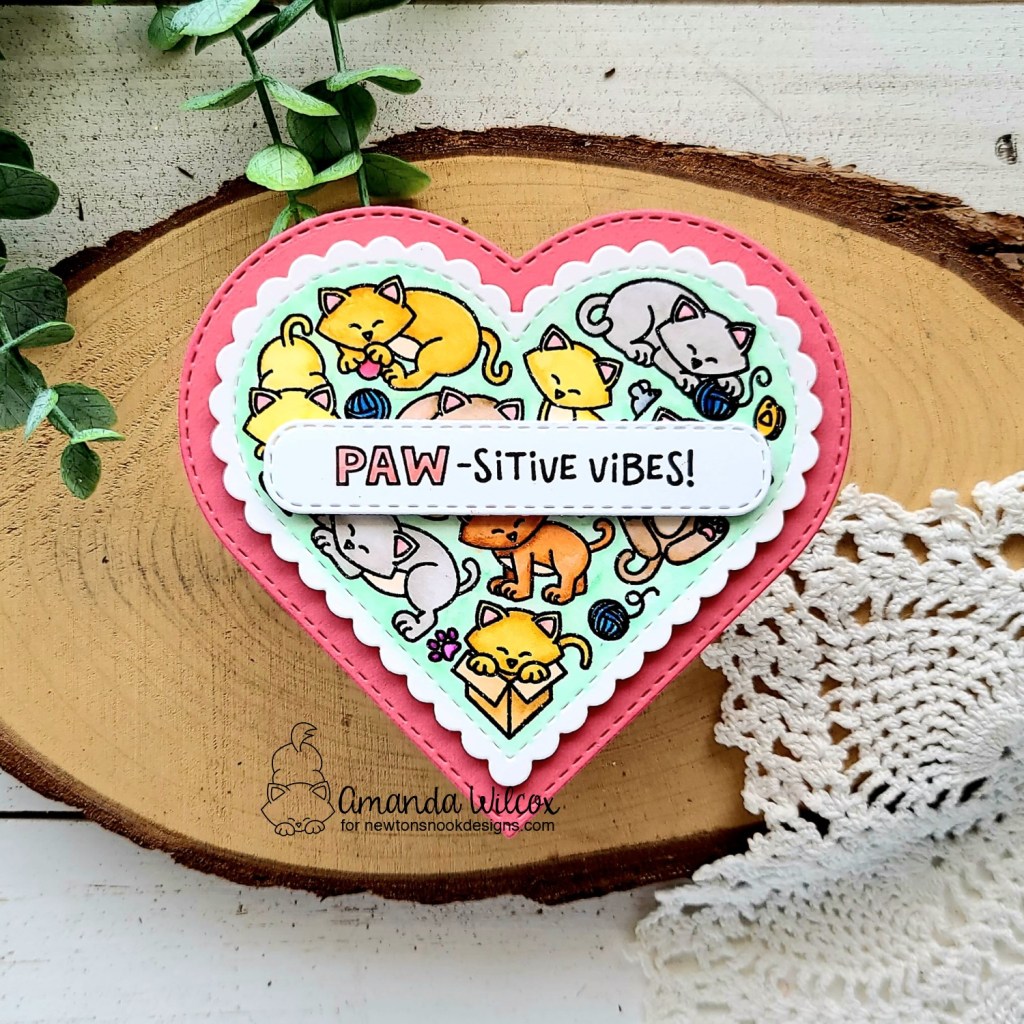
I created a white slimline card base and popped the teal panel up with foam tape. Then I added the glitzy hearts with foam tape as well. Finally I added the images and sentiment strips with a combination of foam squares, strips and liquid glue.

Once everything was assembled I trimmed off the hearts and banners that were hanging over the edge. Then, for finishing touches, I added glossy accents and unicorn Stickles to various parts of the images throughout the design.

I hope you’ve enjoyed today’s projects and the reveal of the wonderful new products coming.

Would you like to win the “Love Bots” Stamp Set? This stamp set will be given away to ONE lucky winner!

Here’s how to win: Comment on the NND blog and Design Team blogs (see list below)! The winner will be chosen at random from the collective reveal posts. Make sure to check out each of their blogs and comment for your chance to win. You will not know which blog has been chosen so the more you comment on the better your chances are of winning! You have until Thursday January 20th at 9pm ET to comment  — winners will be announced on the blog post on Friday, January 21st. 

Check out all the awesome Design Team Blogs below to enter:

Newton’s Nook Designs
Donna Idlet
Ellen Haxelmans
Tina Herbeck
Larissa Heskett
Samantha Mann
Zsofia Molnar
Maria Russell
Farhana Sarker
Tatiana Trafimovich
Amanda Wilcox

Newton’s Nook – January Release Day 3

Hi again! It’s day 3 of release reveals for the Newton’s Nook January release. Today is full of more additions to the ever amazing Heartfelt series that coordinates with the Heart Frames and Banner Trio dies.

Heartfelt Meows and Heartfelt Woofs

I tried to create 2 very different cards for you today that would work great with any of the heartfelt collection, even if you’re not specifically a dog or cat person. I hope you enjoy them both.

First up, let’s have a look at the super adorable Heartfelt Meows shaped card that I created with the Heart Frames dies and Banner Trio dies.

I started by die cutting the scalloped heart from Bristol Smooth cardstock and then stamped and heat embossed the Heartfelt Meows image on it. I used Zig Clean Color Real Brush markers and a water brush pen to watercolor all the images before cutting a larger melon heart to pop it up on.

Next, I stamped a sentiment from the set on a Banner Trio banner and colored the open letters with markers to match the melon heart. I popped it up with foam squares.

To turn this into a card, I die cut another heart the same size as the melon one and scored the top about a 1/2 inch down. Before adhering it to my front panel I stamped another sentiment and colored it with markers too. Then I added tape runner to that small portion above the score lines, adhered the hearts together and creased the fold.

Now, for the Heartfelt Woofs card I took a totally different approach and I think it would be so much fun to try this with different color combos and lots of the Heartfelt series.

I simply chose a bunch of blue cardstock scraps and cut them into 1/4 inch strips. I adhered them to a piece of copy paper to avoid extra bulk and die cut it with the scalloped heart from the Heart Frames die set. I stamped my pups in VersaMark black ink and heat embossed it with clear embossing powder.

Next, I die cut 2 red banners from the Banner Trio dies and heat embossed sentiments in white. Digging through my stash of amazing puppy images I chose these from the Puppy Playtime set. I stamped and colored them with copic markers, cut them out with the coordinating dies and glued the pieces together.

To assemble my card, I splattered black paint on a 4×5.25 inch white panel and popped it up on a white card base with foam tape. Then I popped the heart up the same way and added foam squares to the back of the banners, tucking them under the heart edges.

Last, I added the puppy and his bones with a combo of liquid glue and foam squares. For finishing touches I added glossy accents to his nose and one stripe on the hat, unicorn Stickles to the top of the hat and black glaze pen with white gel pen accents to his eyes.

I hope you’ve enjoyed today’s projects and the reveal of the wonderful new products coming.

Would you like to win the “Heartfelt Meows” or the “Heartfelt Woofs” Stamp Set? We will choose ONE lucky winner for each stamp set!

Here’s how to win: Comment on the NND blog and Design Team blogs (see list below)! The winner will be chosen at random from the collective reveal posts. Make sure to check out each of their blogs and comment for your chance to win. You will not know which blog has been chosen so the more you comment on the better your chances are of winning! You have until Thursday January 20th at 9pm ET to comment  — winners will be announced on the blog post on Friday, January 21st. 

Check out all the awesome Design Team Blogs below to enter:

Newton’s Nook Designs
Donna Idlet
Ellen Haxelmans
Tina Herbeck
Larissa Heskett
Samantha Mann
Zsofia Molnar
Maria Russell
Farhana Sarker
Tatiana Trafimovich
Amanda Wilcox

Newton’s Nook – January Release Day 2

Welcome back everyone! We’re on to day 2 of reveals for the Newton’s Nook January release. Today we have another addition to the incredible floral line.

Orchids

I had a simple but fun card design in mind for this set as soon as I saw the products for this release. But once I started creating, I immediately had to make a second card to share with you today.

I started by creating the card on the left and just had to use the stitched rectangles from the frame which led to the card on the right. So let’s walk through them in that order.

I chose 3 colors of cardstock to start with, then stamped and heat embossed the orchids image on each one in white. I used the coordinating dies to cut them out and set them aside. Then I die cut the other elements from the A7 Frames & Banners die set, heat embossing my sentiment in black on a vellum banner.

Once everything was ready I laid it all out to make sure I liked the placement and color order of the flowers. The white card base seemed stark so I splatters some black paint on it before popping the teal scalloped rectangle up.

next, I popped up the frame and flower images and then hid a smidge of tape runner behind the text on the banner and added it last.

I love the look of this card and could see myself making a few in an assembly line fashion to share with a bunch of people at a time.

Remember the stitched black rectangles we were left with from the frame on the last card…I just had to see if they would stack on an A2 card base and look how fabulous they work!

So I stamped another orchid and colored it with my copic markers this time before cutting out out. Then I cut a banner from the A7 Frames & Banners set and stamped a different sentiment on it, trimmed the top off for this design.

To assemble, I cut a piece of green cardstock and popped the black rectangles up with foam tape, then I adhered the orchids and sentiment banner with foam squares before popping this whole panel up with foam tape on a white card base.

For finishing touches I added some washi tape to the right side to break up the white edge and added some clear crystals from my stash. Then the last thing I did was add a little glossy accents to the center of the flowers.

I hope you’ve enjoyed today’s projects and the reveal of the wonderful new products coming.

Would you like to win the “Orchids” Stamp Set? This stamp set will be given away to ONE lucky winner!

Here’s how to win: Comment on the NND blog and Design Team blogs (see list below)! The winner will be chosen at random from the collective reveal posts. Make sure to check out each of their blogs and comment for your chance to win. You will not know which blog has been chosen so the more you comment on the better your chances are of winning! You have until Thursday January 20th at 9pm ET to comment  — winners will be announced on the blog post on Friday, January 21st. 

Check out all the awesome Design Team Blogs below to enter:

Newton’s Nook Designs
Donna Idlet
Ellen Haxelmans
Tina Herbeck
Larissa Heskett
Samantha Mann
Zsofia Molnar
Maria Russell
Farhana Sarker
Tatiana Trafimovich
Amanda Wilcox

Newton’s Nook – January Release Day 1

Hello friends! It’s time for another fantastic release reveal week from Newton’s Nook! It’s day 1 and we’re revealing a bundle of goodies that will be used today and all through the week! Let’s take a peek!

Love & Meows paper pad

Petite Hearts stencil

A7 Frames & Banners dies

Knead Kittens stamps and dies

Holy moly! Isn’t that a ton if awesomeness to begin our week with?!? It’s all fantastic! Today I have a card to share with you featuring Knead Kittens stamps and coordinating dies and then a bonus set of cards at the end of this post with the A7 Frames & Banners plus the Love & Meows paper pad too.

I just adore this set and absolutely had to use this funny kitty in the bread! It just made me smile too much! I stamped my images and colored them all with copic markers before using the coordinating dies to cut them out.

Then I took a white panel and inked up the ray portion of the Sunscape stencil with light teal ink. Next, I cut a strip of melon cardstock just wider than the small bread slice image and added a black border to the edge. I adhered this to the stenciled panel and added foam squares to my images.

After popping everything up I place my card in my MISTI and stamped a sentiment on the top right corner of the design.

Moving on to finishing touches, I added black glaze pen to the kitten’s eyes and glossy accents to his nose and toe beans. Too cute for words! Don’t you love this new set!?!

Next, I have a super fun and quick to make set of Valentine cards featuring the new A7 Frames & Banners and the Love & Meows paper pad.

I created 3 white card bases and cut the main scalloped rectangle from melon cardstock 3 times. I cut the frame from mint cardstock 3 times, saving the stitched rectangles that pop out for another card later on. Then I chose 3 patterns of paper from the paper pad and cut them with the frame die as well.

To assemble my cards, I popped up the scalloped rectangle, glued the frame directly to that and then popped my patterned panels up with foam tape. To finish them off I cut 3 banners from the Banner Trio die set and stamped sentiments from Heartfelt Love before added foam squares and placing them in the center of each design.

I hope you’ve enjoyed today’s projects and the reveal of the wonderful new products coming.

Would you like to win the “Knead Kitten” Stamp Set?This stamp set will be given away to ONE lucky winner!

Here’s how to win: Comment on the NND blog and Design Team blogs (see list below)! Thewinner will be chosen at random from the collective reveal posts. Make sure to check out each of their blogs and comment for your chance to win. You will not know which blog has been chosen so the more you comment on the better your chances are of winning! You have until Thursday January 20th at 9pm ET to comment  — winners will be announced on the blog post on Friday, January 21st. 

Check out all the awesome Design Team Blogs below to enter:

Newton’s Nook Designs
Donna Idlet
Ellen Haxelmans
Tina Herbeck
Larissa Heskett
Samantha Mann
Zsofia Molnar
Maria Russell
Farhana Sarker
Tatiana Trafimovich
Amanda Wilcox

Newton’s Nook – November Release Day 3

It’s a bit of a smaller release this month so today is the final day of release reveals already! We have 2 more stamp and dies sets, plus a mini stamp to share too!

Snow Angel Newton stamps and dies

Snow Angel Puppy stamps and dies

Roll With It stamps

I had so much fun with these sets that I have 2 interactive cards to share with you today. First I have another slimline card featuring both snow angel sets because they are just too perfect together!

To create this card I stamped and colored both images with copic markers. Then I used the coordinating dies to cut them out and adhered action wobblers to the back of them.

I die cut a light blue panel with the scalloped rectangle from Slimline Frames & Portholes and inked it up with white ink and the Snowfall stencil. Then I flicked pearl watercolor all over it for a magical feel. Next, I stamped and heat embossed a sentiment from Snowfall Roundabout on a banner from the Banner Trio dies. I used foam tape to add the background panel to a white card base and foam squares for the banner. Finally, I removed the release paper on the action wobblers and added the sweet Newton and Puppy!

For finishing touches, I added glossy accents to the noses, toe beans and scarves and then unicorn Stickles to the pompoms on their hats.

They are so fun and the wobble totally makes them look like they’re making angels in the snow! It’s absolutely adorable!

Next, I have a slider card to share because…we’ve got to roll with it. Am I right?!?

For this card, I stamped the full image in the set and colored parts with my copic makers. Then I cut it out with a flag from Frames & Flags. I went ahead and stamped just the snowman head a few more times and colored those as well. Then I fussy cut them out and switched to creating my background and slider mechanism.

The background panel is inked with evergreen bough and mermaid lagoon distress oxide inks and spritzed with water. It’s popped up on a white card base with foam tape. Then I cut a rounded rectangle from the same die set and inked it up with the Snowfall stencil again. I used a slider die to cut a channel and added foam tape to the back, being sure to leave room for the heads to roll from side to side.

I added the snowmen to the slider channel with discs and foam circles so they would roll and not just slide. Then I moved on to finishing touches for this hilarious card!

For that I added unicorn Stickles to the hat bands on all the hats and glossy accents on all the carrot noses. Last, I came in with more glossy accents on the the striped part of the word “roll.”

Would you like to win the “Snow Angel Newton ” or the “Snow Angel Puppy” Stamp Set? We will choose ONE lucky winner for each stamp set!

Here’s how to win: 
Comment on the NND blog and Design Team blogs (see list below)! The winner will be chosen at random from the collective reveal posts. Make sure to check out each of their blogs and comment for your chance to win. You will not know which blog has been chosen so the more you comment on the better your chances are of winning! You have until Wednesday November 17th at 9pm ET to comment  — winners will be announced on the blog post on Thursday, November 18th. 

Check out all the awesome Design Team Blogs below to enter:

Newton’s Nook Designs
Ellen Haxelmans
Tina Herbeck
Larissa Heskett
Samantha Mann
Zsofia Molnar
Maria Russell
Farhana Sarker
Tatiana Trafimovich
Samantha VanArnhem
Amanda Wilcox

Newton’s Nook – November Release Day 2

Welcome to day 2 of the Newton’s Nook November release reveals! Today we have a stamp and die set, plus an extra coordinating die set too!

All Booked Up stamps and dies

Bookmark die set

Aren’t these absolutely fantastic!?! The total die hard book lover in me is ridiculously excited for all of the possibilities these sets bring with them! I have a couple of projects to share with you today. Let’s start with this fun card using All Booked Up and the new paper pad from yesterday!

I cut some pieces of the paper pad and adhered them to a white card base. I thought the transition was abrupt so I cut a thin strip of another pattern and adhered it with a foam strip. Then I stamped and heat embossed the puppy image and a sentiment in white on dark gray cardstock. I used the coordinating die for the puppy and a flag from the Frames & Flags die set. I added them with foam squares. I just love the fun chalkboard feel these have!

But #1 I couldn’t just use the puppy image, and #2 I couldn’t ignore that fantastic new bookmark die set! So I have another fun card to share with you!

I stamped and coloring the kitty image with my copic markers and used the coordinating dies to cut it out. Then I cut a teal bookmark and inked it up with the Argyle stencil set. I added the kitty image with liquid glue and thought it would be great to add the “paws here” sentiment from the bookmark die set to the bottom. Then I threaded some ribbon through the hole and tied it with baker’s twine.

For my card base, I inked it up with tattered rose, dried marigold and a bit of spiced marmalade distsress oxide ink. I spritzed it with water and adhered it to a slimline card base. Then I cut the paw print from the bookmark die set a bunch of times and adhered them randomly all over the panel. After they were dry, I trimmed the excess off the edge and adhered my bookmark with removable adhesive.

This is really fun but I thought it would be even better if there was another message underneath for the recipient to fun when they remove the bookmark. So I stamped and heat embossed one on a heart from the Heart Frames die set and adhered it in the center of the card.

Would you like to win the “All Booked Up” Stamp Set? This stamp set will be given away to ONE lucky winner!

Here’s how to win: 
Comment on the NND blog and Design Team blogs (see list below)! The winner will be chosen at random from the collective reveal posts. Make sure to check out each of their blogs and comment for your chance to win. You will not know which blog has been chosen so the more you comment on the better your chances are of winning! You have until Wednesday November 17th at 9pm ET to comment  — winners will be announced on the blog post on Thursday, November 18th. 

Check out all the awesome Design Team Blogs below to enter:

Newton’s Nook Designs
Ellen Haxelmans
Tina Herbeck
Larissa Heskett
Samantha Mann
Zsofia Molnar
Maria Russell
Farhana Sarker
Tatiana Trafimovich
Samantha VanArnhem
Amanda Wilcox

Newton’s Nook – Holiday Release Day 4

We’ve done it again everyone! We made it to the last day of the Newton’s Nook Holiday Release reveal week. Today is the most packed day of the whole week too! We have 3 new stamp and die sets and I have 3 awesome and fun cards to share with you!

Prehistoric Christmas stamps and dies

Heartfelt Holidays stamps – coordinates with Heart Frames and Banner Trio dies

Christmas Pheasant stamps and dies

For those that know me, know that I squealed like a little kid on Christmas morning to see these absolutely incredible Christmas dinosaurs! I love them so much and had a blast creating this first card! I hope you love it too!

I stamped a ton of images from the set and colored them with my copic markers. Then I used the coordinating dies to cut them out and set them all aside. Next I blended a panel with distress oxide ink in tattered rose and festive berries. I absolutely love this combo! I spattered it with water, black paint and gold watercolor and let it dry.

Once it was dry I pulled out the Essential Alphabet dies and cut the word “dinomite” from the panel. Before I cut the second “i” out though I thought it would be fun to use a tree for the letter instead so I left it. I placed adhered a piece of black cardstock to the white card base so my letters are bold and popped the ink blended panel up with foam tape.

Next, I popped the images on with a combo of liquid adhesive and foam squares so there is some different dimension in my little scene. Isn’t the brontosaurus the cutest?!? I love him!

After all the images were in place, I stamped and heat embossed the rest of my sentiment from the set, masking off the “dinomite” part that I die cut, trimmed the pieces in to strips and popped them in place too.

For finishing touches I added lots of glossy accents to the images and black glaze pen to the dinosaur’s eyes.

I know that was a lot but I still have 2 more awesome cards to share with you. I hope you’ll stick with me a bit longer.

Next up, we have the Heartfelt Holidays beautiful image on another slimline card, also featuring the new paper pad!

For these full size images – heartfelt, circle, square and card front – I die cut the paper first, line up my stamp and then stamp the image. It helps me center the image better and not fall off the edge with those scalloped sides. Just a little trick I wanted to share.

So after all that I colored the image iwth my copic markers, die cut a sentiment banner and heat embossed a sentiment on it. Then I cut a couple of smaller hearts from the Heart Frames die set using paper from the paper pad.

I inked up a panel with tumbled glass and salty ocean distress oxide inks and flicked black paint and gold watercolor all over it. I attached it to a card base and then adhered the smaller hearts with liquid glue. I popped the main heart with foam strips and then did the same with the sentiment.

For finishing touches I added glossy accents to the holly berries and unicorn stickles to the smaller berries.

Okay, we’re moving right along to our last card of the day! The mini set for Christmas time – Christmas Pheasant. It’s so fun and the sentiment cracks me up!

After stamping and coloring the image plus some extra gifts, I used the coordinating dies to cut them out. Then I switched to my background panel which I did in 3 stages – I inked the panel with victorian velvet and milled lavender distress oxide inks – fading into nothing at the top. Then I placed the Holiday Foliage stencil over the top and inked it up with various different green inks on all the leaves and brown for the pinecones. I wasn’t too terrible careful if the colors mixed. I like the imperfect look. Last, I grabbed a palette knife and gold glitz glitter gel and smeared it just in the berry and circle openings on the stencil.

Once that panel was dry, I adhered it to a card base, cut 2 frames from the Framework die set, stamped and heat embossed my sentiment on the smallest die from that same set and added everything with foam squares and strips.

For finishing touches I added some glossy accents to the pheasant beak and feet. So much fun!

Would you like to win the “Prehistoric Christmas” or the “Heartfelt Holidays” Stamp Set? We will choose ONE lucky winner for each stamp set!

Here’s how to win: Comment on the NND blog and Design Team blogs (see list below)! Thewinner will be chosen at random from the collective reveal posts. Make sure to check out each of their blogs and comment for your chance to win. You will not know which blog has been chosen so the more you comment on the better your chances are of winning! You have until Thursday October 14th at 9pm ET to comment  — winners will be announced on the blog post on Friday, October 15th. 

Check out all the awesome Design Team Blogs below to enter:

Newton’s Nook Designs
Ellen Haxelmans
Tina Herbeck
Larissa Heskett
Samantha Mann
Zsofia Molnar
Maria Russell
Farhana Sarker
Tatiana Trafimovich
Samantha VanArnhem
Amanda Wilcox

Newton’s Nook – Holiday Release Day 3

Can you even believe we’re already on day 3 of the Newton’s Nook Holiday Release reveal week? It’s just flying by! We have 2 more super amazing and fun stamp and die sets to share with you! Let’s just dive in!

Christmas Cocktails stamps and dies

Dairy Christmas stamps and dies

Let’s start things off with a super festively fun Christmas Cocktails slimline card, shall we?!?

I just couldn’t pick which super fun drink or sentiment to use out of this set so I stamped and colored them all! I honestly thought about making tags with each one, which might come later, but instead I landed on this fun slimline card.

I blended distress oxide ink in blueprint sketch and tumbled glass on a large panel and spritzed it with water. I also flicked some gold watercolor on it for added texture. Once it was dry, I die cut it with the Slimline Frames & Portholes largest die.

To assemble my card, I created a white card base and adhered some polka dot textured red cardstock to it. Then I added the ink blended panel with foam tape. I arranged my glasses so they were almost clinking in pairs and popped them up with foam squares.

I chose a sentiment from the set and heat embossed it on a banner from the Banner Trio die set. I used liquid glue and reverse tweezers to glue the ends together and popped the banner up with foam squares as well. For finishing touches I added little bits of glossy accents and unicorn stickles to all the glasses or garnishes.

Moving on to one of my favorite sets from this release. The stack of super adorable farm critters in Dairy Christmas just make my heart happy! I had so much fun coloring them up and creating a unique design to showcase them on.

For this card, I brought out the new paper pad again. These patterns and colors are just perfection! I love them all! After the critters were colors and die cut, I cut a white panel with the largest Framework die. Then I cut some strips from the paper pad. While arranging them together I thought the white panel was too stark so I blended a little light blue shadow in the center. Then I adhered everything with foam squares and strips.

Playing off of the strips on the main panel, I cut another piece of the striped paper and adhered it to a white card base and then popped my Framework panel up with foam tape as well. I placed the whole thing in my MISTI and stamped a sentiment in the top right corner. For fun I stamped, colored and cut out the holly image from the set and popped it up too.

For finishing touches I added glossy accents and unicorn stickles to various parts of the images like the tree, hooves, critter noses and such.

Would you like to win the “Christmas Cocktails” or the “Dairy Christmas” Stamp Set? We will choose ONE lucky winner for each stamp set!

Here’s how to win: Comment on the NND blog and Design Team blogs (see list below)! Thewinner will be chosen at random from the collective reveal posts. Make sure to check out each of their blogs and comment for your chance to win. You will not know which blog has been chosen so the more you comment on the better your chances are of winning! You have until Thursday October 14th at 9pm ET to comment  — winners will be announced on the blog post on Friday, October 15th. 

Check out all the awesome Design Team Blogs below to enter:

Newton’s Nook Designs
Ellen Haxelmans
Tina Herbeck
Larissa Heskett
Samantha Mann
Zsofia Molnar
Maria Russell
Farhana Sarker
Tatiana Trafimovich
Samantha VanArnhem
Amanda Wilcox

Newton’s Nook – Holiday Release Day 2

Welcome back friends! It’s day 2 of the reveal week for the Newton’s Nook Holiday release! Today we’ve got 2 fun stamp and die sets to share with you.

Holiday Home

Christmas Cactus

I’ve got a pair of really great cards to share with you today. First up, I created a beautiful slimline scene card with the Holiday Home set.

For this card, I stamped a few images from the set and cut them out with the coordinating dies. Then I cut 2 circles using the Circle Frames dies. I took the white circle and used the Land Borders dies to cut one snow drift and the Sea Borders dies to cut the other one. Before adhering the snow drifts to the blue circle, I stamped a few snowflakes in the sky. After the circle layers were adhered I added the trees and house with liquid glue.

For my background panel, I inked up a piece of white cardstock with evergreen bough, iced spruce and cracked pistachio distress oxide inks. Then I spritzed it with water and flicked gold watercolor all over it. Using my images as a guide, I stamped the sentiment at the bottom and assembled my card.

I added the background panel to a white slimline card base. Then popped the circle scene up with foam tape and added the kids with a combo of foam squares and liquid adhesive.

For finishing touches I added unicorn stickles and glossy accents to various parts of the images and scene.

For my second card today I created something that reminds me of a Christmas cactus my mom had when I was a kid. It was in a macramé hanger and the arms of the cactus would hang over the edge.

I started by stamping and coloring 2 of the Christmas cactus image. I used the coordinating dies to cut it out and found a cardstock in the same pink tone as my flowers. Next, I adhered the Snowfall stencil to it and spread iridescent glitz glitter gel through the stencil. I cleaned up and set my panel aside to dry. Next, I die cut a scalloped rectangle from the Framework die set and inked the same stencil up with light teal ink and a blending brush. Then I stamped my sentiment at to bottom.

Once my background panel was dry, I adhered it to a white card base and popped the smaller panel up with foam tape. I adhered the Christmas cactus with foam squares and finished my card off with some glossy accents on the flower stamen.

Would you like to win the “Holiday Home” or the “Christmas Cactus” Stamp Set? We will choose ONE lucky winner for each stamp set!

Here’s how to win: Comment on the NND blog and Design Team blogs (see list below)! Thewinner will be chosen at random from the collective reveal posts. Make sure to check out each of their blogs and comment for your chance to win. You will not know which blog has been chosen so the more you comment on the better your chances are of winning! You have until Thursday October 14th at 9pm ET to comment  — winners will be announced on the blog post on Friday, October 15th. 

Check out all the awesome Design Team Blogs below to enter:

Newton’s Nook Designs
Ellen Haxelmans
Tina Herbeck
Larissa Heskett
Samantha Mann
Zsofia Molnar
Maria Russell
Farhana Sarker
Tatiana Trafimovich
Samantha VanArnhem
Amanda Wilcox

Thermoweb – Coffee Shaker with Toner Foiling

Welcome back everyone! Today I’m over on the Thermoweb blog with a tutorial how I created this fun coffee themed shaker card using Brutus Monroe toner card fronts and decofoil!

This tide pool decofoil is so awesome in the light and using the microbeads from the Twiddler’s Nook shop as shaker bits is just added fun!

Be sure to head to the Thermoweb blog for all the details and products used to create this fun interactive card!

I appreciate you popping in today. Have a fabulous day!