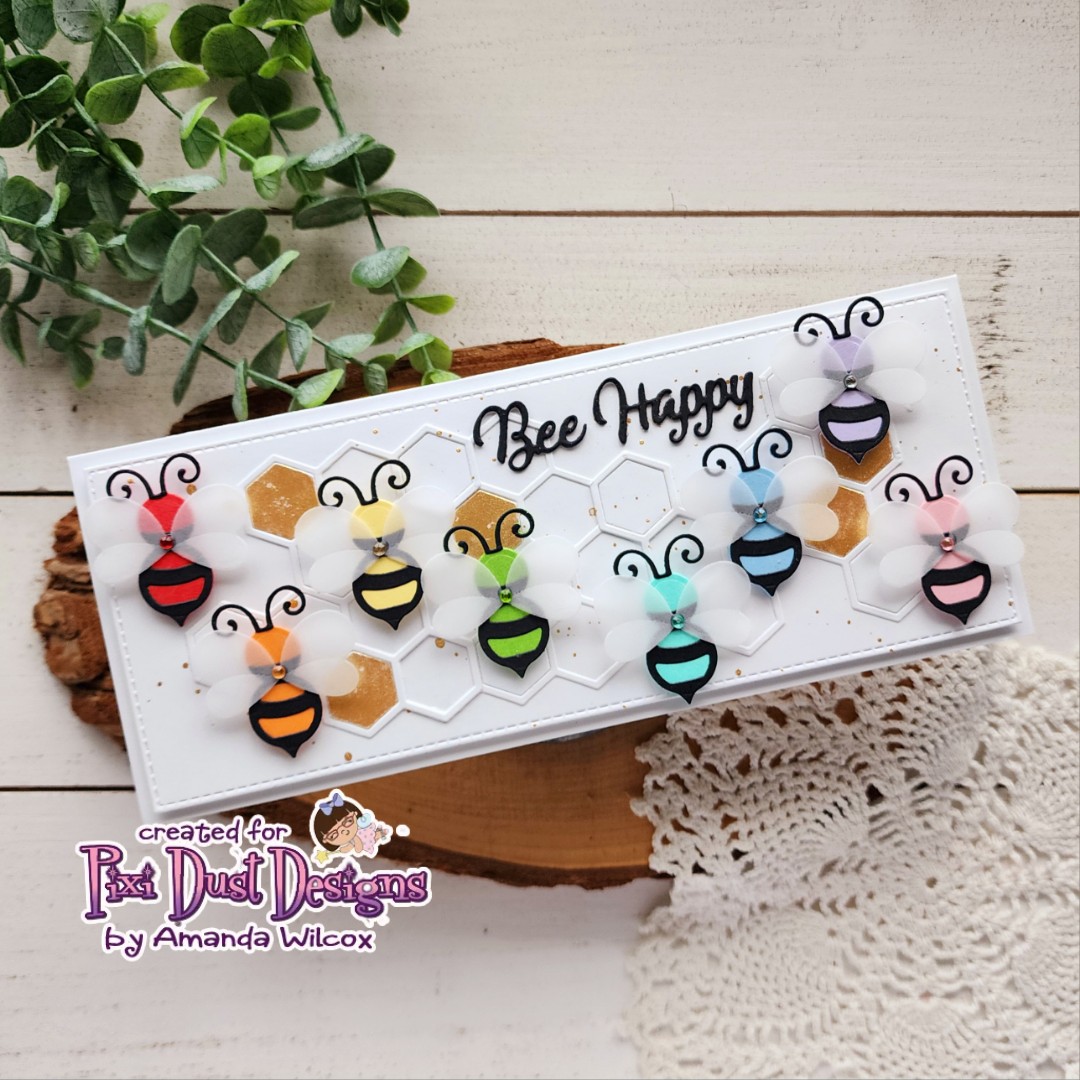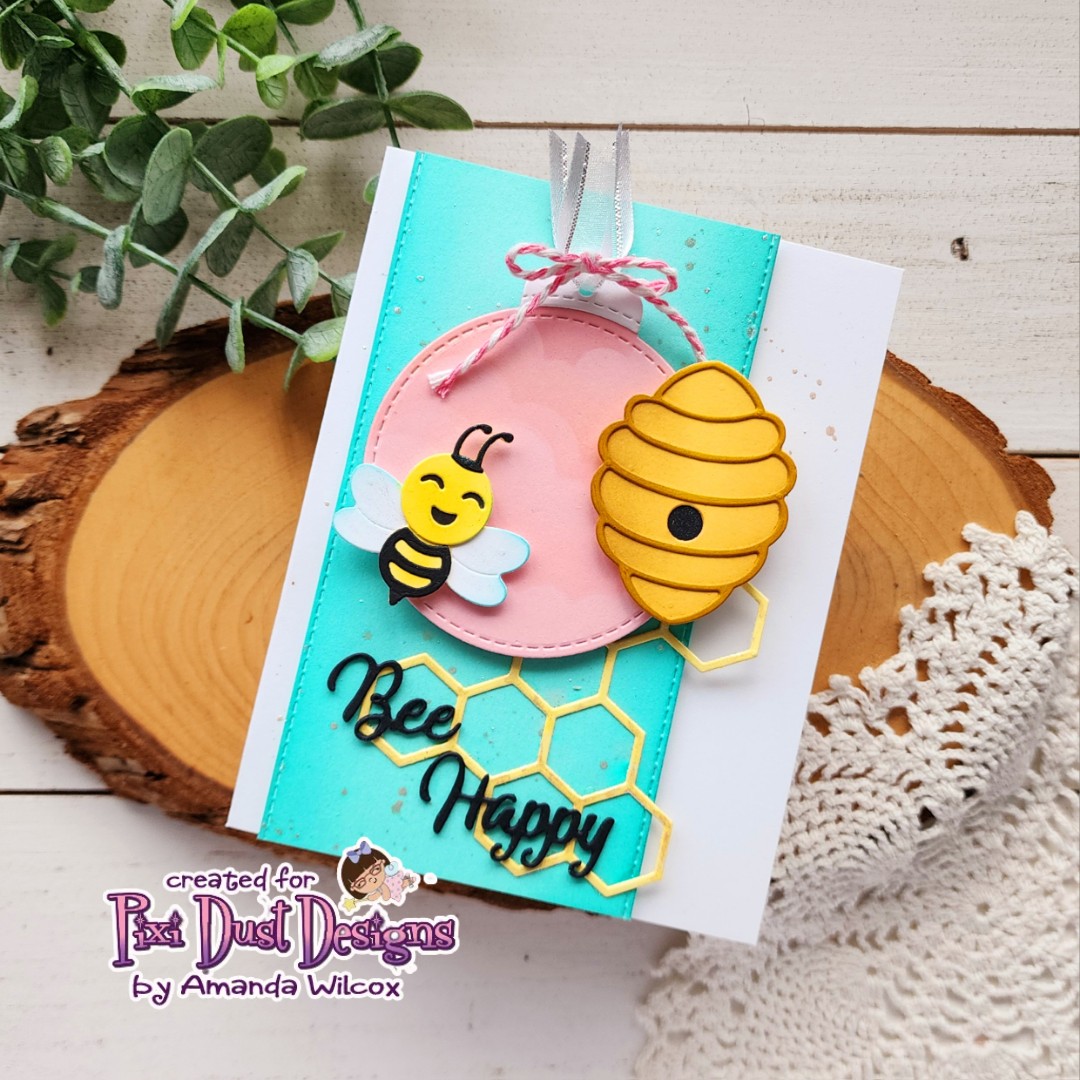
Welcome everyone. I’m so happy you’re here today. I’m back with a second card featuring the Pixi Dust Designs Bee Happy die set. Today I’m pairing it with one of their awesome tag dies and finding A2 uses for my slimline dies as well!

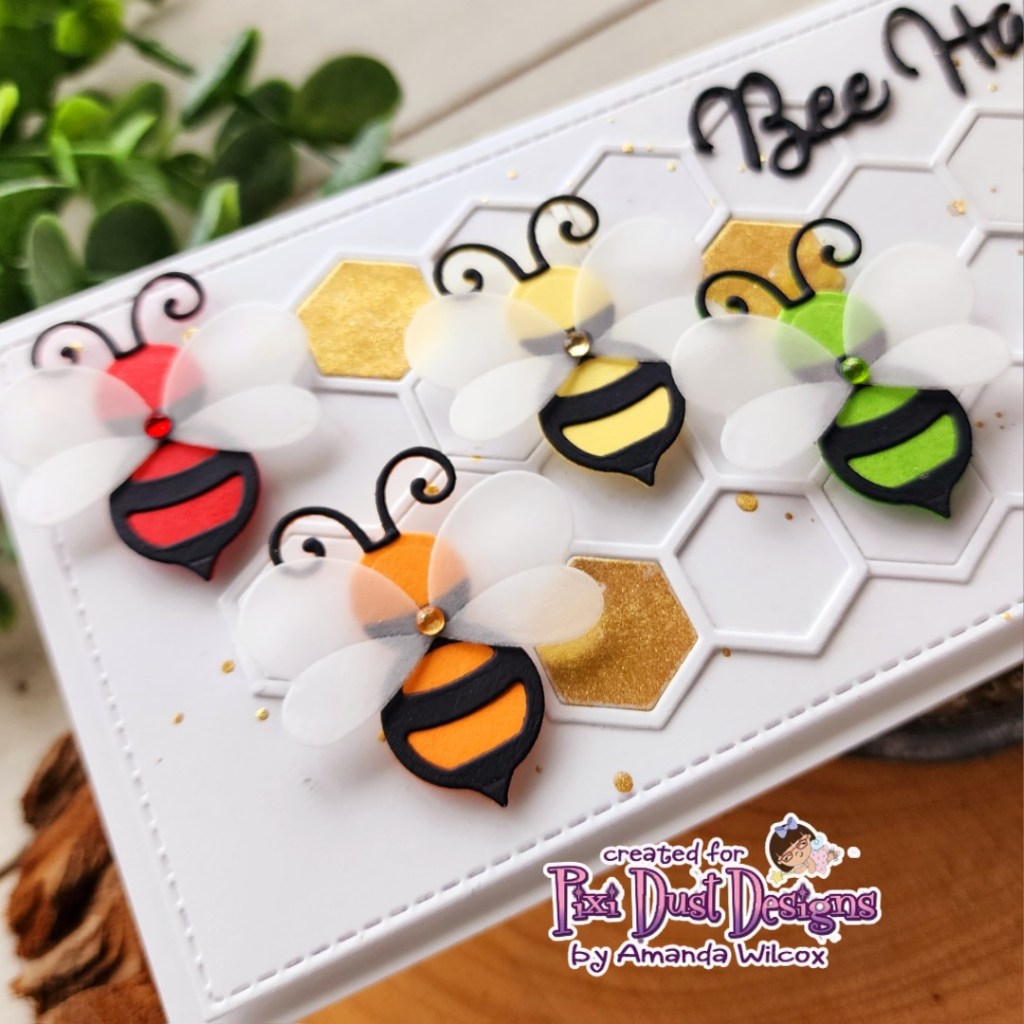
I started my card by cutting the pieces to my bee and bee hive from colored cardstock. Then I used blending brushes and dye inks to add depth to them. I always use liquid glue to adhere the layers because it gives me a second to wiggle things into perfect placement and it holds strong when it’s dry.
Next, I die cut the main tag shape and topper from the Tag B dies and then used the Slimline Clouds die to cut a stencil. I used the cloudy border to ink pink clouds on my pink tag. It’s subtle but adds interest instead of the flat cardstock. Then I added ribbon through the hole in the tag and popped my bee and hive up with foam squares.

I used the third largest Stitched Rectangle Slimline die to cut a strip of teal cardstock for my card front. After inking the edges for some shading, I popped it up on a card base with foam tape. Then I splattered it with iridescent watercolor. While that was drying I die cut the “Bee Happy” sentiment from black cardstock three times and glued the layers together.
Deciding on final placement for the sentiment and tag, I thought it would be fun to add texture so I cut the honeycomb from yellow cardstock and used the same watercolor to paint random spots for shine and shimmer.
Finally, I glued the honeycomb and sentiment down with liquid glue. Then I popped the tag up with foam squares. I hadn’t washed my watercolor brush out yet so I went ahead and added some shimmer to the bee antennae and wings and the hole in the beehive too. It’s subtle but fun.
Products used today:
Bee Happy dies
Tag B dies
Stitched Rectangle Slimline dies
Liquid glue
Foam tape and squares
LH Colors watercolor – iridescent
Blending brushes
Lawn Fawn dye inks – sunflower, mermaid, walnut
I appreciate you sharing your time with me. Have a fabulous day!