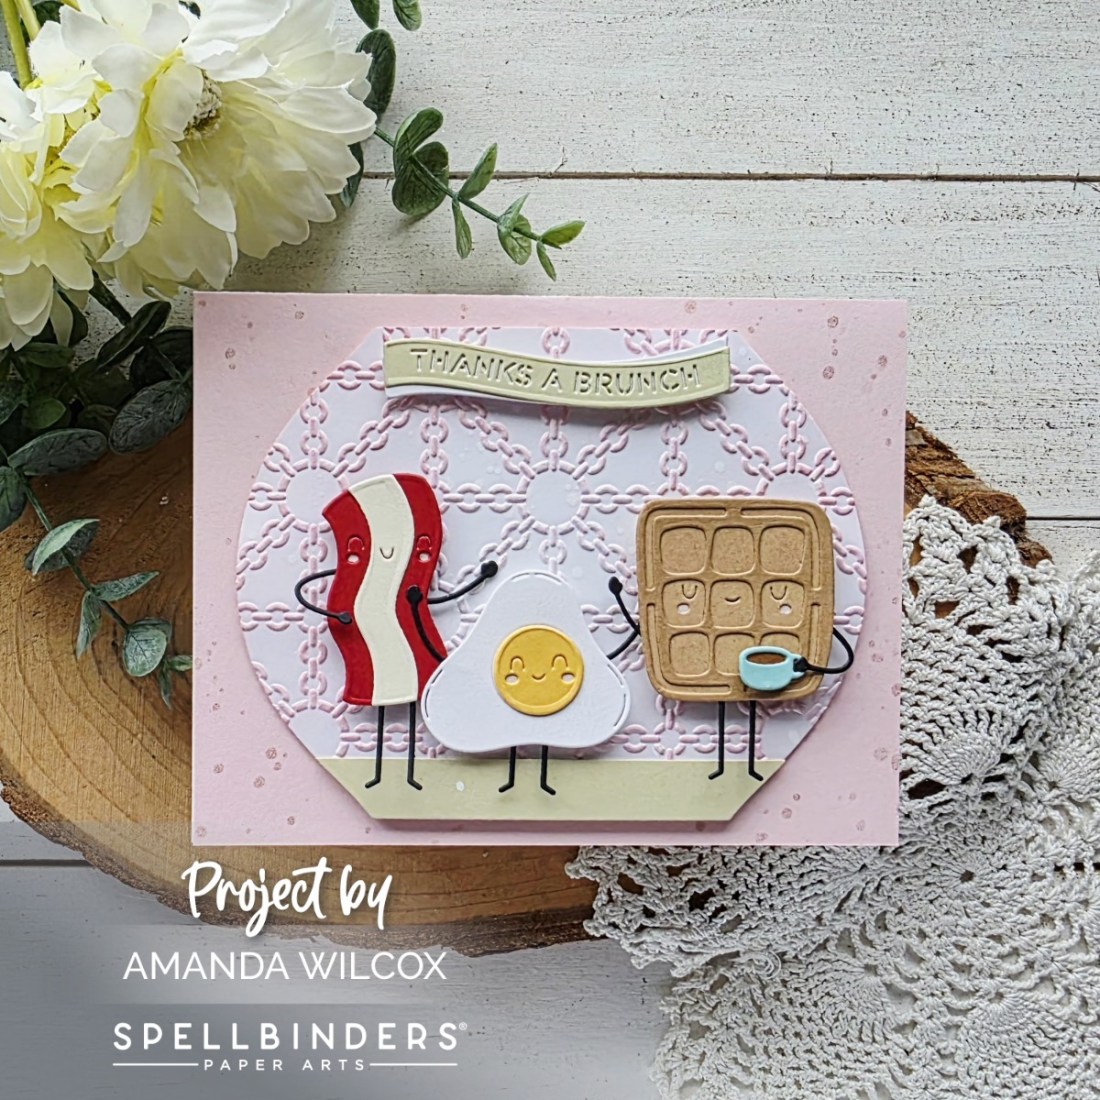
Hello everyone and happy Friday! I hope your week went well and you’re ready for a fun weekend ahead of you! Today I’m here with a trio of cards featuring a couple of products from the recently release All My Senses Collection from Spellbinders. This is a beautiful collection with such a variety of products. Be sure to check it all out at Spellbinders.
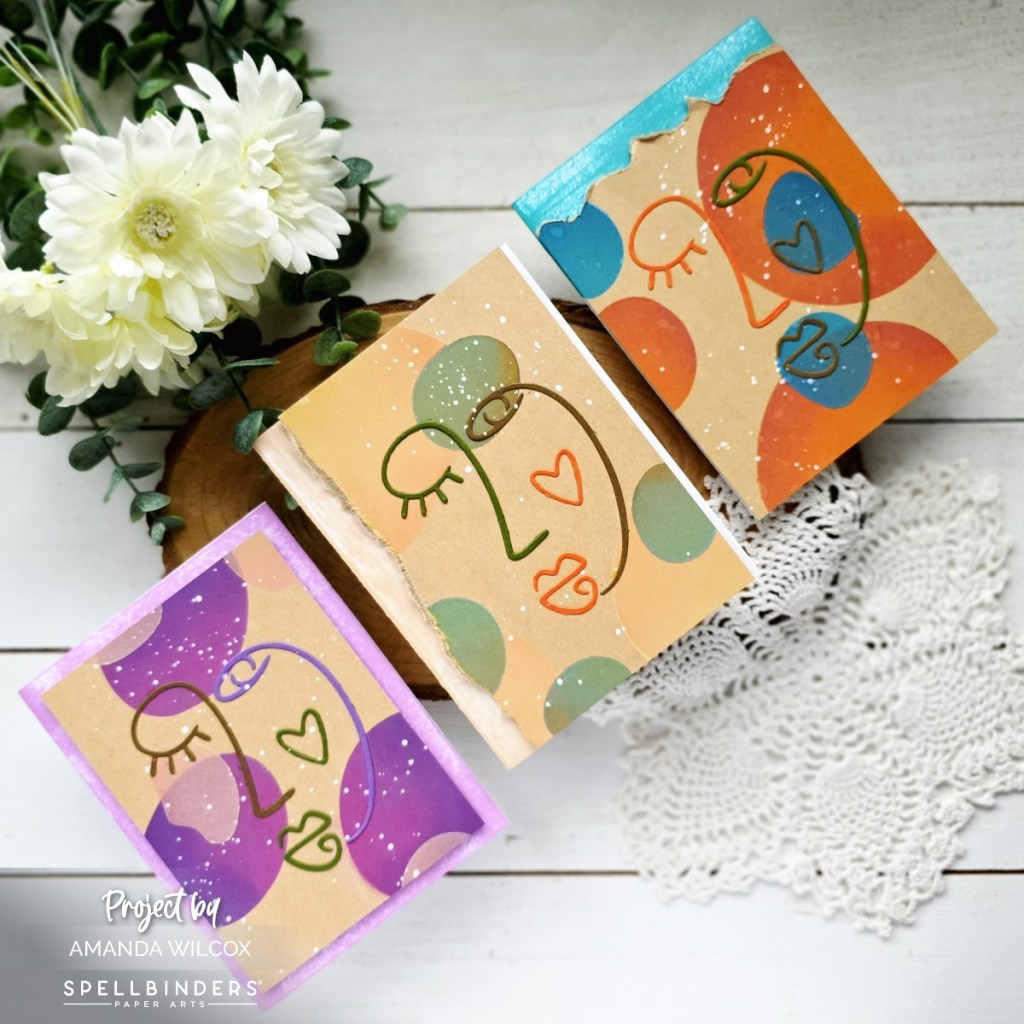
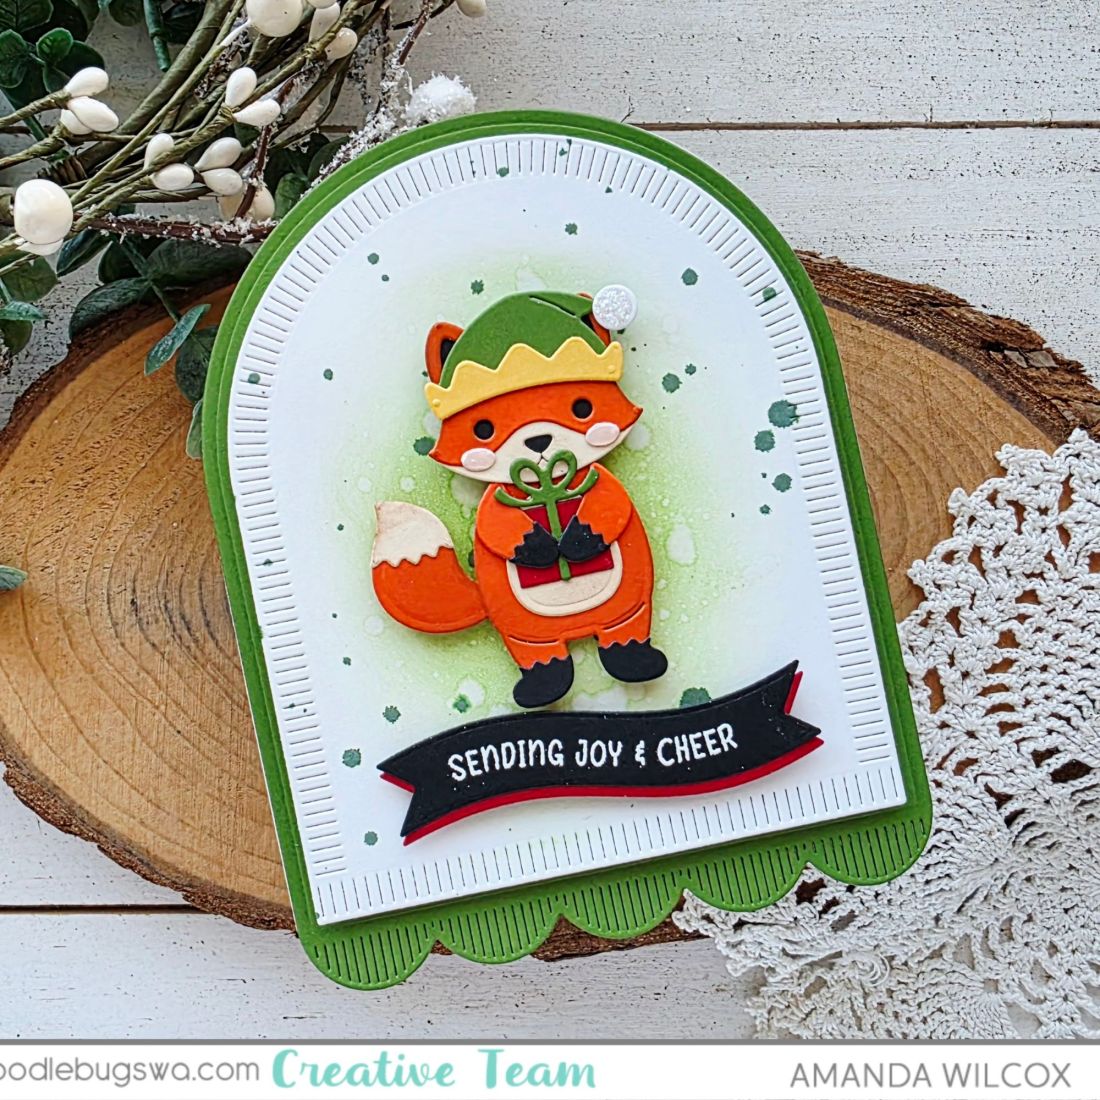
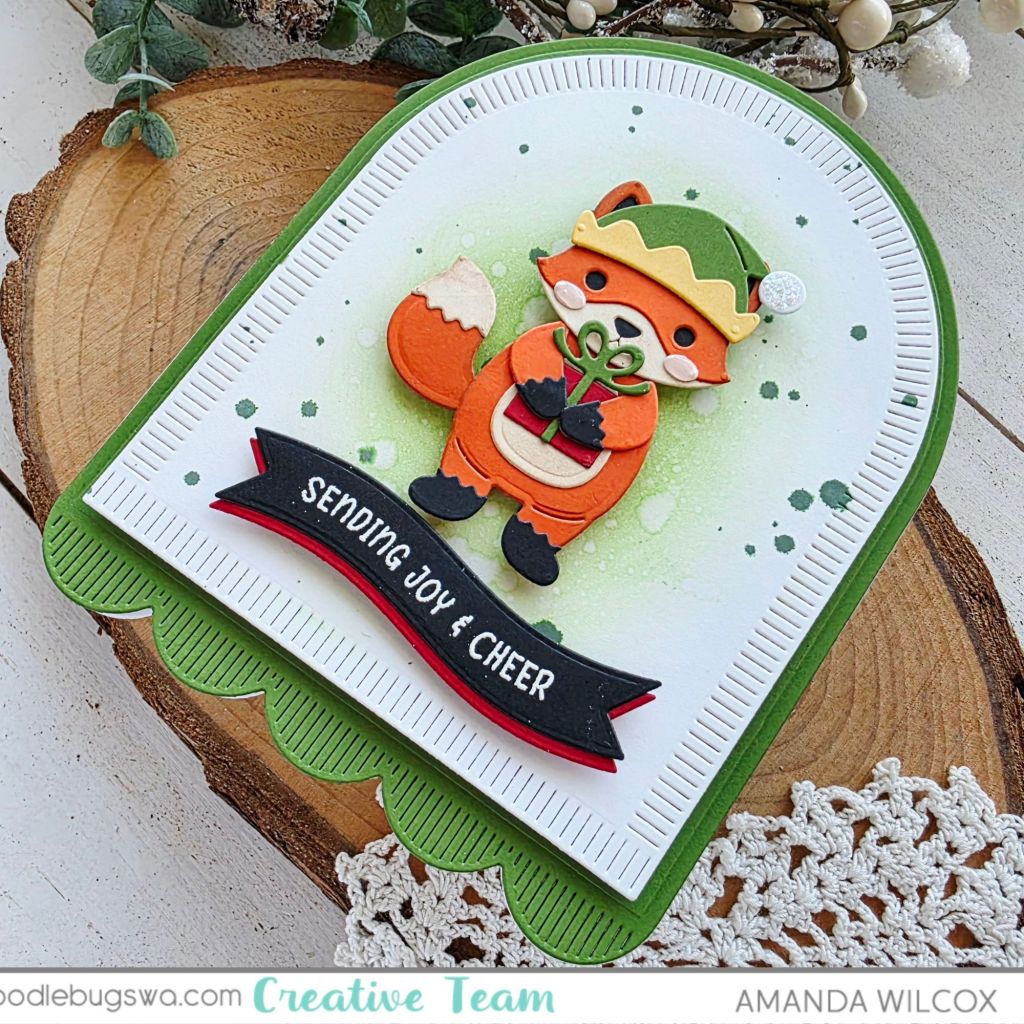
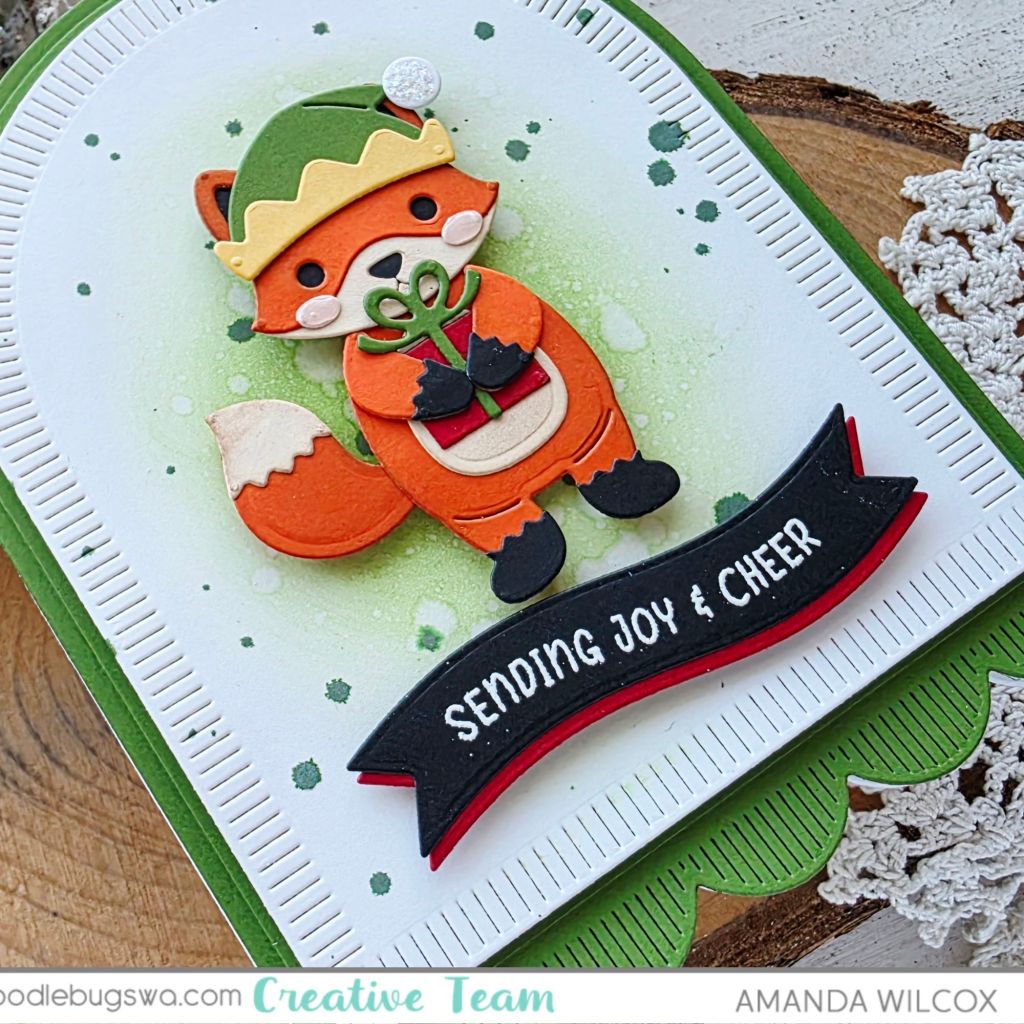
If you’ve been around, you know that I love a good stencil set! Today I created three cards because this amazing Ambient Aura stencil set from the All My Senses Collection has 6 layers. They’re made to mix and match but also are labeled A1, A2, B1, B2, C1, C2 so you can easily pair them. For my first round playing with them I kept them in pairs and created three backgrounds.
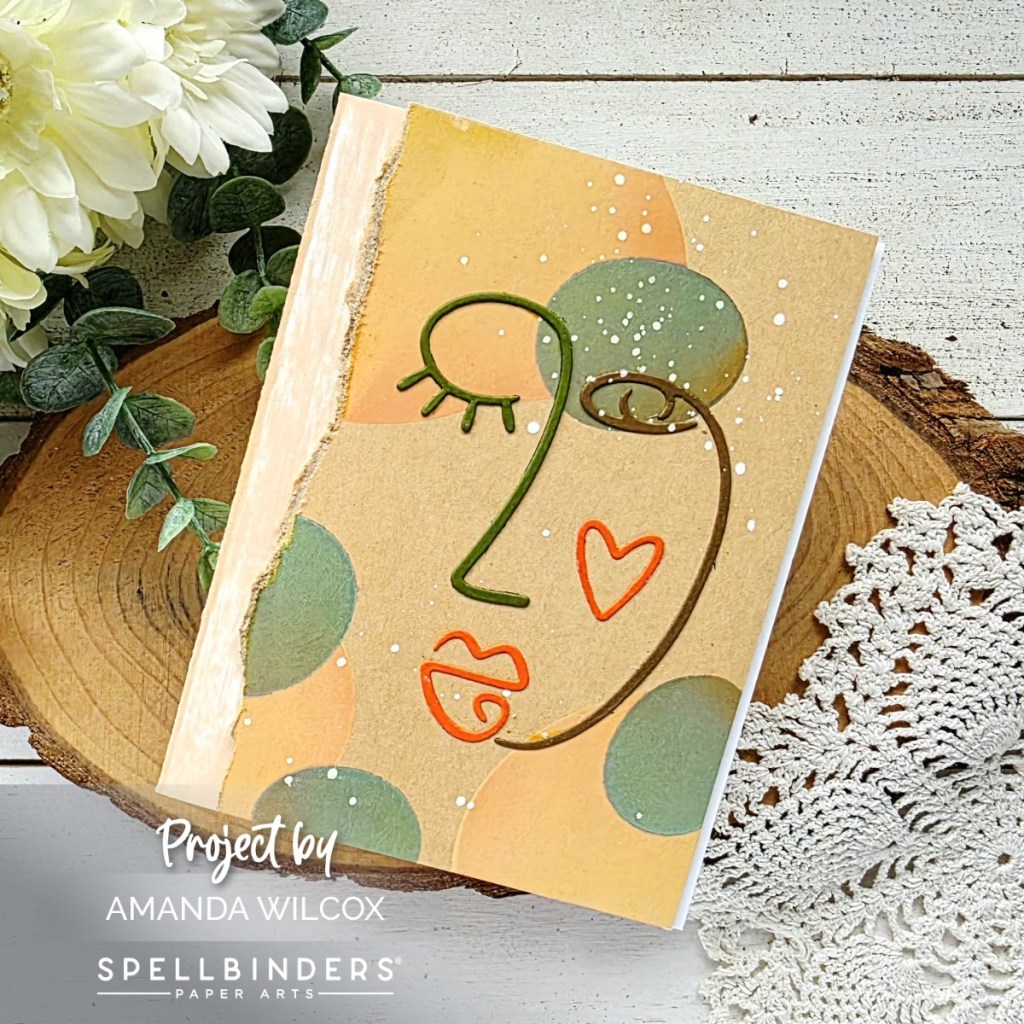
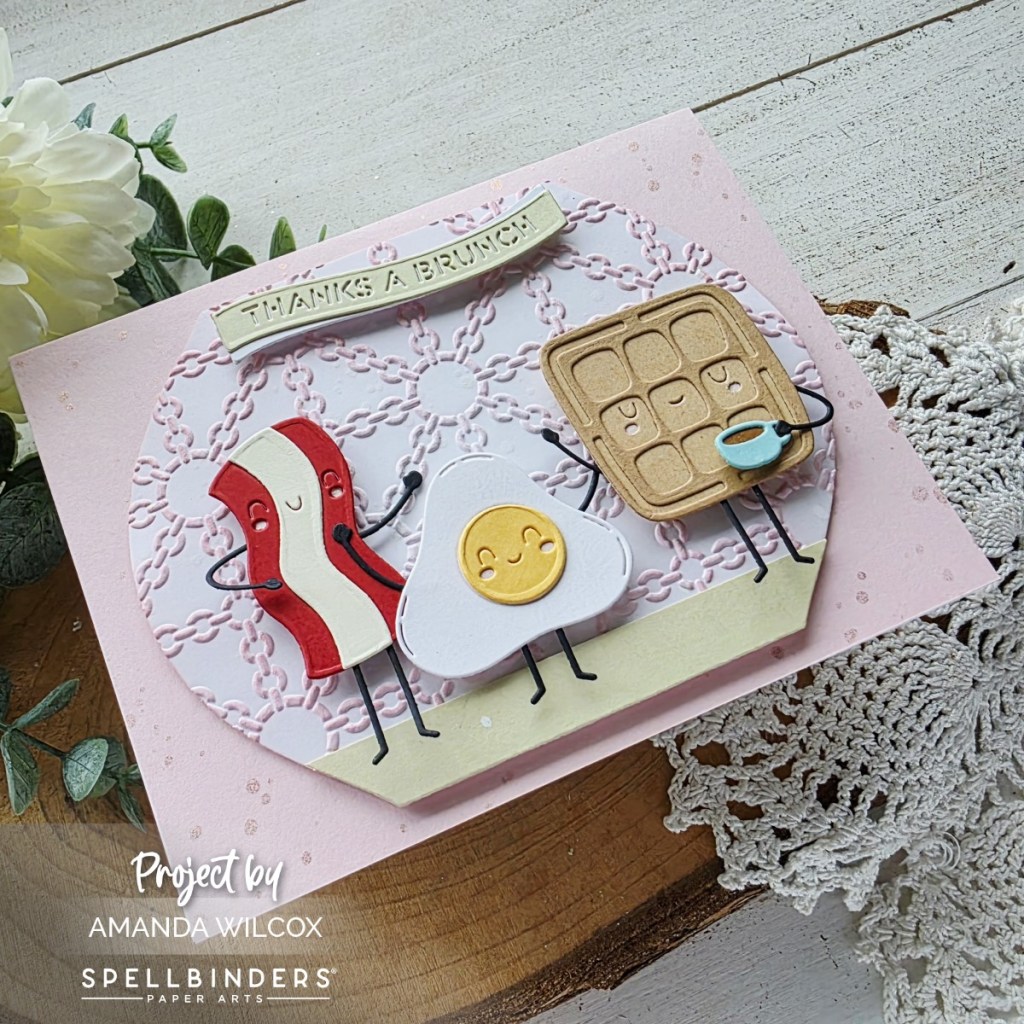
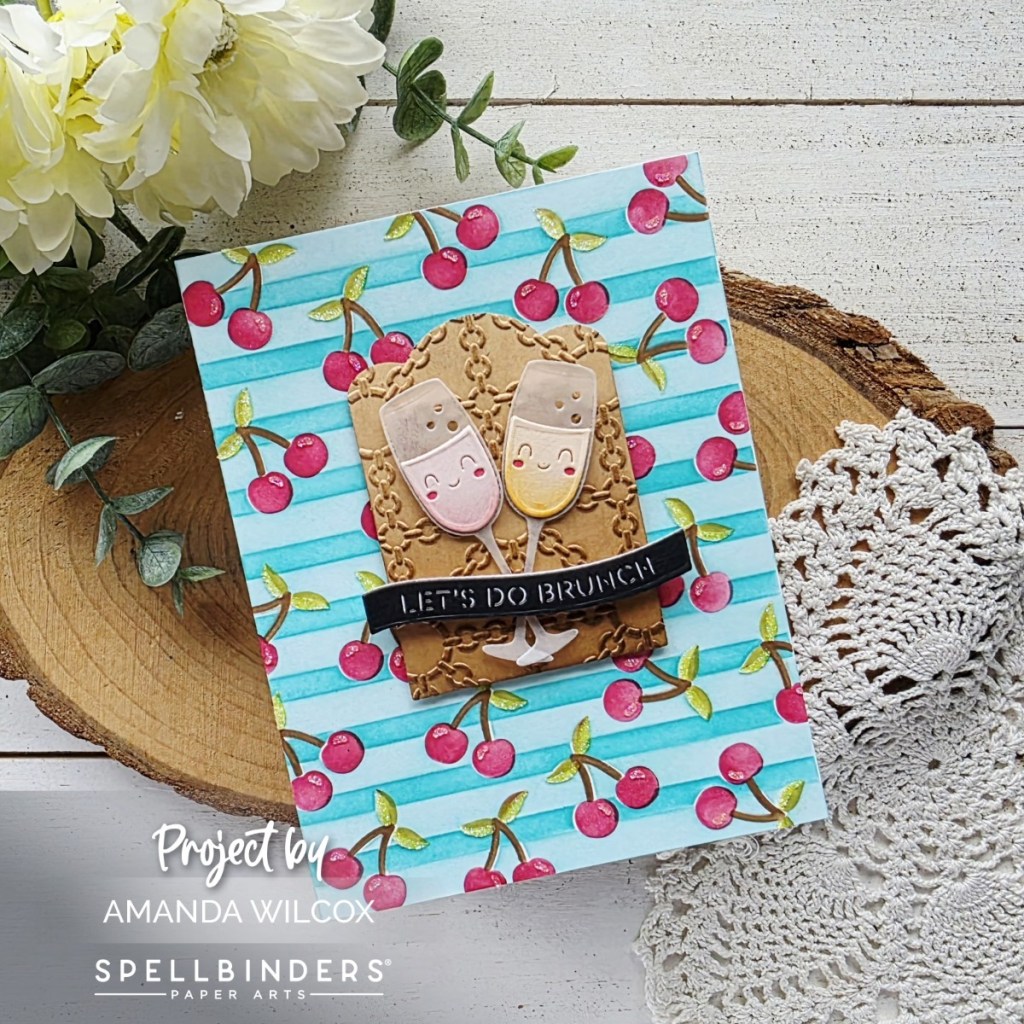
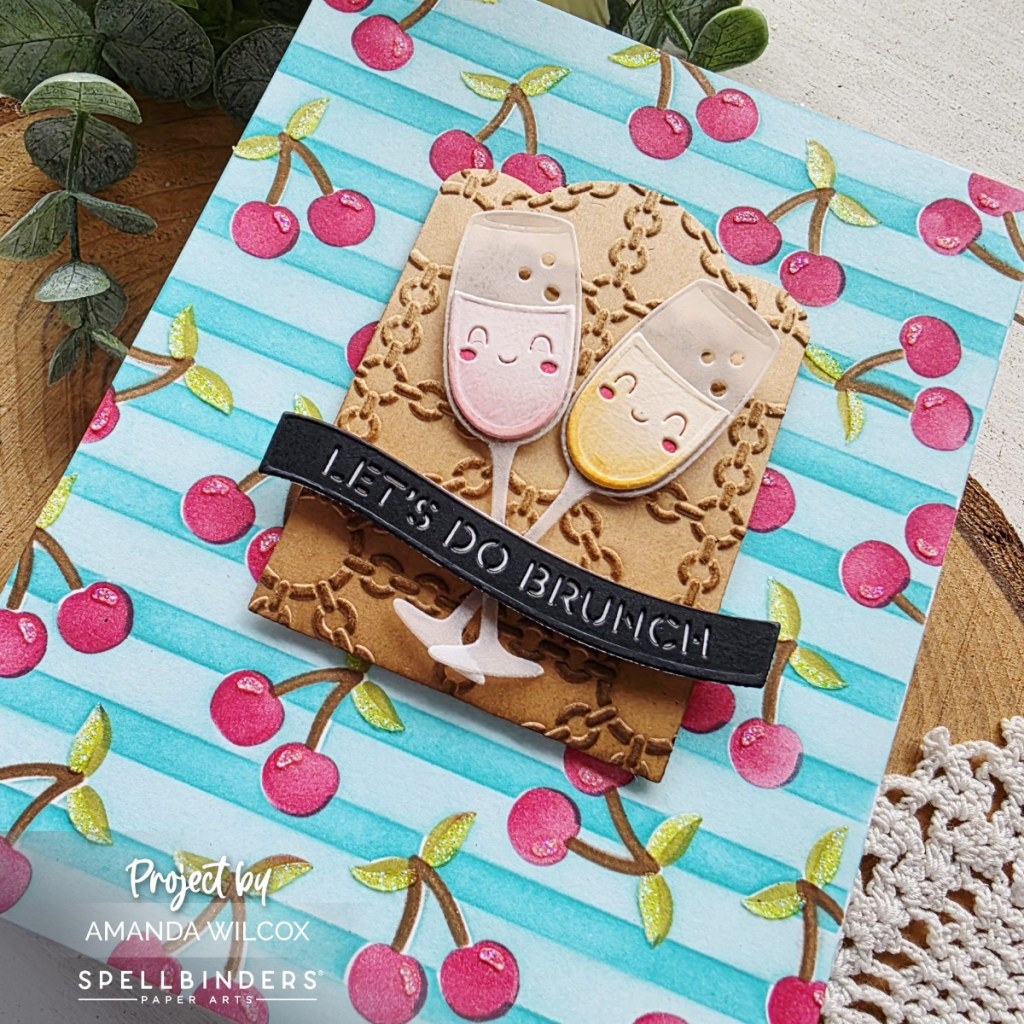
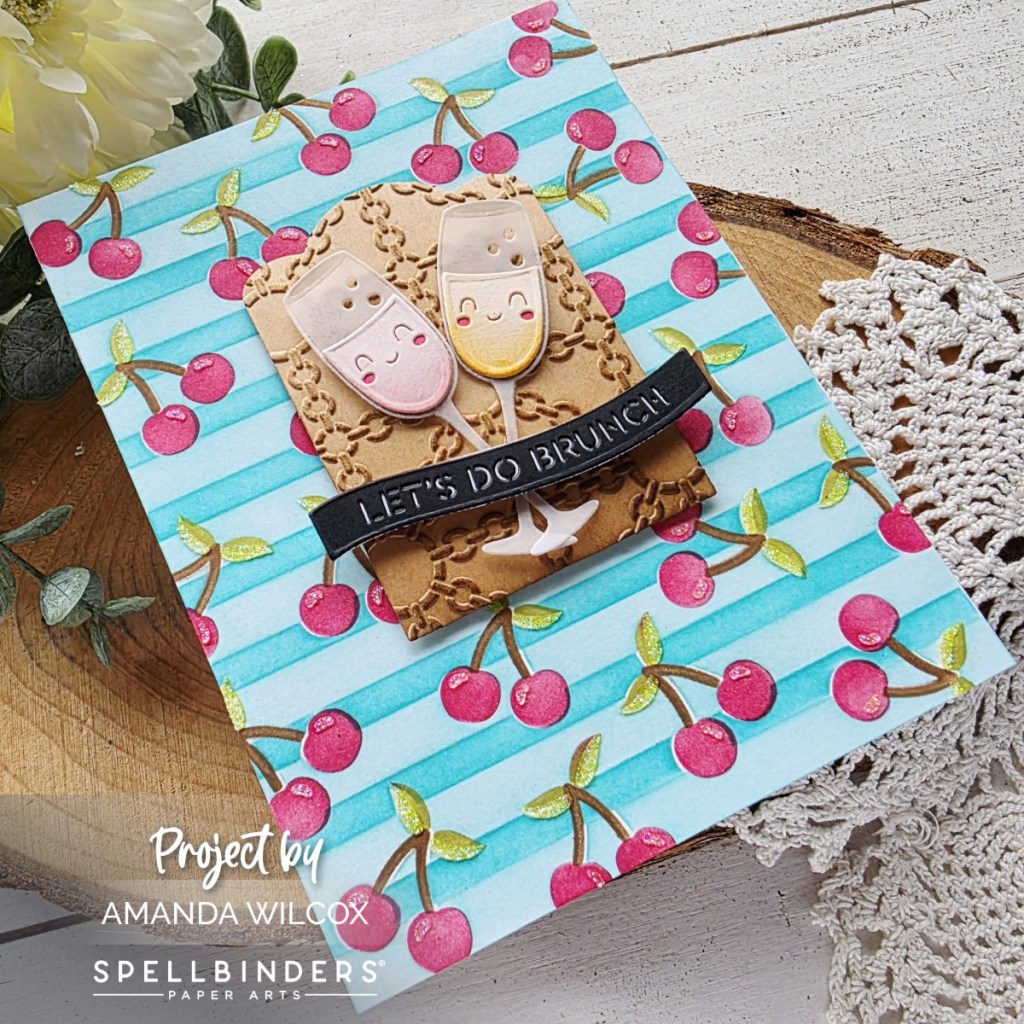
Because I wanted vibrant colors on my backgrounds, I used distress oxide inks for all the stencil blending today. I chose a lighter color for each layer and came in with a darker/accent color on the edges of each opening. Once the panels were inked up, I splattered them with water and let it air dry, then splattered all the panels with watered down white paint for more texture.
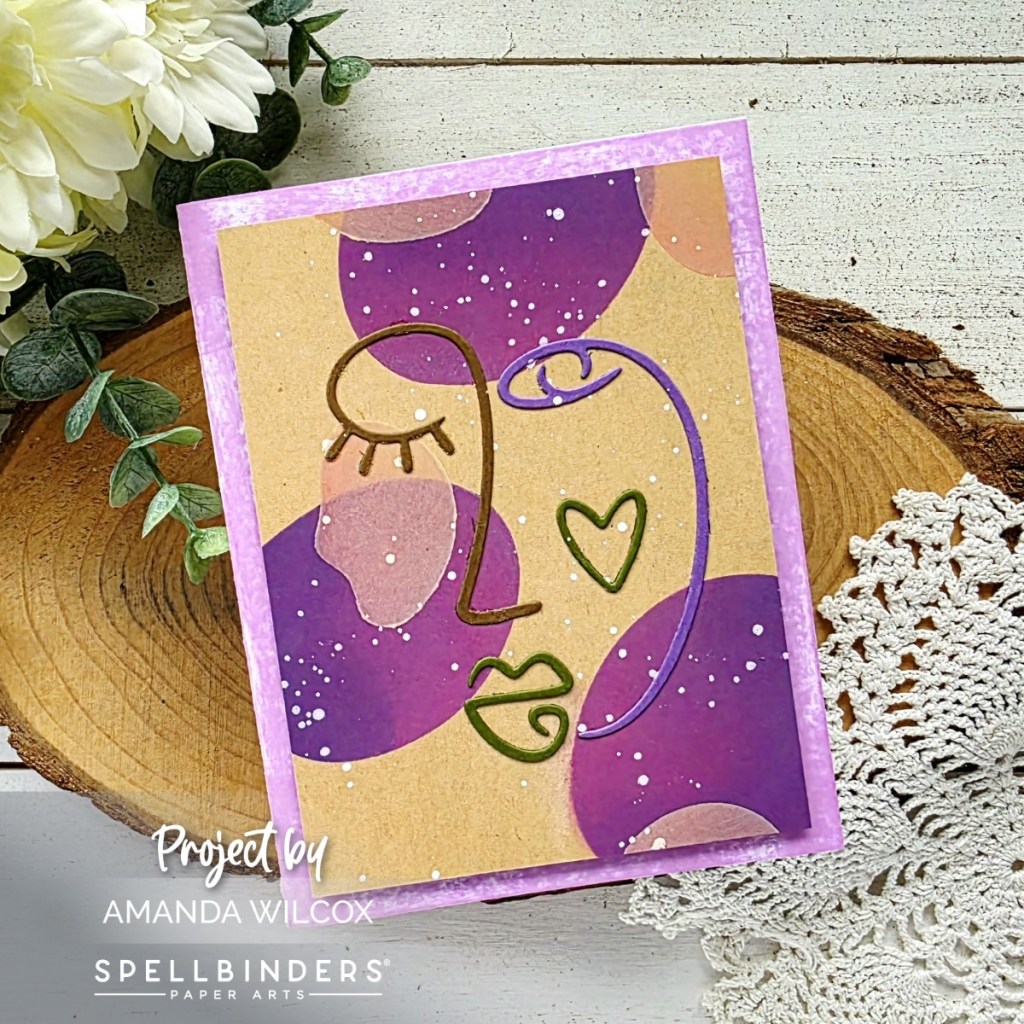
Then I trimmed or ripped edges of each panel so they were all just a bit different. Finally, I chose colors coordinating with my panels and cut the Line of Being die multiple times, using pieces from each color on my panels. These are all adhered with liquid glue directly to the stenciled panels.
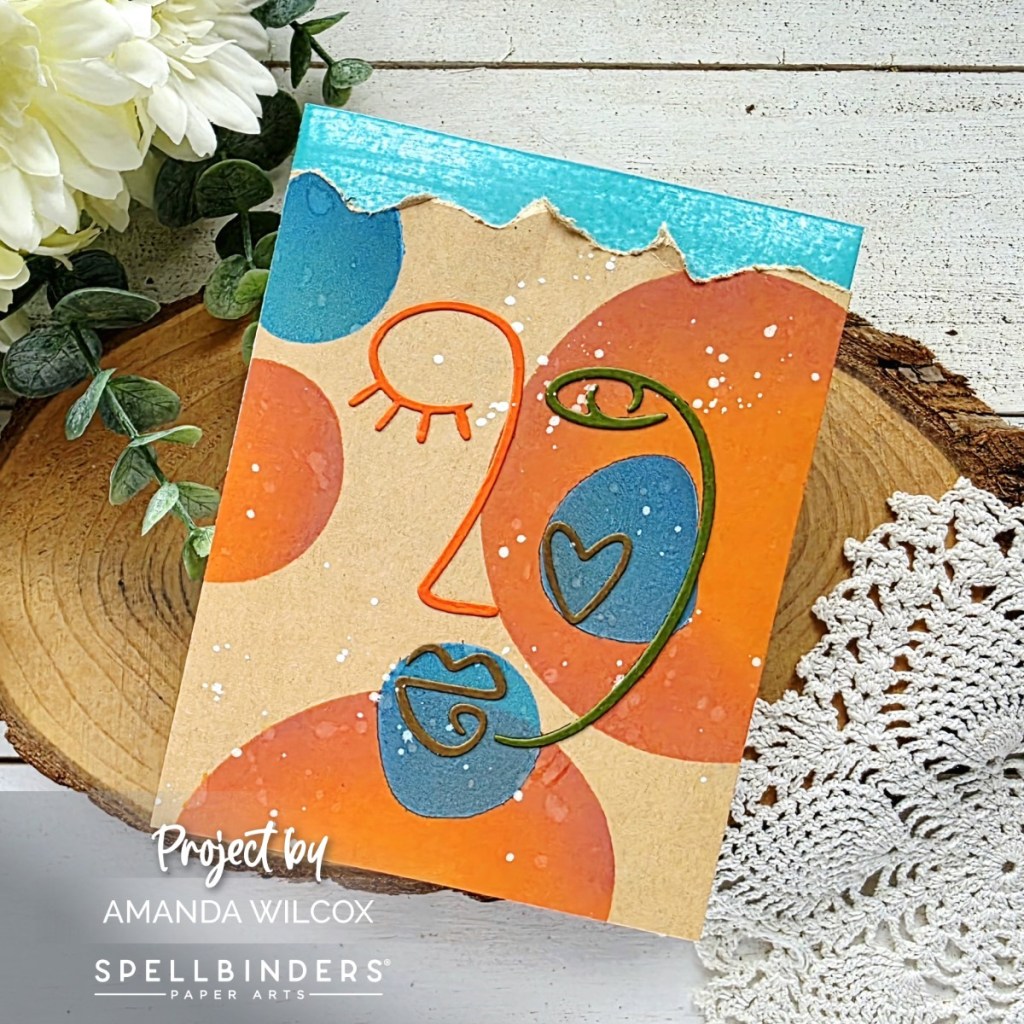
I added foam tape to the back of each panel but before adhering them to my card bases, I chose coordinating colors of ink to add color the the card bases that would show along side the stenciled panels. I love the texture that direct-to-paper gives when you use felt ink pads, which is what I’ve done here.
Remember, not every card has to have a sentiment on the front. Sometimes it’s just a work of art and your words on the inside are their own work of art.
Products used:
Ambient Aura stencils
Line of Being die
Foam tape
Distress Oxide Inks
Liquid glue
I appreciate you sharing your time with me. Have a fabulous day!