Hey friends! Mix it up Monday is back with ink blending and die cutting. Inlay and assembling amazing creations! Let’s make it merry and get started.
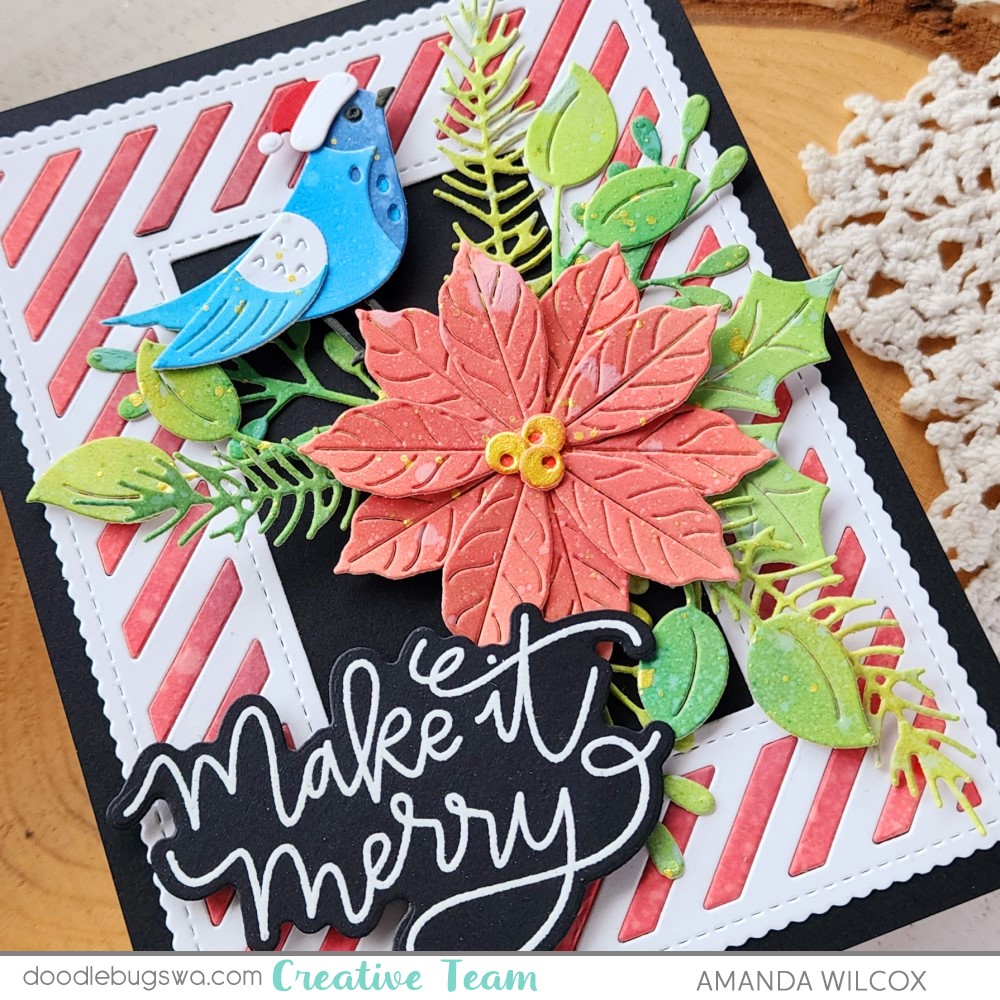
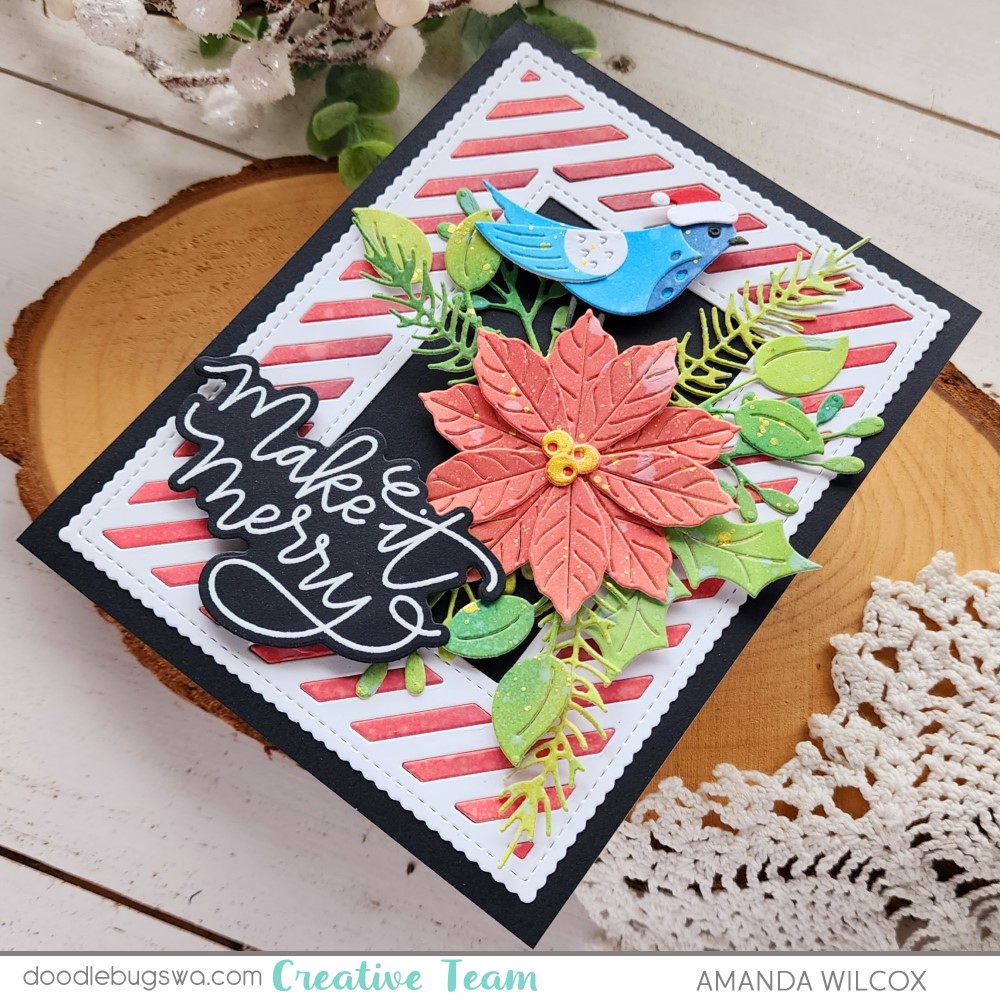
Today, I’m using a Mama Elephant sentiment and frame to show off the gorgeous Spellbinders foliage and sweet bird. I used distress oxide inks to color all my cardstock for a textural variegated look which I love!!!
First I inked up a couple pieces of cardstock with aged mahogany and barn door, twisted citron and mowed lawn, and salty ocean and faded jeans. Then I used the Spellbinders Christmas Bird Poinsettia dies to cut all the elements out and liquid glue to assemble them. I unintentionally made the center of my poinsettia dark red so to remedy that I watercolored it gold and then splattered my whole arrangement for some sparkle and interest.
Next, I inked up a second panel with the same red inks and die cut the Mama Elephant Sweet Shoppe Frame from that and white cardstock. I adhered the white frame to a piece of black cardstock and inlayed all the red pieces with liquid glue. Totally I a labor of love because look at how it turned out! So good!
I added my foliage and bird with foam squares. Then for a sentiment I stamped and heat embossed Make it Merry from Mama Elephant’s Make It Merry set and used the coordinating die to cut it out. It’s also popped up with foam squares.
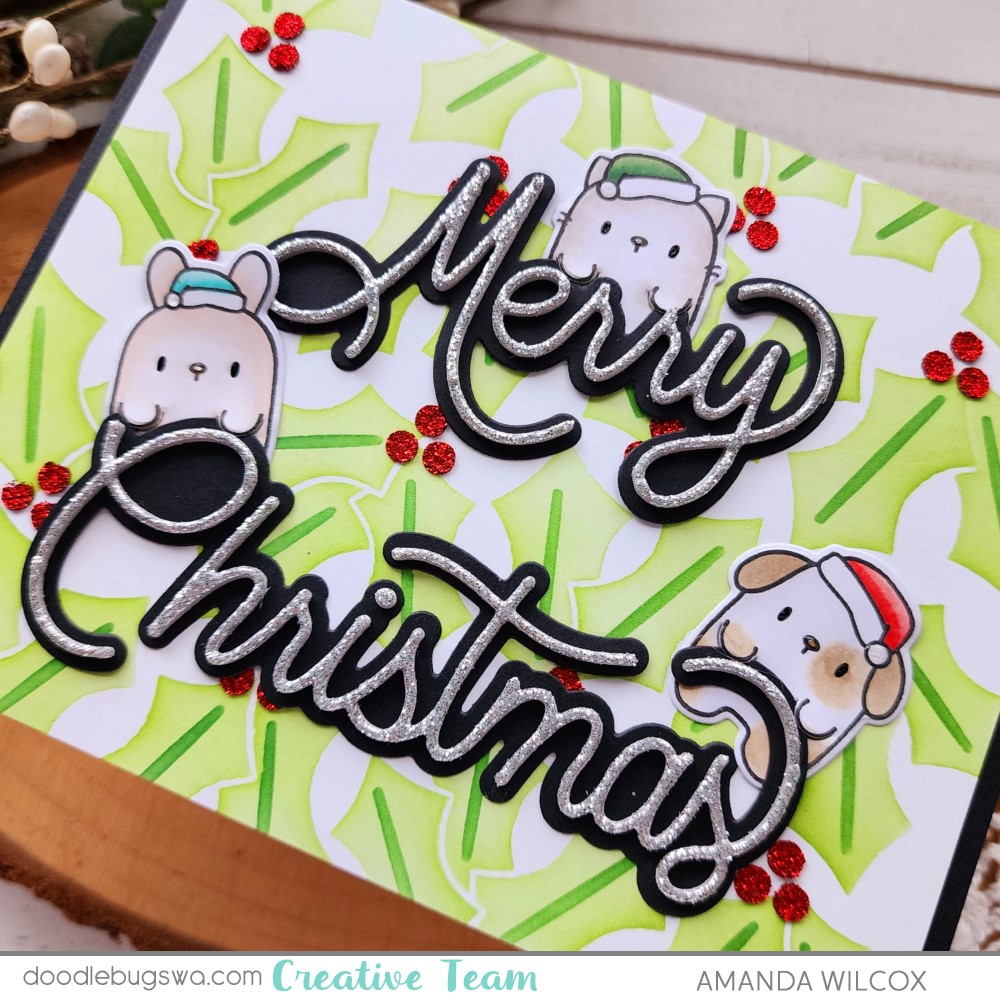
Hey friends! I’m over on the Doodlebugs blog today mixing things up with glitter for all things holiday sparkly! Sparkle and shine are some of my favorite things to add to a card so today I’m sharing a few different ways to achieve that.
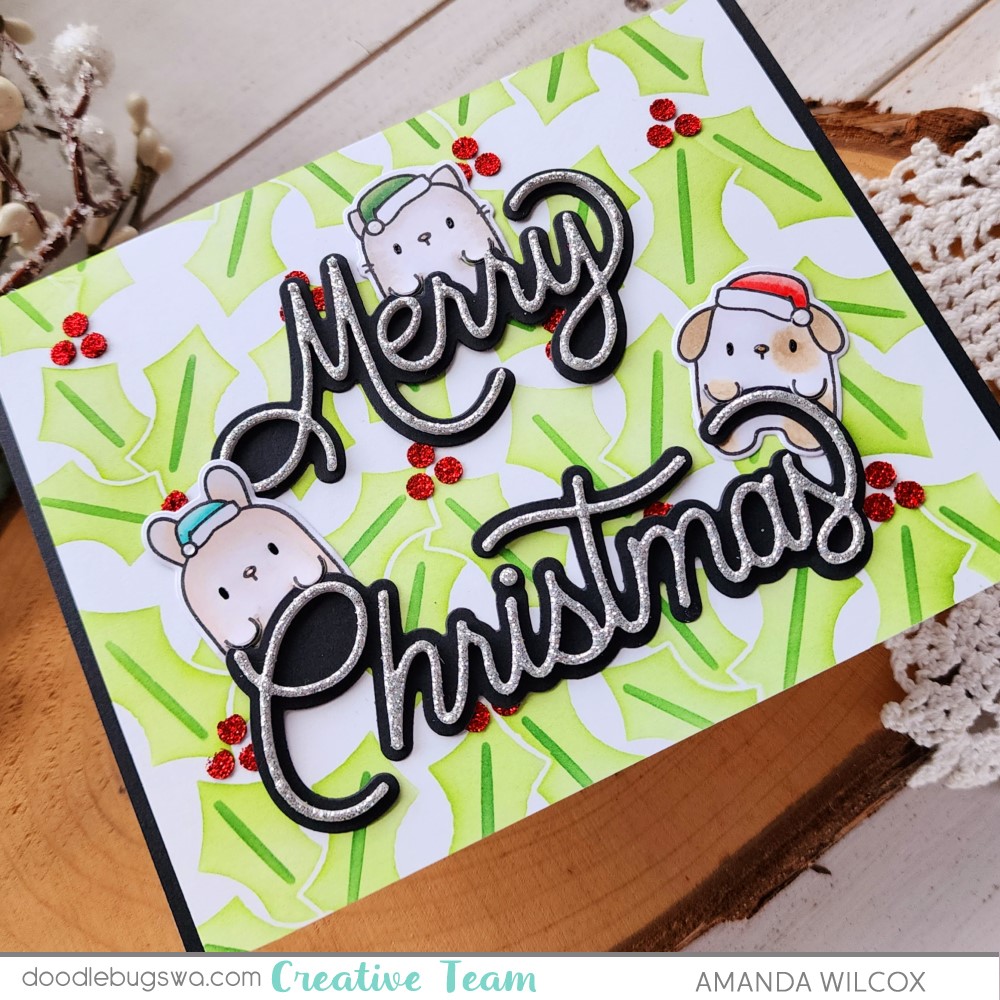
I’m in love with these sweet new Mama Elephant critters from the new Holiday Huggers set and just had to use them as soon as possible. So I went digging to see what I could have them hang on to and when I found this Spellbinders sentiment I knew I didn’t need to look any further. So I stamped all three critters and colored them with copic markers. Then I used the coordinating dies to cut them out.
Next, I cut the sentiment shadow from black cardstock. Then I cut a piece of Spellbinders die cutting foam and also cut a piece of double-sided adhesive sheet to match. I removed the liner and attached the foam to the adhesive sheet. Now my foam is essentially a giant sticker. Then I die cut the sentiment. The die cutting foam tends to stay in your die which is fabulous for this because I removed the release paper and lined the die up with my shadow adhering the sentiment down and pulling my die off. It worked perfectly!
Sparkly sentiment? Yes, please! It grabs your attention and the foam gives instant dimension too!
Next, I inked up the Pretty Pink Posh Holly stencil with Lawn Fawn inks – cilantro and noble fir – before spreading Thermoweb Glitz Gel through the berry layer.
Sparkly stenciling in your background? Fabulous way to add some glam and take things to the next level.
I added my critters to the sentiment and used liquid glue to adhere them to the stenciled panel once the glitz was dry. Then I decided to trim the edges off the stenciled panel – just 1/8 inch off each side. Then I added strips of black cardstock to my card front and finally glued my panel on top of that. I liked how this sets off the shadow on the sentiment.
Then, for finishing touches we add some shine. Black glaze pen to the critter eyes and glossy accents to their noses and the white parts of their hats.
Shine to go with sparkle is fabulous! It’s not as bold as glitter but the shine definitely adds a big piece and catches your eye when you’re looking at the card.
Hi there! I’m on the Doodlebugs blog for Mix-it-up-Monday. Today we’ve got Spellbinders dies with Pretty Pink Posh stamps and dies. But the big thing I want to touch on today is a fun and easy way to add gorgeous color to your die cuts…ink blending before you cut!
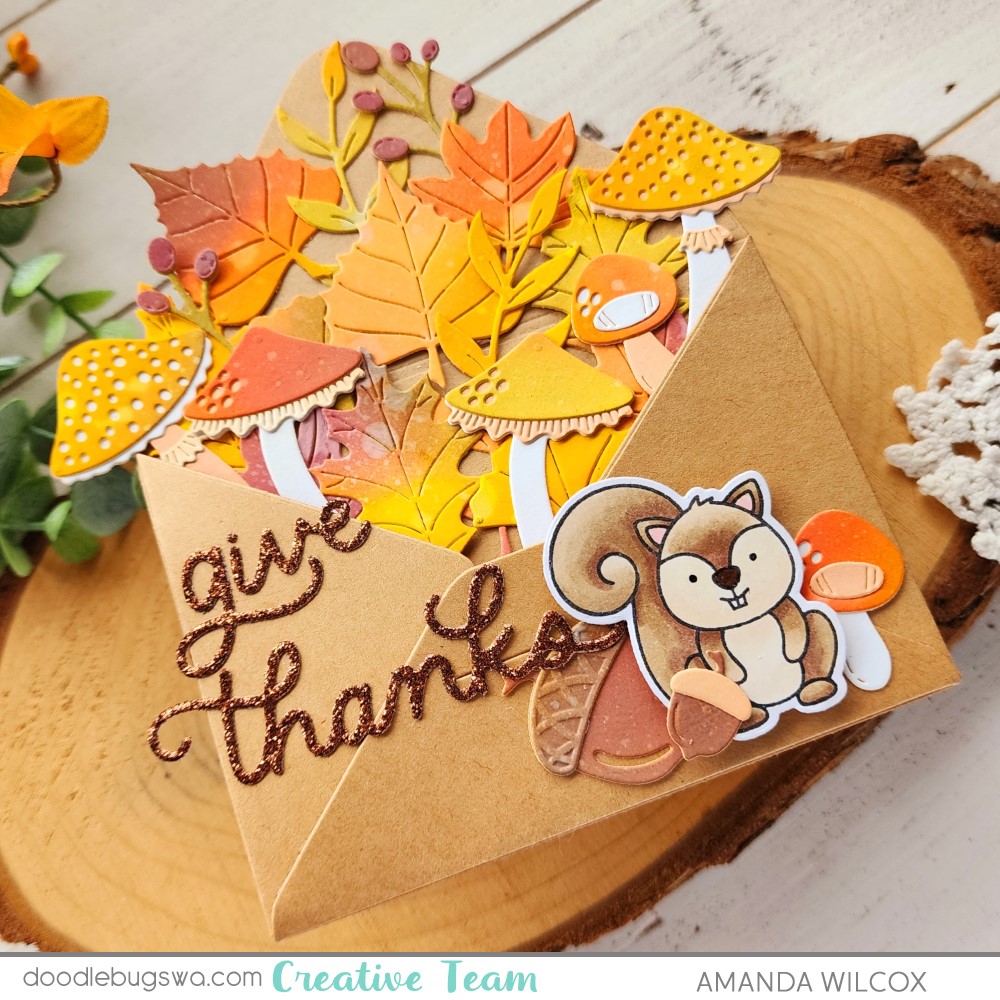
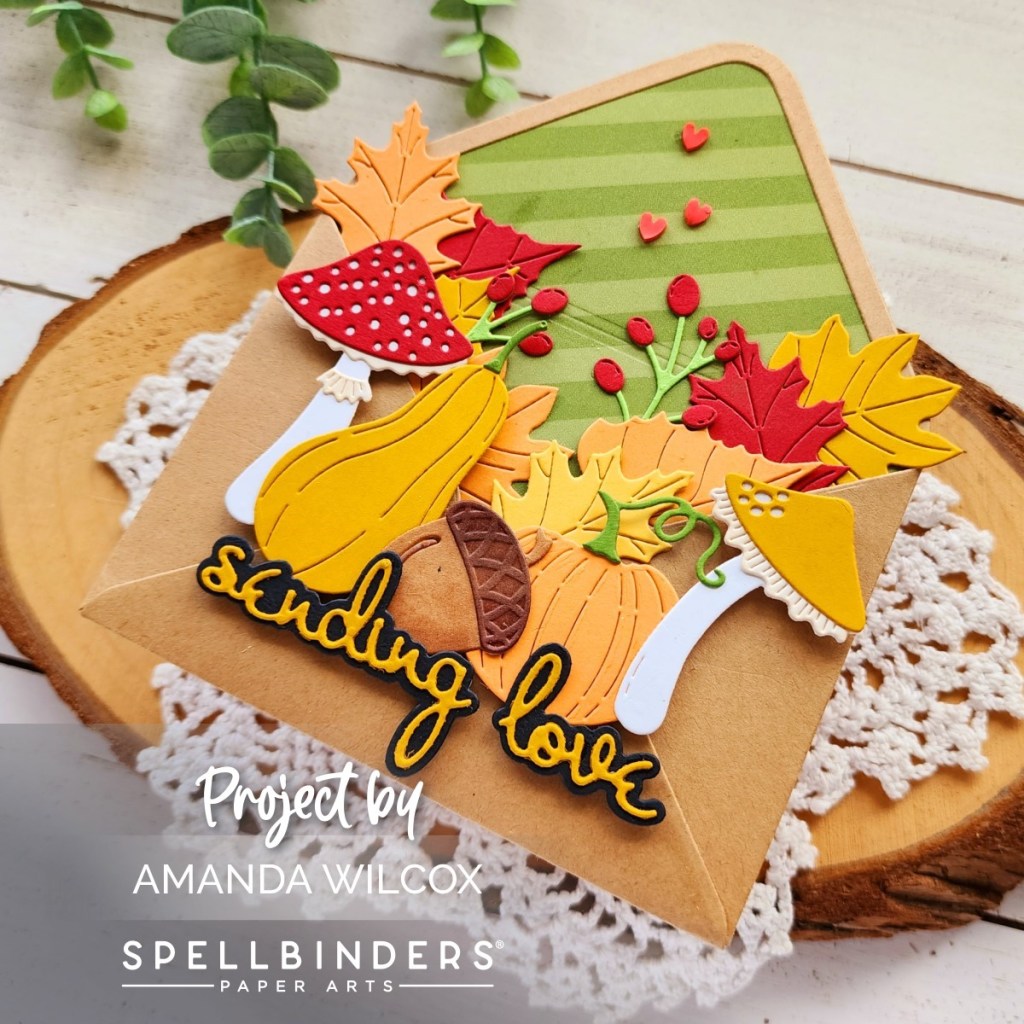
Today I created a shaped card using the Spellbinders Envelope of Wonder and Autumn Wonder die sets. The envelope base comes in the Envelope of Wonder set, then there are add on sets for autumn, Halloween and Christmas so far. You can snag a bundle of all the sets to save some money at Doodlebugs if you’re quick. This is a really fun set and I’m sure once you get the first one, you’ll be back for more.
To start today, I cut the envelope base using kraft cardstock and tear tape to adhere all the pieces. I set that aside and took a piece of white cardstock and an array of fall coloring distress oxide inks. I just covered the whole panel with no rhyme or reason and not a lot of blending between colors either. I started light adding blobs here and there, working my way to my darkest. I used colors like mustard seed, crackling campfire, gathered twigs and forest moss. I spritzed the panel with a distress sprayer and blotted it dry. Then I used a heat tool to completely dry the panel before die cutting all of my Autumn Wonder elements. I have a stack of A2 white cardstock panels ready to go at all times and I’ll be honest that I went back and blended a second panel of just leaves, plus a white panel for the mushroom stems and such to fill my envelope to my liking.
Once those were all cut out, I stamped a sweet squirrel from Pretty Pink Posh Cozy Fall Critters and colored him with copic markers. Then I used the coordinating die to cut him out. I also die cut Pretty Pink Posh Give Thanks Script from brown glitter paper.
I arranged everything in my envelope and used press ‘n seal to pick it all up, added liquid glue and carefully slid it back in the envelope. Last, I used liquid glue to add my sentiment, big acorn and mushroom to the front. Then I popped the squirrel and his small acorn up with foam squares.
For finishing touches I added black glaze pen to the squirrel’s eyes and glossy accents to his nose. I just can’t resist those little touches, especially with critters!
My daughter promptly stole this card from me so it won’t be going in the mail but I think I’ll definitely be trying out some of those other add on sets to the Envelope of Wonder for Halloween and, of course, Christmas too! They’re too cute!
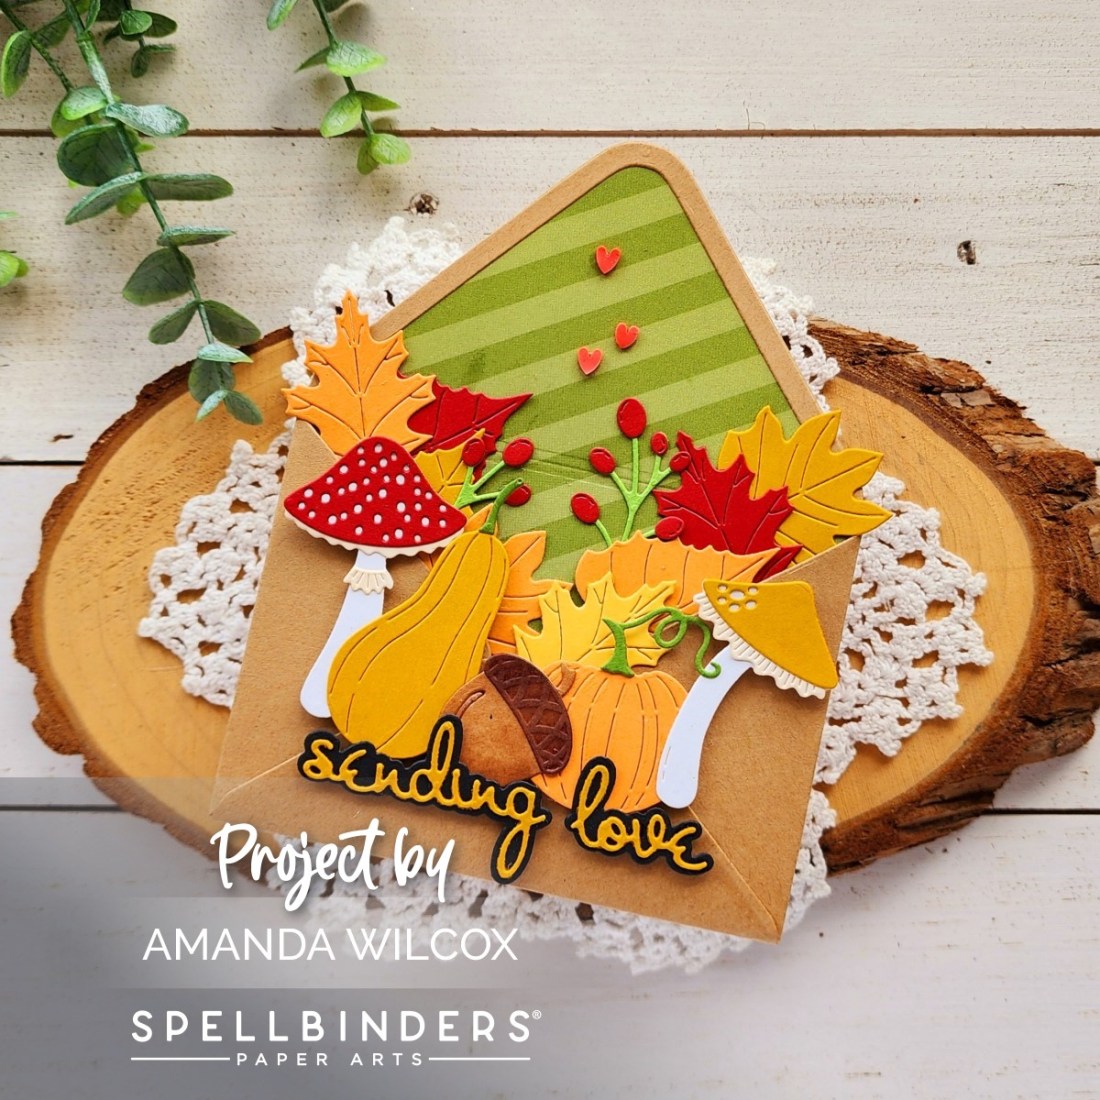
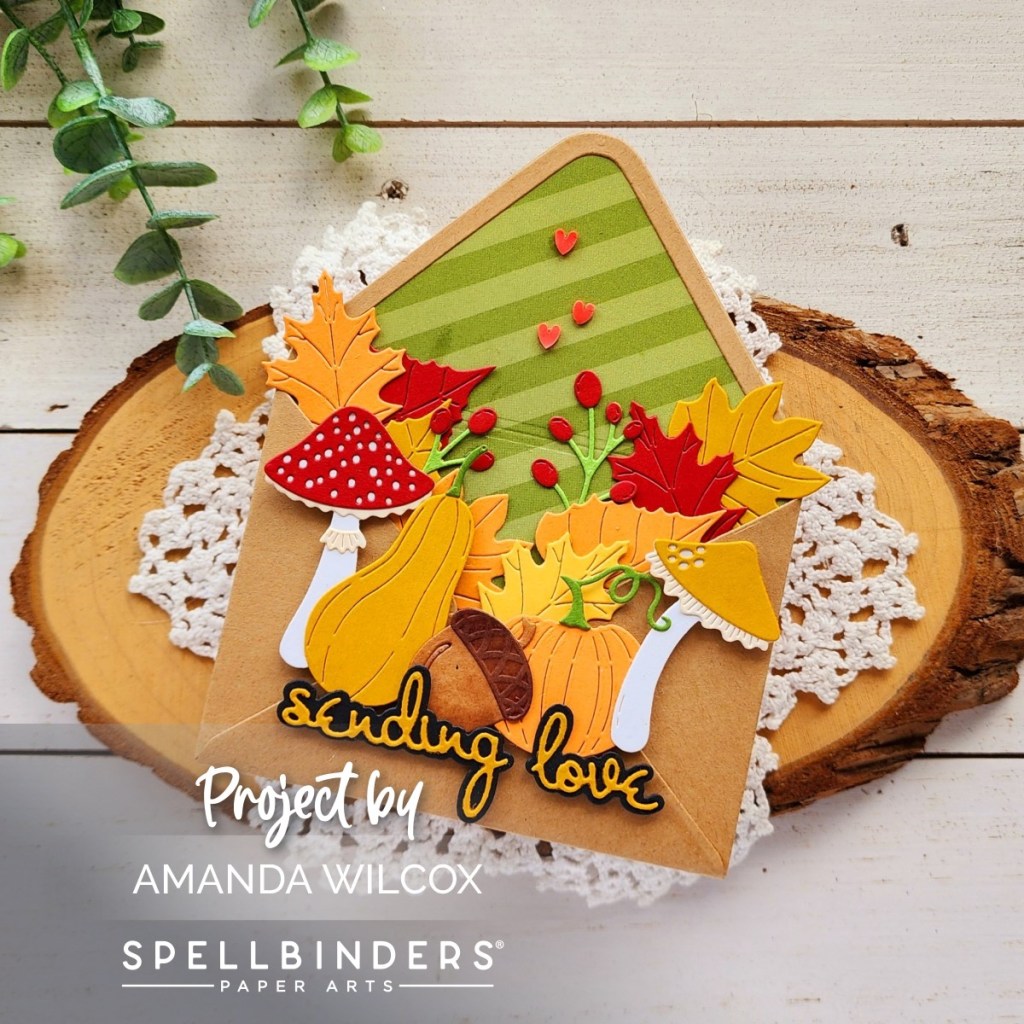
Oh my, friends! Did you see the August release from Spellbinders with the Envelope of Wonder and the add-on sets for it? I honestly haven’t touched any of the original pieces other than the envelope itself because I’m fully stuck on these autumn add-ons!
Today I cut the main part of the envelope from green striped paper that was in my stash and all the other parts from kraft cardstock. I used liquid glue and tear tape to assemble my envelope and then set it aside while I played with all of the great pieces in the Autumn Wonder dies.
After cutting lots of pieces, I used liquid glue to adhere the layers together on the mushrooms and pumpkins. Then I decided on my arrangement and started adhering elements inside the envelope. Then I adhered those on the front and added them to the envelope with foam tape.
Last, I cut a sentiment from the Thanks Enclosed Sentiments, glued the layers together and popped it up with foam squares so it was the same level as the mushrooms and such. Finally, I added a few red clay hearts floating out of the top of the envelope. I like how this filled the empty space a little and tied in the sentiment just a bit extra.
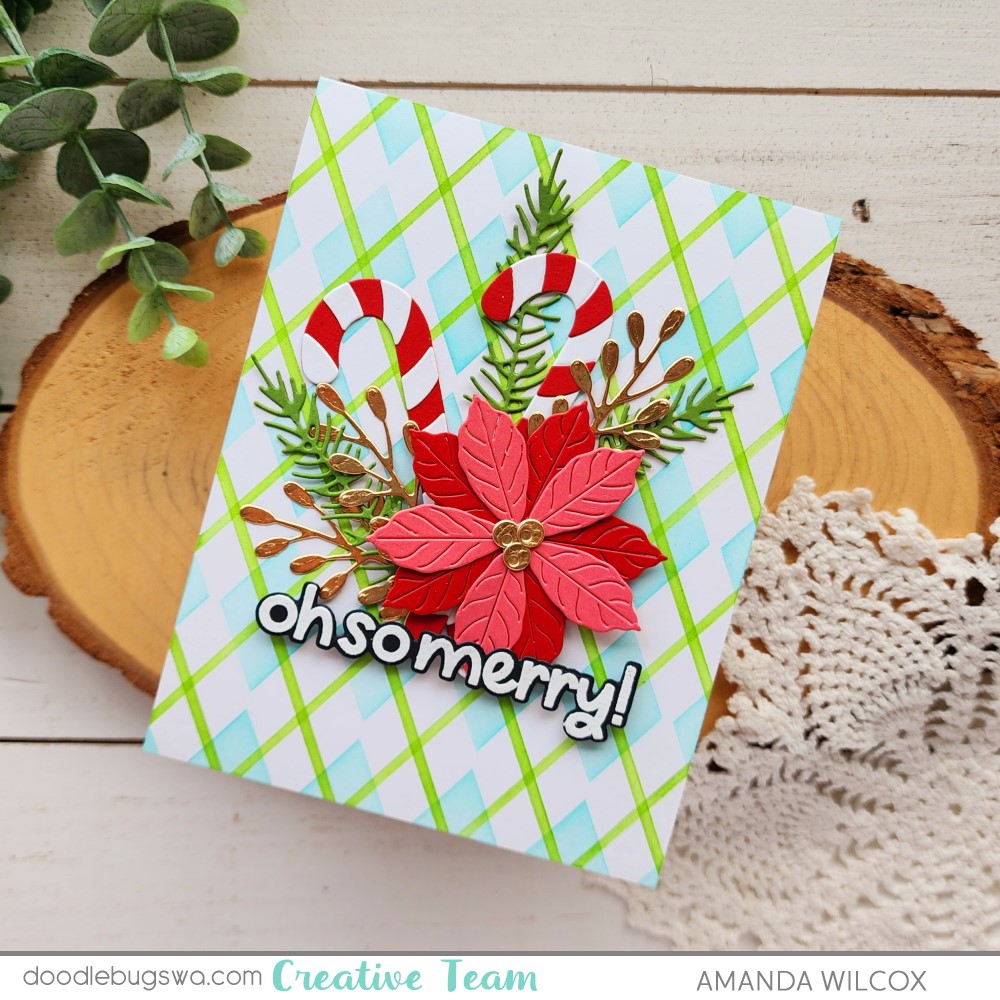
Hi there! Have you gotten any early start on holiday crafting this year? I feel like it really became a thing with companies doing Christmas in July releases which helped my motivation. I also noticed that Christmas crafting now compared to later on, my color choices are brighter and different which is sort of cool and fun!
I recently picked up some new goodies from Doodlebugs with the intent of mixing them together for some holiday cards. This was the first result from that. I started by playing with the Spellbinders Christmas Bird Poinsettia die cutting pieces and arranging them different ways. I used liquid glue to adhere everything except I added the poinsettia with foam squares for some dimension.
Then I inked up a panel with the Pretty Pink Posh Argyle stencil set using mermaid and jalapeno Lawn Fawn inks. After stenciling, I glued the panel to a top folding card base and then glued my foliage down on that.
Next, I heat embossed and die cut a sentiment from Mama Elephant’s Everything Nice sentiment set. I love these bold sentiments and have all of the collections. They come in handy and are a fabulous font! I added the sentiment with foam squares and liquid glue.
Since my foliage has some pretty gold shiny pieces, I didn’t add any finishing touches. They were kind of built in when I added that shiny-ness everywhere as I went along.
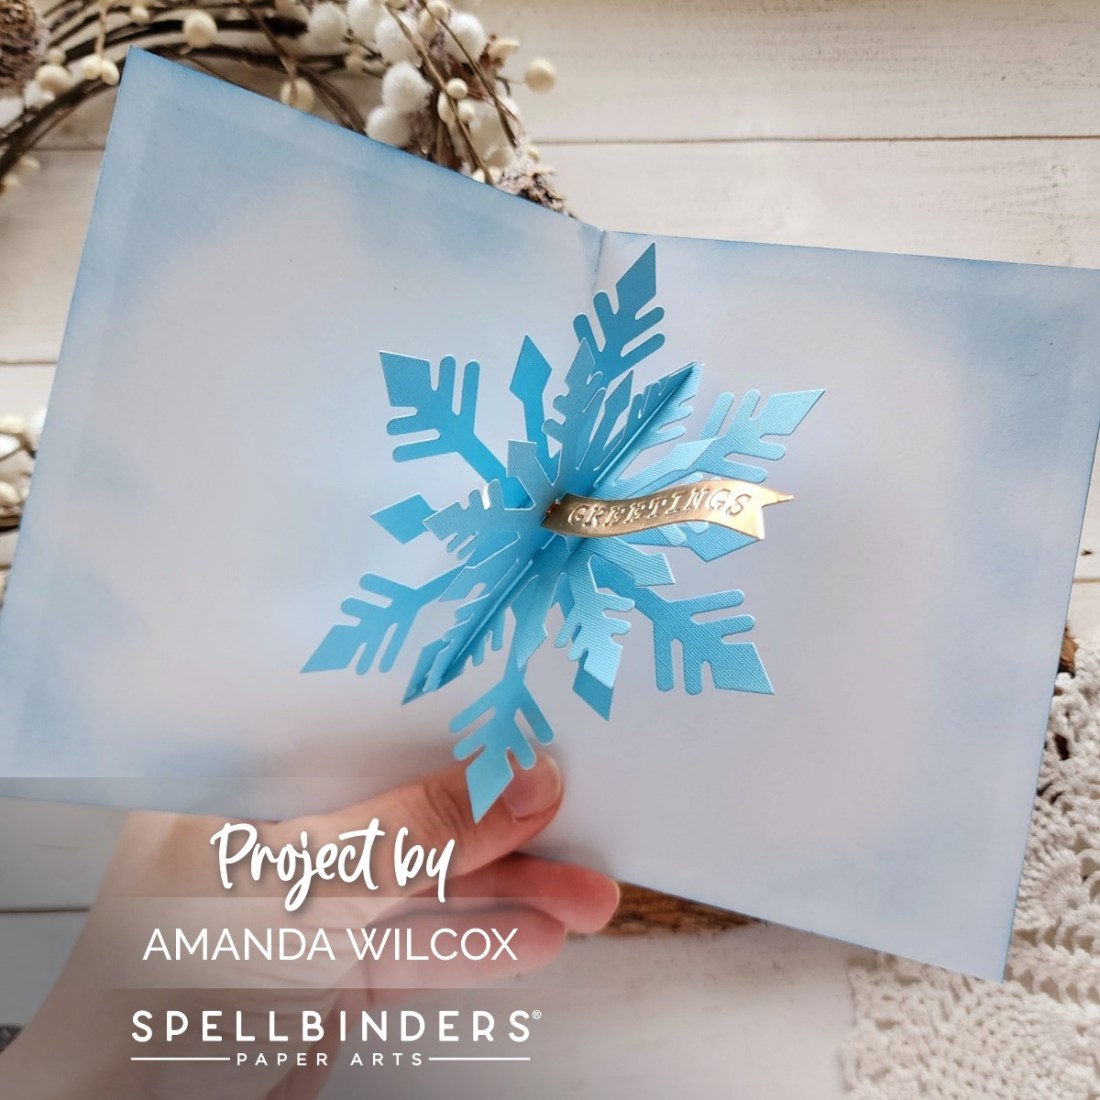
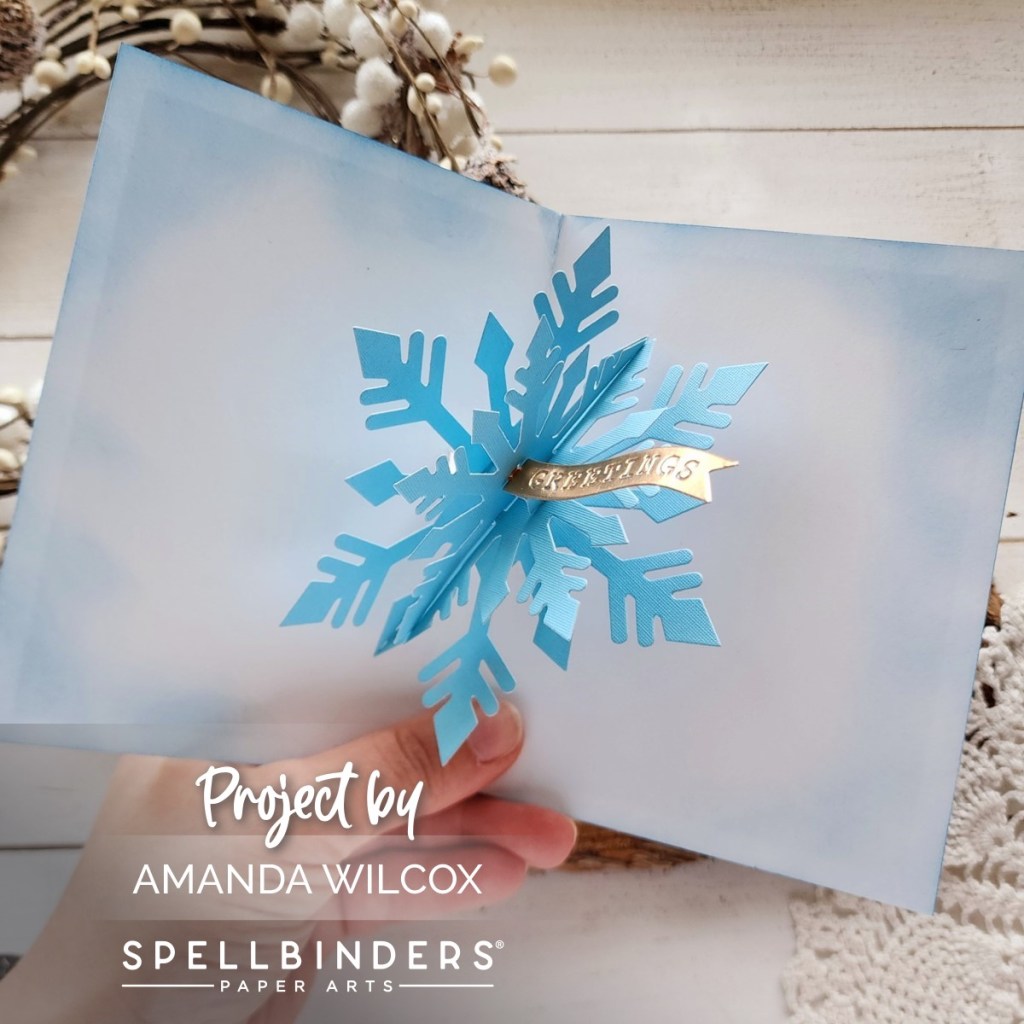
Welcome everyone. Thanks for stopping by. Today I have a card featuring some of the Spellbinders Bibi’s Snowflakes Collection. There’s a really cool layering stencil set and lots of beautiful snowflake dies.
I used the stencil on the front of my card with a poppin’ surprise on the inside!
I inked up the stencil with dye inks, except for the white snowflakes are pigment ink so it would show. Isn’t the ornament so pretty!?! Then I stamped a sentiment from Holiday Hugs Gnome Sentiments on a label and glued it on the front too.
Then, when you open the card you have this stunning snowflake pop out at you with a message even! It’s so pretty and was simple to put together. I used liquid glue so I took time to let the glue dry on each step but it wasn’t bad and reverse tweezers are definitely your friend.
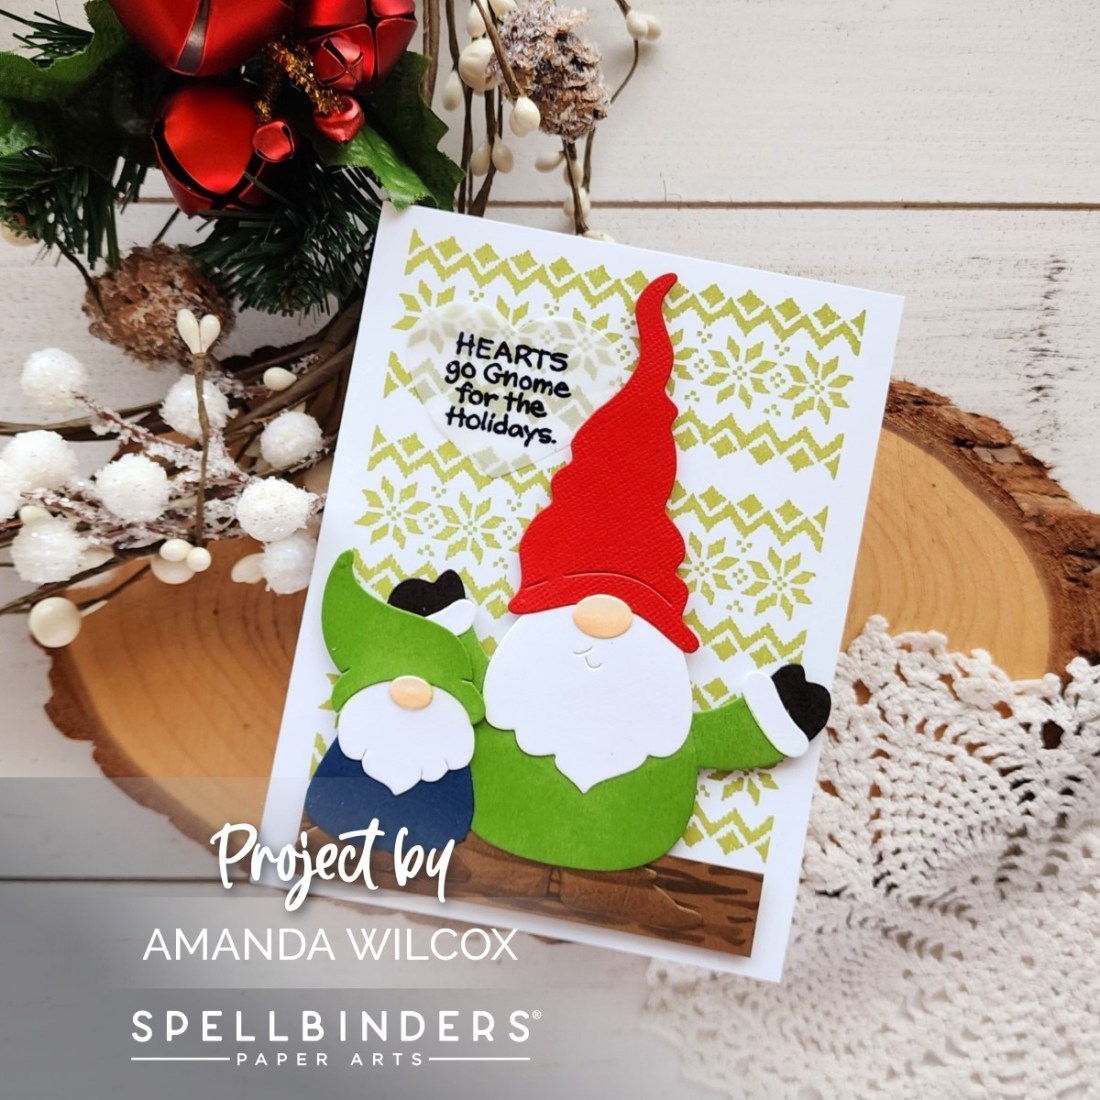
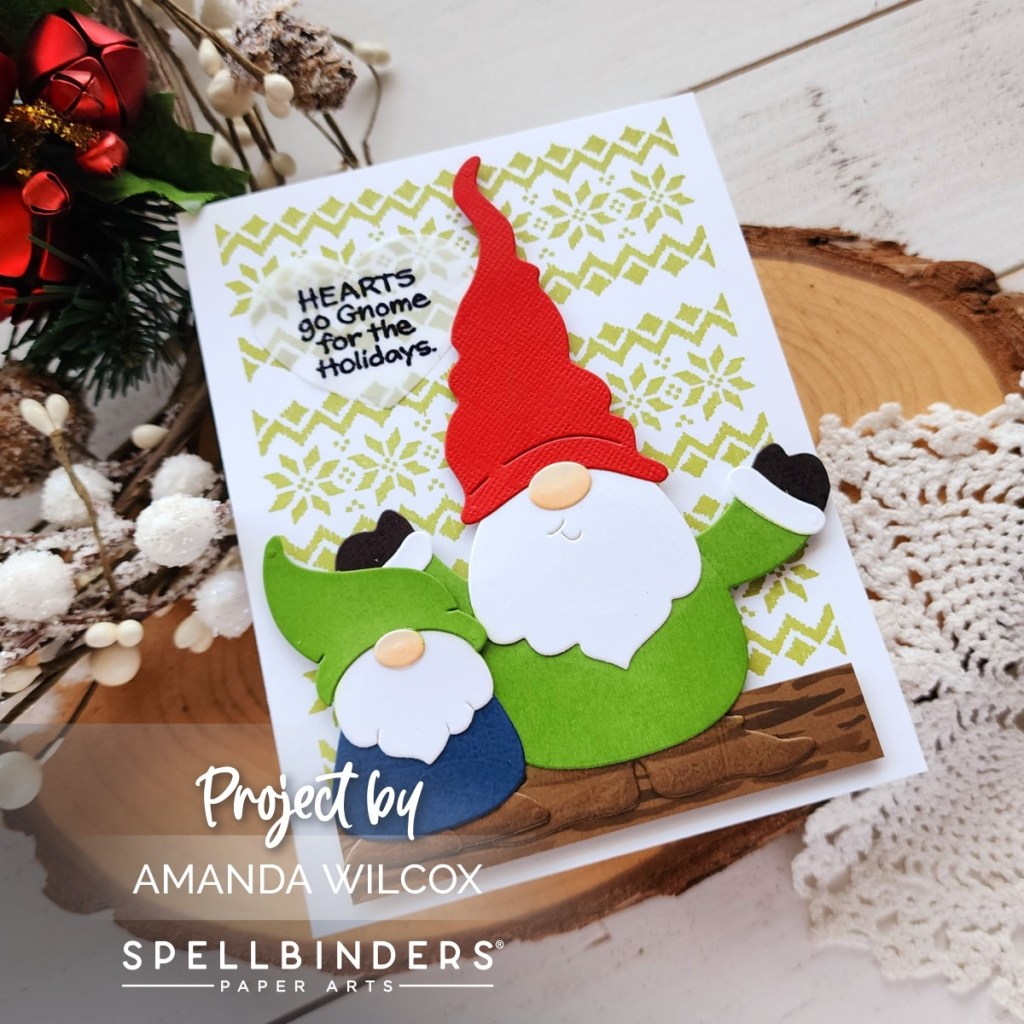
Hi there! I’m popping in really quick today with a fun and adorable card featuring some of the new Stampendous Holiday Hugs collection from Spellbinders. I love the gnome hugger and the coordinating stamp set that has sentiments and nordic feeling images. They’re so pretty.
I took an evening of play and die cut all the elements for my gnomes and used liquid glue to assemble them. Then I played around with what to do with them for a while. They’re almost like paper dolls.
The next night I thought to repeat stamp one of the images in the stamp set like wallpaper creating a scene for my gnomes. After stamping, I cut a piece of brown cardstock and used copic markers to make “woodgrain” designs on it. I popped it up on the stamped panel with foam tape. Then I added my gnomes with foam squares too.
Last, I die cut a heart from vellum and heat embossed a sentiment on it. Then I used liquid glue to adhere it to the background panel. These punny sentiments are so fun and cute! I love them.
Happy Monday everyone! I’m on the Doodlebugs blog today sharing a fun combo with Spellbinders and Pretty Pink Posh, throwing in one of my favorite Mama Elephant sentiment sets too!
Sometimes it’s crazy making and sometimes it’s fun when you have an idea and the creation of said idea does not turn out how it was going in your head. That’s exactly what happened here but I still love it and really had fun creating this card!
Let’s start by die cutting a bunch of the Spellbinders Modern Ovals – I chose the fourth one in from the smallest. I taped three of them to my work surface and ink blended the Pretty Pink Posh Trellis stencil using Lawn Fawn guava ink and a blending brush.
I arranged them on my card front, originally planning to pop them all up, along with die cutting my sentiment. But as I started to play, I liked the idea of the sentiment on one of the ovals – it fits perfectly – and only popping that one up for a little added interest to that specific spot. So I glued everything down and popped that one up. Then I trimmed off the excess with my scissors.
Next, I stamped and colored images from Pretty Pink Posh Crafty Critters with my copic markers. I used the coordinating dies to cut them out and added them above the sentiment with foam squares.
Last, I decided to stamp the mini sentiment intro to the blank oval on the top for fun. I was quite smitten with myself when I thought of that. It’s so fun! And finally, for finishing touches I just added black glaze pen to the mouse’s eyes and glossy accents to his nose and parts of the crafty supplies.
Hi there! So happy you stopped by today. I’m on the Doodlebugs blog sharing this super fun encouragement card featuring a combo of Mama Elephant and Spellbinders stamps and dies. I know it’s summer and we’re all roasting to death with the heat everywhere but I couldn’t resist a little rainy day fun.
I started by die cutting the elements for my umbrella which comes from the Spellbinders Umbrella Bloom die set. After using liquid glue to assemble it all, I pulled out the Mama Elephant Rainy Days stamp set to choose a critter to hold my giant umbrella. This little bunny was just the perfect fit!
I stamped and colored him with copic markers, then used the coordinating die to cut him out. I used liquid glue to adhere the umbrella handle to his hand and lined the back of both with foam squares. Then I cut the Mama Elephant Raindrops cover from white cardstock and ink blended a little teal ink over the center portion.
I went back and forth on the color to put behind the raindrops but landed on a textured teal cardstock from my stash. I used liquid glue to adhere the layers, plus add it to a white card base as well. Then I chose my sentiments from the Spellbinders I’ve Got You Covered stamp and die set. I pulled out the Lawn Fawn sentiment banner die for the smaller sentiment. Then I added foam squares to the back of these too.
After adhering all the elements to my card front, I came in with glossy accents on the bunny’s nose and coat buttons. Then I added stardust Stickles to the raindrops that are bouncing off the umbrella.
Wouldn’t this totally lift your spirits if you got it in the mail? I think it would!
Welcome to another Monday where I’m over on the Doodlebugs blog sharing how to mix and match your companies! Today I have Mama Elephant stamps and dies with Spellbinders hot foil plates and coordinating stencil set! This card was super fun to create!
I started by hot foiling the Spellbinders Geometric Diamond plate with silver foil on white cardstock. Then I went to town with Lawn Fawn dye inks and blending brushes, using the coordinating stencil set to ink up the whole panel. I chose warm, summery colors today. Aren’t they pretty?!? Then I trimmed the panel down to 4×5.25 inches.
Next, I die cut the Mama Elephant Big Happy Birthday from white cardstock 3 times and used liquid glue to adhere the layers. Then, I chose 3 different kitties from the Mama Elephant Little Agenda Cat and colored them with my copic markers. I used the coordinating dies to cut them out.
To put it all together, I added the foiled panel with foam tape to a white card base. Then liquid glue to adhere the sentiment die cuts and finally foam squares for those cute kitties!
For finishing touches I simply added stardust Stickles to the pink parts of each kitty – the balloon, shirt and party hat.