Spellbinders – Nature’s Botanical Garden Release

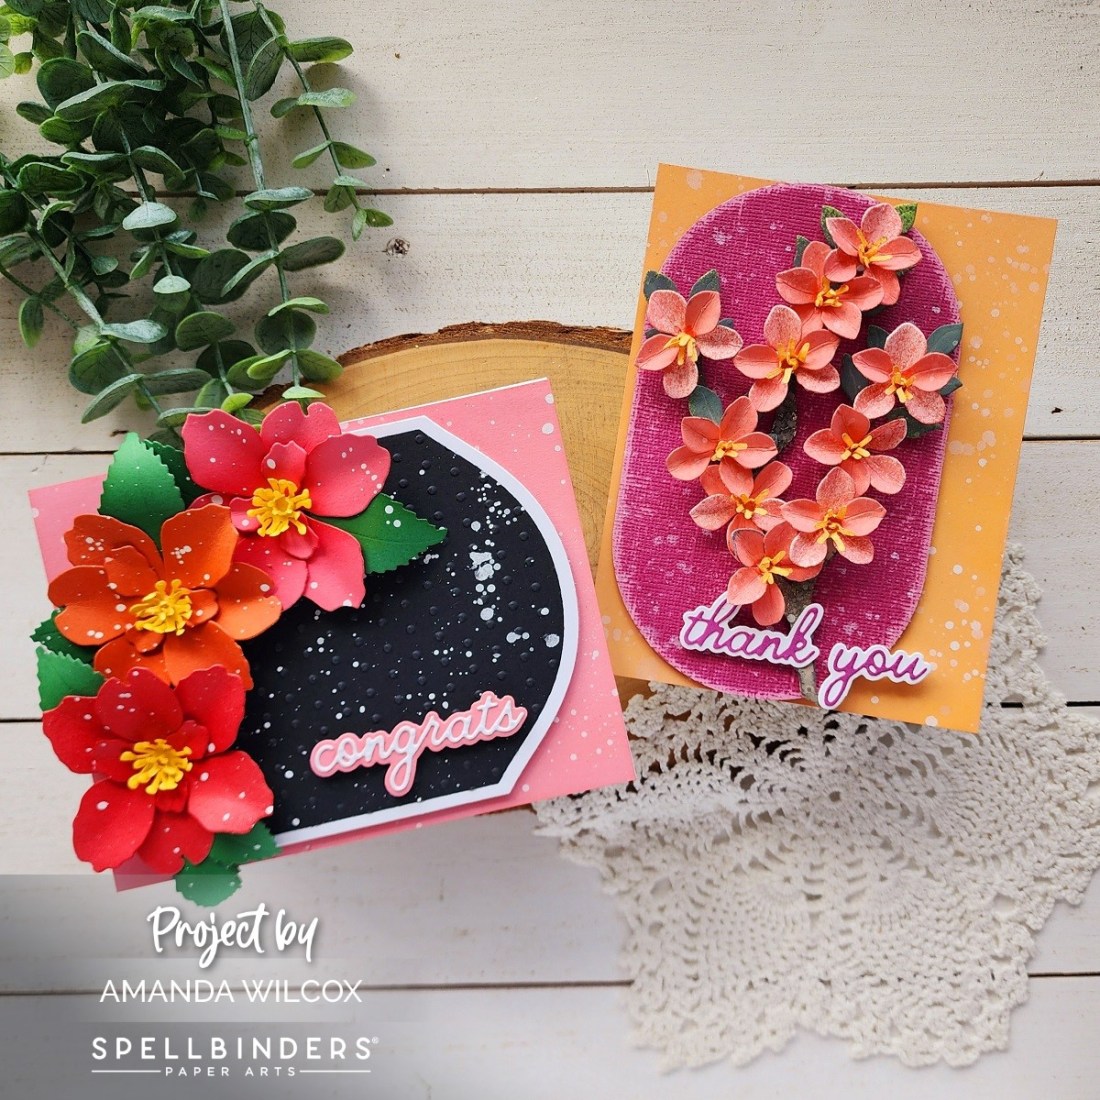
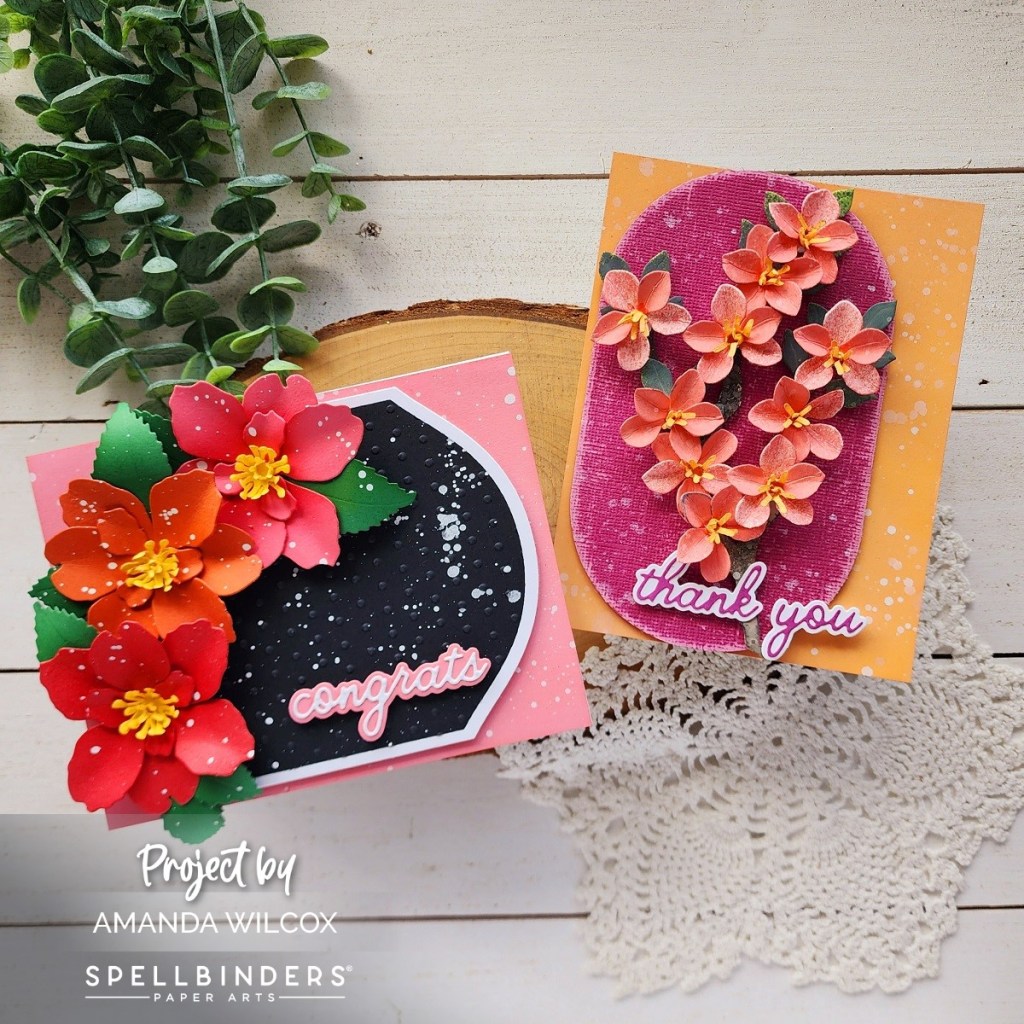
Welcome everyone! I have two cards to share with you today featuring the newly released Nature’s Botanical Garden floral dies from Spellbinders. These die sets give you the ability to create realistic, 3D florals for your projects. They’re awesome for dimensional cards but also for home decor and scrapbook pages too!

I had fun playing around with colors and ways to add color to the florals, along with a little distressed design style.

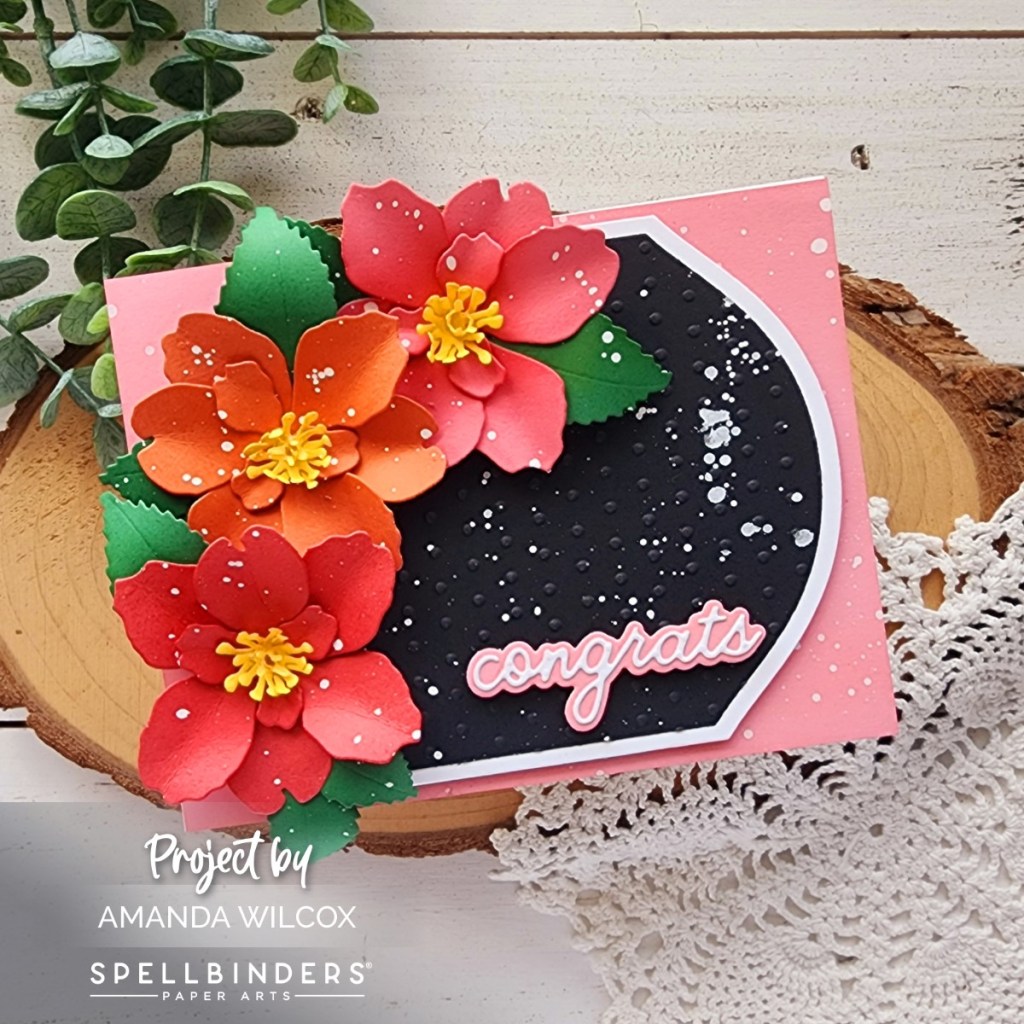
This first card is a pairing of the Landscape Rose dies and Mirrored Arch Labels dies. I embossed the black arch with the Tiny Dots embossing folder and added a sentiment from the Handwritten Sentiments die set.

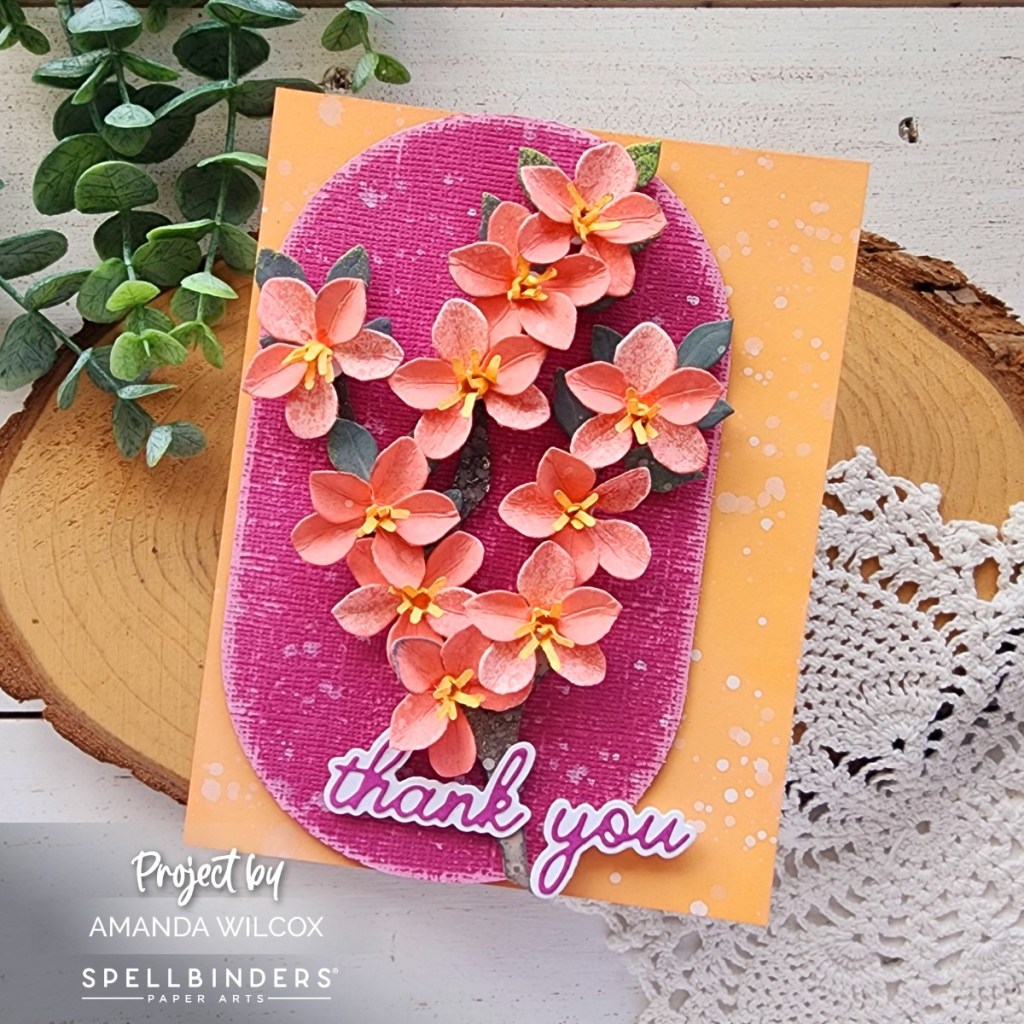
My other card features the Flowering Quince with Essential Modern Ovals for a focal point and another Handwritten Sentiment. These florals were die cut from white cardstock and color added with distress oxide sprays as opposed to the first card that were cut from colored cardstock. Just another fun way to add depth and texture.

Products used:
Landscape Rose dies
Flowering Quince dies
Modern Oval dies
Mirrored Arch dies
Handwritten Sentiments dies
Liquid glue
Reverse tweezers
Distress Oxide Sprays – scorched timber, abandoned coral
Distress Oxide Ink – mowed lawn
Foam squares and tape

I appreciate you sharing your time with me. Have a fabulous day!
Spellbinders – Out and About Mix and Match Scene Card

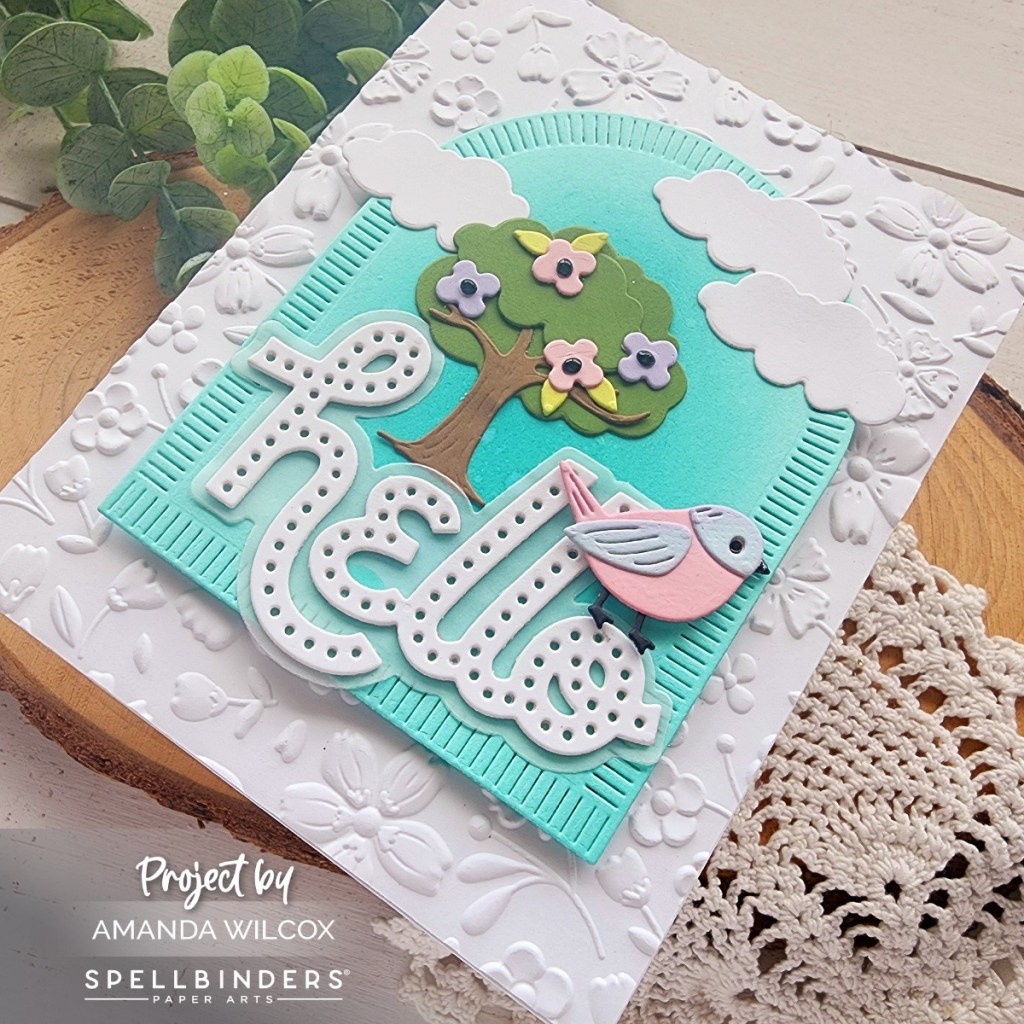
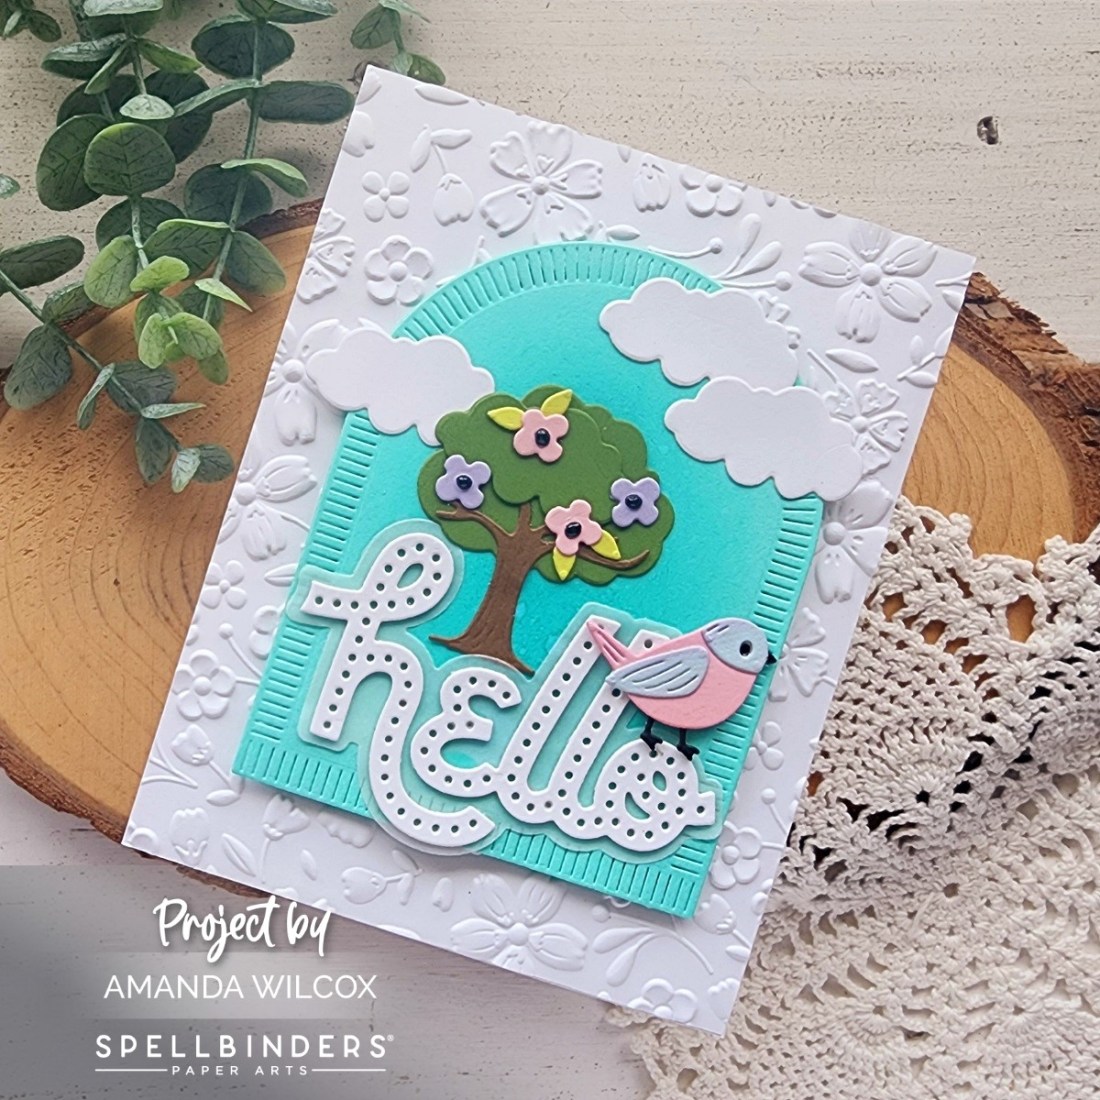
Hello again everyone. I’m back with another mix of the Spellbinders Out and About Collection to create a fun scene card.

I started this card with the Flower Tree die set and then cut the Stitched Hello sentiment to go with it. After playing around a bit with design set up I decided to add the sweet bird from Garden Buddies too.

I cut an arch from the Make a Wish Arches from teal cardstock and inked the center with peacock feathers distress oxide ink. I splattered a little water and glued my sentiment to the bottom with liquid glue. Then I glued the tree in place and popped the bird up with a foam square.

The top of my mini scene was boring so I took the “extra” die in the Flowering Tree set and made it a cloud for the sky. After gluing those in place, I added foam tape to the back of the arch and popped it up on a white background panel I embossed with the Flower Frenzy embossing folder.

For finishing touches I did add some glossy accents to the bird’s eye and beak, and all of the flower centers on the tree.

Products used:
Flowering Tree dies
Stitched Hello dies
Garden Buddies dies
Make a Wish Arches dies
Flower Frenzy embossing folder
Foam tape
Liquid glue
Glossy accents

I appreciate you sharing your time with me. Have a fabulous day!
Doodlebugs – Hooray! Floral Congrats Card

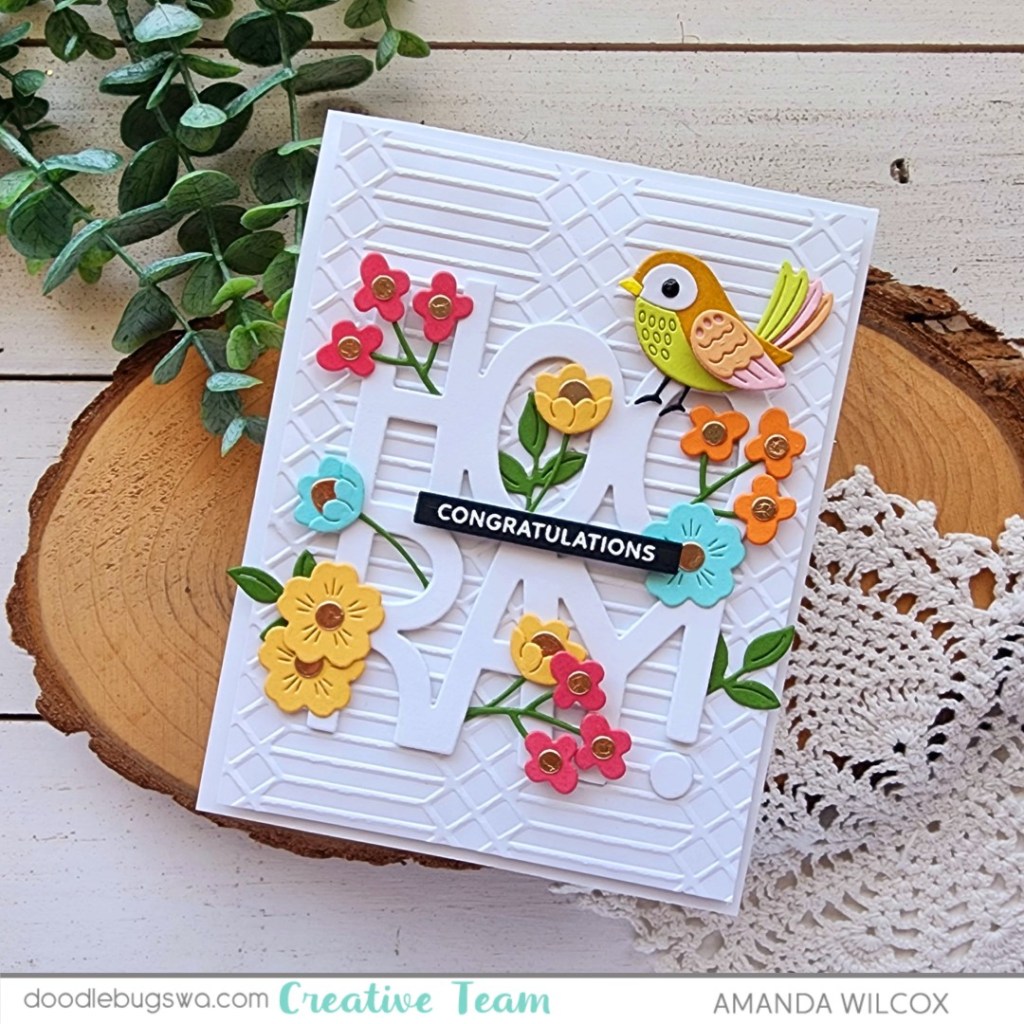
Hello again. I have a fun mix-it-up Monday card to share with you that started with a very simple idea and definitely evolved into its own. I think it turned out so pretty and I had fun playing with some of my favorite dies while I was at it.

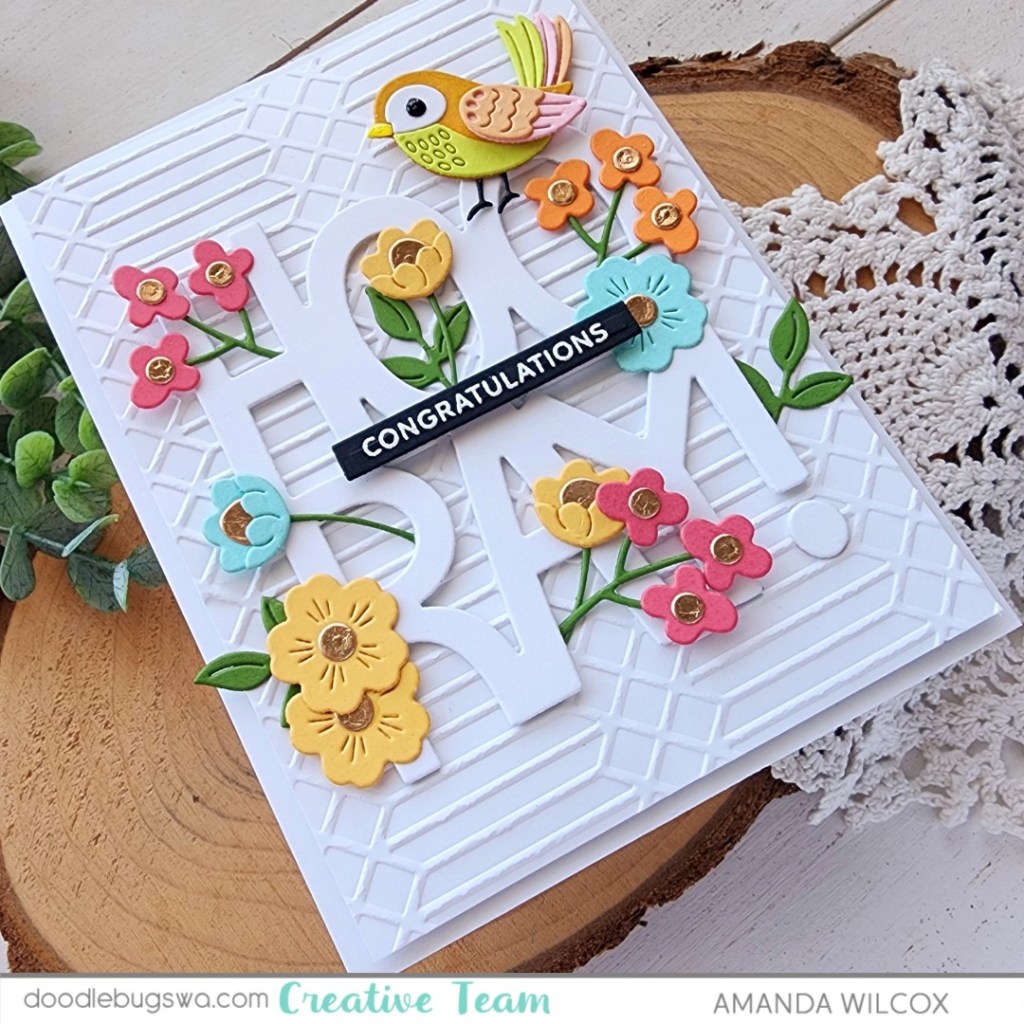
I needed a congratulations card so I went digging in my large sentiment dies to see what struck me with inspiration. I landed on the Lawn Fawn big hooray die, cutting it from white cardstock three times and gluing the layers together before I even formed a solid plan. Then I went digging for a good mini sentiment to go across the center and landed on the Pretty Pink Posh Sentiment Strips collection, and the coordinating dies.

Next, I wasn’t sure what to add around or in the large letters. My initial go-to was cute critters but nothing was vibing for me. So I pulled out my favorite Spellbinders birdie and while I was digging for that, I came across the Spellbinders Kaleidoscope Arch stamp and die set. The florals in this set are so pretty and very low stress to cut and assemble. Some of the more detailed sets stress me out with all the layers and my lack of floral knowledge.

So, I cut all the pieces for the florals and the sweet birdie, using liquid glue to adhere the pieces together. After playing around for a bit I also used liquid glue to adhere the florals popping out of the hooray letters all over. To keep the background interesting but subtle, I embossed a 4×5.25 inch piece of white cardstock with the Spellbinders columns embossing folder.

I popped the background panel up on a white card base with foam tape and then used liquid glue to adhere the floral hooray to that. Last, I added the birdie with a combo of a foam square and liquid glue, and the sentiment strip with a foam strip.

I liked the shine that the foil cardstock gave the flower centers so my finishing touches for this card were just glossy accent on the birdie’s beak and eye. Isn’t she the cutest?!? I love that you can’t go wrong with any variation of color combos on this bird. It’s always fun.

Products used:
Spellbinders Sweet Birdie dies
Spellbinders Kaleidoscope Arch dies
Spellbinders Columns embossing folder
Lawn Fawn Big Hooray die
Pretty Pink Posh Sentiment Strips | Occasions stamps
Pretty Pink Posh Sentiment Strips dies
Liquid glue
Foam squares, strips and tape
Glossy accents
Embossing powder – white
Anti-static bag
Versamark ink

I appreciate you sharing your time with me. Have a fabulous day!

Spellbinders – Out and About with the Pups

Happy Friday everyone! It’s been a long week and I’m really looking forward to relaxing and crafting this weekend. How about you?

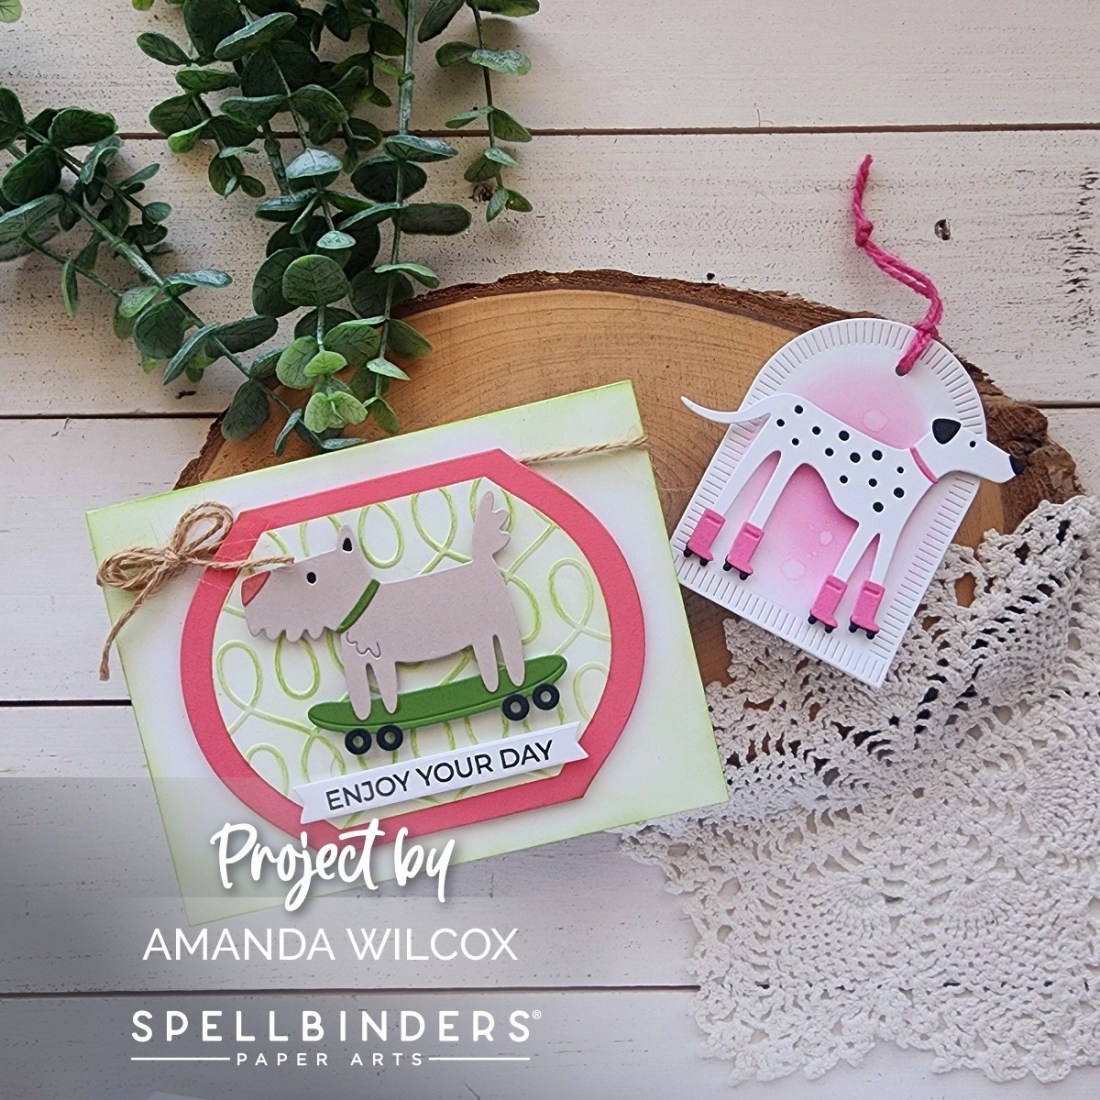
Before that though, I wanted to share a couple more projects featuring the Spellbinders Out and About Collection. These pups crack me up and I couldn’t resist snagging them and playing with them straight out of the package too!

I didn’t have much in mind but just wanted to cut and create both of the dogs – Skateboarding Terry and Roller Disco Dottie – how cute are their names too!?! After I put them together I went digging through my stash to create a card with Skateboarding Terry first.

I used the Mirrored Arch Labels nested die set to cut my focal point pieces. Then I embossed the smaller one with the Loops embossing folder and went over it with a blending brush and green ink. My sentiment strip comes from the Stitched Kaleidoscope Arch stamp and die combo.

After adhering all the layers, I went around the white card base with the same green ink and tied jute twine around the top of the card, tying it in a bow.

When I created my Dottie dog, I couldn’t resist a bright fun pink with her black and white spots so I kept that vibe going when creating a tag for her to go on. Super simple, I cut 2 Make a Wish Arches from white cardstock and glued them together for stability. I inked up the center of the front with picked raspberry distress oxide ink and splattered a little water. Then I just popped Dottie up with foam squares, punched a hole and threaded some pink twine.

The back is blank so I can write a message to go with the occasion but until then this is generic and fun so I have the versatility to choose when I use it!

Like I said earlier in the week, head over and check out the fun Out and About Collection for some sweeties to add to your stash!

Products used:
Skateboarding Terry dies
Roller Disco Dottie dies
Mirrored Arch dies
Loops embossing folder
Make a Wish Arch dies
Foam tape
Liquid glue
Picked Raspberry distress oxide ink
Artichoke Lawn Fawn ink
Blending brushes

I appreciate you sharing your time with me. Have a fabulous day!

Spellbinders – Out and About Release

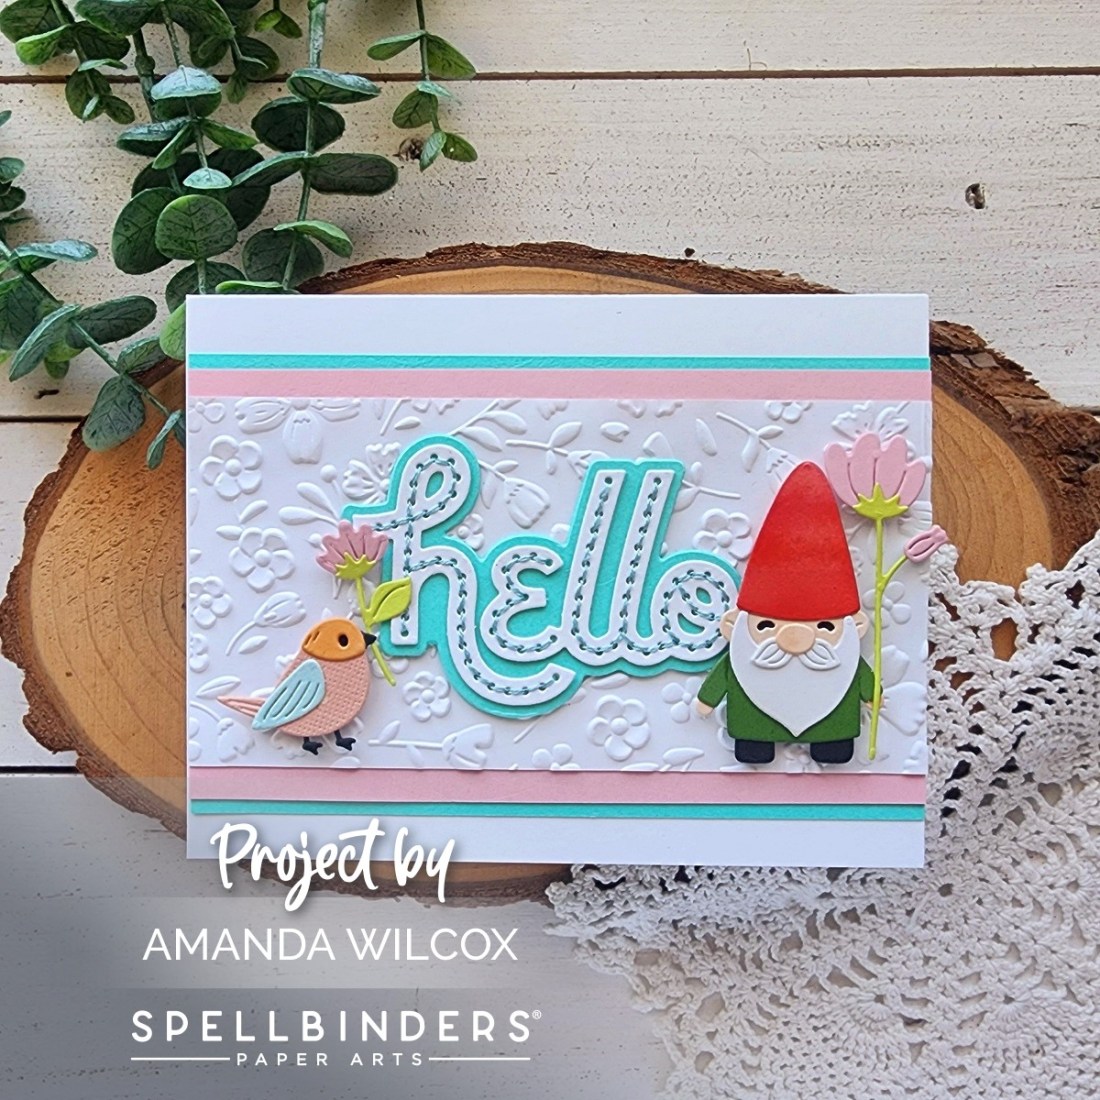
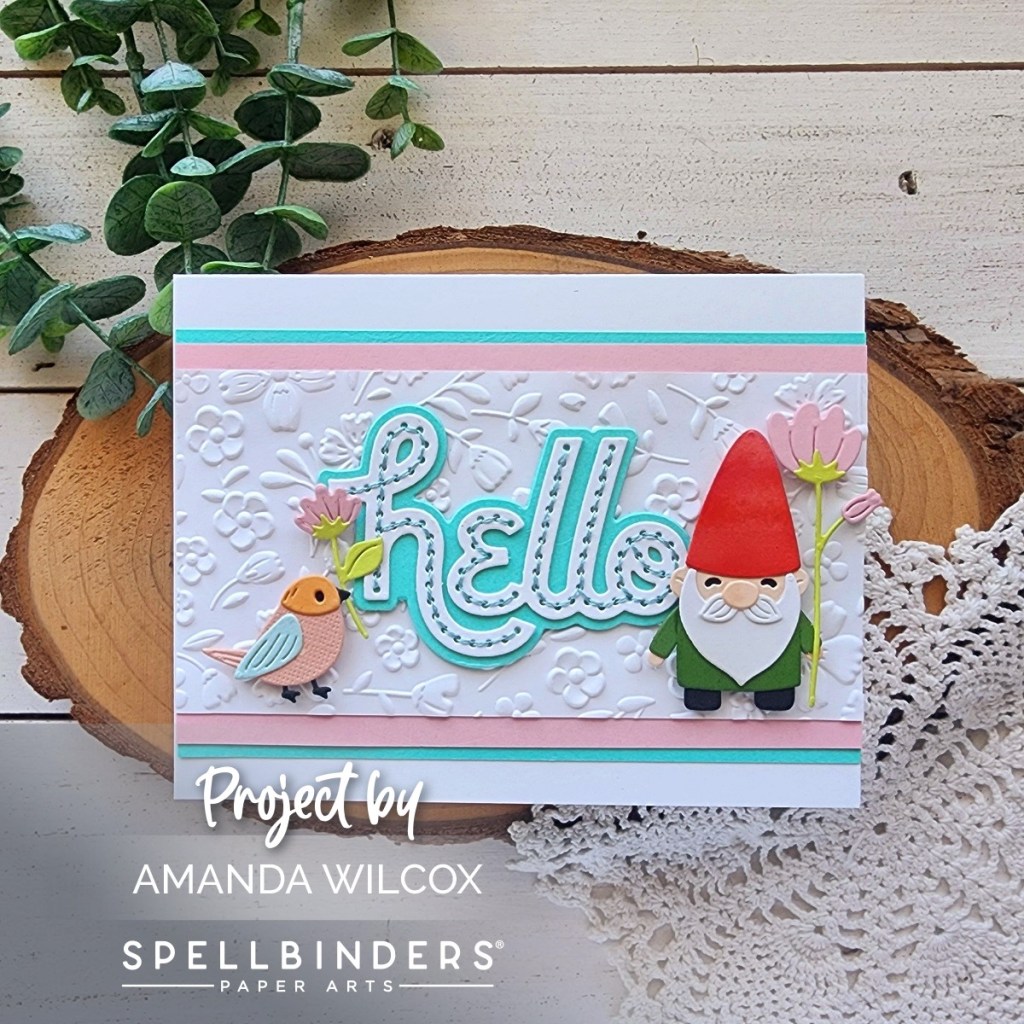
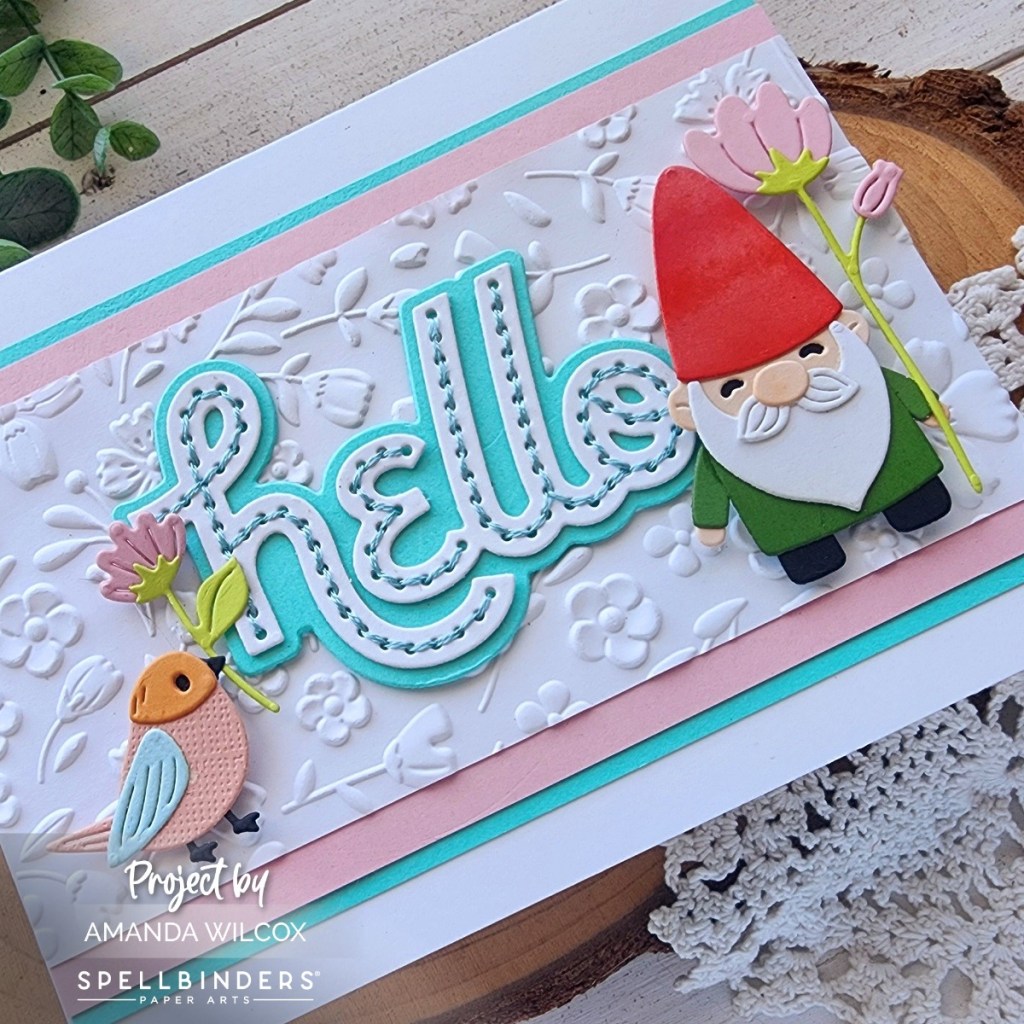
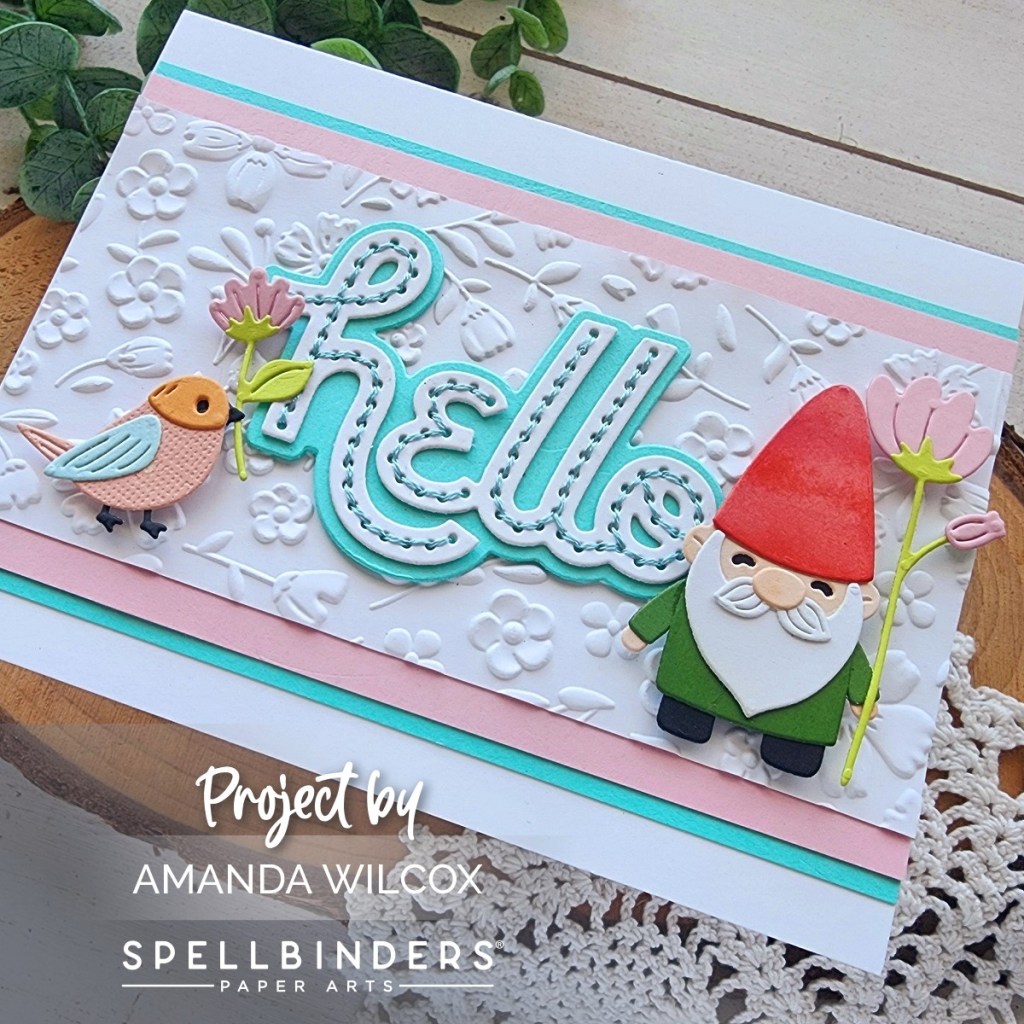
Hey friends, have you seen the new Spellbinders Out and About release? It’s an absolutely adorable collection of small die sets that go perfectly with the new Scout Die Cutting Machine! Today I have a card using a couple of the new dies that was SO FUN to put together!

This card features the Garden Buddies and Stitched Hello sets. Garden Buddies is going to be so much fun to create in all the different color combos, I’m sure of it! And the Stitched Hello is going to be awesome with and without stitching which is great when you don’t have as much time on your hands.

Have you checked out the adorable new Scout Die Cutting Machine yet too? It’s the perfect size for these small projects and for taking on the go with you! I’m not usually one for having all the versions of something but this was so inviting to me with the prospect of crafting on the go again. I used to pack up once a month and craft with a friend but it became cumbersome. This die cutter is a game changer for that. Or even moving from my craft room to the downstairs to hang out with my family.

Whether you’re interested in the Scout machine or not, please check out the Out and About Collection! It’s SO MUCH FUN! I’ll be back later in the week with another project using two more die sets from this collection that you’re going to LOVE!

Products used today:
Spellbinders Garden Friends dies
Spellbinders Stitched Hello dies
Spellbinders Flower Frenzy embossing folder
Spellbinders Scout die cutting machine
Liquid glue
EZ tear tape

I appreciate you sharing your time with me. Have a fabulous day!
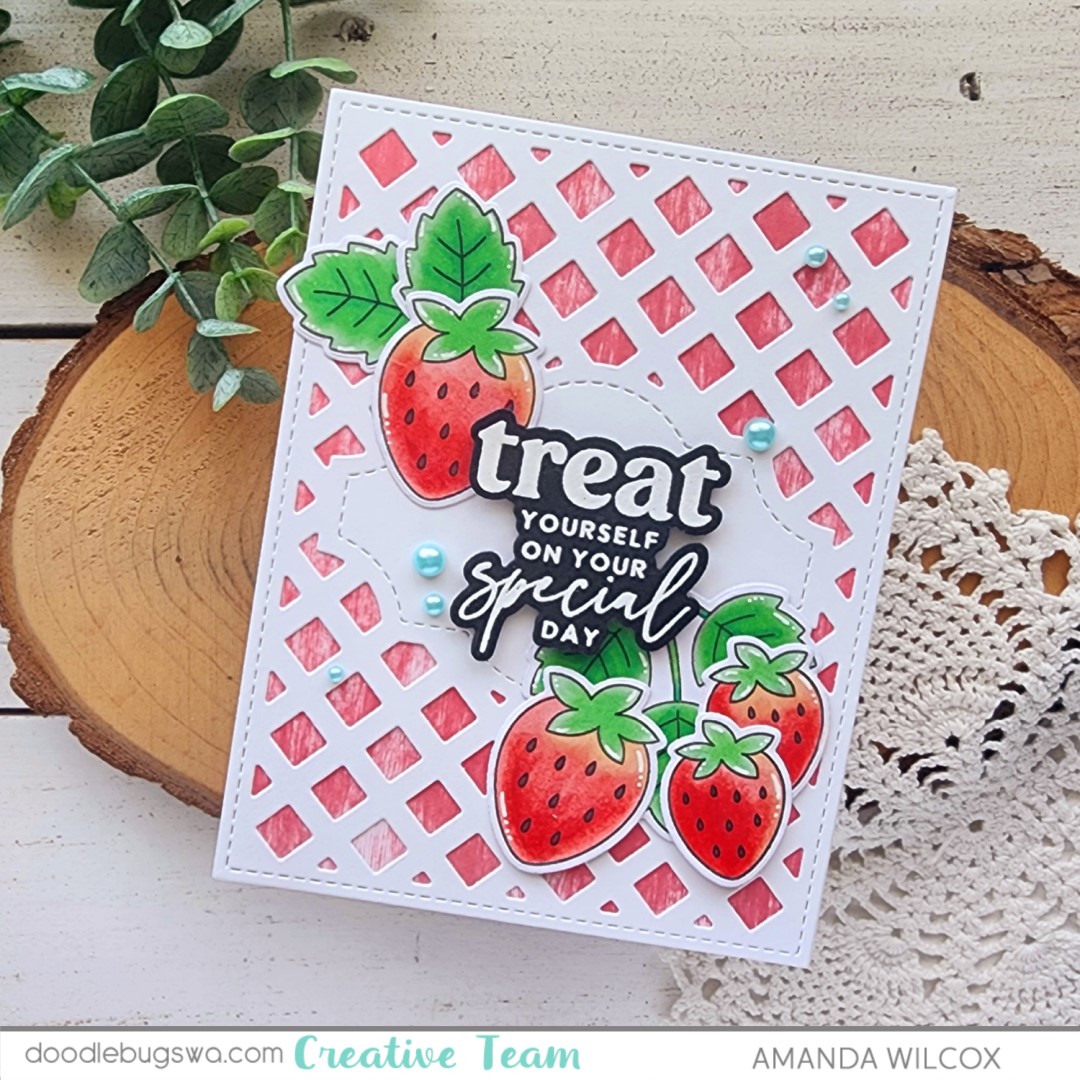
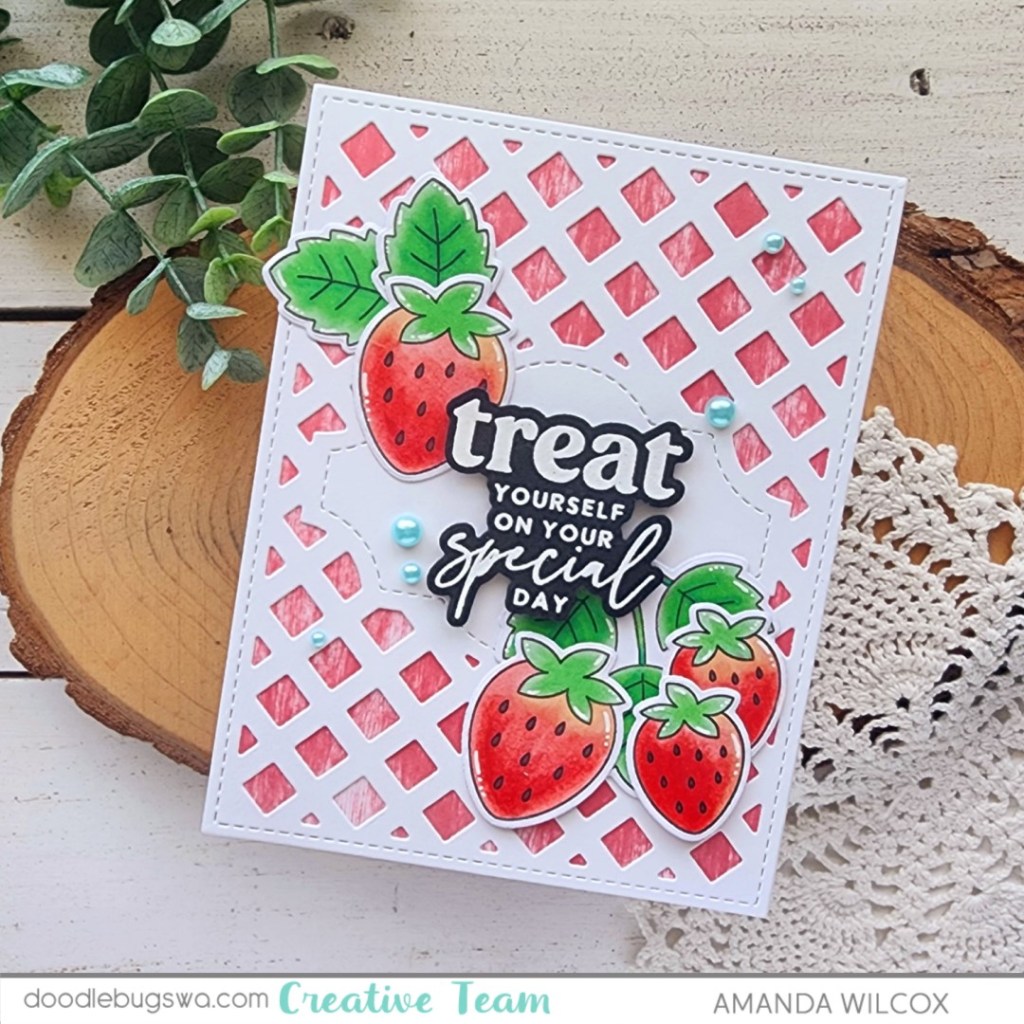
Doodlebugs – Treat Yourself on your Berry Special Day

Hello everyone! It’s time for another mix-it-up Monday on the Doodlebugs blog. Today we’re mixing all the strawberry things together again in a different way. I love how bright today’s card turned out! It’s so sweet you can almost taste it.

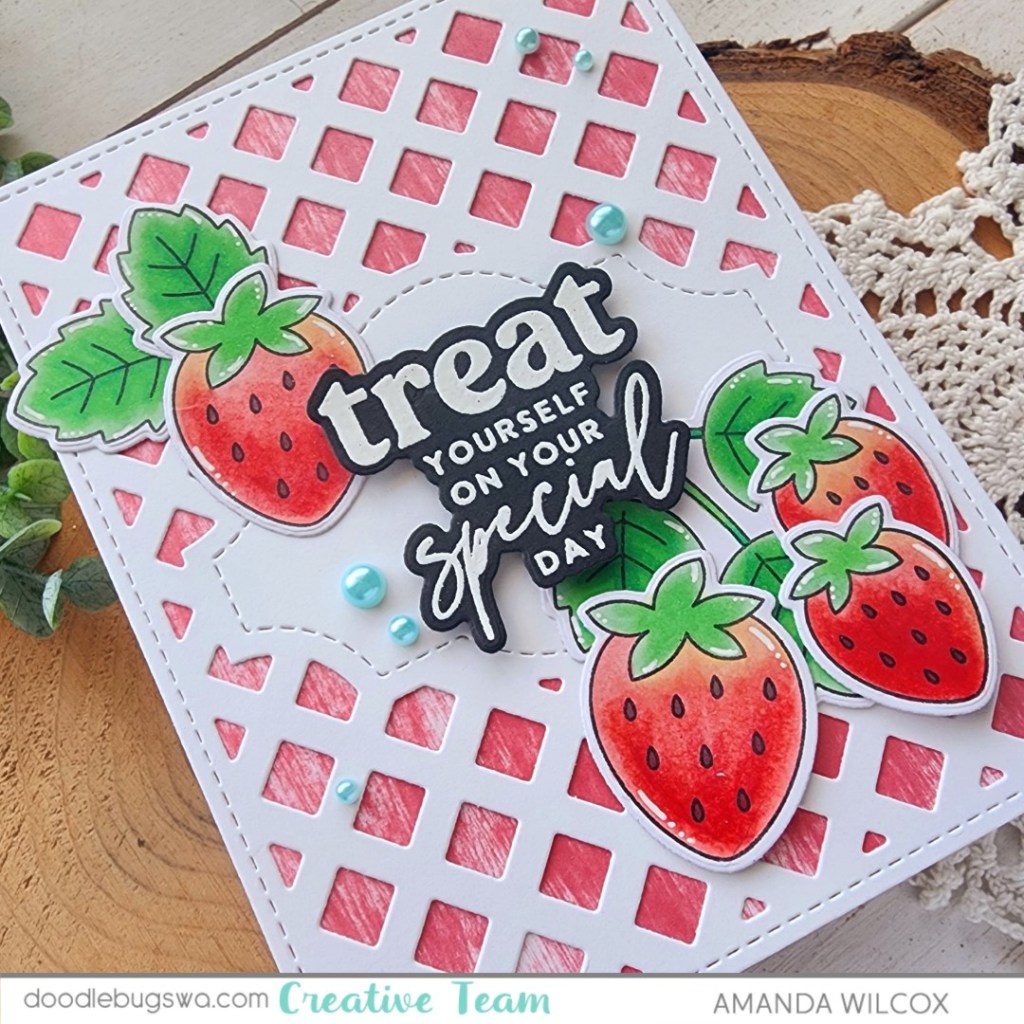
I started with the Pretty Pink Posh Fresh Berries stamp set. I stamped out a few berries and leaves, coloring everything with copic markers before using the coordinating dies to cut it all out.

Next, I stamped and heat embossed a sentiment from the Waffle Flower Birthday Wishes stamp set and cut it out with the coordinating die. I also cut a Waffle Flower Sweet Lattice panel for my background.

With all the pieces ready to go, it’s time to assemble some. Using the sentiment as a guide on the background panel, I used liquid glue to adhere the strawberries and foliage in place. Then I added the sentiment with foam squares so there is some dimension.

Not wanting white on white for my background, I took the Lawn Fawn guava ink pad direct to my card base for some textured color. Then I used liquid glue to adhere the lattice in place.

For finishing touches I added a few Spellbinders pearls and white gel pen highlights to the images.

Products used:
Waffle Flower Sweet Lattice die
Waffle Flower Birthday Wishes stamps and dies
Pretty Pink Posh Fresh Berries stamps and dies
Lawn Fawn guava ink
Liquid glue
Foam squares
Spellbinders Pearls – fashion topaz
Sakura gelly roll pen – white

I appreciate you sharing your time with me. Have a fabulous day!
Doodlebugs – Tri-Fold Scene Card

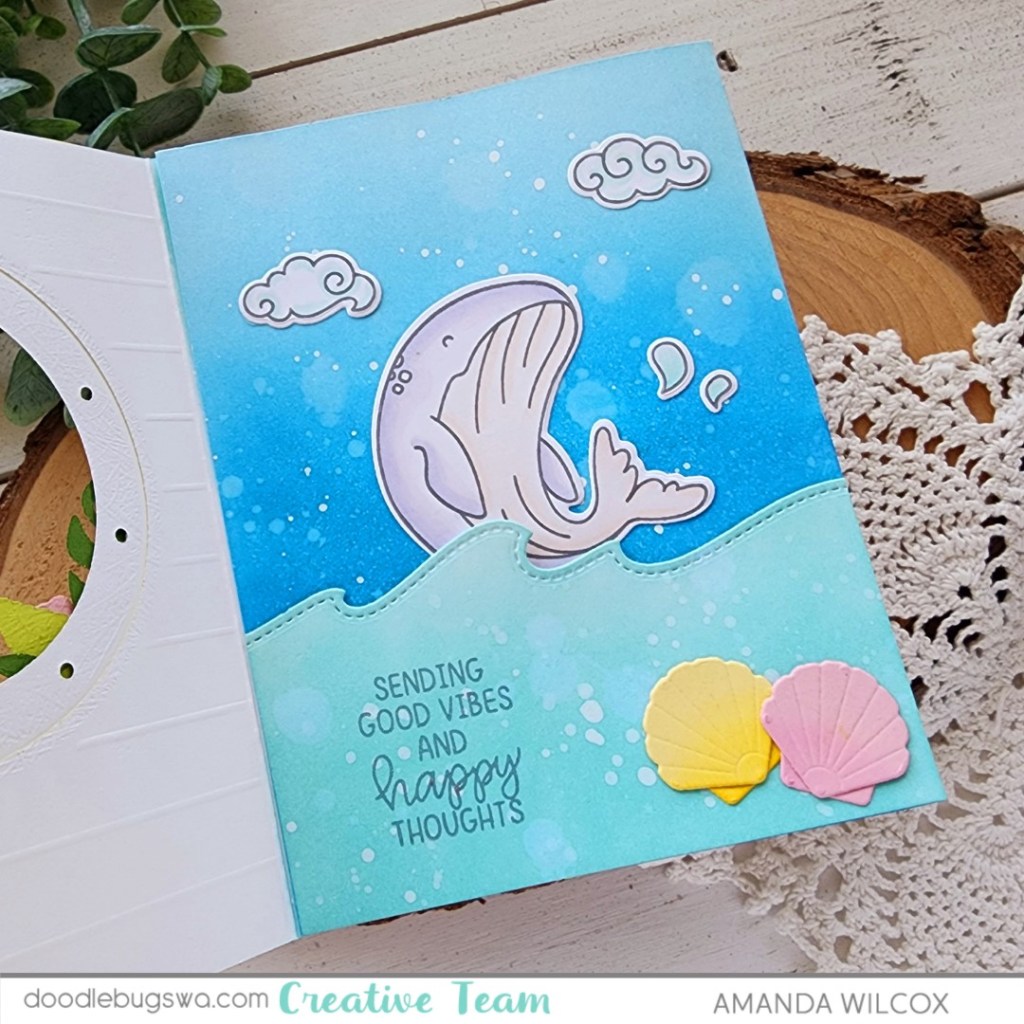
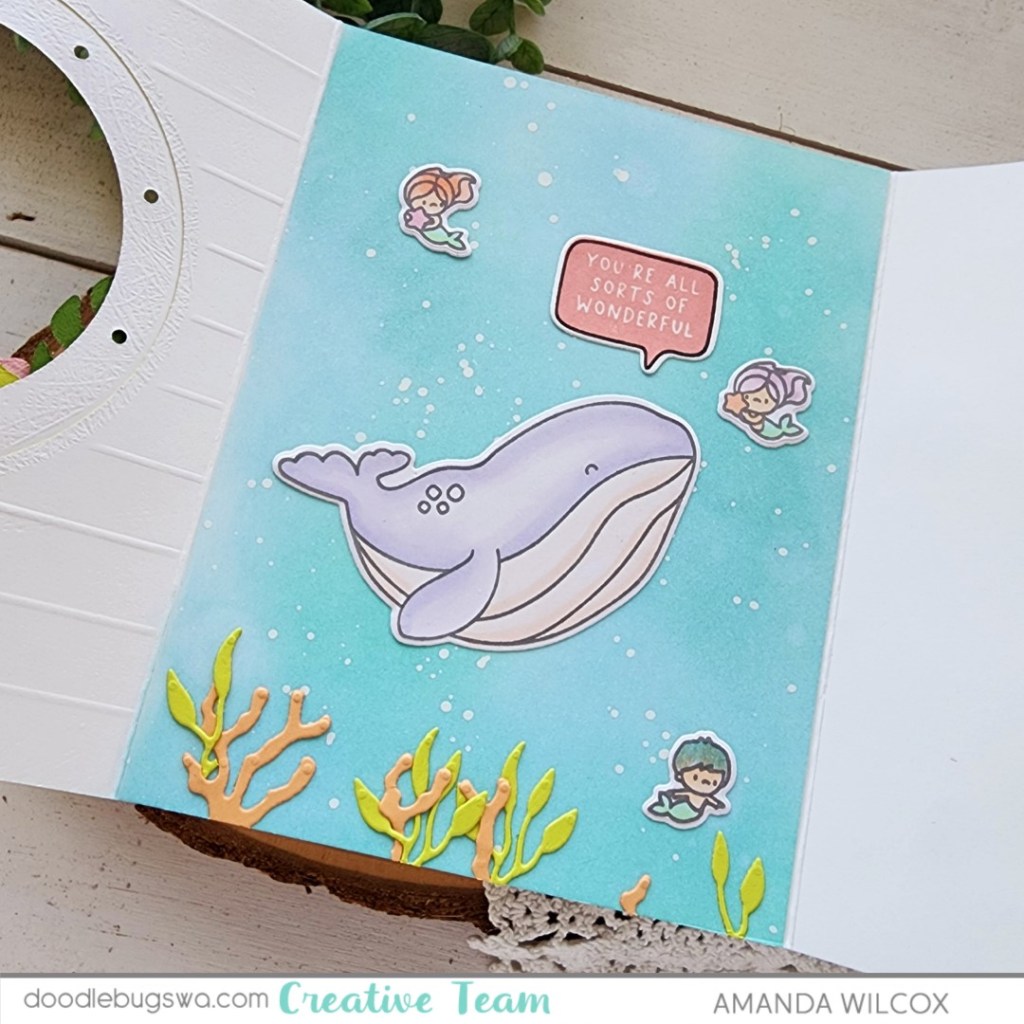
Hey everyone! Today’s mix-it-up Monday is packed full of amazing! I went a little extra coloring some images from the Mama Elephant Me and My Whale set. After cutting everything out and playing around I had a fun thought to make a window card that opened into the scene but I had too much so I went a step further and created a tri-fold card with an ever unfolding scene and still room to write a message.

Okay, starting things off, you just need 2 regular card bases, flip one backwards and slide them together. You’ll glue the back flaps together and it will give you a tri-fold card base to work with.

My front panel is scored every half inch for a shiplap look on the front. Then ink blended with peeled paint distress oxide ink. I used the Spellbinders Coastal Escape View die set to cut my window and add all of the fun porthole decorations to the front. My sentiment is from Mama Elephant’s Essential Tag Sayings. It has a great bubble font that stands out perfectly.

For the scene our card opens up to, I inked a wave panel with salvaged patina and the card flap itself with salty ocean and tumbled glass. The seashells are more great dies from the Spellbinders Coast View set and the other images are from Mama Elephant Me and My Whale. This sentiment comes from Mama Elephant’s Mixed Wishes Greetings.

Our final descent brings us to the center of the card and down in the depths with more Me and My Whale images, paired with a little coral and seaweed from the same Spellbinders die set. I did pull in another sentiment set from Mama Elephant because I couldn’t resist the whale talking to his mermaid friend. This one is called Simple Friends Bubbles and it stamps and die cuts 6 sentiments at once!

The background on this panel is ink blended with mermaid lagoon and tumbled glass distress oxide inks. All of the panels were also spritzed with water and splattered with white paint for texture.

Because of the nature of this card, everything is glued flat and there are no extra embellishments on the inside. I always get nervous that the dimension will ruin the layer above it or pages will stick together. So I kept it all simple except for a little stardust Stickles on the stamen of the front flowers.

It has been years since I’ve created a card this extra. I loved taking my time and enjoying the entire process of this project. I’d love to know if you create cards this involved or like to keep it simple.

Products used:
Mama Elephant Me and My Whale stamps and dies
Mama Elephant Simple Friends Bubbles stamps and dies
Mama Elephant Mixed Wishes Greetings stamps
Mama Elephant Essential Tag Saying stamps
Spellbinders Coastal View dies
Lawn Fawn Stitched Wave Border dies
Distress Oxide Ink – peeled pain, mermaid lagoon, salvaged patina, tumbled glass, salty ocean
Liquid glue
Stickles – stardust
Scoring board

I appreciate you sharing your time with me. Have a fabulous day!
Doodlebugs – A Berry Fun Full Card Front Shaker

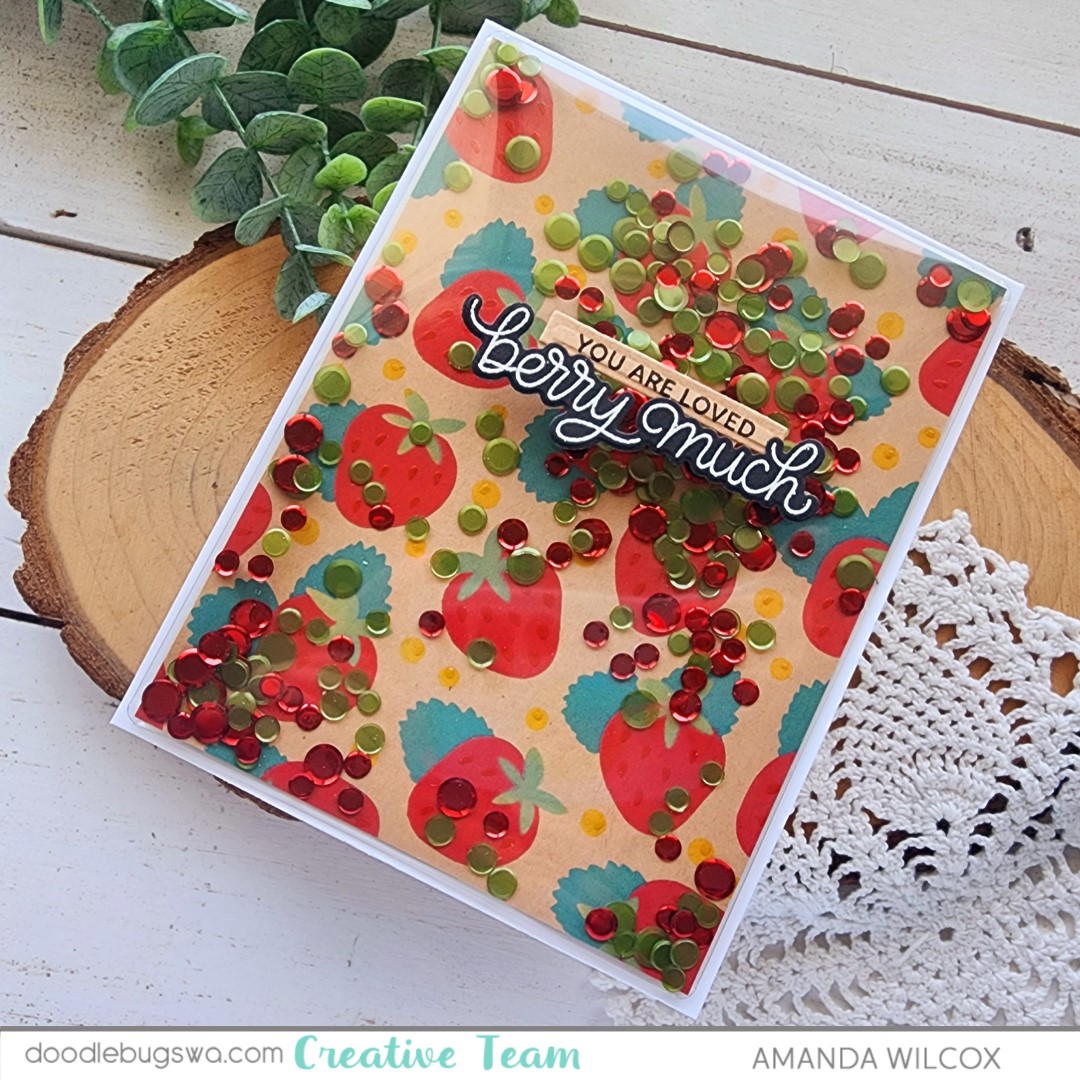
Welcome to mix-it-up Monday on the Doodlebugs blog! We’re creating a quick and fun full card front shaker with a summery strawberry theme. We’ve had a little relapse in weather but I’m not giving up on summer crafting in the slightest!

I started my card today by inking up the Waffle Flower Strawberries background stencil set. To be sure the ink showed up really well on my kraft base, I used distress oxide inks. The colors I chose were candied apple, pine needles, mowed lawn and mustard seed. Then I spread a little glossy gel through the final seed layer for subtle shiny details.

Once the glossy gel was dry, I trimmed the panel to 4×5.25 inches and wrapped a Waffle Flower shaker cover around it. I only adhered 3 sides at first, pouring in my shaker bits and then securing the last side down. I used tear tape for this because it’s strong and instant. I find it works best with the plastic shaker covers. My sequins are from Pretty Pink Posh and Spellbinders.

Next, I stamped and heat embossed a sentiment from Pretty Pink Posh Fresh Berries and used the coordinating die to cut it out. Then I stamped another small sentiment from Pretty Pink Posh Sentiment Strips | Valentine and cut it out with the smallest Pretty Pink Posh Sentiment Strip die. I adhered both of these to the front of my shaker panel with foam strips.

Last of all, I added more tear tape to the back of the shaker panel and adhered it to a white card base. Once again, the tear tape is great against the plastic and gives you instant bond.

Now, just give it a little shake, shake, shake and it’s ready to go!

Products used:
Waffle Flower Shaker Covers
Waffle Flower Strawberries stencil set
Waffle Flower Grip Mat
Pretty Pink Posh Fresh Berries stamps and dies
Pretty Pink Posh Sentiment Strips | Valentine stamps
Pretty Pink Posh Sentiment Strips dies
Pretty Pink Posh Mossy Green confetti
Spellbinders Red smooth discs
Foam strips
Tear tape – 1/4″
Distress Oxide Ink – pine needles, mowed lawn, mustard seed, candied apple
Glossy gel
Palette knife

I appreciate you sharing your time with me. Have a fabulous day!
Doodlebugs – Combining Dies For a Fun Ocean Scene

Hey friends! Is anyone else just searching for all the sunshine they can get? I really feel like I am, which is seeping into the craft room. I’m so excited and happy for all of these summer themed releases starting to come out.

Today we’re creating and all die cut card combining fun products from Spellbinders and Mama Elephant. I love the new Seaside Vibes die set from Mama Elephant so I had to create with it as soon as it hit my mailbox. And when I ordered it, I thought the new Spellbinders Coastal Escape View dies would go perfectly so I snagged it at the same time. And I wasn’t wrong!

I used all of the dies from the Seaside Vibes set and pulled in the coral, seashells and palm tree island from Coast Escape View. I cut everything from colored cardstock and gave them some ink blending shadows, with a little copic detail on the seashells and palm trees too.

For once, this is a one-layer card, with no foam tape in sight. Trust me, this was difficult but I do love how it turned out. I also held back on sparkly and shiny because it felt complete once I finished gluing everything in place.

To create the card base, I traced the outer arch on white cardstock and cut it out by hand. Then I scored it on the left side 3/8″ in and adhered the flap to the back of my scene panel with tear tape. *Remember, you can use this technique on pretty much any shape to create a shaped card.*

Products used:
Mama Elephant Seaside Vibes dies
Spellbinders Coast Escape View dies
Liquid glue
Blending brushes
Lawn Fawn ink – walnut, jalapeno, peach fuzz, sunflower, guava, mermaid
Tear tape – 1/4″

I appreciate you sharing your time with me. Have a fabulous day!
Doodlebugs – Birthday Balloons on Balloons

You can never have too many birthday balloons. Am I right?!? Well, I don’t think so. So when I had the chance to ink up the adorable Mama Elephant It’s Poppin, I had to pair it with my favorite Spellbinders Floating Balloons 3D embossing folder. It’s a match made in heaven.

To start, I actually stamped all of the images in It’s Poppin and colored them all with my copic markers. I used the coordinating dies to cut them out and stashed the other two for later on.

I took a piece of white cardstock and embossed it with the Spellbinders Floating Balloons 3D embossing folder, then placed the panel in my splatter box and went to town with distress oxide sprays. I let the panel dry, splattered it with water, let that dry and then thought it better to run the panel through the embossing folder again. It did make a difference in the balloons standing out.

***So, suggestion to spray your panel with color first, let it dry completely and then emboss it.***

With that done, I splattered the panel with white paint and then trimmed it down to 4×5.5 inches and popped it up on a white card base. I added a couple strips of washi tape to the bottom edge. Then I cut the Mama Elephant Big Happy Birthday three times and glued the layers together before gluing them to the card front. Last, I added the image with foam squares.

For finishing touches I added black glaze pen to the kitties’ eyes and noses and stardust Stickles to the stars in the balloon.

Products used:
Mama Elephant It’s Poppin stamps and dies
Mama Elephant Big Happy Birthday die
Spellbinders Floating Balloons 3D embossing folder
Foam tape and squares
Distress Oxide Sprays – wild honey, abandoned coral and wilted violet
Sakura Gelly Roll black glaze pen

I appreciate you sharing your time with me. Have a fabulous day!