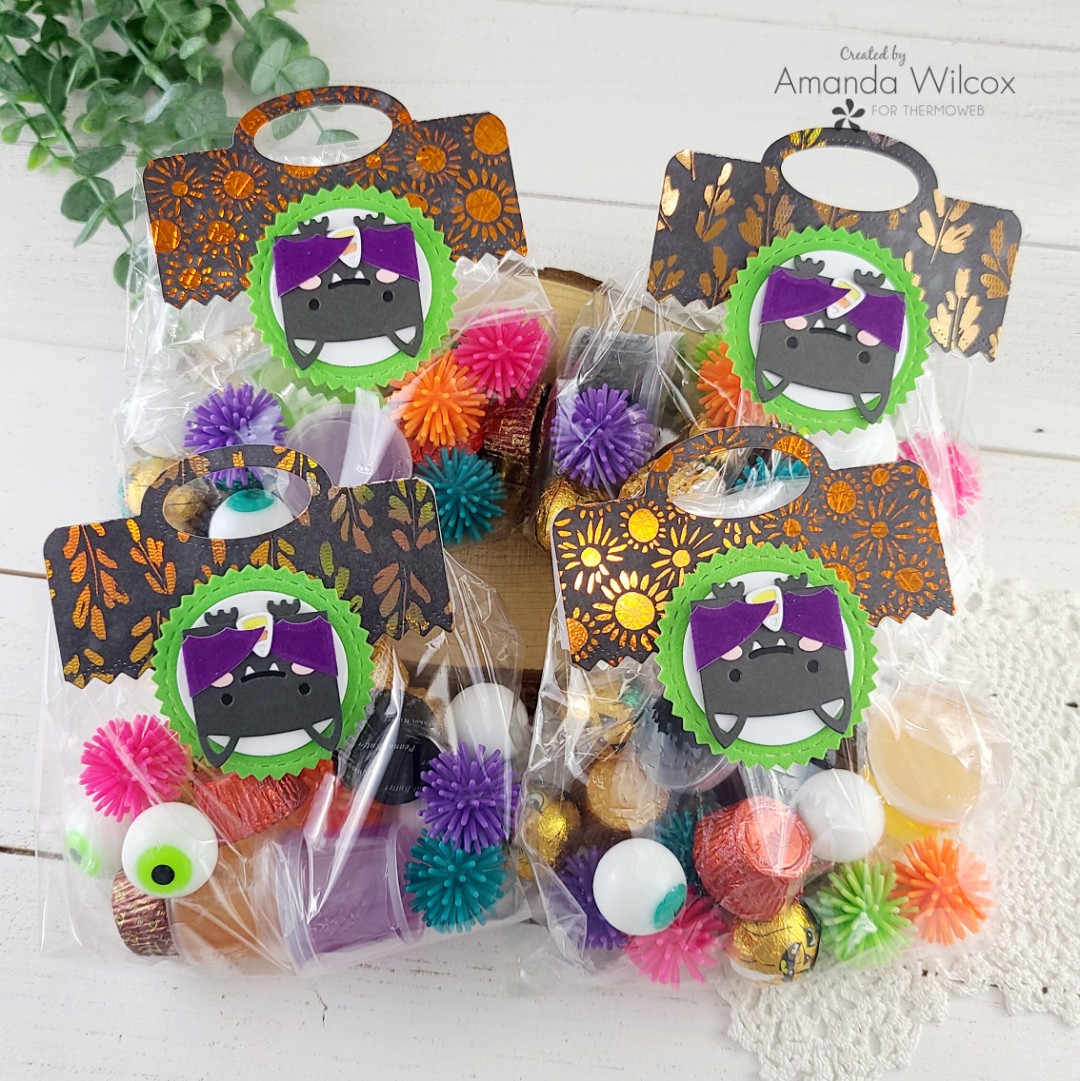
Hello again. It’s a super busy day on here. Just popping in really quick to share a set of adorably fun treat bags I made featuring foiling and flocking fun. All the details are over on the Thermoweb blog today.
I love making gift packages like this! Add the Halloween theme to it and I was over the moon! I had so much fun putting these together!
For all the details, click HERE to get to the blog post.
I appreciate you sharing your time with me. Have a fabulous day!
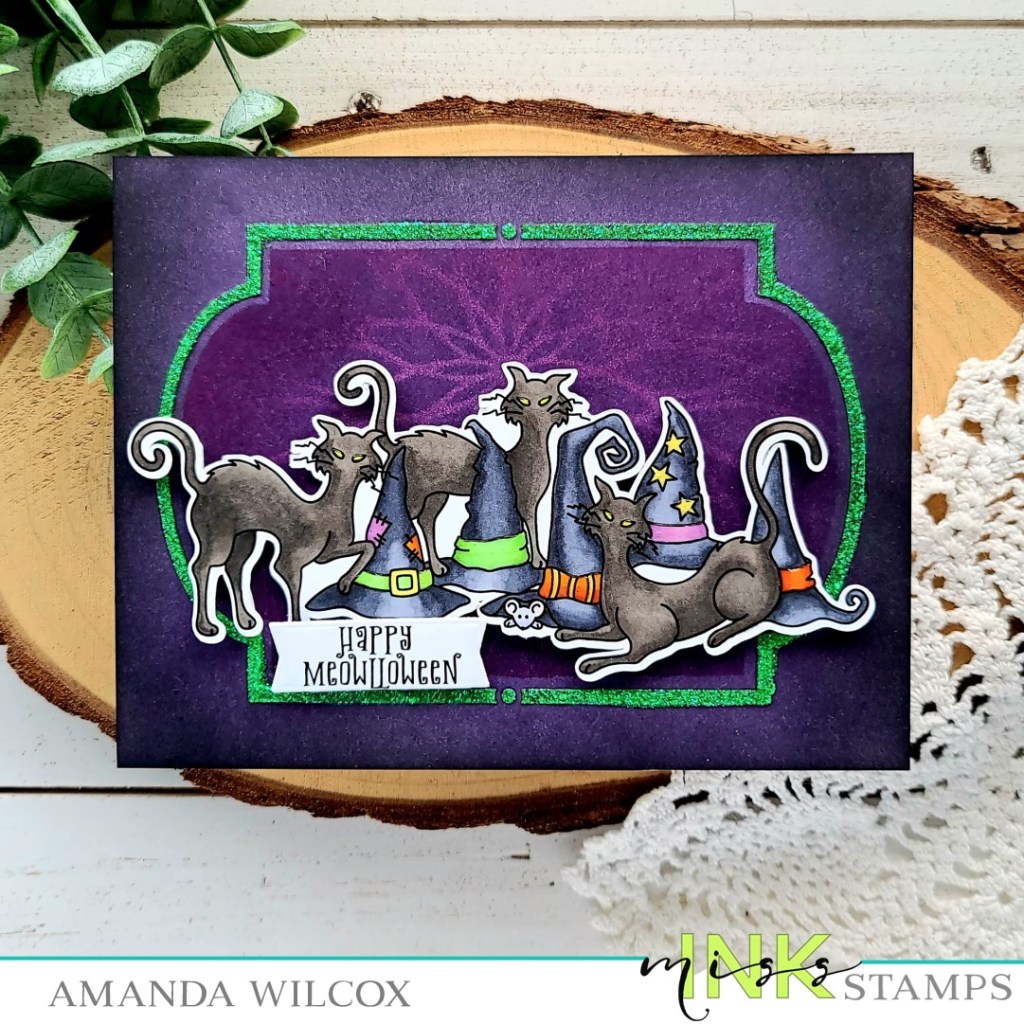
Hello everyone! Today I’m over on the Miss Ink Stamps blog with more Halloween goodness featuring the most recent release goodies! I had so much fun putting this card together. Layering stencils and getting inky! It was so great!
I started by stamping and coloring the main image from Feline Spooky with my copic markers. I used the scan-n-cut to cut it out and also stamped and die cut a sentiment banner to go with them.
Next, I took a white cardstock panel and inked it up with seedless preserves, dusty concord and black soot distress inks. I added the Ins & Outs Hollywood stencil over the top and added another layer of seedless preserves before layering the floral wave offset stencil over the top and inking that with dusty concord. All these layers add for a really cool color effect!
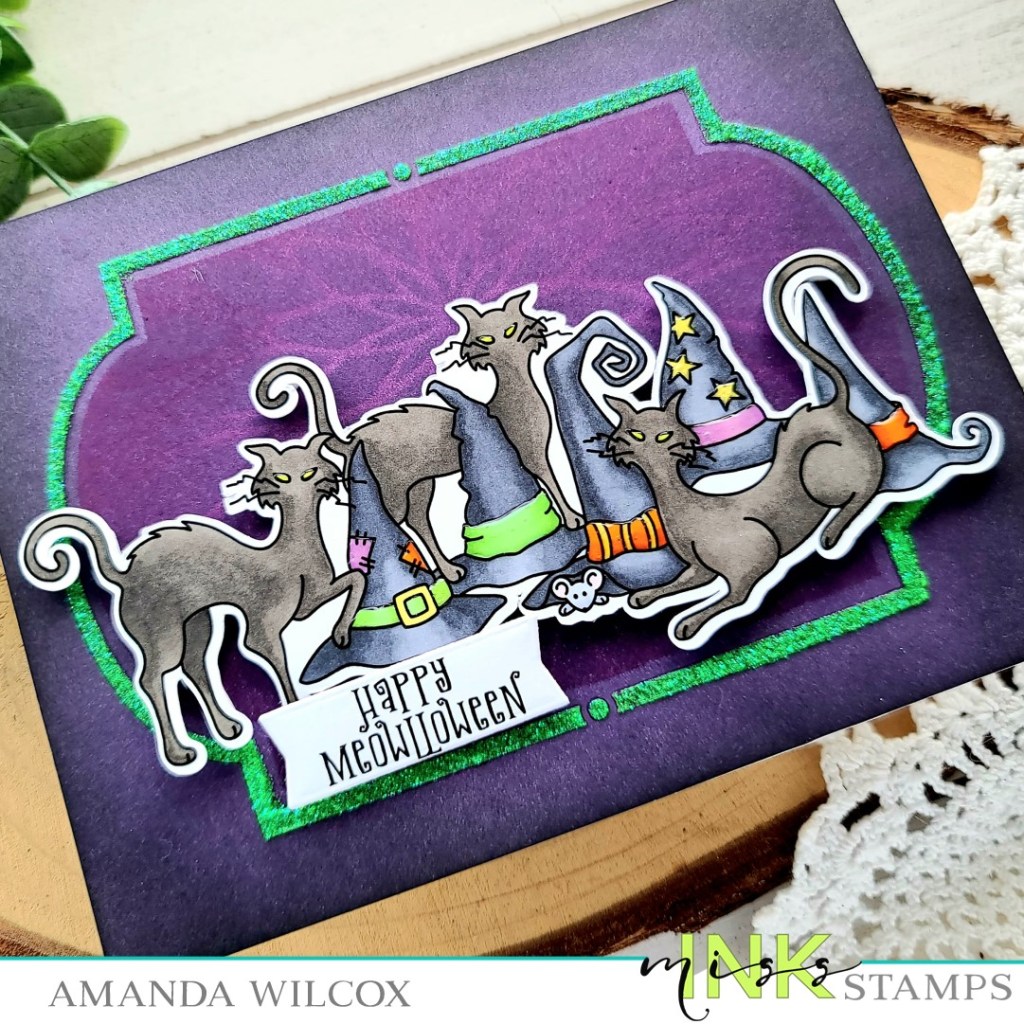
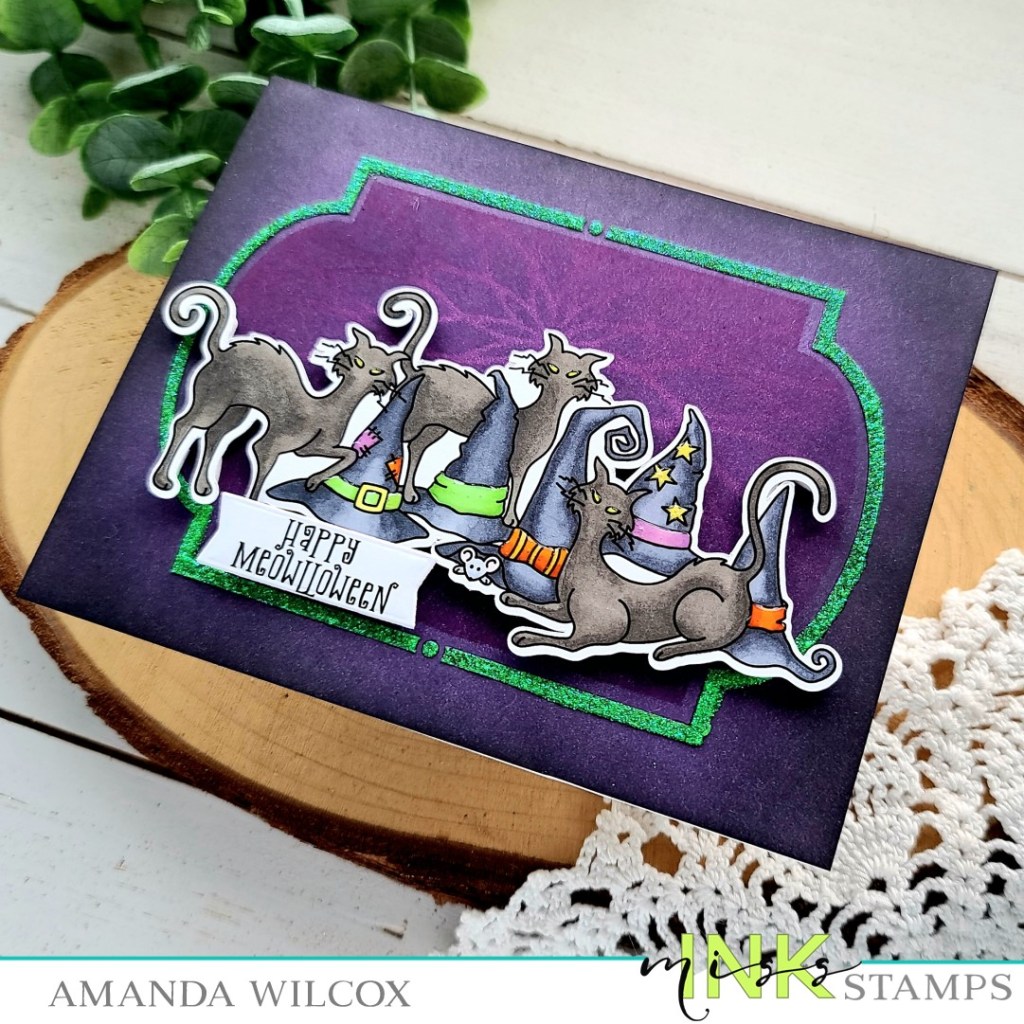
Next, I swapped out all the stencil layers for the Ins & Outs Hollywood frame layer and spread Rina K Glitz Glitter Gel in Screamin’ Green! It just glows off this awesomely dark background!
After that was dry, I added it to a white card base and popped my image and sentiment banner up with foam squares. For finishing touches I added glossy accents to the kitty eyes and various parts of each hat like stripes, buckles, etc.
Happy Tuesday friends! It’s time for Tuesday Tea with Twiddler’s Nook on the Coffee Loving Cardmakers. So be sure to grab a cuppa and settle in because I’ve got a really fun project to share with you today!
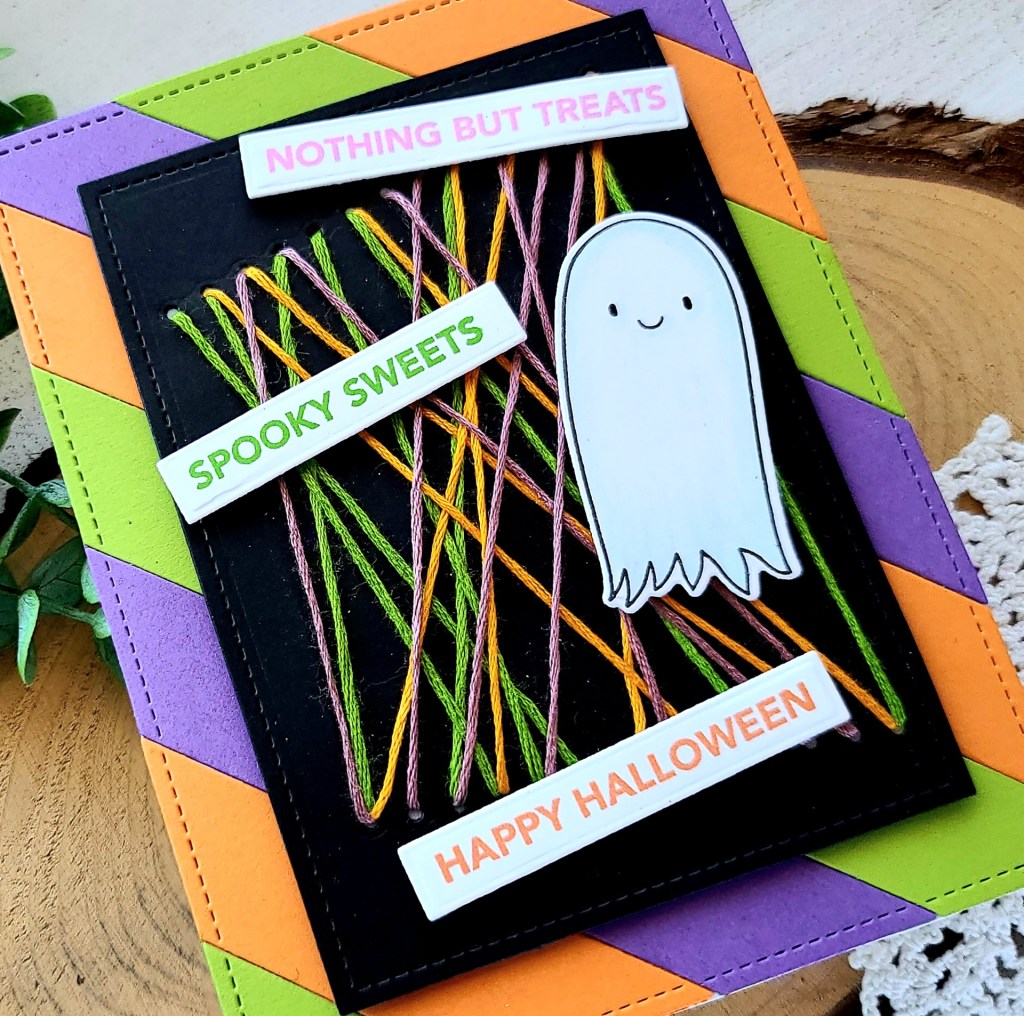
I couldn’t resist this super fun Halloween set from Ellen Hutson called Halloween Treat Tags. The ghost and bat in this set are beyond adorable! Today I’m just using the ghost for a super fun coffee sleeve with the Bear Cozy Kit and then switching gears to a card that coordinates!
For the cozy, I die cut the bear cozy main die from black felt and trimmed off the ears with scissors. Then I cut the ghost from sprout, lilac and sunset felt. I placed the negative from one of the ghosts in my MISTI and used it to align the stamp. Then I simply placed each ghost in the negative and stamped the image right on it. I happen to have a craft ink pad for fabric but I did a little research and you can you Ranger Archival ink on fabric too! I used Thermoweb Fabric Fuse liquid adhesive to adhere my ghosts in place and set it aside to dry.
While it was drying, I die cut a piece of black cardstock with a Lawn Fawn stitched rectangle. Then I took the die from the Bear Cozy kit that gives you stitching holes to sew your cozy together and cut two strips on my black cardstock. I dug through my embroidery floss and stitched a fun, random mess back and forth across the cardstock. I adhered the ends on the back with some washi tape. Then I cut the Lawn Fawn diagonal striped cover plate from coordinating cardstock and adhered it to a card base. Once that was done I used scrappy tape to adhere the stitched panel in place.
I chose sentiments from Tag It Halloween and stamped them in coordinating colors. Then I used a Pink & Main sentiment strip die to cut them all out. I stamped another ghost and used the coordinating die to cut him out and popped everything up with foam strips and squares.
With my card all finished and the ghosts on my cozy dry, I used the stitching die to cut holes on both ends, sewed a fun blanket stitch on the edges and then sewed the ends together, completely my little gift set!
This is going to be such a fun set to give away! I’m super excited!
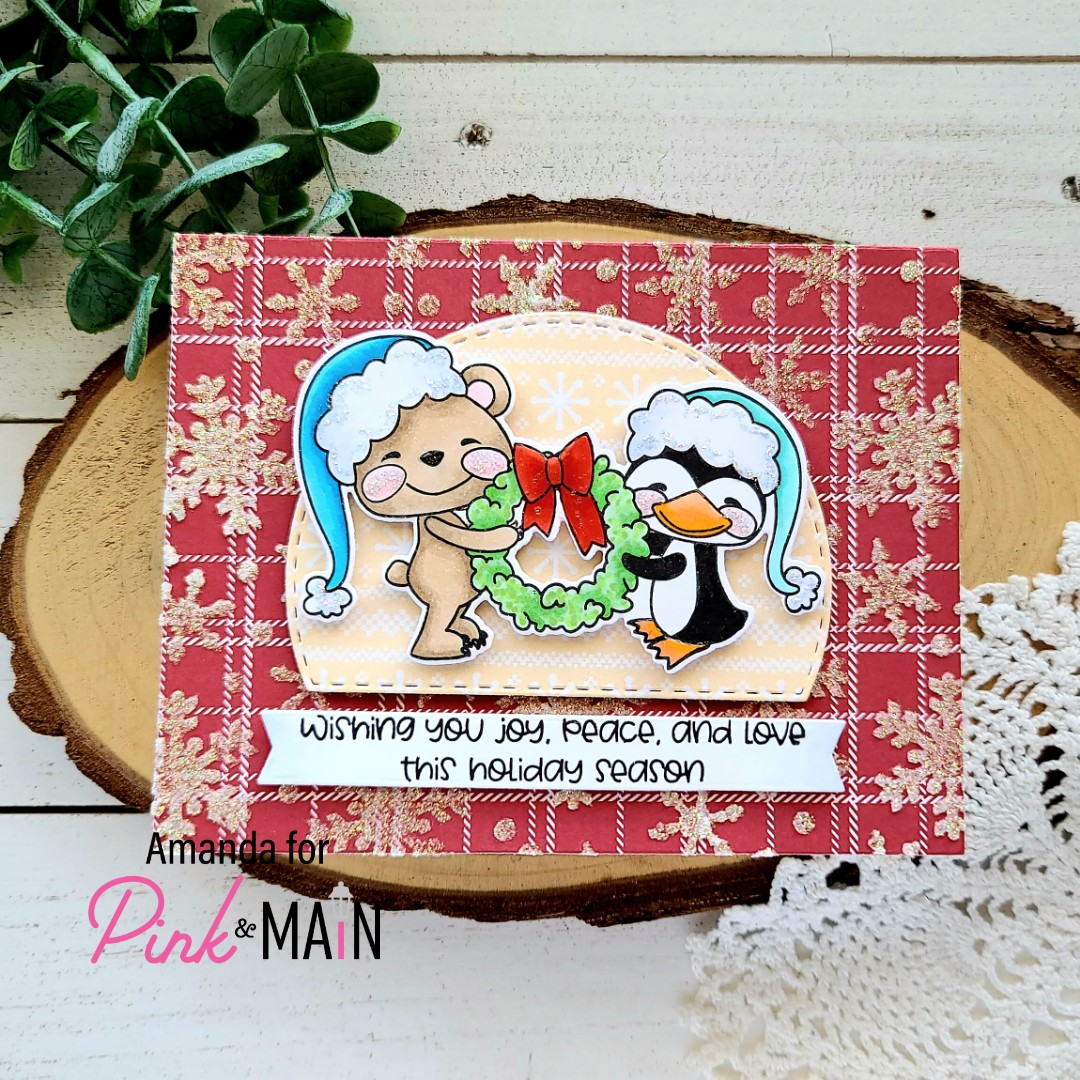
Happy Friday friends! I’m over on the Pink & Main blog today with some more Christmas fun from the September release. The Polly and Pete series are just too cute for me to leave alone. I love them!
I had a layout in mind so I stamped my cute image and colored it with my copic markers. Then I used the coordinating dies to cut it out. I chose a large sentiment strip die that would fit the sentiment, cut the banner and then stamped the sentiment. Because this is a little squishy it gave me more control over where my stamping landed on the banner.
Next I chose 2 patterned papers from the Homespun Holiday paper pack and cut one with the largest layered rectangle dies and the other from the largest double stitched dome dies. I layered the new blizzard stencil over the rectangle and spread iridescent glitz glitter gel through it. The snowflakes over the plaid just make me so happy! I love them together!
Once the panel was dry I adhered it to a white card base with EZ Squeeze liquid adhesive. Then I popped the dome and sentiment banner up with foam squares and then did the same with my image.
For finishing touches I added glossy accents to the bow, bear nose, penguin beak and feet; and unicorn stickles to their hats and cheeks.
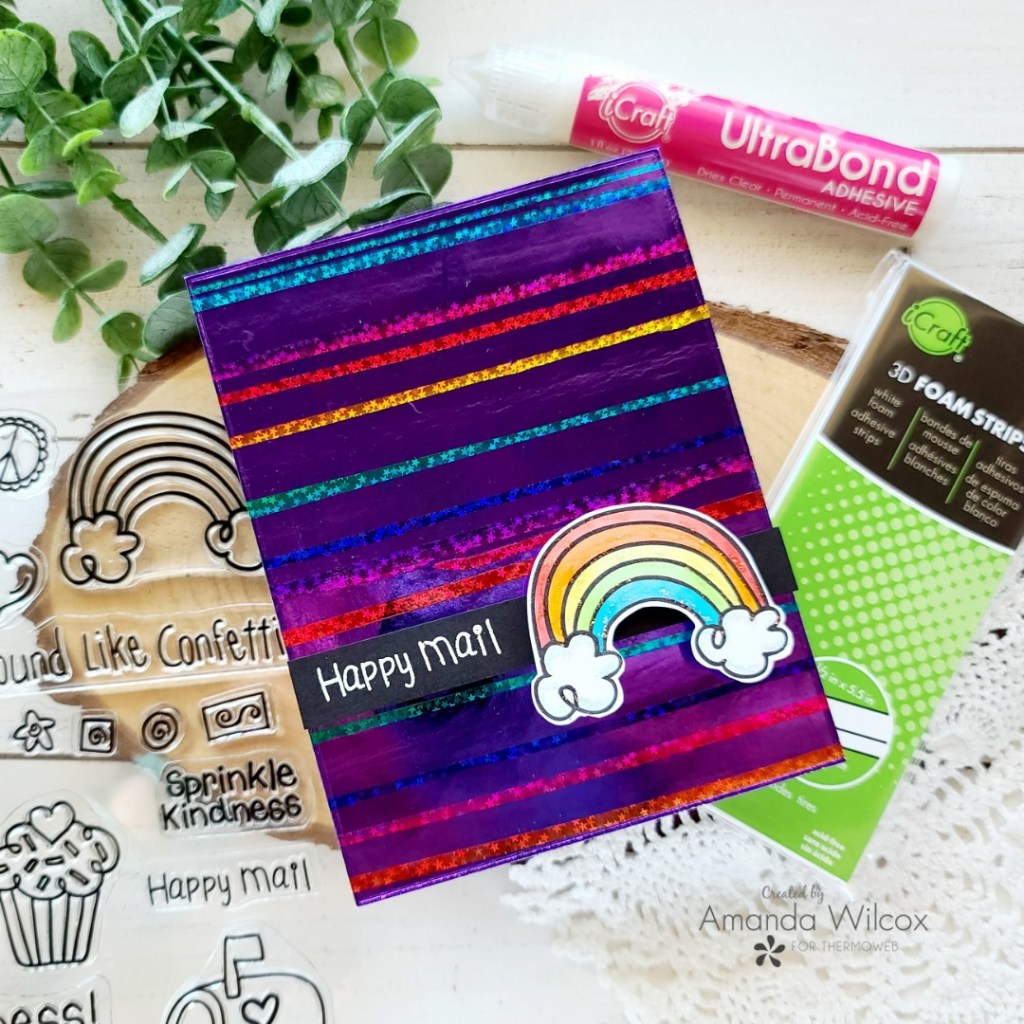
Hello everyone! I’m over on the Thermoweb blog today sharing how I created this pair of cards featuring Laura Kelly Designs products from Thermoweb. Her foil colors and toner card fronts are so fun. Pair those with her whimsical stamps and you’ve got adorable, fun cards!
To create these cards, I started by foiling the toner card front on the right and then adding the negative decofoil sheet to a toner sheet and then foiling the rest with some awesome Rainglow decofoil. It’s kind of a process but it’s fun and magical as you do it!
To add a little something to this first card, I added glitter gltiz gel with a Pink & Main stencil over the foiling. Isn’t it so much fun!?!
And then this amazing double-foiled card needed nothing added because it is so gorgeous!!!
Be sure to head over to the Thermoweb blog for the step-by-step and a list of products used too!
I appreciate you sharing your time with me. Have a fabulous day!
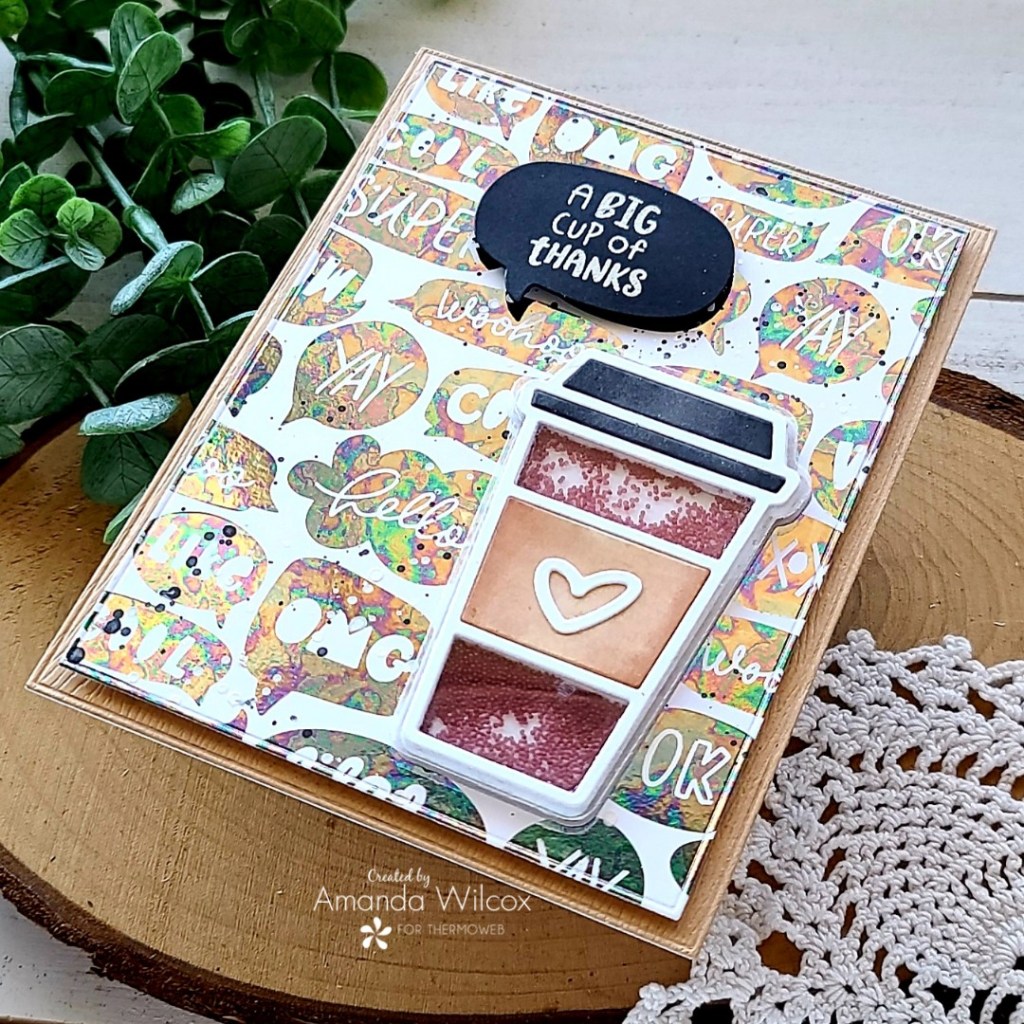
Welcome back everyone! Today I’m over on the Thermoweb blog with a tutorial how I created this fun coffee themed shaker card using Brutus Monroe toner card fronts and decofoil!
This tide pool decofoil is so awesome in the light and using the microbeads from the Twiddler’s Nook shop as shaker bits is just added fun!
Be sure to head to the Thermoweb blog for all the details and products used to create this fun interactive card!
I appreciate you popping in today. Have a fabulous day!
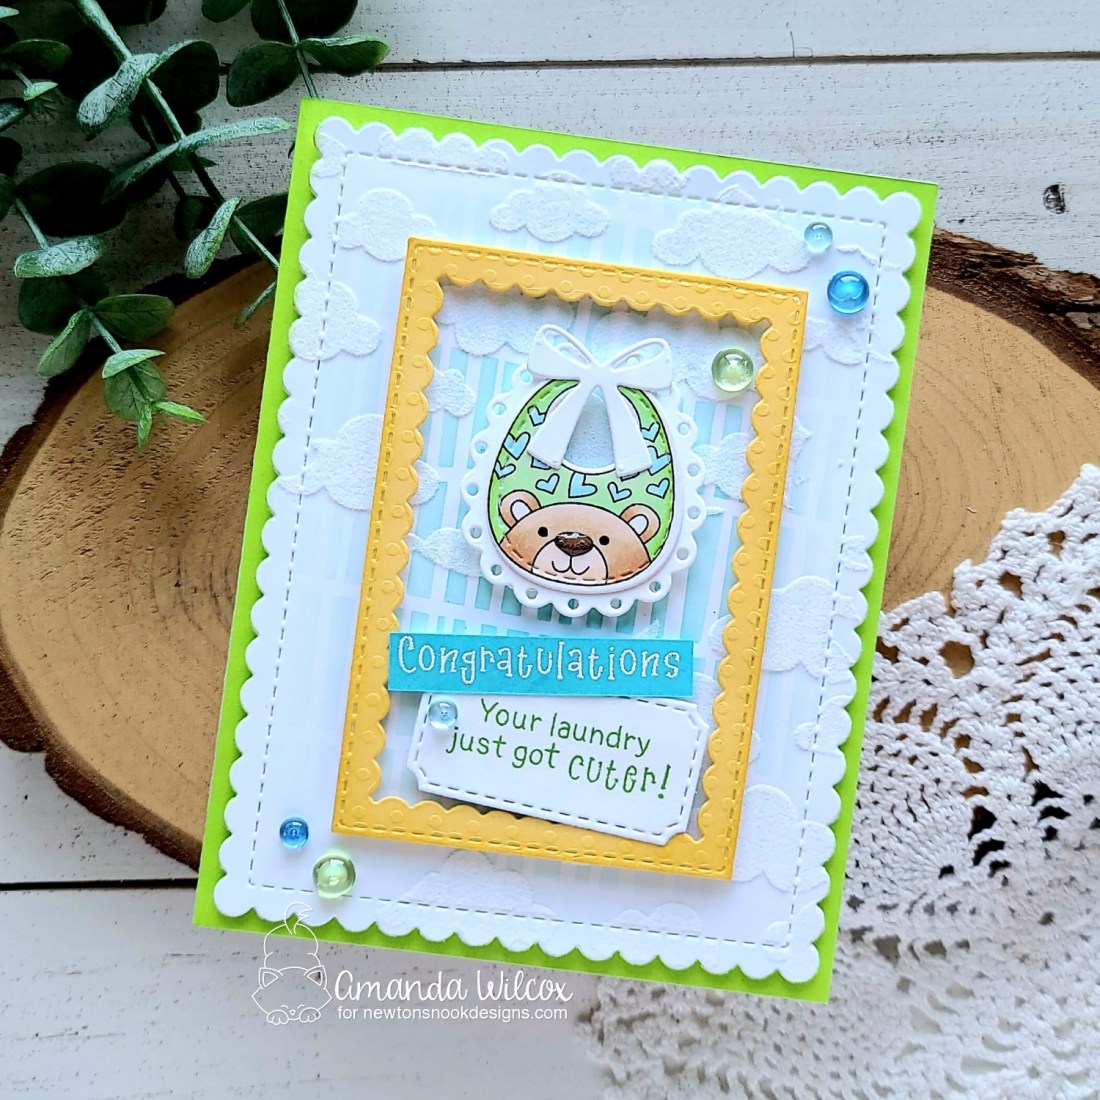
Hello everyone! Today I’m over on the Newton’s Nook blog with a sweet little baby card. I made this for some friends expecting a baby boy very soon. It was super fun to get inky messy and come up with this cute thing in the end.
I started by stamping one of the bibs from Bitty Bibs and colored in with my copics. Then I used the Baby Bib dies to cut it out along with the lacy border and bow. I glued the layers together and switched to my background.
I wanted some flocked clouds but other texture as well so I went digging in my stencils. I came out with the Serene Stripes stencil and inked it up starting in the center, fading out, with a light teal ink. Then I spread Thermoweb Transfer Gel Blanco through the Cloudy Sky stencil. I removed the stencil and set my panel aside to dry while I cleaned up. Once my laminator was heated up I ran the panel through with a decofoil flock transfer sheet in white latte. Then I die cut the panel wtih the scalloped rectangle in the Frames & Flags die set.
To bring the focus on my cute little bib, I die cut the inverted scallop frame from the Framework die set from yellow cardstock. Then deciding on how to do my sentiment came perfectly…I die cut the tag from the same Framework set out of white cardstock and stamped half of my sentiment in green on that. Then I heat embossed congratulations on blue cardstock and cut it into a strip.
Next, I added foam tape, strips and squares to everything! You know how I like dimension. For assembly, I adhered a green panel to a white card base with liquid glue, then popped the stenciled panel in place. Next, I added the yellow frame and the bib, then my sentiment below.
To finish things off I added black glaze pen to the bear’s eyes and glossy accents to his nose. Then I came in with some acrylic bubbles from my stash and glued them across the design.
I’m so happy with how this fun card turned out! Baby and sympathy cards are not my forte so I tend to only make them when they are needed. It helps to have motivation and a recipient in mind for me.
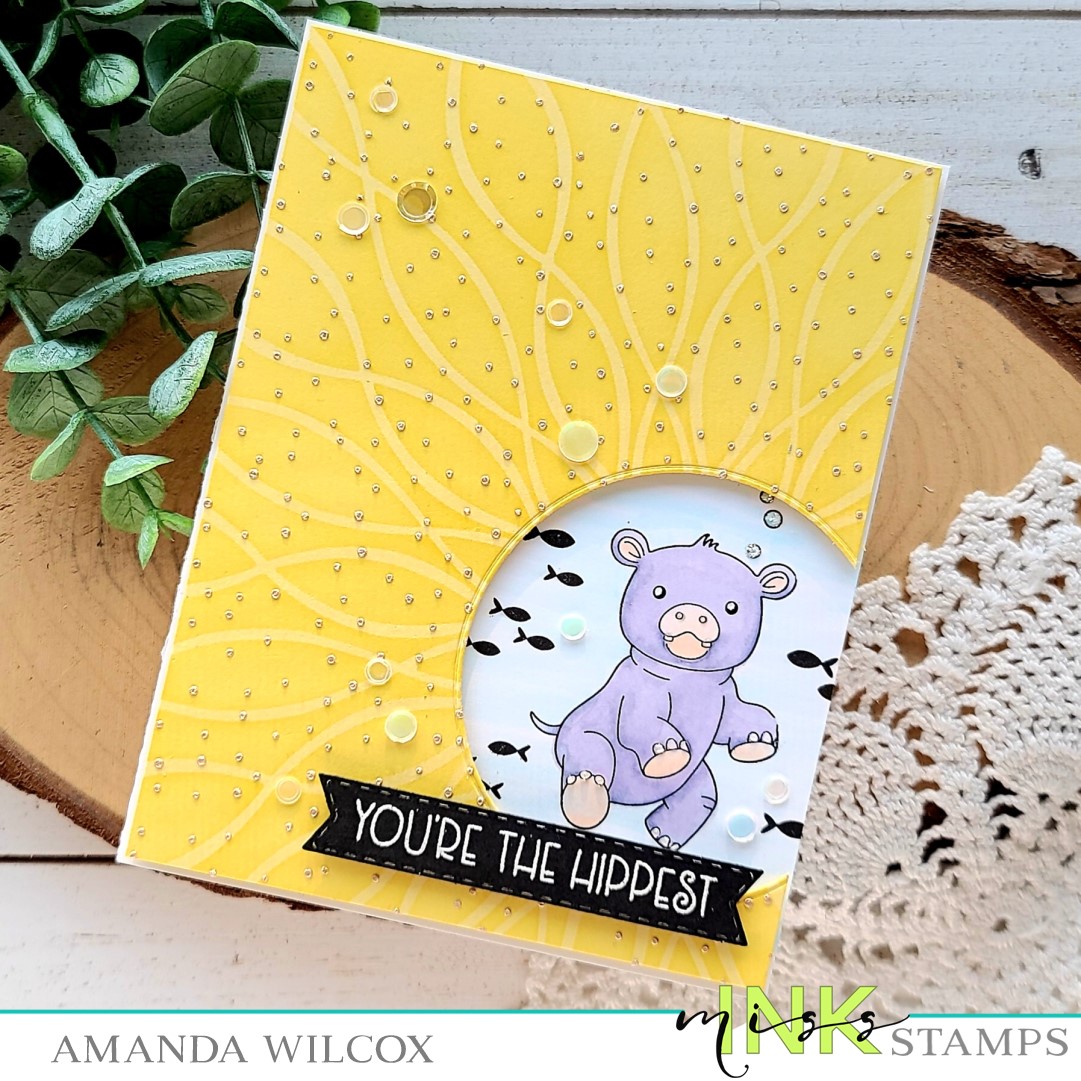
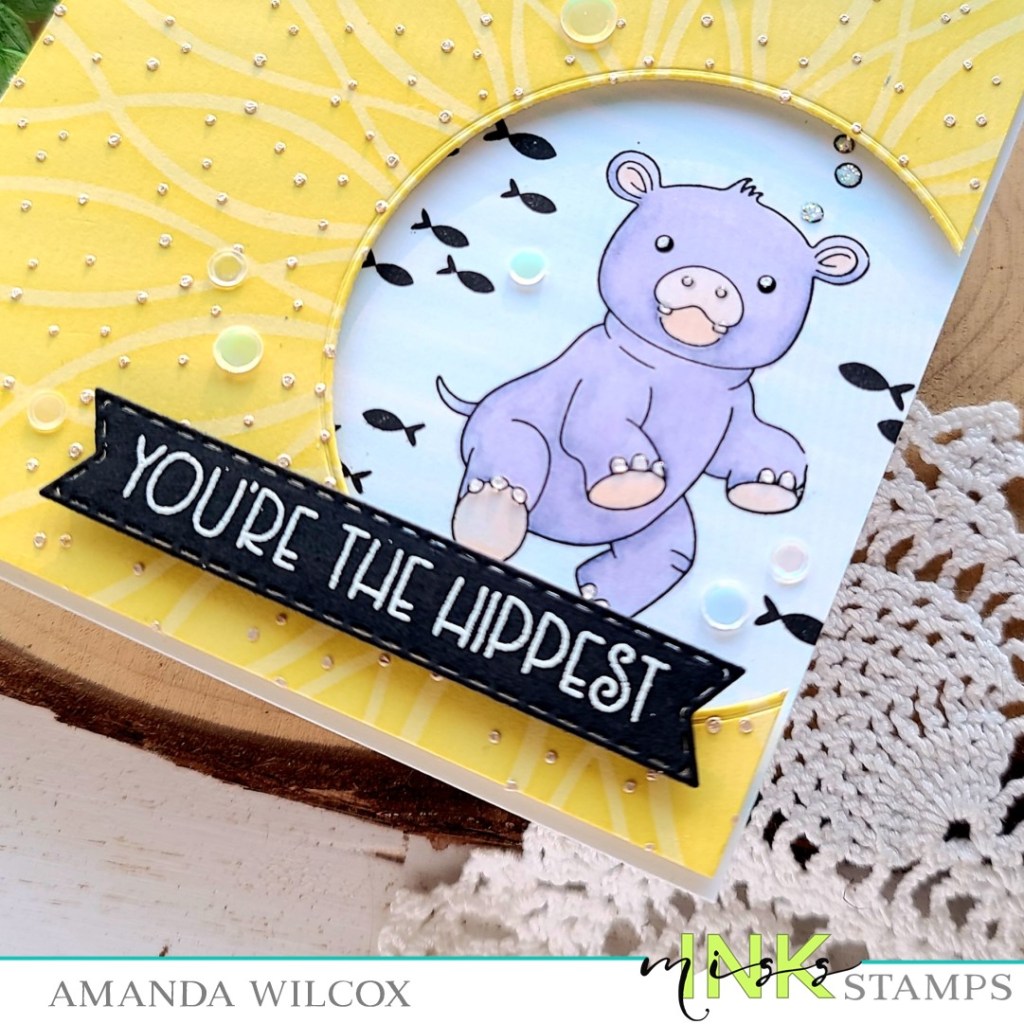
Hello everyone! Thank you so much for stopping by today. I have a super cute, punny hippo card to share with you today featuring Miss Ink Stamps stencils and Hippo Hooray stamp set.
To create my card, I cut a white cardstock panel to A2 size and a yellow cover panel 1/8 inch smaller on both sides. This makes the yellow panel measure 4 1/8 x 5 3/8 inches. Using my hippo stamp as a guide, I cut a circle off the edge of the yellow panel.
Then I places both panels in my MISTI and lined up the stamps. I removed the yellow one and stamped my images. Then I used my copics to color the hippo and a light blue for a watery background.
Next, I sprayed my floral wave offset stencil with pixie spray and stuck it to the yellow panel. I inked it up with a brighter yellow ink and a blending brush. I removed that stencil and taped the tiny snowfall stencil down next. This time I spread champagne metallix gel from Thermoweb through it. I removed the stencil and cleaned everything up. While it was drying, I stamped and heat embossed a sentiment, then die cut it with a banner from Trinity Stamps Mini Slimline Card and Envelope Builder die set. It fits most of these sentiments perfectly!
Moving on to assembly and finishing touches, I adhered the colored panel to a white card base. Then I backed the yellow panel with foam tape and popped it in place. Last I added foam squares to the sentiment banner and added it to the bottom of the circle cut out.
For finishing touches I went over the hippo eyes with black glaze pen and when then dried I gave it a white gel pen highlight. I added glossy accents to the hippos teeth and feet. I gave the bubbles a little unicorn Stickles for fun and then finished things off with a scattering of Trinity Stamps seashore confetti mix.
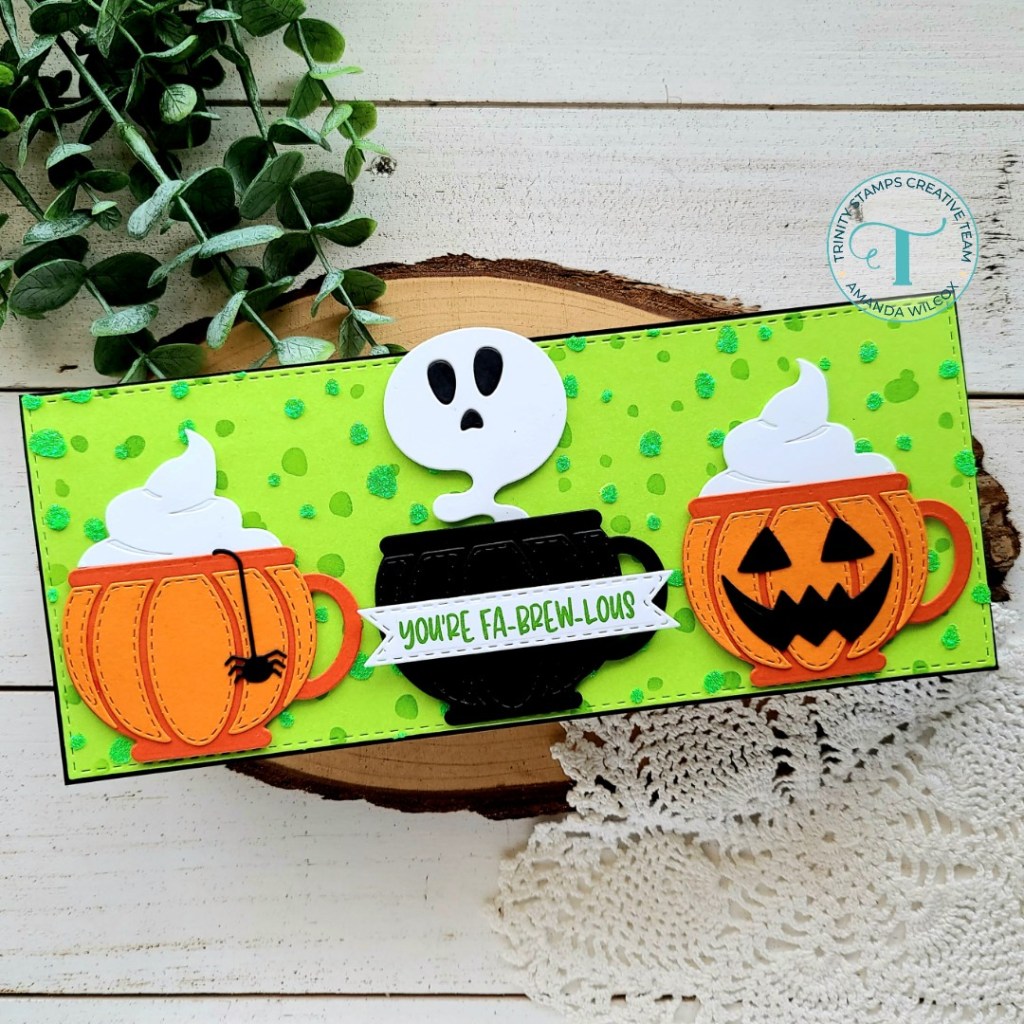
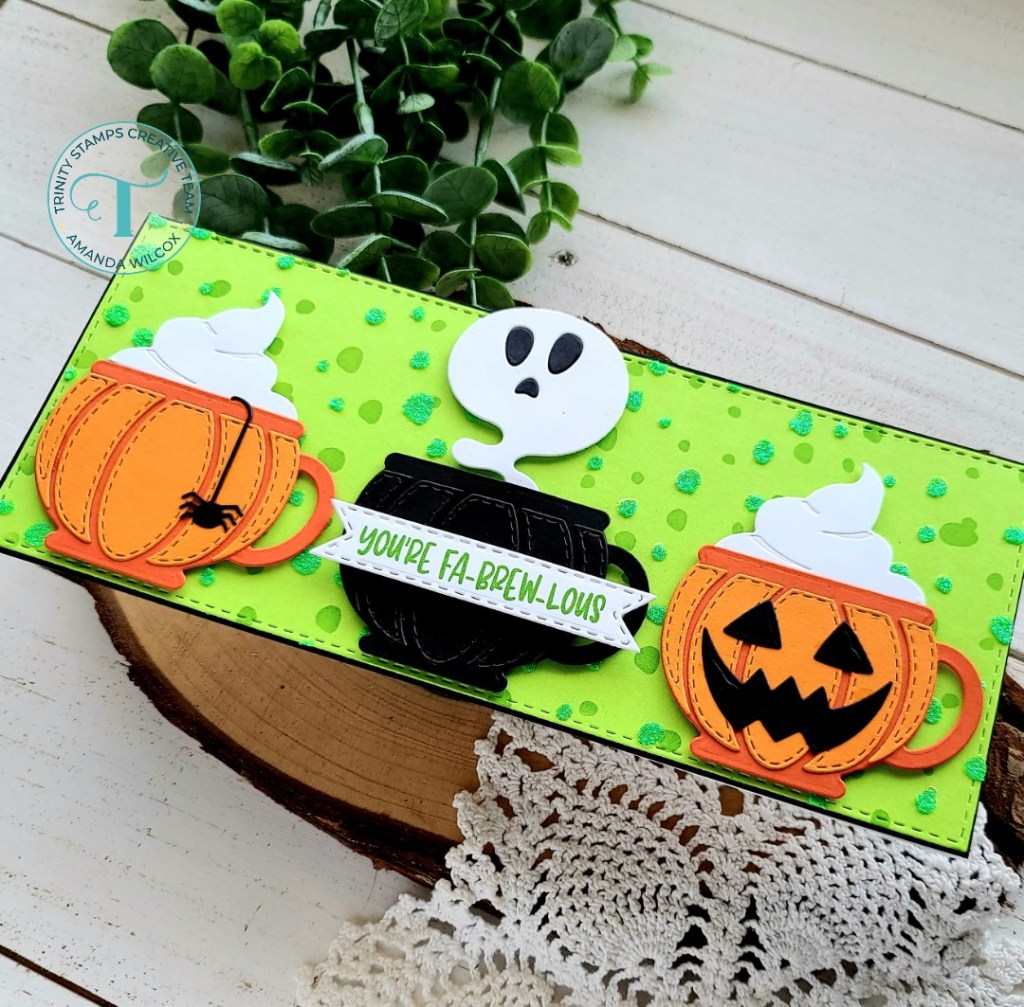
Hello my fa-brew-lous friends! So happy for you to join me today! I am beyond excited about how today’s card turned out. I just love the bright, spooky Halloween feel that it gives. And it was ridiculously fun to create!
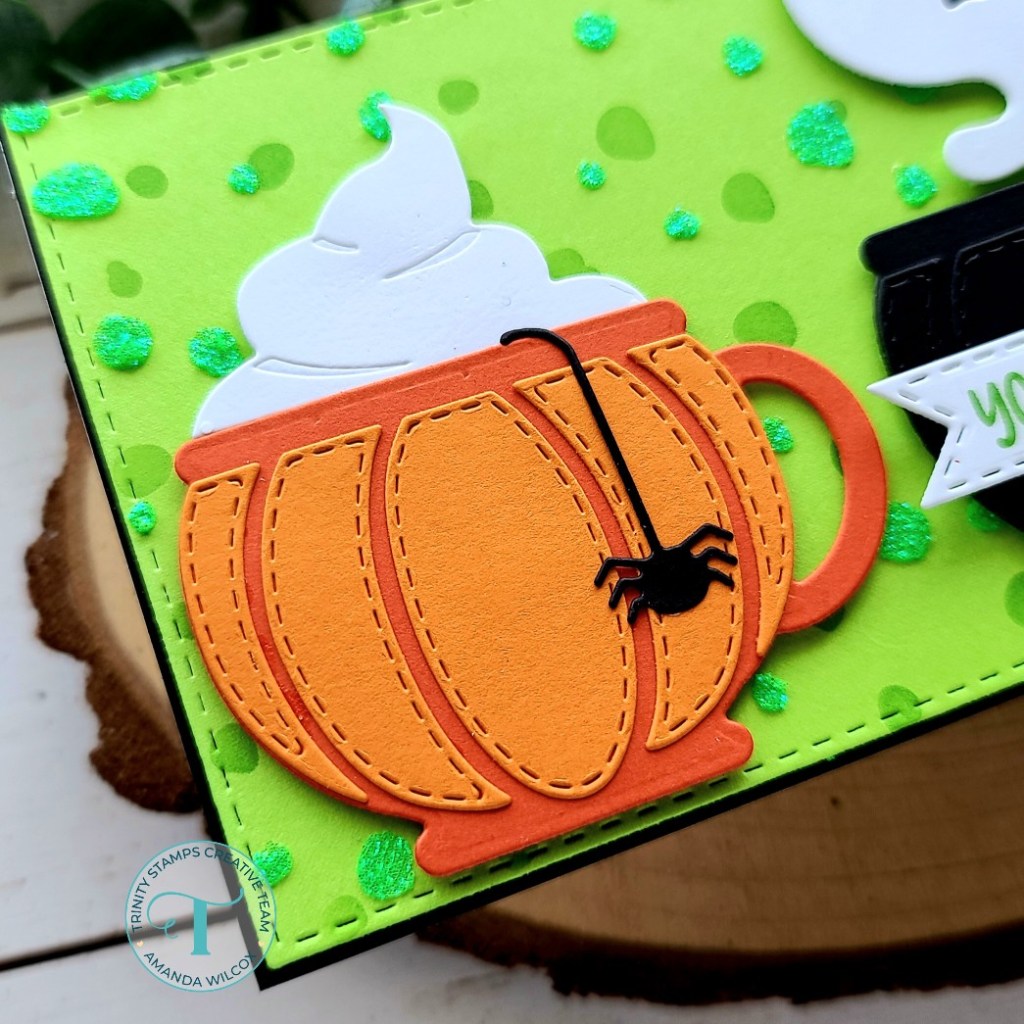
I started by die cutting the elements from the new Boo Brew die set from Trinity Stamps. I just wanted to play around with the dies and see how they went together. Well, it was too fun and I immediately had an idea! So I cut 3 cups with the intention of the black one to look like a cauldron. I didn’t want the orange pumpkin mugs to look the same so I did the spider for one and the jack-o-lantern face for the other. I used liquid glue to adhere all the elements together and moved on to my background.
With all the awesome orange and black it was a no-brainer for me to make a slime green background. Lol! I inked it up with one layer of the snowfall stencil and then used Rina K Glitter Glitz Gel on the second layer. After it dried I die cut it with the largest stitched slimline die. This die gives a 1/8″ border so I adhered it to a black slimline card base for a teeny black border.
I popped each mug up with foam tape for extra visual texture. Here’s a closer look at the spidery pumpkin mug. I think this might be my favorite!
But the face on this jack-o-lantern is pretty frightfully cool too! I just love him!
Last, but not least, our ghostly cauldron is pretty awesome! To finish things off I stamped a sentiment from Fa-BREW-lous in the same green ink I used on the stencil and die cut it with a banner from the slimline scalloped panels and banners die set. To get it shorter I cut one end, realigned the banner to be shorter and then cut the other end. This totally extends the use of your dies whether they are too long or too short.
I had a blast creating this card and could seriously make these little mugs for days and days! Next up is definitely a fall rendition for pumpkin spice because that is literally what I wait for all year long!
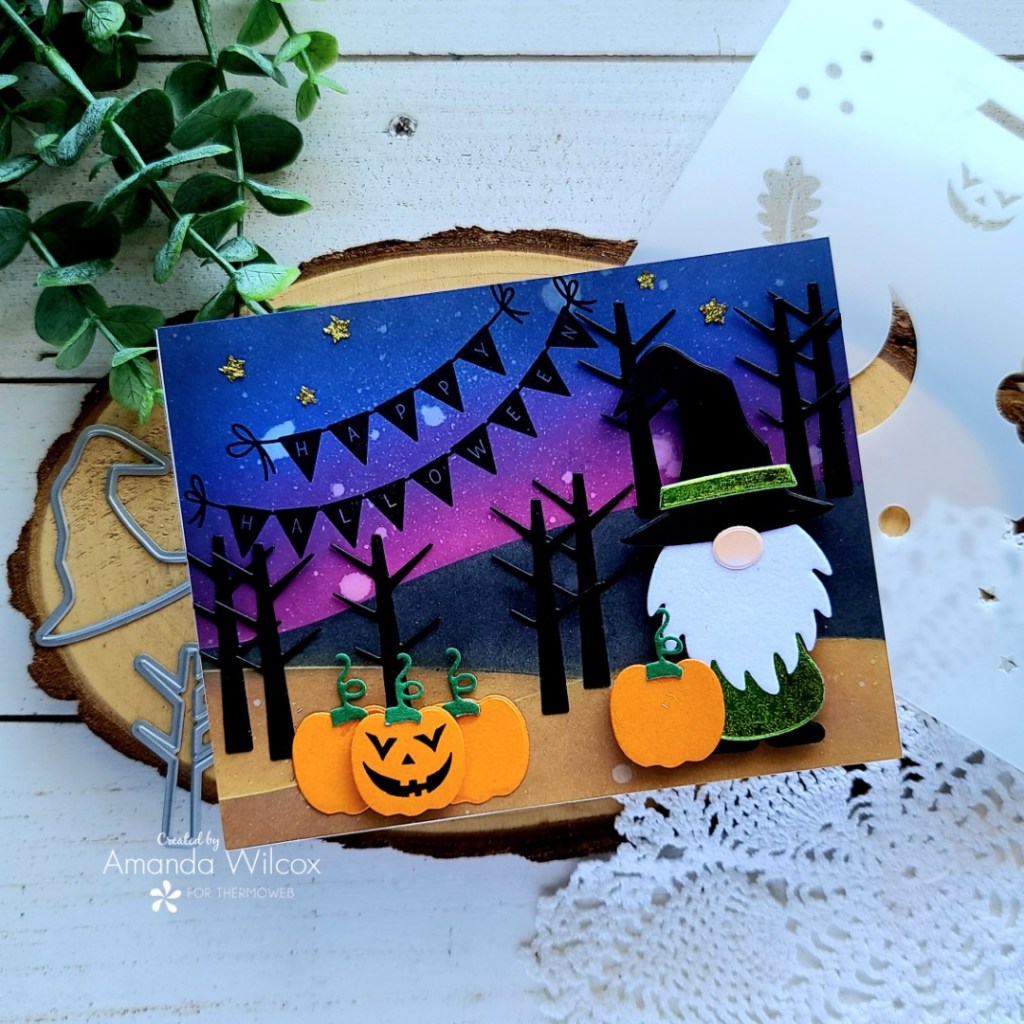
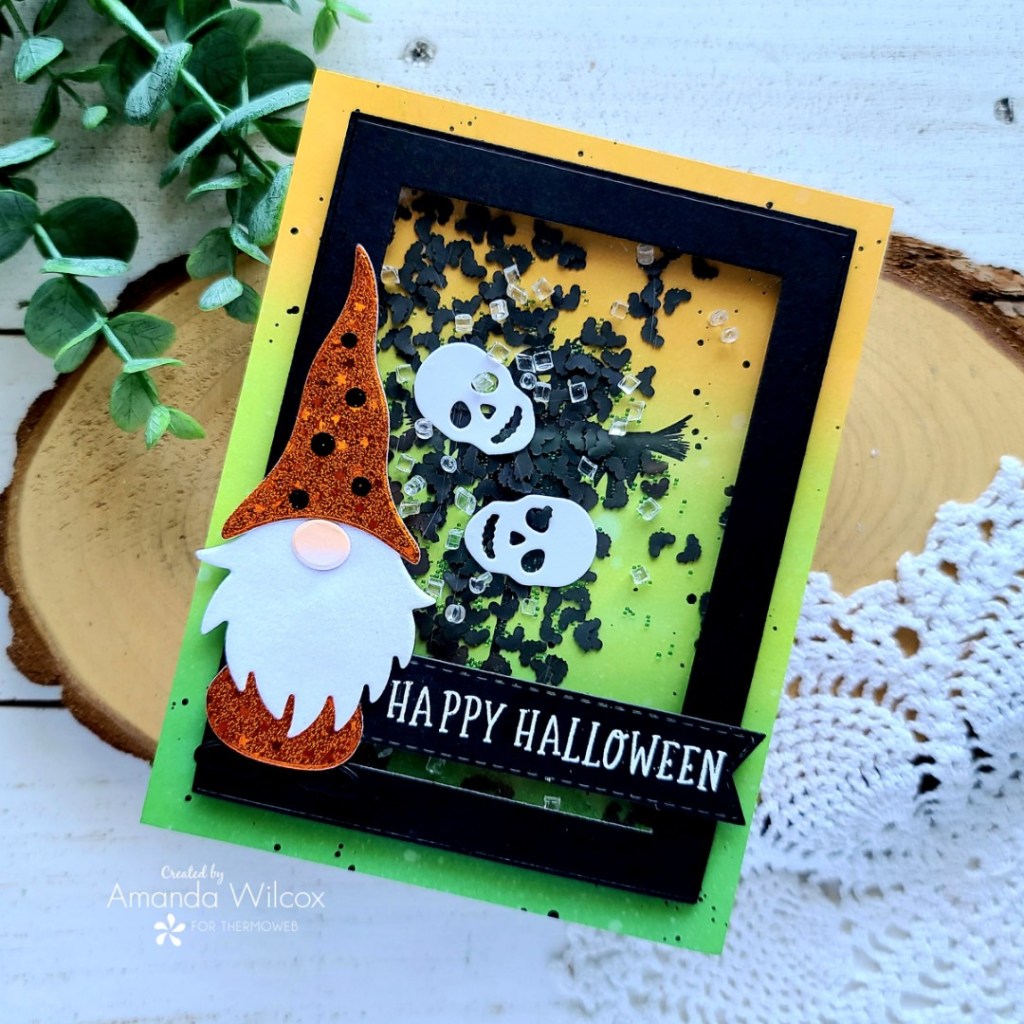
Hi everyone! Last year Thermoweb and Gina K Designs partnered to bring an absolutely adorable and fun gnome themed Christmas card kit. It’s got stamps, dies and a stencil that all coordinate together. So much fun! They were such a hit that they sold out super fast! Well, this year they’re back PLUS there’s an adorable fall add-on to go with it! I’ve got 2 Halloween cards to share over on the Thermoweb blog today.
After playing around with the gnome dies and creating two different cuties to play with. I chose one and created a fun scene card with him. Lots of ink blending, shine and texture going on here and I love it all!
For my second card I made a shaker and filled it with bats, skulls and some clear bits for added interest and shake-ability. Lol. Technical terms…
For all the details and a step-by-step tutorial for both of these cards, head over to the Thermoweb blog and check it all out.
I appreciate you sharing your time with me. Have a fabulous day!