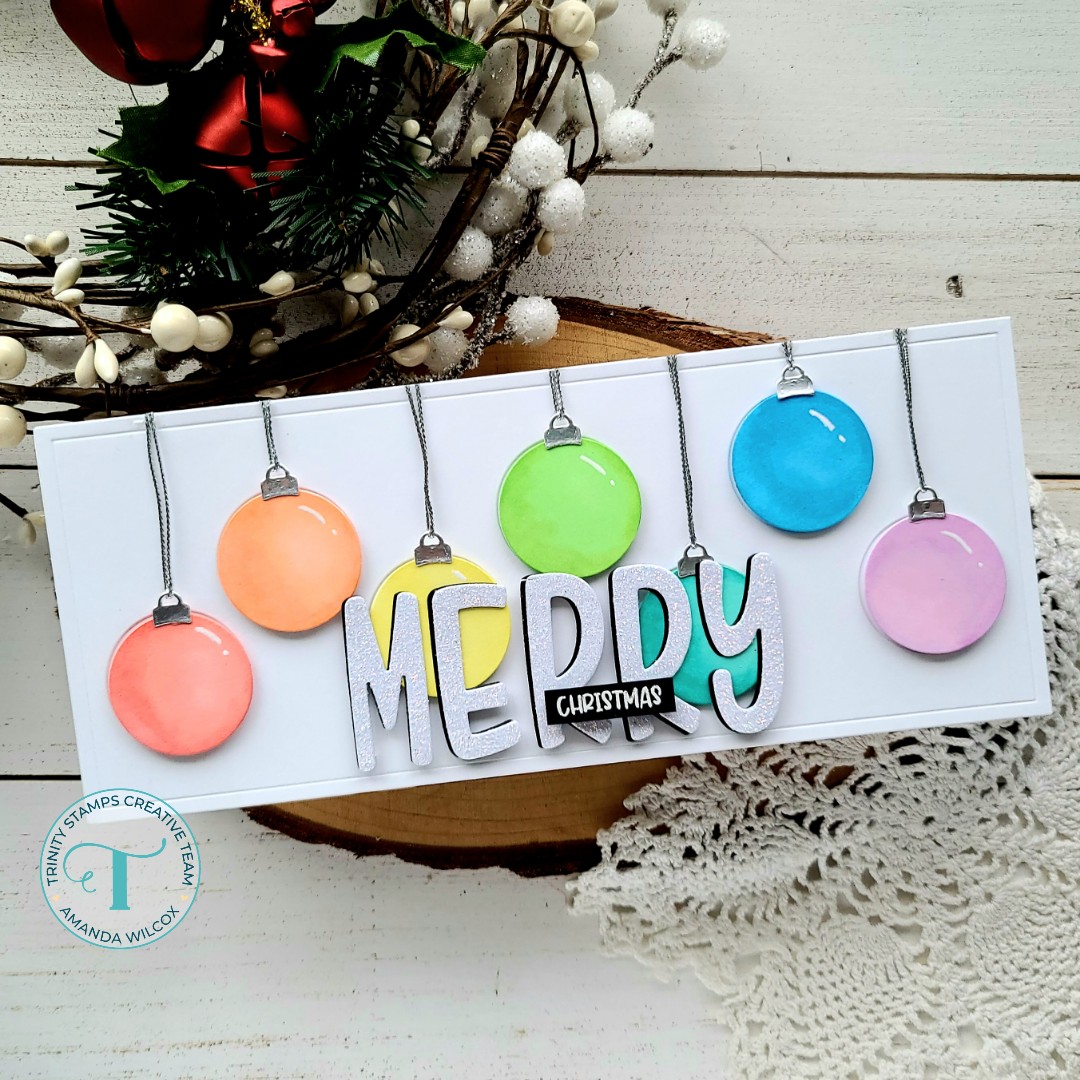
Happy Wednesday everyone! Thanks for stopping by. Today I’m over on the Trinity Stamps blog sharing a slimline card featuring a new cover plate and my favorite alphabet dies of all time!
To create my card, I just die cut the Slimline Hanging Ornament Panel die from white cardstock. I kept all the pieces so that I could color the ornaments with my copic markers. Then I cut the hanger piece of the ornaments from silver foil cardstock and started coloring.
Here’s a look at all the pieces and the copic colors I used on the ornaments. After they were colored I added foam squares to the back of each one and used liquid glue to adhere the silver toppers to them too. Then I adhered the main panel to a white slimline card base and popped each ornament in its place.
I threaded some silver cord from my stash through each one and glued the ends to the edge of the card. After the glue was dry I trimmed off any excess and added white gel pen highlights to each ornament.
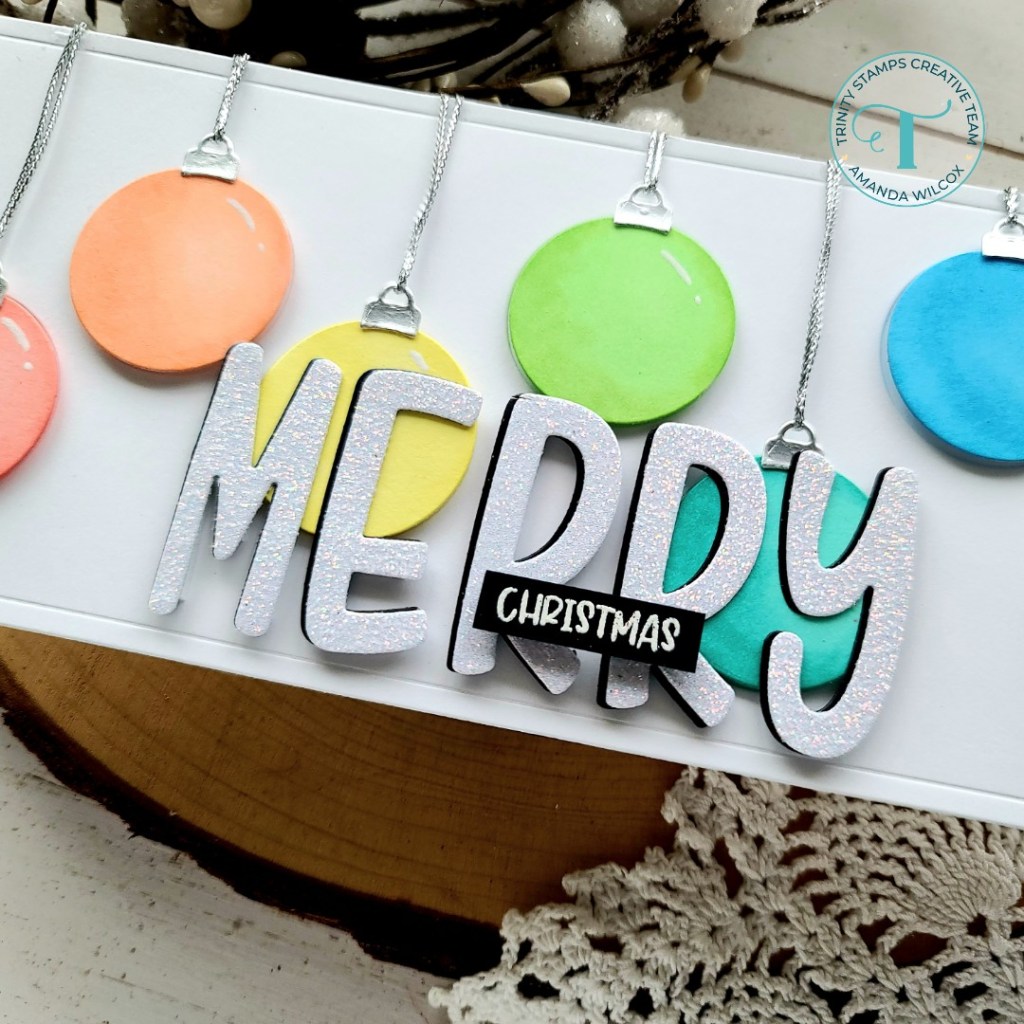
For my sentiment I die cut MERRY from the marshmallow alphabet die set in white glitter and black cardstock. I glued the layers together and adhered them to the card front with a combination of foam strips and liquid glue. Then I went digging in my stash for a “Christmas” stamp and found this perfect one in the Tree Rex stamp set. I stamped and heat embossed it, cut it into a strip and popped it up with a foam strip.
Isn’t this card just so much fun!?! I’m so happy with how it turned out and had a blast creating it. I hope you enjoyed it too!
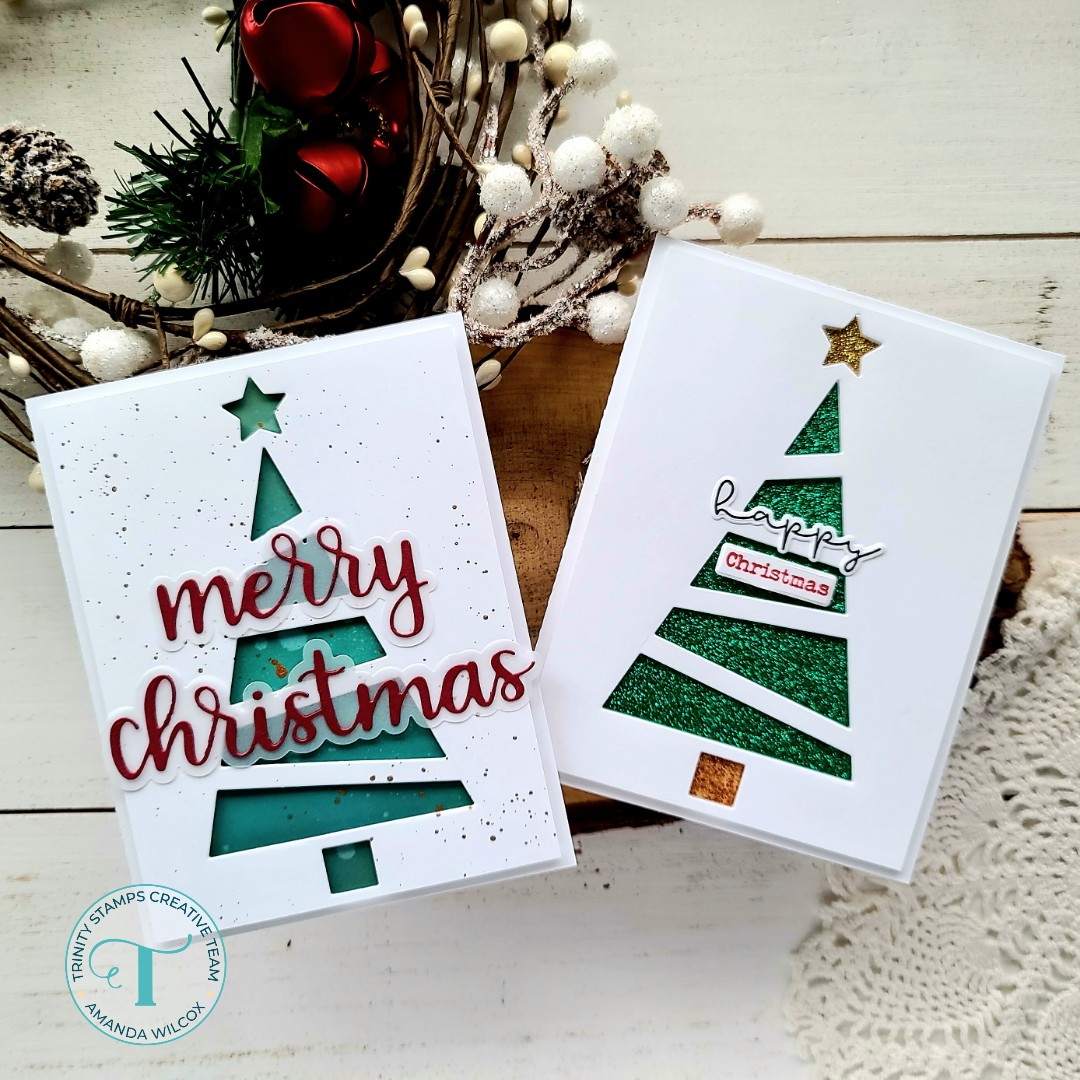
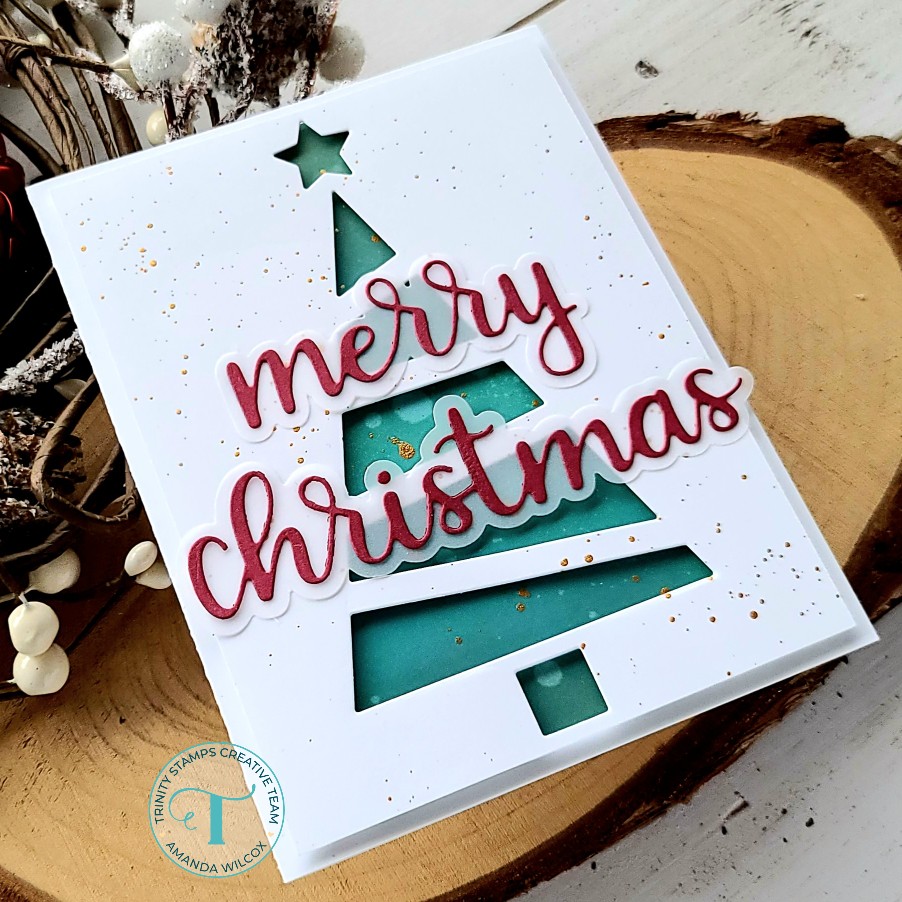
Hello everyone. Today I’m sharing a couple of cards featuring the Christmas Tree Cut Out die from Trinity Stamps. This is such a fun die cut and has endless possibilities for different looks. Today I’ve got two to share with you.
Today I took 2 white cardstock panels measuring 4×5.25 inches and cut the tree from the center of them. I discarded the pieces it cut out but you could totally save them for another set of cards too! Bonus!
For my first card, I cut 3 pieces of glitter cardstock to fit behind the openings. (Tip: When you don’t have the right color glitter cardstock but you have white glitter, just use a copic marker to color it. I used E35 for the trunk.) I added foam tape to the back of my Christmas tree cutout panel and positioned the glitter cardstock so the right colors were only showing in their respective openings. Then I glued the whole thing to a white card base.
I pulled out the new Simply Sentimental Happy stamps and dies to make my sentiment and glued it in place with liquid glue.
Totally clean and simple but so visually fabulous with all that glitter! Don’t you think!?!
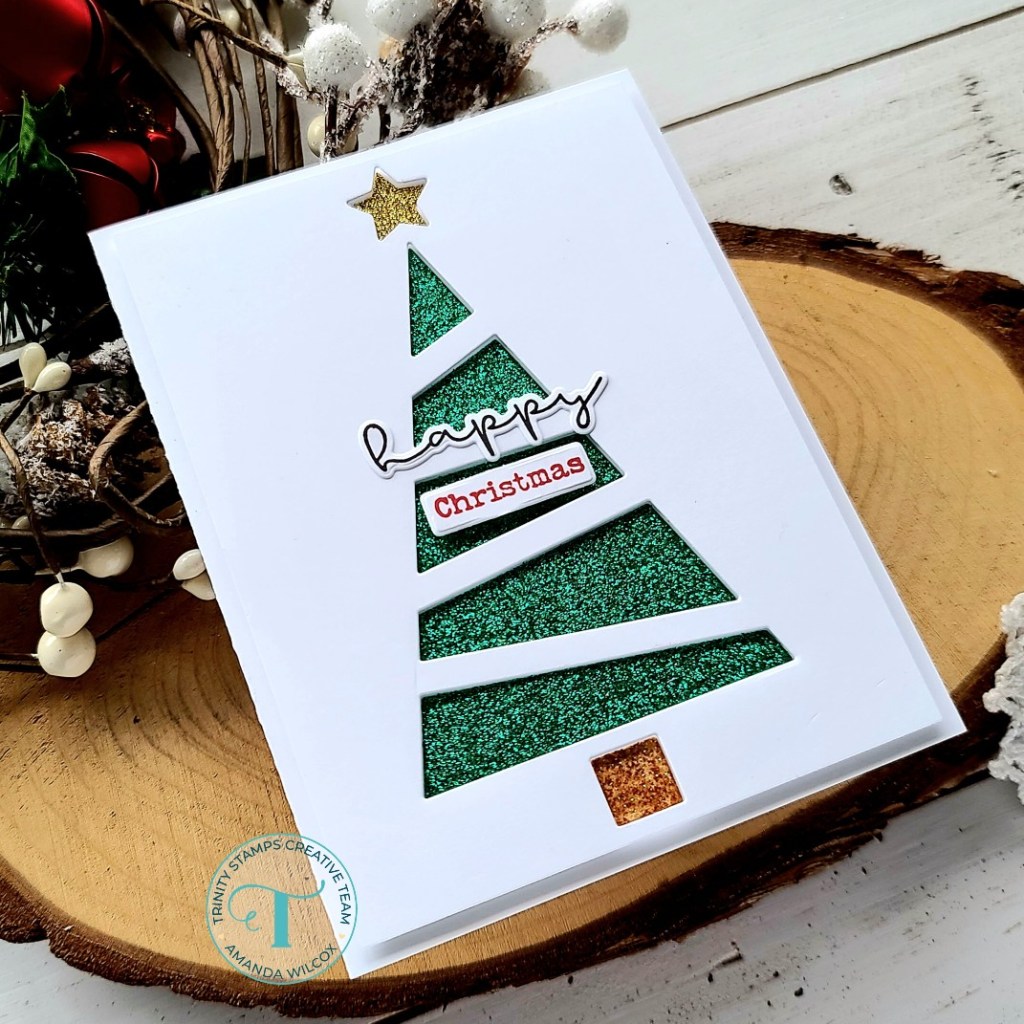
For my second card I went monotone behind the cutout with distress oxide ink blended on a white panel. I blended evergreen bough and lucky clover today. I spritzed the panel with water and flicked gold watercolor on it too. Then I decided to also splatter the gold watercolor on my Christmas Tree cutout panel too.
I adhered these panels together the same way I did the others – with foam tape and then liquid glue to a white card base. Last, I die cut the Scripty Christmas shadow from vellum and words from red cardstock and adhered them together. Then I adhered them to the front of the tree cutout.
Like I said before, there are tons of ways to use this single die to get different looks. You could even make it a really cool shaker or inlay patterned paper on a single layer card! That would be gorgeous! See, I’m getting extra ideas just writing this blog post!
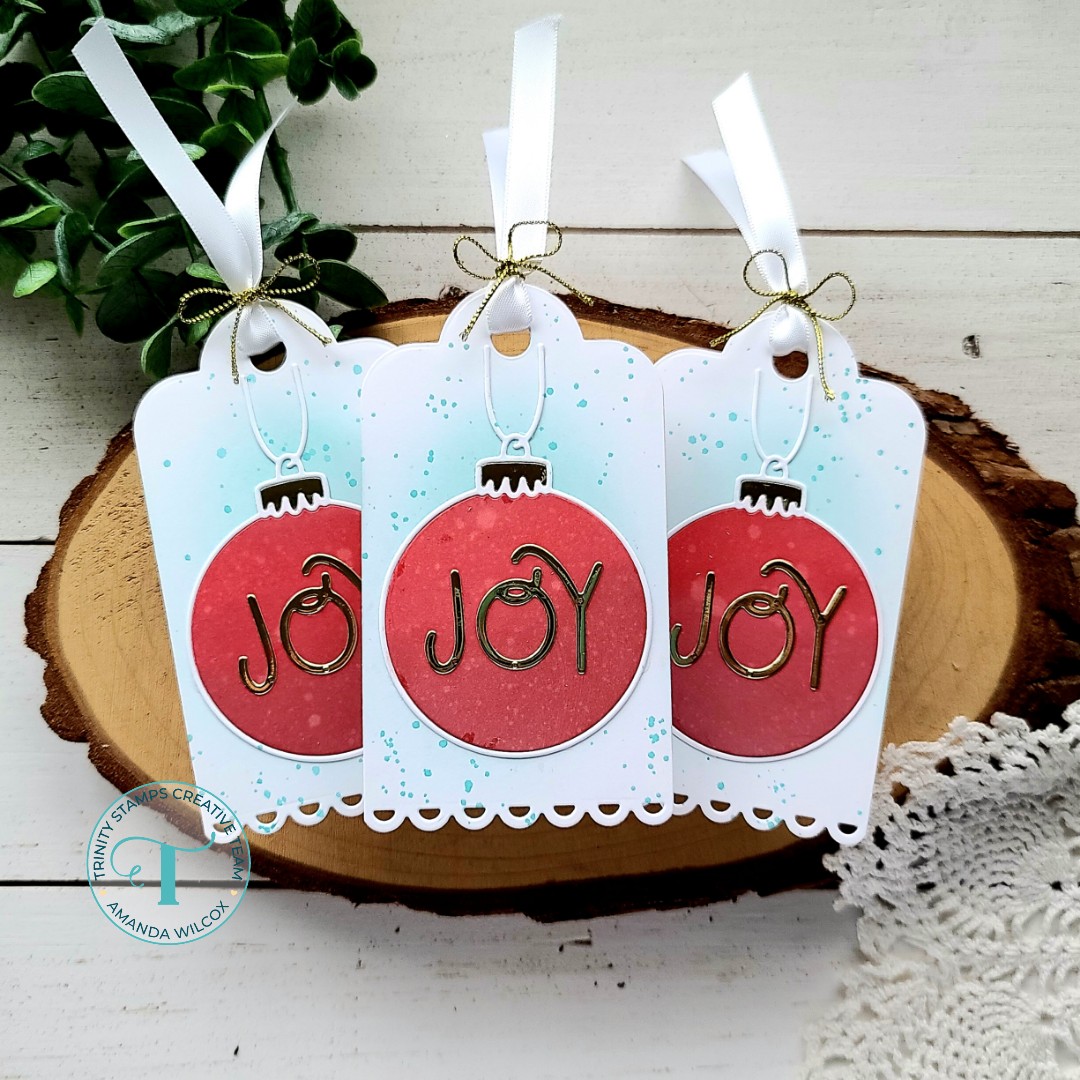
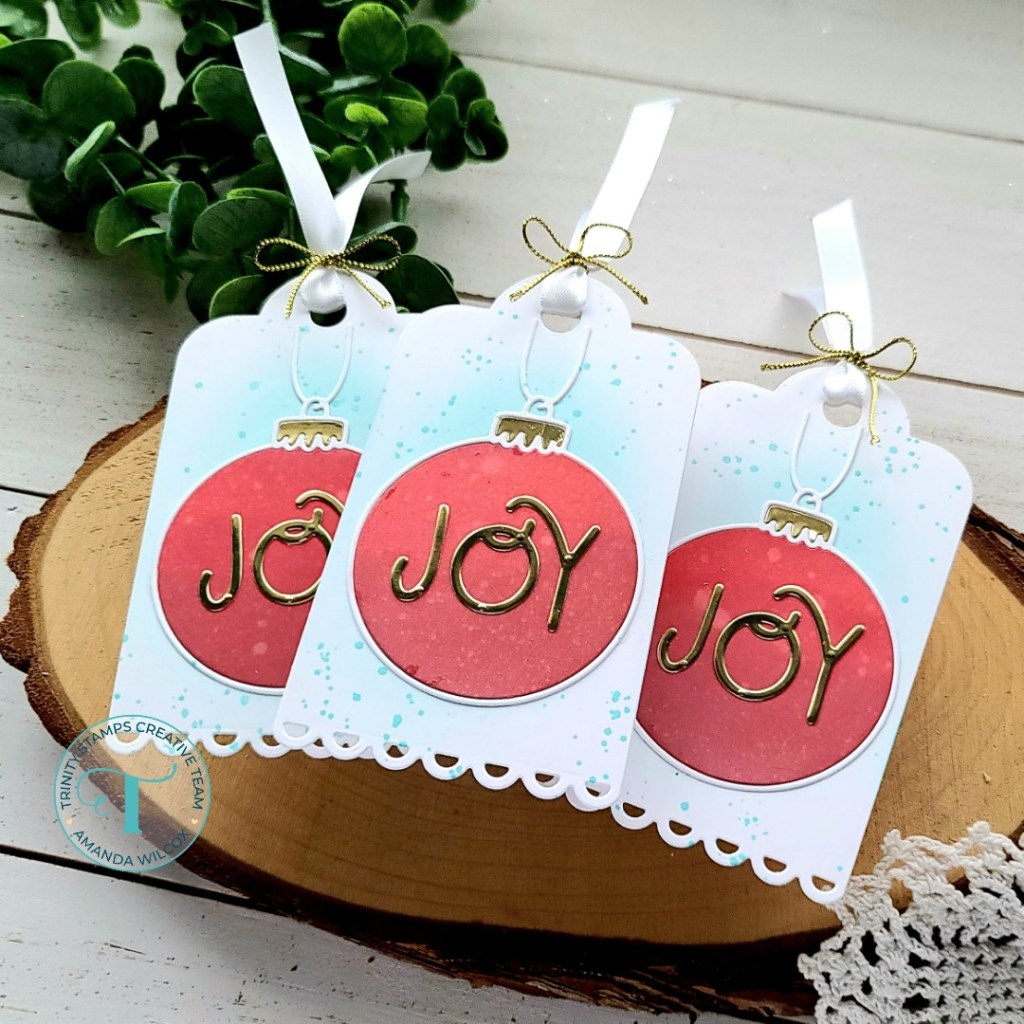
Hello there! Thanks so much for stopping by today. I am over on the Trinity Stamps blog today sharing this simple set of holiday tags that I created with the new Holiday Tag die set. I just adore the look of this tag and the fact that you can use the holiday accents or not, so it’s great all year long!
To create this set of tags, I inked up a strip of cardstock just wider than the ornament with distress oxide inks in aged mahogany and candied apple. Then I spritzed it with water and blotted it dry. Next, I cut the ball part of the ornament from it three times. I took a small strip of gold foil cardstock and cut the topper portion three times next. While I had the foiled cardstock out I also cut the JOY letters from it. Finally, I cut the whole ornament from white cardstock and just kept the frame.
Next, I cut the main tag shape three times from white cardstock. I used my blending buddy brush to add some light teal dye ink as a shadow behind where the ornaments will be adhered. For some added interest I took a darker shade of teal ink, smooshed it on my glass mat, sprayed it with water and flicked it on the tags with a paintbrush.
Next, I used liquid glue and adhered my ornaments to each tag, then added the foiled JOY letters on top of each one. I finished things off by threading white satin ribbon through the hole and tied it with gold thread from my stash.
Aren’t these tags just beautiful?!? They will be the perfect accent to a Christmas gift bag or treat this season. I’m really excited to start putting things together and giving all of these creations out!
Happy Monday my friends! I’m super excited that it’s Thanksgiving week! We love Thanksgiving at our house. Getting together to hang out, play games, chat and eat good food! Seriously, what gets better…other than crafting? Haha!
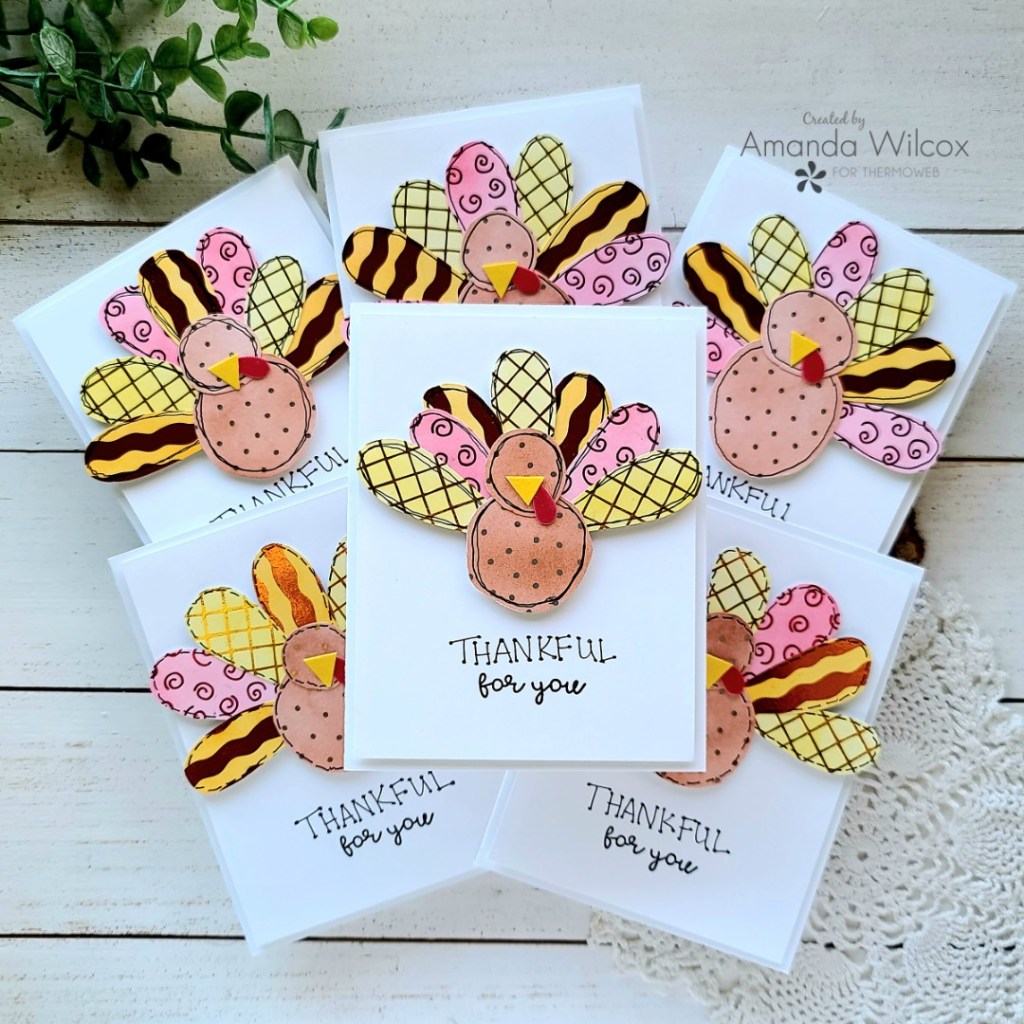
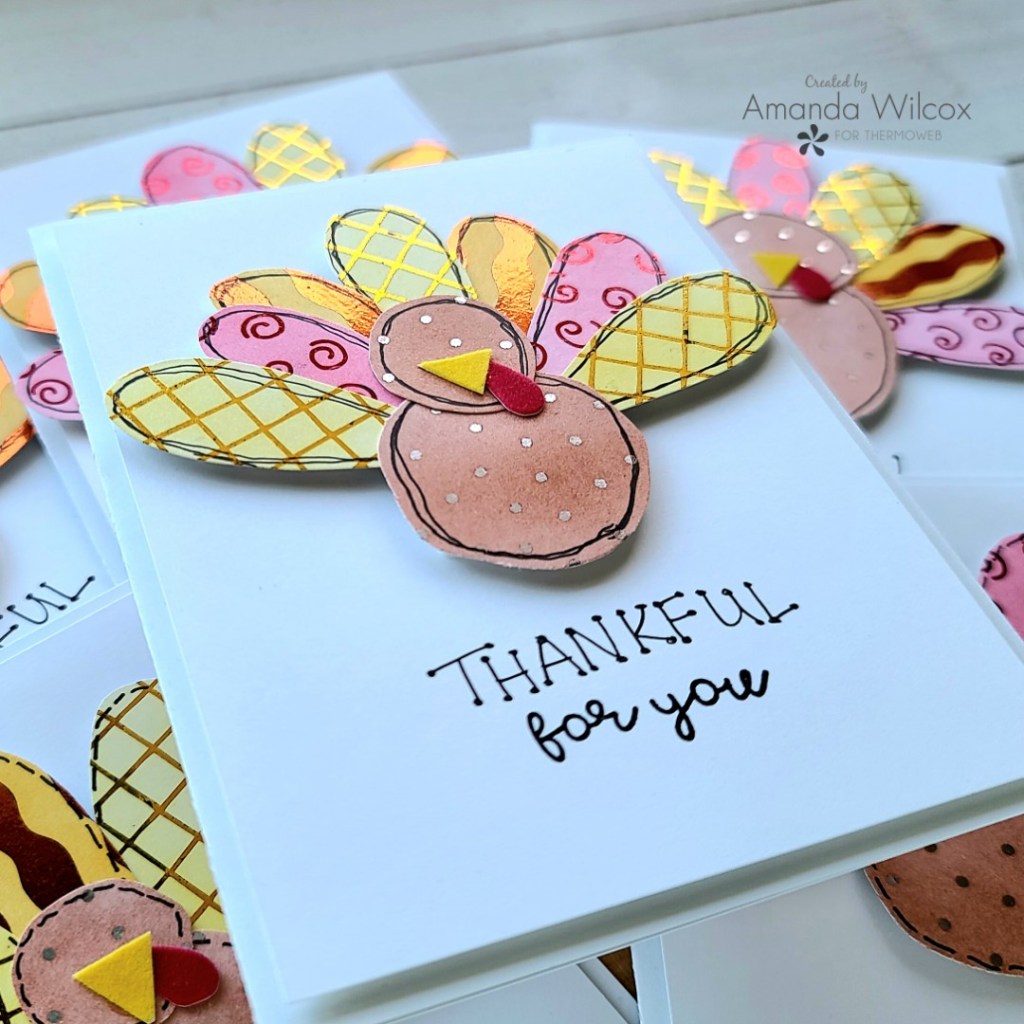
Today I’m over on the Thermoweb blog with this set of adorably fun deco foil thankful cards to share!
This ended up being one of those projects where I was having fun and just couldn’t stop so I ended up with 6 fun turkeys and that turned into 6 thankful cards. Not a bad problem to have though. I am excited to write in each one and give them out this week.
For all the details on how I made these, head over to the Thermoweb blog where I share a photo tutorial from start to finish and have links to all the products used too!
I appreciate you sharing your time with me. Have a fabulous day!
Happy Thursday everyone! I’m back with a little caffeinated inspiration from Miss Ink Stamps today! I had a little fun with one of my favorite gnome sets – Big Mugs and a new stencil – Lava Lamp. I also wanted to change things up a bit so I decided on a circular card today too!
I stamped my gnome out and colored him with copic markers before cutting him out with my scan-n-cut. Then I inked up a brown panel with the lava lamp stencil and white pigment ink using my blending buddy brush. I die cut the panel with an embossed edge circle from Trinity Stamps. Then I cut the next size up circle from kraft cardstock.
I created a white card base with the same circular die and adhered the kraft circle with liquid glue, then popped the stenciled circle up with foam tape. I felt like the gnome needed something behind him so I cut a smaller circle from vellum.
To hide my adhesive, I attached the gnome to the vellum with foam squares and hid tape runner on the back of the vellum behind the gnome only.
Last, I stamped a sentiment on a banner from Newton’s Nook Banner Trio set and popped it up with foam squares under the gnome’s feet.
For finishing touches I added some brown clay hearts from the Twiddler’s Nook Caffeinated Crafting embellishment mix and gave the image some white gel pen highlights.
Tomorrow is the last day to play along with the Coffee Lovers Fall | Winter Hop. Have you played along yet? I’m entering this cutie for sure!
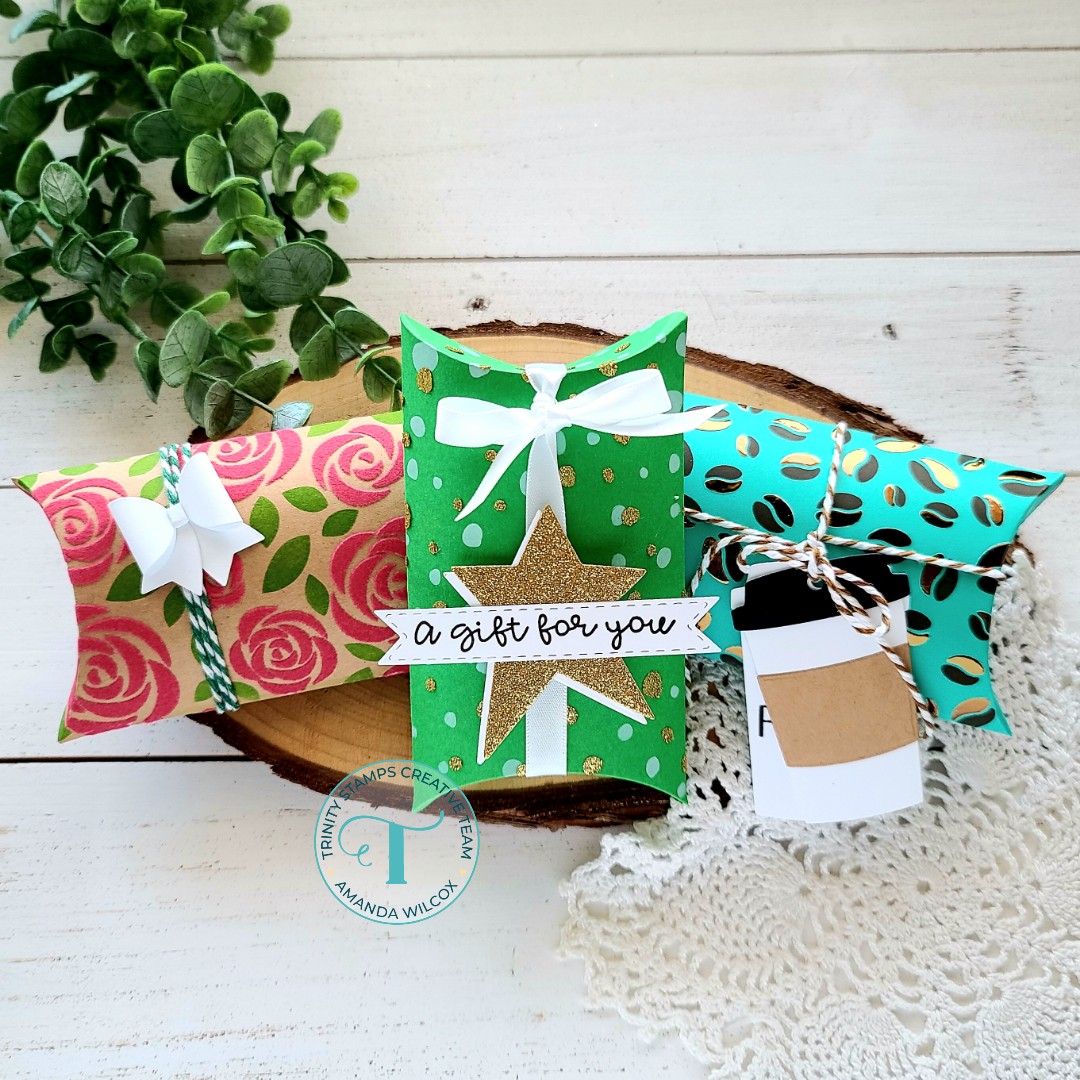
Oh my goodness my friends! I am BEYOND excited to share Trinity Stamps new release with you! Today I have 5 projects featuring the new pillow box die set and other products too! Here’s a peek at a couple of them and then we’ll take a look at each one on its own.
These first 3 that I’m sharing are like the Thermoweb trifecta! We’ve got flocked roses, glitzed snow and foiled coffee beans! How could you go wrong?!? Aren’t they fantastic!?! I love them all! Let’s look at some more, shall we?
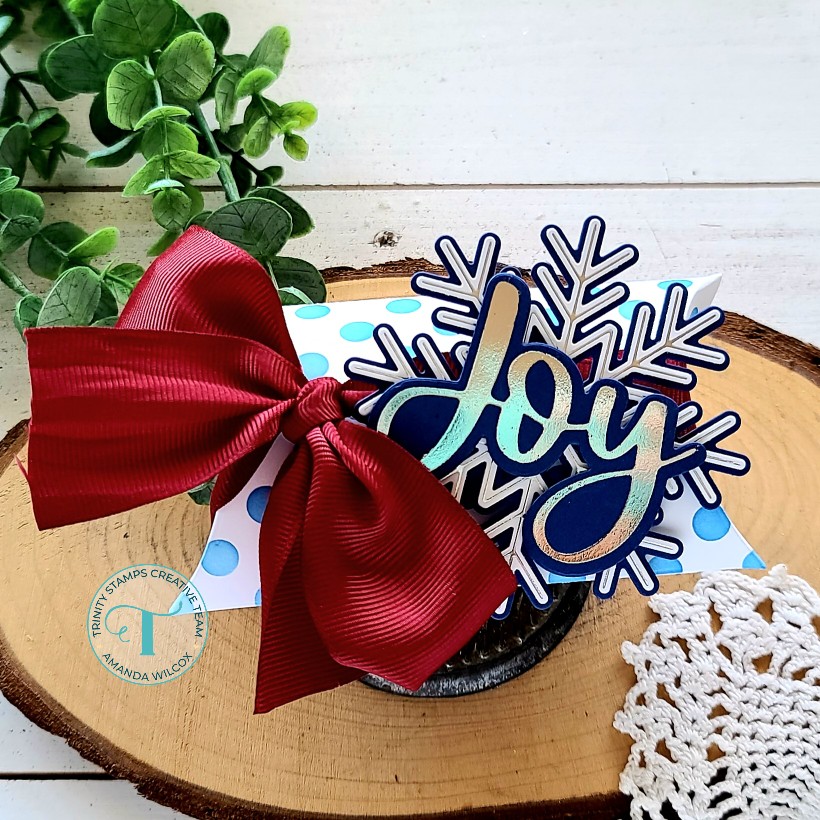
For this beauty, I foiled the big cut and foil snowflake and layered it on dark blue cardstock. Then foiled the cut and foil joy with the same silver foil on the same dark blue cardstock and adhered them with foam squares. I inked up the pillow box with the polka dot stencil and tied it with a fat red ribbon. Isn’t it stunning?!?
For this fun, lovey feeling box, I used the heart in the set to cut out a window and lined the inside with recycled packaging. I cut 2 additional hearts – one from white glitter cardstock and the second from plain white and used the new Holiday Tag Helper stamps to add a to and from.
Heading back to the trifecta at the beginning, I cut the pillow box for this one from green cardstock and inked one layer of the snowfall stencil with white pigment ink. Then I spread gold glitz glitter gel through the second layer and set it aside to dry. While I was waiting I cut 2 stars using the die in the set and adhered them together. Then I stamped another sentiment in the Holiday Tag Helpers stamp set and cut it out with the stitched banner from the Slimline Scalloped Card Panels and Banners die set. After assembling my box, I tied it lengthwise with white ribbon and adhered the star to that with foam squares.
For this sweet box, I inked up the leaf layer of the Bed of Roses stencil with green dye ink and then spread transfer gel blanco through the flower layer. Once it was dry, I ran it though my laminator with ruby red deco foil flock. I assembled the box, wrapped it with green baker’s twine and hid the twine connection with a white bow using the Bunch of Bows die set.
Last, but not least, I cut a teal pillow box and inked up the coffee bean stencil with brown ink for one layer and transfer gel for the second. After that was dry I ran it through my laminator with bronze deco foil for a fantastic shiny caffeinated treat box! Then I cut the coffee cup tag from the pillow box die set twice – one for a decoration with all the details and the second with another to and from included in the Holiday Tag Helper stamps.
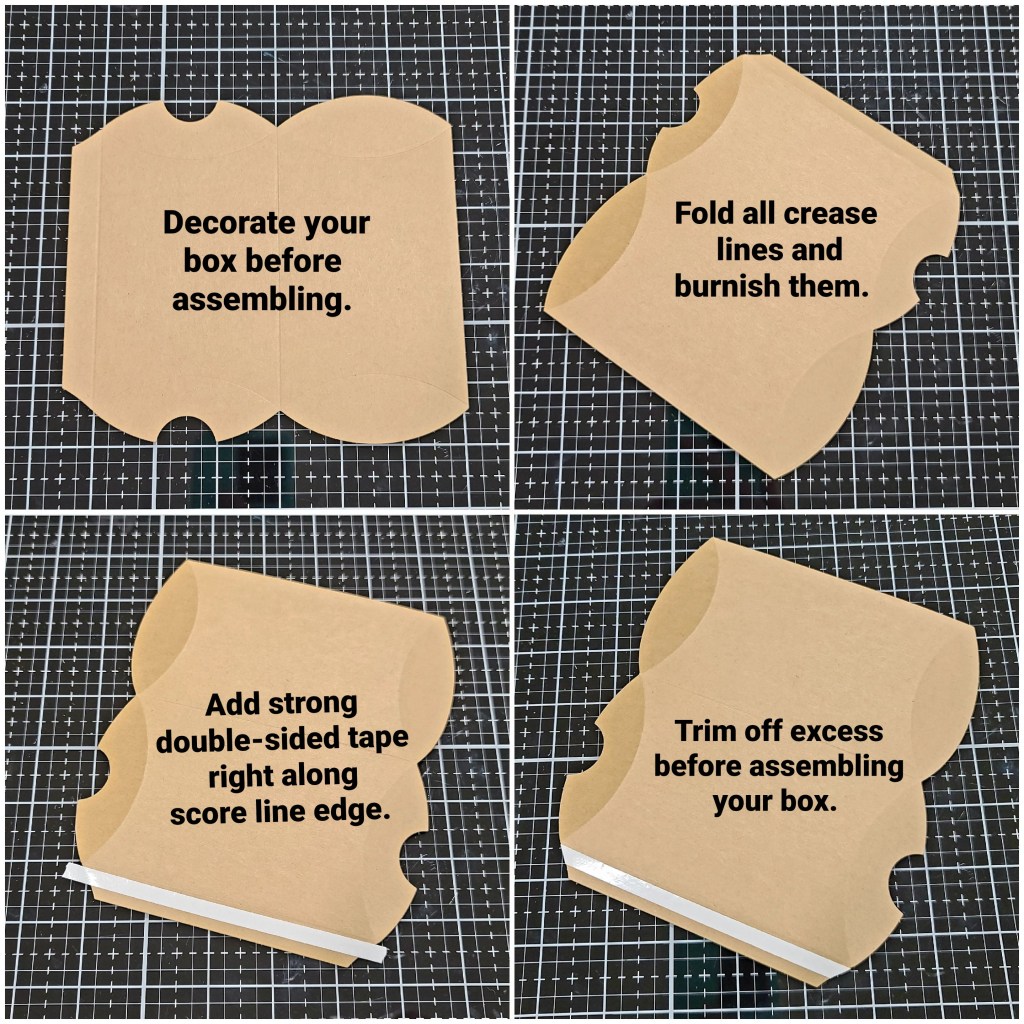
Now, before I go and leave you to your fabulous Thursday. I have a couple of helpful hints if you’re interested in creating wonderful gift boxes this holiday season.
Starting in the top left and going clockwise, this is the process I found most helpful. And, honestly, the biggest part of this simple step-by-step is the way you add your adhesive to the tab that closes your box. Taking completely from one edge to another is very helpful in keeping the box closed when it’s got something inside, possibly pushing at the seam.
Next is simply a preference thing. I made this red box very first cutting the dies apart straight out of my package. When I folded it I though, darn it! So, here I am sharing in case you like to hide the closure of the box too. I make a point now to decorate the side with no finger notches as if it’s going to be the front of my box. The stenciling may go all the way around but my tag and such go on that side.
I hope those help you out a little and you have a total blast creating this fun boxes!
Now, that you’ve stuck with me through this huge post, which I appreciate more than you know! You can head to the Trinity Stamps shop and snag some new goodies HERE or you can head to Instagram and hop along for even more inspiration HERE.
I appreciate you sharing your time with me. Have a fabulous day!
Welcome friends! Today I’m popping in with a little sneak peek of some products coming up in the next Trinity Stamps release which goes live TOMORROW!!! It’s got some super fun holiday products that get you well into the New Year and beyond! Can’t wait for you to see it all!
Today I get to sneak the new bottle tag die set with you! I cut the main bottle tag from the new slimline mixed media paper and ink blended it with my blending buddy brushes. Then I took the new Simply Sentimental – Happy stamp set and stamped the happy in all the fonts all over the paper. Next, I wanted some shimmer so I flicked pearl and gold watercolor all over the panel.
Then I used the Simply Sentimental – Happy dies and cut one from black cardstock for the letters and white for the shadow. I used liquid glue to adhere them together and popped them up on the tag with foam squares. I stamped and heat embossed “new year” from the stamps set on black cardstock and trimmed it into a strip, popping it up below the happy.
I really excited for all of the new products that release tomorrow! I’ll be back then with another fun blog post using a whole new set of products available and also remember we’ll have an Instagram hop with tons of inspiration and a chance to win a gift card to the Trinity Stamps shop too!
I appreciate you sharing your time with me. Have a fabulous day!
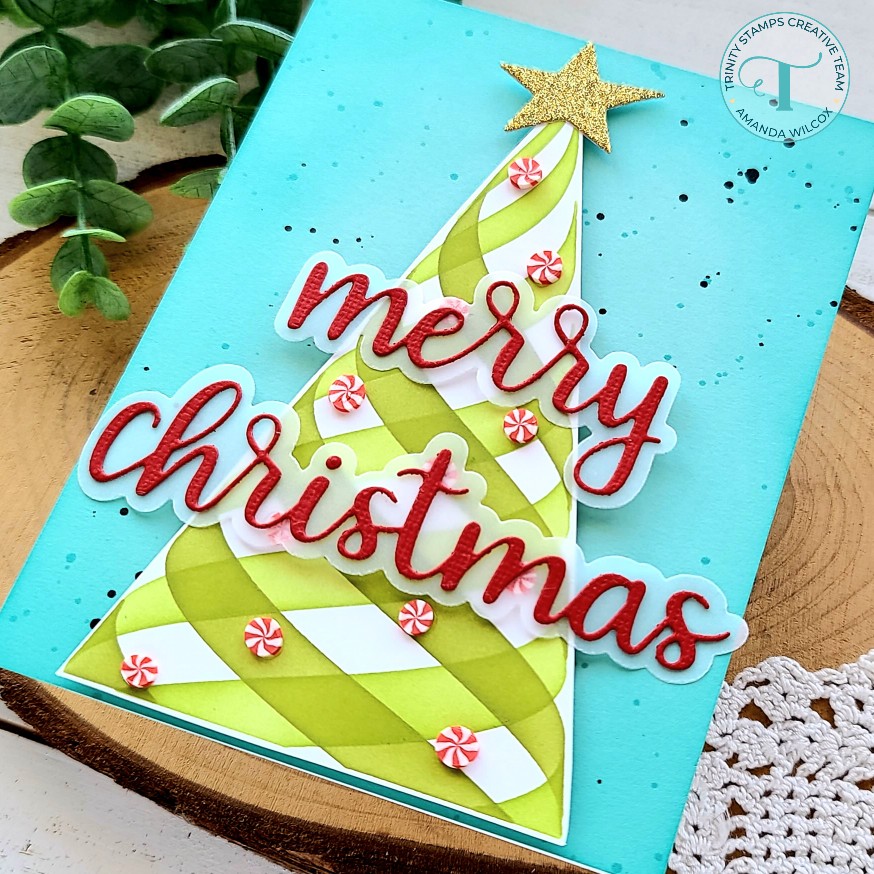
Welcome again crafty friends! Today I’m over on the Trinity Stamps blog sharing another version of the ribbon twirl tree stencil. These new layering stencils from Trinity are fabulous, so easy to use and come out stunning in a million different combinations!
I started today by inking up the ribbon twirl tree stencil with green dye ink and my blending buddy brush. Then I used my scissors and cut it out. I really wanted a fun star for my tree so I used the star die from We Wish You a Merry Christmas die set and cut it from gold glitter cardstock. I used liquid glue to adhere it.
For the background, I cut a piece of teal cardstock and inked the edges with peacock feathers distress oxide ink. Then I flicked some watered down ink across the design and also black acrylic paint. After it was dry I adhered it to a white card base and popped my tree up with foam tape. Next, I glued some peppermint candy clay embellishments on the tree with liquid glue.
To finish my card off, I die cut the Scripty Christmas layers from vellum and red cardstock and used liquid glue to adhere them together and to my card front.
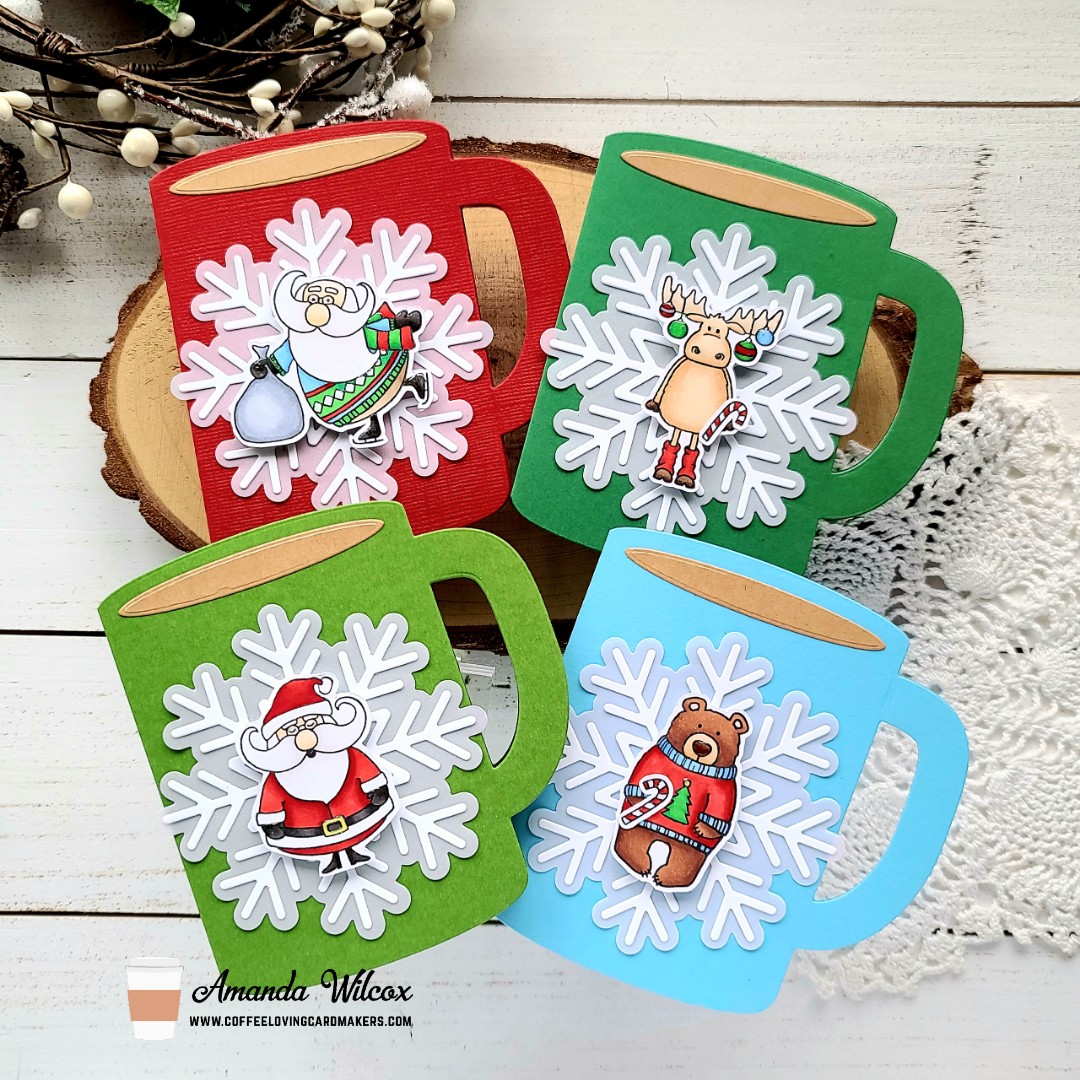
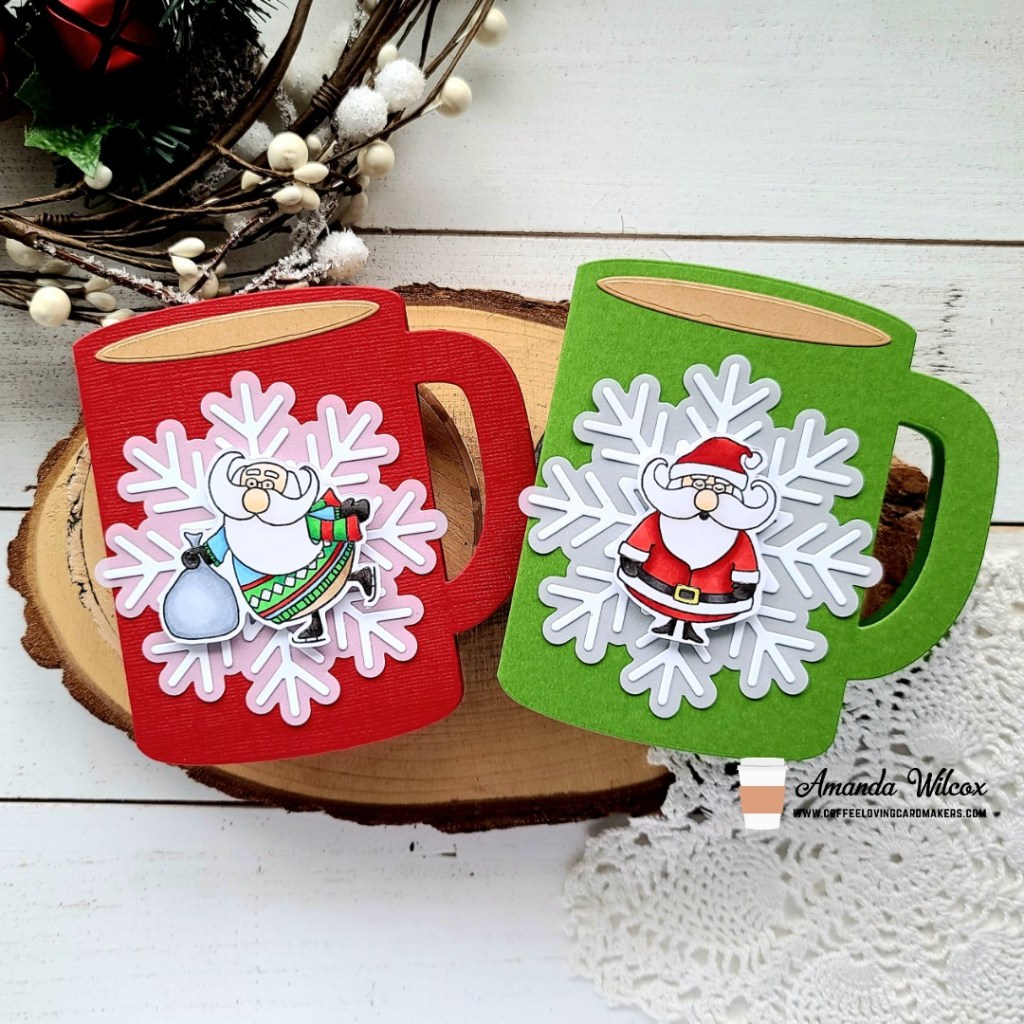
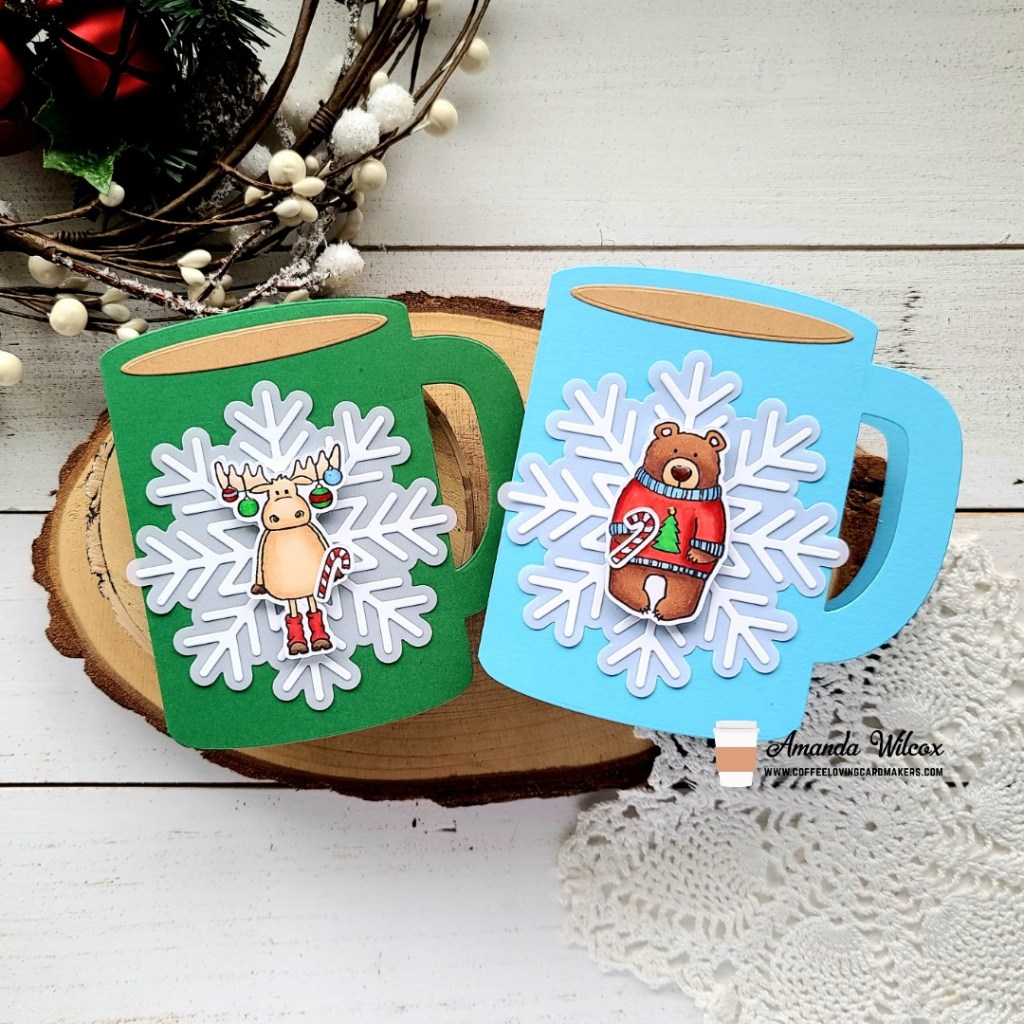
Hey there! It’s Tuesday Tea over on the Coffee Loving Cardmakers blog today and I’ve got a whole set of absolutely adorable cards to share with you!
I was really itching to color these cuties from Jane’s Doodles so I pulled them out and did just that. They are from Warm and Cozy and St. Nick. I colored the images with my copic markers and use the scan-n-cut to cut them out. Then I pulled out the every amazing Trinity Stamps Coffee Mug Card die and cut some mugs and the little oval that looks like coffee in the cup.
For a little something I decided to add the Trinity Stamps Cut and Foil Snowflake behind each image. I cut the shadow from iridescent vellum and the snowflake from white cardstock. I adhered them with liquid glue and then adhered them to the mug. I popped eahc image up on their mug and moved on to finishing touches.
For those I just added bits of glossy accents to each image somewhere. Things like critter noses, St. Nick’s glasses, candy cane strips and ornaments.
I actually plan to stick hot cocoa packets in each of these and tie the handles with ribbon but they would be adorable cards or gift card holders for the holidays too!
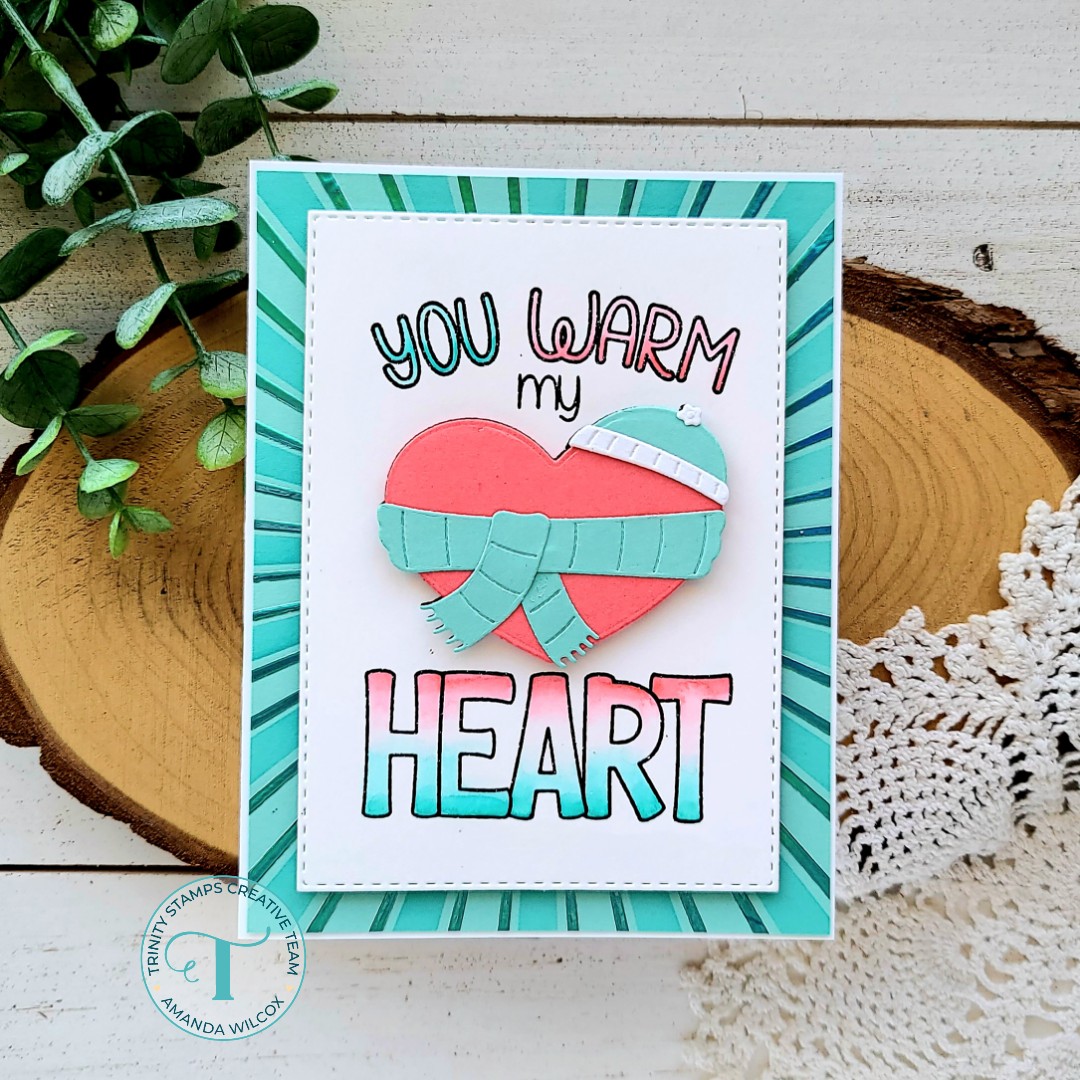
Hey everyone! Thanks for stopping by. Today I have a Trinity Stamps card to share with you featuring the Warm Heart stamps and dies that are designed by Love Dani Studio. Her word art is always beautiful and so fun to color! Today I combined the stamp with the paper piecing portion of the dies and threw in a little Thermoweb amazingness for some pizazz!
I started by stamping the image on Bristol Smooth cardstock with versamark ink and heat embossed it in black. Then I used my Zig Clean Color Real Brush markers to watercolor the words. I cut the panel out with a stitched rectangle from the 4-Bar Card die set. Next, I chose some cardstock colors close to the words and cut the pieces for the heart. I used liquid glue to adhere them together and popped them up on the watercolored panel with foam squares.
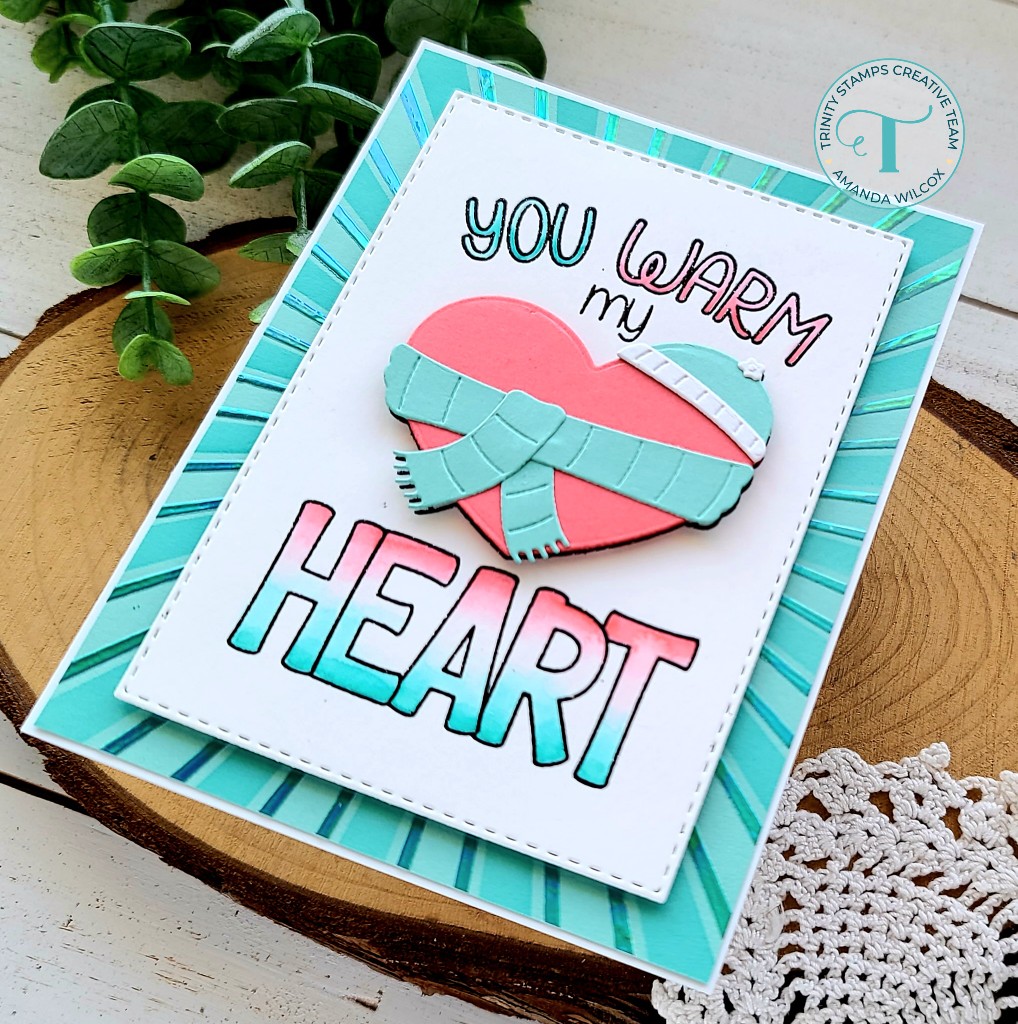
I cut another panel of the teal cardstock I used for the scarf and hat and taped the first layer of the Catching Some Rays stencil to it. I inked it up with a teal dye ink, then switched to the second layer. For this I spread Thermoweb transfer gel blanco through it, removed the stencil and set the panel aside to dry while I cleaned up. Once it was dry, I heated up my laminator and ran it through with glass slipper deco foil. I trimmed the panel down to 4×5.25 and adhered it to a white card base. Then I popped the sentiment panel up with foam tape over the stenciling.
Here’s a look at the amazing foil in the light. It plays so perfectly with all the teal and looks amazing when you move the card around. I just love how this turned out! It’s just warm and fuzzy looking at it!
I hope you enjoyed today’s card and found some inspiration to create something wonderful to share with someone!