Trinity Stamps – Batty For You String Art

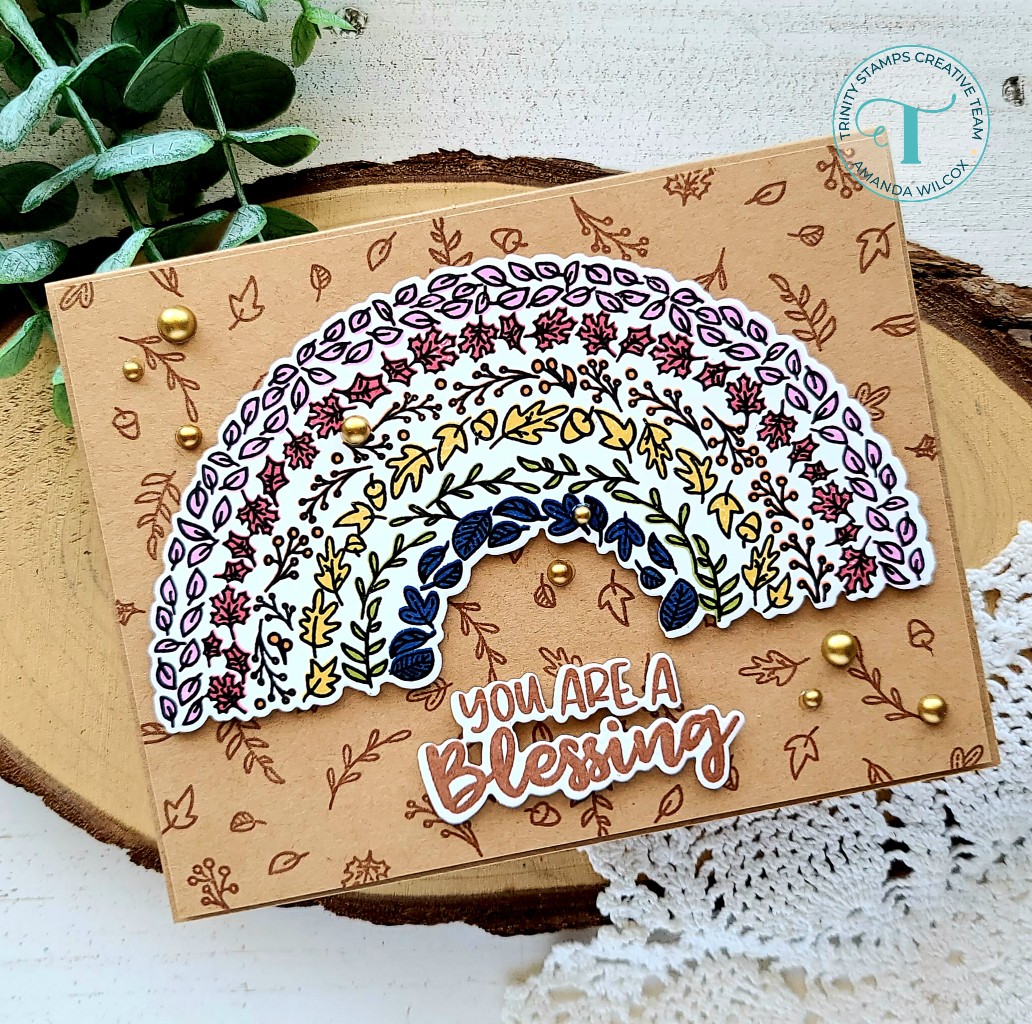
Well, hello friends! Fancy meeting you here. 😉 I’m over on the Trinity Stamps blog today sharing a fun decoration I made for my festively fall decorated mantel! I make a big deal about the mantel because I’ve wanted one since we bought this house and my wonderful husband built a custom one last winter so this is my first fall season being able to decorate it! It’s so fun!

I love swiping the 2×4 scraps from the garage when my husband builds things. This one is about 6 inches tall. Here’s a little photo step-by-step in case you want to try it out!

Sand your piece of wood down to the smoothness/shape you’re looking for. Then paint it with acrylic paint. For this project I put the dry block in my splatter box and added flicks of pearl and gold watercolor all over it and let it dry.

To make a template for my moon, I die cut a circle from white cardstock and then I took the circle one size smaller and cut the side off, creating a crescent shape. I placed it on my block and used a pencil to make dots about 1/2 inch apart, maybe a little more. If you’re more comfortable, you could mark on your cardstock first so that you know if you like the spacing or not. I’ve done enough of these to just wing it now.

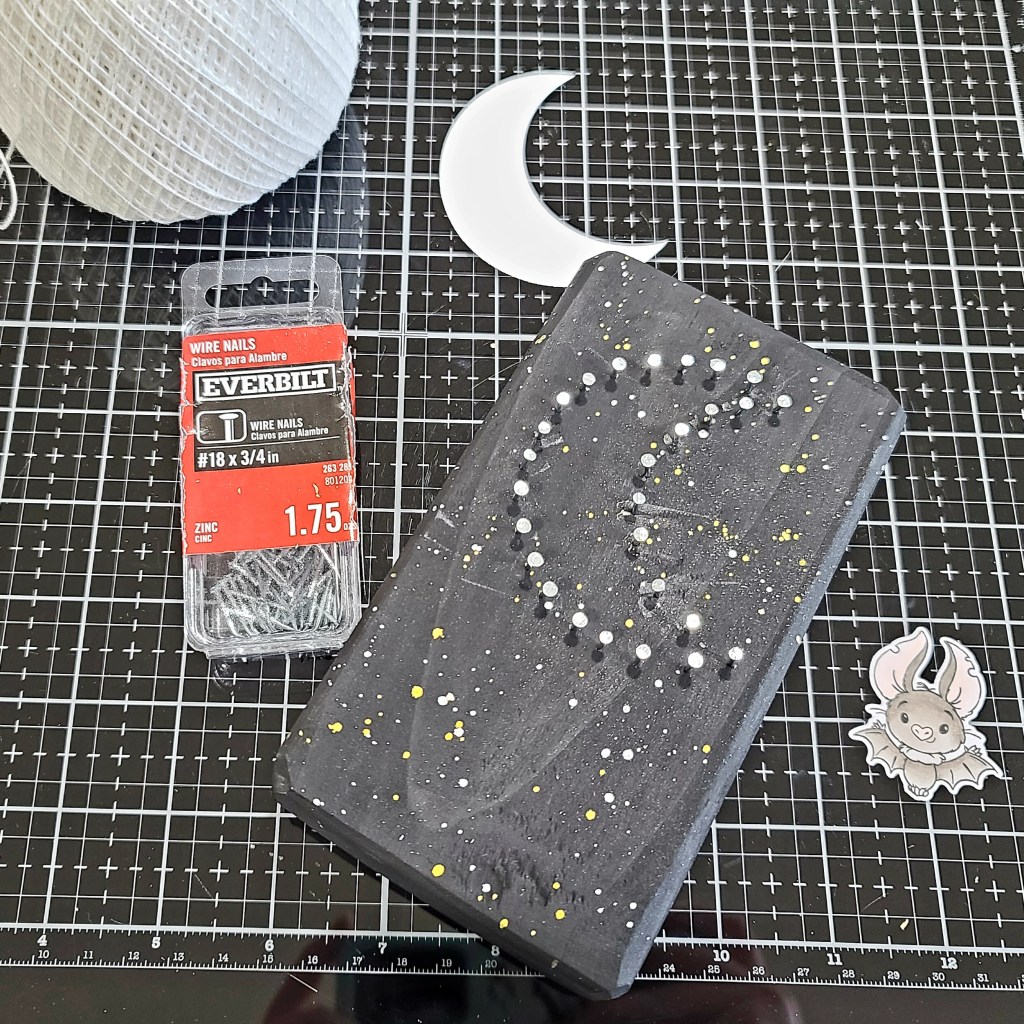
After I marked the dots, I hammered in penny nails so they stick up about a 1/2 inch out of the wood. I tied embroidery thread to one nail and started winding and wrapping. It’s not rocket science and the more imperfect, the more fun it looks…to me at least.

I tied off the thread and trimmed the tails. The knots are hidden beneath the wrapped thread naturally so it’s not a worry. Then I stamped my favorite little bat from Fang-tastic Friends, colored him with simple copics and die cut him out. I added black foam squares under him, it took 3 stacked to get him the same height as the nails.

I stamped a sentiment from the same set and heat embossed it on black cardstock. Then I used the banner die from the 4-Bar Card die set to cut it out. I used a foam strip to attach it to the wood block.

For finishing touches, I added some glossy accents to the bat and then glued a scattering of these awesome Glowing Sky clay embellishments all over. They glow in the dark which makes this extra awesome at night!

I am just tickled with how this fun decoration turned out! Have you ever made string art before? I love the way they look but have had even more fun adding stamped images to the designs over the last year. It changes the whole look!

Products used today:
Fang-tastic Friends stamps and dies
Embossed Edge Circle Stack dies
4-bar Card dies
Glowing Sky embellishments
Foam squares
Ultra Bond liquid adhesive
Glossy accents
Copic markers

I appreciate you sharing your time with me. Have a fang-tastic day!

Miss Ink Stamps – Everything I Boo…

Hello there! Today I’m playing with the most recent Miss Ink Stamps Halloween release. It’s so stinking cut and super fun to create with. This time I’ve created a simple heart shaped card with a Halloween flair to it.

I stamped and cut out the ghosts from Kindred Spirits and just outlined the inside of them with a B0000 copic marker for that glowing look.

I started creating my card base with Trinity Stamps Nested Hearts dies by cutting the largest heart from black cardstock. Then I folded a piece of white cardstock in half and hung the same die over the top edge by about a 1/4 inch and cut it out. Then I glued the two pieces together. However, because the edge of the white card base was a teeny bit visible I took a black marker and went around the whole edge.

Next, I inked up a scrap of cardstock with distress oxide inks in carved pumpkin and seedless preserves. I sprized it with water and blotted it dry. Then I layerd the Hand Drawn Hearts stencil over top and spread black glitter glitz gel from Thermoweb through it. Once that panel was dry I added foam tape and centered it on the card base. Then I added foam tape to the ghosts and popped them up as well.

I really liked the simple look on the front of this card and didn’t want to muddle it with a sentiment so I stamped and trimmed one from the set, mounted it on a slightly larger piece of black cardstock and adhered it inside.

Just perfect for a significant other and it all fits in an A2 size envelope still!

Products used on today’s card:
Miss Ink Stamps Kindred Spirits stamps
Miss Ink Stamps Hand Drawn Hearts stencil
Trinity Stamps Nested Hearts dies
Distress Oxide – carved pumpkin, seedless preserves
Thermoweb 3D foam tape roll

I appreciate you sharing your time with me. Have a fabulous day!

Trinity Stamps – Hello Bootiful

Hey friends! I’m popping in today with a fun Trinity Stamps Halloween slimline card. These products released last year for fall but I didn’t get a chance to use them and there was no way I was going another season without! They are so much fun! I especially love the font of the Hello Bootiful dies, don’t you?!?

To create this card, I ink blended a panel with distress oxides in seedless preserves, twisted citron and carved pumpkin. These three colors have become my staple Halloween trio this year. I love them together and seriously can’t get enough! After they were blended nicely I die cut the panel with the largest scalloped slimline panel die.

Then I stamped the main image from Slimline Boos on a white panel and cut it out with the smallest Stitched Slimline Panels die. I adhered the inked panel to a white card base with liquid glue and popped the ghosts up with foam tape.

Next, I die cut the Hello Bootiful dies five times – black, white, green, purple and orange. I used liquid glue to adhere them together slightly offsetting each layer. Then I used liquid glue to adhere them to the ghost panel.

For finishing touches, I went over the top layer of the sentiment with Wink of Stella glitter brush pen so it shimmers in the light really well! It’s super fun! And, my card is finished!

Products used on today’s card:
Slimline Boos stamps
Slimline Scalloped Panels and Banners dies
Slimline Stitched Card Panels and Windows dies
Hello Bootiful dies
Distress Oxide – seedless preserves, twisted citron, carved pumpkin
Wink of Stella glitter brush pen
Ultra Bond liquid adhesive
3D foam tape

I appreciate you sharing your time with me. Have a faBOOlous day!!!

Thermoweb – Coffee Shaker with Toner Foiling

Welcome back everyone! Today I’m over on the Thermoweb blog with a tutorial how I created this fun coffee themed shaker card using Brutus Monroe toner card fronts and decofoil!

This tide pool decofoil is so awesome in the light and using the microbeads from the Twiddler’s Nook shop as shaker bits is just added fun!

Be sure to head to the Thermoweb blog for all the details and products used to create this fun interactive card!

I appreciate you popping in today. Have a fabulous day!

Miss Ink Stamps – Release Day | Welcome Home

Hey! Hey!!!! It’s release day for Miss Ink Stamps! This Halloween release is beyond amazing and SO MUCH FUN!!! Today I’m sharing a card featuring the new set called Welcome Home and it’s just adorable plus it’s packed with super fun sentiments too!

I started by stamping my critters and coloring them with copic markers. Then I used the scan-n-cut to cut them all out. Next, I stamped the porch image from the set on a large piece of white cardstock and colored it with my copics as well. Then I die cut a Trinity Stamps Embossed Edge Rectangle from kraft cardstock and cut another from inside it to create a thick frame.

I adhred the scene panel to a card base and then added the frame next. For dimension and interest I added all of my critters with foam squares.

Then I chose two sentiments, stamped and trimmed them into strips and popped them up with foam strips as well.

For finishing touches I added glossy accents to various things all over the scene like lights, critter noses, pumpkin faces and such. Then I cam in with unicorn Stickles on other fun things like costumes.

This release is packed full of so many super fun sets so be sure to head over to the Miss Ink Stamps shop and have a look. Click HERE to get there.

Products used today:
Welcome Home stamps
Trinity Stamps Embossed Edge Rectangle dies
Stickles – unicorn
Glossy accents
Foam squares

I appreciate you sharing your time with me. Have a fabulous day!

Jane’s Doodles – Happy Halloween

Happy weekend my friends! I’m super excited to share this card with you today! I had been wanting these sets from Jane’s Doodles forever but I made myself wait until closer to Halloween…and then they were out of stock! Figures, right?!? Well, as soon as Jane restocked the shop I jumped on and ordered them and finally had a chance to play!

To create my background I blended distress oxides in crushed olive, ripe persimmon and seedless preserves. I spritzed the panel with water and let it dry. When I ink blend, I almost always use an oversized panel so once it was dry I die cut it with the Modern Embossed Edge Rectangle die from Trinity Stamps. Then I used my MISTI to stamp images from Jane’s Doodles Haunted House with VersaFine onyx black ink.

Then I stamped and heat embossed images from Winnie Halloween and Haunted House on Bristol Smooth cardstock. I used my Zig Clean Color Real Brush markers to watercolor them and then cut them out with the scan-n-cut.

I adhered my background panel to a card base with liquid glue and then added the images with a combination of liquid glue and foam squares.

Isn’t this card just too much fun! I am so happy with how it turned out and just how cute these images are!

Products used today:
Jane’s Doodles Haunted House
Jane’s Doodles Winnie Halloween
Trinity Stamps Embossed Edge Rectangle dies
iCraft Ultra Bond liquid adhesive
Foam squares

I appreciate you sharing your time with me. Have a fabulous day!

Trinity Stamps – Harvest Rainbow

Thanks for stopping in today. I have a short tutorial for you featuring the recently released Harvest Rainbow stamp and die set from Trinity Stamps. The idea of this set is just beautiful and when you put the color to paper it just doesn’t disappoint at all! So many variations are possible too! Practically endless!

Here’s a peek at the finished card before we dive in. I specifically chose a muted ink palette because I knew I wanted it to feel like fall and also mat it on a kraft card base. I think they work well together. Let’s get started, shall we?

I used my MISTI for all of the stamping today but you really don’t have to, it just makes life a little easier. I started by stamping the outline image in black. Then, working from the smallest rainbow band outward, I lined up and inked the solid images that fill the layers in. Super simple.

Then I used the coordinating dies to cut the rainbow out. Aren’t those colors so pretty together? This just makes me happy!

Next, I took a kraft panel and placed it in my MISTI. I pulled out all of the individual leaf stamps from the set and created a cluster. I stamped it and then rotated my paper and stamped it again. I rearranged the stamps and did it again. This left the center with a few gaps which I filled in individually. Then I trimmed this panel down to 4×5.25 inches and added foam tape to the back.

After popping the background panel up on a kraft card base, I added foam to the rainbow and placed it on my card too. I stamped the sentiment in the set and used the coordinating dies to cut it out next and popped it up with foam squares.

To finish things off I glued down a scattering of gold satin baubles across the design. I love the matte finish on these and how it gives a little shine without being overbearing on a more toned down color palette.

Products used on today’s card:
Harvest Rainbow stamps and dies
Gold Satin Baubles
Foam tape
Foam squares

I appreciate you sharing your time with me. Have a fabulous day!

Coffee Loving Cardmakers – Thanks a Latte

Happy Tuesday everyone! Grab a cuppa because it’s Tuesday Tea over on the Coffee Loving Cardmakers blog today. I’m still having a blast with the latest Trinity Stamps release. Today I took a stab at creating a shadow sentiment in my slimline image. It was really fun to create and the end result is pretty cool too.

To create this card, I stamped the Fa-BREW-lous image in black on white cardstock. I die cut the panel with a Slimline Modern Embossed Panel die so it would fit inside the dainty scallop panel. Then I took the Marshmallow alphabet die set and cut “thanks” from the center of it. To do this I lined the letters up on my craft mat and picked them up with post-it tape, then positioned them where I wanted them a cut. It helped that the letters in thanks are all different. Next, I cut the same letters from white cardstock 3 more times and adhered all the layers together with liquid adhesive.

I used my copic markers to color the images on the letters only. Next, I stamped a sentiment on white cardstock, cut it into a strip and colored it to match some of the cups in the letters.

I die cut a peachy-orange dainty scallop panel and adhered my stamped panel to that. Then I inlaid my letters and used foam strips to pop up my sentiment. Next, I added foam tape to the back of the scalloped panel and adhered it to a slimline card base.

I had a lot of fun taking this card from an idea to reality and think it turned out pretty cool. I hope you enjoyed it too.

Products used on today’s card:
Trinity Stamps Fa-BREW-lous stamps
Trinity Stamps Marshmallow alphabet dies
Trinity Stamps Slimline Modern Embossed Panel dies
Trinity Stamps Slimline Dainty Scallop Edge dies

I appreciate you sharing your time with me. Have a fa-BREW-lous day!

Trinity Stamps – Spooky Stenciled Scene Card

Welcome! Welcome! Come in! We mustn’t lurk in doorways dear, it’s rude! Hehe! Spooky like Ursula, I’ve got quite a scene card to share with you today! I had so much fun playing with stencils and layering inks to create this card! I hope you enjoy it too!

I really wanted to play with the new Trinity Stamps dies that coordinate with last year’s Pumpkinhead layering stencil. So I started with that. I die cut the pumpkins from orange cardstock and the stems from green. Then used the stencil to add depth and dimension to them. I die cut a spooky face from one and backed it with black to make it scary instead of lit up.

Then for my background panel I inked up the October Night Sky stencil. I started with the trees on each side and then filled in the dark spooky air. For these I used dye inks and my blending buddy brushes. Then for the fog I came in with speckled egg distress oxide ink so that it sits on top of the other images a little, really giving that eerie feeling. Last, I inked up the bats with VersaFine onyx black ink because it gives a dark crisp layer and also stamped my sentiment in the same ink. This came from the Pick of the Patch stamp set.

I die cut my scene with the Modern Embossed Rectangle Stack die and adhered it to a white card base. Then I added foam squares to my pumpkins and popped them up at the bottom of my scene, which finishes off my card.

Typically I come in with shiny and sparkly things but I refrained on this card because I just love the Halloween spooky vibe it has!

Products used on today’s card:
Pumpkinhead stencils and dies
Modern Embossed Edge Rectangle dies
October Night Sky stencils
Blending buddy brushes
foam squares

I appreciate you sharing your time with me. Have a fabulous day!

Jane’s Doodles – Oh Crab!

Happy weekend everyone! I have a fun little slimline watercolor card to share with you today. Every once in a while I just get the itch to watercolor and get messy so that’s what I did for this bright, fun oops, forgot your birthday card.

To start, I stamped and heat embossed my images from Jane’s Doodles Under the Sea stamp set. Then I used my Zig Clean Color Real Brush markers and a water brush pen to watercolor all of them. When I do this, I really prefer either watercolor paper or bristol smooth. These markers blend so well on them! After they were dry I used the scan-n-cut to cut them all out.

Next I die cut a mini slimline stitched panel and inked it up with distress oxide inks – gathered twigs for the ground and salty ocean with cracked pistachio for the water. Then I stamped some other images and a sentiment on them with VersaFine onxy black ink. I find this ink sits on top of the oxides really well and dries perfectly!

Finally, I added foam squares to my images and popped them all in place. Then I used liquid glue to adhere my panel to a card base measuring 3×6 inches and created a mini slimline envelope to go with it!

I mean, at least it’s a happy looking card to apologize for messing up. Haha! Am I right?!? 😉

Products used on today’s card:
Jane’s Doodles Under the Sea stamps
Trinity Stamps Mini Slimline Card and Envelope Builder dies
Trinity Stamps Mini Slimline Stitched Panel dies
Distress Oxide Ink – gathered twigs, salty ocean, cracked pistachio
Foam squares
Scrappy tape – 1/4 inch

I appreciate you sharing your time with me. Have a fabulous day!