Newton’s Nook meets Spellbinders – Autumn Mice

I’m super excited to share today’s interactive card. I recently caved and ordered the festive wreath slider die set from Spellbinders and couldn’t wait to test it out! That paired with the new Inky Paws Challenge, I knew they had to meet.

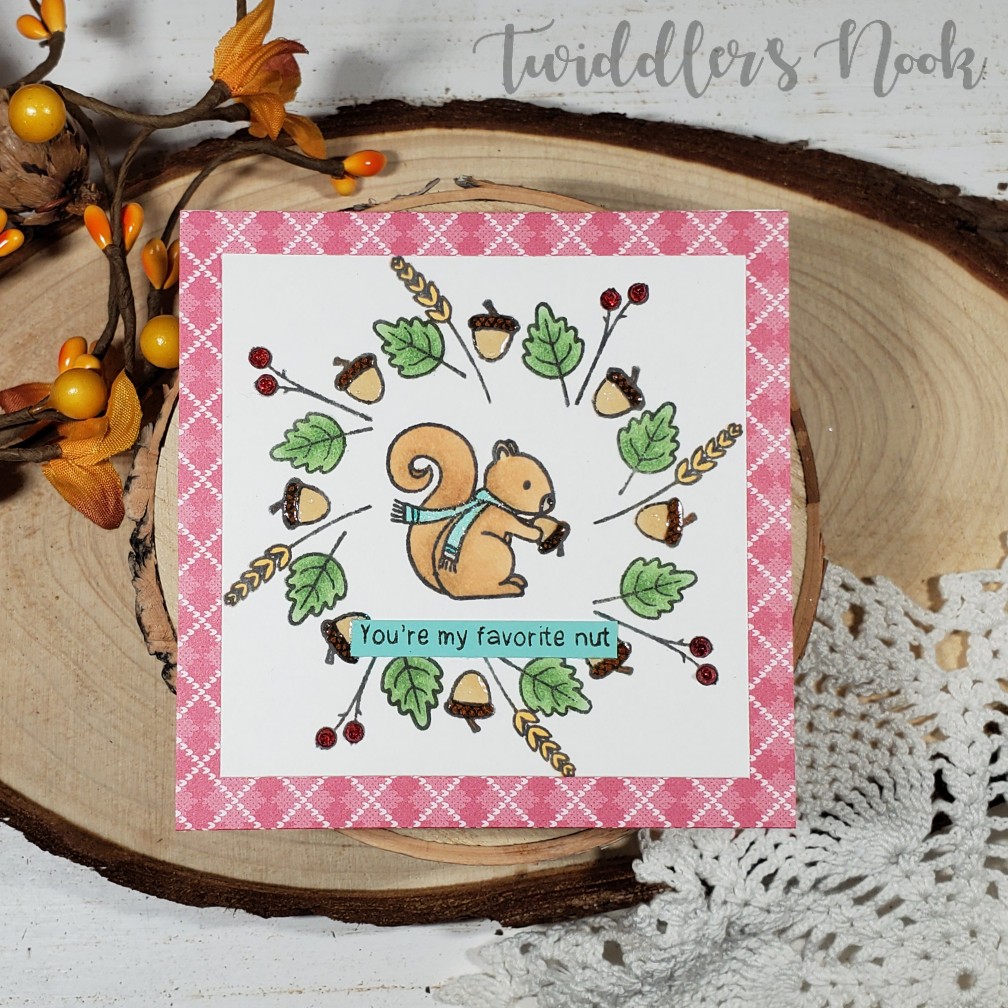
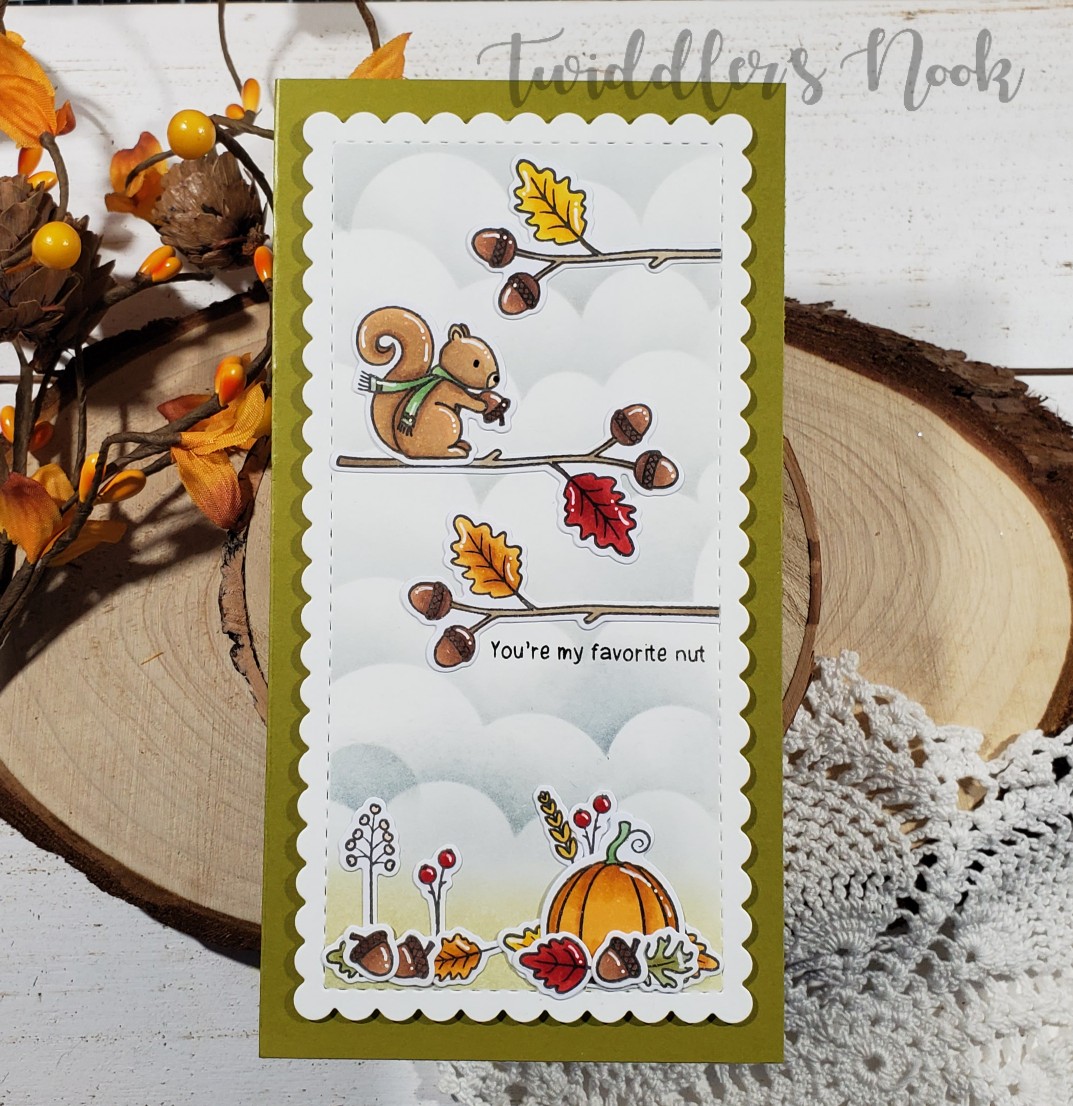
The theme this challenge is holiday mix-up so we can create any Halloween, Thanksgiving or Christmas card to enter. I’ve been making so many Christmas cards lately that it was a welcome idea to back up and enjoy fall for at least one or two more cards. So, I pulled out my Autumn Mice and started coloring.

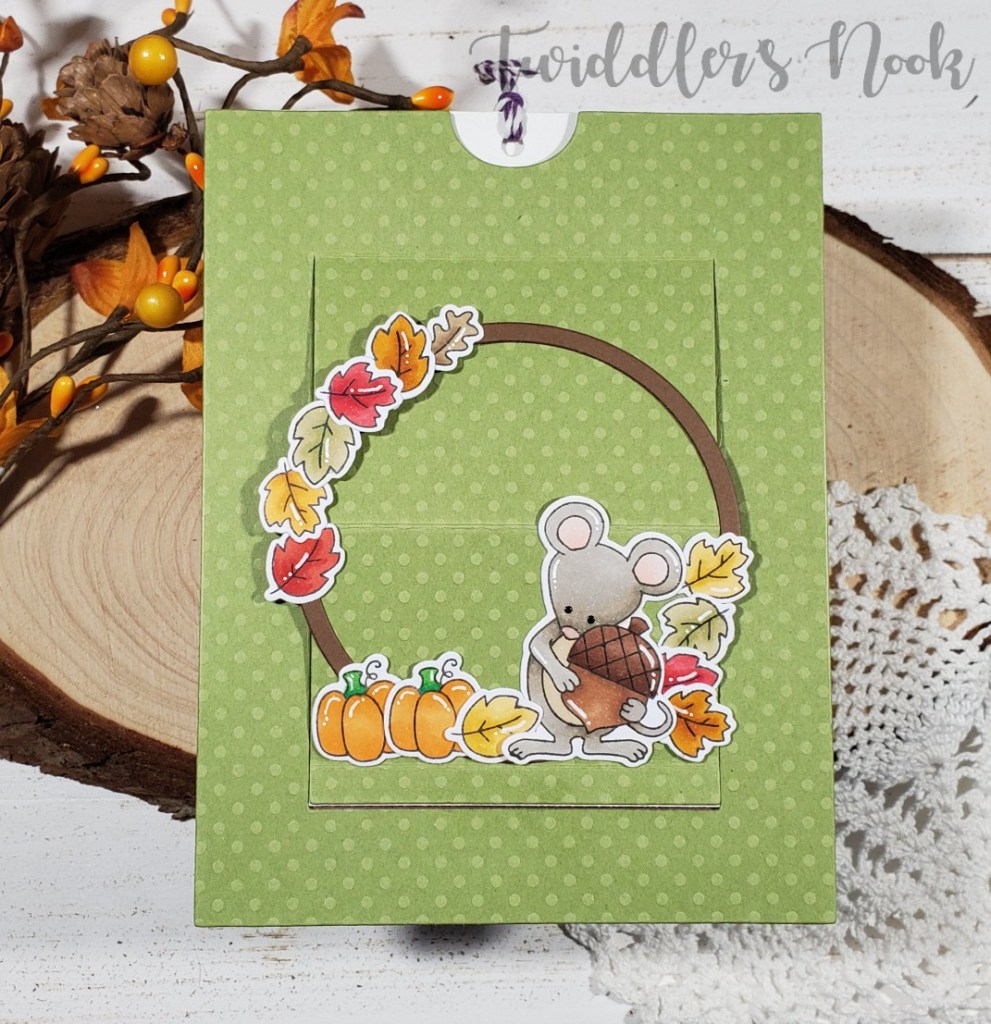
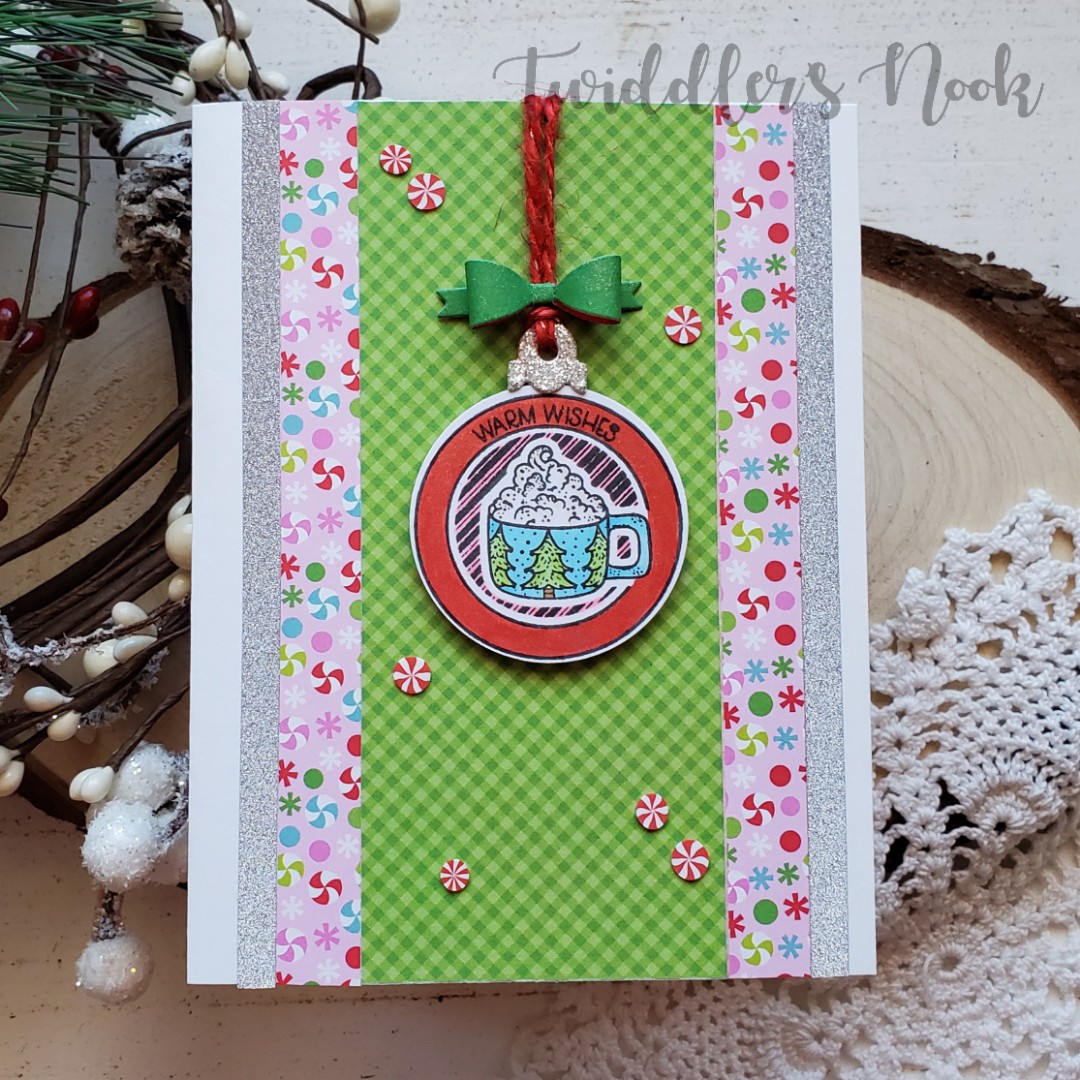
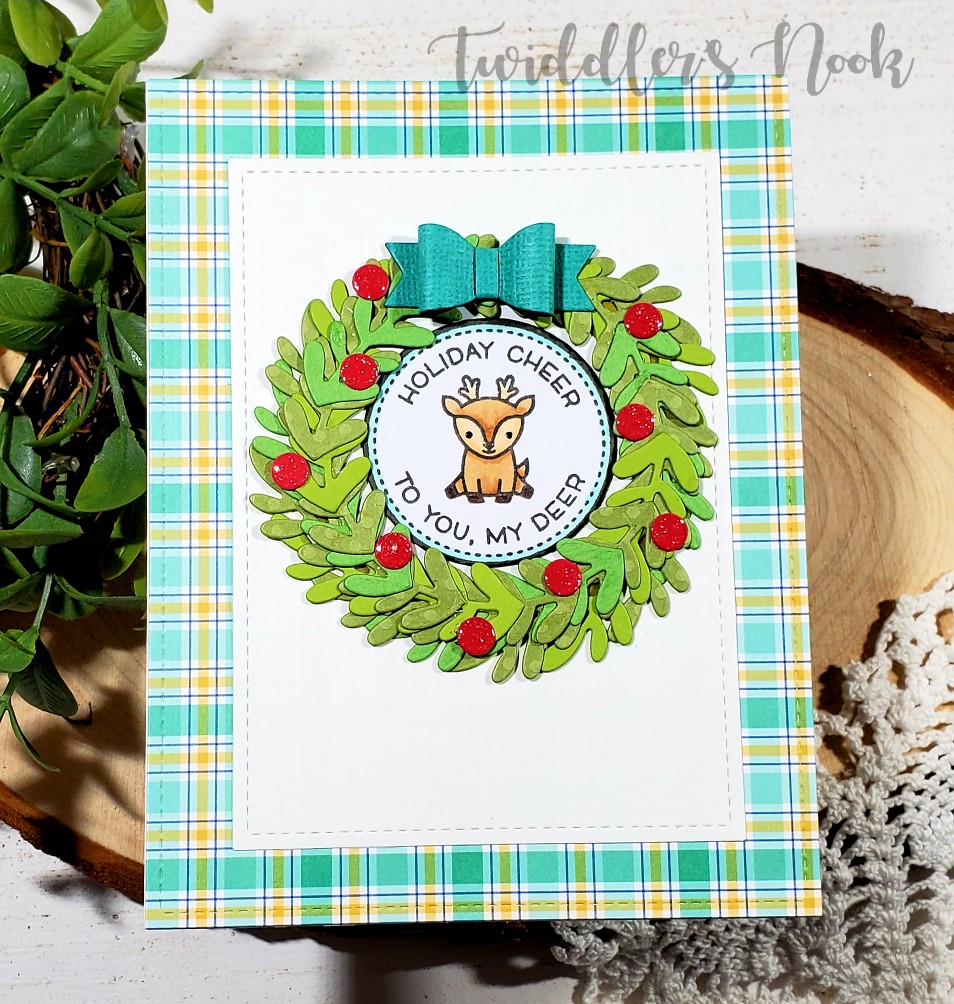
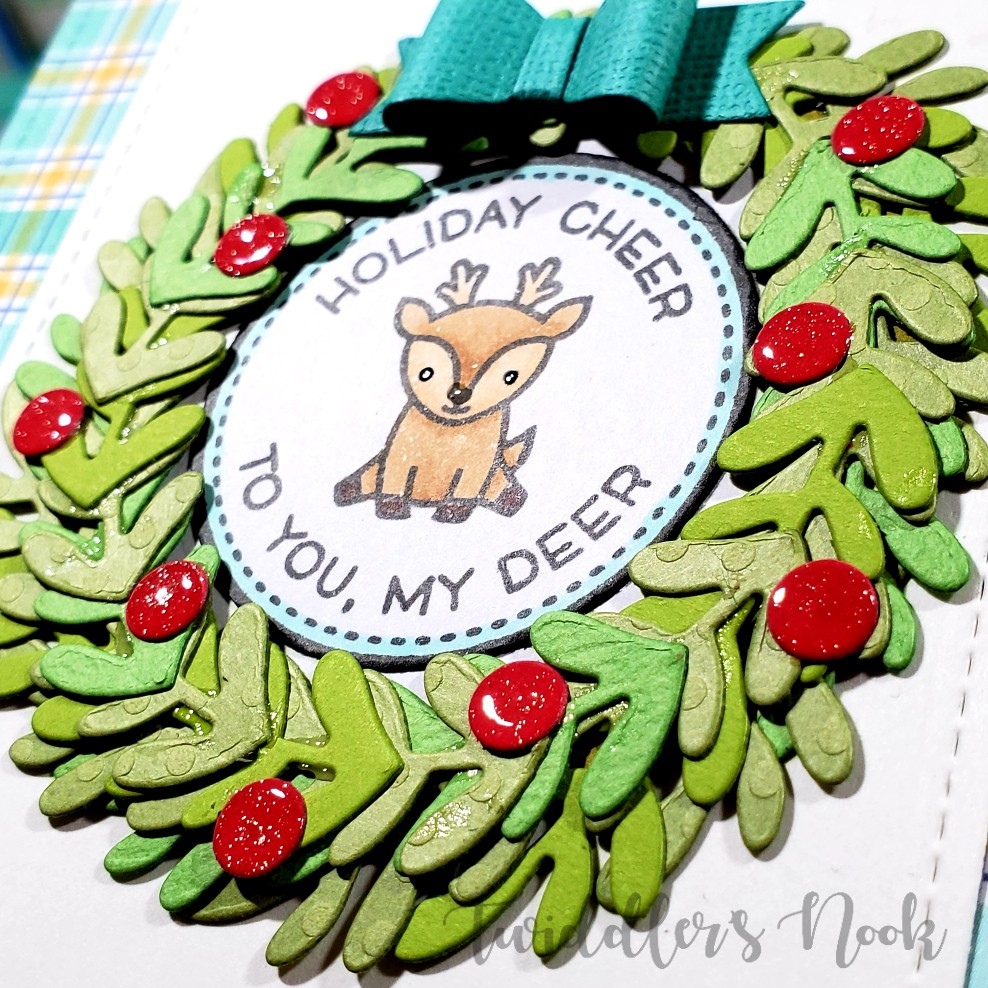
Here’s a look at the card closed up like it would be coming out of the envelope. To make it I just die cut the elements from the set and built the interactive part of the card. Then I built my wreath and attached it to the bottom half of the slider so everything still opens like it’s supposed to.

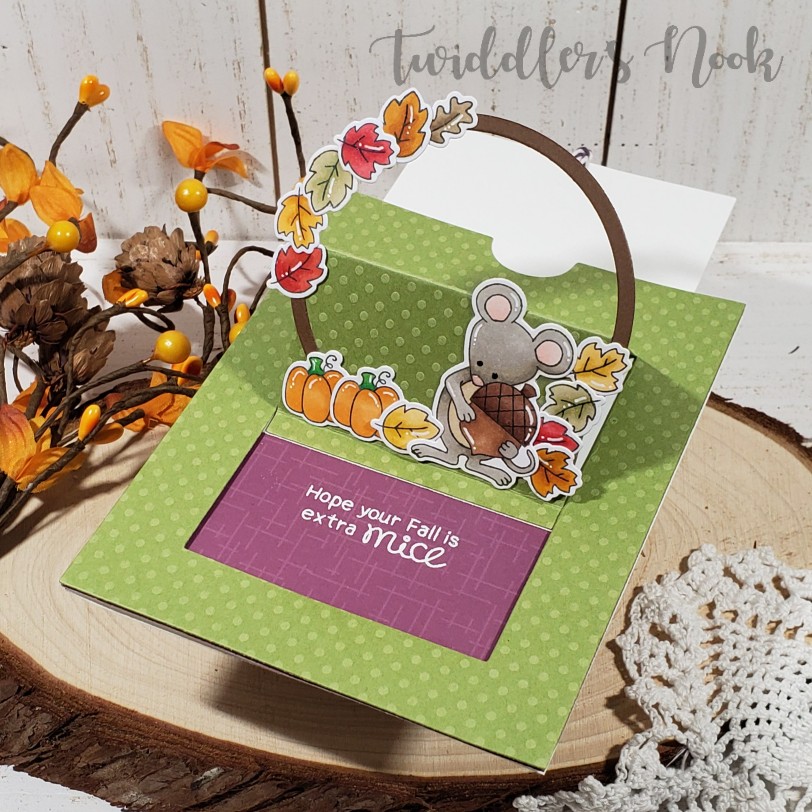
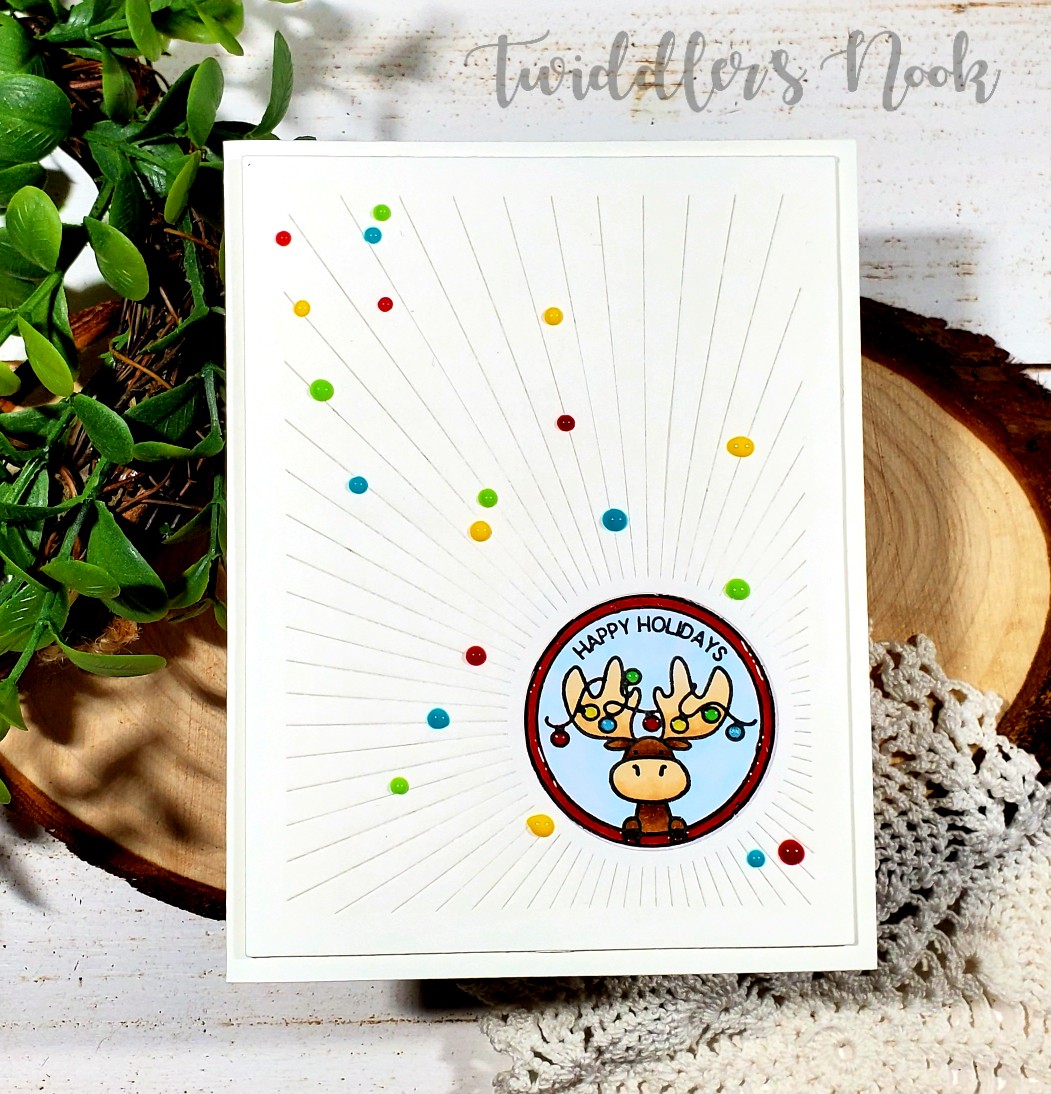
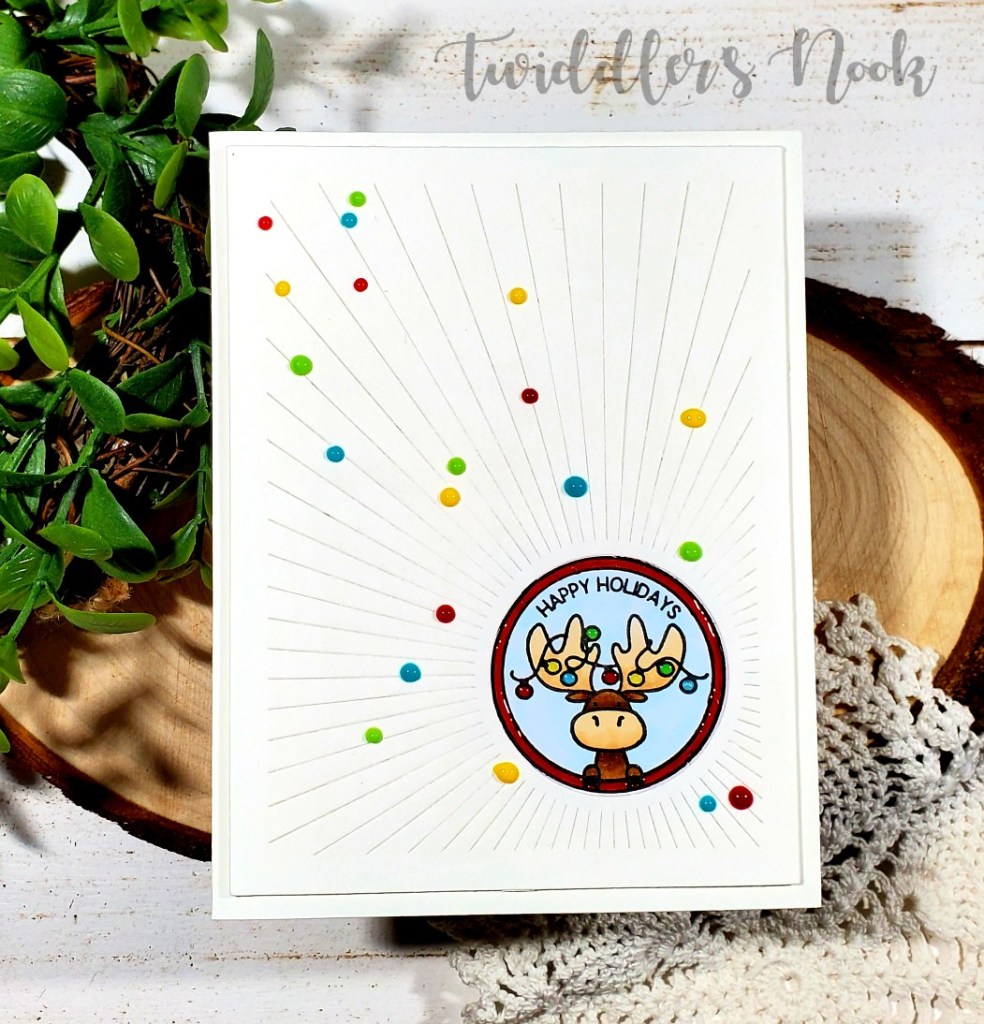
Here you can see that when you pull the tab, the window slides back and reveals this sweet sentiment that I heat embossed in white. I love the pop of deep purple against all the other fall colors in the card.

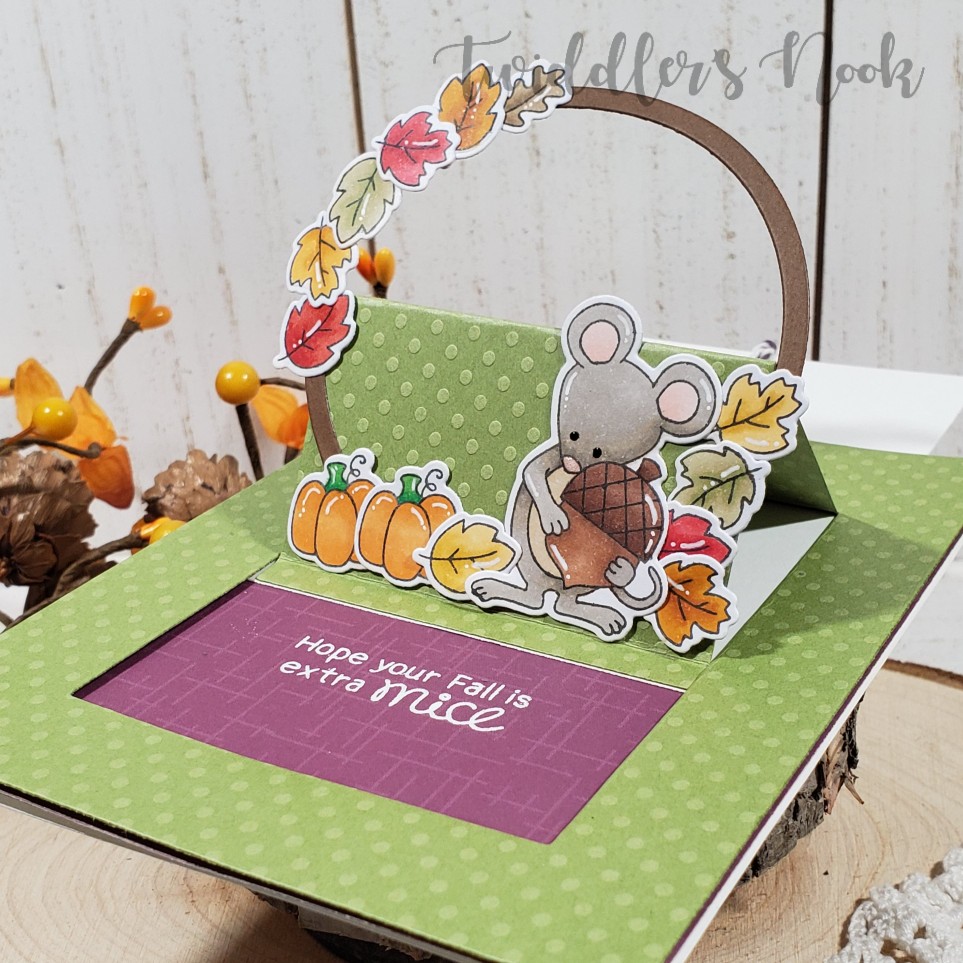
I did put this sliding mechanism on a regular white card base so that I can also write a message on the inside to the recipient but you totally wouldn’t have to. Also, the slider opening is big enough to hide a gift card inside which I think would be so much fun to give.

I appreciate you sharing your time with me. Have a fabulous day!

The Stamping Village – Pink & Main

Hello again! I’m back with another installment from my goal to use each holiday seal from The Stamping Village Holiday Seals stamp set. Today we’re going to use the Pink & Main seal to make a bright and colorful ornament card.

This is one of those cards that really shows how fun it can be to mix and match from different companies. We’ve got Doodlebug papers showcasing this fun Pink & Main holiday seal, with Lawn Fawn dies to turn it into a hanging ornament. Then, to finish it off, I added Trinity Stamps peppermint candy clay accents around the background.

There is so much going on in this card but it’s super fun and cheery and works so well together. I did add Wink of Stella glitter brush pen to the red ring on the holiday seal and the bow for a little extra interest. I think it ties everything together with the silver glitter washi tape I added to the sides.

This card was super fun to put together and is a design you could easily change out the papers on and use the entire stamp set to make! How fun would it be to have the same overall design but a different seal on an entire set of 12 Christmas cards?!? Maybe a goal for next year. 😉

Have a wonderful weekend! I can’t believe it but it’s the last one before Halloween. Where has this year gone??? We’re headed to the pumpkin patch to soak up as much fall as we can!

As always, I appreciate you sharing your time with me. Have a fabulous day!

Lawn Fawn – Let It Snow!

Happy Friday everyone! I hope you had an awesome week and are ready for a great weekend! I’m back sharing a monotone penguin card featuring Lawn Fawn’s Snow Cool and Here We Go A-waddling stamp sets.

Do you ever stamp too many things when you’re not exactly sure how your card is going to go? It doesn’t happen very often for me…I’m usually going back and adding more instead. However, that’s how this card came about entirely. I stamped some images for my daughter and she didn’t need a bunch of them. I was looking at them and thought…this is our family: a daddy, a mama and a baby (well, she’s not so baby anymore but you get the idea). But, I think that’s why I like how this simple turned out so much.

I colored my penguins in cool grays and the accents in blue. Then I found a matching blue cardstock and gave it a falling snow background from Snow Cool. I die cut the landscape stitched hillside backdrop and glued it over the snowy card front. Using my images as a guide I stamped and heat embossed my sentiment in silver and then glued down my images. For finishing touches I added Stickles to the snow hills and penguin’s hat and glossy accents to all their beaks and feet.

Here’s a closer look at the fun texture those details give. And how cute is that mama penguin dressing the snowman up with a bow.

I appreciate you sharing your time with me. Have a fabulous day!

Trinity Stamps – Mini Squirrel Card

Hello again! Today I’m excited to share this super cute mini card using the Trinity Stamps nutty squirrel set. I’ve been having so much fun with this set since I got it. The squirrel is such a great focal image and all the foliage images that also come in the set immediately had my wheels turning for a wreath builder card. So, that’s what I’m sharing with you today.

This is a mini card with the white panel being 3.5×3.5 and the card base is 3.75×3.75. I started by stamping my wreath images and then added my squirrel after. I colored everything with copic markers and added glossy accents to the acorns and squirrel’s nose. I added Nuvo Crystal Drops to the berries and Wink of Stella to the squirrel’s scarf. I stamped my sentiment, cut it into a strip and glued it down. Last I adhered Lawn Fawn knit picky paper to a card base and added my stamped panel to that.

I kept the card fairly flat because I plan to pop it in my daughter’s lunchbox today for a fun pick-me-up at lunch time. I love doing this randomly and she gets excited too.

I appreciate you sharing your time with me. Have a fabulous day!

The Stamping Village – Lawn Fawn

Hello there. I hope your week is going well. I’m back today with another card featuring The Stamping Village Holiday Seals. Today I’m using the Lawn Fawn deer seal. I love the Lawn Fawn critters. They are just adorable!

For this card I pulled out my Lawn Fawn large wreath and die cut it from 3 different green cardstocks and layered them together. Then I cut the berries from red cardstock and glued them on top. I made the bow from teal cardstock and adhered it to the top. I stamped, colored, cut out my seal and put it in the center of the wreath. I thought it was a perfect frame.

For the rest of the card, I used the largest stitched rectangle and cut some perfectly plaid paper, then the next size down rectangle cut in white cardstock and glued them to a card base.

After I adhered the wreath and seal to the white stitched rectangle, I added black glaze pen to the reindeer’s eyes and glossy accents to his nose. Then I added Wink of Stella glitter brush to the berries and put glossy accents over that.

The shine and shimmer is super fun and adds lots of interest to this simple card.

These seals have the sentiments in them which keeps these cards quick and great for mass production. I love them! I’ll be back soon with another card idea featuring these seals soon.

Thank you for sharing your time with me. Have a fabulous day!

The Stamping Village Holiday Seals Card – Avery Elle

Hello there. I finally took a moment to get my Stamping Village Holiday Seals stamp set out to play with. I knew I wanted to color the Avery Elle cute moose first off so I stamped him right away. The other one I wanted to try was the Lawn Fawn deer. Stay tuned, he’s coming up tomorrow!

In case you don’t know, The Stamping Village is a collective group of stamp companies who come together to release special stamp sets and all of the proceeds are donated to The Dreaming Zebra Foundation which gets art supplies to needy children.

This card came together quickly and was inspired by the YouTube hop The Stamping Village did to showcase these stamps being used on various projects. I cut the Avery Elle ray backdrop die from white cardstock and matted the back with foam tape. I stamped, colored and cut out my moose seal and placed it behind the opening. It fits perfectly!

For finishing touches, I added glossy accents to the lights in his antlers and the ring around the circle’s edge. Then I scatter Nuvo Crystal Drops across the card front for added interest and a splash of color.

Seriously, that’s it. This card is finished. It would be an awesome design to make if you were sending out large amounts of cards. It came together quickly and you could easily change up your colors however you wanted. It would even be fun to add additional sentiment strips below the circle for an added message.

Stop by tomorrow for another simple card using one more holiday seal. I hope to make at least one card with each of these stamps this year.

Thanks for sharing your time with me. Have a fabulous day!

Hoo’s There?

Hey everyone! I’m over at The Rabbit Hole Designs blog today with this wicked cool light-up card using the Caffeinated Owl stamp.  This was my first attempt at a light up card and with the help of my friend Amanda at Pear Blossom Press, it was super easy and I’m excited to try it again.

Here’s how I did it:

  • Die cut a circle from a white panel and set the circle aside.
  • Ink blended the main panel like a night sky, splattered with water and gold watercolor. Then layered vellum behind the opening.
  • Next ink blended the circle yellow for a moon…or sun, whichever you prefer. This was glued directly to my card front.
  • Stamped, colored and cut my caffeinated owl and die cut a branch for him to sit on. Using my images  as a guide I also stamped and heat embossed “push here” where the button would be hiding.
  • At this point I laid out and glued my light and circuitry down. Check out Pear Blossom Press for info on that.
  •  After that was glued down I popped my sky panel up with double-layer foam tape and glued my branch and owl directly to it.
  • I stamped and heat embossed a sentiment, cutting it into a strip and popping it up with foam squares.

Here’s a look at it all lit up! It’s so fun!!! My whole family keeps playing with it. I think this owl might be my favorite in the caffeinated critter collection. Thank you so much for joining me today. I’ll chat with you again soon.

The products I used are:

Caffeinated Owl

For more information, news and updates check out these links:

Trinity Stamps – You’re my favorite nut!

Hello again! I’m so happy you stopped by today. I just received my latest order from Trinity Stamps and I couldn’t contain myself; I had to make this card immediately! I’ve had it sketched out since I ordered this cute squirrel!

Using my new narrow card dies and nutty squirrel stamps and dies, I made this awesome slim, long card.

It’s pretty simple really. I die cut the scalloped card front and masked off the stitched edge. Then I used a cloud stencil and distress inks to give the panel a sky and ground. I stamped, colored and die cut my images and then laid them all out to start gluing. I find that liquid glue sticks better to distress ink so that’s what I used here. Then I took the panel and popped it up on an olive green card base.

For finishing touches on this card I used black glaze pen to the squirrel’s eyes and nose and white gel pen throughout the images.

If you’ve read my posts or seen my cards lately, you know this is my newest obsession for rounding out a card. Look at what those fun little details do for it. I just love it!

The sentiment on this card cracks me up. It’s my favorite from the whole set. I’m seeing a mini note in my daughter’s lunch with this on it in the near future!

I appreciate you sharing your time with me. Have a fabulous day!

Ink Pink! with a Special Guest

Happy Friday Everyone! I am so excited to be apart of a special Instagram hop called Ink Pink! It’s a group of cardmakers getting together to bring a different awareness and thought to the Think Pink movement. We’ve all made pink inspirational/thinking of you cards to share with you. There are prizes up for grabs too so be sure to check it out.

I have a fun card to share with you today and I also have a very special guest joining me to share a card as well. My daughter was excited about this event and wanted to get in on the action as well. I hope you enjoy both cards we are sharing today. Be sure to leave her some comment love to let her know how she’s doing.

Aren’t these cards so fun! I’ve never made a monotone card before but it was so fun I’ll have to try it again. And my daughter thought it was great fun to color penguins in silly colors.

Here’s the recipe for my card:

Micaela’s card recipe:

Didn’t these pink cards turn out so great?!? I love them both! My daughter leans toward clean and simple; where white space terrifies me and makes my brain hurt. LOL! I love how our opposite looks achieve the same things…smiles for the recipients!

Be sure to head over to Instagram and hop along with the group for wonderful inspiration and comment for chances to win fun prizes from great sponsors! You can start with me and keep hopping until you end up where you began. My Instagram handle is @twiddlersnook.

I appreciate you sharing your time with me. Have a fabulous day!

Newton’s Nook Birthday Balloons

Hello there! Today is my final share for the current Inky Paws Challenge with Newton’s Nook. I love how I was able to take a sketch and create 3 completely different cards. They were for different occasions, totally different colors and I was able to use different stamp sets each time too! This challenge was so fun to play along with.

Without further ado, here’s today’s card share!

For this card I did things a little different by choosing some products I wanted to use first and worked around those. This is how I did it:

  • Stamped, colored and cut my Newton’s Birthday Balloons image.
  • When I colored him in I knew I wanted to try a rainbow of clouds on the tag behind him so that’s what I did next. Using a stencil and blending brushes, I inked a rainbow of clouds on a tag I had cut out.
  • I also knew that I wanted to use the bubbly stencil so I chose my background color and used texture paste on the stencil. I set that aside to try while I decided on the rest of the card.
  • I chose patterned papers for the strip and flag, then played with my final layout to figure out where I wanted my sentiment. Once that was decided I went ahead and stamped it.
  • After everything was dry, I worked on assembly.
  • I glued the stenciled panel to a card base, then the strip and flag were glued to that.
  • Newton is popped up with foam squares on the tag and the tag is popped up with foam tape.
  • I did add ribbon and baker’s twine to the tag hole.
  • A couple of finishing touches to this card were glossy accents to Newton’s nose and toe beans and then Wink of Stella glitter brush pen to the balloons and present.

Here’s a look at the glossy accents. I love how much these details add to the final card. It’s so great in the light.

And he’s a great view of all that shimmer glitter from the Wink of Stella. This is something I seriously play with every time I use it on a card. It’s mesmerizing!

I hope you’ve enjoyed this mini series of Newton’s Nook fun while I played along in the Inky Paws Challenge.

Please be sure to stop by tomorrow. There is a VERY special guest joining me, along with an Instagram event to join in on too! I really hope to hear from you for that.

Thank you for sharing your time with me. Have a fabulous day!