Newton’s Nook – Sweet Treats Blog Hop

Newton’s Nook Designs 6th Annual Sweet Treats Blog Hop!

The Newton’s Nook Designs Team is hopping along today to share some great Sweet Treats – just in time for Valentine’s Day! Make sure you scroll down to the bottom of this post to see the whole list and hop along and comment for a chance to win!

I’m so excited to be sharing a really fun Valentine treat box with you for the Newton’s Nook Sweet Treats Blog Hop today! Treat boxes are one of my all-time favorite things to create so this hop is right up my alley! I hope you find fun inspiration and have enjoy hopping along to see everyone’s projects!

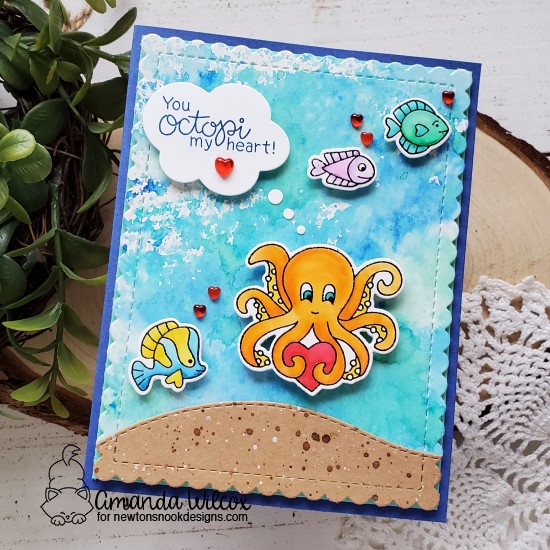
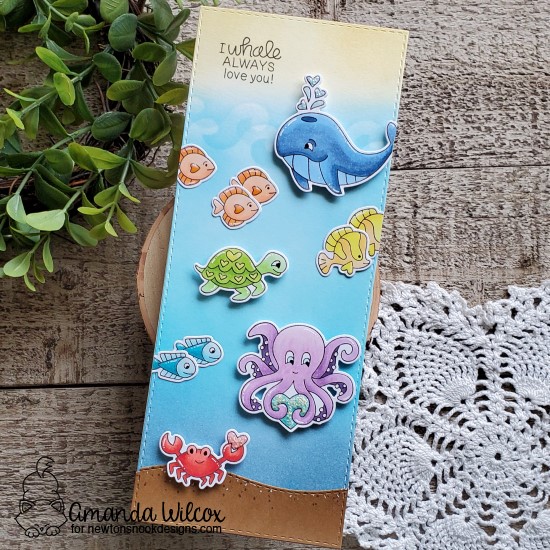
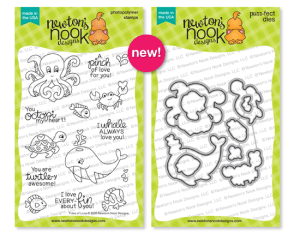
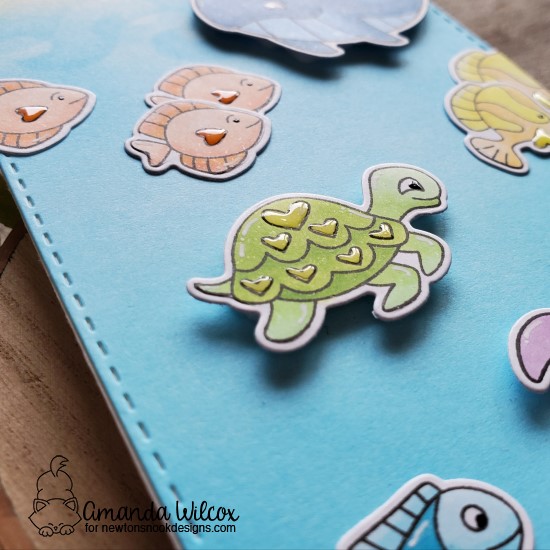
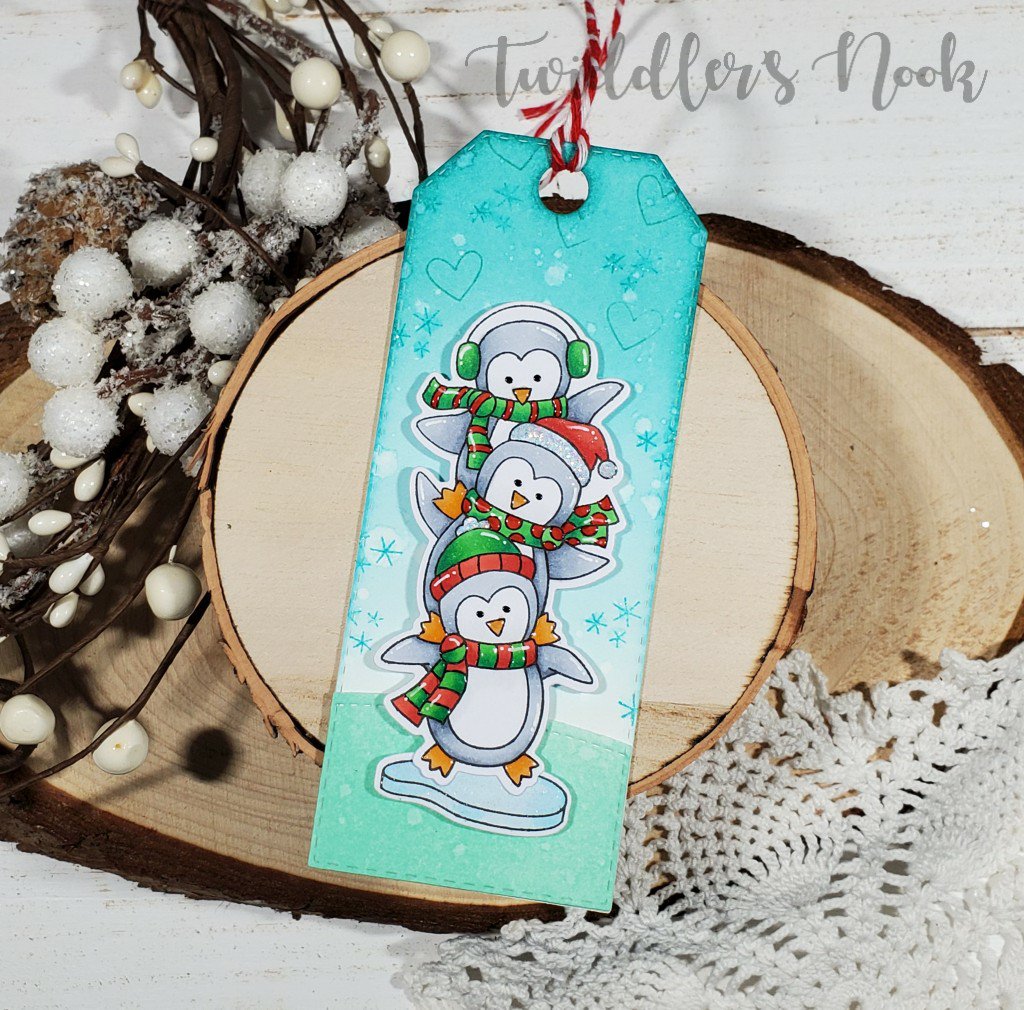
I chose to make a mini-milk carton treat box and decorate it with the newly released Tides of Love stamps and dies, along with some other fun Newton’s Nook products.

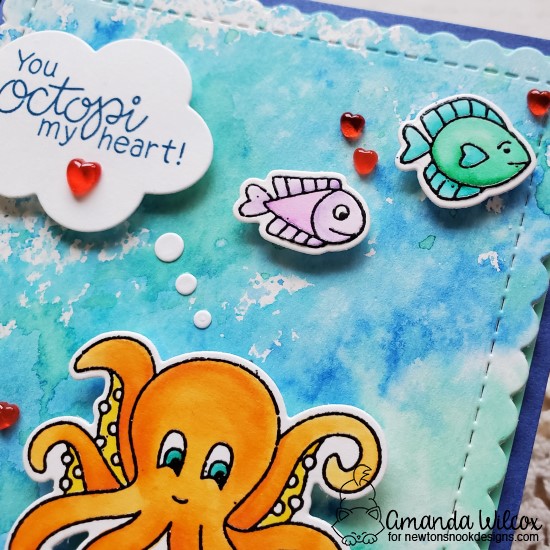
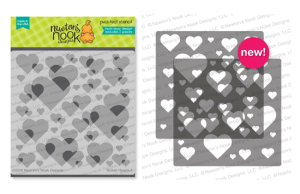
I started by die cutting my box and then used the waves stencil to give the top some fun water texture. Then I grabbed the mountain border stencil and used that for a sandy bottom. Then I assembled my box and started adhering my ocean creatures.

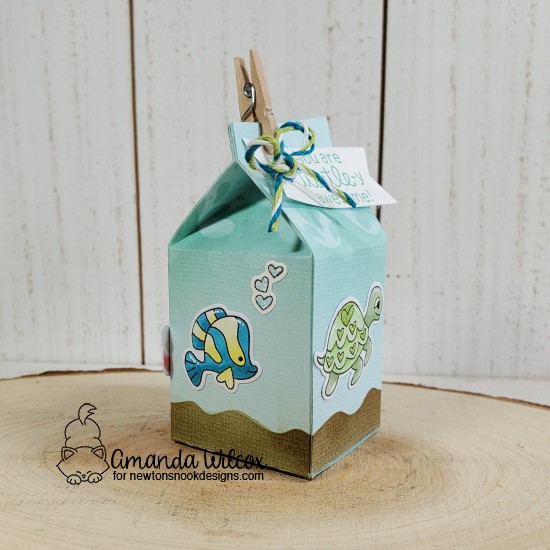
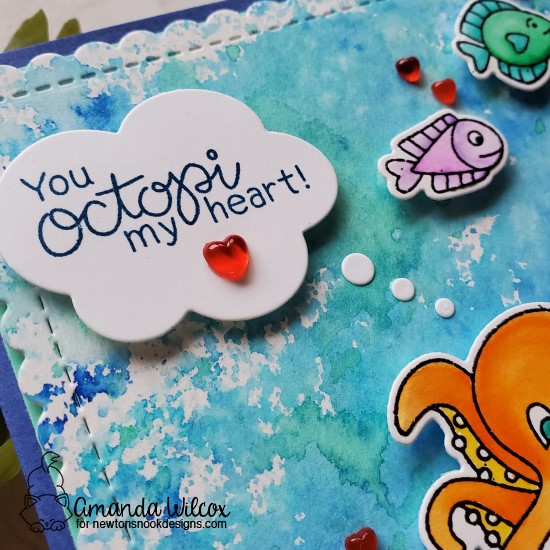
After those were on I used the banner die from the Frames and Flags die set and made a tag to stamp my sentiment on. I punched a hole, added a twine bow and clipped it to the top with a mini clothespin. This way it’s easy to open and close the box for the giver and the recipient.

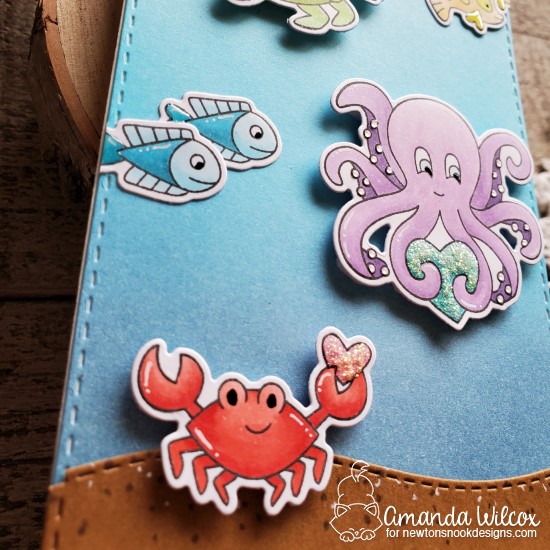
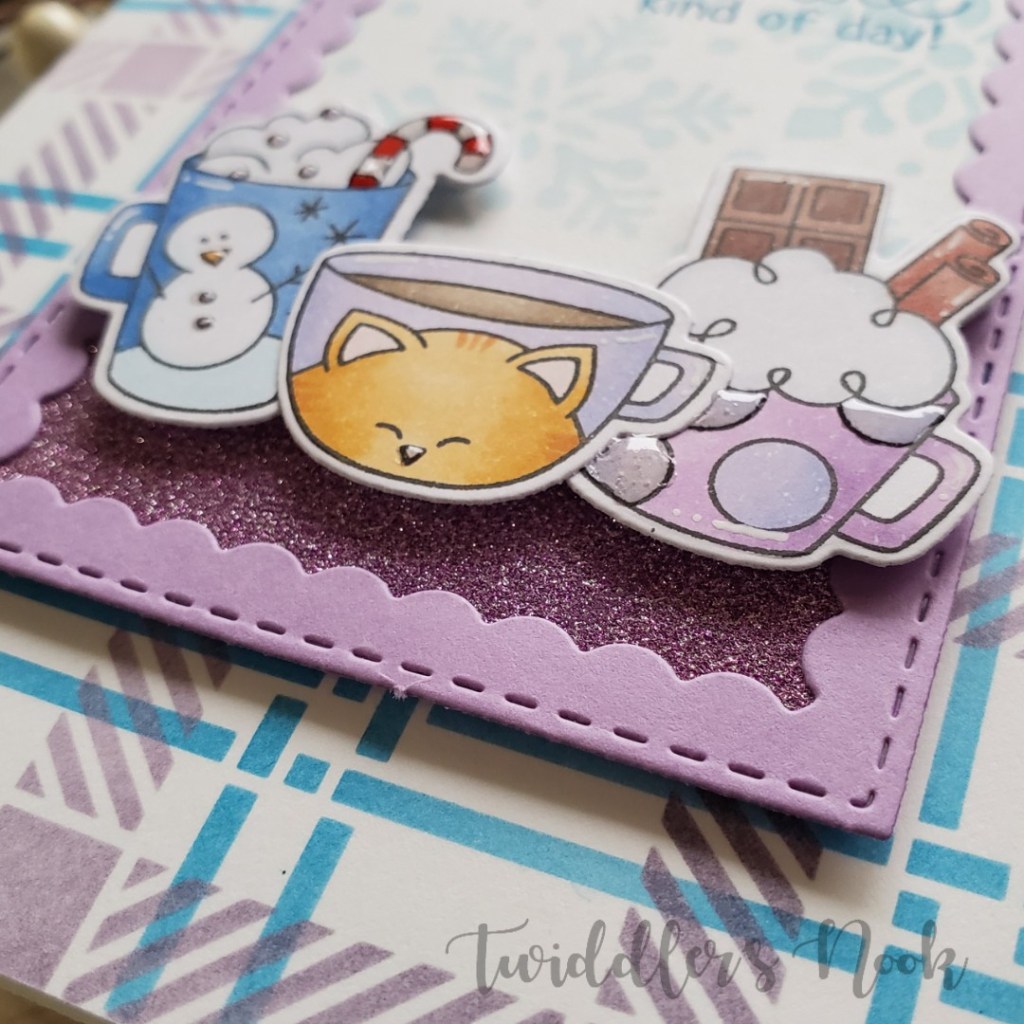
For finishing touches I added Stickles to the turtle’s hearts and all of the heart bubbles coming up from the fish.

Sweet Treats Blog Hop Giveaway!

Would you like to win a $25 store credit to Newton’s Nook Designs online shop?

We are giving them out to TWO lucky winners!

Here’s how to win:

Comment on the NND blog and Design Team blogs (see list below)! The winner will be chosen at random from the collective reveal posts. Make sure to check out each of their blogs and comment for your chance to win. You will not know which blog has been chosen so the more you comment on the better your chances are of winning! You have until Monday, February 10th at 9pm EST to comment — winners will be announced on the NND blog on Tuesday, February 11th.

Check out all the awesome Design Team Blogs below to enter:

Newton’s Nook Designs
Ellen Haxelmans
Larissa Heskett
Samantha Mann
Zsofia Molnar
Naki Rager
Maria Russell
Andrea Shell
Tina Smith
Tatiana Trafimovich
Amanda Wilcox <——You are here.

Newton’s Nook – You Octopi My Heart

Hello everyone! I’m up on the Newton’s Nook blog today sharing this fun watercolor-type ocean card featuring the recently released Tides of Love stamps and dies. I love making scene cards and I really love making ocean cards so this was a blast for me!

I decided to play with some techniques I don’t do often – ink smooshing for the background panel and watercolor with my Zig Clean Color Real Brush Markers for all my critters. I think this background is so fun and the different textures are awesome! I love the scalloped border the Frames and Flags dies give too.

I heat embossed my critters with black before coloring them in and die cutting them. Then I popped them up with foam squares. I used the Land Borders die set to make some sand and splattered it with distress ink and pearl watercolor.

I stamped my sentiment in a blue ink on the thought bubble from the Speech Bubbles die set and popped it in place too. The finishing touches on this card were just the candy hearts as bubbles above all the fish and one in the thought bubble because it just fit too perfectly!

Last, I popped the watercolor panel on a teal panel with foam tape and then adhered the whole thing to a dark blue card base. I just love the texture of the background and the shine from the heat embossing.

It’s going to be such a fun card to mail to someone special! ❤

I appreciate you sharing your time with me. Have a fabulous day!

Newton’s Nook January Release – Day 4

Welcome back to the final day of the Newton’s Nook January release hop! I hope you’ve enjoyed everything so far and are excited to find out the final sets so you can start shopping tomorrow when it all goes live!

Newton’s Valentine

Newton’s Crafty Cardio

Both of these sets are so much fun! I have two cards to share with you – one with each set!

For this card I used the new Bokeh Hearts stencil to make a sky and then die cut it from the largest of the Frames and Flags set. I inked some cardstock up for my ground and die cut that from the same rectangle and then from the Land Borders grass border. I glued the first layer to the sky and popped the second one up so Newton could be in the grass. Now I stamped and heat embossed my sentiment in the largest bokeh heart. It fit just perfectly!

Newton is popped up with foam along with the hearts and then the flowers are glued directly to the card. After that was done I added glossy accents and Wink of Stella glitter brush pen for some shimmer and shine and finished it all with white gel pen accents.

Now on to Newton getting his crafty cardio on! Haha! I wish crafting burned more calories…but don’t we all. 😉

For this card I stamped the small images from the set all over a panel in light gray ink and then die cut it from the largest rectangle in the Frameworks die set. Then I took the flags from the Frames and Flags set and cut them from patterned paper as well. I stamped my sentiment and tied some baker’s twine around one and adhered it down. Then adhered the others for a ground under Newton. After stamping, coloring and die cutting my main image, I popped him up with foam squares.

For finishing touches on this fun card I added glossy accents to Newton’s nose and all the paints, and Wink of Stella glitter brush pen to Newton’s sweatband. I put white gel pen accents throughout and finished with a scattering of rainbow Nuvo Crystal Drops across the background. Once all of that way dry, the whole panel was popped up with foam tape on a card base.

Would you like to win the “Newtons Crafty Cardio” or the “Newton’s Valentine” Stamp Set?We will choose ONE lucky winner for each stamp set!

Here’s how to win: Comment on the NND blog and Design Team blogs (see list below)! The winner will be chosen at random from the collective reveal posts. Make sure to check out each of their blogs and comment for your chance to win. You will not know which blog has been chosen so the more you comment on the better your chances are of winning! You have until Thursday January 23rd at 9pm EST to comment  — winners will be announced on the blog post on Friday, January 24th. 

Check out all the awesome Design Team Blogs below to enter:

Newton’s Nook Designs
Ellen Haxelmans
Larissa Heskett
Samantha Mann
Zsofia Molnar
Naki Rager
Maria Russell
Andrea Shell
Tina Smith
Tatiana Trafimovich
Amanda Wilcox

Newton’s Nook January Release – Day 2

Welcome back to day 2 of the Newton’s Nook January release! Today’s set – Love Quarry – is my all-time favorite of this release! I had SOOOO much fun playing with it and have endless amounts of other ideas too!

Love Quarry Stamps and Dies

Seriously, those adorable construction trucks and the punny sayings are just the best!

To make this fun card, I used the land border dies to cut hills and then inked them with distress inks and spritzed them with water. Next, I used acrylic paint to dye my texture paste and then smeared it on my cardstock for an awesome muddy look! While that was drying, I inked my card front to make a blue sky and spritzed it too. Then I set to stamping, coloring and die cutting my images.

Once the mud was dry I popped the panels up with foam tape and started adhering all my pieces. Most of these are popped up with foam tape as well because it masked the mud’s texture.

I decided that these awesome trucks needing to be talking so I used the speech bubbles die set for my sentiments. I love the added whimsy it gave this card.

For finishing touches I added white gel pen accents throughout the images, Wink of Stella glitter brush pen to all the hearts and glossy accents throughout the card design. There is so much awesome texture going on in this card. I’m so in love with it!

Would you like to win the “Love Quarry” Stamp Set?This stamp set will be given away to ONE lucky winner!

Here’s how to win: Comment on the NND blog and Design Team blogs (see list below)! Thewinner will be chosen at random from the collective reveal posts. Make sure to check out each of their blogs and comment for your chance to win. You will not know which blog has been chosen so the more you comment on the better your chances are of winning! You have until Thursday January 23rd at 9pm EST to comment  — winners will be announced on the blog post on Friday, January 24th. 

Check out all the awesome Design Team Blogs below to enter:

Newton’s Nook Designs
Ellen Haxelmans
Larissa Heskett
Samantha Mann
Zsofia Molnar
Naki Rager
Maria Russell
Andrea Shell
Tina Smith
Tatiana Trafimovich
Amanda Wilcox

Newton’s Nook January Release – Day 1

Oh my goodness! I’m so excited to finally start sharing the Newton’s Nook January release with you! It is over-the-top amazing! Today we’re sharing the:

Tides of Love Stamps and Dies

Bokeh Hearts Stencil Set

I’ve got a super fun card to share with you using the Tides of Love stamps and dies. Stay tuned for inspiration from me using the awesome new stencil!

I couldn’t decide which critters to use so I decided to make a slimline card and use everyone! The critters are stamped, colored and die cut. Then popped up with foam squares on an ink blended panel.

I used the land borders to cut my sand and then added dot detail for texture. I added white gel pen to all the critters and black glaze pen to the eyes.

If you follow me at all, you know I love my finishing touches and little details. On this card, I added glossy accents to the hearts on the fish, turtles and also on the octopus tentacles and whale water spurt. Then I added unicorn Stickles to the crab and octopi’s heart and the hearts in the whales water spurt. The difference in texture and also the look from gloss to super-sparkle is so eye catching. I love how this card turned out! Don’t you?

Would you like to win the “Tides of Love” Stamp Set? This stamp set will be given away to ONE lucky winner!

Here’s how to win: Comment on the NND blog and Design Team blogs (see list below)! The winner will be chosen at random from the collective reveal posts. Make sure to check out each of their blogs and comment for your chance to win. You will not know which blog has been chosen so the more you comment on the better your chances are of winning! You have until Thursday, January 23rd at 9pm EST to comment  — winners will be announced on the blog post on Friday, January 24th. 

Check out all the awesome Design Team Blogs below to enter:

Newton’s Nook Designs
Ellen Haxelmans
Larissa Heskett
Samantha Mann
Zsofia Molnar
Naki Rager
Maria Russell
Andrea Shell
Tina Smith
Tatiana Trafimovich
Amanda Wilcox

Designer’s Nook Sneak Peek

Hello everyone. Last month I learned that there is a special newsletter that Newton’s Nook sends out to subscribers only every Tuesday. It’s got special projects from the design team and the only way to see them is to subscribe! This is so cool and I wanted to share it with you because tomorrow is my first time joining in on the Designer’s Nook fun for Newton’s Nook!

Click HERE to subscribe today so that you don’t miss out on my awesome project tomorrow! Be sure to check the box for Designer’s Nook when you subscribe.

Here’s a sneak peek of tomorrow’s project for you…

I hope you’ll head over and subscribe. I wouldn’t want you to miss out on the fun!

As always, thanks for stopping by. Have a fabulous day!

Newton’s Nook Penguin Pile Tag

Happy Christmas Eve everyone! I’m so excited for Christmas this year! It’s going to be so much fun! Do you have traditions or plans for Christmas Eve? I’d love to hear them in the comments! We are always struggling to keep busy until bedtime.

Anyway, I have one last tag to share with you today. All of these personalized tags will be under my tree for the special people in my life. It’s the first year I’ve made tags and it was so much fun!

I love this penguin set from Newton’s Nook so much and this was my first time coloring it with actual Christmas colors! The tag is from Trinity Stamps narrow card and bookmark die set.

I die cut my tag from white cardstock and ink blended it. Then cut the bottom again and ink blended it as well. I adhered these together and splattered water. Then I stamped, colored and die cut my images. I popped them up with foam squares and decided to snag the snowflakes from Newton’s Nook Toboggan Together set and the heart from Cup of Cocoa to stamp in the background.

I added white gel pen accents throughout and black glaze pen to the eyes. Then I added glossy accents to the stripes, polka dots, beaks and feet and Wink of Stella glitter brush pen to the hats and earmuffs. Last I added Stickles to the white parts of the hats.

I did die cut another tag in white and glued the recipient’s name to that one. Once everything was dry I adhered them together and added baker’s twine to the top.

This one is all ready and now everyone in my family has one gift with a special handmade tag on it. I hope they all like them!

Thank you for sharing your time with me during this busy time of year! I hope you have a fabulous day! Merry Christmas!

Newton’s Nook – Hot Chocolate Day

Hello everyone! Happy Friday! I hope you’ve had a wonderful week and have enjoyed the last 12 days of Christmas tags. I am leaving commenting open until this evening for those posts. I will choose winners and post them on here and Instagram in the morning. Be sure to check back and see if you’re the luck winner.

And on to today’s fun card. I’m playing along with the Newton’s Nook Inky Paws Challenge – Snow Day! Everyone needs hot chocolate on a snow day, right?!? My daughter and I always go play until we’re too cold, come in and warm up with a cup full and then do it all over again.

I’m so in love with the end result of this card even though I wasn’t sure when I started with the color palette. It’s just so sweet! I started out with the layering plaid stencil and moved on to color and die cut my images from the Cup of Cocoa.

I cut a piece of cardstock and stenciled it with the snowfall stencil and added a piece of purple glitter washi tape to the bottom to ground my images. Then I cut a frame from the Framework set and adhered it. This little panel is popped up on the plaid background with foam tape. Finally, I added my images with foam squares to give them a little dimension.

Last I stamped my sentiment and started on finishing touches. I put glossy accents on the snowman nose and buttons, candycane, Newton’s nose and the dots on the mug. I also added white gel pen accents on all of the mugs.

I’m so pleased with the outcome of this card and can’t wait to share it with someone. I think I’ll tuck a packet of hot cocoa inside for fun!

I appreciate you sharing your time with me. Have a fabulous day!

12 Days of Christmas Tags – Day 9

Oh my goodness, we’re already three quarters of the way through our series! This has been so fun and has stretched my creative thinking in new ways. I love it! I hope you’re enjoying it too!

Today I’m sharing a different take on Christmas tags…the opposite of mass production. ❤

I really wanted to make a special tag for a special gift we’re giving this Christmas so I treated it like a smaller card front. I used the Newton’s Nook – Newton’s Tobbogan stamps and dies paired with the snowfall stencil for this one.

I blended distress ink on a panel and went over it with white and my stencil. Then I used my Cricut to cut it into a tag, plus 2 white tags of the same size. Then I used a stitched hills die to cut a snow hill and adhered it. I took my image and popped it up with foam squares and then stamped and heat embossed my sentiment. Finally I added this really fun velvet ribbon to the tag whole and moved on to finishing touches.

For those, I added white gel pen accents throughout and wink of stella glitter brush pen to the hats. Then I took glossy accents and put them on kitty noses, mouth and toe beans; plus the scarves and hats all have shiny accents too.

The very last thing I did was die cut the recipient’s name from the same pink, blue and purple colors as the tag’s color palette and glued it to the back. That part is a secret though. 🙂

Don’t forget there are prizes to be won. Comment each day on here, on my Instagram post for the day and then head to Caffeinated Craftiness and do the same for her. Four comments per day gives you a shot at any one of four prizes!

I appreciate you sharing your time with me. Have a fabulous day!

Newton’s Nook – Purr-fect Present

Thanks for stopping by today. I have had this idea in my head for a while and I was really happy to have a chance to make it a reality AND it came out just as I hoped!

Using the Gingham stencil, I inked black over red cardstock, added gold ribbon to make it look like a package and then glued it to a card front. Next, I die cut a circle from the card front and glued the circle to the inside card panel.

I stamped my Newton in a present from Purr-fect Present and die cut him out. Then popped him up on the circle with foam squares. Next I stamped the sentiment off to the left and couldn’t resist coloring in the holly at the bottom of it.

For finishing touches I added white gel pen accents, glossy accents to Newton’s ears and nose and Wink of Stella glitter brush pen to the package’s ribbon and bow.

This image is just adorable and I love how this sweet card turned out. It gives the recipient a little surprise when they open it up. So much fun!

I appreciate you sharing your time with me. Have a fabulous day!