Miss Ink Stamps – You Inspire Me

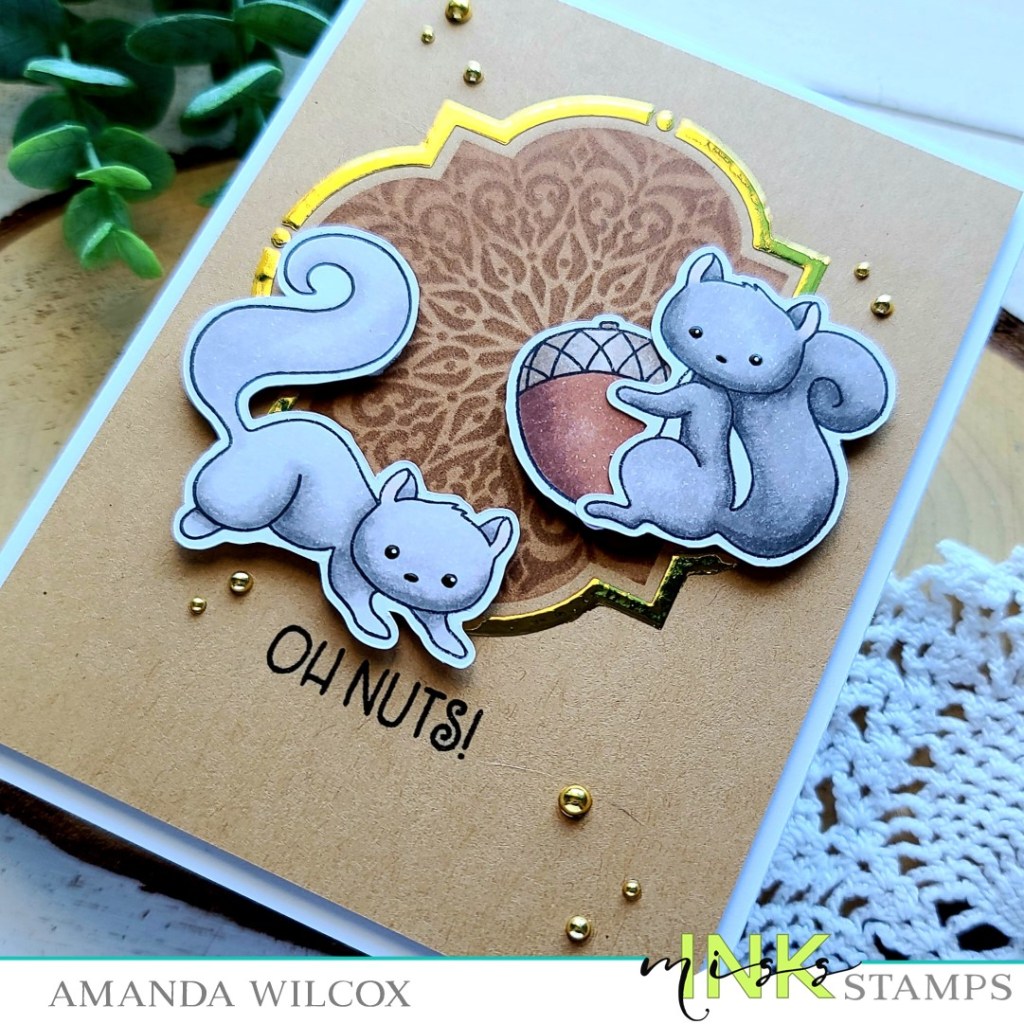
Welcome back friends! I’m here to share a card featuring stamps and stencils from Miss Ink Stamps today. I got a little inky and also did a little foiling for some bling on today’s card. Let’s jump right in.

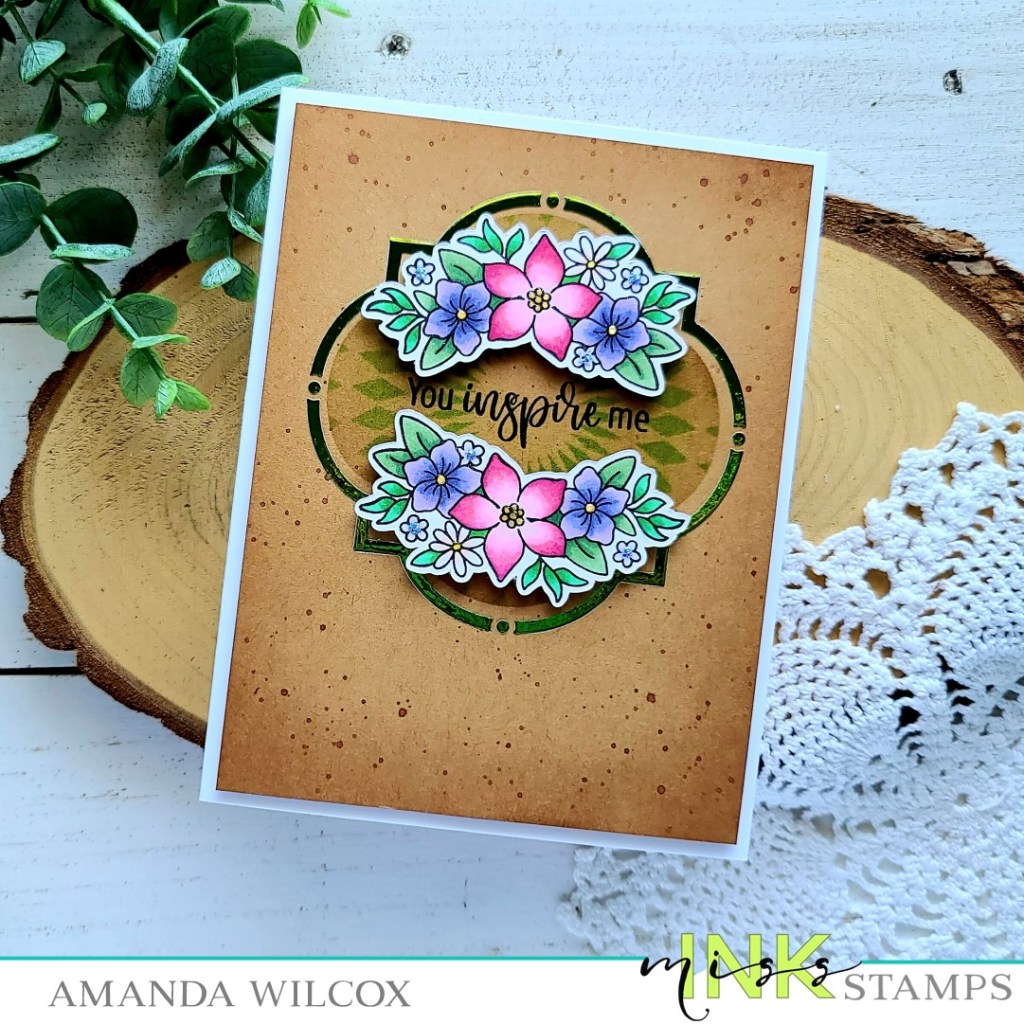
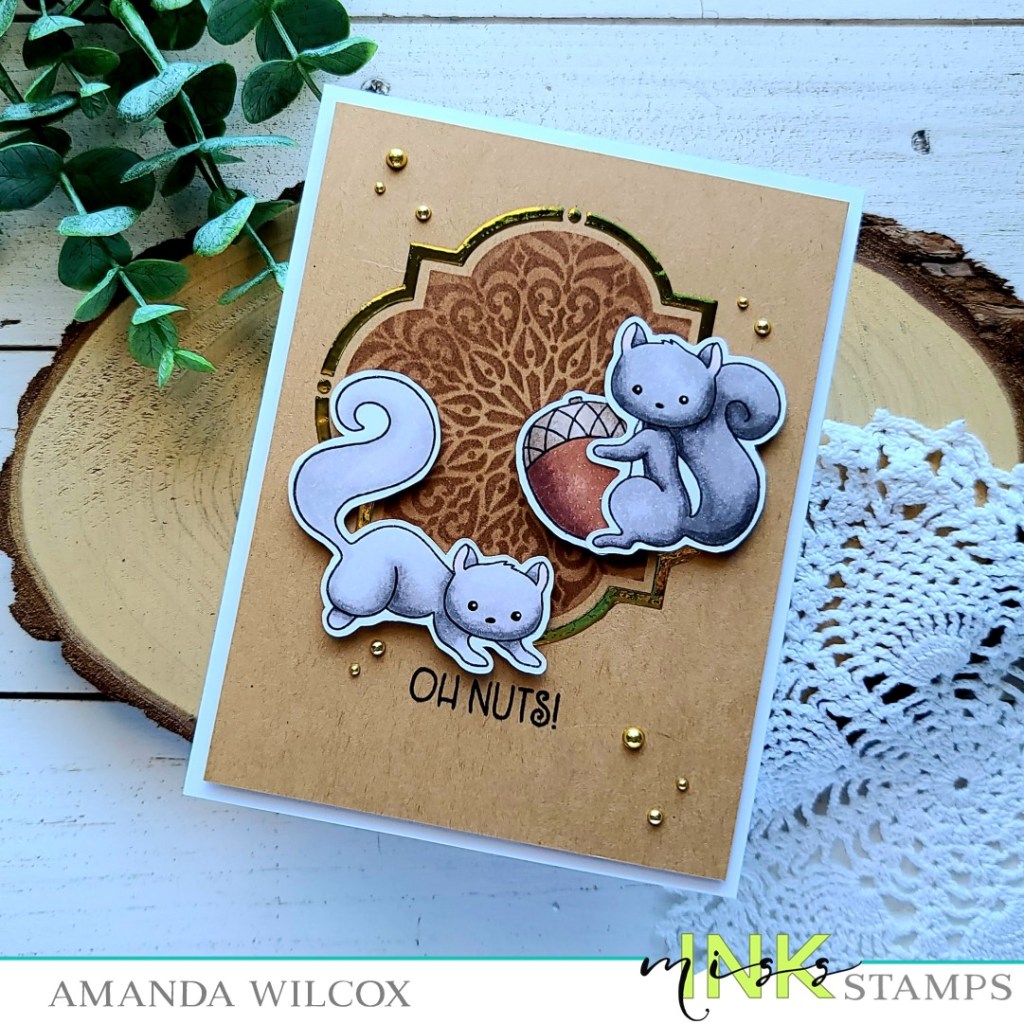
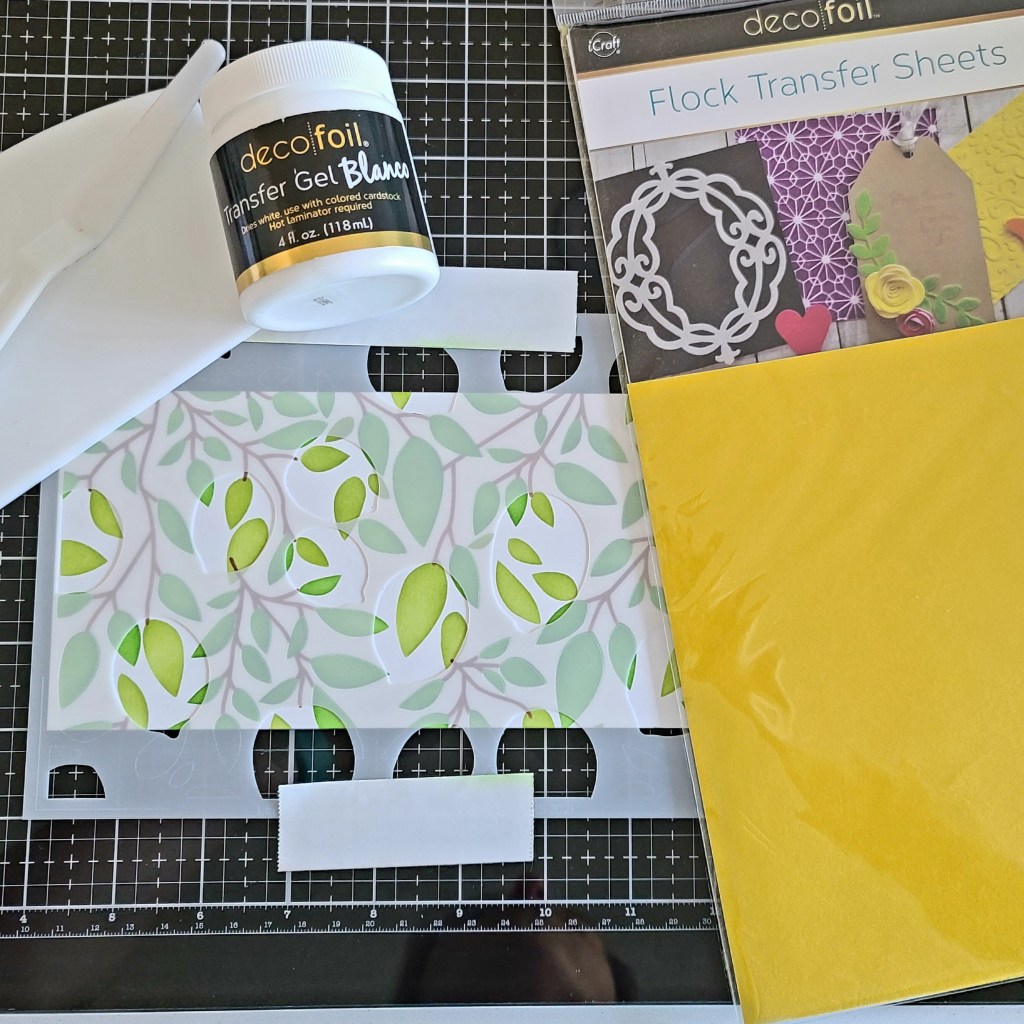
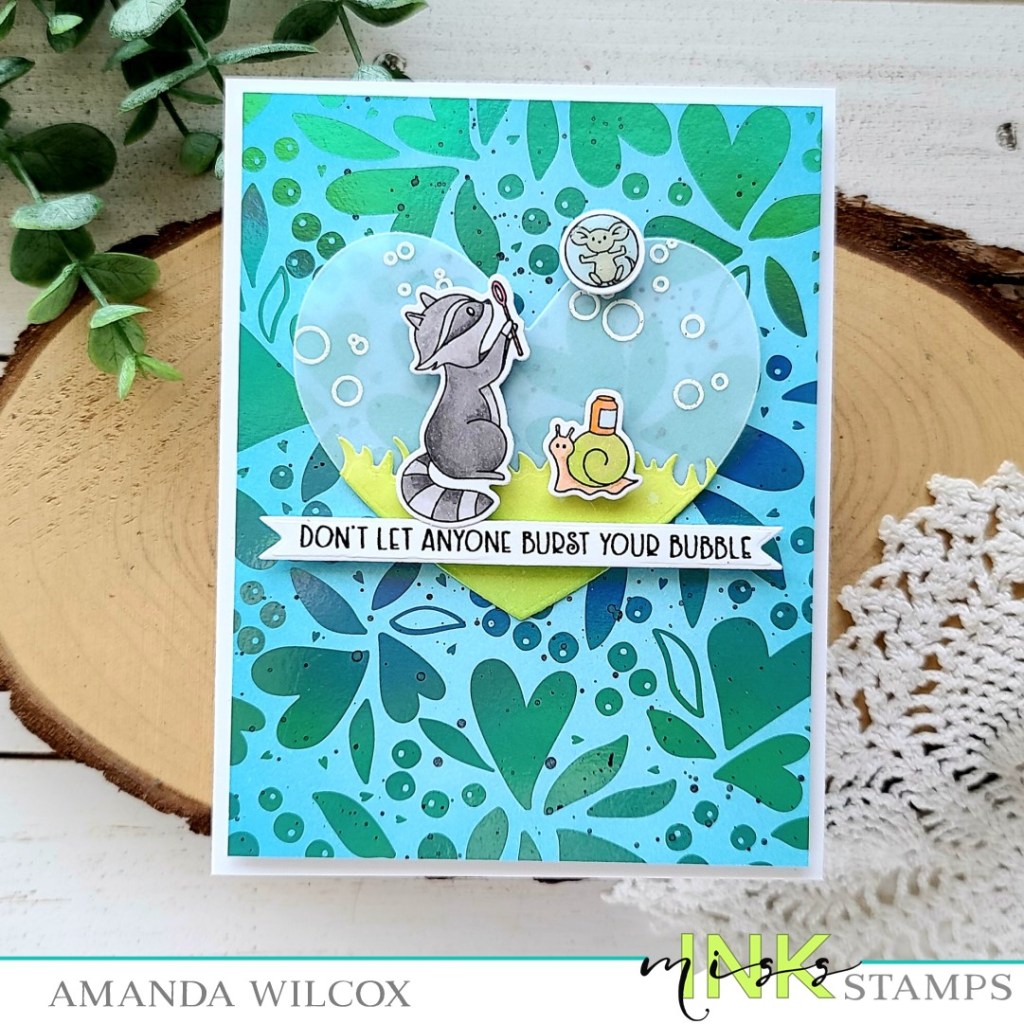
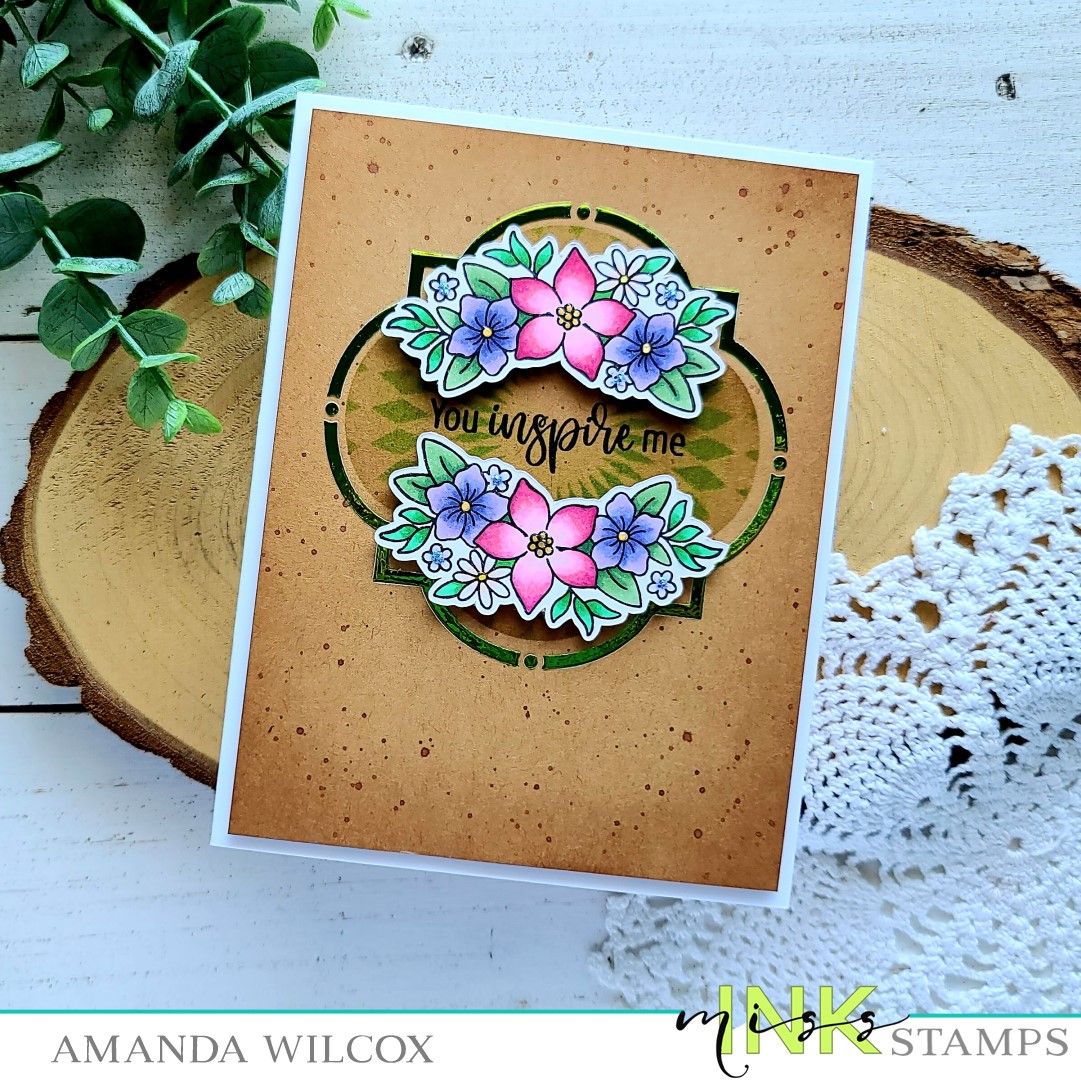
I started by choosing one of the floral images from the new Blooming Brushes stamp set. I stamped it twice, colored it with my copic markers and used the scan-n-cut to cut them out. Next, I cut a kraft panel to 4×5.25 inches and centered up the smaller Ins & Outs Quatrefoil stencil on it. I inked it up using a blending brush and brown ink. Then I centered the Circular Harlequin stencil and used a green ink on that. I removed both stencils and then taped down the Quatrefoil frame stencil in place. I spread Thermoweb transfer gel blanco on that and set it aside to dry.

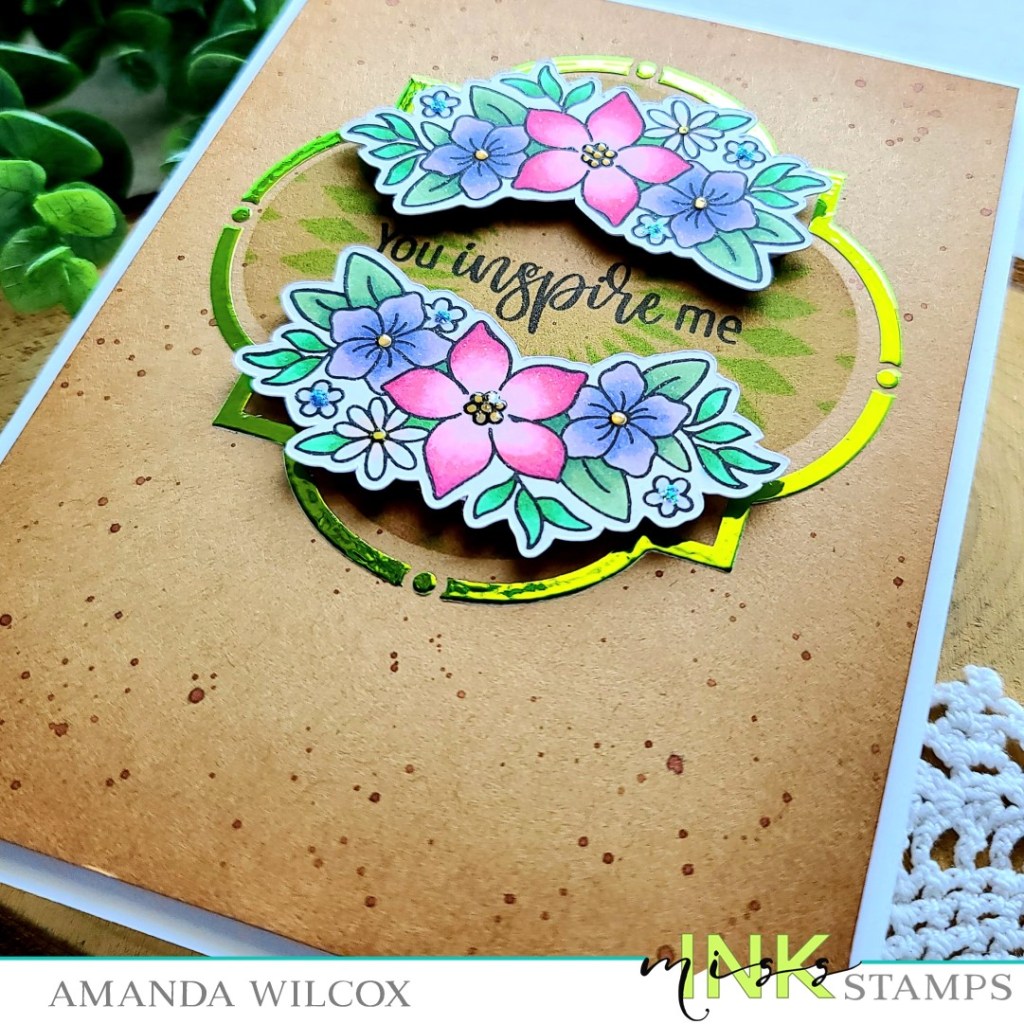
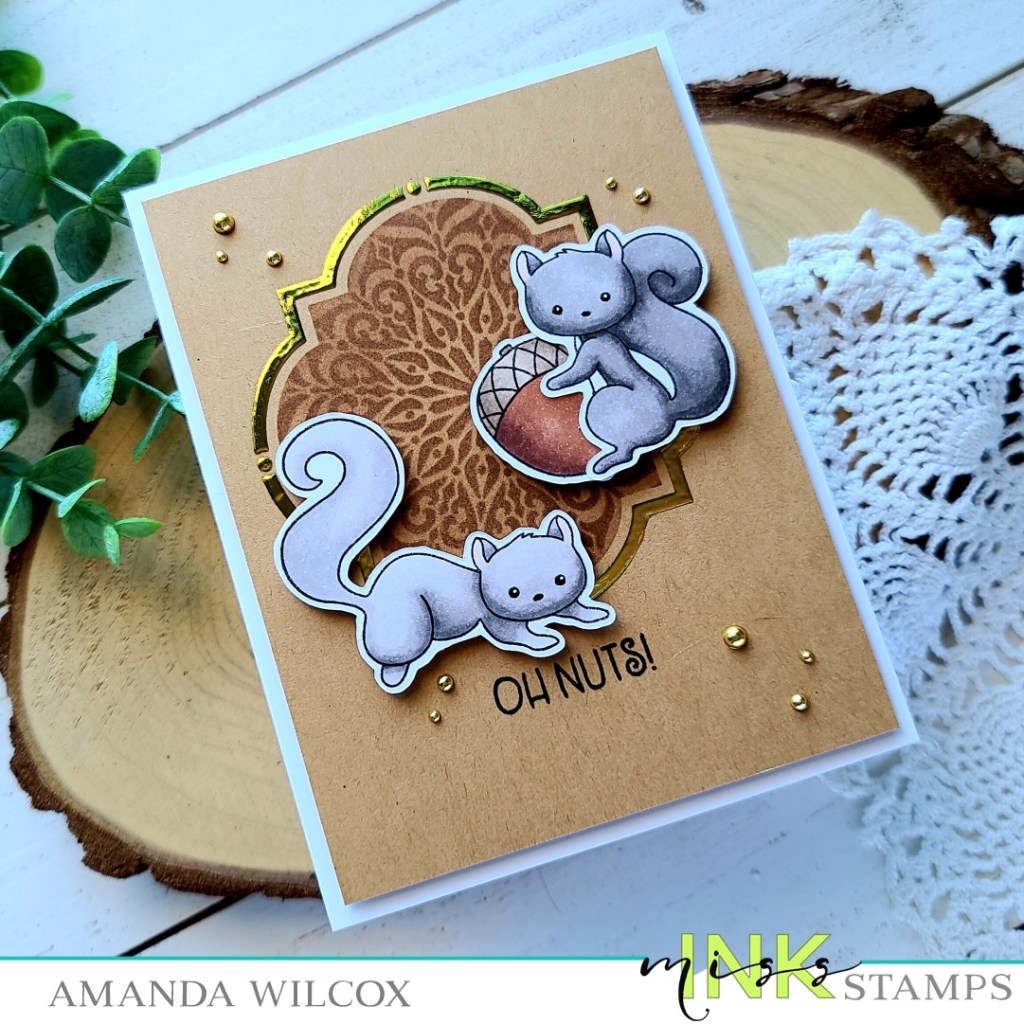
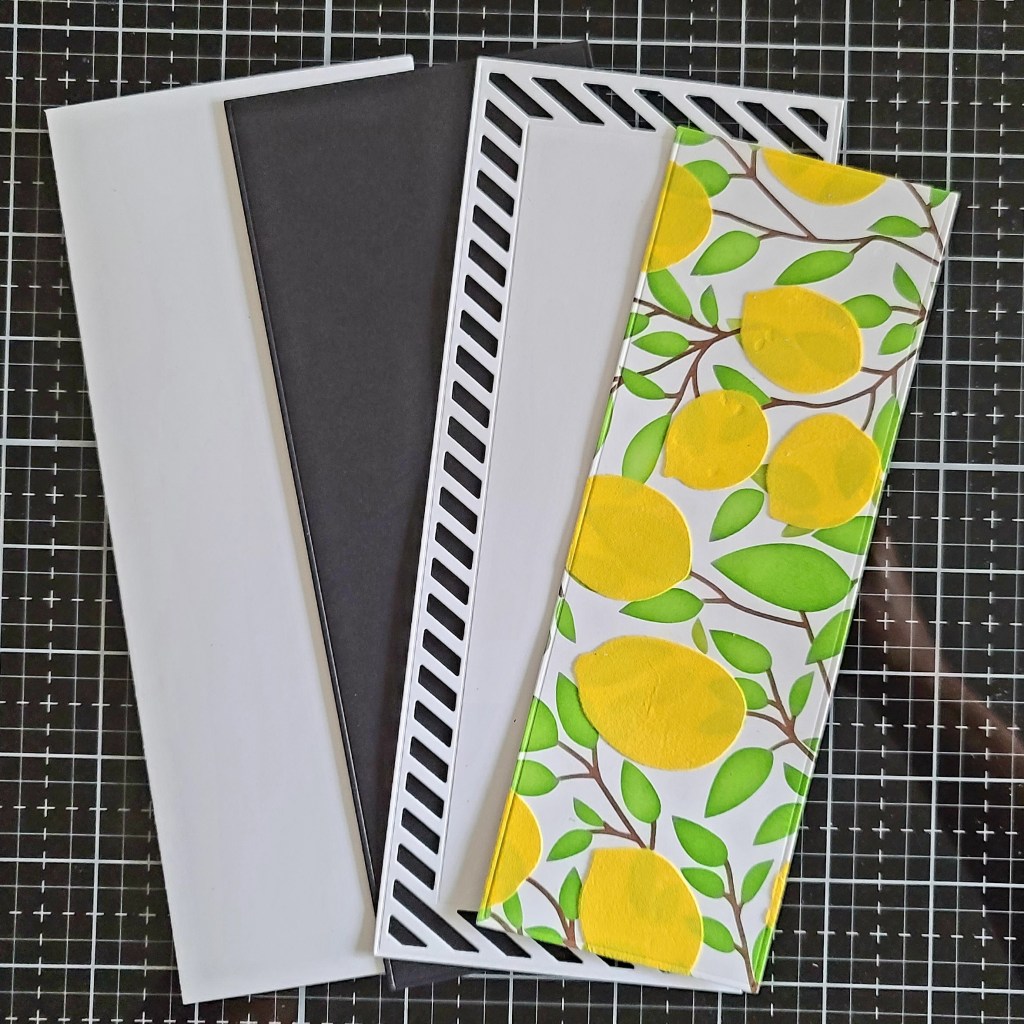
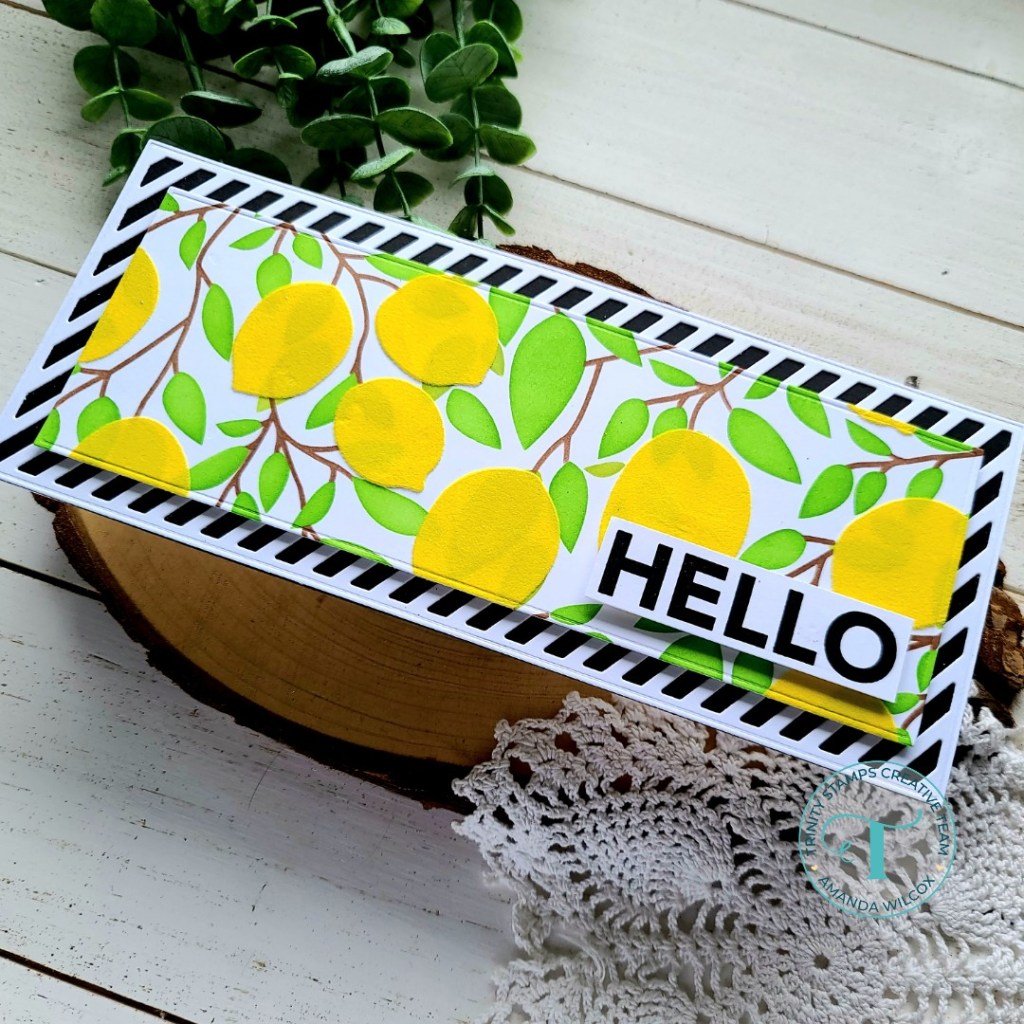
Once it was dry, I heated up my laminator and ran it through with grass green decofoil. After removing that I decided to add texture to the panel so I flicked watered down brown ink all over. Once that was dry I used the floral images as a guide and stamped my sentiment in the center. Then I added foam tape to the back and adhered it to a white card base.

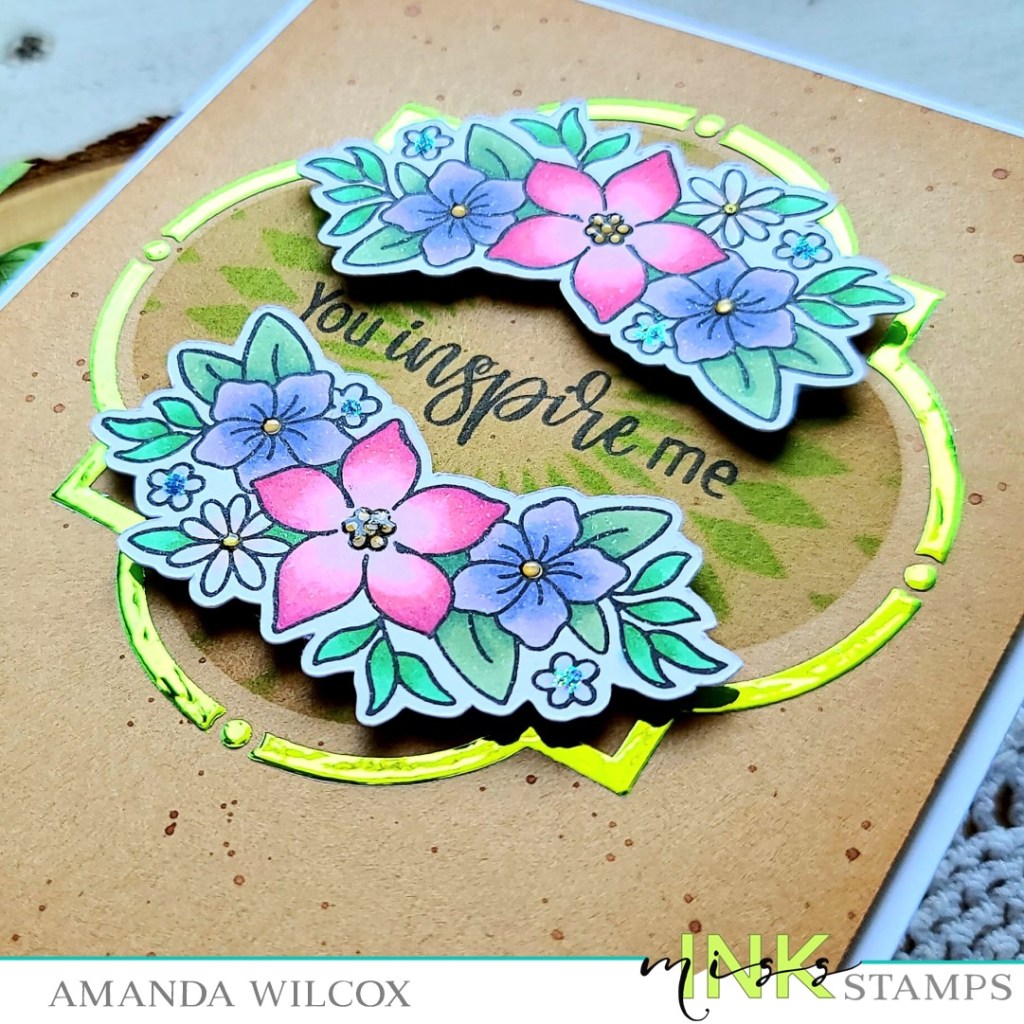
Next, I added the floral images with foam squares and moved on to simple finishing touches. For that I just used glossy accents on the flower centers with the exception of the small blue ones. For those I added some waterfall Stickles.

Products used on today’s card:
Blooming Brushes stamps
Ins & Outs Quatrefoil stencils
Circular Harlequin stencil
Theroweb Transfer Gel Blanco
Stencil Pal
Decofoil – grass green
Blending brush
Glossy accents
Stickles – waterfall

I appreciate you sharing your time with me. Have a fabulous day!

Coffee Loving Cardmakers – Boo

Happy Tuesday friends! It’s Tuesday Tea with Twiddler’s Nook over on the Coffee Loving Cardmakers today and I had some spooky fun creating today’s card! I used some newly released Halloween goodies from Pretty Pink Posh with the never-failing, ever-amazing Trinity Stamps Coffee Mug Card die.

To start, I die cut the coffee mug card from black cardstock. Then I inked it up with the spooky sky layering stencil set and pigment inks. For the last layer I used ThermOWeb glitz glitter gel to have sparkly black bats! To decorate the mug a little more I die cut the boo portion from the center of the boo shaker die from silver cardstock and also 4 times from white cardstock. I trimmed the word out and glued them together for the layered effect. Next, I chose 3 of the supporting images from the Halloween Wreath stamp set and colored them with my copics. I used the coordinating dies to cut them out and popped them up with foam squares on my mug.

At first I was going to make this a shaped card but I switched gears and ink blended a fun Halloween background instead. I used distress oxide inks in twisted citron, blueprint sketch and seedless preserves. I spritzed it with my distress sprayer and also flicked black acrylic paint on it. After the panel was dry I die cut it with the Trinity Stamps Modern Embossed Rectangle die.

I adhered the inked panel to an A2 size card base, glued my mug closed and to my card front and trimmed off anything hanging over the edge. For finishing touches I drew a web string from the end of “boo” to the top of my spider so it looks like it’s hanging down. Then I also added white gel pen accents to the images and black glaze pen to their eyes.

I know there are people clutching on to the last of summer but this girl is BEYOND READY for all thing FALL! These cards are just making my heart so happy to create! Where do you stand? Pumpkin spice or hand me another iced latte?

Products used on today’s card:
Pretty Pink Posh Halloween Wreath stamps and dies
Pretty Pink Posh Spooky Sky stencil set
Pretty Pink Posh Boo shaker die
Trinity Stamps Coffee Mug Card die
Trinity Stamps Modern Embossed Edge Rectangle dies
Distress Oxide Inks – twisted citron, blueprint sketch, seedless preserves
ThermOWeb Glitter Glitz Gel – black
Pixie Spray
Stencil Pal
iCraft Ultra Bond liquid adhesive
foam squares

I appreciate you sharing your time with me. Have a fabulous day!

Newton’s Nook – August Release Day 1

Woo-hoo!!!! Super excited to start sharing the amazing Newton’s Nook August release with you all this week! Today we’re starting with a REALLY fun stamp set and a new triple-layer stencil that you’re going to die for! Let’s not waste any time!

Brooms & Boos stamps and dies

Candy Corn stencil

Today I have a super fun card to share with the Brooms & Boos stamp set but I’ll be sharing an adorable card with the candy corn stencil later on this week! So, stay tuned!

The sentiments in this set go so well with the images and I just love it all! Today I narrowed it down to a silly, moderately snarky sentiment and this cute little witch with her broomstick! I had fun pulling out some traditional Halloween colors to use too!

After stamping my images, I used copic markers to color them and the coordinating dies to cut them all out. For my background panel I blended distress oxide inks in mowed lawn, seedless preserves and carved pumpkin. I sprizted the panel with water and let it dry. Then I adhered the Cascading Stars stencil to it and spread Wild Lilac Glitter Glitz Gel from Thermoweb through that. I started in the top left corner and just spread until it faded out. I didn’t want a full panel of glitter, just some fun accents.

Once that panel was dry, I trimmed it down to 5.5×4 inches and added foam tape to the back. For a little accent I stuck a strip of washi tape on the edge of my card base and then adhered the background panel down.

Arranging my images on the card front, I decided to add my sentiment to a banner from the Frames & Flags die set. This die is solid so I cut it out first and stamped the sentiment second. Then I added foam squares to the back of everything and adhered it all down.

For finishing touches I added some glossy accents to my witch on things like her hat band, boots, broom and belt. Then I added Stickles to the moon for a little glitz up there too. I couldn’t leave the bats alone though so I painted some Wink of Stella clear glitter brush pen on them so they shimmer too!

Would you like to win the “Brooms & Boos”  Stamp Set?This stamp set will be given away to ONE lucky winner!

Here’s how to win: Comment on the NND blog and Design Team blogs (see list below)! The winner will be chosen at random from the collective reveal posts. Make sure to check out each of their blogs and comment for your chance to win. You will not know which blog has been chosen so the more you comment on the better your chances are of winning! You have until Thursday August 19th at 9pm ET to comment  — winners will be announced on the blog post on Friday, August 20th. 

Check out all the awesome Design Team Blogs below to enter:

Newton’s Nook Designs
Tina Herbeck
Larissa Heskett
Samantha Mann
Zsofia Molnar
Farhana Sarker
Tatiana Trafimovich
Samantha VanArnhem
Amanda Wilcox

Miss Ink Stamps – Birthday Gnomes Part 2

Hello again! I’m back with Part 2 of the Miss Ink Stamps Birthday Gnomes card set. These cuties are so much fun I couldn’t just make one card with them. So I’m back today using the rest of the images from the set.

I started things by stamping and coloring the images in a limited color palette. Then I pulled from those colors for my background panel and card base.

For the background I used the two stencils in the Layered Small Alternating Dots stencil set. I inked up the larger dots with a purple ink and then positioned the smaller dots in between and spread gold glitz glitter gel from Thermoweb through the stencil.

Once it was dry, I added foam tape to the back of the panel and adhered it to a pink card base. Then I used a combination of liquid adhesive and foam squares to adhere all of my images. I chose a sentiment from the set, stamped it and trimmed it into a rectangle. Then I mounted it on a piece of black cardstock and popped it up as well.

For finishing touches I added a mixture of white gel pen highlights and glossy accents across the images.

Isn’t the glitzy background super cute with this sweet girl gnome? I just love the vibe this card has. It’s so fun!

Products used on this card:
Miss Ink Stamps Birthday Gnomes stamps
Miss Ink Stamps Layered Small Alternating Dots stencil
Thermoweb Gold Glitz Glitter gel
Stencil Pal
Pixie Spray
Lawn Fawn Juice Box ink
Trinity Stamps Blending Buddy brush
Copic markers
Foam squares and tape
Glossy accents

I appreciate you sharing your time with me. Have a fabulous day!

Thermoweb – Christmas Cards with Deco Foil Flock

Hello again! Thanks for stopping by. Today I’m over on the Thermoweb blog with a fun tutorial on making Christmas cards with Deco Foil Flock! This is one of my favorite products and I had a blast creating this pair of cards using just one piece of flock.

For my first card, I used transfer gel on a blue piece of cardstock through the Newton’s Nook snowflakes stencil, and white deco foil flock over that. Then on the second card I used the negative flock sheet with a little ink blending for the background! Literally two-for-one backgrounds!

For the first card, I added a snow bank and then the cute snowman from Newton’s Nook Snowman Greetings. I love this set with the fun greetings created to fit perfectly in the wood sign he’s holding!

On the second card, I chose the image from Newton’s Holiday Post as the focal image. I stamped a sentiment from the set on a stitched circle since this one wasn’t part of the main image.

If you’d like the details on these adorable cards, head over to the Thermoweb blog HERE where I’ve got a step-by-step to share with you!

I appreciate you sharing your time with me. Have a fabulous day!

Thermoweb – Collaboration with Benzie Design

Oh my goodness! I am so excited to share that Thermoweb and Benzie Design have partnered up for a really awesome Christmas in July collaboration! They’ve got designers from the paper team and fabric team creating awesome projects all week long! Today I have some ornaments, tags and a card to share!

Here’s a quick look at all the fun things I created for the collaboration! The sweet bears and foiled tags are great together or on their own. Tied to a package or maybe affixed to an envelope even. And the Christmas card is fun and the sweater is removable to hang on the tree!

Here’s a closer look at the Christmas card. The fun foiled background mixed with the fuzzy texture from the felt are so awesome! And I can’t get enough of the Ugly Christmas Sweater dies from Benzie! They are so fun!

Here’s another look at those sweet bears and gift tags. I have been obsessed with these bears for a while and love making them hold lots of different things. For this project I gave them each a Christmas gift with a bow on top! The tags are two layers with foiled acetate on top and white cardstock for writing a message or the recipient’s name on the bottom.

If you’d like to see a step-by-step for these projects and more head over to the Thermoweb blog and check it all out!

I appreciate you sharing your time with me. Have a fabulous day!

Miss Ink Stamps – You Color My World

Hey friends! I’m back today with another Miss Ink Stamps card. I just had to bring that awesome Rainbow Builder stencil set and play again. I just love these so much!

I started by cutting a white panel to 4×5.25 inches. Then I centered the largest layer of the rainbow stencil I wanted to use and inked it up. Then I switched to the second layer and ended with those fun accents details in dark blue this time.

I trimmed a piece of cardstock in the general shape of the rainbow to use as a mask from the outer stenciling I wanted to do. I taped down the Tiny Snowfall stencil next and inked it up in dark blue. Then I came back with the Starry Night stencil and gold glitter glitz gel. While the glitz gel was drying I stamped and heat embossed a sentiment from Sunshine and Rainbows on a dark blue cardstock with white embossing powder. I used the Trinity Stamps 4-bar Card die set to cut it into a sentiment banner.

I added foam tape to the back of the stenciled panel and popped it on a white card base. Then I used a little liquid adhesive to adhere the banner down and my card is all finished. Isn’t this so fun?!?

Products I used on today’s card:
Miss Ink Stamps Rainbow Builder stencil
Miss Ink Stamps Tiny Snowfall stencil
Miss Ink stamps Starry Night stencil
Miss Ink Stamps Sunshine and Rainbows stamps
Trinity Stamps 4-bar Card dies
Thermoweb Glitter Glitz Gel – gold
iCraft Ultra Bond liquid adhesive
Thermoweb foam tape roll

I appreciate you sharing your time with me. Have a fabulous day!

Miss Ink Stamps – Oh, Nuts!

Hey friends! I hope your week is chugging along smoothly. Today I’m popping in with a silly card from Miss Ink Stamps featuring some of my favorite squirrels from Oh, Nuts! I paired them with a little stenciling and decofoil for some texture and shine.

To start my card, I pulled out the Ins & Outs Quatrefoil and Latte Love stencils. The Ins & Outs stencils are 2-piece sets that work together to give you a center shape and a frame. Today I inked up the center piece with Lawn Fawn walnut ink and a blending brush, then taped the Latte Love stencil over the opening and added another layer of the same walnut ink. I removed the stencils and placed the quatrefoil frame stencil in place and spread Thermoweb transfer gel through the opening. I removed the stencil and set my panel aside to dry. Next, I turned on the laminator to heat up while the transfer gel dried and I cleaned up my workspace.

While I was waiting to foil my panel, I stamped images from Oh, Nuts! and colored them with my copic markers. I used the scan-n-cut to cut them out and set them aside. Next, I placed my stenciled panel in a folded sheet of parchment paper and added a piece of gold decofoil over the top. I ran this through my laminator and voila! Shiny, beautiful frame around my stenciling! This never gets old.

I trimmed my panel down to 4×5.25 inches and stamped a sentiment below the foiled frame. I added foam squares to the back of my images and popped them in place. Then I added foam tape to the back of the panel and popped it up on a white card base.

To finish things off I glued a scattering of gold baubles from the Twiddler’s Nook shop and added black glaze pen to the squirrel eyes and noses. After the eyes were dry I added a dot of white gel pen for a highlight.

Aren’t these furry little guys super cute?!? I love them and this sentiment leaves room for so many different types of cards too!

Products used on today’s card:
Miss Ink Stamps Oh, Nuts!
Miss Ink Stamps Ins & Outs Quatrefoil stencil
Miss Ink Stamps Latte Love stencil
Thermoweb Transfer Gel
Thermoweb Decfoil gold
Thermoweb stencil pal
Twiddler’s Nook gold baubles

I appreciate you sharing your time with me. Have a fabulous day!

(This blog uses affiliate links whenever possible, at no additional cost to you.)

Trinity Stamps – Hello Lemons

Hey friends! Today I’m over on the Trinity Stamps blog sharing this fuzzy, fun slimline card featuring more new goodies from the most recent release!

To create my card, I started by grabbing the Lemon and Leaves stencil, choosing some inks, my blending brushes and a white panel for my stenciling.

You’ll notice that I had a yellow ink picked out but as I got that far in my stenciling I thought it would be way more fun to make fuzzy lemons. So I switched gears for that last layer and spread Thermoweb Transfer Gel Blanco through the lemon layer.

After I spread the transfer gel, I set my panel aside to dry while I cleaned up my mess and also turned on my laminator to heat up so it was ready to go when the panel was dry. I ran the panel through my laminator with a yellow decofoil flock transfer sheet in a folded piece of parchment paper. Then I just peeled the flock sheet away from the stenciled panel and MAGIC!

Then I pulled out the Slimline Embossed Edge dies and cut the largest one from black cardstock and the third largest one from the stenciled panel. Then I die cut the new Slimline Striped Frame Panel die from white cardstock.

For assembly, I adhered the black panel to a white card base, then adhere the striped frame panel to that. I added foam tape to the back of the stenciled panel and popped it in place next.

For my sentiment, I stamped hello from the new Big & Bold Sentiments stamp set and trimmed it out with my paper trimmer. I popped it on with foam tape as well.

I just LOVE the bright yellow lemons and their green leaves popping against the white and black of this card! Isn’t it just awesome!?!

Products used on today’s card:
Trinity Stamps Lemon and Leaves stencil
Trinity Stamps Slimline Striped Frame Panel dies
Trinity Stamps Slimline Modern Embossed Panels dies
Trinity Stamps Big & Bold Sentiments stamps
Trinity Stamps Blending Buddy brushes
Trinity Stamps Blending Bar
Trinity Stamps Blending Bar Magnetic Color Caps
Thermoweb Transfer Gel Blanco
Thermoweb Decofoil Flock Transfer Sheets – yellow
Thermoweb Stencil Pal

I appreciate you sharing your time with me. Have a fabulous day!

Miss Ink Stamps | Thermoweb Collaboration – Bubbles and Foiling

Hey friends! The super fun collaboration between Miss Ink Stamps and Thermoweb continues today! I’m over on the Miss Ink Stamps blog with this adorable card featuring Bubbles and the coordinating dies with Thermoweb toner card fronts and decofoil for some awesome shine!

I started this card by choosing a toner card front from the Love Blooms toner card front pack. I foiled it with glass slipper decofoil and then ink blended tumbled glass and mermaid lagoon distress oxide over the top. I used a clean microfiber cloth to wipe the ink off the foiling and splattered the background with watered down black paint.

Next, I stamped and colored images from Bubbles with my copic markers. Then I used the coordinating dies to cut them out and set them aside. I die cut a vellum heart from the Trinity Stamps Nested Hearts dies, then cut the bottom tip again from white cardstock. I inked that up with mowed lawn and twisted citron distress oxide and cut the top with the grass border from Trinity Stamps Great Outdoor Borders die set. I used tape runner to adhere them together. Using my images as a guide, I stamped and heat embossed some bubbles on the “sky” portion of the heart for a little added interest.

I stamped a sentiment from Bubbles and cut it out with a banner die from the Trinity Stamps 4-Bar Card die set. Next, I added foam squares and strips to the images and sentiment strip and adhered them to the heart.

I trimmed the foiled panel down to 4×5.25 inches and added foam tape to the back, adhering it to a white card base. Then, hiding adhesive behind the grass and images, I adhered the heart to the front of the card and moved on to finishing touches.

For those, I just added glossy accents to the bubble bottle on the snail and the whole bubble that the mouse is floating in. The background on this card is so eye catching and beautiful that I didn’t really need to add anything.

There are giveaways going on over on Instagram, the Miss Ink Stamps blog and Thermoweb’s blog too! So head to those places and check out the posts this week for sure!

Products used on today’s card:
Miss Ink Stamps Bubbles stamps and dies
Thermoweb Love Blooms Toner Card Front
Thermoweb Glass Slipper decofoil
iCraft XL Tape Runner
iCraft foam tape roll
iCraft foam squares
Trinity Stamps Nested Heart dies
Trinity Stamps Great Outdoor Border dies
Trinity Stamps 4-Bar Card dies
Distress Oxide Inks – mermaid lagoon, tumbled glass, twisted citron, mowed lawn
Glossy accents

I appreciate you sharing your time with me. Have a fabulous day!