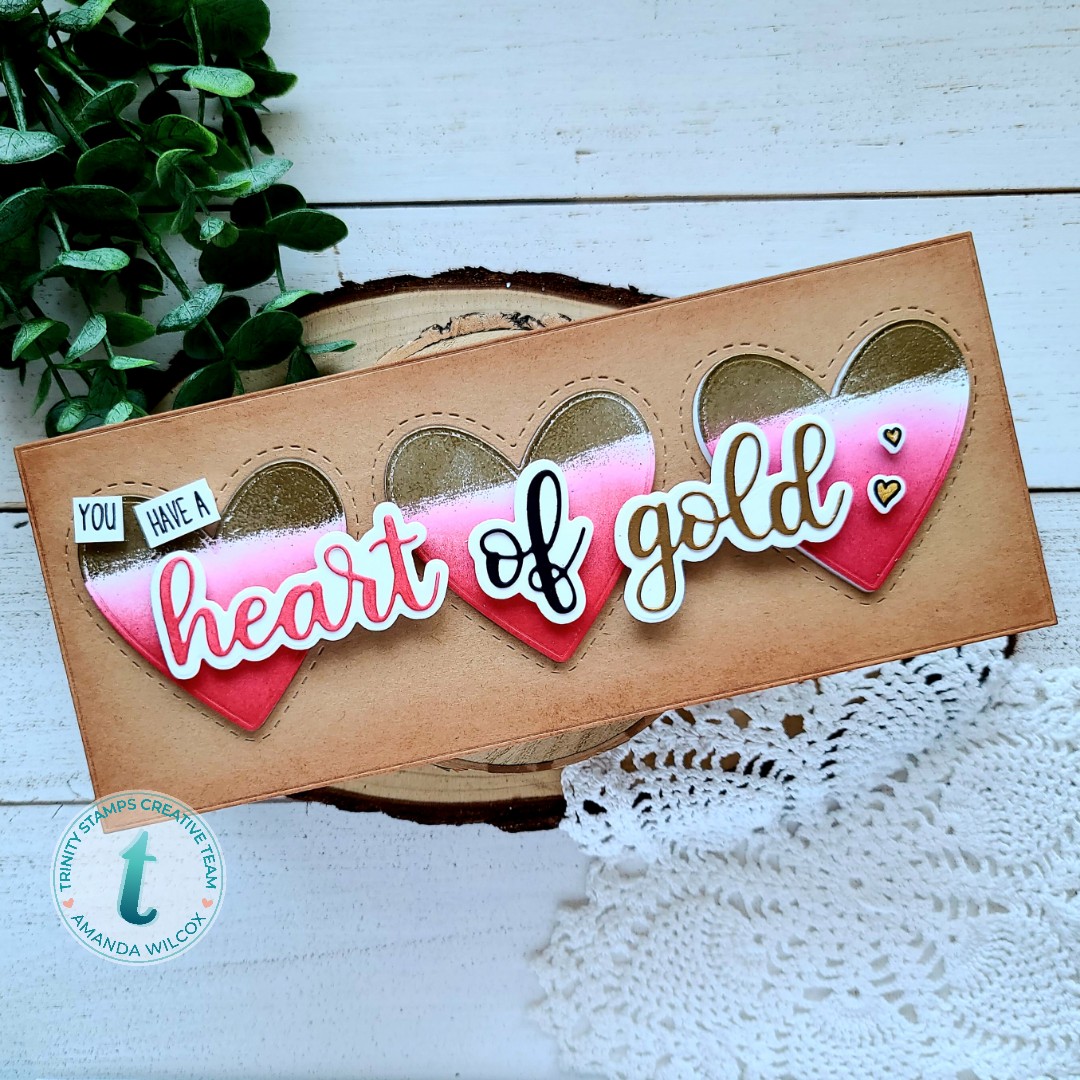
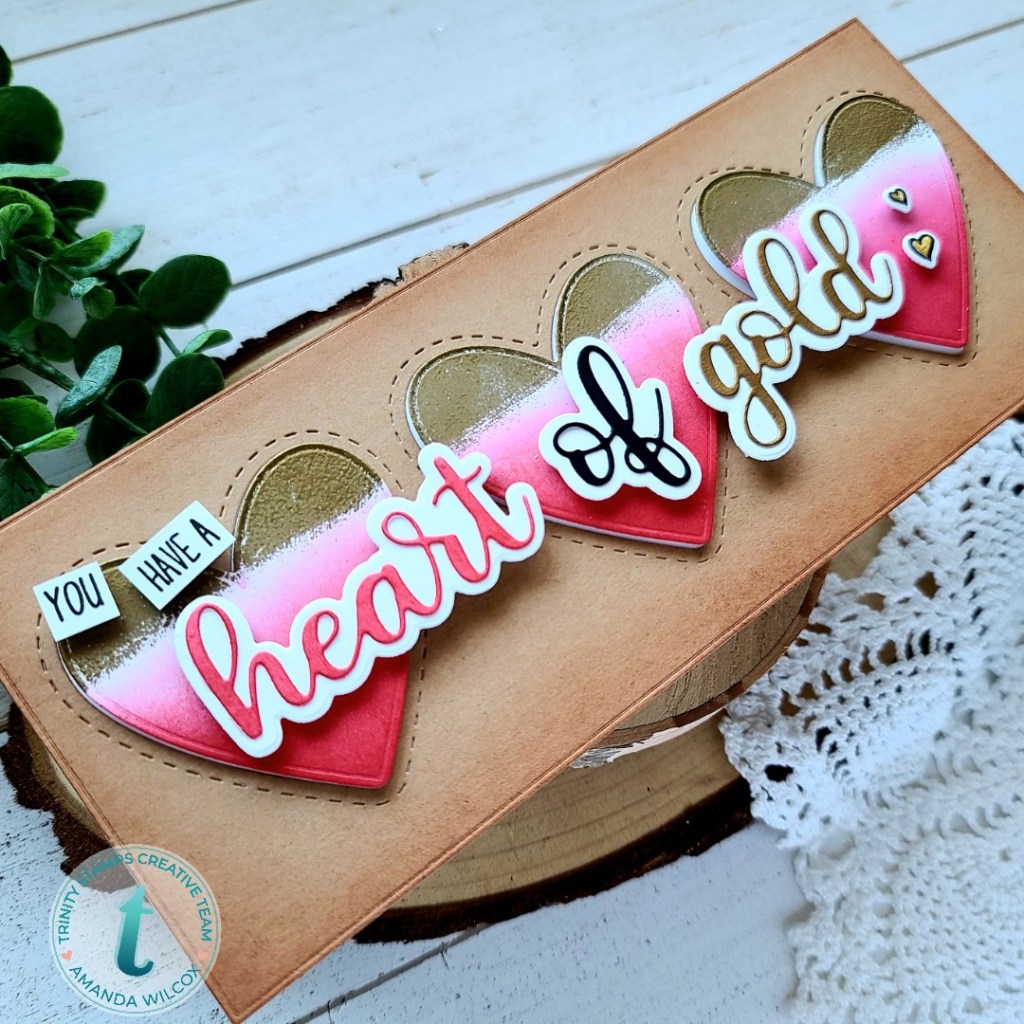
Hello everyone! I’m sharing a fun and different card with you today that has a bit of a Valentine feel but really could be for any time to show someone you appreciate them. It features some goodies from the most recent Trinity Stamps release and I also borrowed some sentiments from older sets to complete my card.
I was playing with the new goodies a had die cut the slimline wide heart trio die from a few different colors. I was left with this kraft panel and some white hearts and had an idea! I inked up the bottom of the hearts with a blending brush and some red ink. Then I smeared the top of the heart on my versamark pad and sprinkled it with gold embossing powder. Once all 3 were done I heat set them and then moved on to the sentiment.
I die cut the new scripty heart words for heart of gold from white, black and gold cardstocks. I inked up the white with the same red as the hearts. I cut the shadow from white cardstock and adhered everything together with liquid glue. I wanted this to be a complete phrase so I dug in my stash and found “you have a” in the sentiments on the ocean reef builder and turtley awesome stamp sets. So I stamped them and cut them into strips.
Moving on to assembly, I adhered the wide heart trio panel to a card base with liquid glue. Then I added foam tape the the hearts and popped them in place. The scripty heart words and sentiment strips were also popped up with foam squares. I thought the right side of the card was missing something so I stamped a couple of hearts from Falling For You and cut them out with the coordinating dies. Then I used some gold watercolor to paint them in and popped them in place with foam squares I cut up in teeny pieces.
Don’t you just love the sentiment of this card? I do. It’s different and so sweet. It would be great to share with someone special.
I appreciate you sharing your time with me. Have a fabulous day!
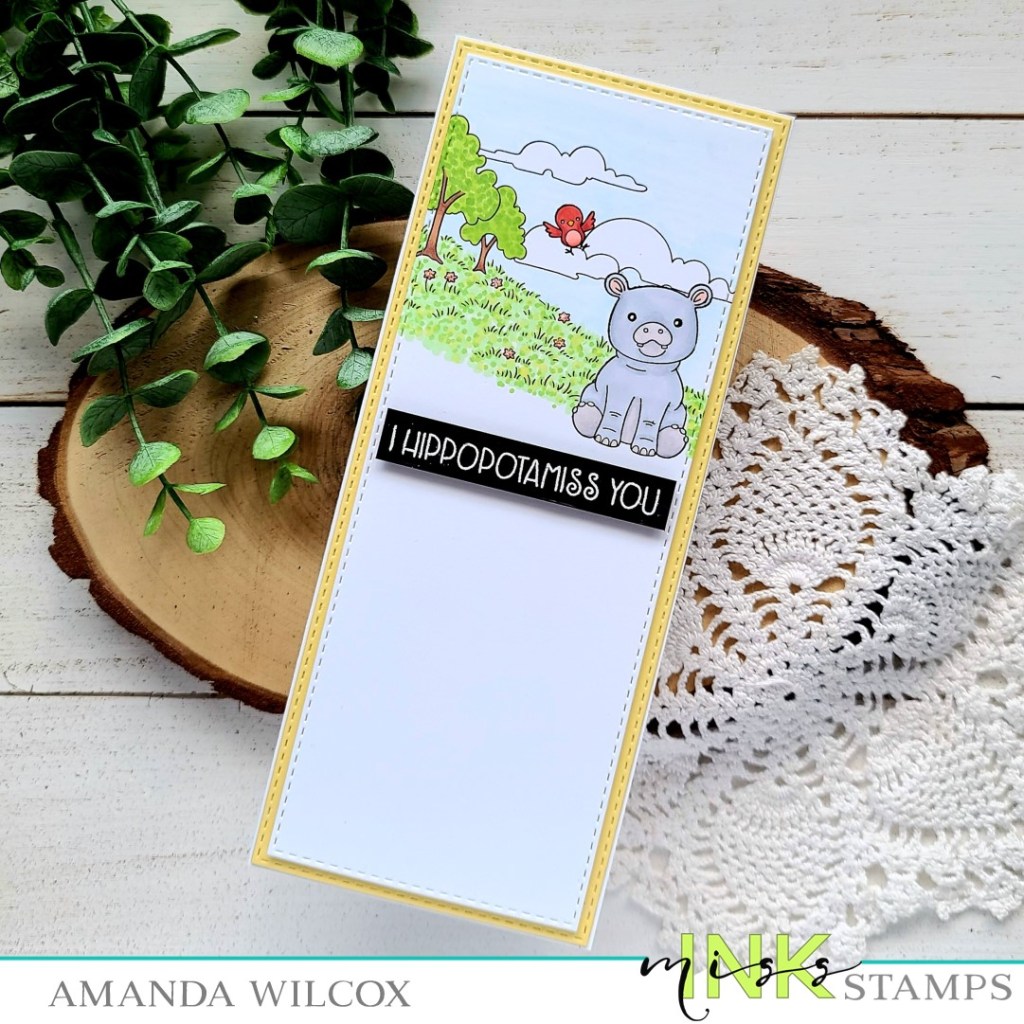
Hey there again! I’m hanging out on the Miss Ink Stamps blog today with a fun slimline mini scene card. Sometimes coloring in whole card front scenes can be daunting and overwhelming so I decided to try something different and just to a mini scene. I love it and I’m totally hooked! Plus, you know I love these hippos more than words!
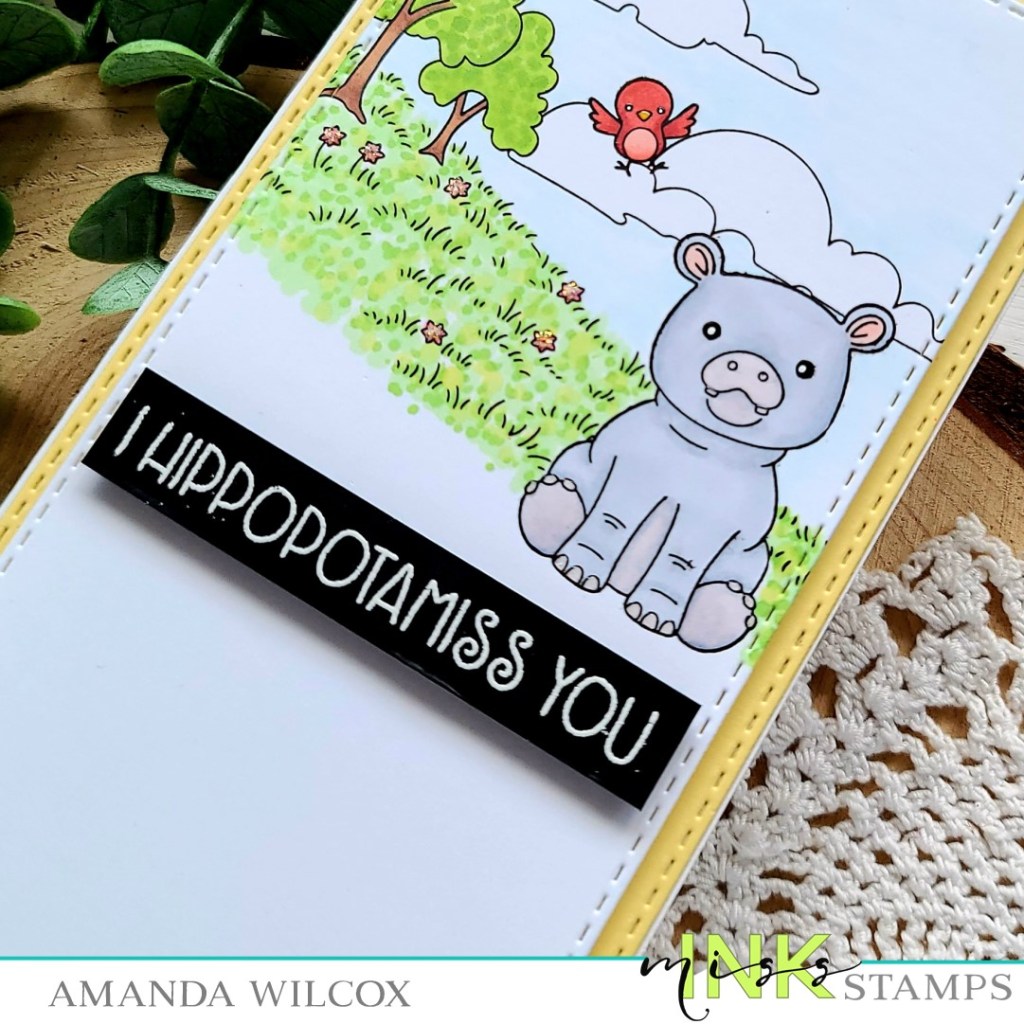
For today’s card I stamped my hippo and bird from Hippo Hooray and then also stamped masks for them. After cutting and placing the masks I stamped one of the Scene Builder: Meadow images over the top. I removed the masks and colored everything with my copic markers. I die cut the panel with a stitched slimline rectangle and then cut a second one just a smidge bigger out of yellow.
The yellow one is adhered to a card base with liquid glue and my scene panel is popped up with foam tape. I stamped and heat embossed a sentiment from Hippo Hooray on black cardstock with white embossing powder. I trimmed it down into a strip and popped it up with foam squares.
Moving on to finishing touches, I added black glaze pen to the critter eyes and, once it was dry added a white gel pen accent back in. Then I added unicorn Stickles to the flowers in the grass for a little shimmer. The last thing I did was add glossy accents to the bird’s beak and hippos teeth and toes for a little shine.
I appreciate you sharing your time with me. Have a fabulous day!
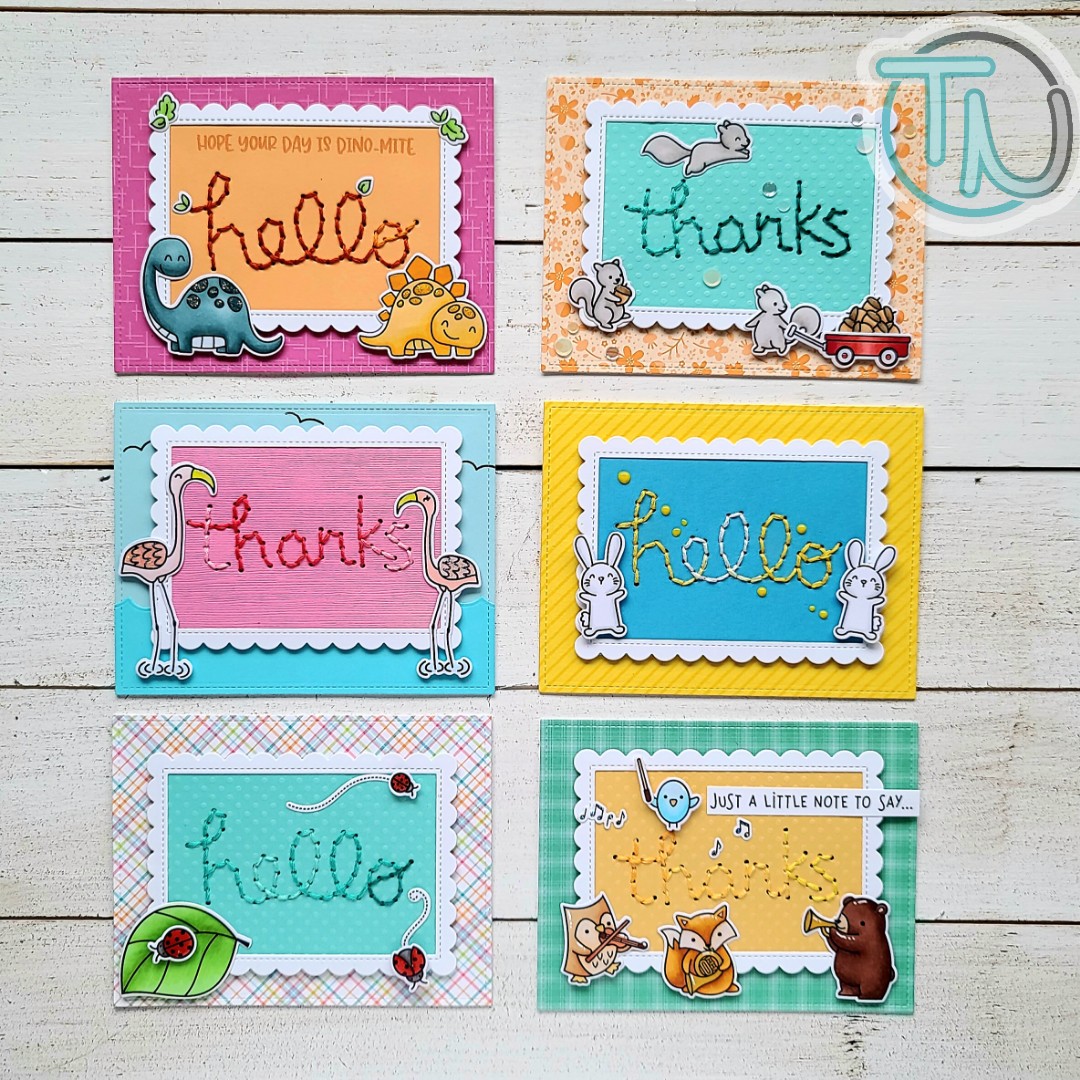
Hello everyone!!! I’m starting off your week with a big batch of really fun cards featuring Lawn Fawn and Avery Elle goodies. These embroidery dies came out from Lawn Fawn a few years ago and, while I thought they were cool, it didn’t totally interest me at the time. Fast forward to now and I like stitching on paper quite a lot so I picked them both up recently and decided to give them a shot. Obviously I had a problem stopping because I whipped these up in a weekend and was eager to make more.
I did 3 hello and 3 thanks style cards and used different paper and stamps to decorate each one but generally kept to the same layout. Here is a picture of just the hello set.
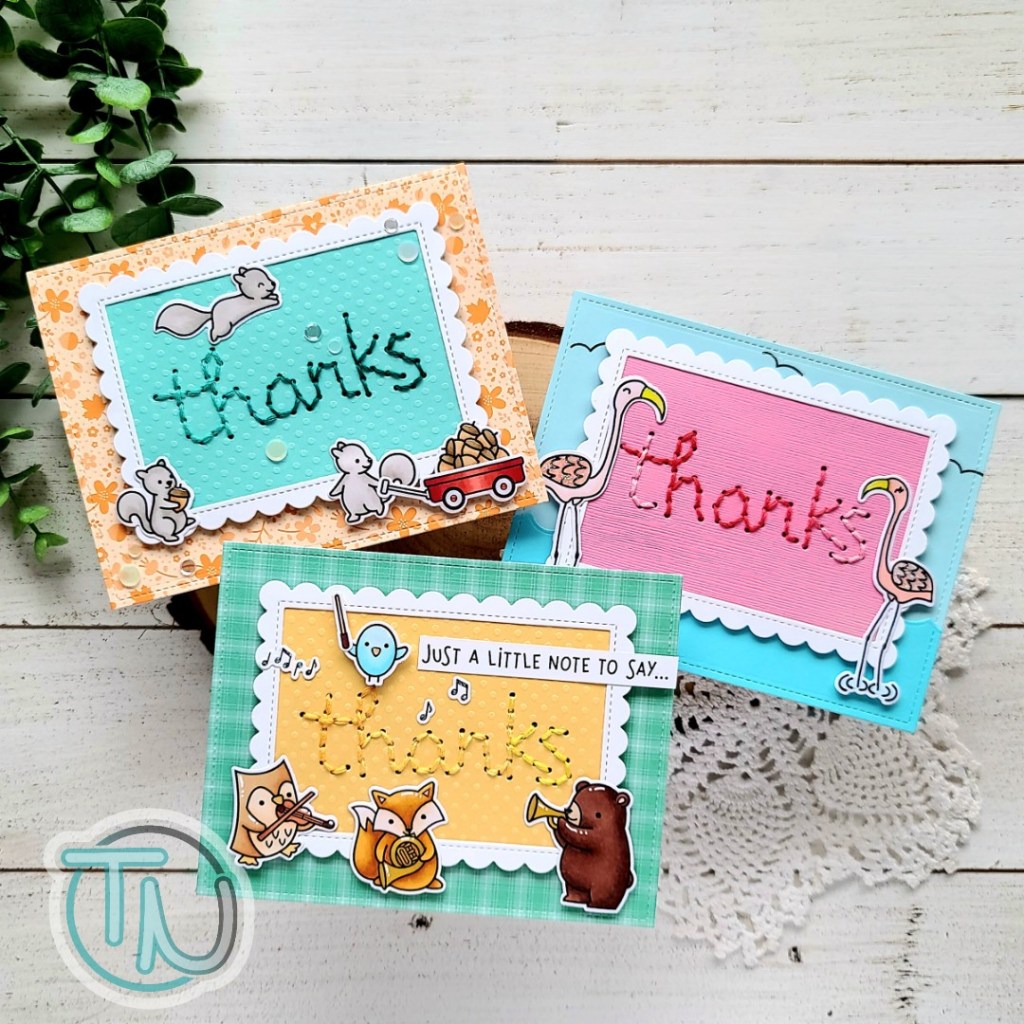
I had so much fun pulling out stamps that I haven’t used before or very often and was able to decorate these cute stitched panels. Let’s take a look at the thanks set closer too.
For this whole set of cards, I just chose some colors of cardstock I liked and cut them into 3×4 inch panels. I ran them through the die cut machine with the Lawn Fawn hello and thanks embroidery dies and sat in front of the TV stitching one evening. Then I die cut a Lawn Fawn scalloped rectangle frame from white cardstock 6 times and adhered the panels to them. With this part done, I dug through my stamps and paired different sets with the different stitched panels. Some I chose because of the cardstock and stitching colors and some because of the sentiment.
I stamped out the images I chose and colored them all with copics. Then I used the coordinating dies to cut them all out and put the cards together one at a time.
I know this will get long but I’m going to run through each card individually in case anyone is wondering what I used to create them.
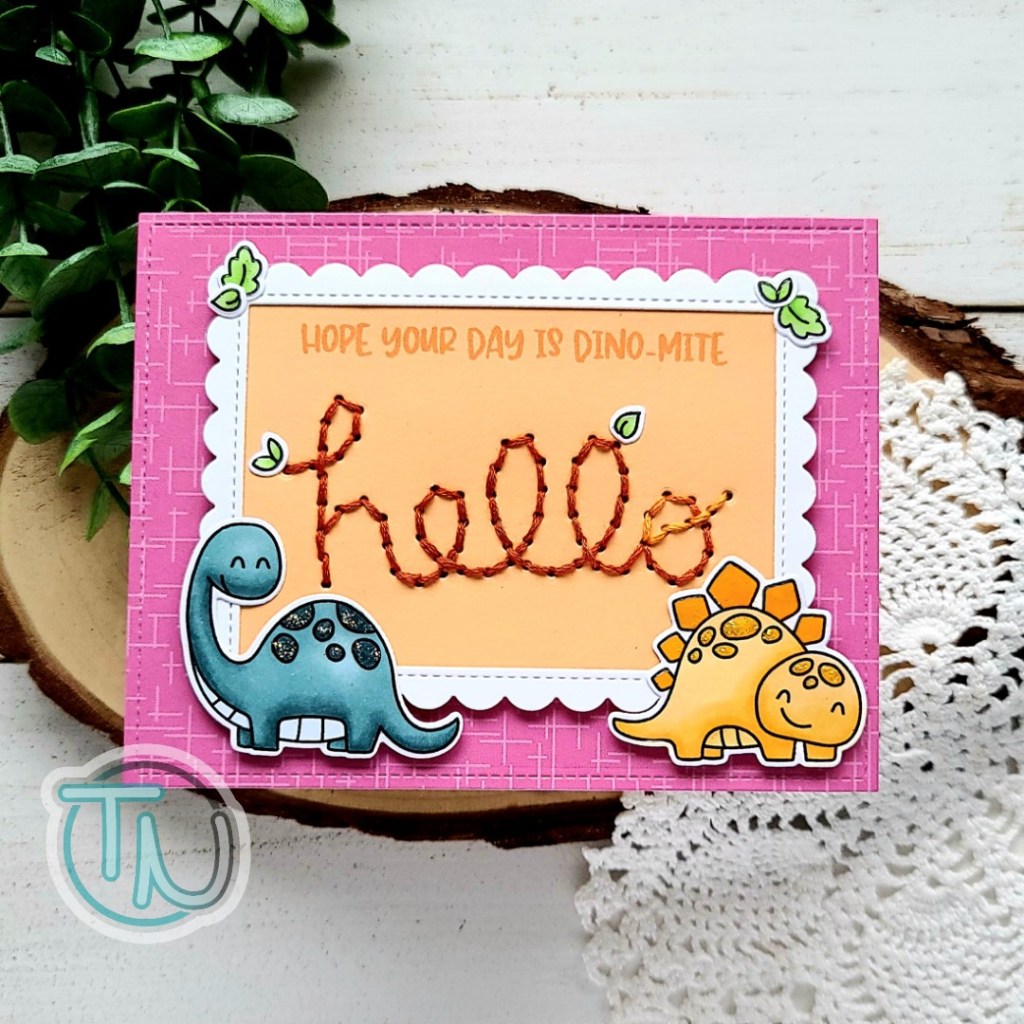
This dino one is my absolute favorite. I have a serious affliction for dinosaurs and these guys are adorable. The paper is an old Avery Elle pad I had in my stash and the stamps are also Avery Elle – Rawr.
This flamingo set also happens to be Avery Elle also and is called Flamingos. It’s retired now but I love how well it framed up the sentiment here. I used the Lawn Fawn ocean waves border for the water panel on the background.
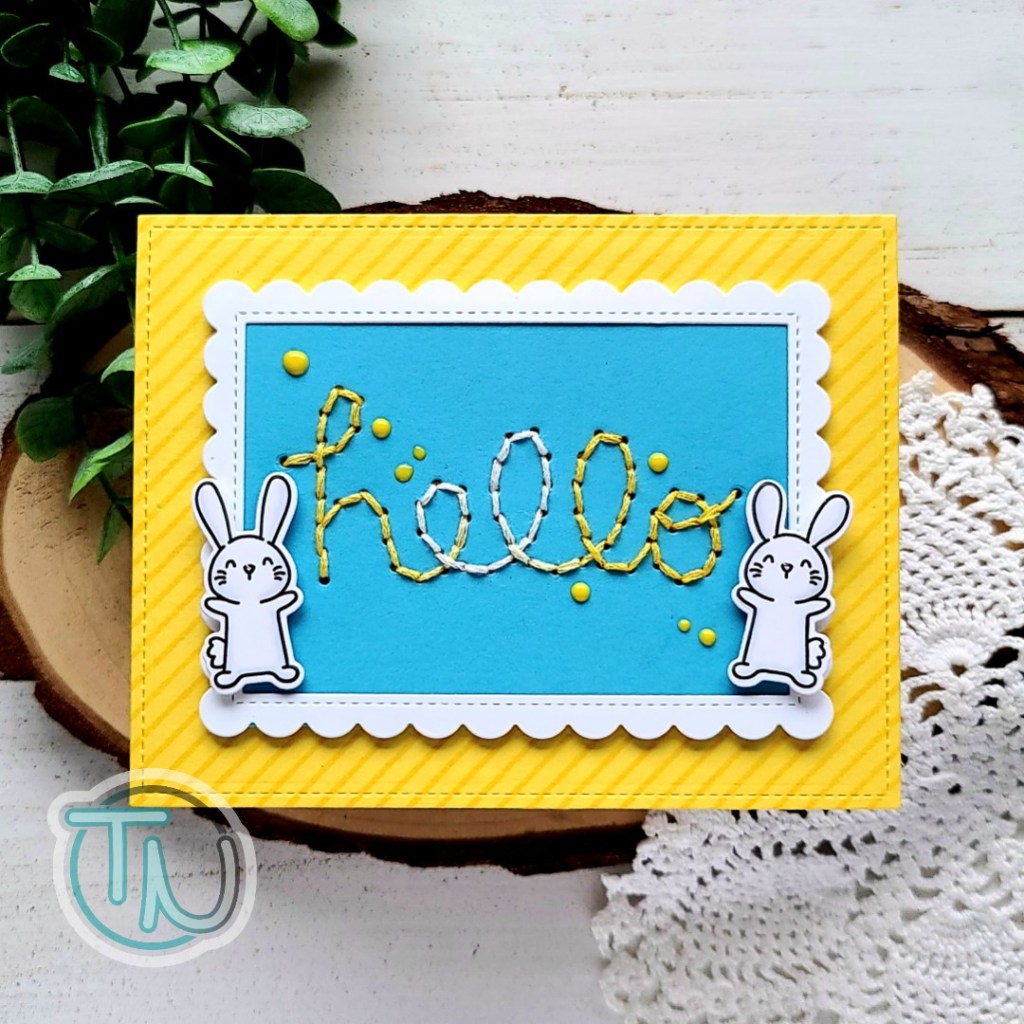
This cuteness uses a Lawn Fawn set from last spring called Hey Lady that I was gifted from a wonderful friend. Aren’t they so cute crawling around on that panel? The paper in the background is Lawn Fawn Perfectly Plaid. This was one of my favorite pads they created and I’m sad it’s retired now.
Next, we’re tooting our horns with Lawn Fawn Critter Concert stamps and the Perfectly Plaid Chill paper pad. My daughter and I actually scored this at a super discount this summer and she just had to have it. These critters are adorable and I love how the sentiments work together here.
Staying on track with Lawn Fawn, we’ve got those adorable squirrels from Let’s Go Nuts playing around our whole scene. That beautiful floral paper is from the Lawn Fawn Fall Fling paper pad. This card has a fall feel to it but it’s really just pretty and I would totally give it year round. I embellishments on this one are from Trinity Stamps called Glass Slipper.
I always like to add those finishing touches to cards so most of these have glossy accents or unicorn stickles in various places too. Black glaze pen on critter eyes is always a must as well. Some also have white gel pen accents added for a little extra interest.
I truly hope that you enjoyed today’s post and found a little inspiration to create something wonderful.
I really appreciate you sharing your time with me, especially for such a long post. Have a fabulous day!
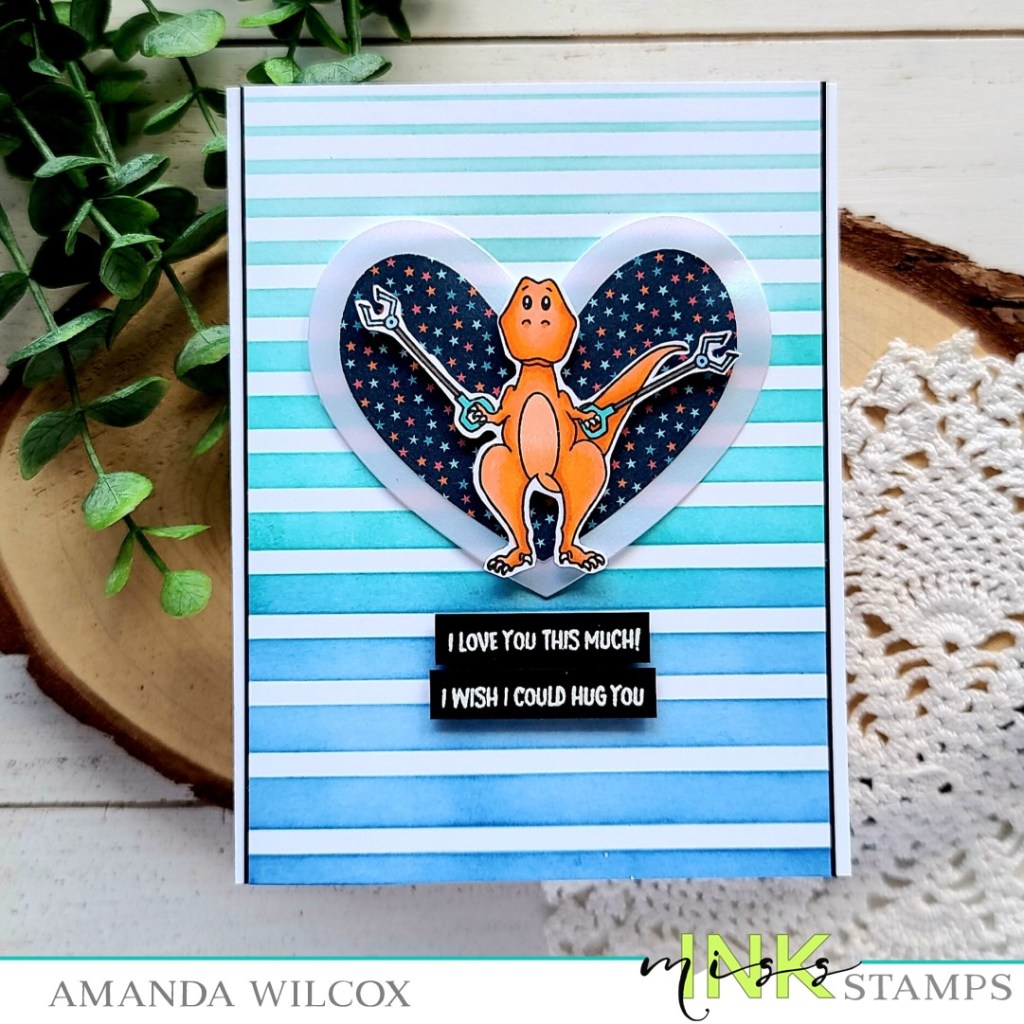
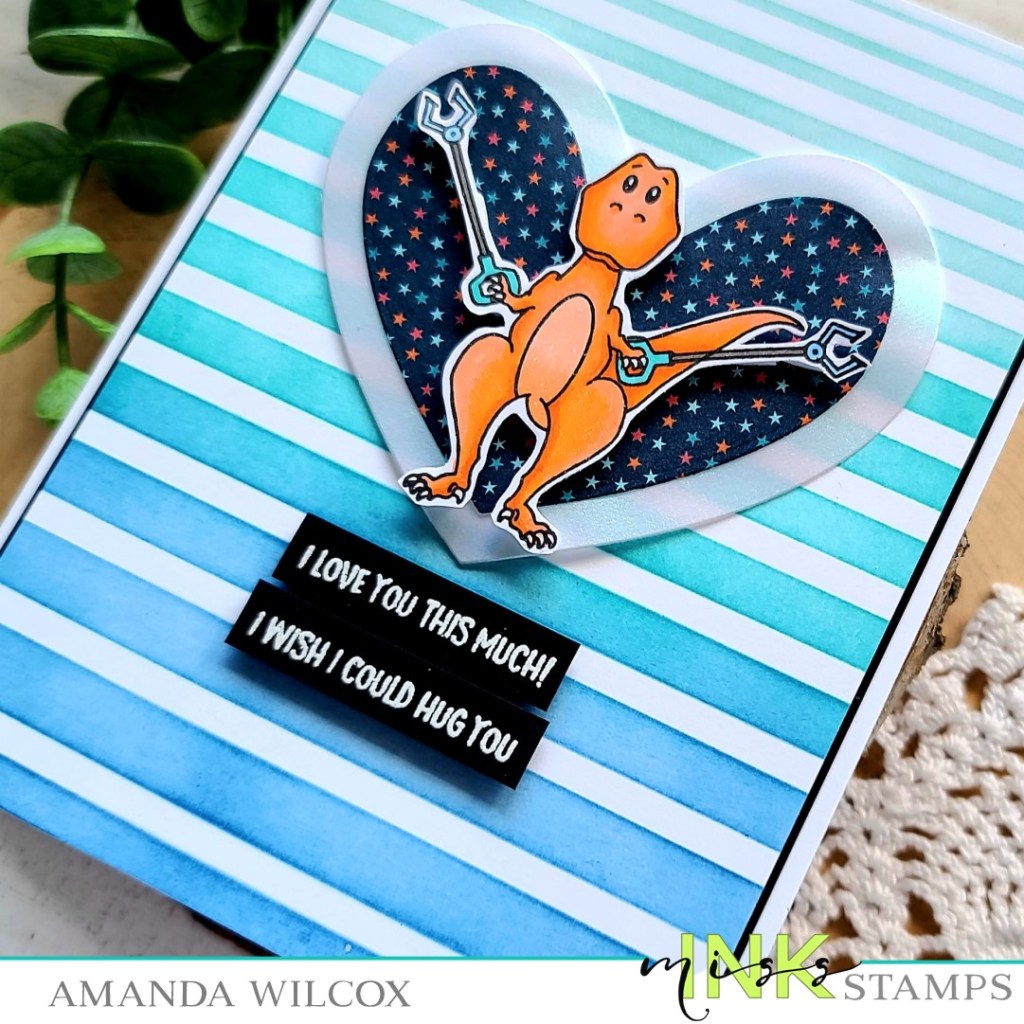
Hi there! I have a super adorable dinosaur card to share with you today featuring the Miss Ink Stamps Unstoppable set. I love these dinos so much! They crack me up!
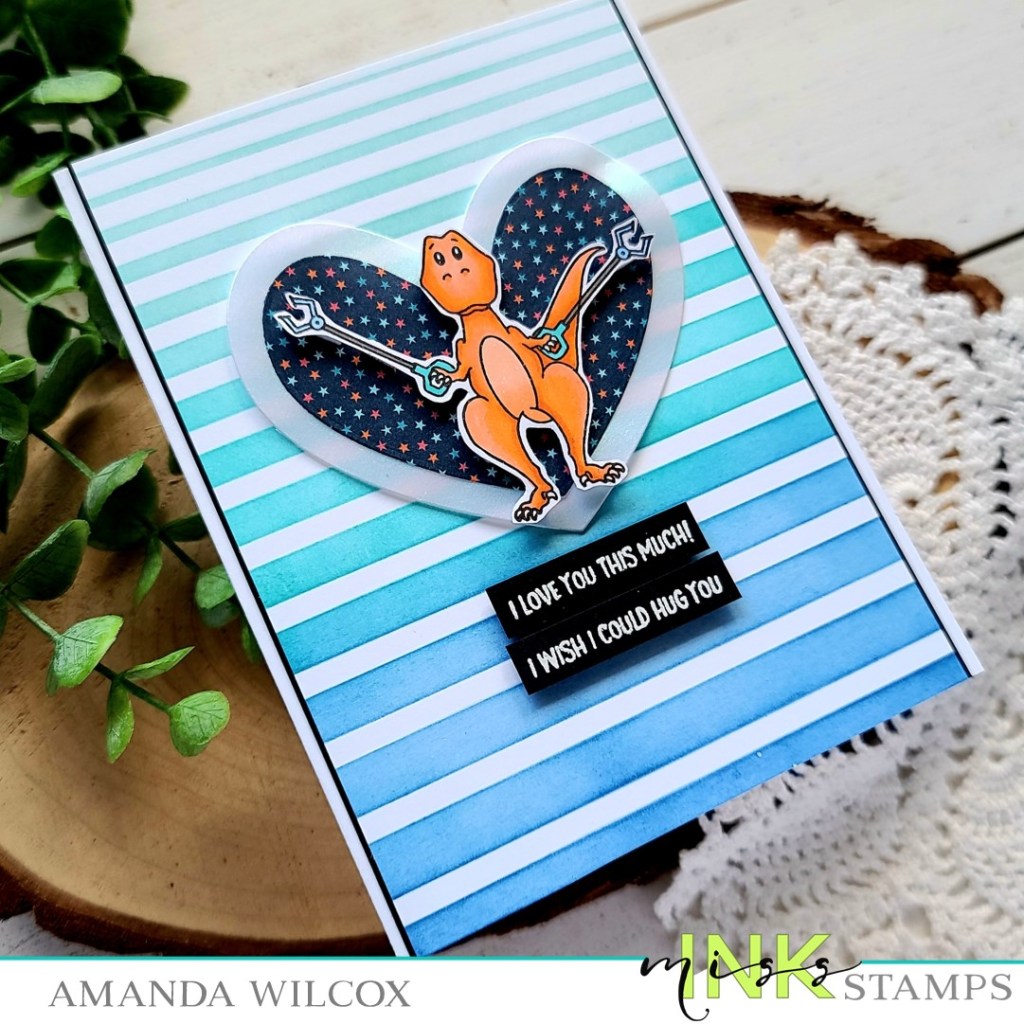
I started by stamping my dinosaur and then cut a mask for him. Then I stamped down the claw arms and removed the mask. I colored him with my copics and fussy cut him out. Then I moved on to my card front by inking up the Stripes stencil with blue and teal inks. on a white panel. I trimmed it down to 5.5×4. Then I glued a couple of thin black strips behind the edge for a little interest. I die cut 2 hearts from Trinity Stamps nested hearts dies and adhered them together. They are popped up with foam tape on the stenciled background and my dino is also popped up.
I stamped and heat embossed 2 sentiments from the set on black cardstock and cut them into thin strips. Then I added foam strips and adhered them down. The whole panel is adhered to a white card base with liquid glue.
This card is so stinkin’ cute! I just love the idea of a giant T-Rex holding onto those claw extenders because his arms are so short. Makes me giggle.
I appreciate you sharing your time with me. Have a fabulous day!
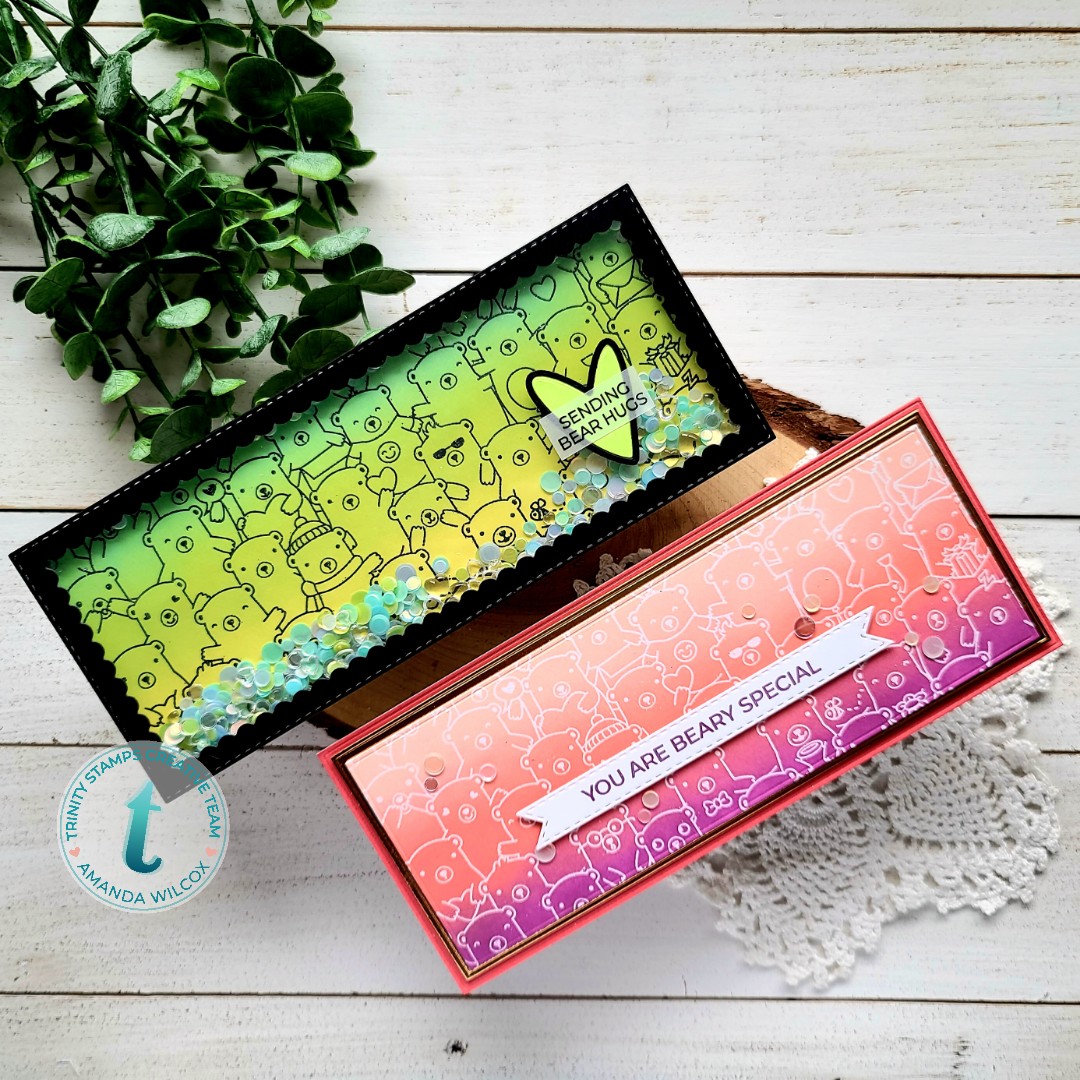
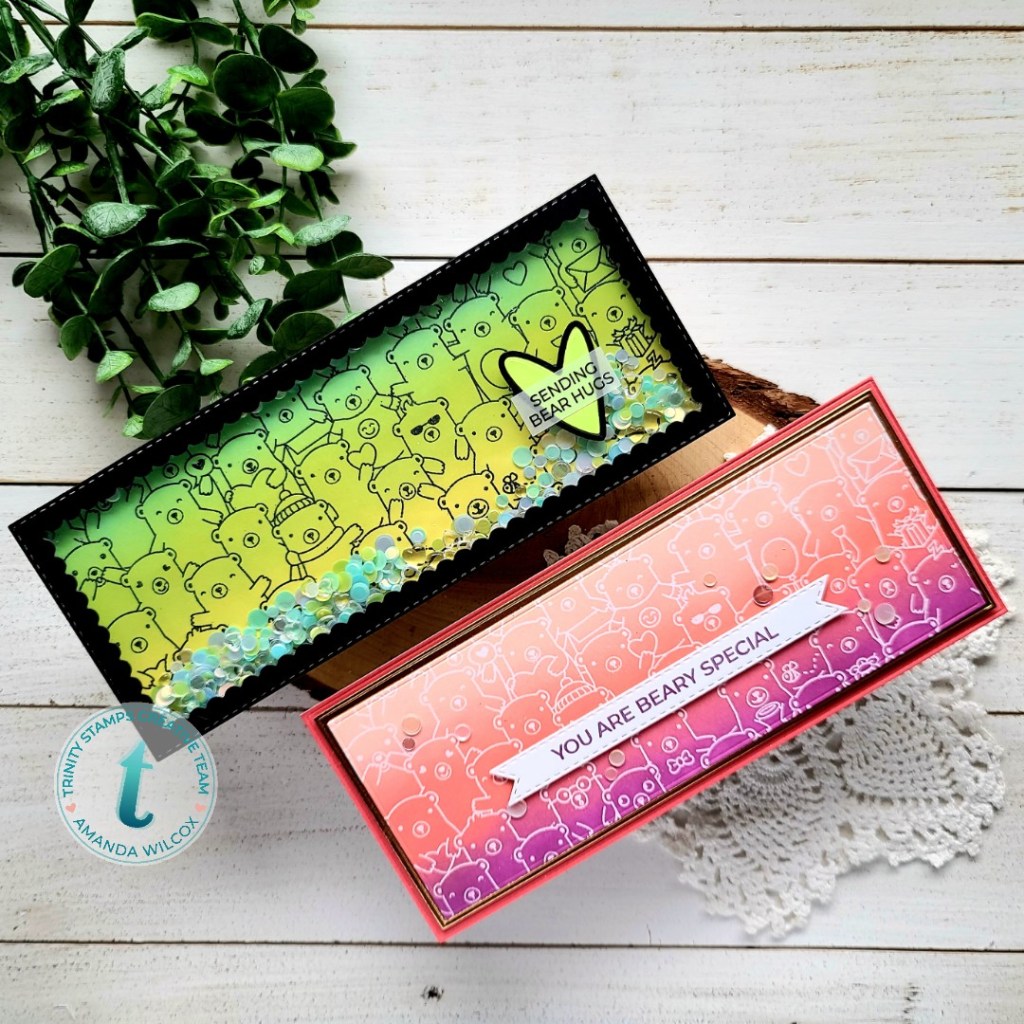
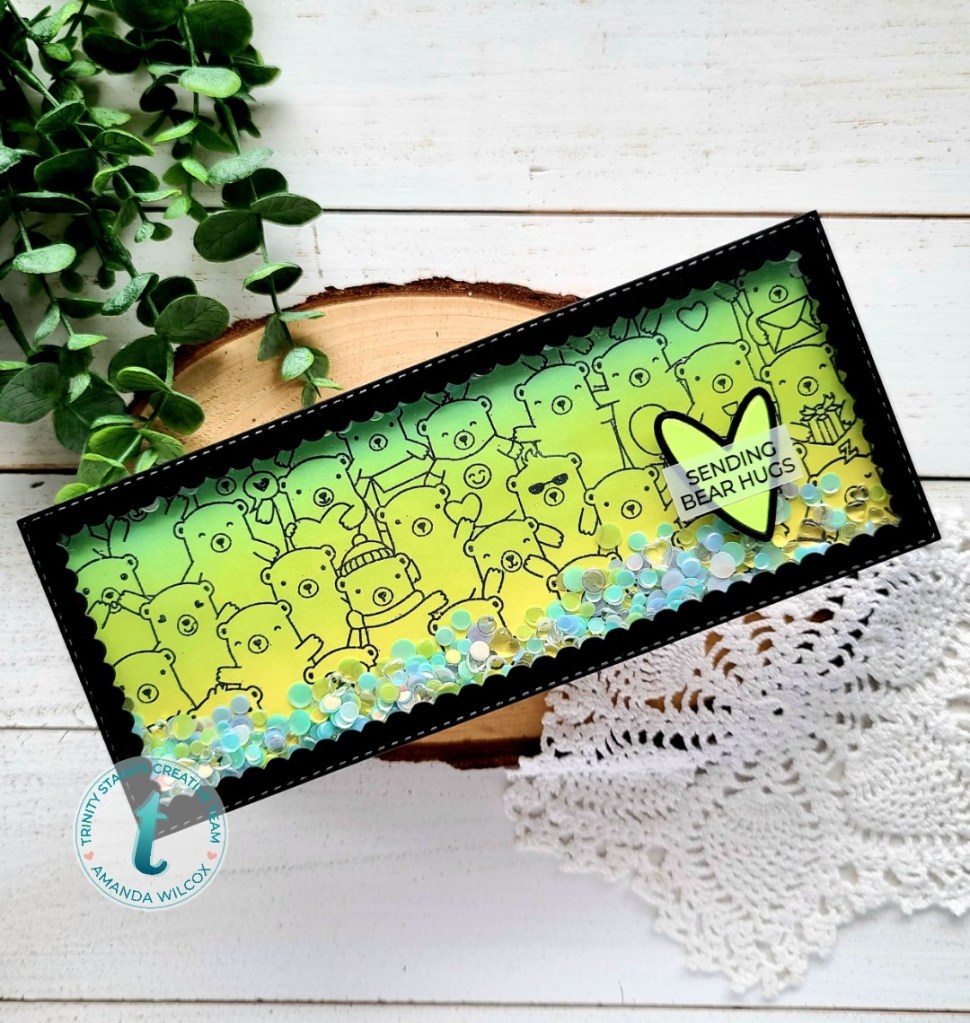
Hey friends! I’m over on the Trinity Stamps blog today with a couple of fun slimline cards featuring the newly released Beary Special slimline stamp set. I thought it would be fun to make 2 different cards using a lot of the same techniques and products.
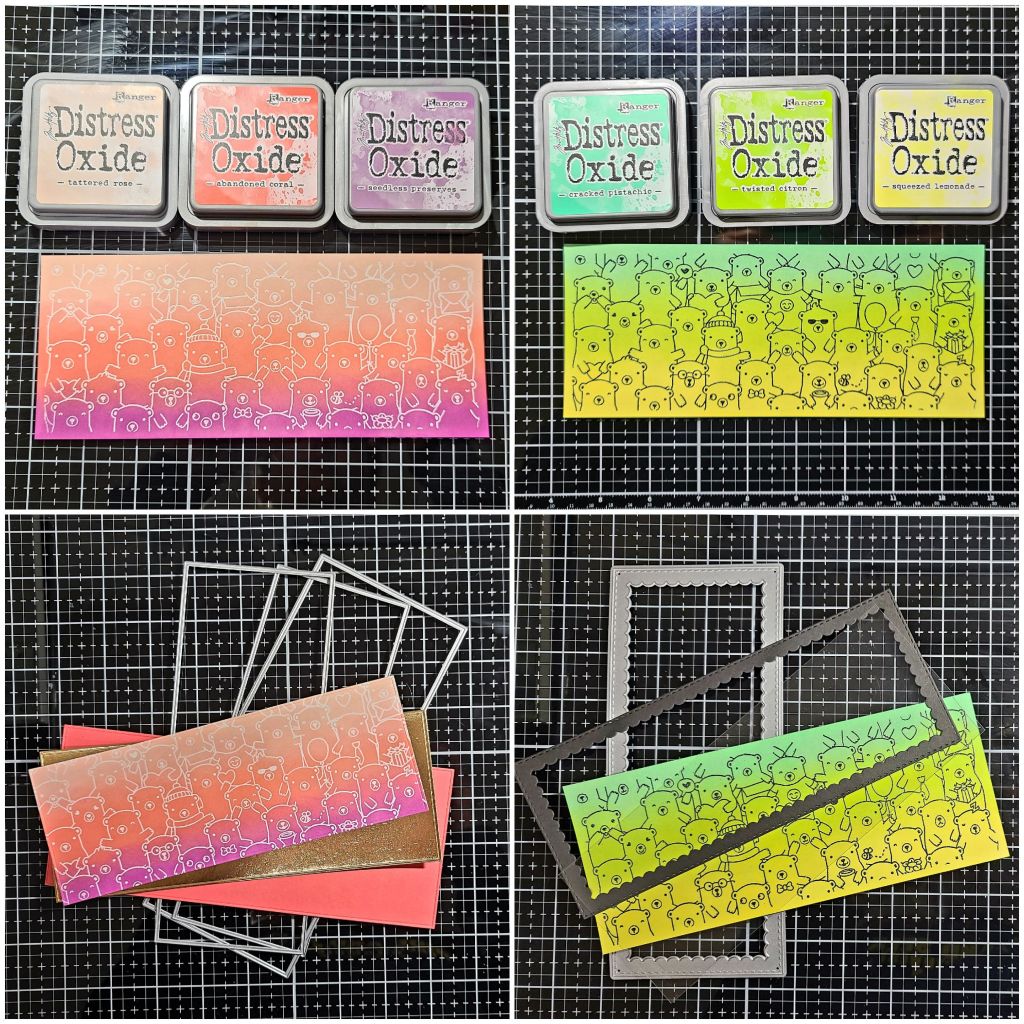
I started by inking up my Beary Special stamp with VersaMark ink and heat embossing 2 panels – one in white and one in black. Then I ink blended distress oxides over each one. I cut the green-toned one with the largest of the Modern Embossed Slimline dies. For the pink-toned panel, I cut three pieces with those same dies – coral cardstock, rose gold foiled cardstock, and then the inked panel.
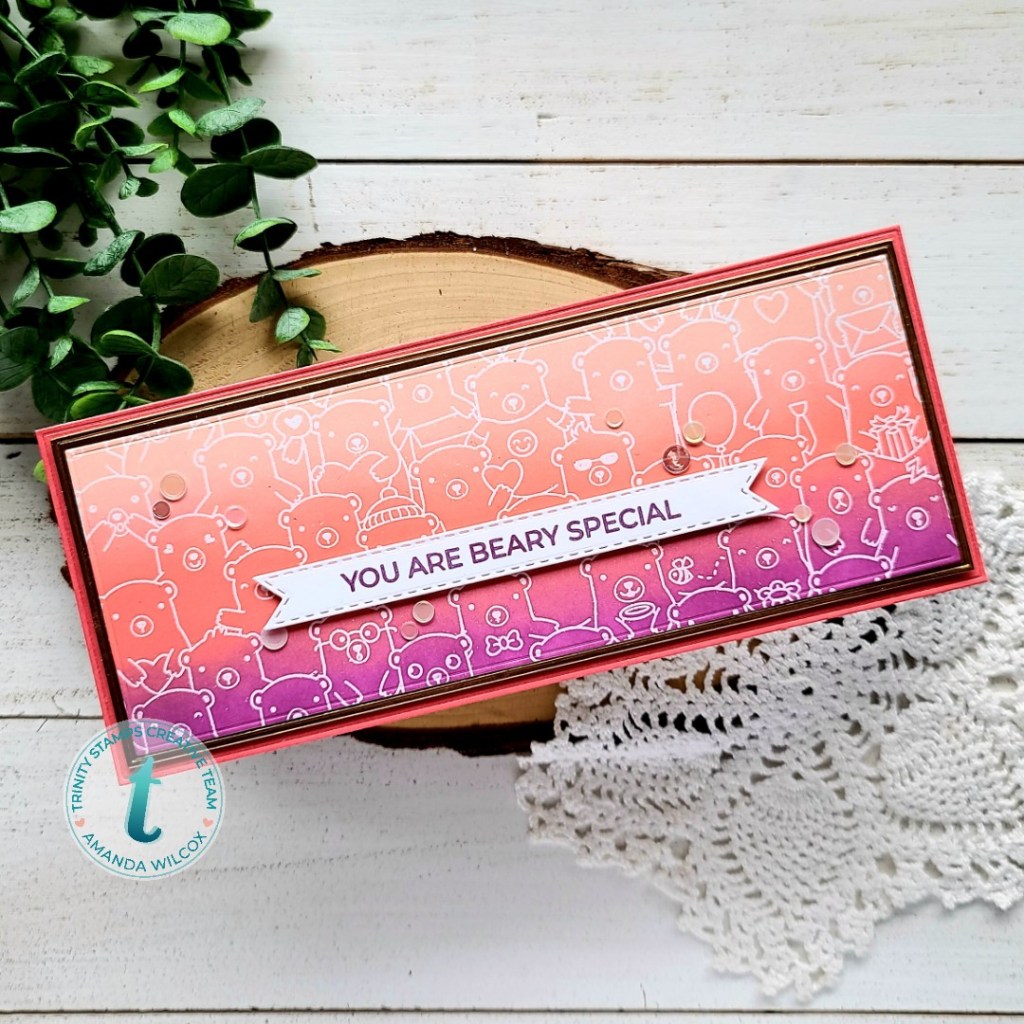
Finishing off the pink-toned card, I adhered the largest panel to a white cardbase, then popped up the other 2 panels with foam tape. I stamped a sentiment from Beary Special with Seedless Preserves and die cut it with a banner from Slimline Series Scalloped Panels and Banners. I popped the banner up with foam tape and glued a scattering of confetti embellishments across the design.
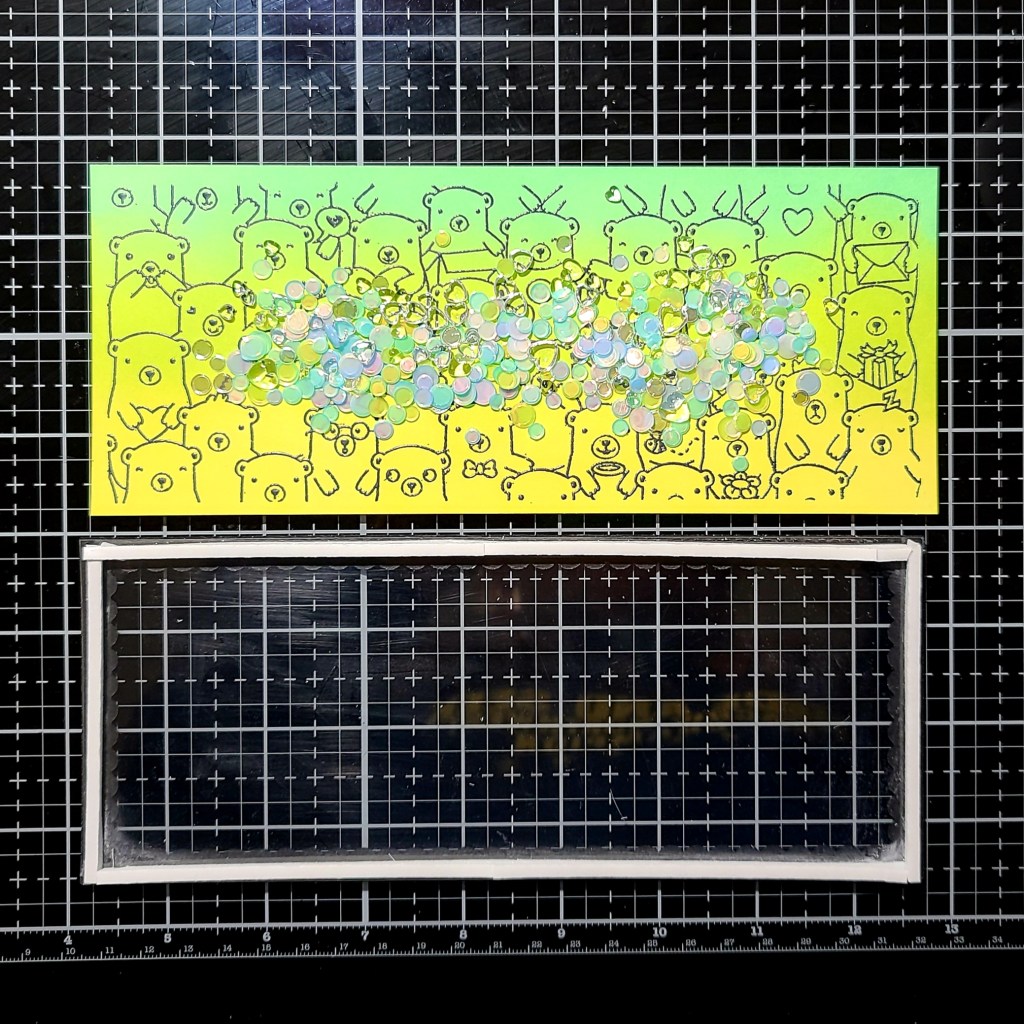
Switching gears back to the green-toned card, we’ve got our panel and now it’s time to build it into a shaker. I die cut the scalloped frame that comes with the Slimline Envelope Builder die set from back cardstock. I cut a piece of acetate and adhered them together with double-sided tape. Then I lined the frame with double-height foam strips.
I sprinkled confetti bits and resin hearts on my panel, removed the release paper from the foam strips and adhered them together. I used liquid glue to add the shaker to a card front and moved in to the sentiment.
For that, I die cut the heart from the Marshmallow Alphabet dies from a similar green and black cardstock and adhered them to the acetate window with liquid glue. I stamped and heat embossed a sentiment from Beary Special on vellum and cut it into a rectangle. I smeared a layer of liquid glue on the back of the vellum and attached it to the heart.
I hope you’ve enjoyed today’s projects and found a little inspiration to create something wonderful.
I appreciate you sharing your time with me. Have a fabulous day!
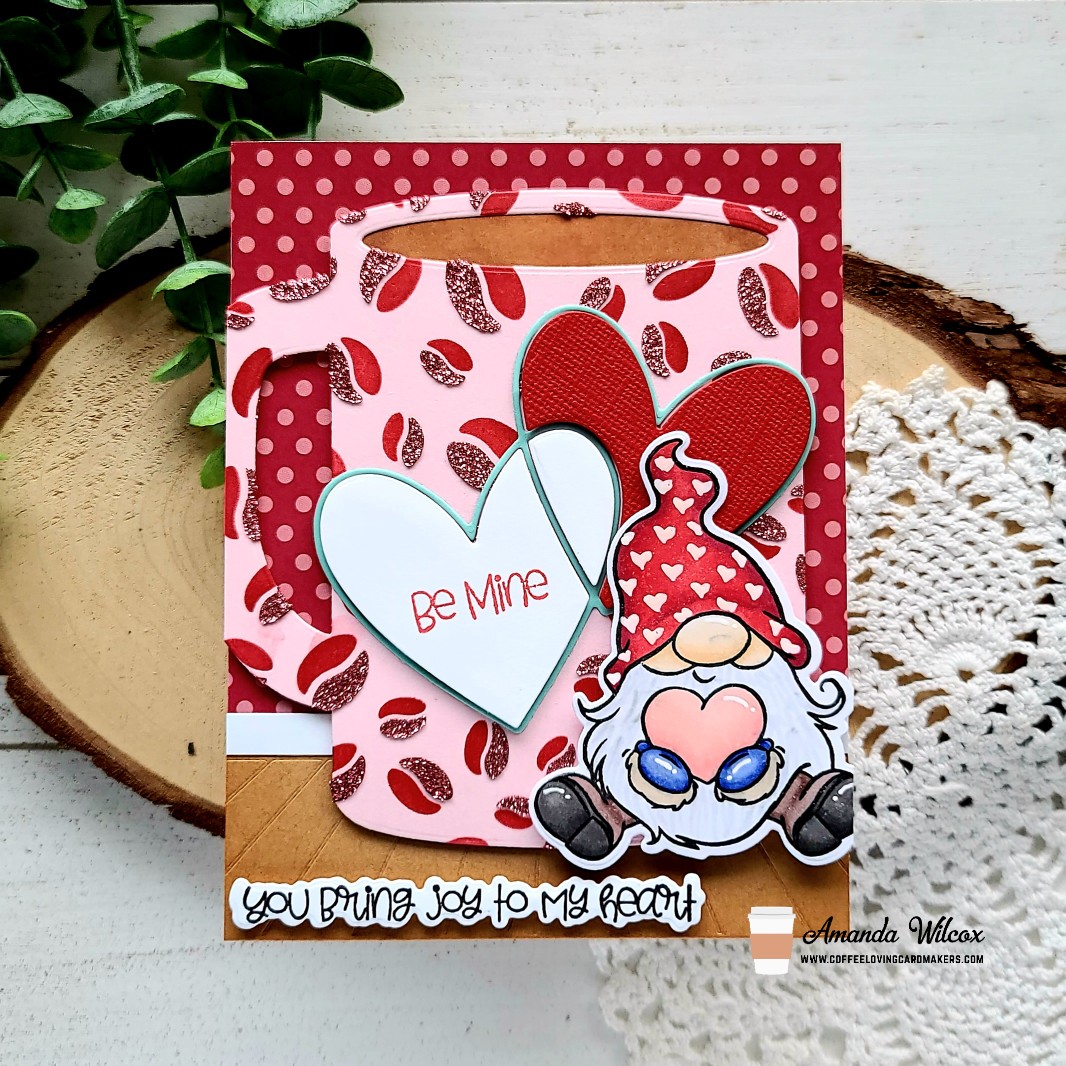
Hey friends! It’s Tuesday Tea over on the Coffee Loving Cardmakers blog today and I’m playing with some old and some brand new Trinity Stamps goodies today. They’ve got such a fun line of gnomes I decided to pair one of the new ones with the coffee mug die.
I started my card by die cutting half of the coffee mug and then inking up the layered coffee bean stencil. Half is red dye ink and the second half is glitter glitz gel. So sparkly and fun! I had die cut the hole for the coffee initially, so I colored some white cardstock and layered it behind the opening too. Then I die cut the new intertwined heart 3 times from red, white and teal. I glued the frame to the mug and popped the inside pieces up with foam squares.
Next, I stamped and colored the gnome from Joyful Heart with my copic markers. Then I used the coordinating dies to cut him out. I added foam squares to the back of him and added him to the mug. For my background, I die cut the “floor” from the slimline room builder dies and trimmed it to fit my card front. Then I cut a piece of red paper from the Autumn Rainbow pad for the top and adhered both to my card front. I thought it needed a border so I cut a strip of white paper 1/4 inch and glued it over the seam. Then I popped my mug and gnome up with foam tape and adhered them down.
Last, I stamped a sentiment from the Joyful Heart set and used the coordinating dies to cut it out and added it to the bottom of the card with foam squares. I thought the white heart on the mug looked a little empty so I also stamped a sentiment on it with red ink.
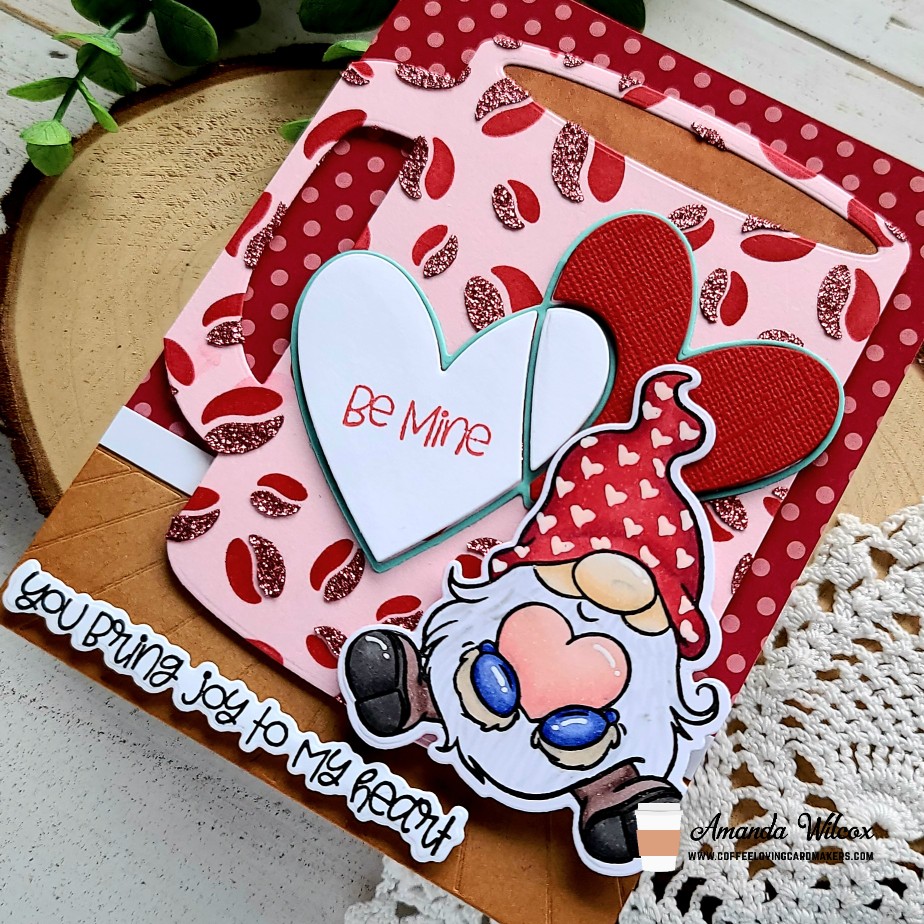
For finishing touches, I just added some white gel pen accents to my image and hearts to the gnome’s hat.
This combo is just too cute! A giant coffee cup with a sweet gnome professing his love…to you or the coffee??? I suppose that’s up for interpretation.
I appreciate you sharing your time with me. Have a fabulous day!
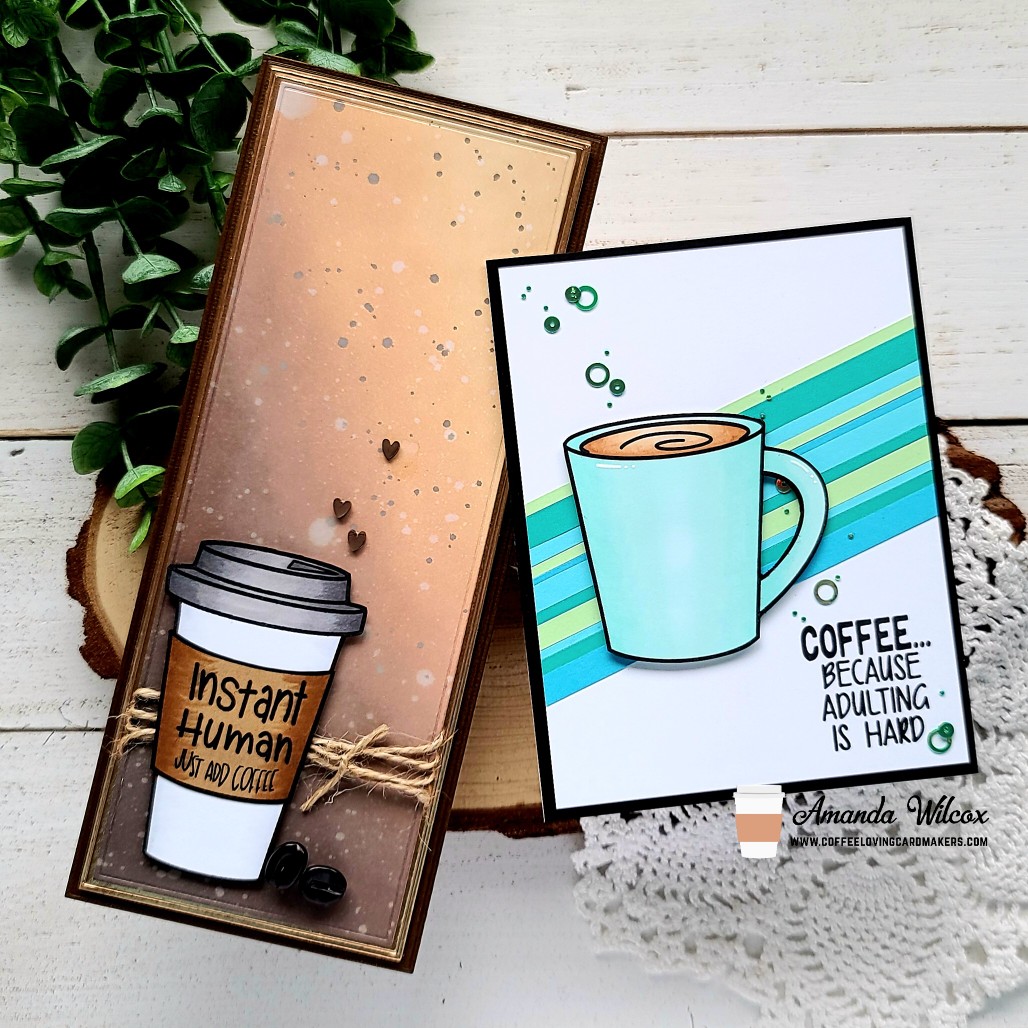
Happy Friday everyone! I’m super excited to be apart of the Coffee Loving Cardmakers – Sweet ‘n Sassy Stamps Collaboration today! I’ve made 2 cards to share with you featuring I Like Big Cups and Coffee Talk 2. These sets pair perfectly together so I couldn’t resist.
Let’s talk slimline first, shall we? I inked up a panel with ground espresso, vintage photo and tea dye distress oxide inks. Then I flicked some watered down ground espresso ink and regular water all over the panel. Once that was dry, I pulled out the Trinity Stamps slimline modern embossed panels dies and cut the 3 largest sizes from: dark brown, rose gold and the inked panel. The brown was adhered to a slimline card base with liquid glue, then the rose gold with foam tape. I wrapped some twine around the inked panel, tied it in a knot and put foam tape on the back avoiding the twine and put it in place too. Then I stamped and colored the travel cup and sleeve from I Like Big Cups and cut them out. I stamped a sentiment from Coffee Talk 2 on the sleeve and adhered them together with liquid glued. I added foam tape to the back of the cup, skipping the part where it overlaps the twine so it lays flat and popped it in place. For finishing touches I added some hearts and coffee beans from Twiddler’s Nook Caffeinated Crafting embellishment mix.
For my second card, I wanted to brighten things up a bit. So I chose a selection of blue and teal cardstocks and cut some different width strips. I added adhesive to a white panel and stuck the strips down at an angle and trimmed off the excess. I trimmed the panel down to 4×5.25 inches and stamped a sentiment from Coffee Talk 2 in the bottom right corner. I stamped another mug from I Like Big Cups, colored it with my copics and cut it out. I popped it up with foam squares and added foam tape to the back of the striped panel. I decided for a little contrast so I attached it to a black A2 size panel and used liquid glue to adhere it on a white card base. Then for finishing touches I added some white gel pen accents to the mug and a scattering of Twiddler’s Nook Princess Rings – Tiana across the design.
Remember, we’re hopping along today for the chance to win a $25 gift code to the Sweet ‘n Sassy Stamps store! You should have come from the fabulous Lori Turner and now will head over to the amazing Christine Burillo-Kirch.
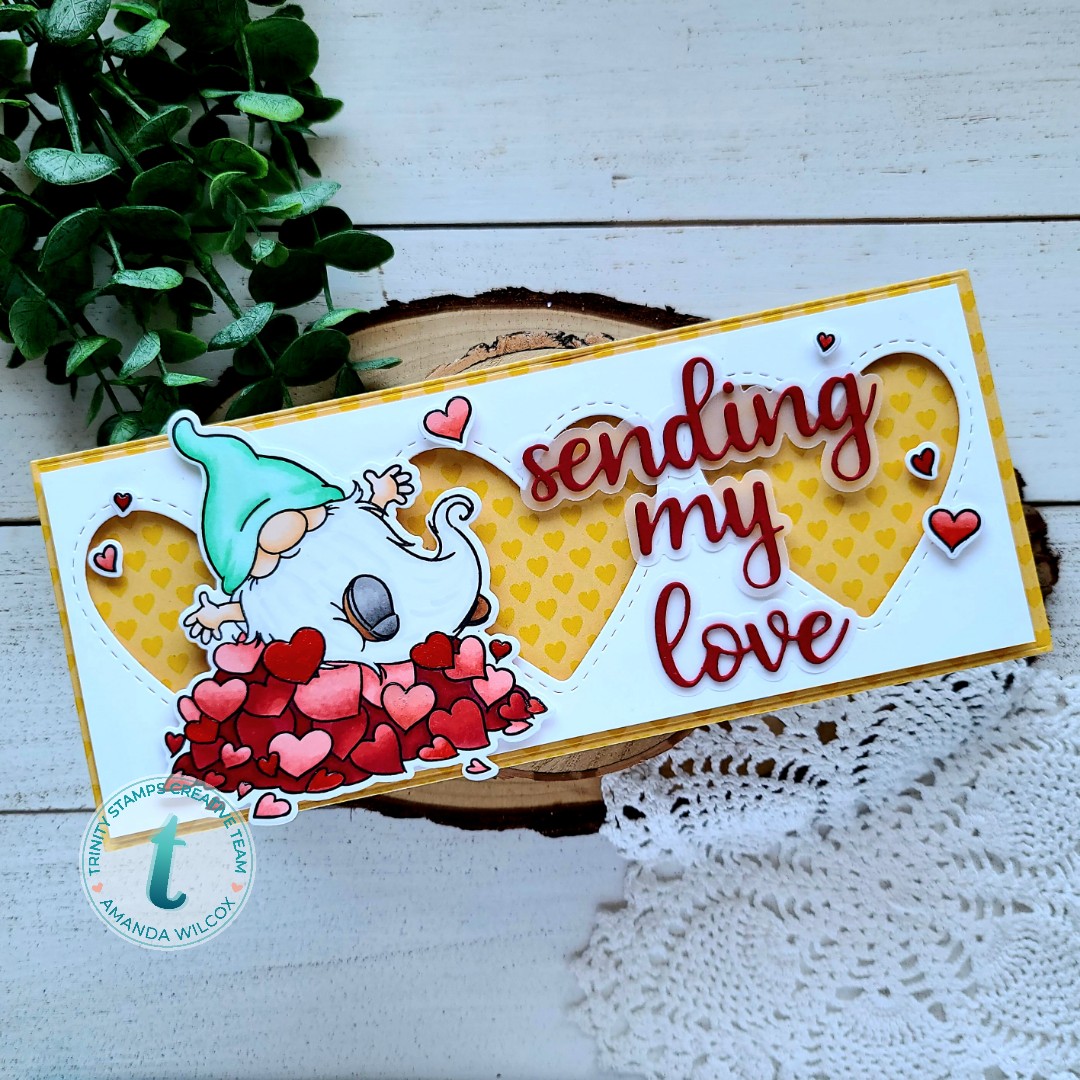
Hello everyone! It’s release day for Trinity Stamps’ Sending Smooches release. It’s packed full with so much lovey goodness! We’re having an Instagram hop today so be sure to head HERE and hop along for great inspiration and a chance to win a certificate to the Trinity Stamps shop!
I wanted to share my card for the hop with you here too and a little info about what I used to create it.
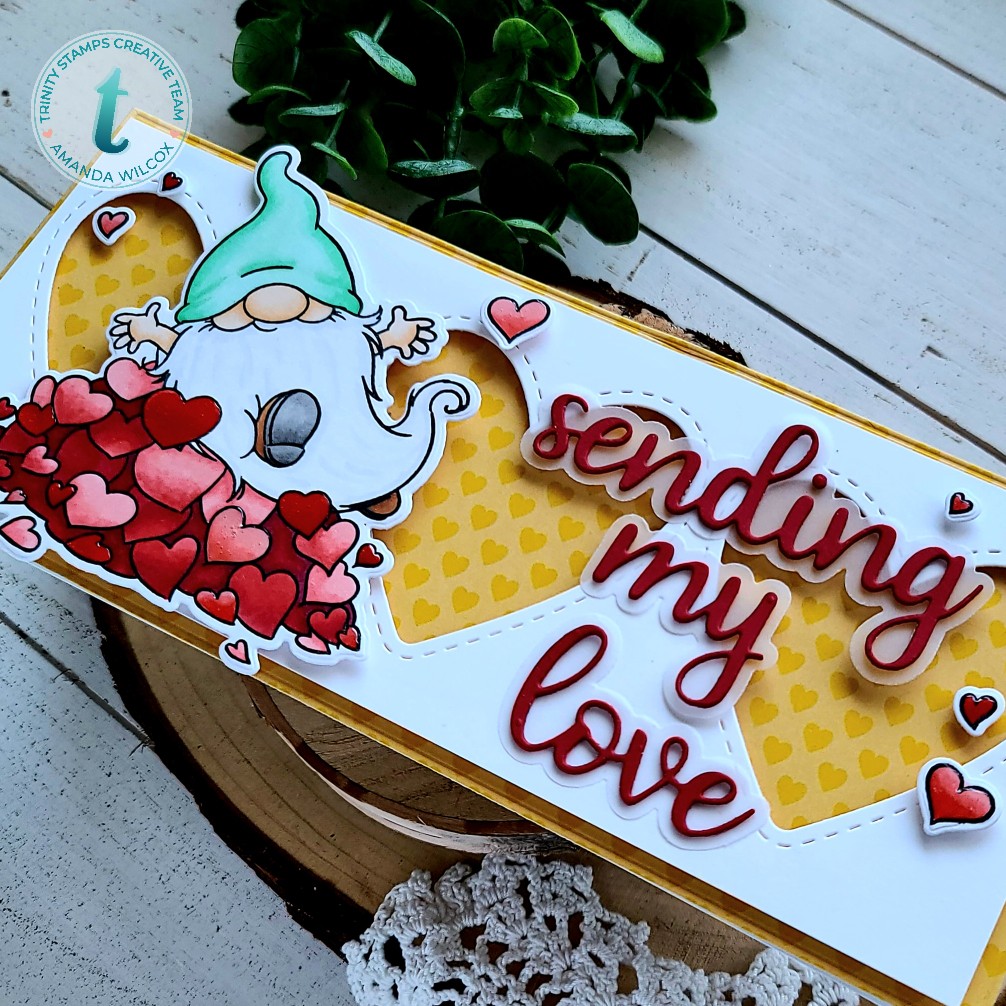
Trinity is releasing a new paper pad today call All Heart which I used with the modern embossed slimline dies to create the background panel. Then I used the new slimline wide heart trio on white cardstock to make my window panel. This is also available in a tall version which is so fun! I trimmed a little off each side because I wanted the yellow paper to show around the edge but it does cut a full slimline panel.
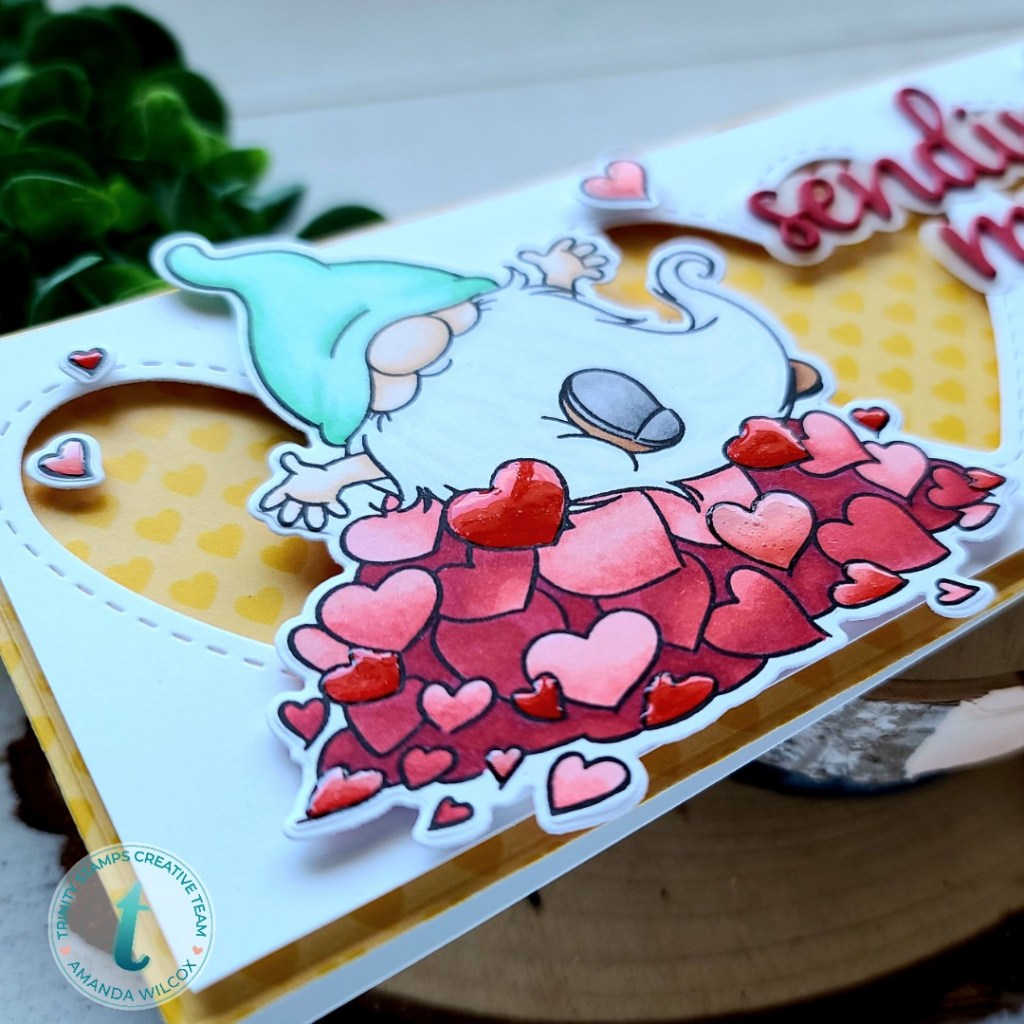
I stamped and colored the gnome from the new Falling For You with my copics and cut him out with the coordinating dies. Last, I used the new Scripty Love dies for my sentiment. I love how these have the shadow along with the words. It just gives you more options how to use them on your projects. It’s perfect.
For finishing touches on my card, I added glossy accents to random hearts in the pile and all of the hearts in the air. I absolutely love the little accent it gives this fun card!
I appreciate you sharing your time with me. Have a fabulous day!
Hey friends!!! I’m super excited to share all the things with you today! I had a massive crafting session this weekend and created a ton of projects! It was so much fun and felt so good to be so productive! A handful of them all revolve around Jane’s Doodles’ set – Stinks! – so I thought I would group them all into one blog post to share with you.
It’s going to be long but I hope you’ll bear with me because there is so much cuteness to share. I hope you’ll find some fun inspiration along the way. Let’s get started with a peek at everything and then I’ll break it all down in case you’re curious.
This whole thing came about because I needed to create some gift tags for my daughter’s Valentine gifts she is delivering to friends in a few weeks. We both decided that the sentiments in this set plus the ADORABLE skunks were just too perfect to pass up. But I couldn’t stop at tags, I just wanted to color a million of these cuties so we’ve ended up with some string art, a dozen tags and two cards…and I love it all!
Let’s start with the tags. I’ve been fairly obsessed with Trinity Stamps nested hearts dies lately, so I cut 12 white ones in the middle size. Then used Newton’s Nook grass & hills and clouds stencils on it. I adhered the skunks with tape runner and stamped the sentiments, some hearts and a flower on them assembly line style. I die cut another heart the same size in pink and adhered them together for stability. Then I punched holes, added twine and glued some red bows on. My daughter loves taking her time with handwriting so she’ll add to and from herself to the back of each one. I just love them!
Next, I made some cards with extra images I had colored. Aside from the Jane’s Doodles Stinks! skunks, the goodies on these cards are all Newton’s Nook. They’re pretty self explanatory but I used stencils for the backgrounds – hills & grass, cloudy sky, argyle, and bokeh hearts. Then I used dies like frames & flags, framework and fancy edge tags for the components. Then everything is pretty much attached with foam tape or foam squares because I love dimension on my cards.
My final project today is another string art creation that popped in my head and I just had to create! I added water to my acrylic paint to create more of a white wash look, rather than the coated paint. I love this and will be making more with this idea. I used another one of the Trinity Stamps nested hearts to outline my nails for the string art. Then I die cut additional Stinks! images so each one is layered 4 times for stability and added with foam squares. I die cut LOVE from the Trinity Stamps marshmallow alphabet and adhered that directly to the wood with liquid glue. I finished things off with some red hearts from the Twiddler’s Nook conversation hearts clay embellishments.
Phew, that was a lot. Thank you so much for making it this far. I appreciate you sharing your time with me. I hope you found some inspiration to create something wonderful! Have a fabulous day!
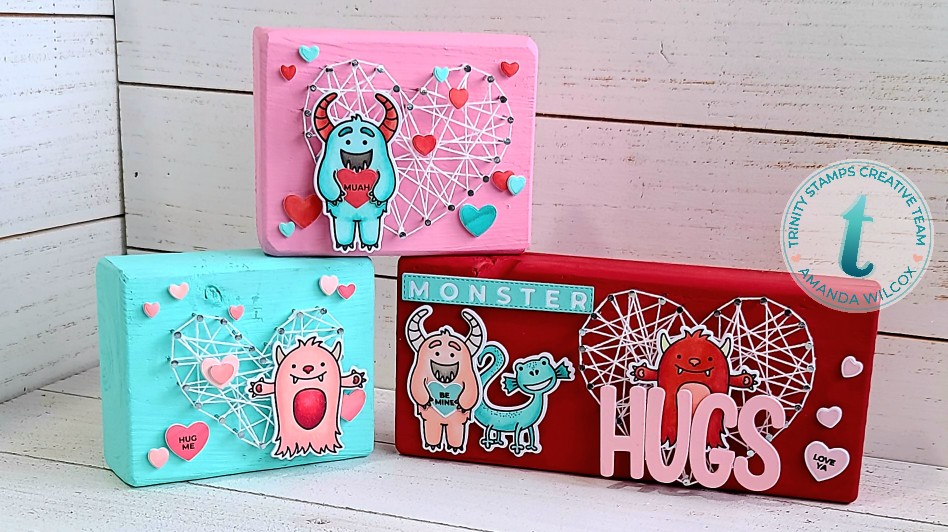
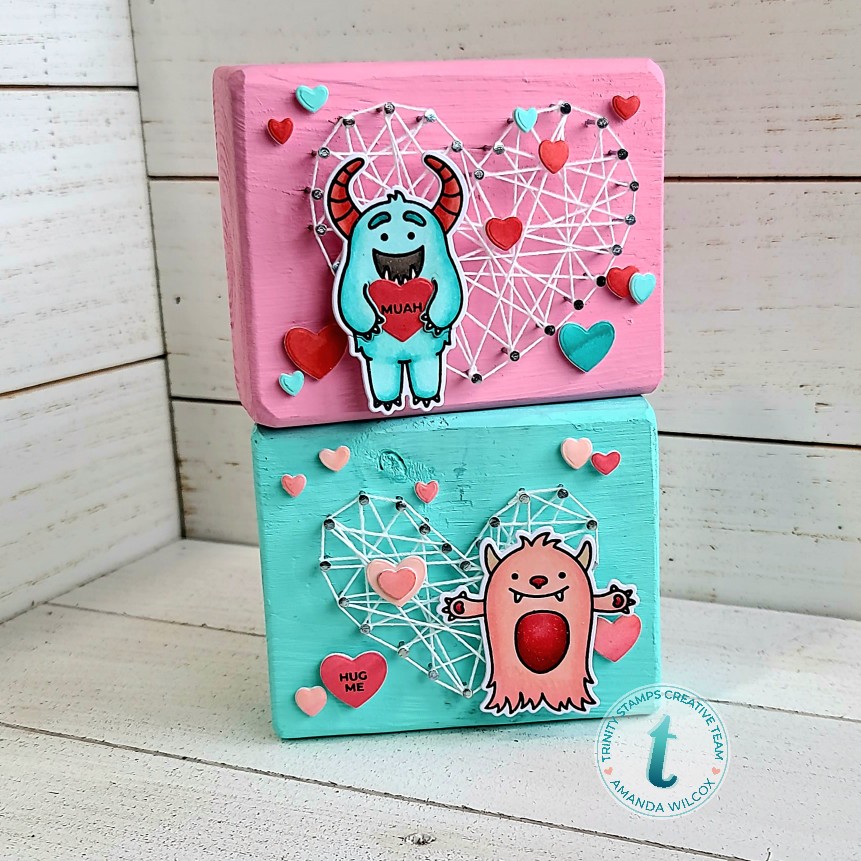
Hello again! Today I’m also over on the Trinity Stamps blog and I’m sharing this REALLY COOL Valentine themed decoration project. I hope you like it because I’m REALLY EXCITED about it!
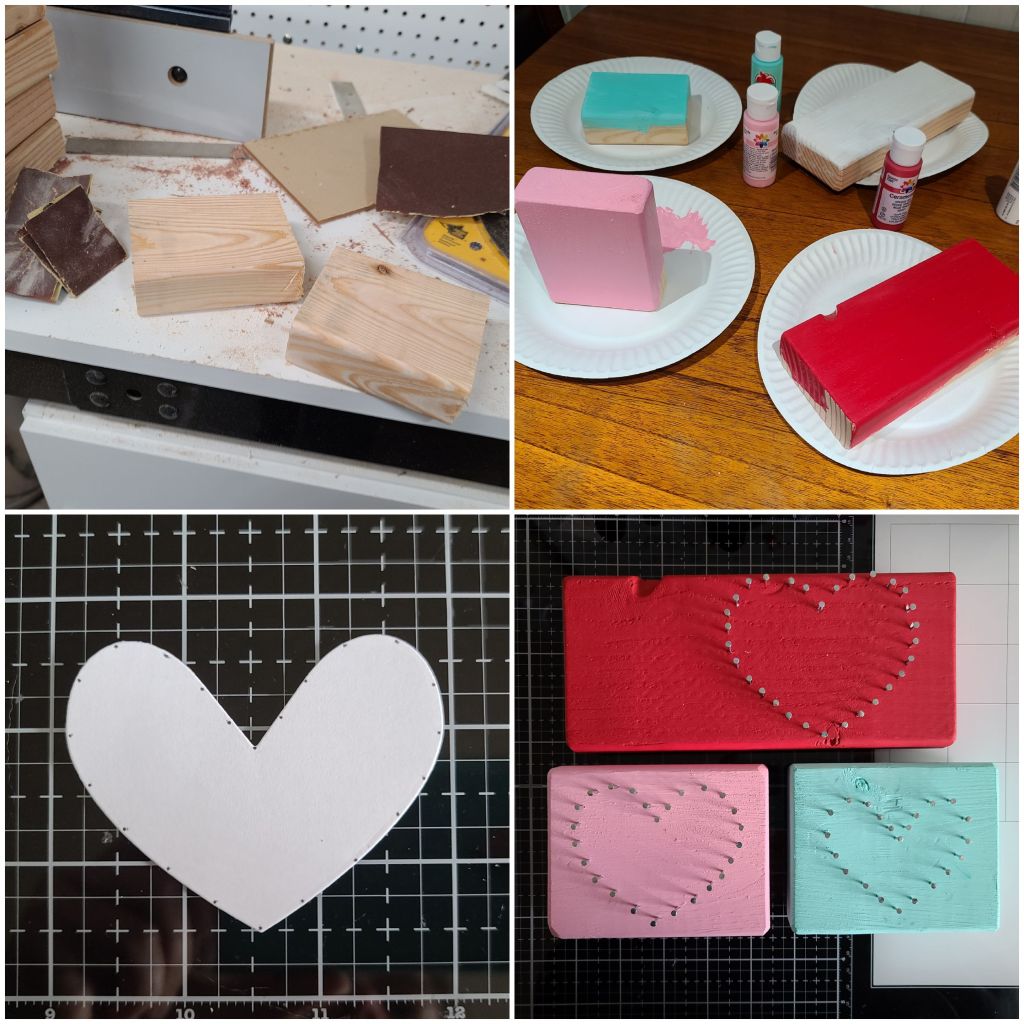
I have had this idea in my head for years and finally took the time to try it out and I’m so happy with the results. My husband was building a workbench in the garage so I was spending time with him, helping when he needed it. There were a pile of leftover 2x4s on the ground and I suddenly thought, why not!?! So I started sanding one, it was taking forever so I switched to the belt sander. Then I pulled out acrylic paints and painted them all different colors.
While those were drying, I came up to the craft room and pulled out my Nested Hearts dies and cut 3 different sizes from regular printer paper. Then I made marks along the edges about a 1/2 inch apart. When the blocks were dry I used a little washi tape on the back of the paper hearts to hold them in place and I started hammering my nails in along the dots.
For the string art piece, I just tied embroidery thread to one nail and started wrapping it around, criss-crossing here and there. No rhyme or reason. Trying not to think about it too hard. At the end I went one time around the outside edge to create an outline around the heart and tied it off the same way I started, just a simple square knot.
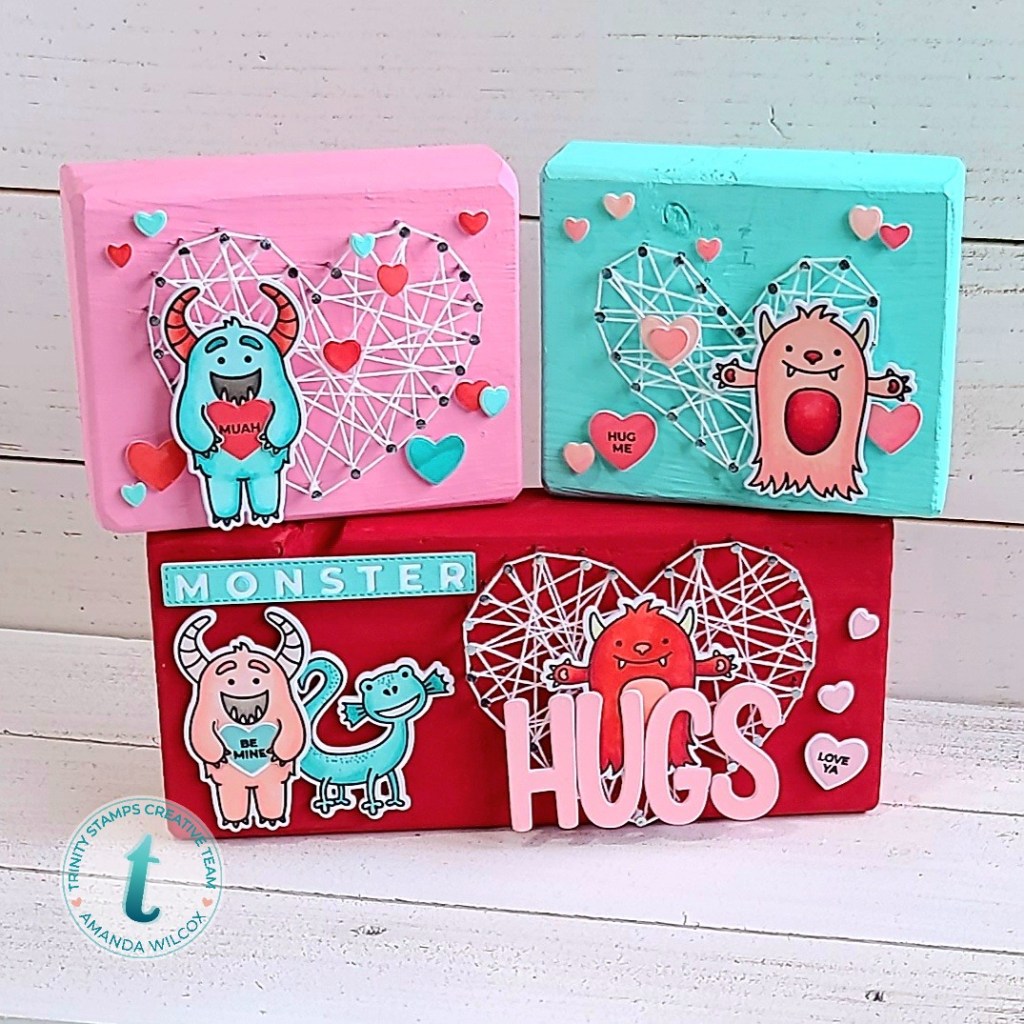
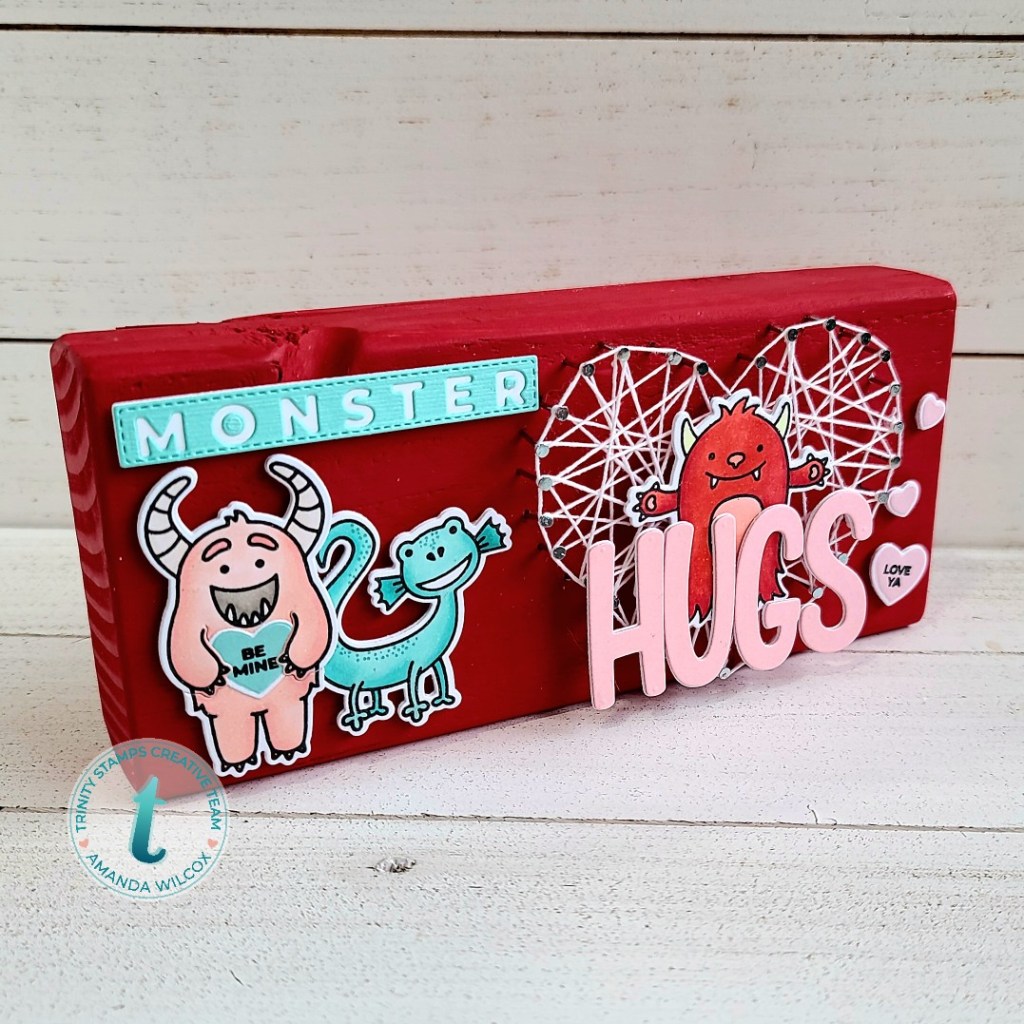
Once the string art was done, I pulled out my stamps and dies and started to work on that portion. Once I stamped and colored everything with my copics, I used the coordinating dies to cut everything out. Then I cut everything an additional 3 times and glued them together for extra depth and stability. Monster Hugs comes from the Sending Hugs die set and all of the other images used come from Monster Love, including all the hearts.
All of the images on the wood blocks are popped up with foam squares and the images that are on the string art are adhered with liquid glue.
I truly hope you enjoyed this project and found a little inspiration to create something wonderful! Remember, it doesn’t even have to be a card. 😉 Think outside the box. I know I’ll be making more of these projects as I find those scraps lying around the garage. Lol.
I appreciate you sharing your time with me. Have a fabulous day!