Blog

The Rabbit Hole Designs – October Release Day 1

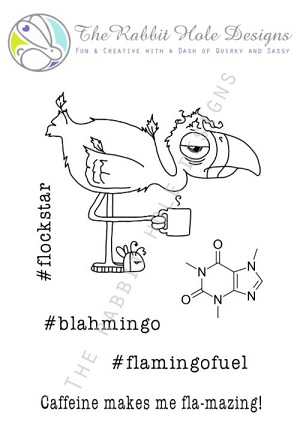
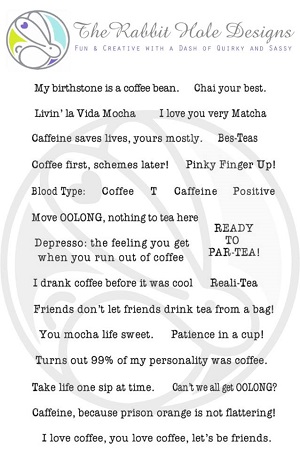
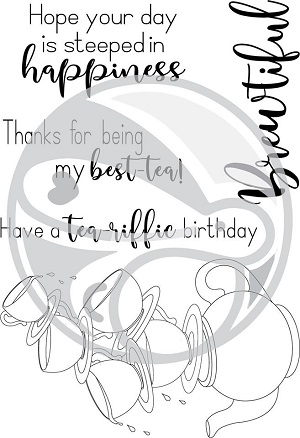
Hi everyone!!! So excited to be sharing a new set from the fabulous October release for The Rabbit Hole Designs!!! Are you so excited? Today’s set is called Steeped in Happiness and I love it! I’ve made two completely different cards to share with you today. I hope you enjoy them.

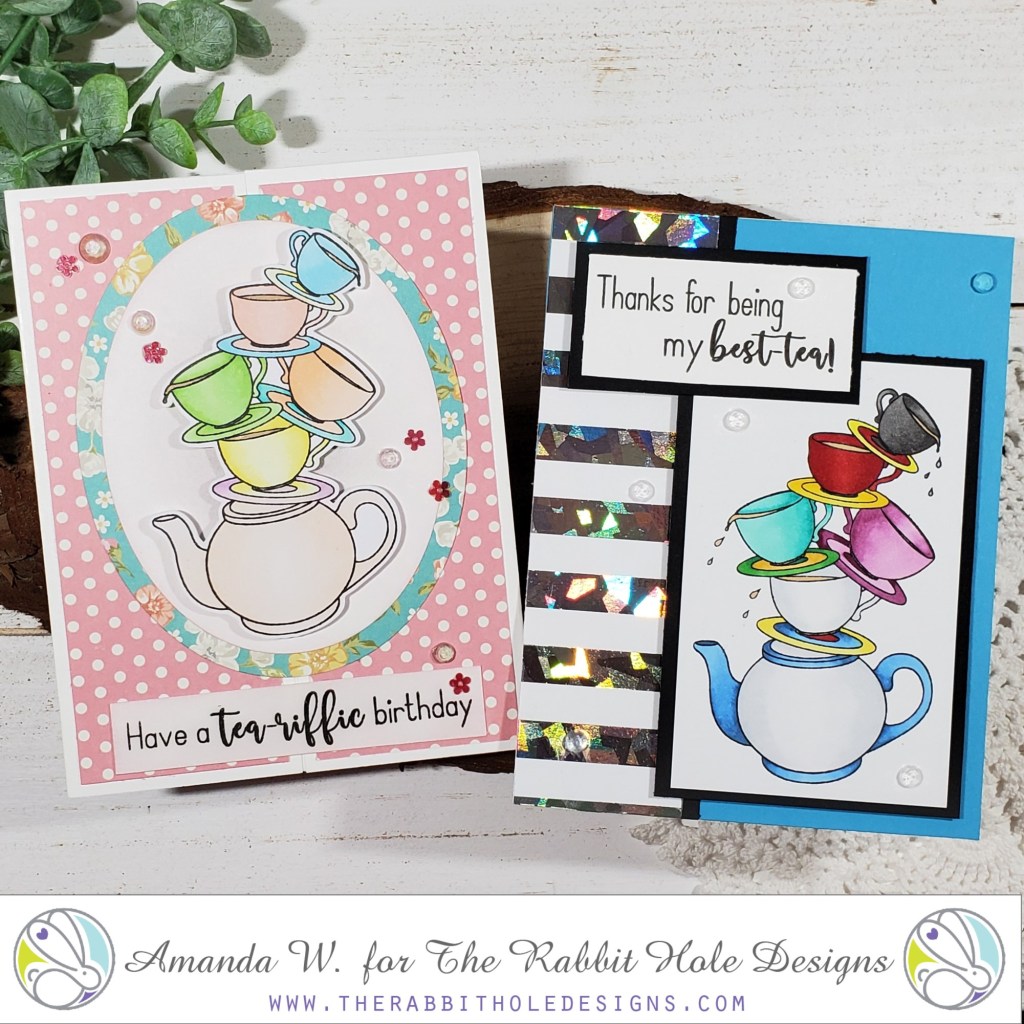
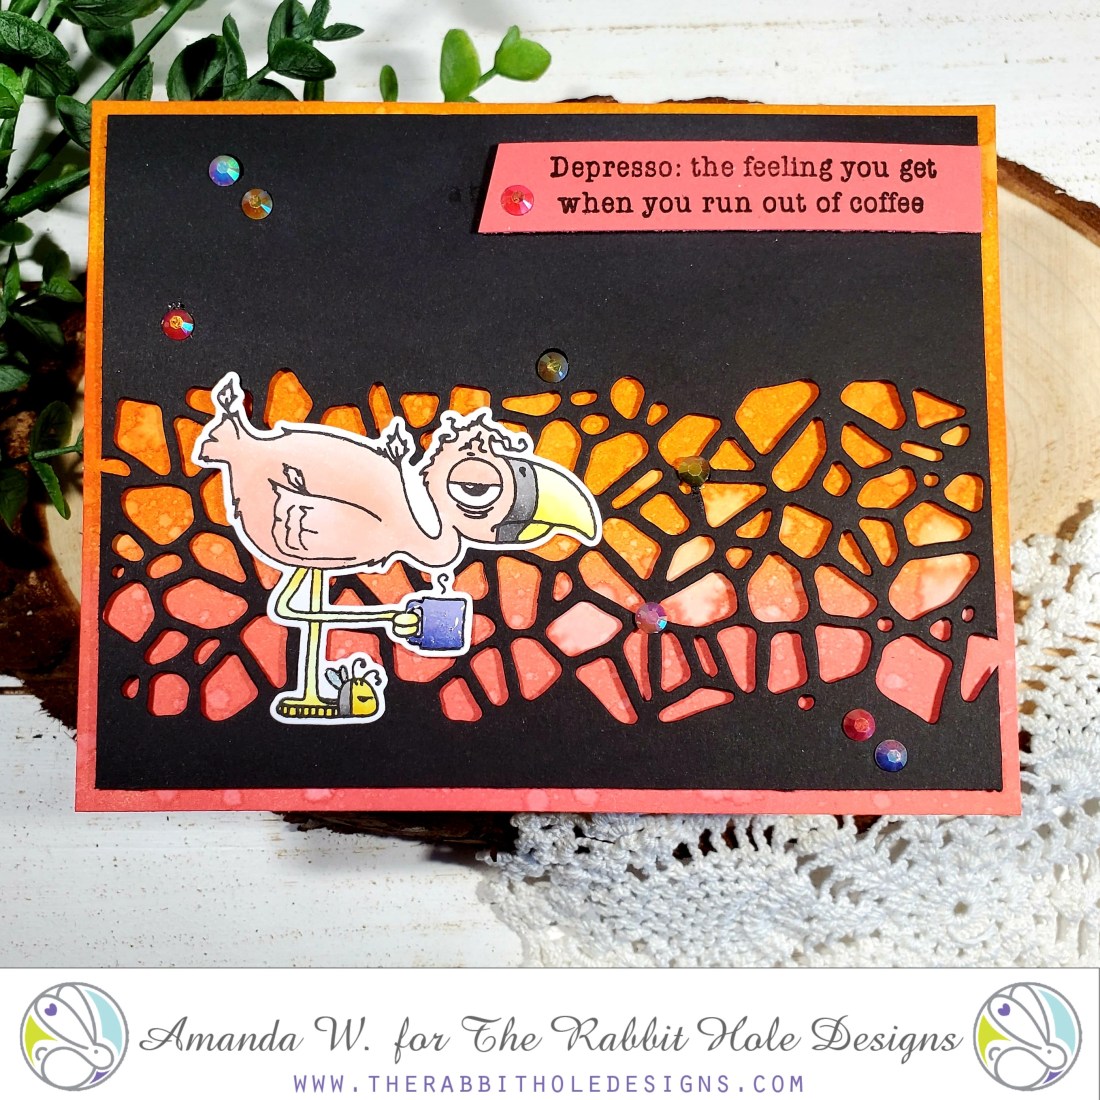
For this first one I knew I wanted to try a different fold technique to make the card original. So I’ve made a gate fold card but the images on the front are attached on opposite sides. It’s really cool for the recipient. Here’s a closer look.

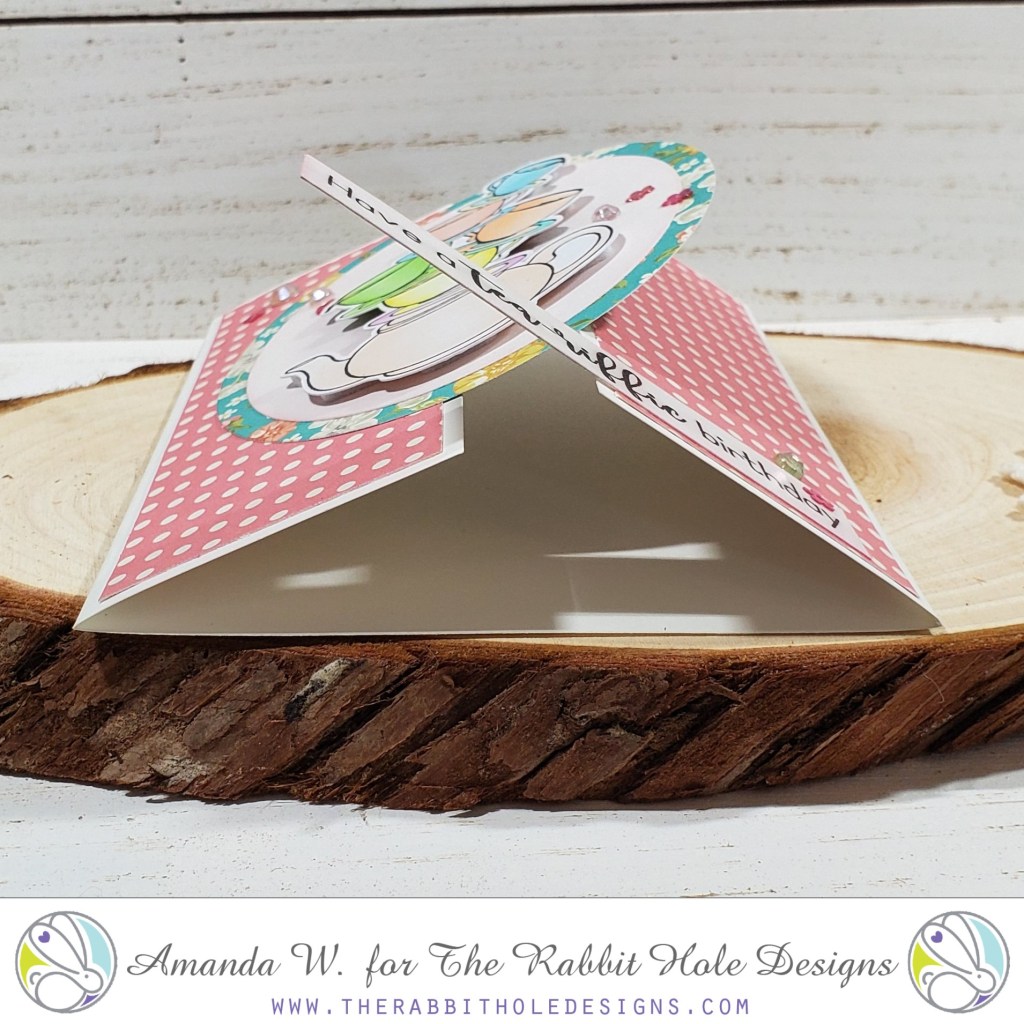
Isn’t that cool??? Here’s a few more details on how I made this card.

  • I started with the card base 8 1/2 x 5 1/2 and scored it at 2.25 from each side to create the gate fold. Then cut patterned paper to fit the front panels and glued it down.
  • I stamped, colored and cut the image out.
  • I die cut 2 nested ovals – one with white cardstock that I inked lightly in the center and the other with patterned paper and glued them together. Then popped the teapot image up with foam squares.
  • I glued the oval to the left flap of the gate fold.
  • Next I stamped my sentiment from the set and cut a banner. This was only glued to the right flap of the card.
  • For finishing touches I glued gems and sequins all around the card.

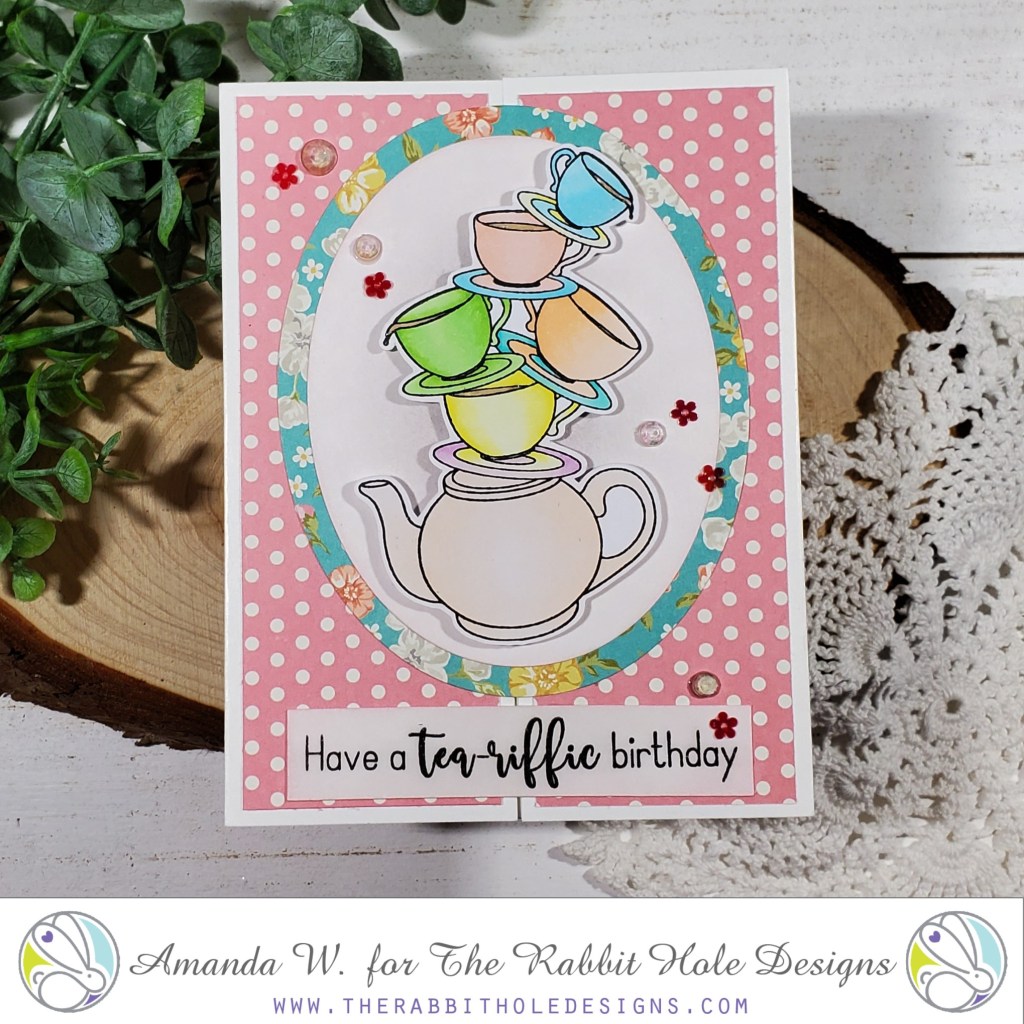
It’s a really fun card but I especially like the gate fold technique for added interest and it helps it stand up nicely too. Do you ever make cards with different folds? I think I need to try it more often. This was fun and outside of the norm for me.

For the next card, I knew that I wanted to do something completely different than my first so I spent time thinking…then it hit me. I’m a Disney freak and Alice has always been one of my favorites. So, here we go!

Do you see it??? Let me know in the comments. 😉

Here are the details:

  • Printed striped paper on a toner copier and sent it through my laminator with Silver Shattered Deco Foil, then cut it down to a strip.
  • Stamped and colored my image and matted in on black cardstock. Same with the sentiment.
  • Now for assembly, I glued blue cardstock to a card base, then added my silver stripes and a black stripe along the edge. Then I popped up my sentiment and image panels with foam squares.
  • For finishing touches on this card I scattered clear gems throughout.

I love how this card turned out! Don’t you? What will you create with this super fun tea set? I can’t wait to see!

Here are the products I used:

Steeped in Happiness

Don’t forget!!!

Every order placed will be eligible for a 10% discount. Discount Code TRHD2019 this code will only be accepted until Friday 10-04-2019 12:01 am PST. There are no exclusions on this code it is applicable to your whole order.
Please Note: There will not be free shipping available during the time this discount code is in effect. Not applicable to previous orders. May be used more than once. Does not apply to shipping and tax.

GIVEAWAYS:
To celebrate day 1 inspiration The Rabbit Hole Designs is giving away the stamp set Steeped in Happiness to One lucky winner. Winner will be chosen at random from the comments left on participating blogs, so make sure to visit each stop and leave a comment. Leave comments by 11:59 pm PST 10-03-19 on all participating blogs. Winner will be announced on The Rabbit Hole Designs blog 10-04-2019

Here’s the blog order for you:
Shanna Slater
Niccole Kulig
Amanda Stevens
Amanda WilcoxYOU ARE HERE
Lisa Golzbein
Charmaine Canham
Echo Noble
Katie Brooks

For more inspiration, news and updates check out these links too!

The Rabbit Hole Designs – Depresso Flamingo

Hey! I’m over at The Rabbit Hole Designs blog today with this awesome caffeinated flamingo card. I have been playing with distress ink backgrounds lately and when this one was finished I knew I wanted to try a flamingo with it.

Here are the details:

  • Blended distress inks and spritzed the panel with water. Then adhered it to a card front.
  • Trimmed down a black panel to 4×5.25 and die cut a border out. Then popped this up with foam tape for dimension.
  • Stamped, colored and die cut my flamingo. Then I glued him directly to the black panel.
  • I chose a sentiment from the Perfectly Blended set, stamped it on a red-ish cardstock that matched my background and popped the strip up with foam tape.
  • For finishing touches I added glossy accents to the mug and gems scattered throughout. I love a little bling!

I love that black cardstock against the bright background. And the flamingo is just soft enough to pop from both of those elements and not get lost. This is such a fun card and was pretty quick to put together. I feel like a set of these with different sentiments would be a fun gift for someone. Or a great thing to have on hand for when you need to send a card on short notice.

Thanks for hanging with me today! Below are the products I used.

Caffeinated Flamingo

Caffeinated Flamingo Die

Perfectly Blended

For even more inspiration, updates, and news make sure to check out these links.

Lawn Fawn Monster Mash Clear Birthday Invitations

Thanks for stopping by today. I love watching Jennifer McGuire’s YouTube videos. She’s always got great inspiration and ideas to share. Recently she had one involving laminating pockets for windows. It was a great idea and came at a perfect time. She made wintry snow scenes with hers but I immediately thought of my daughter’s upcoming birthday invitations that needed made. I showed her the pictures Jennifer had posted and she loved the idea.

Together we dug through confetti, stamps, paper and copic colors and planned out her invitations together. It was a lot of fun and we both love how they turned out.

Here’s how we did it:

  • Opened the laminating pocket and sprinkled confetti all over, closed it and ran it through the laminator twice. It’s probably not necessary but I thought it might help seal the confetti inside.
  • Next I trimmed the sheets down to two 8.5×5.5 inch pieces and scored them at 4.25. After I folded them, I ran them through the laminator again to solidify the crease. It worked great!
  • For the stamping, coloring portion…we cut a yellow strip to 1.75×5.5 and stamped a polka dot background stamp in yellow for a tone-on-tone look.
  • Next we stamped, colored and die cut images from Lawn Fawn’s Monster Mash, Beam Me Up and Year Four stamp sets. I love being able to mix and match stamps.
  • And last we just glued them all in place with liquid glue.

Here’s a closer look at those cute monsters.

One thing to note: We glued extra yellow panels to the inside and back of the card so everything is covered. It hides the glue and gives a nice finished look. In the end we have four strips of yellow cardstock covering the fronts and back of the clear card.

Now, my poor daughter has to wait to hand these out until next month. Waahhh. Lol.

I appreciate you sharing your time with me. Have a fabulous day!

Avery Elle Scary Shaker

Thanks for stopping by again. Recently I had a coworker ask for some interactive Halloween cards for her grandkids. They are ranging in age and I thought a shaker card would be perfect for the littlest. Then I came across this awesome burst die from Avery Elle and immediately wanted to try the peek-a-boo scary pals with it!

I went with the burst shape and decided to make a square card. The final card size is 4.25×4.25 so it still mails in a standard A2 size envelope.

To make this card I splattered pearl and gold watercolor on a black panel, then die cut the burst die and the largest circle from the set out of the middle. Next, I adhered acetate to the back of the window and added three layers of foam around the edge for the shaker pocket. I took the circle that came out of the burst center and glued it down to the card front. Then scooped sequins, glitter, pearls and bubbles to the center and secured the window over the top. I had already chosen my scary pals so I stamped, colored, die cut and then glued them down. Last I stamped and heat embossed my sentiment on gold paper and glued it to the front. Finishing touches were just adding black glaze pen to the eyes and white gel pen accents to the monsters.

I love shaker cards! They are so fun to shake around and also just fun to look at. I’ve said it a million times but the peek-a-boo pals are one of my all-time favorite lines of stamps. They are so different, versatile and fun! I hope this kiddo enjoys their Halloween card.

I appreciate you sharing you time with me. Have a fabulous day!

Avery Elle Cocoa Stand

Let’s start this week off right…with cocoa and a cute bear to run the stand!

Today’s card features Avery Elle’s Cocoa Stand, some fun ink blending and lots of sparkle!

Here’s how I did it:

  • Blend salty ocean and blueprint sketch distress inks on a 4.25×5.5 inch panel. Spritz with water and then also splatter with pearl watercolor.
  • Die cut a white border with Lawn Fawn Puffy Cloud Border and splatter with pearl watercolor too.
  • Stamp, color and die cut images from Avery Elle’s Cocoa Stand.
  • Heat emboss stand sentiment on the top with white embossing powder.
  • Glue background panel and “snow” border to card front. 
  • All of the images are popped then up with foam squares.
  • Last, I stamped and heat embossed the sentiment from Avery Elle’s Christmas Kids in silver embossing powder.
  • Finishing touches are Wink of Stella Glitter Brush pen on the mug and presents and glossy accents on the lights, Christmas tree base and the bear’s nose.

Here’s a closer look at the details. It’s so fun and whimsical! I hope you enjoy it as much as I did making it!

I appreciate you sharing your time with me. Have a fabulous day!

Avery Elle Penguin Wreath

Thanks so much for stopping by today! I’m super excited to share this card today. It was inspired by a Trinity Stamps Design Team Member Jenn Bena. Her Youtube video is here in case you want to check it out. ❤

I had this cute little penguin sitting on my desk from a previous craft session just waiting for inspiration to hit. As soon as I saw that video it made me think of the smaller images the awesome Avery Elle sets have in them and if I paired a few together I could make a cool Christmas wreath. Voila! Here it is and I love it!

The general gist is to die cut the quilted frame and pop it up, ink the inner circle and glue it down. Then stamp, color and die cut smaller images from lots of sets (Christmas Magic, Cocoa Stand, Polar Playtime) and layer them around the outside of the oval creating a wreath around our adorable penguin. Then I added a bunch of fun finishing touches like glossy accents, Stickles and Wink of Stella glitter brush pen. I also stamped and popped up a sentiment at the bottom which is totally glitterfied!

Do you love it? I totally do! I wish pictures really did it justice…but they don’t. All the shiny and glittery cuteness is just perfect!

I appreciate you sharing your time with me. Have a fabulous day!

The Rabbit Hole Designs Watercolor Pumpkin Friends

Hey there! I’m up on The Rabbit Hole Designs blog today sharing this great pumpkin friends watercolor card. I love all things Halloween and these cards have been so fun to make! I love it all!

Today I decided to get messy with watercolor. Let’s be real, I’m rarely a clean crafter but when you add paint I’m an extra mess.

  • Today I used watercolor paper for the background panel and just did multiple layers of black watercolor, drying the paper in between to add texture and dimension to the paint. Then I splattered that with gold and purple watercolor and set it aside to dry.
  • I stamped, colored and cut my pumpkins and popped them up with foam squares.
  • I stamped and heat embossed the sentiment in gold and then stamped a spider hanging down from the bottom of it for an extra spooky look.
  • For finishing touches I added glossy accents to the pumpkin’s eyes, noses and mouths and the spider’s body.
  • This whole thing was glued onto a purple card base for a little pop of extra color around the edge.

Look at the light shine off the glossy accents. It really gives it a whole different look. I love it!

Here are the stamp sets I used.

Pumpkin Friends

Boo to You

For more inspiration, updates and news be sure to check these places:

I appreciate you sharing your time with me. Have a fabulous day!

Avery Elle Penguin Friends

Hello again! I’m still playing with the new Avery Elle Polar Playtime stamp set. It’s adorable and has so many possibilities. Today I’m sharing a Christmas card with a more non-traditional color palette. I hope you like it!

These little penguins look like best buddies sharing candy canes and gifts. I love it! I used the Avery Elle quilted frame die, popping the outside frame up with foam tape and inking the center piece with shaded lilac distress ink and stamping snowflakes in the stamp ink but gluing it directly to the card front. I stamped, colored and die cut my penguins and popped them up with foam squares. My sentiment banner is inked on the edged to go with the inner oval and is also popped up. Then I scattered clear and purple gems throughout the design. I also added sprinkled sugar Stickles to the hats, Glossy Accents to the beaks and Wink of Stella glitter brush to the gift bow and sentiment banner.

Here’s a closer look at these cute penguins! I love them and can’t wait to make more cards and treat bags with them. I am also really loving the awesome Avery Elle backdrop/frame dies. They are so beautiful and versatile!

I appreciate you sharing your time with me. Have a fabulous day!

Avery Elle Polar Playtime Slider Card

Welcome back! I’ve been slowly getting bits and pieces from the new Avery Elle holiday release and I finally got a chance to play with the Polar Playtime set. As soon as I saw the set I knew I wanted to make a slider card with it. That sled was just asking for it! 🙂

Here’s how I made it:

  • Stamped, colored and die cut my images from Polar Playtime.
  • I stamped the sky from Starry Scene on the card front.
  • Using my images for reference I die cut a stitched hill and then cut the slider track from that.
  • I inked the top of the hill with distress ink to set it apart from the background and popped it up with double layer foam tape leaving room for my slider penny to slide freely. If you’re not sure how to make a slider card here’s a video to show you.
  • I added my images to the background and popped my sled on the slider penny.
  • Last I used my Misti to stamp my sentiment on the bottom left in the same ink I used for the sky.
  • For finishing touches I used white gel pen on all of the images, glossy accents on the penguin beak and bear nose, and Wink of Stella glitter brush pen on the top of the snow hill and the snow caps on the mountains.

Here’s a closer look at the cuteness! This set is a fabulous addition to the Avery Elle collection and I can’t wait to use the other images on cards coming up soon!

I appreciate you sharing your time with me. Have a fabulous day!

Lawn Fawn Fortune Teller Tabby

Thanks for stopping by again! Today I’m excited to share a fun card using the new Fortune Teller Tabby from Lawn Fawn. My daughter really wanted this stamp set and while I was home sick with her yesterday I made this fun card to surprise her with.

If you’ve never made a reveal wheel card before you should watch this video to get the gist. After that you’ll see that I just stamped, colored and die cut my images, stamped my sentiments on my wheel and adhered it all together. I kept this a one layer card (minus the foam squares to help the reveal wheel spin) because I’m planning to put it in my daughter’s lunch for a fun surprise.

For finishing touches on this card I added glossy accents to all the animal’s noses, white gel pen accents to the images, black glaze pen to the bunny’s eyes and scattered Nuvo Crystal Drops and some star gems I had in my stash across the card.

Here’s a look at each sentiment on the wheel. I chose the 4-up version so I could use each sentiment from the stamp set.

I’m really excited to make this in a Halloween style card and put candy in the crystal ball and the Costume Party kids watching. I think that idea is so absolutely cute!

I love interactive cards, don’t you? Do you ever make them? Let me know in the comments.

I appreciate you sharing your time with me. Have a fabulous day!