Well, it’s official. My (not so) little girl finished 6th grade today. I can’t believe how much she embraced the change to middle school and completely rocked this year! She kept a 4.0 all year along with many other accomplishments. We couldn’t be more proud of her and I wanted to make her a special card to let her know.

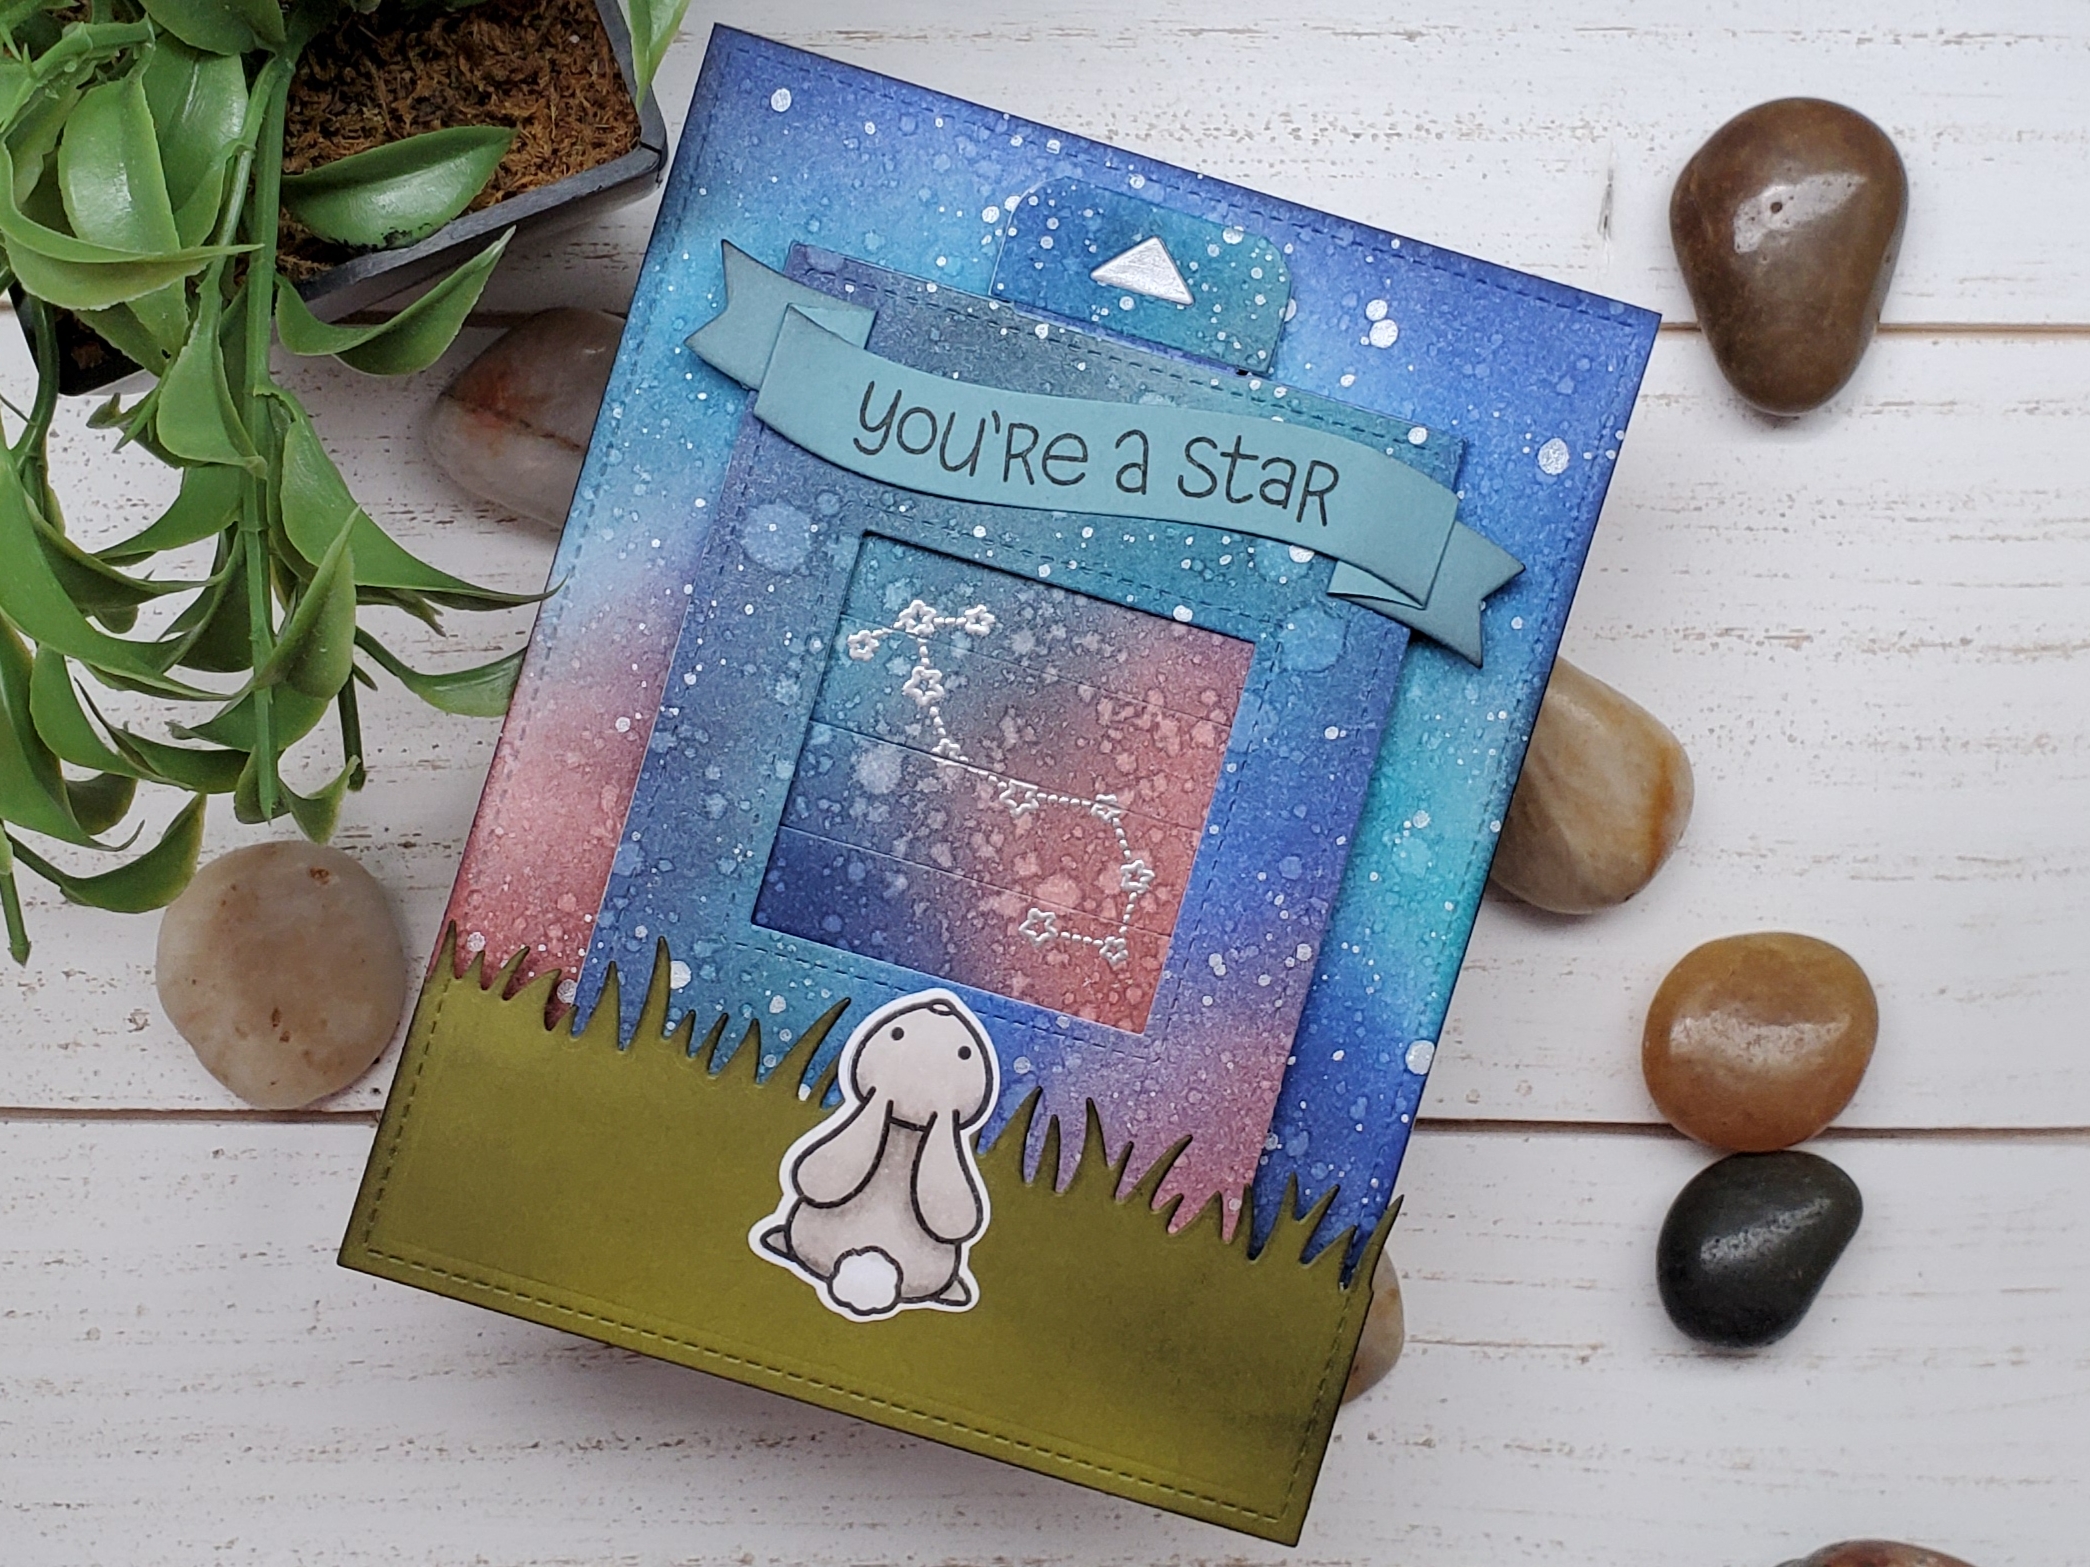
She loves watching me in the craft room and occasionally making her own cards as well. However, the interactive cards are always her favorite so I knew I wanted to make something along those lines for her. Ultimately I decided to use the Lawn Fawn Upon a Star set and the Magic Picture Changer dies. Above is a picture of the mechanism closed and below is what it looks like open.

Here’s how I did it:
- I started by taking a full sheet of cardstock, cutting it in half longways so it gave me two 4.25×11 pieces. Then blended distress inks all over both pieces. I chose blueprint sketch, mermaid lagoon and worn lipstick. Once it was all blended, I lightly went over everything with black soot to dim it down like a night sky.
- I chose the two constellations I wanted to use, stamped and heat embossed one on each sheet of cardstock with silver embossing powder.
- Then I die cut the two main pieces to the magic picture changer, the pull tab stopper and the cover from the add-on set and put it all together to create my interactive mechanism. For instructions on this watch the Lawn Fawn You Tube video here.
- Next I cut the largest of the stitched rectangles from the distress inked background so the night sky covered the whole card.
- I stamped, copic colored and die cut my bunny.
- For the grass, I used the stitched rectangle to cut a scrap and then the grassy border to cut it the correct height. I also used black soot distress ink on this to dim it down, since it is night time after all.
- I adhered the magic picture changer mechanism with foam tape and then the grassy border the same way. The bunny is glued directly so the grass with tape runner.
- I die cut a wavy banner, stamped a sentiment from Lucky Stars and glued that down as well.
- I glued the whole thing to a card base and, voila, it’s ready to go!
Sorry for the lengthy how-to this time. It really wasn’t that complicated but there are definitely more steps to the interactive cards. They are so worth it though! I love how this turned out and hope my daughter will to!
I appreciate you sharing your time with me. Have a fabulous day!
