Blog

The Rabbit Hole Designs – T-Wreck

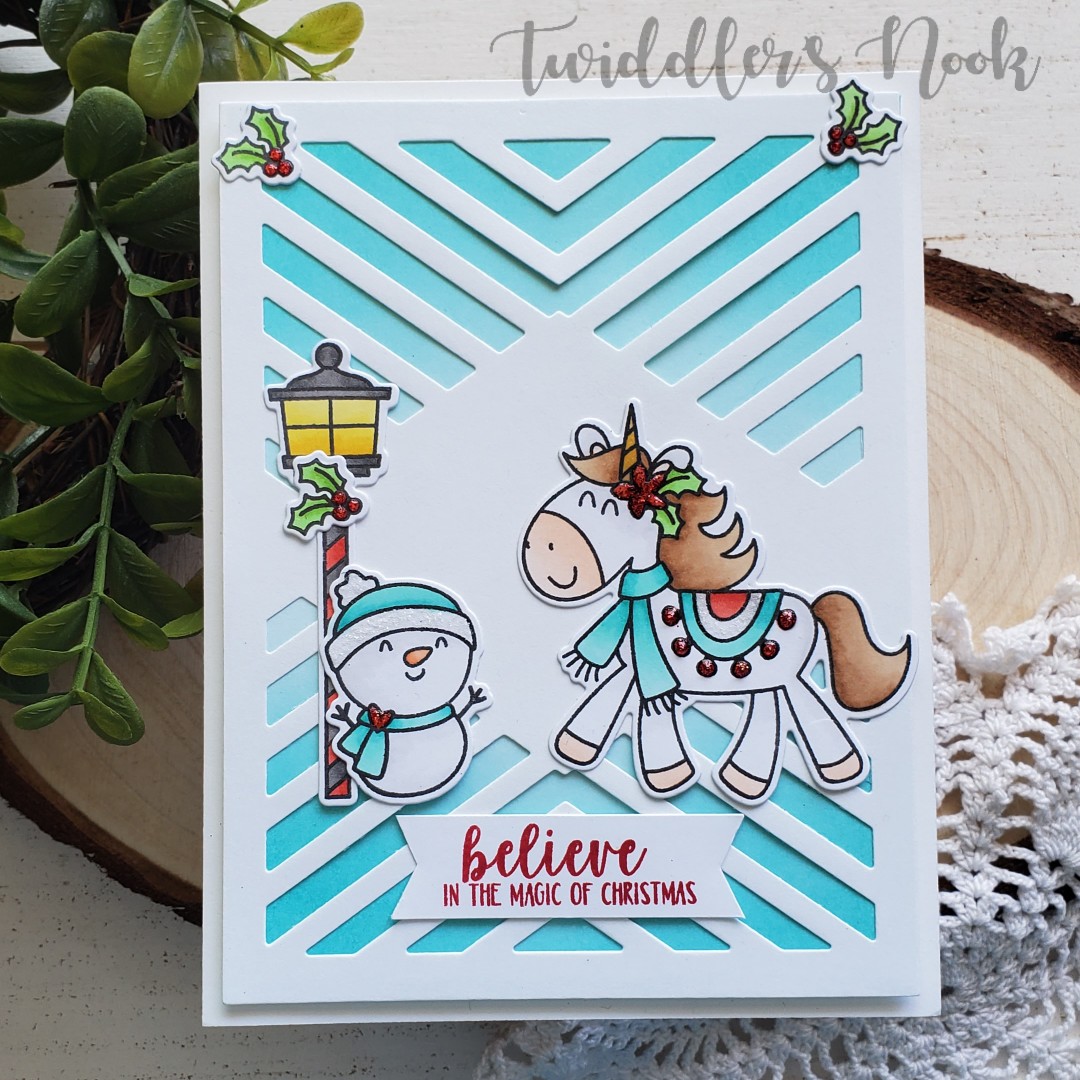
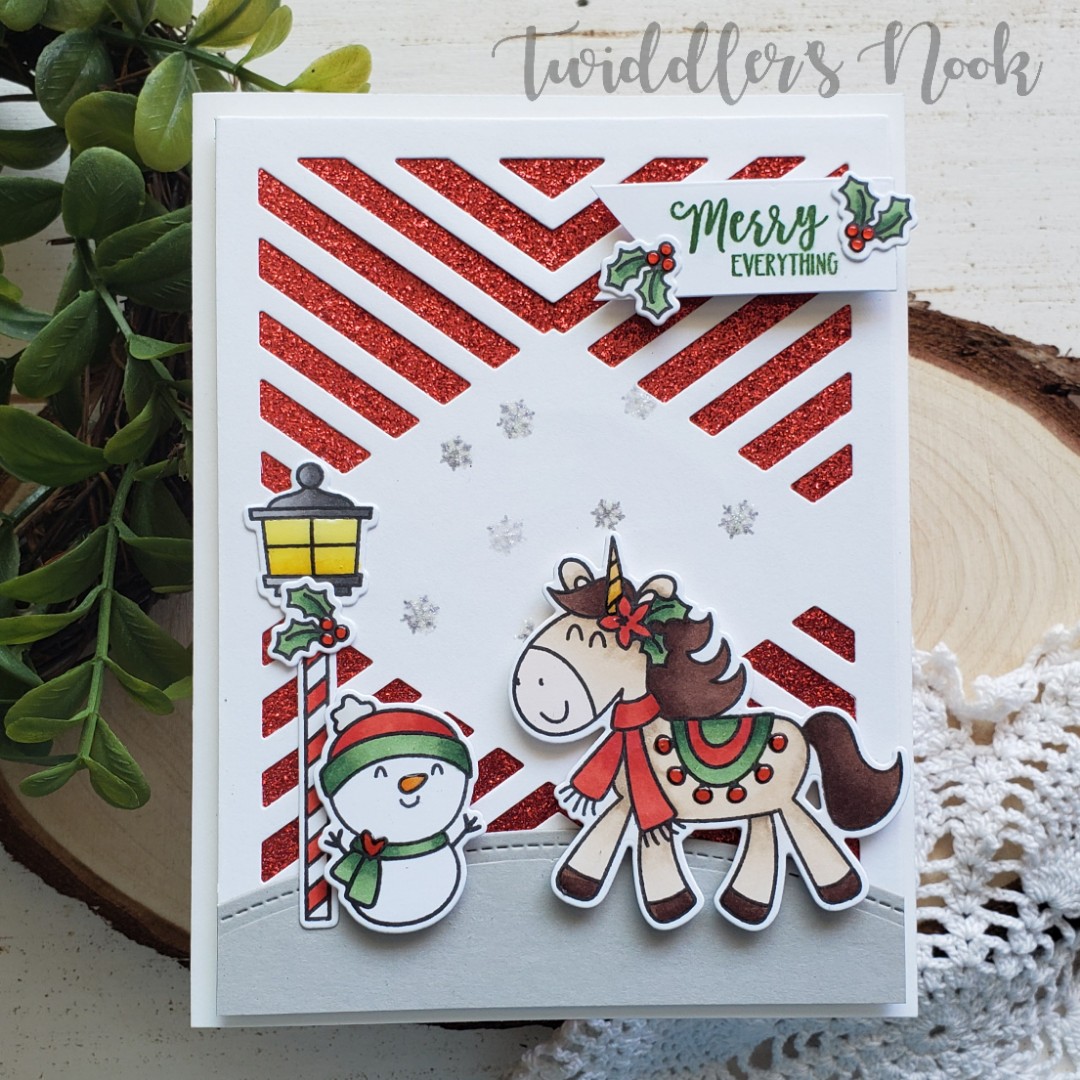
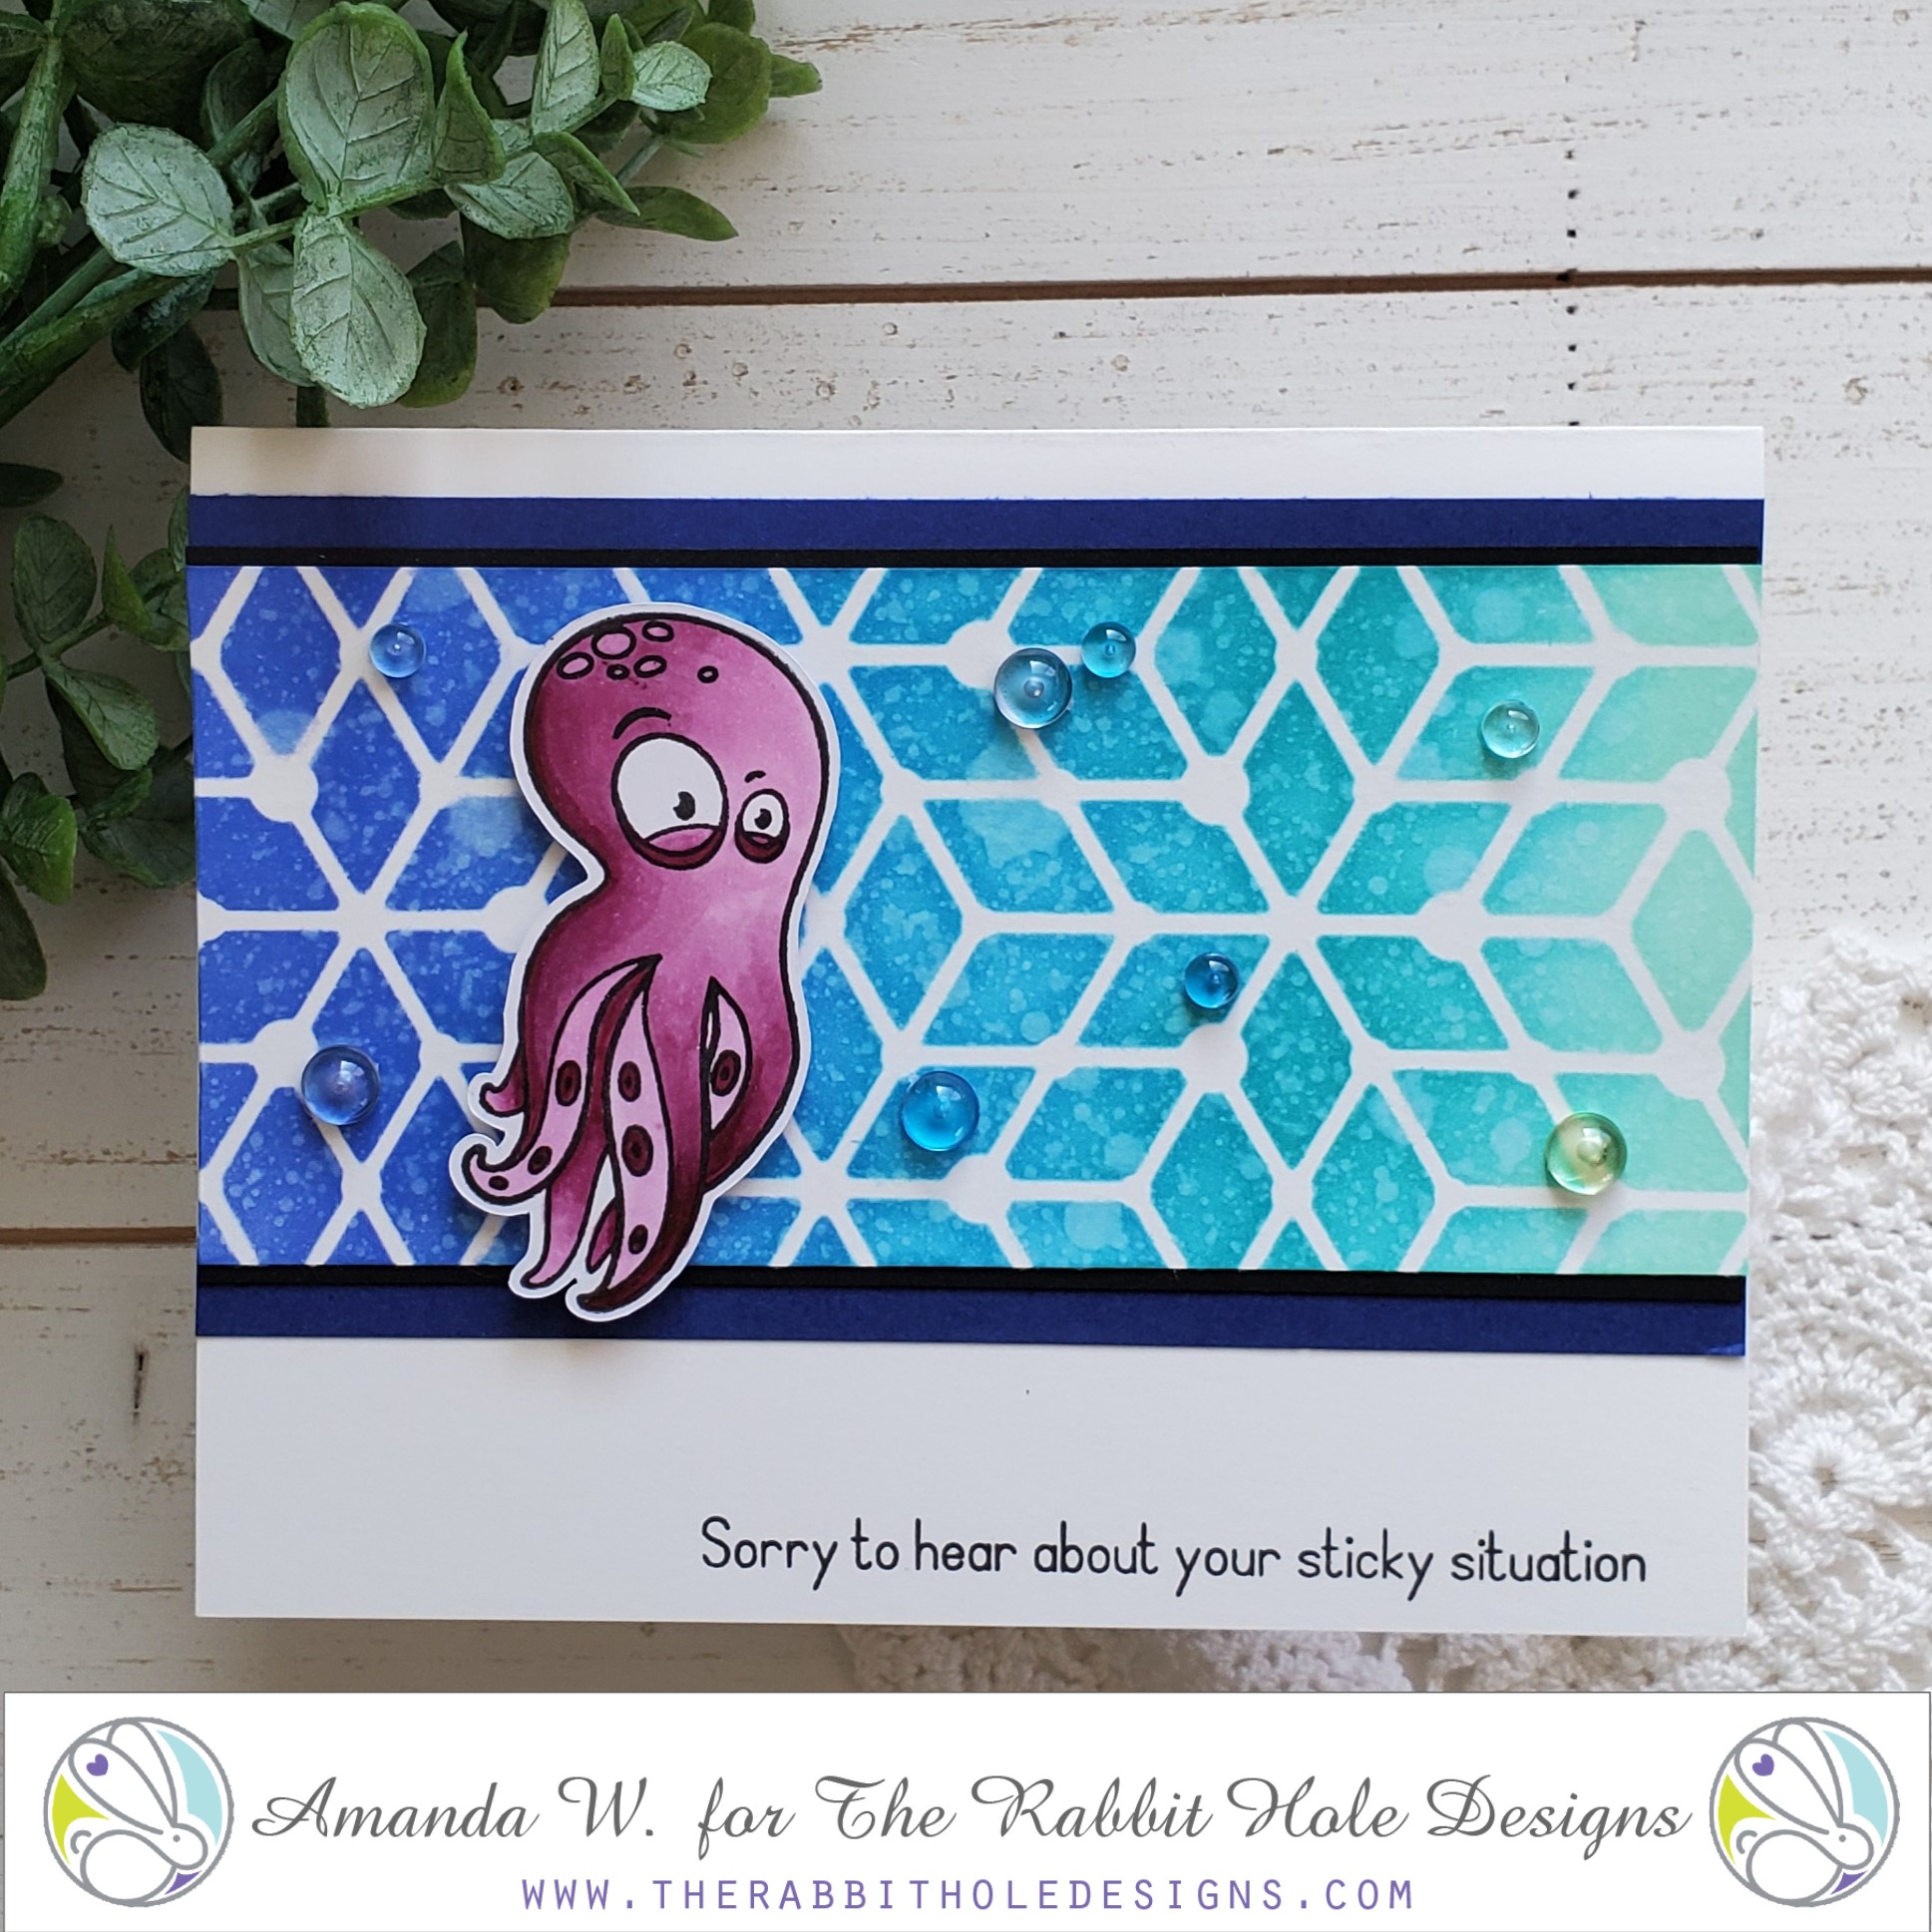
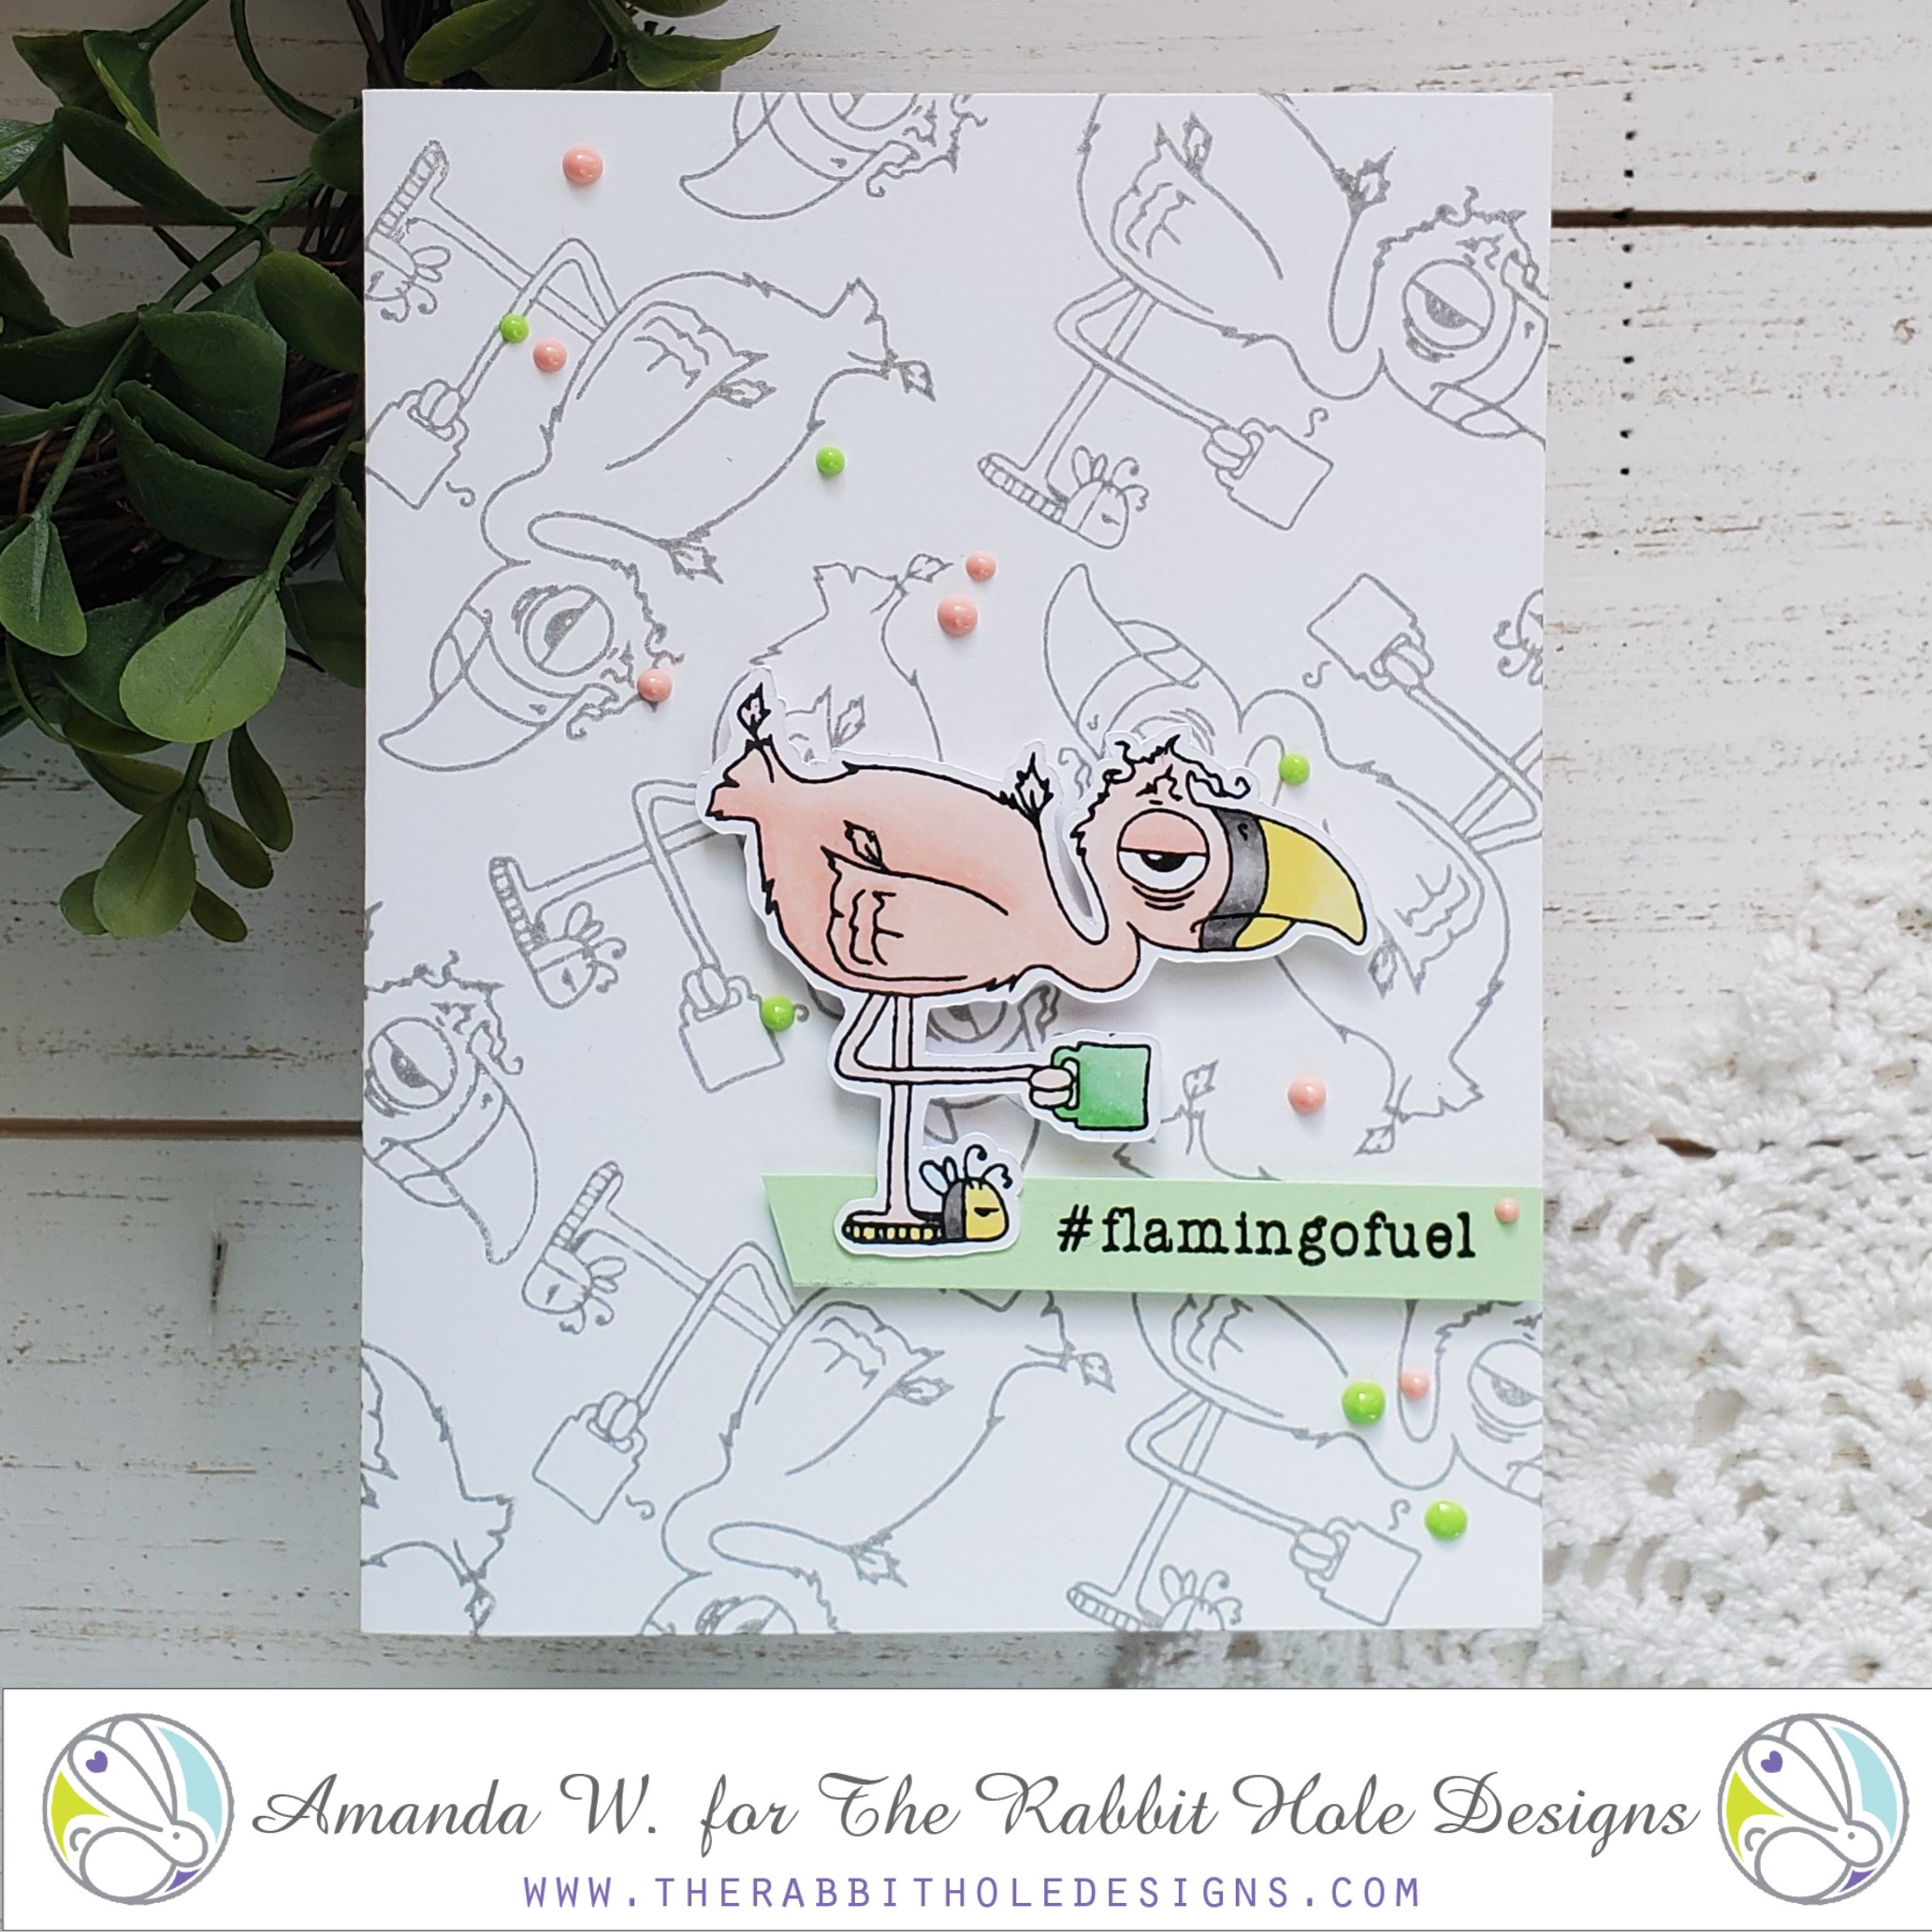
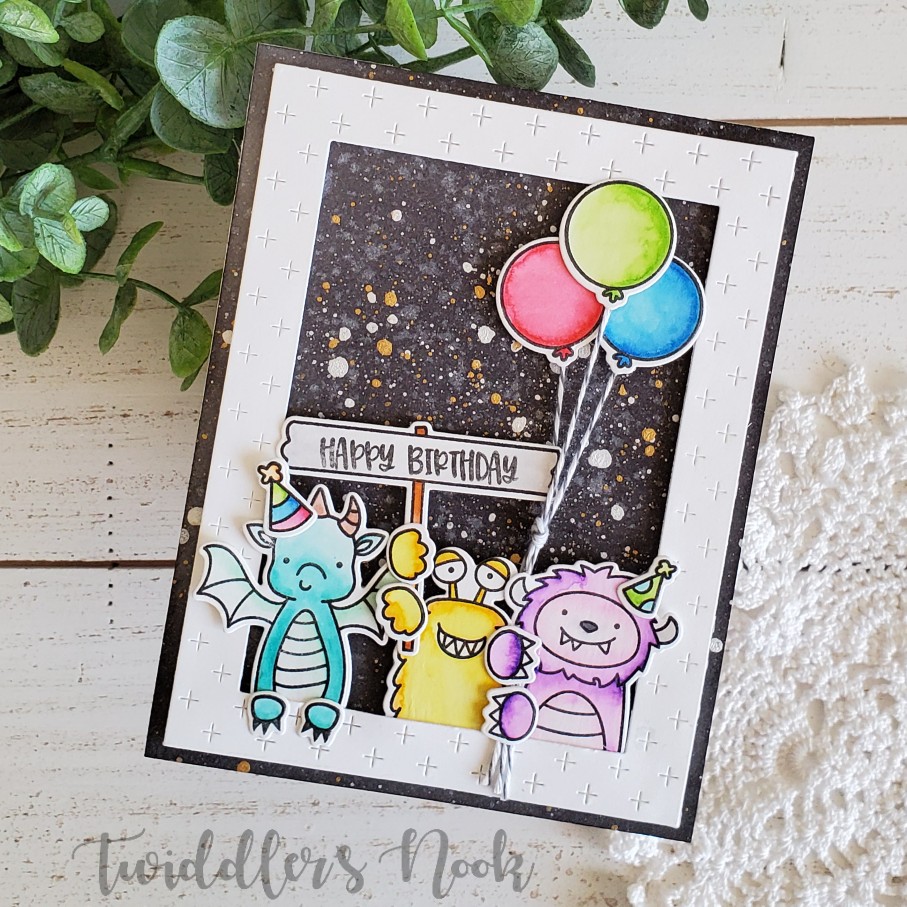
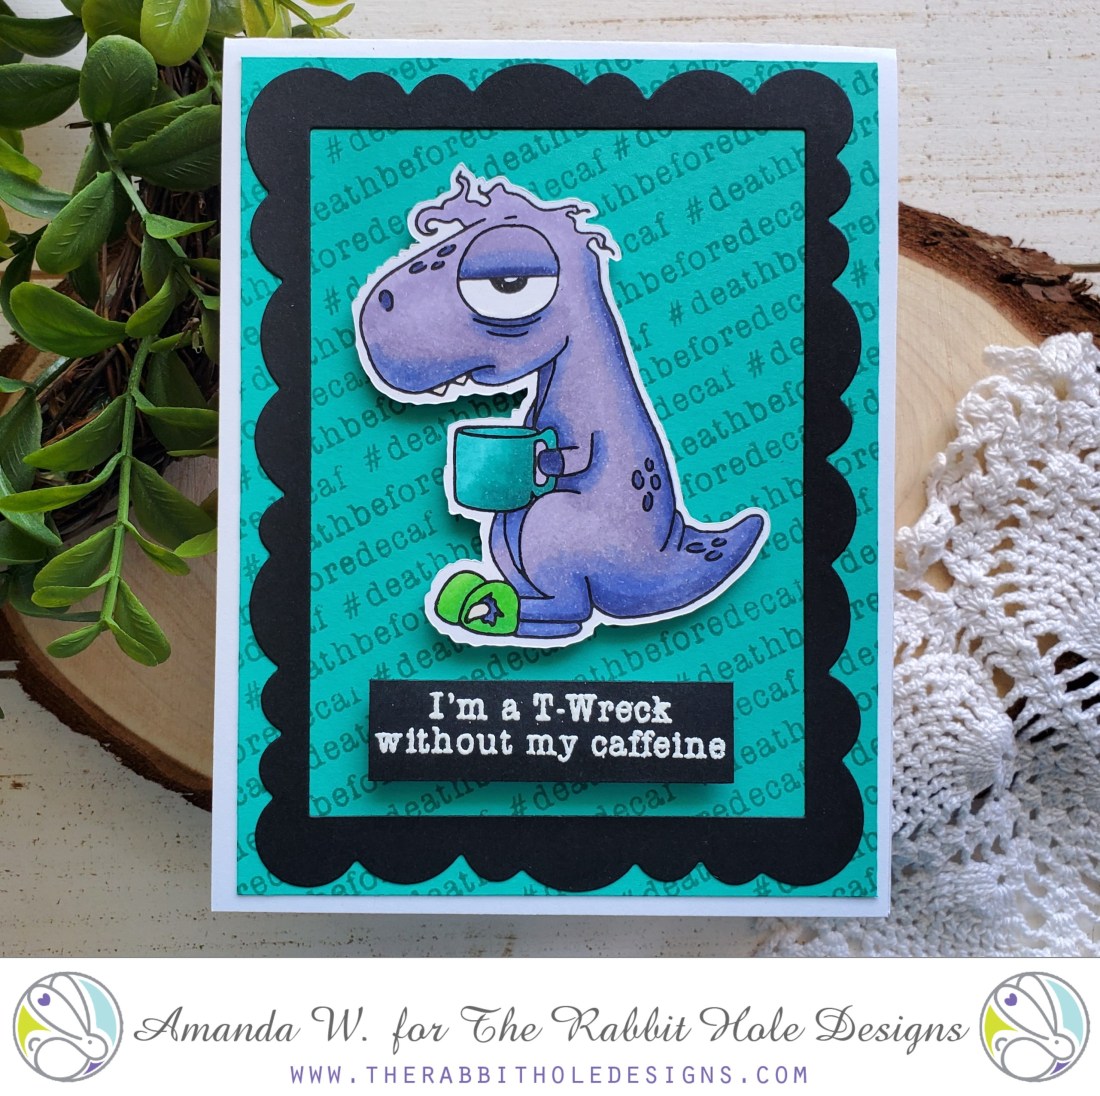
Welcome back everyone! I hope you’re having a great day! Today I’m sharing a simple Caffeinated Dino card from The Rabbit Hole Designs with a different take on the repeated stamping background technique.

Here’s how I did it:

  • Stamped, colored, cut my dino and set him aside.
  • Stamped and heat embossed the sentiment and cut it into a small rectangle.
  • For the background, I stamped the sentiment at an angle repeatedly across the teal panel in teal ink for a tone-on-tone look and adhered it to the card front.
  • Next, I attached the wonky frame to that panel and popped up the dino and sentiment with foam squares.

And voila! This card is all finished in all it’s T-Wrecking glory!

The stamps I used today are:

Caffeinated Dino Stamp Set

For more inspiration, updates and news be sure to check these places:

This card was entered into the Caffeine Fueled Paper Play challenge.

I appreciate you sharing your time with me. Have a fabulous day!

Newton’s Nook – Prickly Before Coffee

Thanks so much for stopping by today! I’m currently a little obsessed with this style of card after the Caffeinated Flamingo turned out so well last week. Today I’m sharing a set I got in my recent haul from Newton’s Nook – Cuppa Cactus.

To create both backgrounds, I arranged stamps from the set on a block and stamped them with gray ink all over the card front creating a patterned paper look. I also stamped colored and cut out the cactus images. Here are the rest of the details for each card:

This one has a strip of paper glued to the left side of the card front. Then I layered a white circle on the wood grain circle and stamped the sentiment. I adhered this to the card front and popped up the cactus with foam squares. To finish it off I added Nuvo Crystal Drops in light gold on the circles and in the flower center. I love the darker bold colors of this card. Not my typical color palette but it goes together well.

For this next card I chose lighter colors for a brighter card and made it landscape.

I used some silver washi tape from my stash to line the edge of the teal strip and also inked the edge of the white panel with peacock feathers Distress Ink before stamping my sentiment. I adhered that all to the card front and popped up the cactus with foam squares. For finishing touches I scattered Nuvo Crystal Drops across the card front.

Such a fun pair of cards! I love these images and the sentiments are adorable too! Goodness knows we all need caffeine to survive this thing we call adulting.

These cards were entered on the Caffeine Fueled Paper Play challenge.

I appreciate you sharing your time with me. Have a fabulous day!

It’s an Avery Elle Christmas!

I’m over the moon to share this set of Avery Elle Christmas cards with you today. I got so excited when I came up with the design that I immediately stamped three sets, knowing that I couldn’t decide on just one color scheme.

I stamped, colored and die cut the images from Christmas Magic, cut the Chevron Mat for each card and set them all aside to create the backgrounds.

The first two cards have distress inked backgrounds – peacock feathers and mowed lawn to match the elements of the colored images. The third is red glitter paper from my stash.

Then I started layering the pieces together. The teal and red cards have the mat adhered directly to the card front while the green one is popped up with foam tape.

The images for the first two cards are adhered directly to the card front and on the last one they are popped up with foam squares. Each card is essentially the same design with little differences here and there. Each one is also finished off with a combination of glossy accents, Nuvo crystal drops and Stickles on different elements of each card.

I made a point to use all of the sentiments from the stamp set; since there were three, I thought it was perfect!

I appreciate you sharing your time with me. Have a fabulous day!

Rabbit Hole Designs Sticky Situation

Thanks for stopping by! I’m over at The Rabbit Hole Designs blog today with this awesome card featuring Inky and one of the new stencils – puzzle box.

Here’s how I did it:

  • Blended distress inks over the stencil and then spritzed it with water.
  • Added it to a black panel and then a navy blue panel to give it a little frame.
  • Stamped, colored and cut Inky and popped him up with foam squares.
  • I adhered the panel to a white card base and stamped my sentiment. Finishing the card off with some acrylic bubbles all over.

I’m not gonna lie, Inky is my favorite from the new release! So much fun to color and play around with!

Here is the stamp set I used:

For more inspiration, updates and news be sure to check these places:

I appreciate you sharing your time with me. Have a fabulous day!

The Rabbit Hole Designs Flamingo Fuel

TGIF everyone!!! Thanks for stopping by. I wanted to share this fun Caffeinated Flamingo from The Rabbit Hole Designs on our way into the weekend!

Here’s how I made it:

  • I stamped, colored, cut and then set aside my flamingo.
  • I stamped the flamingo in gray ink all over the card front and then stamped the sentiment on a thin green strip.
  • I popped the strip and flamingo up with foam squares and finished the card off by scattering pink and green Nuvo Crystal Drops across the card.

I love the design of this card and can really see myself trying it with so many more images. For now though, enjoy your weekend and I hope this flamingo inspires you to fuel up and make the most of it!

Here is the stamp set I used:

Caffeinated Flamingo

For more inspiration, updates and news be sure to check these places:

I appreciate you sharing your time with me. Have a fabulous day!

The Rabbit Hole Designs August Release Blog Hop – Stencils

Welcome back to The Rabbit Hole Designs hop for the August release – Day 3! Today I’m sharing two cards using one of the new, fabulous stencils – circles and stars! They are 6×6 and are great for so many different techniques. Be sure to hop so you can see them all!

Sassy is back for this card featuring the new circles and stars stencil for it’s background. Here’s how I did it.

  • I cut an over-sized panel of blue cardstock and taped it to my work surface, then taped the stars and circles stencil on top. Then, I spread a layer of texture paste over the whole thing. Once it dried I cut it down to fit the card front.
  • I stamped, colored and cut a unicorn, clouds and sentiment from Sassy and set them aside.
  • I cut 2 cloud borders, one from vellum and one from cardstock and glued them to the stenciled panel. The white clouds are popped up with foam tape.
  • Next I added the images and finished things off with wink of stella glitter brush pen and a jewel for the “i” in unicorn.

Up close you can see the dimension the texture paste gives. It’s a fun and different way to use stencils and you can color it too! Endless possibilities.

Next up are the pups from the July release in Doggone and some ink blending with the new stencil.

Here’s how I did this one.

  • Stamped, colored and cut the pups and set them aside.
  • Ink blended distress inks for a rainbow effect on the card front.
  • Cut a frame and glued a piece of woodgrain paper for a floor. This is glued directly to the card front.
  • The pups and sentiment are popped up with foam squares and I finished it off with glossy accents on the dog noses.

I’m just starting to up my stencil game and can’t wait to try other techniques and the other designs. Remember the new release is live in The Rabbit Hole Designs shop and every order placed will be eligible for a 10% discount. Discount Code TRHD2019 this code will only be accepted until Friday 08-02-2019. EXCLUDES Dies and Crafters Essentials. Not applicable to previous orders. May be used more than once. Does not apply to shipping and tax.

GIVEAWAYS:
To celebrate day 1 inspiration The Rabbit Hole Designs is giving away 2 of the stencils featured to one lucky winner. Winner will be chosen at random from the comments left on participating blogs, so make sure to visit each stop and leave a comment. Leave comments by 11:59 pm PST 08-01-2019 on all participating blogs. Winner will be announced on The Rabbit Hole Designs blog 08-02-2019.

Blog Hop:
The Rabbit Hole Designs Blog
Lisa G
Katie
Shanna
Niccole
Maria
Amanda S
Amanda W – You are here. Be sure to go back if you missed anyone!

For more inspiration, updates and news be sure to check these places:

The Rabbit Hole Designs August Release Blog Hop – Inky

Welcome back to The Rabbit Hole Designs hop for the August release – Day 2! Today I’m sharing two cards with the new set called Inky! I love making under water cards so this set was right up my alley!

I’ve been wanting to make one of those really long cards that are so popular and this set seemed like the perfect opportunity. Here’s how I did it.

  • Stamped, colored and cut all 3 octopi from Inky and the fish from Mermaid Hair and set them aside.
  • Ink blended a panel for the front of the card, cut a wave border from the top and glued it to the card front.
  • Next I adhered the fish to the water panel and popped the octopi up with foam squares.
  • Last, I stamped the sentiment and cut a flag notch, then popped it up as well.

After that busy card I thought I would try my hand at a more clean and simple design being sure to use the ink splatter because I thought they were funny.

Here’s how I did this one:

  • Stamped, colored and cut the octopus and set him aside.
  • Die cut the grid frame 4 times and glued them together. I took one set of the negative inserts and colored them with copics.
  • I glued the frame and inserts to a white panel where I stamped the ink blot and sentiment in black. Then I glued the octopus to the grid frame.

I just love this stamp set. It’s got great punny sentiments and awesome images that I can’t wait to use! Remember the new release is live in The Rabbit Hole Designs shop and every order placed will be eligible for a 10% discount. Discount Code TRHD2019 this code will only be accepted until Friday 08-02-2019. EXCLUDES Dies and Crafters Essentials. Not applicable to previous orders. May be used more than once. Does not apply to shipping and tax.

GIVEAWAYS:
To celebrate day 1 inspiration The Rabbit Hole Designs is giving away the stamp set Inky to one lucky winner. Winner will be chosen at random from the comments left on participating blogs, so make sure to visit each stop and leave a comment. Leave comments by 11:59 pm PST 08-01-2019 on all participating blogs. Winner will be announced on The Rabbit Hole Designs blog 08-02-2019.

Blog Hop:
The Rabbit Hole Designs Blog
Lisa G
Katie
Shanna
Niccole
Maria
Amanda S
Amanda W – You are here. Be sure to go back if you missed anyone!

For more inspiration, updates and news be sure to check these places:

The Rabbit Hole Designs August Release Blog Hop – Sassy

Hello and welcome everyone! Thanks so much for stopping by. I hope you’re enjoying The Rabbit Hole Designs hop for the August release! Today I’m sharing two cards with the new set called Sassy! It’s so much fun!

Here’s how I made the first card.

  • Used a cloud stencil on the background panel with distress ink.
  • Die cut and glued down the rainbow.
  • Stamped my sentiment from Sassy and popped up the cloud at the base.
  • Stamped, colored and cut out the unicorn from Sassy and popped her up as well.
  • For finishing touches, I added glossy accents to the unicorn horn, wink of stella glitter pen to the unicorn hair and scattered color matching gems throughout the card.

Unicorns are so fun and this sweet card is great to make any friend smile.

Here’s the second card I’m sharing.

Here’s how I did this one:

  • Stamped, colored and cut out the unicorn and cloud from Sassy and set them aside to do some die cutting.
  • Die cut a rectangle panel and clouds from white cardstock, and then another layer of clouds with vellum
  • Then glued purple glitter on the edge of the white clouds and stamped the sentiment from Sassy.
  • The unicorn, cloud with hearts and vellum clouds are glued directly to the white panel. The white clouds are popped up with foam tape.
  • I stamped a star background on a teal rectangle panel.
  • Then the whole white panel was glued to craft foam and attached to the teal star background and finally a card base.
  • Finishing touches for this card are glossy accents on the unicorn horn and cloud hearts, wink of stella glitter brush on the stamped cloud and unicorn hair.
  • I also stamped the scripty unicorn from the set on the inside of the card.

So much fun! Thanks for stopping by. Remember the new release is live in The Rabbit Hole Designs shop and every order placed will be eligible for a 10% discount. Discount Code TRHD2019 this code will only be accepted until Friday 08-02-2019. EXCLUDES Dies and Crafters Essentials. Not applicable to previous orders. May be used more than once. Does not apply to shipping and tax.

GIVEAWAYS:
To celebrate day 1 inspiration The Rabbit Hole Designs is giving away the stamp set Sassy to One lucky winner. Winner will be chosen at random from the comments left on participating blogs, so make sure to visit each stop and leave a comment. Leave comments by 11:59 pm PST 08-01-2019 on all participating blogs. Winner will be announced on The Rabbit Hole Designs blog 08-02-2019.

Blog Hop:
The Rabbit Hole Designs Blog
Lisa G
Katie
Shanna
Niccole
Maria
Amanda S
Amanda W – You are here. Be sure to go back if you missed anyone!

For more inspiration, updates and news be sure to check these places:

Flora and Fauna Mermaid Trio

Thanks for stopping by today! I’ve got quite the line up today with a trio of Flora and Fauna mermaids to share with you!

For this first one, I watercolored the background and then stamped the sentiment, oyster shell, bubbles and plants on there. I stamped, colored and cut the mermaid and narwhal and attached them with foam squares. For finishing touches I added glossy accents to the mermaid hair and heart, the bubbles and glitter to the sea floor.

Look at that glossy shine and the sparkly glitter! I love it all!!!

Here’s the next mermaid to say hello!

For this one I embossed a purple background and added gems. I watercolored a small panel and stamped the floor, waves and plants on that. I stamped, colored and cut the images and popped them up with foam squares; then attached the panel to the card base along with a sentiment strip. Finishing touches here are Stickles on the mermaid tail and waves and glossy accents on the mermaid’s heart.

I don’t know about you but mermaids and glitter just go together. It’s only natural.

Our final beauty swimming by today…

Another watercolored background with the sentiment, ocean floor and waves were stamped directly on it. The images were all stamped colored, cut out and popped up with foam squares. Finishing touches here were Stickles for bubbles, glossy accents coated with glitter for the mermaid tail and chunky glitter glued to the ocean floor. Glossy accents were also added to the jellyfish and the mermaid’s heart.

I always gravitate toward ocean themes, especially mermaids. I’m definitely a mermaid at heart. I know this is a long post but I hope you’ve made it all the way through and enjoyed these cards.

I appreciate you sharing your time with me. Have a fabulous day!

Avery Elle Monster Bash

Happy Friday and thanks for stopping by! I can’t get enough of these new Scary Pals from Avery Elle! They are too fun and so versatile. Today’s card has a really fun metallic watercolor background and the monsters are watercolored with Zig Clean Color Real Brush Markers too.

Here’s how I did it:

  • I stamped, colored and die cut the monsters and accessories and set them aside.
  • Blended black soot distress ink on a white panel and spritzed it with water. Then flicked gold and silver watercolors all over the background for a night sky/galaxy look.
  • Die cut the Avery Elle plus frame and popped it up on the black panel with foam tape.
  • Next I adhered all my monsters and accessories with foam tape as well.
  • For the balloons I glued twine to the back before popping them up and then pulled the string tight down to the purple monster so it can look like she’s holding the balloons.

So much cuteness and that metallic splatter really shimmers in the light. I love how this card turned out! Don’t you?

I appreciate you sharing your time with me. Have a fabulous day!