13 Days of Tricks and Treats – Day 5

Welcome back! Today I’ve got a really fun treat holder for you and can be adapted for other candies and your toppers could be for any occasion! I’ve made these with cute apples on top for Teacher Appreciation Week before and filled them with Smarties. They were a total hit!

These treat bags are from Stampin’ Up but you can get them almost anywhere. They happened to hold 3 packages of Sixlets perfectly which I loved because of the colors being darker and bolder for fall.

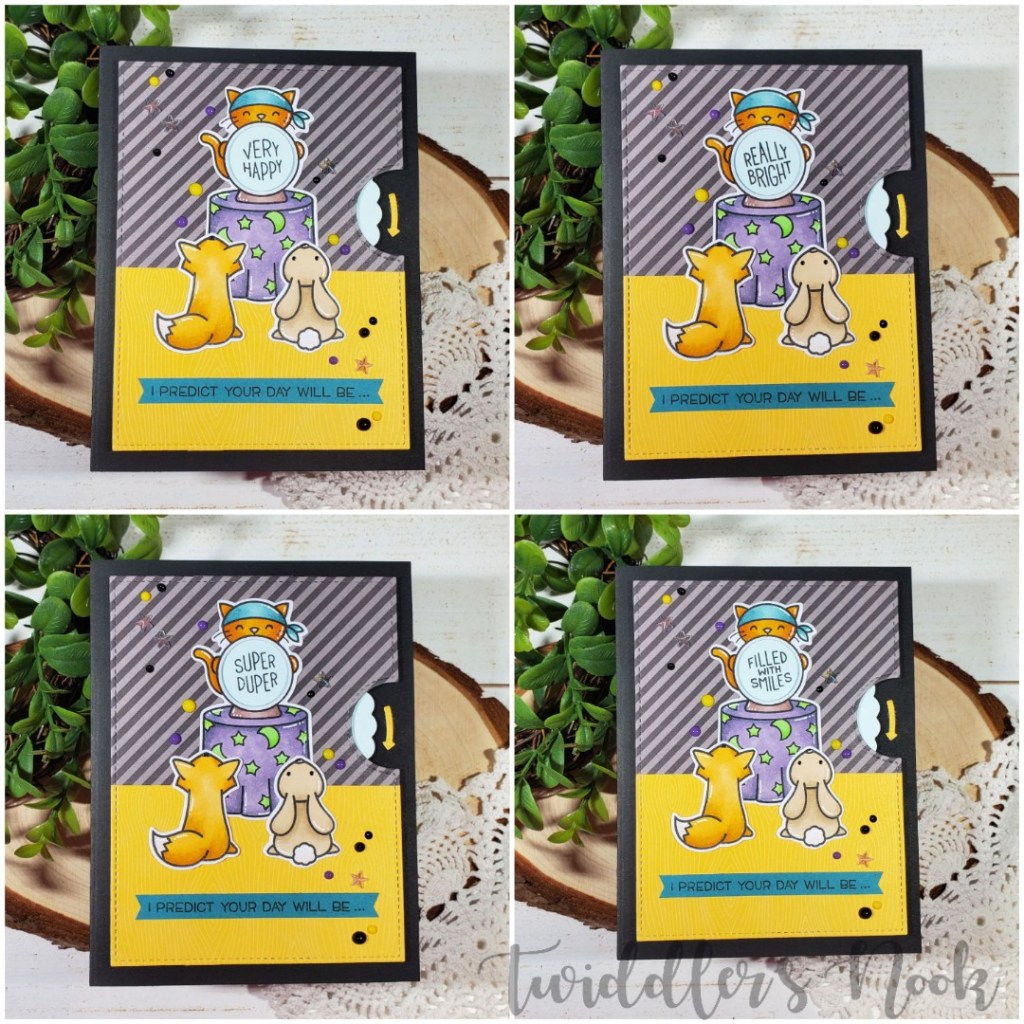
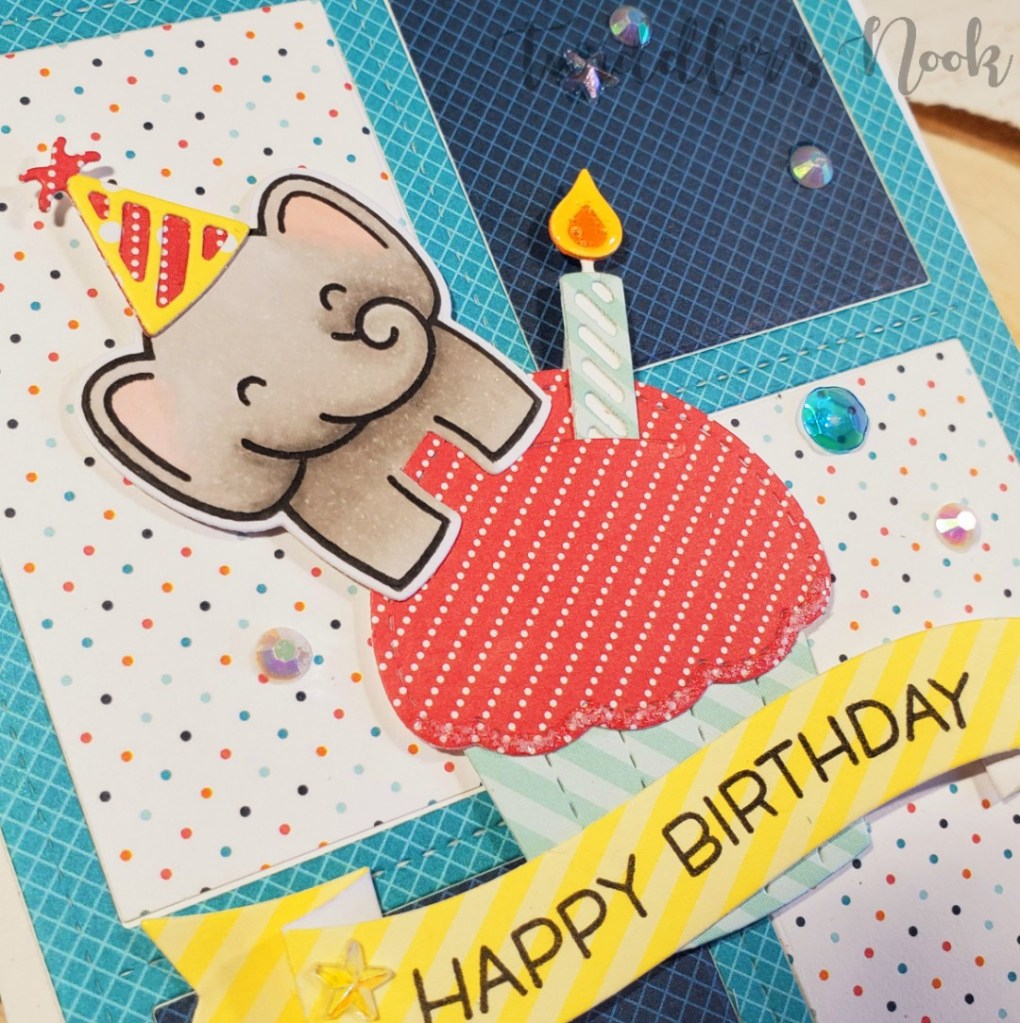
For the topper, I die cut 2 Lawn Fawn stitched circles (next to the smallest) for each one and stamped a star background stamp in yellow ink for a little interest. I stamped, colored and die cut my bunnies from Critters in Costume. Then stamped, heat embossed and die cut the word bubble from the same set. The bunny and speech bubble are both popped up with foam squares. Finally, to seal them off I used Scrappy Tape on the back of both circles so they are adhered to each other and to the top of the bag.

These have inspired me to think Christmas and make another set filled with red and green M&Ms. I think that would be so cute! Don’t you?

I appreciate you sharing your time with me. Have a fabulous day!

Lawn Fawn Monster Mash Clear Birthday Invitations

Thanks for stopping by today. I love watching Jennifer McGuire’s YouTube videos. She’s always got great inspiration and ideas to share. Recently she had one involving laminating pockets for windows. It was a great idea and came at a perfect time. She made wintry snow scenes with hers but I immediately thought of my daughter’s upcoming birthday invitations that needed made. I showed her the pictures Jennifer had posted and she loved the idea.

Together we dug through confetti, stamps, paper and copic colors and planned out her invitations together. It was a lot of fun and we both love how they turned out.

Here’s how we did it:

  • Opened the laminating pocket and sprinkled confetti all over, closed it and ran it through the laminator twice. It’s probably not necessary but I thought it might help seal the confetti inside.
  • Next I trimmed the sheets down to two 8.5×5.5 inch pieces and scored them at 4.25. After I folded them, I ran them through the laminator again to solidify the crease. It worked great!
  • For the stamping, coloring portion…we cut a yellow strip to 1.75×5.5 and stamped a polka dot background stamp in yellow for a tone-on-tone look.
  • Next we stamped, colored and die cut images from Lawn Fawn’s Monster Mash, Beam Me Up and Year Four stamp sets. I love being able to mix and match stamps.
  • And last we just glued them all in place with liquid glue.

Here’s a closer look at those cute monsters.

One thing to note: We glued extra yellow panels to the inside and back of the card so everything is covered. It hides the glue and gives a nice finished look. In the end we have four strips of yellow cardstock covering the fronts and back of the clear card.

Now, my poor daughter has to wait to hand these out until next month. Waahhh. Lol.

I appreciate you sharing your time with me. Have a fabulous day!

Avery Elle Cocoa Stand

Let’s start this week off right…with cocoa and a cute bear to run the stand!

Today’s card features Avery Elle’s Cocoa Stand, some fun ink blending and lots of sparkle!

Here’s how I did it:

  • Blend salty ocean and blueprint sketch distress inks on a 4.25×5.5 inch panel. Spritz with water and then also splatter with pearl watercolor.
  • Die cut a white border with Lawn Fawn Puffy Cloud Border and splatter with pearl watercolor too.
  • Stamp, color and die cut images from Avery Elle’s Cocoa Stand.
  • Heat emboss stand sentiment on the top with white embossing powder.
  • Glue background panel and “snow” border to card front. 
  • All of the images are popped then up with foam squares.
  • Last, I stamped and heat embossed the sentiment from Avery Elle’s Christmas Kids in silver embossing powder.
  • Finishing touches are Wink of Stella Glitter Brush pen on the mug and presents and glossy accents on the lights, Christmas tree base and the bear’s nose.

Here’s a closer look at the details. It’s so fun and whimsical! I hope you enjoy it as much as I did making it!

I appreciate you sharing your time with me. Have a fabulous day!

Avery Elle Polar Playtime Slider Card

Welcome back! I’ve been slowly getting bits and pieces from the new Avery Elle holiday release and I finally got a chance to play with the Polar Playtime set. As soon as I saw the set I knew I wanted to make a slider card with it. That sled was just asking for it! 🙂

Here’s how I made it:

  • Stamped, colored and die cut my images from Polar Playtime.
  • I stamped the sky from Starry Scene on the card front.
  • Using my images for reference I die cut a stitched hill and then cut the slider track from that.
  • I inked the top of the hill with distress ink to set it apart from the background and popped it up with double layer foam tape leaving room for my slider penny to slide freely. If you’re not sure how to make a slider card here’s a video to show you.
  • I added my images to the background and popped my sled on the slider penny.
  • Last I used my Misti to stamp my sentiment on the bottom left in the same ink I used for the sky.
  • For finishing touches I used white gel pen on all of the images, glossy accents on the penguin beak and bear nose, and Wink of Stella glitter brush pen on the top of the snow hill and the snow caps on the mountains.

Here’s a closer look at the cuteness! This set is a fabulous addition to the Avery Elle collection and I can’t wait to use the other images on cards coming up soon!

I appreciate you sharing your time with me. Have a fabulous day!

Lawn Fawn Fortune Teller Tabby

Thanks for stopping by again! Today I’m excited to share a fun card using the new Fortune Teller Tabby from Lawn Fawn. My daughter really wanted this stamp set and while I was home sick with her yesterday I made this fun card to surprise her with.

If you’ve never made a reveal wheel card before you should watch this video to get the gist. After that you’ll see that I just stamped, colored and die cut my images, stamped my sentiments on my wheel and adhered it all together. I kept this a one layer card (minus the foam squares to help the reveal wheel spin) because I’m planning to put it in my daughter’s lunch for a fun surprise.

For finishing touches on this card I added glossy accents to all the animal’s noses, white gel pen accents to the images, black glaze pen to the bunny’s eyes and scattered Nuvo Crystal Drops and some star gems I had in my stash across the card.

Here’s a look at each sentiment on the wheel. I chose the 4-up version so I could use each sentiment from the stamp set.

I’m really excited to make this in a Halloween style card and put candy in the crystal ball and the Costume Party kids watching. I think that idea is so absolutely cute!

I love interactive cards, don’t you? Do you ever make them? Let me know in the comments.

I appreciate you sharing your time with me. Have a fabulous day!

2019 Oregon State Fair Card Entries

So, a few weeks back I decided to do a thing and entered 14 of my recent cards into the Oregon State Fair Creative Living Competition. It was totally on a whim and I had zero expectations but thought it would be fun.

To my astonishment and surprise, I ribboned 10 out of the 14 cards.

Let’s start with the third place (white) ribbons.

From left, The Rabbit Hole Designs Caffeinated Narwhal was entered in the “card with movement” category, below that using Spellbinders dies went into “die cuts,” Inky from The Rabbit Hole Designs was entered in “coloring with alcohol inks” and the Avery Elle Christmas Magic card was entered in “Christmas.”

For the second place (red) ribbons we have…

The Lawn Fawn Costume Party card was entered into “Halloween,” and the Lawn Fawn Fairy Friends were in the “thank you/thinking of you” division.

And for the first place (blue) ribbons… Drum roll please…

Ta-da!!! The Lawn Fawn Fairy Friends were in “Halloween,” The Rabbit Hole Designs Pretty in Peony was in “thank you/thinking of you,” Newton’s Nook Scuba Newton was in the “birthday” division and finally The Rabbit Hole Designs Mermaid Hair was in the “coloring with alcohol inks” division.

I’m still flabbergasted and honored to have been recognized so many times over and in so many different categories. This was a really fun experience and plan to do it again next year.

Have you ever entered anything into your state fair? I think it would be fun to try my hand at other crafts and see how they do too.

I appreciate you sharing your time with me. Have a fabulous day!

Lawn Fawn Jump for Joy Card

I have been so inspired by the recent fall weather at home and I love every bit of it!!! Today I’m sharing a card with Lawn Fawn’s leafy tree backdrop die, mushroom house dies, largest scalloped frame and jump for joy stamps. This card took a lot of process but it was so worth it in the end!

Teal is my favorite color and it’s such a great non-traditional fall color! I love it!

Here’s how I made my card:

  • Ink blended a panel with scattered straw, cracked pistachio and peacock feathers and spritzed it with water. Then I took gold and silver watercolors and flicked that on there too.
  • Die cut the scalloped frame and leafy tree backdrop and inked it with tea dye distress ink.
  • Die cut the grass and mushroom borders from the mushroom house sets and inked them. Grass – scattered straw and shabby shutters. Mushroom border – antique linen. Mushroom caps – die cut from red cardstock and inked with walnut stain.
  • Stamped, colored and die cut my images.
  • Now for assembly. I assembled this in layers – background panel, mushroom border, leafy tree backdrop, scalloped frame, popped grass up with foam tape. Then I adhered the leaves directly down and the hedgehog and owl with foam squares.
  • Then I stamped my sentiment in a teal ink to match and inked the banner with scattered straw to tone down the bright white. Then I stamped the second part of the sentiment below the banner with a mustard colored ink.
  • For finishing touches I added black glaze pen to the eyes and noses, white gel pen accents to the images and a drop of antique gold Nuvo Crystal Drops on the dots of the sentiment banner.

Here’s a closer look at the sparkle in the background and the cute images! This card was kind of a process but it was so fun to just create!

I hope you enjoyed today’s card.

I appreciate you sharing your time with me. Have a fabulous day!

Therm-o-Web Deco Foil with Heat Embossing

I recently purchased some Deco Foil by Therm-o-Web with no idea how I was going to use it. I intended to pick up transfer gel but that hasn’t happened yet and I was itching to get some shiny on my cards. So off to the land of Pinterest and YouTube I went. I found an older video by Jennifer McGuire (linked here) that showed how to use foil on heat embossing. So I decided to give it a go and here’s what we came up with! 😀

Not too shabby, if I do say so myself. The general idea I used here is distress ink blend the background, stamp and heat emboss a star background stamp. Then lay foil over my panel and run it through my laminator in a copy paper folder. Then I trimmed it down to 4×5.25 and added it to a card base with foam tape.

For my sentiments I used Honey Bee Stamps layered happy die cut. The top layer, in yellow, is die cut three times and then covered in glossy accents. This idea is another one from Jennifer McGuire in a more recent video. (linked here) Then I added birthday from Lawn Fawn Wild for You set and popped it up with foam tape.

Between the glossy words and that awesome Deco Foil background, this card is so eye catching and fun to move around in the light. I can’t wait to play around with more types of Deco Foil and with more techniques.

Have you used Deco Foil before? What techniques have you tried? Any favorites? Leave a comment below. I’d love to know!

I appreciate you sharing your time with me. Have a fabulous day!

Lawn Fawn Stitched Cupcake Birthday Card

I’m super excited to share this cupcake card with you today. I made it for my mom’s recent birthday and wanted to wait to post it until she opened it.

As soon as I saw this Lawn Fawn Stitched Cupcake in the reveal I knew I wanted to make a card like this…it just took me this long to follow through with it. Ha! I love how it turned out! I think making a set with all of the hanging critters would be so fun!

The details:

  • I die cut the peekaboo frame from 3 pieces of patterned paper – one for the frame and two to fill in the windows. I glued these to a card front.
  • I die cut all the pieces to my cupcake and adhered them together.
  • Stamped and die cut my elephant from Slow Down and Enjoy and hooked him on the edge of the cupcake. I popped this whole thing up with foam squares.
  • Next I die cut my fancy wavy banner, stamped my sentiment on it and glued it down.
  • For finishing touches I added glossy accents to the candle flame, stickles to the edge of the cupcake and glued embellishments scattered all over.

Here’s a closer look at that cute elephant and the added embellishments. Can’t you picture this layout with the sloth, bear and deer hanging on the cupcake edge too! It would be so great.

I appreciate you sharing your time with me. Have a fabulous day!

Lawn Fawn Pick of the Patch Pivot Pop-up Card

Oh man I’m so excited to share today’s card with you. I was at a truck show with my husband all day Saturday, which was really fun. But you know my fingers were itching to be crafty as soon as I got home. And this is what came of my brain percolating all day long.

Here’s the front. I used fabulous Lawn Fawn striped paper for the background, ink blended and water spritzed a night sky. Then popped up the Lawn Fawn spooky fence with foam tape. I glued the pumpkins and squirrels from Pick of the Patch directly down and heat embossed my sentiment. Isn’t this card front so sweet? But wait! There’s more!!!

Ta-da!!!! Here’s the inside of this fabulous card! I love it so much!

If you need instructions for the pivot pop-up mechanism head over to the Lawn Fawn YouTube channel. Their videos are fabulous! Here’s a quick rundown on how I put the inside together.

  • Ink blended the inside of the card to match the panel on the front and heat embossed my sentiment toward the top.
  • Ink blended the pop up pieces and cut an additional layer of stitched tree border for added spooky and assembled it all.
  • I stamped, colored and die cut all my critters and pumpkins and attached them.
  • Last, I decided to add a grassy border for the bottom and happened to have an extra pumpkin which gave a cute, rounded out look.
  • One extra thing I did that you can’t see was adding a piece of black cardstock to cover the back of the card. I’m a messy ink blender so this covered up that issue plus gave the card extra stability.

I love it! Don’t you??? I really do hope you enjoyed it! What creative things have you made lately?

I appreciate you sharing your time with me. Have a fabulous day!