Rabbit Hole Designs Current Mewed – Cat

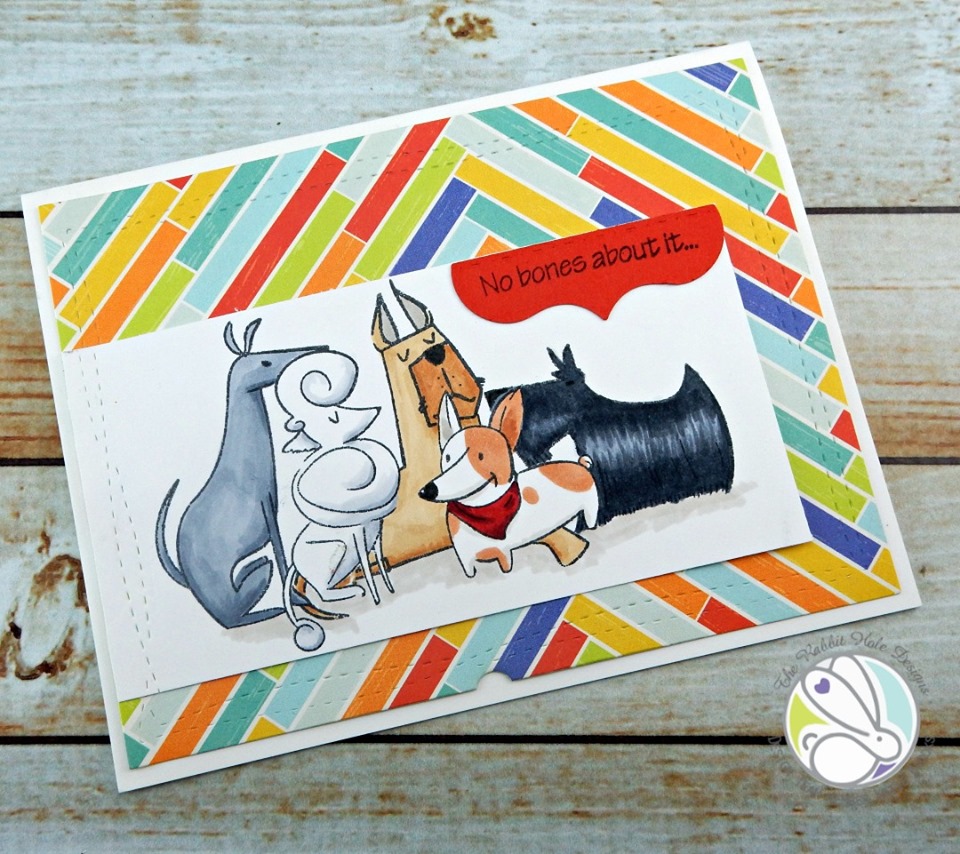
This new stamp set by The Rabbit Hole Designs fits any cat I’ve ever known so perfect. It cracks me up and I had fun playing with it to make this fun card.

Here’s how I did it.

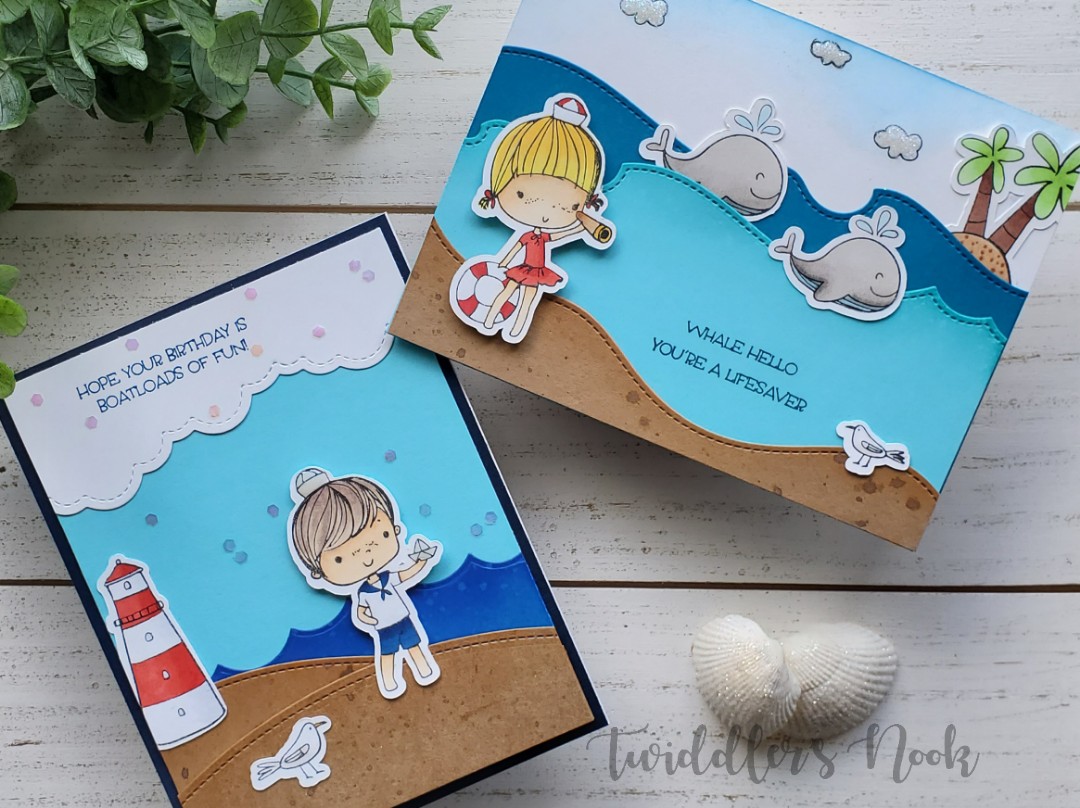
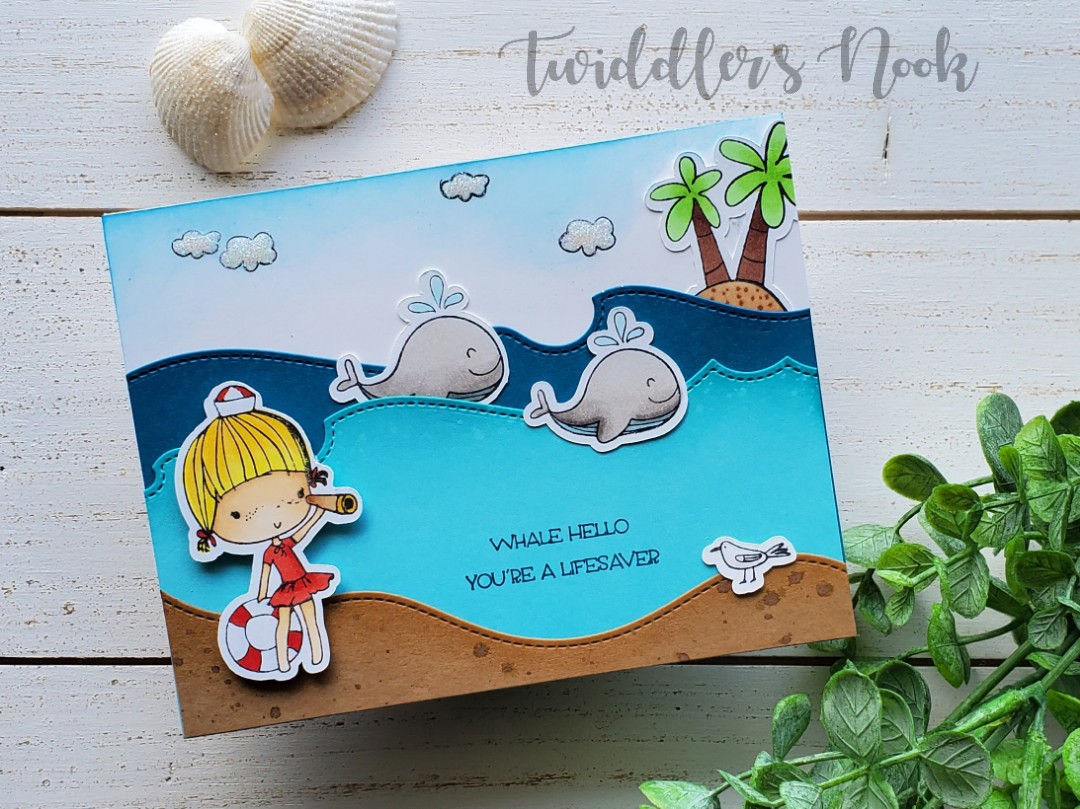
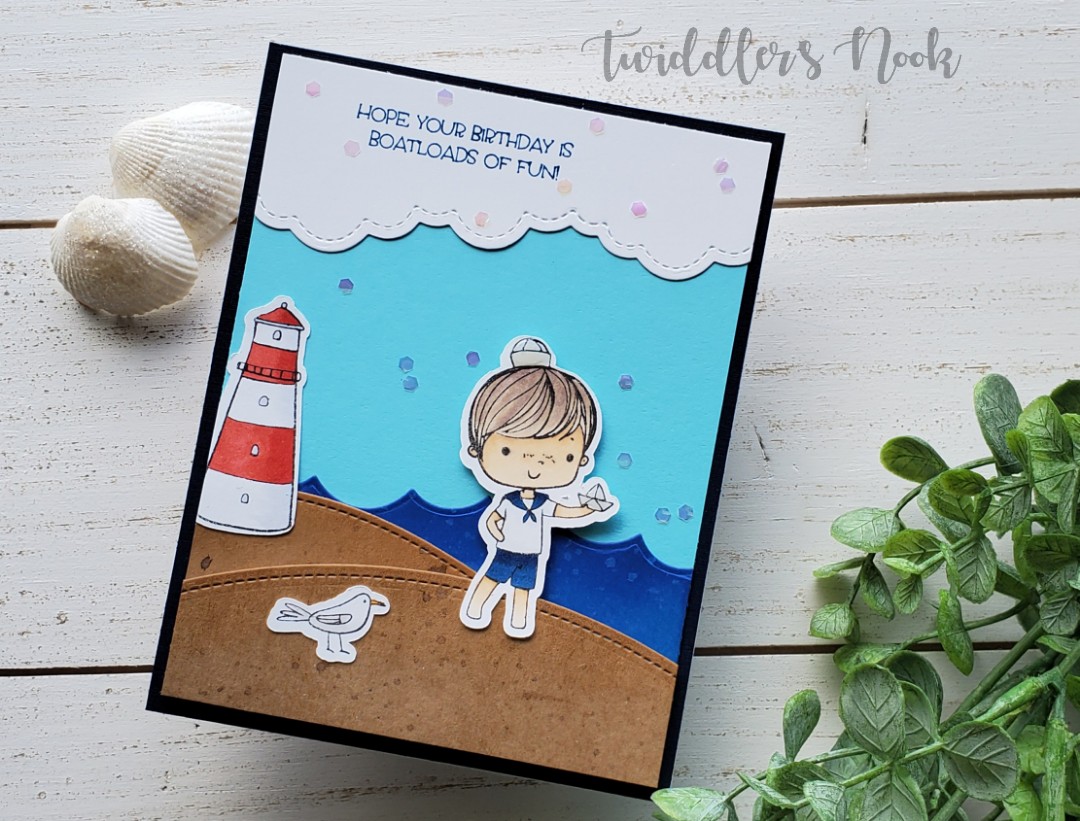
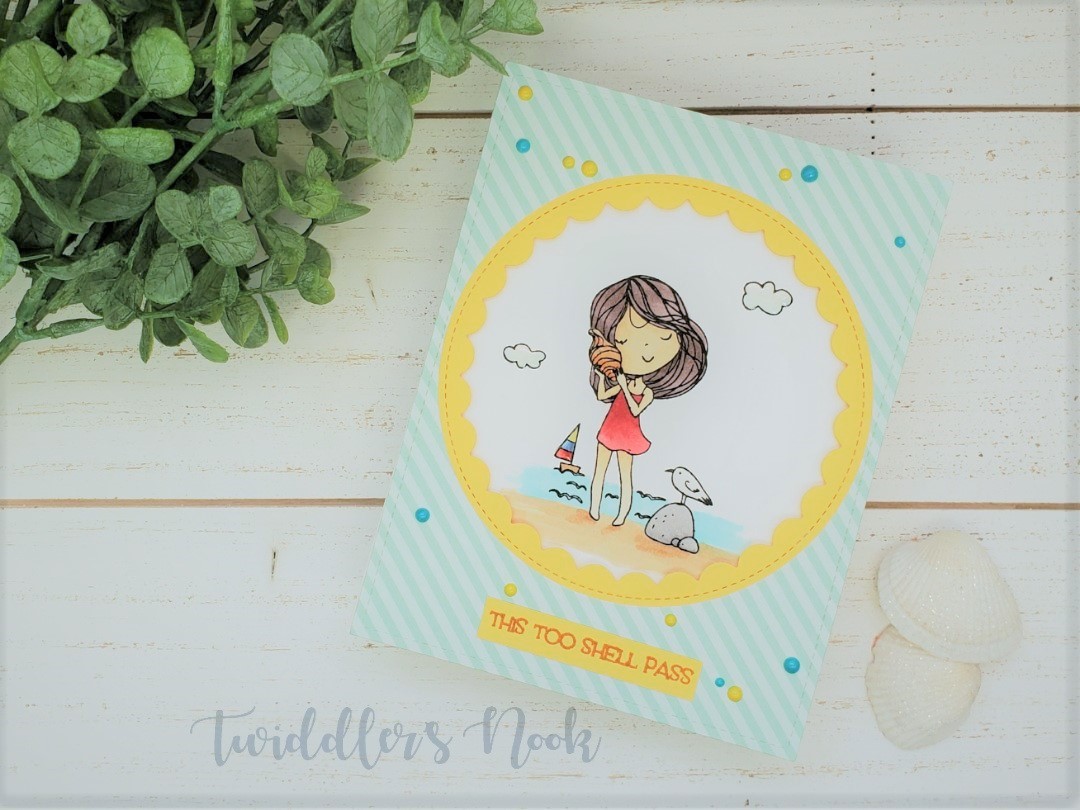
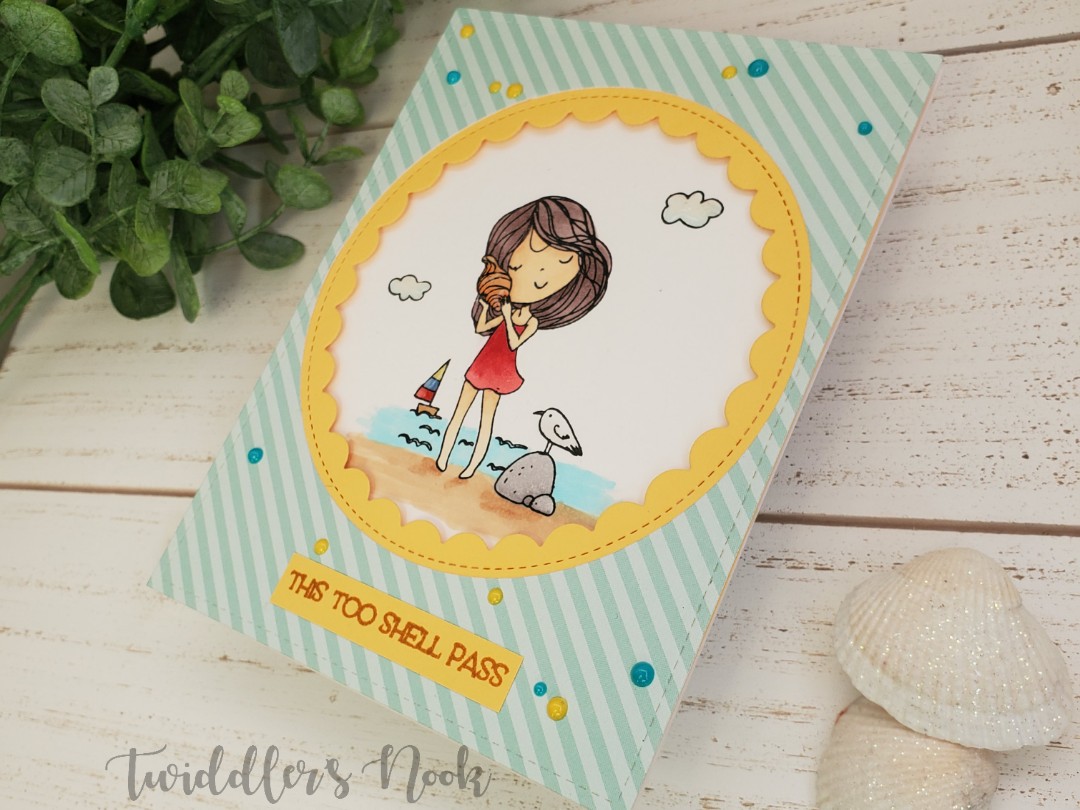
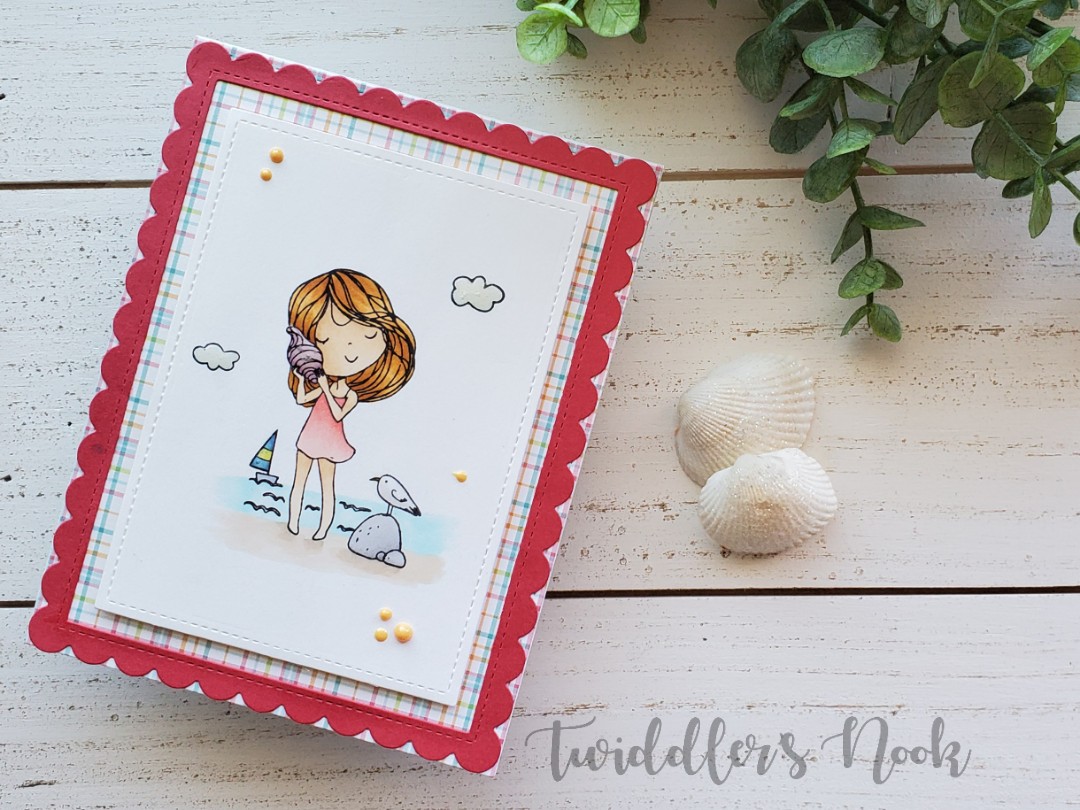
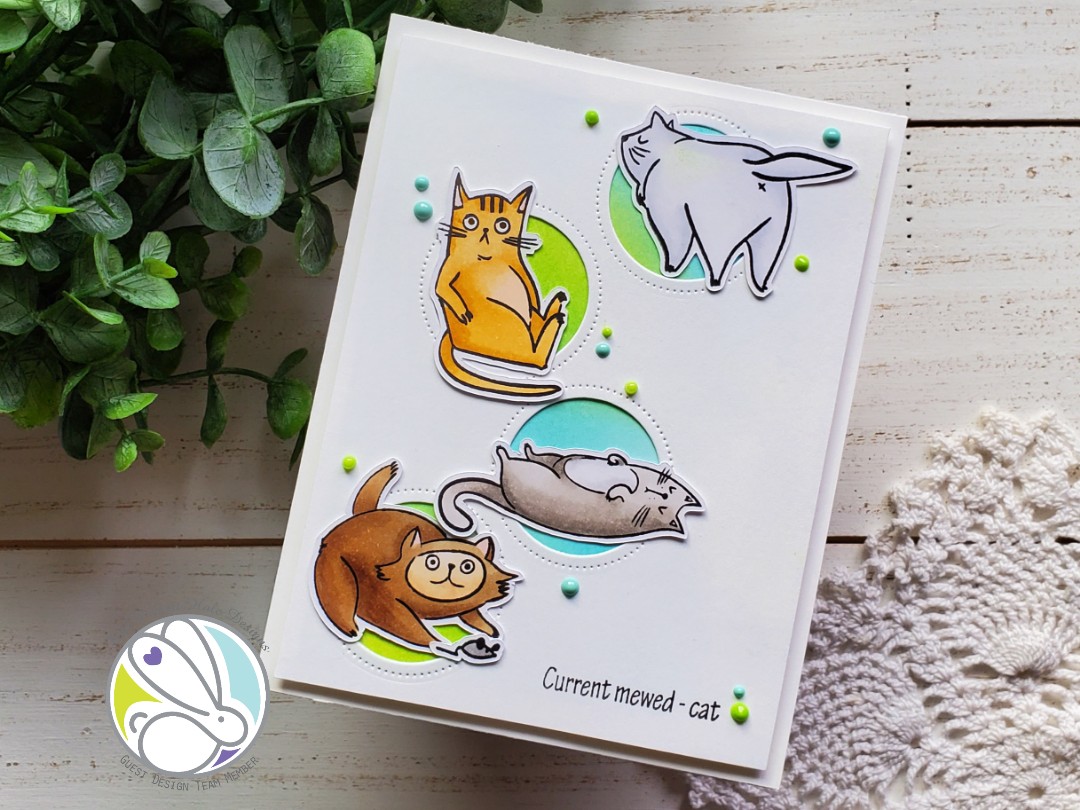
  • Stamped, colored and cut all the kitties and the mouse from Cattitude.
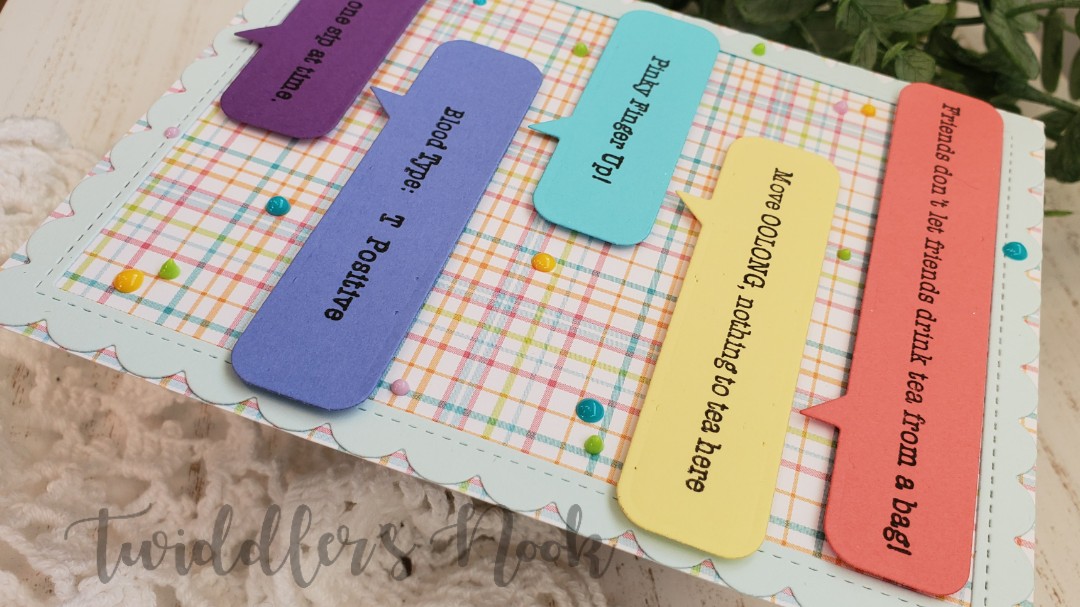
  • Cut a white panel down to 4×5.25, die cut the circles and stamped the sentiment.
  • Ink blended a panel to go behind the circles and glued the two together.
  • Attached that panel to a piece of craft foam and adhered it to a card base.
  • Next I attached all the images to that panel and finished the whole thing off with a scattering of Crystal Nuvo Drops.

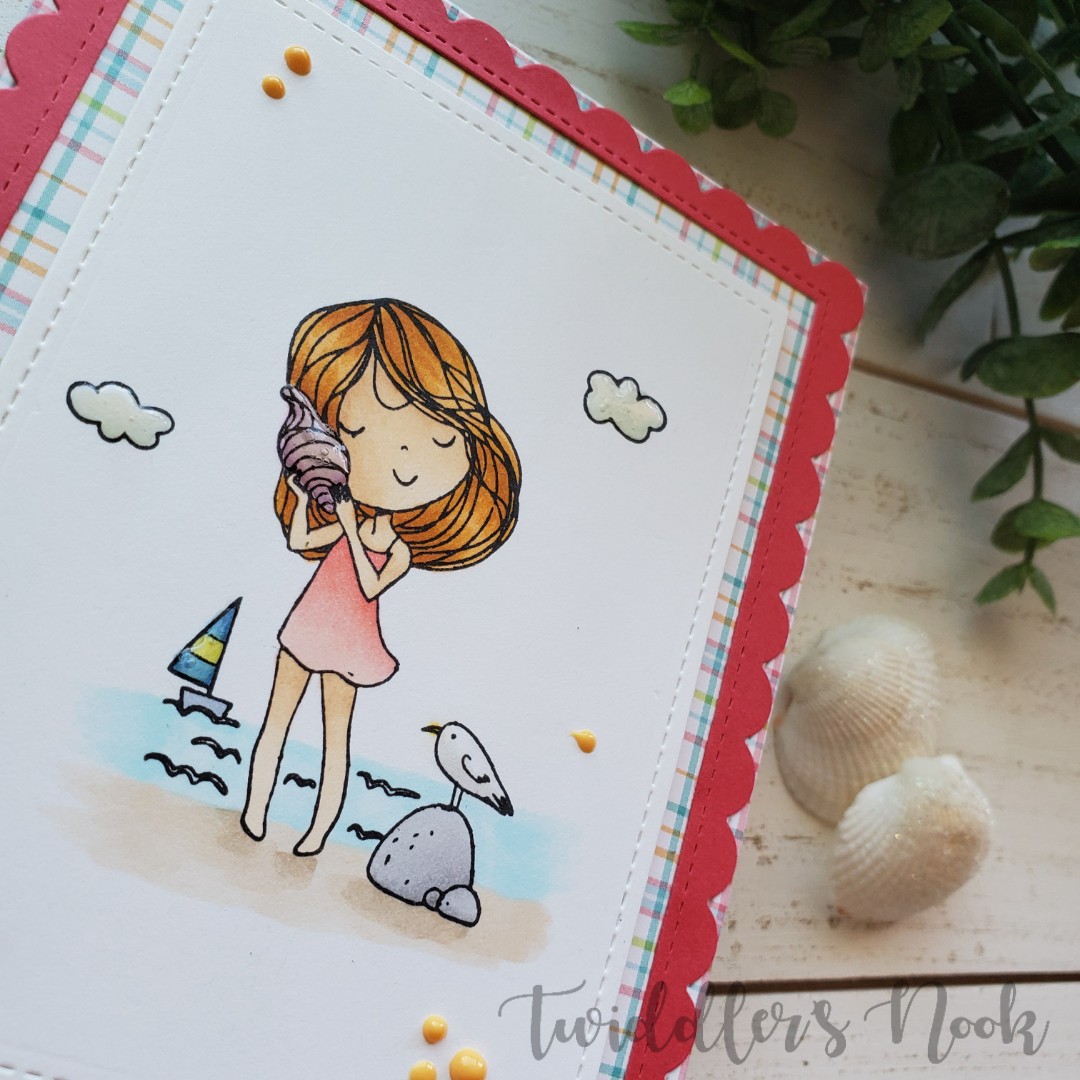
Here’s a closer look at the kitties with all their sass. The middle two remind me of my cats. I think next time I’ll color them to match.

For more inspiration, updates and news be sure to check these places:

I appreciate you sharing your time with me. Have a fabulous day!

The Rabbit Hole Designs Pretty in Peonies Thank You Card

Hello again! It’s a flowery kind of day, don’t you think. I’m not typically into flowers but this Pretty in Peony set is just beautiful and I love playing with them. The Rabbit Hole Designs has such a great variety of sets. Be sure to stop by and see what else they have while you’re picking up this beauty!

Here’s how I made it:

  • Stamped and heat embossed flowers and leaves with gold embossing powder.
  • Watercolored with Zig Clean Color Real Brush markers.
  • Stamped my sentiment, scattered some gold jewels about and added washi tape to the edge of the watercolor panel.
  • Mounted the watercolor panel on black cardstock and glued that to a kraft card base.
  • I also stamped the largest peony on the back flap of my envelope in brown ink for a little extra pretty when the recipient opens the envelope.

I just love watercolor flowers! Don’t you? The color variation looks like real flower petals.

Here is the stamp set I used:

For more inspiration, updates and news be sure to check these places:

I appreciate you sharing your time with me. Have a fabulous day!

Rabbit Hole Designs Mermaid Hair Card

Literally…my hair today. It’s so Monday but I’m thrilled to be sharing this Mermaid Hair card using The Rabbit Hole Designs stamp set. †

I squeal every time I look at this card. I thought the background was trash when the colors didn’t do what I wanted them to but I set it aside and left it alone for a while. I started sifting through my background dies and found this awesome one from Neat and Tangled called snake scales. I swear it looks like mermaid scales to me though. Don’t you think?

Ahhh, I’m in love! Okay, enough swooning. Here’s how I did it:

  • Smeared distress ink on my glass work mat and sprayed it with water. Drug my Bristol Smooth cardstock through the ink, heat dried it, did it again, and then again. Didn’t like it, set it aside to mull it over.
  • Found my snake scales die and die cut it with the cutting side up and inked side of the paper facing down. This is helpful, I promise.
  • Next, with the paper still in the die, I carefully put small drops of glue ONLY on the scales, not the frame the die also cuts. Then I placed that on a piece of cardstsock and removed the die. Last, also carefully, I removed the frame from between the scales. Viola! Totally worth the extra work and BONUS I have the frame for another card…coming soon! 😉
  • Now I cut, stamped and colored my mermaid, then attached her with foam squares.
  • I cut the scalloped frame from white cardstock 3 times and glued it together for dimension and added it to the front as well.
  • Last I stamped my sentiment and cut it into a strip adhering it with foam tape.
  • For finishing touches I added SO MUCH Wink of Stella clear glitter brush to the mermaid’s hair and tail and scattered confetti from The Rabbit Hole Designs throughout too.

Look at that sparkle! Ahhh, she’s beautiful! Really, she helps a Monday though.

The Rabbit Hole Designs actually has a new release happening today and a blog hop. Here are a couple of cards from the Design Team being shared today.

Head over and check it all out!

I appreciate you sharing your time with me. Have a fabulous day!

Rabbit Hole Designs Tea Conversation Card

Hello everyone! It feels like it’s been a while since I’ve been on here. Things have been so busy at home with the end of the school year, my daughter’s dance recital this weekend and then Father’s Day to top it all off. We’ve survived it and are ready for a relaxing summer!

Today I’m stopping by with a really simple but fun, no coloring involved card. Just die cutting and stamping. The dies are all Lawn Fawn and the stamps are from The Rabbit Hole Designs.

Here’s how I did it:

  • Start by choosing the color scheme for the speech bubbles.
  • Then I chose which sentiments from The Rabbit Hole Designs Perfectly Blended stamp set I wanted to put in which order and matched the right size speech bubble die to that sentiment. I kept these all tea themed but you could do coffee or a combo with this set.
  • I chose to die cut the speech bubbles before stamping but you could do it either way.
  • I trimmed my plaid cardstock down and adhered it to the front of the card base and then glued down the scalloped frame.
  • Last I popped the speech bubbles up with foam strips for a little added interest on this simple card and finished it off with a rainbow of crystal nuvo drops scattered all over.

I am quite a tea drinker myself and have lots of friend who do as well and I know they would all get a kick out of getting this card in the mail.

I appreciate you sharing your time with me. Have a fabulous day!

Rabbit Hole Designs Beach Day Cards

Welcome! I’m so excited to be back sharing this set of cards featuring The Rabbit Hole Designs new stamp set Beach Day. The kiddos in this set are adorable and the other images are perfect for setting up scene cards like I’ve done today. I hope you enjoy them as much as I do! Without further ado, let’s look at each card individually.

This first card featuring the little girl and whales from the set is a great thank you card. Here’s how I did it:

  • Stamped, cut and colored images with copic markers.
  • Die cut two wave borders and a stitched hillside border. I inked the top edges of each with distress inks and splattered a darker brown ink on the hillside for a textured sand look. The top of the white panel is inked to give the sky a little dimension as well.
  • Next, I layered all the background pieces together with tape runner and then added my whales, island and bird the same way.
  • I attached the little girl with foam tape so she stands out a bit.
  • The sentiment is stamped with a blue ink so it’s legible but doesn’t take away from the scene.
  • For finishing touches I added glossy accents to the clouds and then sprinkled iridescent glitter on top of it.
  • All done and cute as can be!

I love this boy card. As soon as I saw the birthday sentiment in the set I knew I wanted to make a card featuring just him and that sentiment. Here’s how I did it:

  • Stamped, cut and colored images with copic markers.
  • Die cut wave border, cloud border and two different hillside borders.
  • Inked the hillside and wave borders with distress inks and splattered the sand with dark brown ink again. I spritzed it all with water for a distressed look which does show up nicely on the blue waves. Kind of like bubbles.
  • I layered the clouds, waves and hillsides directly to a teal panel and then added the lighthouse and bird next.
  • I added foam squares to the back of the boy and added him as well.
  • The sentiment is stamped in a blue ink on the clouds.
  • For finishing touches on this card I scattered iridescent glitter in the background for interest and added glossy accents to the boy’s hat and boat.
  • And this sweet card is finished and ready for someone’s special birthday.

I hope you enjoyed these two adorable cards from The Rabbit Hole Designs.

I appreciate you sharing your time with me. Have a fabulous day!

Rabbit Hole Designs By the Shore Window Card

I just can’t get enough of these beachy stamps. I’m so ready for summer and it’s really showing in my craft choices. Today I’m back again with the new By the Shore set from Rabbit Hole Designs.

Card recipe:

  • Stamp and color image with copic markers.
  • Die cut scalloped window from a darker yellow cardstock.
  • Die cut circle window from striped cardstock just slightly bigger than the scallop.
  • To help with alignment I glued the striped and yellow panels together first. Then added foam tape to the back and layered it over the stamped panel so it could be centered. Everything was wonky at this point so I just trimmed off excess yellow and white cardstock from the edges and then layered it onto a card base.
  • The sentiment was stamped in a dark yellow ink on the same yellow cardstock and glued to the front.
  • For finishing touches on this card I scattered Nuvo Crystal Drops in caribbean ocean and dandelion yellow and added glossy accents to the clouds, seashell and sail on the boat.

This is such a sweet card and would be great to encourage someone going through a rough time.

I’ll be back tomorrow with more fun from the most recent Rabbit Hole Designs release!

I appreciate you sharing your time with me. Have a fabulous day!

Rabbit Hole Designs Mermaid Hair Card

I’m back again today with that fabulous Rabbit Hole Designs May release. Today we’re playing with Mermaid Hair. Anyone who knows me, knows how ME this set is! I couldn’t wait to play with it and after this one card, I’m completely hooked!

Card recipe:

  • Stamp mermaid and fish throughout copic friendly cardstock and color them in.
  • Stamp and cut masks for all of your images. I use full-stick post-it notes. They have sticky on the entire back of the sheet and work great.
  • Blend distress inks all over your background. I focused the lightest color in the center, getting darker closer to the edge. Colors used were salty ocean, mermaid lagoon and blueprint sketch. Then spritz with a water sprayer and blot off.
  • Next, the big reveal of taking off all that masking and seeing your beautiful creation!
  • Trim down the mermaid panel to measure 3.75×5. Add a teal mat underneath measuring 4×5.25. Glue together and adhered to a black card base.
  • Stamp the sentiment and heat emboss on vellum. Run the strip through a Xyron sticker maker to cover the entire back with adhesive and adhere to the panel.
  • To finish this card I added Nuvo Crystal Drops in morning dew to the mermaid’s bubbles, the jellyfish and gave all of the fish a bubble or two as well.
  • Inside the black card I added a piece of teal cardstock to have an area to write a message.
  • All finished, beautiful and vibrant!

I’m so in love with this mermaid set! All of the images are just adorable and so versatile. My mind is spinning with many more ideas so stay tuned!

I appreciate you sharing your time with me. Have a fabulous day!

Rabbit Hole Designs By the Shore Card

I don’t know about you but I’m over the moon for the newest Rabbit Hole Designs release. It’s all to die for and I had to have everything! Today I’m showcasing the By the Shore stamp set with a simple and adorable card!

Card recipe:

  • Stamp and color images with copic markers.
  • Die cut image with stitched rectangle and also a larger stitched rectangle from plaid paper.
  • Die cut scalloped frame from contrasting paper.
  • Glue plaid rectangle and frame to a card front.
  • Pop up smaller rectangle with stamped images with foam tape.
  • Embellish with Nuvo crystal drops and glossy accents.

This card is so sweet and simple. I left off a sentiment so it didn’t distract from the adorable image. I’ll add one to the inside when I’m ready to give it away.

I’ve already got another one of these beauties stamped and waiting for color because I loved this one so much!

Be sure to stop by tomorrow to see what other new Rabbit Hole Designs set I’ll be playing with!

I appreciate you sharing your time with me. Have a fabulous day!

Rabbit Hole Designs Caffeinated Flamingo Cards

I’m so excited to share this pair of cards made with The Rabbit Hole Designs Caffeinated Flamingo stamp set. I think it’s so perfect to start the week of with these caffeinated critters because…well, Monday. Ugh. Cheers to more coffee and making it through another week!

Originally, I only had this first card in mind but as I started die cutting, the second one came into my head and I knew I needed to make a pair. Here’s how I made them.

  • Die cut the polka dot cover from white cardstock and layered it over purple.
  • Die cut the whole scalloped frame set in rainbow colors and glued them onto the polka dot cover.
  • Stamped, colored and cut the Caffeinated Flamingo with my Cricut.
  • Stamped and heat embossed the sentiment from the same stamp set and trimmed it into a strip.
  • Die cut two palm trees.
  • The flamingo, sentiment strip and palm trees were all popped up with foam adhesive.

This first card is complete! I love how the bright rainbow colors are totally the opposite of the look on the flamingo.

Here is how I made the second card.

  • The rainbow rectangles are the centers from the die cut frames on the first card and are adhered to a white card base at alternating angles.
  • Die cut two palm trees again.
  • Stamped and heat embossed a sentiment from the Perfectly Blended stamp set and trimmed it into a strip.
  • Stamped #flockstar from the Caffeinated Flamingo stamp set in a pinkish-red ink directly to the card base.
  • The sentiment strip, palm trees and flamingo are adhered with foam adhesive just like in the first card.

Now this one is all finished too!

I love this pair of cards! They are so bright and fun. That flamingo makes me laugh every single time!

I appreciate you sharing your time with me. Have a fabulous day!

Rabbit Hole Designs Caffeinated Bee Interactive Card

Hi there! I’m popping in today with a simple and SO FUN interactive card using The Rabbit Hole Designs Caffeinated Bee and an action wobbler to make things interesting.

To make this card I started with the background using a hexagon stencil and two yellow distress inks for varied color – scattered straw and mustard seed.

Then I used my Cricut to cut a 2 inch hexagon out of black cardstock and a 2.25 inch hexagon out of yellow cardstock. I layered them together and glued them to the card front.

I stamped, cut and colored my bee with copic markers. Then added the action wobbler mechanism to the middle of the hexagon and attached the bee to the center of it.

To finish the card off, I stamped and heat embossed the sentiment from The Rabbit Hole Designs Perfectly Blended stamp set. This is a really long sentiment so I just cut it apart and attached it to the card front with foam squares.

This was a really quick card to put together and I absolutely love it! The wobbly bee is so fun to play with!

I appreciate you sharing your time with me. Have a fabulous day!